Table of Contents
Virtual and Real Together to Shoot streams and Waterfalls
Waterfalls and streams are the most poetic landscapes in natural landscapes.
Choosing the right season and looking for a unique stream and waterfall is the premise of taking a good photo. In the choice of the frame, in order to express the broad and rushing momentum of the waterfall, photographers mostly use the horizontal frame. In order to express the high and deep streams and waterfalls with large drop, photographers mostly use vertical frames. To show a gentle stretch, a medium-sized square format is used.
Most of the stream waterfalls are in the valleys, and there is often no room for manoeuvre when shooting. To get a full panorama, a medium-wide-angle lens should be used. Taking its part and close-up, it is inseparable from the telephoto lens.
Regarding the shooting height, the flat shot is close to the usual line of sight, which makes people feel immersive and intimate. When looking down, the picture of the stream waterfall changes greatly in perspective, which is conducive to the expression of layers. When shot upwards, the height of the stream waterfall in the perspective of the picture is more majestic and taller than the actual feeling. The shooting direction is mostly on the side, and it should not be too positive, so as to avoid the picture being dull.
Correctly Handle Virtual and Real
In addition to the above points, the most important thing in shooting the waterfall is the virtual and real processing of the picture. The use of real and virtual are two aspects that complement each other. If the screen is full of real scenes, it will give people a feeling of suffocation. On the contrary, the picture is full of emptiness, and there is no real place at all, which will make people feel empty. Therefore, only by properly grasping the complementation, foiling, and growth of the virtual and the real can we achieve the endless wit of the picture.
This is mainly reflected in the choice of camera shutter speed. If you shoot a splash of water, in order to display the water droplets, you can use a high-speed shutter. But in most cases it can’t be done. In order to show the momentum of the stream and look soft and elegant, you must find ways to slow down the shutter speed and shoot at a slower shutter speed.
Ways to achieve slow shutter speed
And the slower the shutter speed, the more fluid the stream, and the more exaggerated and expressive it is. Common shutter speeds are 1/2 second to 1 second or even up to several seconds. There are usually 4 ways to achieve a slow shutter:
- Narrow down the aperture to extend the exposure time relatively.
- Choose to shoot on a rainy day with dim light or in the morning and evening.
- Select a lower sensitivity by setting.
- Add a neutral gray mirror (one is not enough, two are superimposed).
In order to avoid the jitter that is easy to occur when using slow shutter speeds, be sure to fix the camera on a tripod and open the shutter with a cable release. If there is no cable release, you can enable automatic shooting.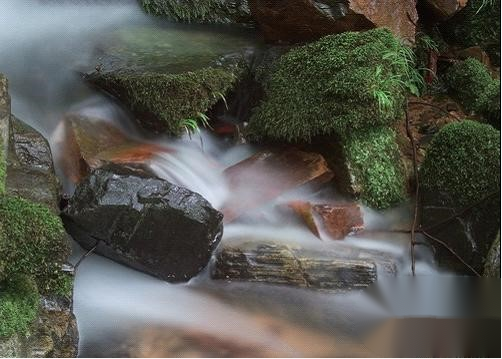
Look for the Golden Divider
Start by choosing a panorama you want to shoot, and then start searching for a worthy subject. You want to visualize the landscape as a grid with multiple quads in your mind, which helps you better focus on each element in the landscape.
Professional photographers use a frosted glass with horizontal and vertical lines in the viewfinder. Some digital cameras have projected these guide lines electronically onto the LCD screen. If your camera doesn’t have this feature, you can also help out with an erasable soft pen. Use this pen to mark the lines on the LCD screen. In this way, it is not only convenient to divide the subject matter into several parts, but also helps to find the “golden separation point”.
To find the subject of your shot, you can also “look in your fingers”. Form a rectangle with the index fingers and thumbs of both hands. It may look funny, but it’s a quick way to find the subject. Of course, cardboard folded at an angle or an empty slide border can also be used for the same purpose.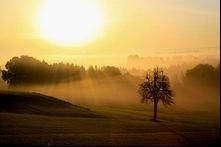
Summary and Panorama
In one photo, “condescending” plays an important role. However, this bird’s-eye view of the overhead method requires a certain amount of preparation. The photographer can shoot directly from the window when flying in the daytime, which can realistically record the actual geographical structure.
If you do not have this condition, you can also try to find a high point. For example, in the picture above, you can get a good view of the valley or bay from the top of a mountain. If in a city, a tall building can serve the same purpose.
To get a panoramic photo, you can shoot continuously in the same direction. However, many digital cameras now have the ability to shoot such panoramic photos. If your camera doesn’t have this capability, you can simply take 4 to 6 photos with overlapping edges and then combine the photos together in Photoshop or other image editing software.
It is important that you manually set fixed aperture and shutter values. Because if auto exposure is used with each shot, there will inevitably be brightness jumps at the transitions between shots.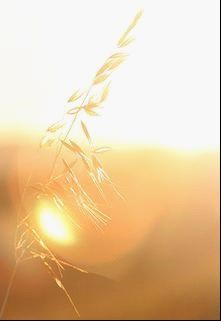
Show Movement Through Lines
An important compositional element is “dynamic lines”. You want to delineate a small area of the landscape with your chosen photo subject, so you can get more vivid elements into the structure of the photo. For example, elements such as a stream can be placed in a meadow. These lines should not simply be placed in the center of the photo, preferably at an angle.
In addition, streets and walls are also suitable as dynamic lines. As shown above, you can position your camera so that the wall in the framing field stretches toward the viewer. This way, there is a soothing change in the photo.
This line should end within the frame, but not simply start on the other end of the photo. Also, don’t let the lines simply go straight through the photo, slightly curved lines or other shapes will be more interesting.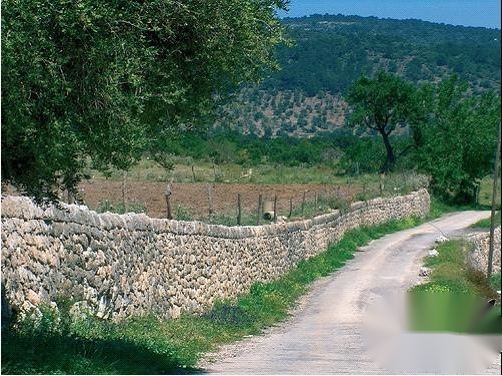
Observe the Subject Matter in Grayscale
Ansel Adams is a great master of landscape photography. He used the zone system method in the late 1930s to achieve the perfect black and white photo shoot. For color photos, the guideline of “all areas in the photo need tones” is equally valid, where the tones are the grayscale values.
If you want to learn more about the ideal distribution of brightness in a photo, you should first put the camera aside and mentally convert the subject matter into grayscale values.
Now, you have to look at this picture from a purely mathematical point of view. Each brightness area has a percentage value. 100% represents deep black, and 0% represents pure white. In a well-exposed photo, there won’t be any overexposed or underexposed areas. You can work hard to find the correct exposure in every light condition. The thing to note is that every area in the photo has a gradation.
Detailed Shot
It is not common practice to take a lot of photos in all scenic areas. Most of the time, photographers will choose a specific location or a very specific area to describe the journey.
Detail shots are important if you want to express the inner consistency of a series of photos. And these details are not found in ordinary landscape photography. You can photograph locals at work, a classic dish or local plants and animals.
Try to photograph local objects or details as simply as possible, and choose a typical composition method. That way, it’s a good comparison with a painstakingly shot landscape photo. Viewers can not only get information about the place from it, but also feel the story told in the photos.
In order to remember clearly which river you are focusing on when you get home, it is best to carry a notebook with you. This way, you can immediately jot down some information about the place and the subject matter of the shoot.
Night Shot: Underexposure is Necessary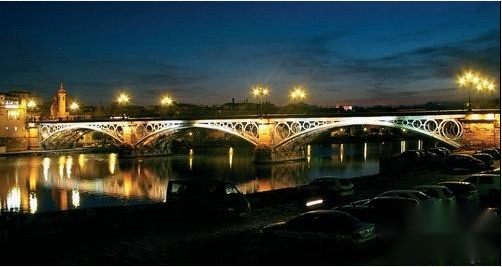
In order to capture the typical night scene atmosphere, it was necessary to be flexible. You don’t have to wait until your eyes sense it’s getting dark before you’re ready to take a photo. Usually, it’s too late.
What you have to wait for is the moment when the street lights come on. The sun had set by this time, and the artificial light from the street lamps was cast on the buildings. In order to get a deep blue tint to the sky, one should consciously underexpose in manual mode.
To do this, you look for an area with only low light and record the metering data at that time. Next, with this reference value, you can complete a series of photos. Taking this measured exposure data as a reference, you can shoot at 3 different aperture data, brighter and darker. There will always be one of these photos that is properly exposed. However, the deep blue sky can only be photographed on a cloudless evening.
