Table of Contents
Backlight Photography Tips:
- Metering the bright background and not filling the foreground at all can get a strong contrast silhouette effect, which is a good rendering of the atmosphere.
- Use a reflector or flash to properly fill in the foreground to get more details.
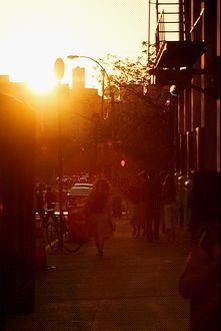
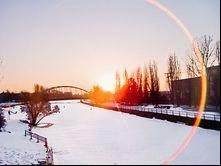
- When shooting with backlight, a dazzling contour light can be generated around the object, which strongly outlines the appearance of the object.
- While shooting flowers, trees and other subjects that are easy to transmit light, you can take the light position of the backlight, and the illuminated subject will show a stronger texture.
- When there is serious halo in the lens, you must pay attention to the composition and adjust the position of the lens slightly to avoid the flare covering the subject.
- While shooting against the light, the accuracy of the auto focus will be affected. You can use manual mode to adjust the focus accurately.
- Avoid looking directly at the sun through the viewfinder for a long time to cause vision damage.

Scenery Photography Shooting Skills Under Backlight
In landscape photography, backlight shooting is a photography technique that has certain difficulty in shooting and can produce unique artistic effects.
Backlight comes from behind the scene, and the subjects we shoot are often dark parts that are not illuminated by direct light. Therefore, it is not easy to show the light and dark levels and lines of the scene, and the contrast is large and there are many changes. If there is no richer shooting skills and experience, the exposure of the subject will be inaccurate, and the unique charm of backlight photography will not be displayed. Therefore, photographers should be proficient in using and mastering the following skills when shooting backlight photography works:
1. Exposure
Exposure should be based on the exposure of the subject, and the rest are ignored. For example, when shooting sunrise or sunset, the exposure value of the sky or the sun should be the main basis.
2. Contrast
When shooting backlit scenes with clear outlines and transparent textures such as flowers, plants, people, animals, etc., you should choose a darker background to contrast. When exposing, the highlight part is used as the metering basis to create a strong light ratio contrast, strengthen the backlight effect, achieve a clear outline, and highlight the artistic effect of the subject.
3. Silhouette effect
When shooting a silhouette effect, the exposure should be based on a bright background brightness.
4. Control glare
Since the camera is facing a strong light source when shooting in backlight, pay attention to the effect of glare. Try to use a hood or cover in front of the lens with your hands, hat, cardboard, etc., or adjust the shooting angle to prevent glare.
There are two most commonly used backlight shooting effects: one is the silhouette effect. And the other is the “contour light” effect. The following are backlit photos that use different shooting methods at the same time, place, and subject matter to produce different effects.

The “Rim Light” Effect in Backlight
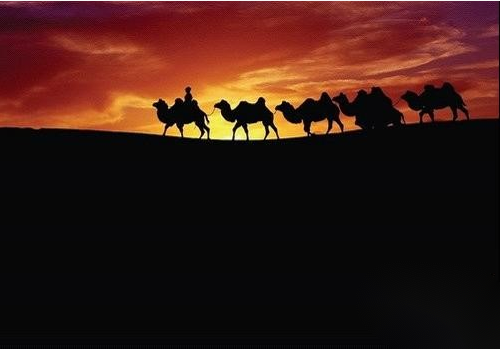
As shown above, this is a camel caravan taken in the desert in October 2005. Although it was backlit at the time, due to the relatively high position of the sun, the top of the camel caravan and the dune that was hit by the light outlined a bright outline, which contrasted with the large area of the dark black background to form a unique “outline” in the backlight. light” effect.
When shooting, take the light metering as the basis, and reduce the exposure by 2 to 3 stops during the average metering to avoid overexposure.
silhouette effect
The shooting of the silhouette effect is relatively simple, and the exposure of the bright part shall prevail when shooting. It is mainly a shooting method used to reflect the unique tones and atmosphere of the environment, as shown in the above picture.
Concise Background Has a Way
Landscape photography not only emphasizes the selection and arrangement of the subject, but also cannot ignore the processing of the background. Background refers to the scenery behind the subject to set off the subject to emphasize the environment the subject is in.
The background plays an important role in highlighting the image of the subject and enriching the connotation of the subject. The processing of the background is an important link in the structure of the photographic picture. Only by careful selection during shooting, can the content of the picture be refined and accurate. And the visual image be perfectly expressed.
The ideal background should strive for simplicity and purity, with refined visual elements and harmonious tones. Experienced photographers are good at mobilizing various techniques to achieve the simplicity of the background. Any elements that are optional in the background and prevent the subject from standing out should be subtracted.
 To sum up, there are several ways to improve the background.
1. Virtualization
That is, use a larger lens aperture (such as F2 or F2.8) to narrow the depth of field as much as possible. Focus on the subject, so that the background behind the clear subject is blurred. So as to receive a good effect of contrasting the real with the virtual.
2. Occlusion method
That is to use the rising clouds, misty white fog, tree branches and leaves, or the back side of mountains, walls and other objects to hide the background, so as to highlight the subject.
3. Avoidance
That is, adjust the shooting height, or look up to avoid the cluttered scene on the horizon. And set off the main subject cleanly against the sky background. Or lean toward the background of the road, water, and grass. So that the outline of the subject is clear and a concise background is obtained. Sometimes a telephoto lens is used to shrink the background, and clutter is excluded from the frame.

High Profile Scenery Shot
High key, also known as bright key. Photos with light tones are often referred to as high-key photos.
Most of the tones in high-key photos are light colors. They are composed of a few levels from light gray to white to form the tones of the entire picture. It is generally more concise and clear, and is suitable for expressing themes with white as the keynote.
Although high-key photos are dominated by light tones with high levels, they still require rich layers. And the existence of small dark tones is not excluded. Due to the large area of light tones, the small dark shades appear more prominent.
Here are 5 things to keep in mind when taking high-key landscape photos:
- Select a light-toned scene, and the color of the main body and the accompanying body should be as close as possible.
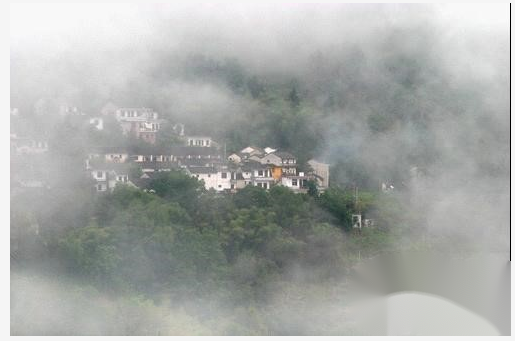
- Choose a light background, and use a white or light gray background to bring out the dark subject. These light backgrounds can be rain, fog, clouds, or rolling mountains and vast water.
- Use frontal or diffuse lighting to achieve a soft, flat-contrast image. On a sunny day, you can obtain a shadowless image by using a flat, straight frontal light. On cloudy and rainy days, you can achieve soft-contrast images by using well-proportioned, peaceful diffused or reflected light.
- Increase exposure.
On the basis of the normal metering value, the exposure should be increased by 0.5 to 1.5 stops depending on the specific situation. That can brighten the background.
- To control the light ratio.
It is advisable to control the light ratio within 1:2. If the light ratio is too large, the level of the highlight part will be lost. Or the gray tone part will be darkened, thus losing the characteristics of high-key photos.
The role of high-profile shooting techniques
In natural scenery photography, high-profile techniques are often used to show the beautiful, ethereal, vast and vast beauty. There are many natural backgrounds that can be used. For example, when shooting landscapes, it is often based on the concept of blank, with a simple composition and a general approach to highlight the main scene. The rest of it gradually changed into hazy distant trees, fresh water, fog, rain and mist. There are also snow scenes, almost pure white snow is an excellent background for high-profile pictures.
In architectural landscape photography, the method of selecting a corner and a half of the scene, or focusing the scene on one side, is often used to direct the viewer’s attention to the empty space. It gives people room for contemplation and reverie. Also, with the sky as the background, shooting at an elevation angle, the exposure is based on the subject metering value. The sky is pure white due to overexposure. And the high-key effect of the whole picture can be well expressed.
Low-key shooting Scenery
Low key, also known as dark tone. We usually refer to photos with heavy tones as low-key photos. The tones in the low-key photos are mostly black and dark gray. And the tones of the whole picture are relatively thick and deep.
Generally, it is suitable to express the theme with dark black as the keynote. It reflects the vicissitudes of life and the characteristics of calmness. Although low-key photos are mostly dark and dark, they do not exclude small areas of white light. Due to the large area of dark tones, the small pieces of white are particularly obvious, forming the visual center and making the whole picture lively.
There are 6 things to keep in mind when taking low key landscape photos.
- Choose a scene with a dark tone, and the tone of the accompanying person should be darker and coordinated with the low-key of the subject.

- Choose a dark background, pure black or dark background can bring out the light subject.
- Use side light or side backlight. These light positions are viewed from the direction of the lens, the subject’s light-receiving area is small. And it is contour light, so it is easy to obtain deep and dark images.
- To reduce the exposure, the exposure should be appropriately reduced by 0.5 to 1.5 stops on the basis of the normal metering value according to the specific situation. This can darken the background.
- The light ratio is large, and the light ratio can be greater than 1:4 or even 1:8.
- The use of the shaded side of the sun as a foil is to use the shadows of mountains and walls that cannot be illuminated by the sun as the background to hide the messy lines in the shadows.
Time to get low-key photos
In natural scenery shooting, the photos with low-key effect are mostly in special weather or time period. For example, a scene covered with dark clouds and rolling under the dark clouds presents an atmospheric, heavy and low-key artistic conception.
In the morning or evening, sunlight from a low angle is noticeably directional. The projection of light is long and the shadow area is large. That can separate the projection plane of each scene and highlight some important aspects in the picture. Thereby presenting a three-dimensional, deep-toned scene photo. These periods can be put to good use for low-key photos.
Also, shoot with night lights. Different from the daytime, except for the faint moonlight, lights, fireworks, etc. at night, a large area of the ground appears dark. With the help of a tripod and a cable release, long exposures can be used to capture low-key night scene photos.
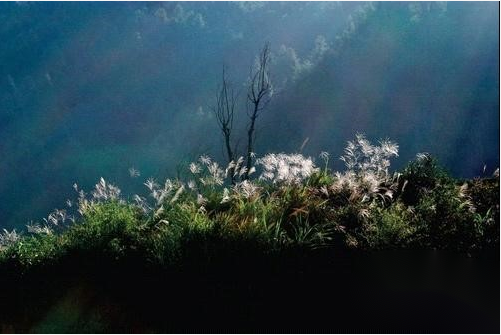
As shown in the picture below, the morning sun shines on the white autumn reed thatch. And the dark background is very eye-catching to set off the subject that you want to express.
