Table of Contents
Specific Shooting Articles:
2. Clouds are sometimes the protagonists
The clouds are natural reflective objects in shooting. It can reflect or refract the sun’s rays, thus constantly changing the moving image. Clouds are an indispensable factor in many excellent sunrise and sunset works, so clouds can also be used as the main subject for shooting.
When shooting, pay particular attention to what happens when clouds cover the setting sun. At this time, the sun’s light will shoot out from behind the cloud, forming a large scene of radioactive light, which will add a very moving effect to the photo.
Sometimes when the sun hides behind the clouds, there will be a bright edge around the clouds, which is also very suitable for shooting. However, due to the fickleness of the clouds, the photographer is required to pay attention to observation when shooting, and pay attention to seize the opportunity to press the shutter. When taking pictures of clouds as the main body, generally, the metering point should be aimed at the clouds to measure the light. But at the same time be careful not to overexpose the sun.
3. Don’t ignore the use of foreground
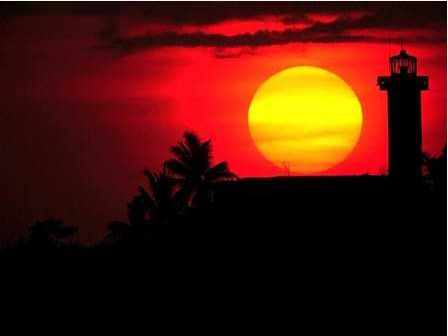
When photographing sunrise/sunset, it is also a common phenomenon that the sky does not have some clouds. In order to avoid the sky being too monotonous, using some surrounding foreground as a foil, such as sparse leaves and branches as the foreground of the empty sky part, can help to balance the structure of the scene. However, if the foreground is too large or too heavy, it will cover most of the sky and affect the balance of the picture. However, you can also use the foreground as the main subject of the shooting, and the sunset/morning sun scene behind it as the background of the shooting is also a very good method.
If you want to use the foreground to show the sunset or rising sun in the sky, the foreground is often processed into a silhouette effect. The silhouette effect photo is obtained by taking full advantage of the difference in light between the subject and the background. Generally speaking, the backlight at sunrise/sunset is easy to show the effect of silhouette, because the light at this time is the softest. Choose the position and angle in advance, wait for the sun to rise from the horizon, or set the horizon, from red to orange-yellow, or from orange-yellow to red, when it does not look dazzling, it is the best time to shoot.
Control exposure
Exposure should follow the principle of underexposure rather than overexposure. Exposure metering against the background is the only way to severely underexpose the subject and create a strong silhouette.
First, select the camera’s metering mode as “spot metering”. And then select the metering point on a brighter sky for metering. If your camera has an exposure lock (AE Lock) function, press the camera’s AE Lock button to lock the exposure value. For cameras without AE exposure lock function, you can hold down the shutter button halfway to lock. Finally, re-adjust the composition and shoot with the exposure combination just now. This results in a perfect silhouette effect.
4. Are you near the water? Show beautiful reflections!
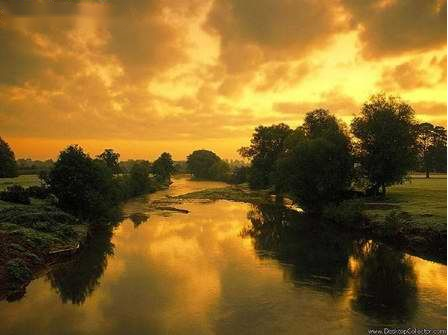
A lot of good sunrise/sunset photography is done near the water. Because at sunrise or sunset, the shimmering water surface reflects the beautiful colorful clouds. And the sail shadows of ships on the water add a bit of vividness to the picture. This is a really good subject for photography.
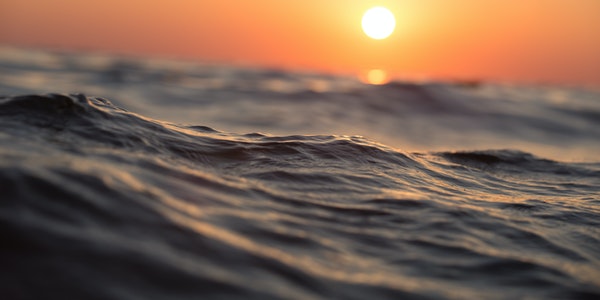
Shooting water reflections can enhance photos of sunrises and sunsets, and a calm sea or lake can reflect the sky. In this way it gives us a mirror-like image. A breeze blowing over the water always disturbs this reflection, leaving a more dazzling ray of light on the water and delineating a light path from the horizon to the foreground of the picture.
As the sun gradually goes down, this light path stretches out in front of your eyes. Therefore, when shooting by the water, the first thing to pay attention to is the composition factor. Did you position the horizon line before you pressed the shutter? Is the scene I need already included? These are all issues worth noting. When metering, the average metering mode is generally selected. So that the light distribution of the entire screen can be uniform, and it will not be overexposed or underexposed.
5. Do not randomly select the white balance of the camera

As mentioned earlier, you can use some color filters when shooting, but digital cameras can not use them. Because the rich white balance effect of digital cameras can replace some simple color filters. General digital camera white balance includes the following modes: sunlight, cloudy, tube and incandescent mode.
Among them, when you select daylight white balance , the picture is most yellowish. And when incandescent white balance is selected, the picture is most blue. When shooting sunrise/sunset, photographers recommend choosing auto white balance or daylight white balance. Because this yellowish tone can best express the atmosphere of sunset or sunrise. If you choose a bluish incandescent white balance, the yellowish tone of the picture will be lost. Thus affecting the atmosphere of the entire picture.
(To Be Continued)
