Table of Contents
1. What is the Depth of Field?
Depth of field refers to the area of acceptable clarity in front of and behind a well-focused focal point. When the depth of field is shallow, the focal point is a very thin plane that falls on the object, which is parallel to the plane where the sensor in the digital camera is located.
When conditions affecting depth of field change, such as when the lens aperture is narrowed, this apparent range of sharpness extends in front of and behind the lens’ focal plane. By controlling the depth of field, the photographer can control the clarity of the subject and the background environment.
Among the basic methods of composition, it is very common to use depth-of-field blur to deal with the background. Using a long focal length or a large aperture, or shortening the shooting distance, can create a shallow depth of field effect. A shallow depth of field can blur complex backgrounds and make the subject stand out.
The picture above shows the cute scene of the cat lying on the seat. The photographer used a relatively shallow depth of field, and the subject stood out, creating a beautiful background blur and soft picture effect.
2. Factors That Affect the Depth of Field
How deep the depth of field should be used in the photo depends on the message the photographer wants to convey. The image below shows a close-up of a pet dog, shot at f/3.2. Shallow depth of field, focus on the dog’s eyes, the dog’s eyes are perfectly displayed.
In photography creation, the three main factors that affect the depth of field are as follows, we can adjust these items to change the depth of field effect.
- The size of the aperture when shooting,
- The focal length of the lens,
- The distance between the camera and the subject.
The specific relationship between the depth of field and the above three elements is as follows.
Aperture size: The larger the aperture, the smaller the aperture value, and the shallower the depth of field. The smaller the aperture, the larger the aperture value, and the deeper the depth of field.
The focal length of the lens: The longer the focal length, the shallower the depth of field. The shorter the focal length, the deeper the depth of field.
Shooting distance: The closer the camera is to the subject, the shallower the depth of field. The farther the camera is from the subject, the deeper the depth of field.
3. Depth of Field and Foreground and Background
(1) Shooting with a focus on the foreground
We all know that when framing, the picture in the viewfinder will be divided into two parts: foreground and background. The foreground is the part closest to the camera. Focusing on the foreground shot will highlight the foreground as the main body of the frame. Generally, when the background of the picture is very cluttered, you can focus on the foreground to make the background blur, thereby reducing the adverse effect of the background.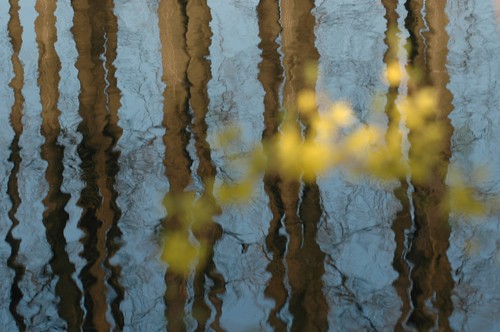
(2) Focus on the background shot
The background is the person or thing in the shot that is behind or close to the subject. The background corresponds to the foreground in the scene of the lens, and is sometimes used as the subject or companion of the performance.
Focusing on the background shooting will show the background as the subject, and the parts other than the background will be blurred. This kind of photos with strong contrast between reality and reality often leaves a very deep impression on people.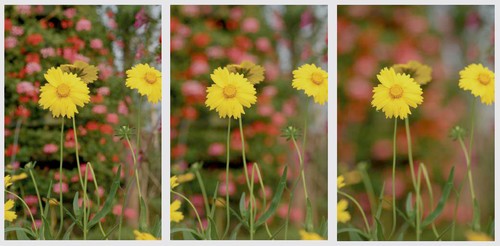
Normal shooting generally requires a clear focus, so that the subject is clearly presented. But sometimes, purposefully blurring part of the scene in the picture is also one of the techniques of photographic expression. For example, in the picture, by selectively placing the foreground branches and leaves out of focus, the photographer deliberately crossed the foreground and only focused on the reflection of the trees in the water surface behind, so that the branches and leaves became the foil foreground. The contrast between reality and reality is impressive.
(3) Control method of depth of field
Shooting flowers in a bush, different apertures create different depth-of-field effects. It can be seen from the figure that with the change of aperture, the depth of field of the picture also changes.
(4) How to get the maximum and minimum depth of field
Control over depth of field is one of the fundamental techniques of photography. We can expand the depth of field so that all subjects are clearly visible on the frame. We can also narrow down the depth of field, so that only the main objects are clearly represented, and the secondary objects are blurred and hidden. The depth of field effect has a very noticeable effect on the composition of a photo.
How to get the deepest depth of field? We can get the deepest depth of field by the following 3 measures:
•i Try to use the wide-angle end of the lens or a short focal length lens.
•ii When shooting, try to extend the shooting distance.
•iii Close the aperture as much as possible.
Sometimes, photographers want to have both reality and reality in the photo, such as blurring the environment and making the subject clear. This requires the use of a shallow depth of field technique known as “selective focus”.
How to get the smallest depth of field? There are also 3 measures:
•i Try to use the maximum focal length of the lens or shoot with a telephoto lens.
•ii Try to get as close as possible to the subject.
•iii Use the widest aperture as much as possible.
(5) Control the depth of field through the aperture
Although these three elements can control the depth of field effect, the most operable aspect in photographic creation is adjusting the aperture. Because changing the focal length or shooting distance will change the overall composition and perspective of a photo. If the composition and perspective of a photo have been determined, the only way to control the depth of field is by changing the aperture. The two images below are two photos taken at the same focal length. The difference in depth of field is achieved by the adjustment of the lens aperture: the larger the aperture, the shallower the depth of field. The smaller the aperture, the deeper the depth of field.
4. Control the Degree of Blur by Adjusting the Background
Among the 3 factors that affect the depth of field, the shooting distance (the distance between the lens and the subject) plays an important role. There are two ways to change the shooting distance: one is to move the camera to change the distance between the camera and the subject, and the other is to change the distance between the subject and the background.
When changing the distance between the subject and the background, other shooting factors are kept constant. At this time, the depth of field of the picture will not change, but because the background is further away from the clear depth of field range, the blurring effect of the background in the photo will be stronger. That is to say, by changing the shooting distance, we can control the degree of blurring of the picture.

The photographer took the first of the two photos above using an overhead shot. The distance between the flowers and the ground is relatively close, and the ground is relatively dim, and the degree of blurring is not particularly obvious. When the photographer took the second photo from the side, the background in the picture was farther and farther from the subject, and the blurring effect of the background was more obvious.
5. Control the Depth of Field by Adjusting the Focal Length
We can also control the depth of field by adjusting the focal length of the lens. The shorter the focal length, the deeper the depth of field of the picture. The longer the focal length, the shallower the depth of field of the picture.
However, in actual shooting, the adjustment of the focal length is often subject to many restrictions, because the change of the focal length will simultaneously change the viewing angle and framing range of the picture. The perspective is often the most important factor in determining the composition of a photo. Therefore, changing the focal length is often not a photographer’s first choice for controlling depth of field.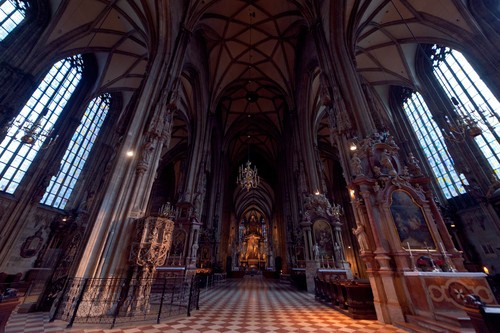
In the picture, the photographer used the wide-angle lens to shoot close to the sculpture. And the background is not blurred enough. And we can still see the elements in the background. At this point, the photographer stepped back and switched to a telephoto lens to shoot. And the depth of field of the picture immediately became much shallower. In the picture on the left, using a wide-angle lens to shoot a large indoor scene, it is impossible to simply adjust the focal length to control the depth of field.
6. Correct Understanding of the Degree of Blurring
Depth of field and accurate focus are very important to the sharpness of the picture. Some beginners may think that a certain part of the photo is either clear or blurred. In fact, this understanding is too absolute. The degree of blurring out of focus in the image is also different, And can show a linear change. That is, from a little blur to a complete blur. From in-focus to out-of-focus, there is a trend from clear to gradually blurred. That is, the degree of blurring gradually changes.
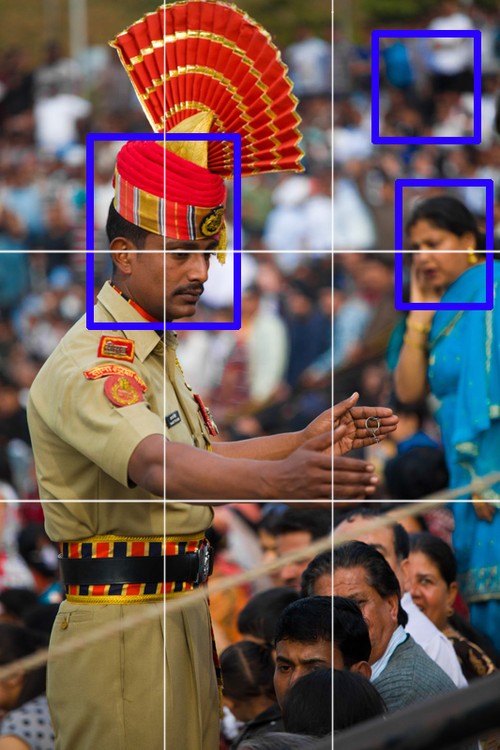
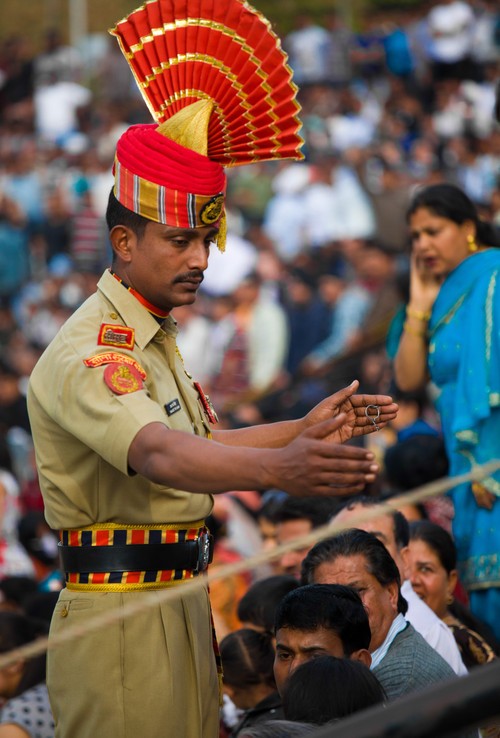
The subject in the photo is only really sharp when it is in the focal plane, all points that are not on the focal plane are more or less blurred in the photo. But the weak blur effect we can’t distinguish with the naked eye.
The further from the focal plane, the blurrier the image. In fact, in many photos, because the depth of field is not shallow enough, the out-of-focus scene can still be clearly identified. Thereby, it reduces the viewer’s attention to the subject. At this point, you need to control the depth of field to be shallower.
On the contrary, if you need to explain the environmental information of the picture, such as the picture on the left, you need to explain the environment where the subject is in the stadium stand. At this time, we can control the depth of field deeper, and the picture gradually changes from clear to blurred. But some background elements are still clearly identifiable, allowing viewers to learn about the shooting scene. As a background element, even if the out-of-focus area is not very clear, it can give people a sense of the background and other information of the photo.
