Categories
Studio Lights Education

Portrait Shooting Techniques-Introduction to Art Photography

Shooting Technique 1: Large Aperture

The trick to shooting with large apertures is not to be superstitious about large apertures, not to simply consider the size of the aperture, and ignore the length of the exposure time. If there is enough light, you can also shrink the aperture by 1-2 stops appropriately to get better picture quality.

Shooting technique 2: Backlight

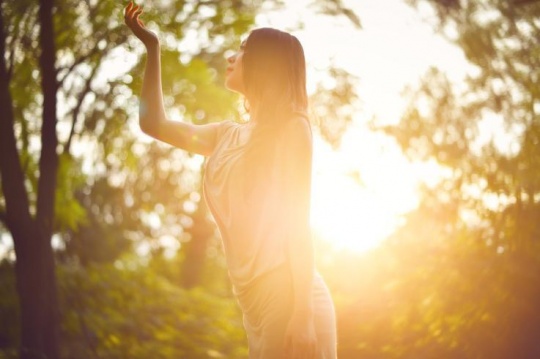
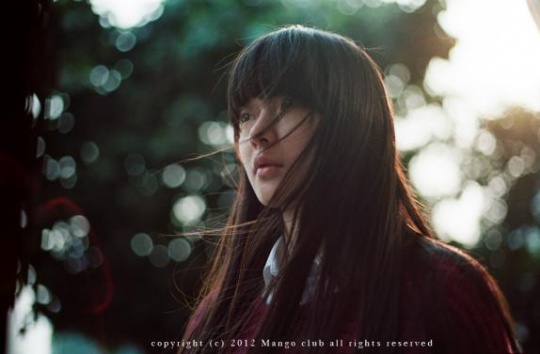
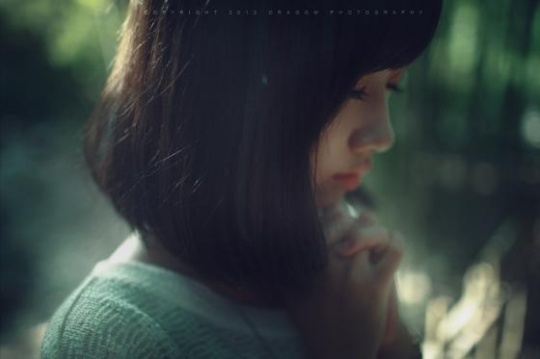
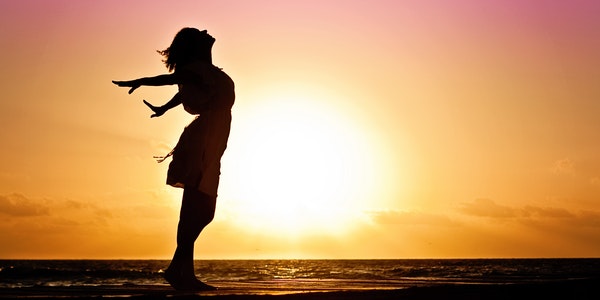
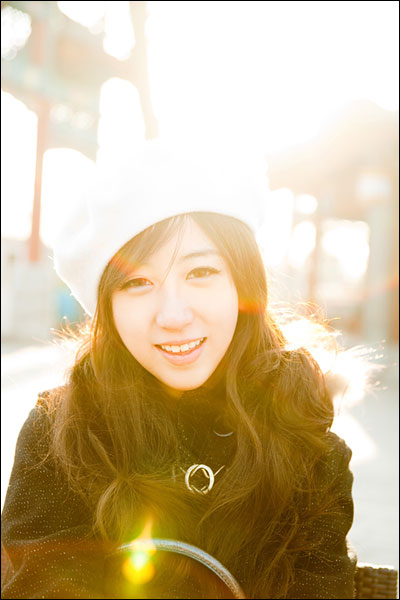
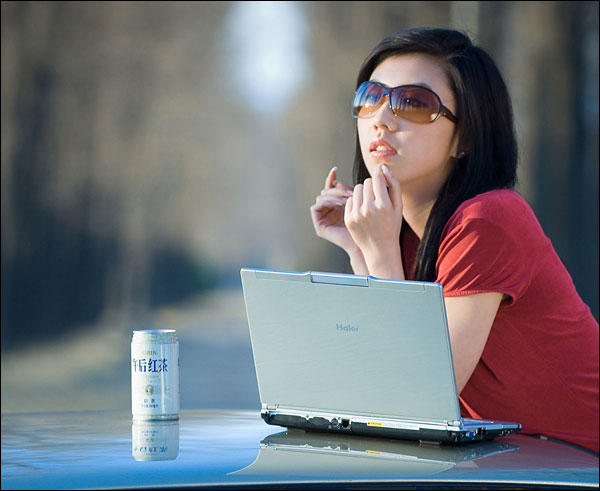
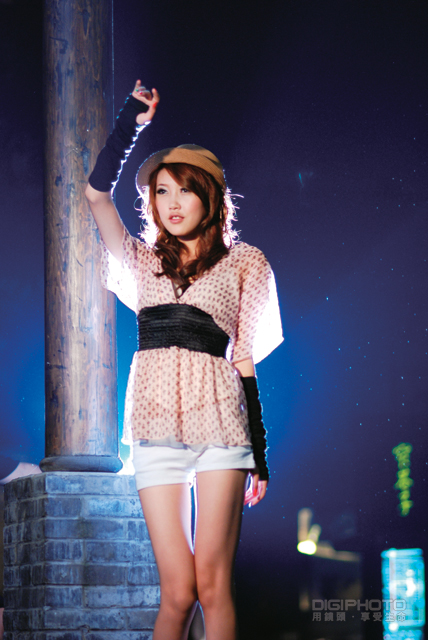
First of all, I would like to ask a few questions for the girls. What is backlight shooting? Is it natural light or light? Should you shoot the front or back of the character? Should I take a close-up shot or a panoramic shot? Take the following picture as an example, some issues that girls should pay attention to when shooting in the sun against backlight:

  1. Pay attention to fill light. Appropriately increase some exposure compensation to let the sun fill the screen.
  2. Pay attention to choosing the height of the light. Top light is not suitable for taking close-up shots of people.
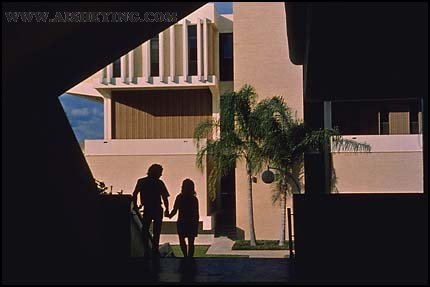
  3. Pay attention to choosing a darker background, otherwise you will get a silhouette effect.
  4. Be careful not to let the lens into the light, wear a hood to avoid damage to the screen.

    Shooting technique 3: How to cleverly shoot the back

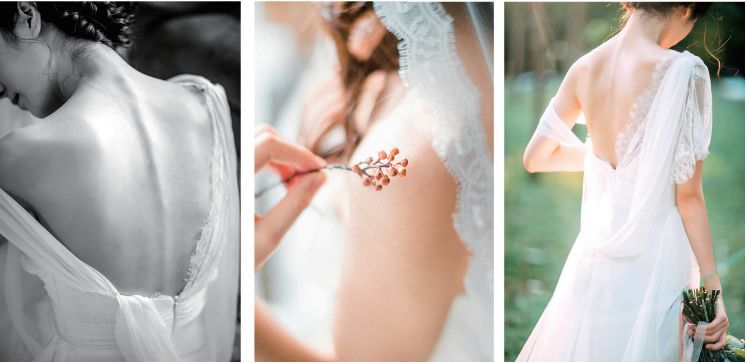
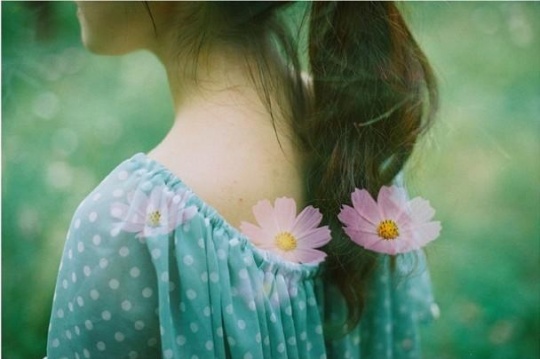
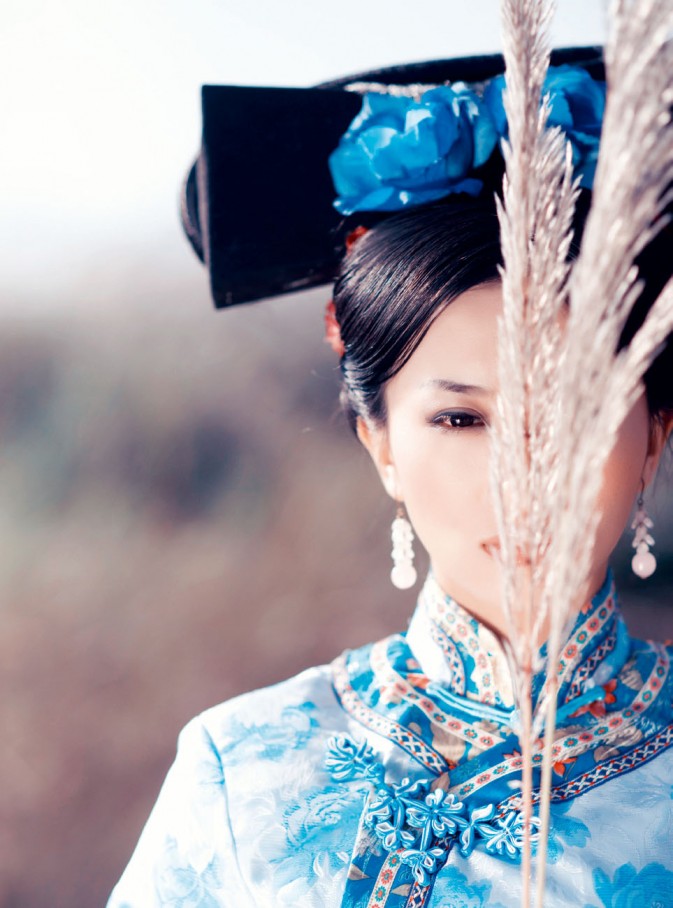
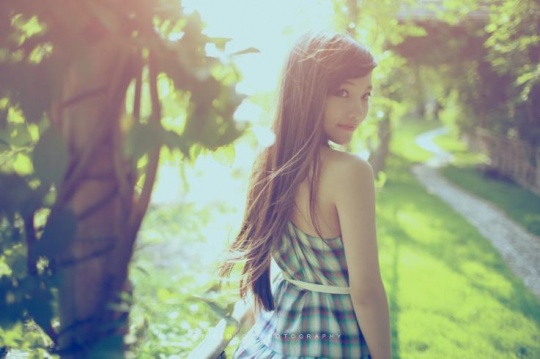
    In fact, by choosing a partial composition, you can discover the most beautiful side of the character. Whether it is multiple exposures or the use of foliage occlusion, it is your magic weapon to win. Being good at discovering the most beautiful moments of characters, you can still make blockbuster movies without “showing your face”.

    Shooting technique 4: large spot

    Shooting with a large aperture is generally divided into two types: the light spot of the night scene light and the light spot in the woods. When shooting, adjust the camera to at least F3.5-F5.6 and select the Selfie mode. The specific focusing distance is determined on site. The shutter speed is also set according to the on-site situation. In this way, the large light spot formed by the distant light source can be photographed.

    Shooting technique 5: Make good use of SLR cameras

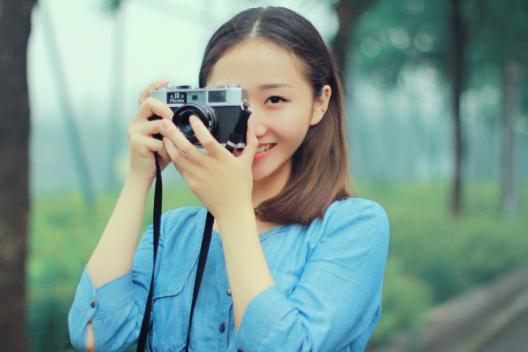
    SLR also has many advantages that mirrorless cameras do not. Good control is the easiest to master, and learning to use props is also a magic weapon for girls. The antique retro camera is of course a must-have good “thing”, whether it is a rangefinder, a double-reflex or a Polaroid can be a weapon in your hand.

    Shooting technique 6: wide angle

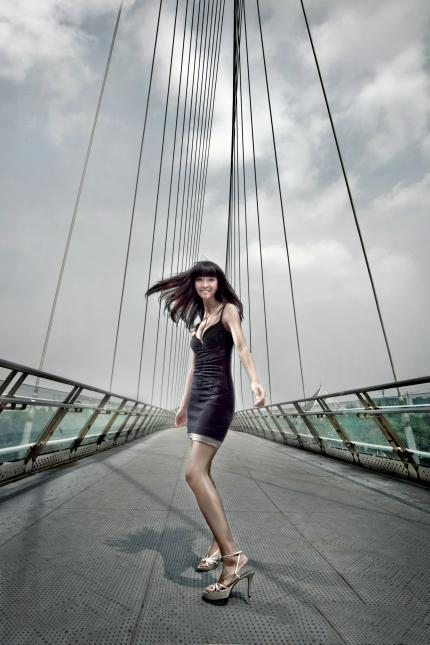
    Such a lightweight body is also a good choice if you use a wide-angle lens to shoot. The first method that comes to mind must be to take full-length portraits, which is how the long-legged girl came. But it does not necessarily mean that you can only shoot portraits in a panoramic environment. For a simple panoramic view, you can use it to lengthen the shape of the subject’s legs. People on earth love long legs, right? Remember that your toes and knees must not face the camera directly, otherwise the picture will be distorted and ugly. Of course, wide-angle is a good choice for portrait shooting for the purpose of beautifying girls. Set up the camera and walk up from a low angle to shoot upwards.

    Shooting technique 7: the subject’s emotions

    For SLR cameras that can be extended to ISO 12800, we can handle even darker and darker environments. When talking about portrait photography, creativity, emotions, etc. are often thought of. In the process of shooting girls, people are taken as the subject. According to the scene, they are divided into distant view, panoramic view (from head to toe), seven avatars (above the knees), medium shots (half-length), close shots (on the chest), close-ups ( Avatar). However, it is believed that the characters in the perspective are only embellishments and the center of interest, and the non-subject is not absolute. The key is to blend the character’s emotions with the surrounding environment.

    Shooting Tip 8: Creativity

    One last thing to remember: If you are too serious, you will lose! Technology belongs to technology, and idea belongs to idea. There is no golden rule for creating with SLR, breaking the rule is the last word. If you want to discover different angles and creativity in your life at all times, you can pick up your camera to shoot at any time, and use your imagination to shoot boldly! Good work, just in an instant.

Categories
Studio Lights Education

Some Taboos of Pose in Portrait Photography

When taking pictures of female friends, if you want to look good, you should first avoid the following taboos! We’ll show you the 10 “no’s” for portrait shooting and teach you to take more beautiful and professional portrait photos.

1. Show Your Teeth Whether You Laugh or Not

Unless it is intentional, under normal circumstances, whether taking cool photos or sweet smile photos, showing your teeth is more relaxed and natural. Pursing your lips only makes the subject’s face look tight. So when shooting, guide your subject to relax the muscles on his face and expose his teeth.

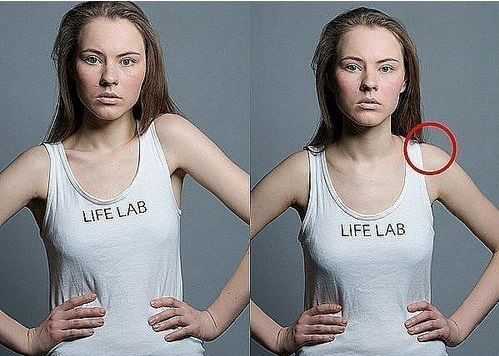
2. Grasp the Shoulder Height

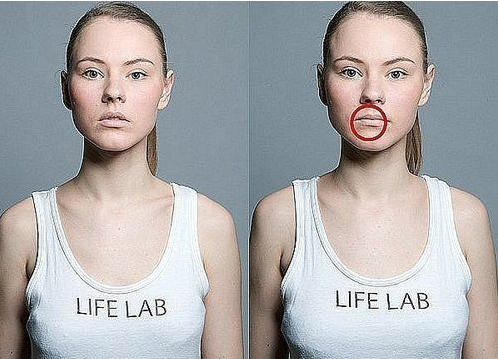
If you want to be a model, you must have the “momentum” of a model. Put one shoulder up and let the subject’s body show a curve. This is pose photography. The position on the right is obviously a position to quarrel with you.

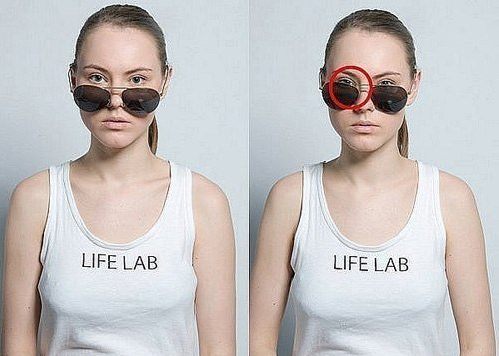
3. The Window of the Soul Should be Open

Many girls like to take pictures with glasses and sunglasses. At this time, if the lens blocks half of your eyes, your picture fails 90%. So either completely block the eyes or let the eyes completely show. When taking side face portraits, remember to fully expose one eye in order to make the photos look good.

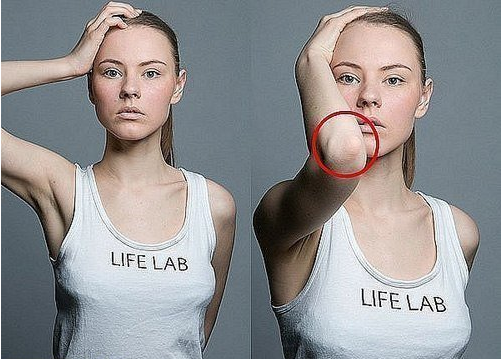
4. Don’t Block Your Face

When posing, guide the model to show his face. You can let her “shape her face” by adjusting her hair style, or you can make a popular “melon seed face” by taking a top shot. However, blocking your face with your arm is obviously a defect left by shooting, which should be avoided as much as possible.

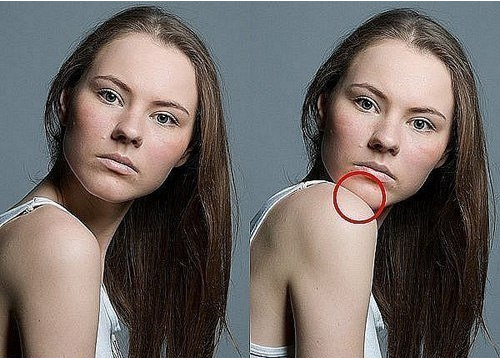
5. Control Shoulder Height

Revealing fragrant shoulders is also a very common shooting pose. At this time, too high shoulders will also block the chin. You need to get the model to lower her shoulders a little. The example is extreme, but it is safer to leave a little space for the neck between the shoulder and the face. When shooting a big close-up, you may use an airtight composition. At this time, you can try to stick your face and shoulders together.

6. Caress Your Face Gently

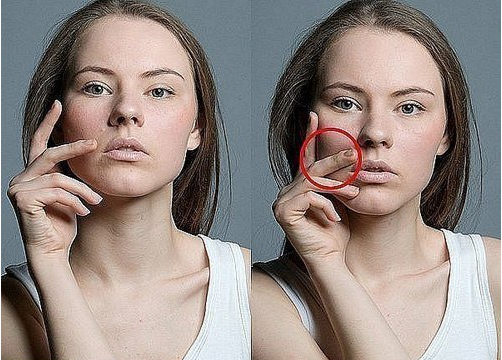
In many photos, in order to show charm, you need to touch your face with your hand and give a small look (this depends on your charm). In this action, many girls will be very sincere and really press their hands on their faces. This will change the face shape and create unnecessary shadows. So at this time, just gently catch it and pretend to make this action.

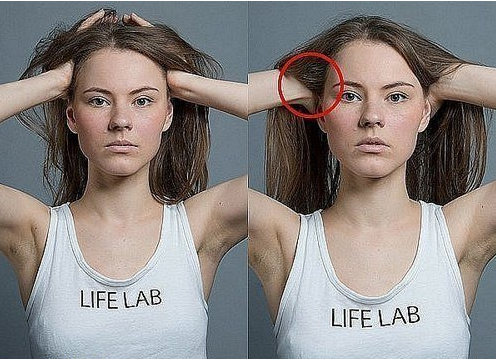
7. Expose Your Fingers

This posture is suitable for girls with various hairstyles. Whether soft long hair or handsome short hair, can achieve good results. But it’s best to show some fingers when shooting. Don’t just let the viewer see two wrists. Little attention has been paid to this detail, but by comparing the pictures, you will find that the photos with fingers exposed are more like art photos, while the picture on the right is like doing sit ups.

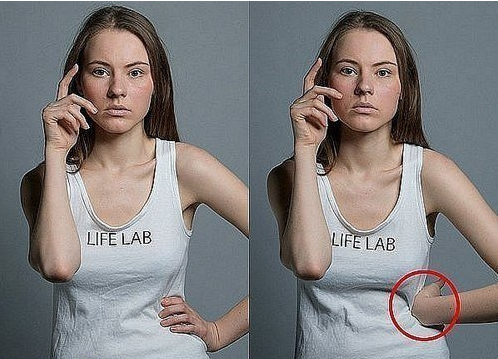
8. Hands Must be Natural

When shooting, many awkward postures can produce good results, such as chest and hip. However, the hand must be natural. Don’t let everyone feel that the hand is broken!

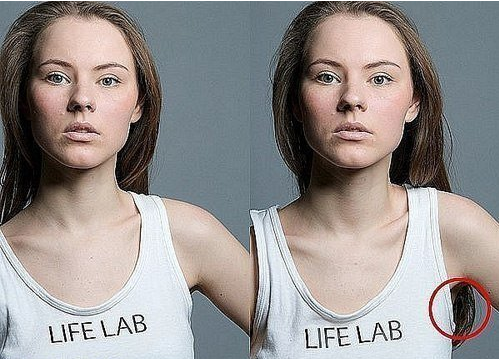
9. Don’t Show Anything Strange

When shooting girls with long hair, be sure to pay attention to whether the end of the hair is exposed from the armpit, otherwise it will cause this… Um… Uncomfortable effect. In addition, whether the corners of the clothes are exposed and whether the belt head behind the pants is exposed are all issues that photographers need to consider. Don’t let those strange things show up.

How to Create Portrait Photography According to Local Conditions?

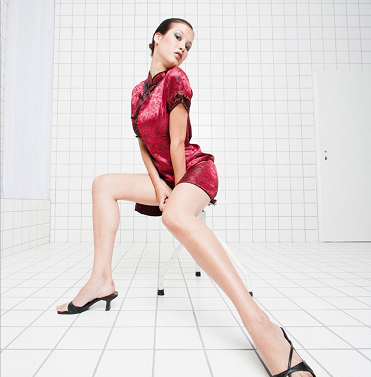
wide-angle lens

In this shooting, we also see the lines with perspective effect formed at the joints of ceramic tiles. We want to integrate these lines into the photos. Because we know that short focal length will particularly enhance this effect, we chose the lens with the shortest focal length. Then invite the model to the scene. The room was pure white, so we chose a red dress with great contrast.

Pose instruction we only gave the model a key word – stretch pose. For us, it is important that our limbs should be very stretched and our posture should have a deep depth in space. Our models should stretch their hands, feet or other parts of their body to us as much as possible. The compact, huddled posture is not suitable for this kind of photo. After a brief explanation, we asked the model to pose creatively.

For these poses, it is important that you further understand and make use of the characteristics of your wide-angle lens. The distance between a nearby object and a distant object is magnified. Therefore, it is very important to shorten the distance between the camera and the model.

If your shooting site — as in our example photo — already has distinctive lines that can enhance the feeling of this extended posture, you can integrate the posture accordingly. For example, we can use the seam of ceramic tile as a line of sight to enhance the perspective effect.

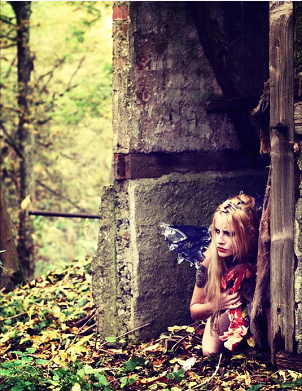
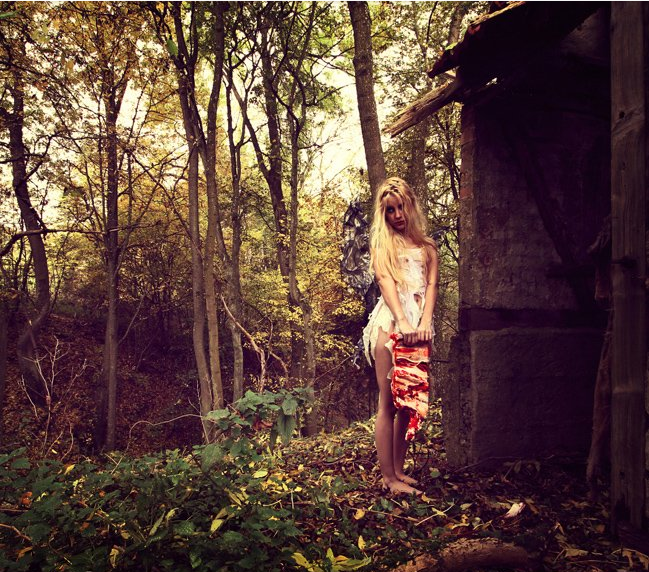
Forest Elf

When it comes to expressing emotions, posture plays a very important role. Changes in body language alone can produce completely different photo themes. The question is how flexibly you guide your model.

In our example photos, the basic shooting concept is “spirit and her dark side”. Our model will dress up as an elf and do something a real elf will never do – predation! Interestingly, this idea comes from models, so we don’t need too much guidance in expression, expression and posture. We found a suitable shooting place together with the model, and then made a performance outline according to our ideas. Within the scope of the outline, our model can play freely.

A little story here also helped us. This little story gives a frame to the plot and the pose of the model. In the example photo, the main idea of the plot is: “imagine that you are an elf, who has just done an incredible thing – hunting, catching prey and avoiding the tracker.” our model is showing “seeking protection”, posing in a compact, huddled posture and looking warily at the forest.

The following picture is produced under different storylines. This story is true. You were caught on the spot and stood there innocently with your face on. You said, “I? I don’t know anything. How could this happen?” the model’s posture here is also very natural. The slightly sideways legs and the low, innocent eyes over the shoulders give the impression that “I didn’t do anything” – although the prey is still in hand.

When practicing such stories, we should pay attention to that the posture can really emphasize the theme of the photos. It is a pity if the beautiful field and excellent props do not achieve good results due to improper posture.

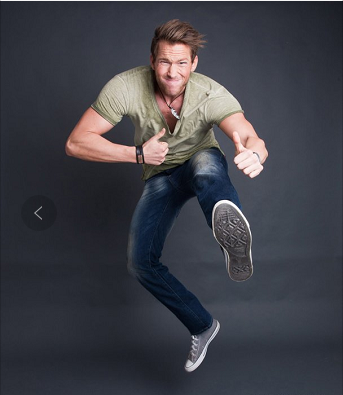
A naughty child

Everyone has seen interesting pictures of people jumping. Our customers often like to shoot this popular theme. However, it is often difficult in practice. Because it’s not just jumping up. There are some aspects to pay attention to when doing this lively and explosive posture to a certain extent.

It is important that the model is ready to jump really correctly. Many times, photographers need to give models some encouragement, because a shy jump can’t bring the expected results. The photographer should have the courage to demonstrate the whole process to the model – it will make the atmosphere more relaxed.

When jumping, you should pay attention to the model’s arms and legs. In addition, leg bending jump is more dynamic than rigid jump. The model’s limbs should move together to truly express his love for life. In this sense, the open posture with arms and legs pointing in different directions is much better than the compact leg bending posture.

By the way, another tip: jumping is very laborious. Make an appointment with the model to let him know when to jump. So you can accurately record the right moment.

And facial expressions must not be forgotten. Models often focus too much on posture, so that facial expressions reflect more concentration than happiness and enthusiasm.

Don’t urge the model to jump. Only when jumping really makes the model feel happy and fun, the picture will be more special.

Follow the instructions!

Home accessories are a very popular theme for free pose. Models can perform with these accessories – whether it’s chairs, windows, sofas, or curtains like the one in this example photo. In this case, most models can pose very real postures, which are known by the model in the ordinary “communication” with these objects.

Our model stood by the window and was instructed to gently pull the curtain aside and look out of the window. Because it is very important for us to show the model’s face, we agreed an instruction with the model. When the model heard the instruction, he turned his head to us and looked at the camera. The model should give the impression that she was distracted when she “looked out of the window”. You will find that if the model does not turn his head after hearing the instructions, but looks directly at the camera, his eyes will appear dull and unnatural after a period of time.

When arranging the posture, we should pay attention to the basic posture of the model’s arms and head. The model should raise his right hand and caress the curtain. Put your left hand on your hip. In terms of framing, we put the model’s left hand out of the picture and let this slightly curved arm form a boundary on the right side of the picture. We let this pose open to the viewer in this way. After hearing our instructions, the model turned his head to us. The result is a nervous, alert and vibrant look.

Door frame

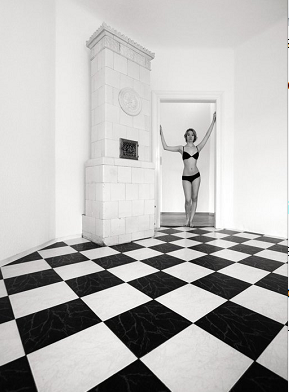
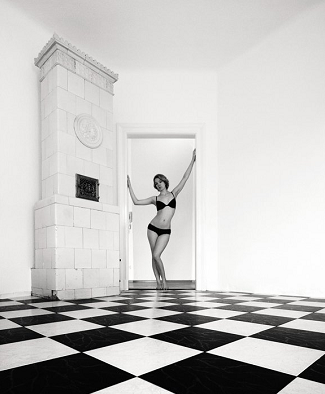
The empty room is the perfect shooting scene. Especially an empty room with outstanding features like this room – an old tile fireplace and a black-and-white tile floor with beautiful perspective lines. Our model spontaneously stood in the door frame and finally proved that this was the best position.

In clothing, we pay attention to extending the dark and light colors of the floor to the model. We ask the model to wear black underwear so that the clothing can be clearly revealed in contrast to the model’s light skin. The lines of the floor play a role in guiding the line of sight. The model has a keen sense of smell for the best position. Her hands are supported on the door frame at different heights from left to right. However, this is not enough for a tense posture, because the model’s body is still too relaxed as a whole. In addition, parallel legs do not look beautiful enough, because they look a little thick, which visually increases the width of the hips.


We adopted this spontaneous posture and made some adjustments. In addition, we asked the model to bend his left leg slightly and tilt it to the right. In this way, we get beautiful converging lines to make the model’s thighs look thinner. The model tilts her hips to the right, causing a slight twist, resulting in a thinner waist. In addition, the upward opening of the arm visually increases the width of the upper body. This pose emphasizes the most important part of the aesthetic body shape, making the body like a beautiful and swinging “s”.

Categories
Studio Lights Education

Key Skills to Improve the Ability of Portrait Photography

Why Composition?

A: Composition is the most basic and key factor in portrait photography. In short, composition is the process of combining, dividing, configuring and sorting out various elements in the picture, so as to obtain works with high appreciation and artistry.

The purpose of photographic composition is the same as that of painting composition, which is to better express the theme and artistic effect of the work, and then arrange and deal with the relationship between the subject and the background in a certain environment or space.

Shooting parameters

Camera: Canon EOS 40d focal length: 42mm aperture: f7.1 sensitivity: ISO 100 shutter speed: 1 / 100s exposure compensation: ev0

Even if the same model has the same background, the photographer uses different composition methods, and the photo effects are often very different. Reasonable composition can well express the photographer’s shooting intention and give people the enjoyment of beauty. If you want to make good portrait works, novices can follow the basic composition principles, start with the simplest and easy to learn composition method, lay a good foundation, and then study at a deeper level.

Shooting tips

Composition is the process of recombining various elements in the picture by means of photography. The composition level of a photograph is a full display of the photographer’s photography level.

What Arae the Basic Principles of Composition in Portrait Photography?

Photography is an art of subtraction. All the processing we do (camera internal processing and post-processing) is processing the original picture. In portrait photography, the character is always the main body of the whole picture, and other objects can only be used as the auxiliary of the character. Concise composition is the basic principle of portrait composition, which can fully highlight the subject status of characters in the picture. Even in many subdivided portrait photography, concise composition is the key to success.

Shooting parameters

Camera: Sony α 900 focal length: 85mm aperture: f11.0 sensitivity: ISO 100 shutter speed: 1 / 125S exposure compensation: ev0

Simple composition will make the theme or subject of the photo more prominent and give people a harmonious and relaxed feeling. If we want to get a simple picture in the environment with complex background, it seems simple, but it will be difficult to operate. No matter what operation methods we use (controlling the depth of field, using various exposure techniques, etc.), the main character must match the background and be able to serve the shooting theme.

Shooting tips

A clean and concise background is usually the premise of getting a good portrait photo. Simplicity can make the characters in the whole picture more prominent.

How to Take Close-up Photos?

The effect of close-up photos is further than that of close-up photos. It can fill a part of the model with the whole picture and reveal the internal characteristics of the character object from subtle points. The close-up pays more attention to revealing the inner dynamic of the picture and looking at the essence through the details.

The key to success in close-up shooting is that the photographer should have unique insight and be able to capture some parts worthy of close-up. Close up will give people a very strong visual impact. Without complex factors such as composition and shooting skills, they can shoot directly locally. Close ups are generally used to show the more characteristic side of the character or part of the body. Of course, it also includes some scenes of special significance.

Shooting parameters

Camera: Sony α 900 focal length: 70mm aperture: f2.8 sensitivity: ISO 200 shutter speed: 1 / 80s exposure compensation: ev0

Shooting tips

If the facial contour of the model is clear and beautiful, it is very suitable for close-up shooting. The eyes of characters are often the content of close-up, because people often say that the eyes are the window to the soul. Through the eyes, we can see the inner feelings of the characters.

Shooting parameters

Camera: Sony SLT α 55 focal length: 85mm aperture: f8.0 sensitivity: ISO 100 shutter speed: 1 / 125S exposure compensation: ev0

Shooting Tips

Although you can not use complex shooting techniques, you should also change the angle of shooting appropriately. Remember not to shoot close-up portraits directly. When shooting, keep the character’s neck, which will give people a deeper and attractive feeling.

Photography Secrets

When shooting close-up, it requires high light and color in the scene. It is best to use contrast (color contrast, ancient and modern contrast, etc.) and complementarity to highlight the characters in the scene, so that the viewer can expand his ideas according to the focus of the picture.

How to Use Close ups to Portray Characters?

The use of close-up can describe a part of the character in more detail, which is easier to attract the attention of the viewer. It is also a detailed description of beauty. Close up can depict the characters’ facial features and emotions very finely. The viewer can read rich content from the eyes of the characters, and the screen has a stronger sense of communication.

In the process of shooting, the photographer needs to understand the appearance and personality characteristics of the model. Different models need to depict different emphases. When shooting with close-up technique, it can not only show the facial features of the character, but also show some other parts of the character. Such close-up is more creative and can leave more imagination space for people.

Close ups are different from busts, but they also have something in common. The difference is that the close-up can not only shoot the parts above the character’s legs, but also shoot the parts below the character’s legs, such as the close-up of the feet. The same point is that they all take showing the model’s expression or expressing some emotion as the main starting point.

Shooting parameters

Camera: Sony α 900 focal length: 85mm aperture: f2.0 sensitivity: ISO 200 shutter speed: 1 / 8000s exposure compensation: ev0

Shooting Tips

The photographer can design a shape for the character when making a close-up of the character’s shoulders. And try not to keep the character’s shoulders flat. This is more helpful to enhance the beauty of the picture through the lines of women’s shoulders.

Shooting parameters

Camera: Sony α 900 focal length: 85mm aperture: f11.0 sensitivity: ISO 100 shutter speed: 1 / 125S exposure compensation: ev0

Shooting Tips

Pay attention to the details of the picture when shooting. Perhaps the deviation of a detail will affect the beauty of the whole picture. Therefore, we should pay attention to keep the characters and clothes clean and tidy. And each small pose and action of the characters is very important.

Photography Secrets

When shooting close-up, be sure to show the whole in part. A prominent part can express a complete story or thought. Therefore, when taking a close-up, we need to consider whether the idea to be expressed in the close-up is complete. If it is incomplete, we can take a global effect first, and then get an ideal close-up photo through post-processing.

Categories
Studio Lights Education

How to Establish the “Unique Style” of Portrait Photography?

In the photography industry, a term we often talk about is “photography style”. What is “photographic style”? In fact, your photographic works are highly recognizable, and you have your own unique set of propositions in terms of color, composition, and post-processing.

Therefore, as a portrait photographer, you must have your own style, so that it will be easier for people to remember. But for the majority of photography enthusiasts, a lot of practice is important. Today we are going to talk with you about the topic of “photography style”.

How to Make Your Photos Unique?

People often ask this question: What is the most important thing to take a good portrait photography?

Regarding this question, I think every photographer will have a variety of answers. Some people may say that since it is a portrait, the most important thing is special. With a good model, the work is 80% successful. Some people will say that the most important thing is lighting, because photography itself is a game of light and shadow.

And I think that the most important thing for an attractive portrait photography is to have emotions and have the photographer’s own aesthetics and ideas. This is also the decisive factor that determines whether your photo has a distinctive style and distinguishes it from other photos of the same kind.

How to Develop Your Own Style?

Style refers to the uniform characteristics of a work of art that are externally expressed.

We can classify a photo into a certain style through the surface information of a photo. And what really determines the style is actually the interior of the work, the photographer’s unique and distinctive expression of aesthetics.

Aesthetics is simply what you like and hate.

Do you like portraits with accurate exposure, rich details, sharp inside focus, and oily outside tar, or photos with dim and soft backlighting, looming, interlaced light and shadow? It depends on your heart and not others.

To Find Your Own Style, You Must First Abandon the Herd Mentality

What I took when I picked up the camera was a life record. Beautiful portrait photography requires the photographer to do a lot of thinking and self-criticism before shooting. What are you taking, what do you want to express through photos, and how to express your thoughts.

There should be a clear definition in the brain before each shooting. Even if the film is different from what you imagined, you should learn to analyze the reasons for this gap. Only after countless practice runs can we feel ourselves.

Thinking, practicing, and thinking again, the style will gradually become clear in this cyclical process. Even if you can’t use fixed words to describe your style, at least you will know what you want to shoot and why you want to shoot like this before the next shoot.

Photography Style-Warm, Quiet, Natural

Regarding photography style, I believe that everyone will go through a long period of vaguely defined time to establish. Is my style Japanese, European or American, fresh, heavy, or any other style.

I want to use three descriptions to define my photo style: warm and beautiful, quiet and powerful, natural and not artificial.

Warm and Beautiful

First of all, “warm and beautiful”, this is the first feeling I hope the whole photo presents. I believe this is easy for everyone to understand. The picture style and color tone are warm and delicate, and the theme of the photo is a beautiful thing that expresses a specific image.

If you tell a story with photos, then I hope that the story told must be a warm, beautiful story with a happy ending.
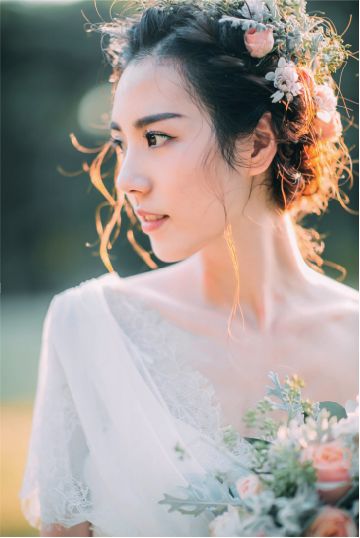
Lens: 85/1.2 Aperture: f/1.2 Shutter: 1/800 Sensitivity: ISO 250

With the overall tone and direction, the next step is to go deeper in the content of the photo, “quiet and powerful.” The picture I pursue does not need too much color and decoration, and does not need to be too gorgeous or exaggerated.

Quiet

“Quiet” here refers to the silent language in the picture, which is relative to the powerful visual impact. Specifically, there is no strong visual impact, simple and low-key.

powerful

And “powerful” refers to the ability to trigger or make viewers think about things beyond the surface of the photo. It can also be understood as attractive, simple but extraordinary, and there is a deeper meaning behind the simplicity. This visual beauty does not just stay on the surface.

What I expect is that my photos are not only about the warmth and beauty of the surface, not just the looks of the model, nor just the exquisite and beautiful shape.

What I seek is that the audience can feel the photographer’s emotions and thoughts when viewing this photo. When you see the photo, you know that it is not a photo with the shutter being pressed at will, but a carefully conceived work.
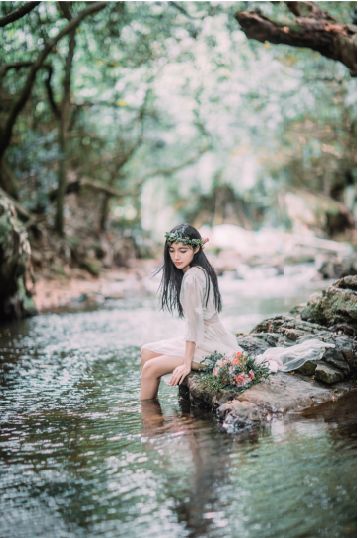
Lens: 85/1.2 Aperture: f/1.2 Shutter: 1/320 Sensitivity: ISO 400

Natural and Unpretentious

The last point, “natural and unpretentious”, this is also easy to understand, mainly refers to the state of the main character in the picture.

What proportion does the character occupy in the picture, and what kind of relationship does it have with other components in the picture? As well as the character’s shape, makeup, movements, expressions and what he or she does in the picture. I hope that these elements can express the natural and unpretentious effect.

Regarding “Naturally not pretentious”, there is another point, that is, when the audience sees this photo, they will be attracted by the content of the picture and ignore the existence of the lens. Just like when we appreciate a painting, we often do not feel the painter’s painting methods, painting skills, etc., but are first attracted by the content of the painting.

This is especially important when I take pictures. I don’t want to convey my photography skills, control ability of equipment, precision composition or some fancy photography skills through photos.

Naturally not pretentious, it is actually a feeling of long-term accumulation. In this way, when you pick up the camera, it will naturally convey the picture you want.
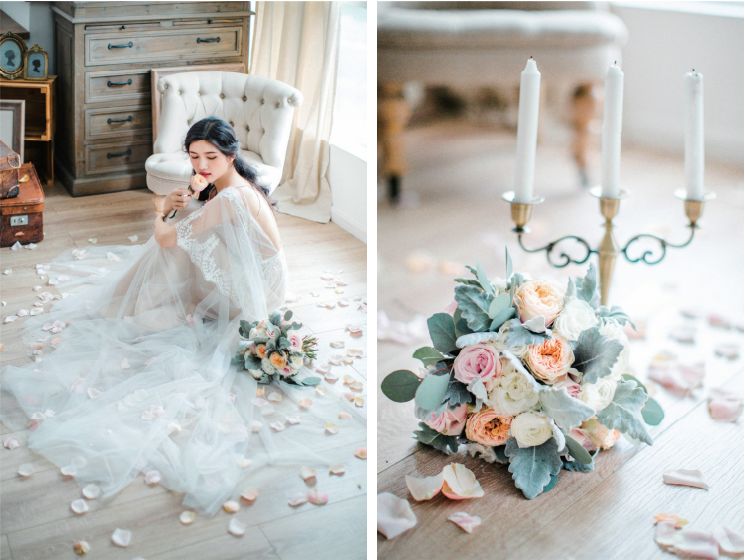
Lens: 50/1.2 Aperture: f/1.4 Shutter: 1/160 Sensitivity: ISO 640

Try a Different Composition

The various composition modes of portraits are all based on the characters. When the model is standing, the photographer is also standing, holding the camera in both hands to shoot. At this time, looking at the viewfinder frame, the view that can be taken is actually limited, so if you want to diversify the composition, you must try a variety of angles.

For example, the photographer stands higher or close to the ground, or lets the model squat down or lie down. The change of camera position and model position can make the composition more diverse. Here are a few commonly used examples.

The Character is Inverted:

There is a very interesting phenomenon. The human eye cannot recognize whether the facial features of the inverted image meet the proportion of beauty. When we see an inverted photo of a person, the facial features and facial expressions will be ignored by us. Even if the facial features of the person in the photo are not refined and the expression is unnatural, we will inadvertently ignore it.

So in theory, anyone is suitable for shooting inverted images. Occasionally, we also need to jump out of the conventional composition habits and try more shots at special angles.
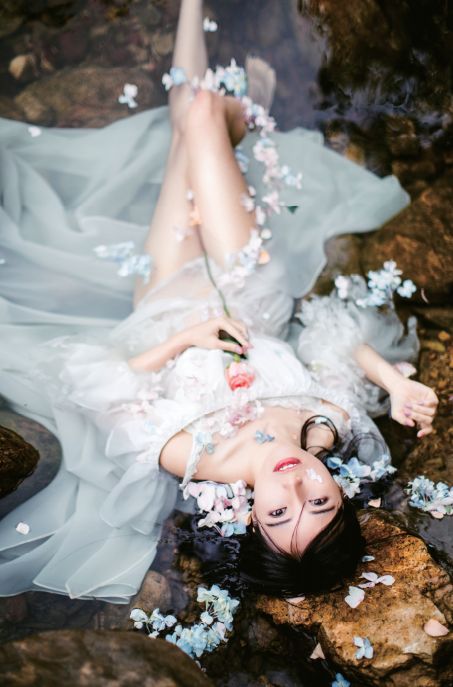
Lens: 50/1.2 Aperture: f/1.4 Shutter: 1/1000 Sensitivity: ISO 100
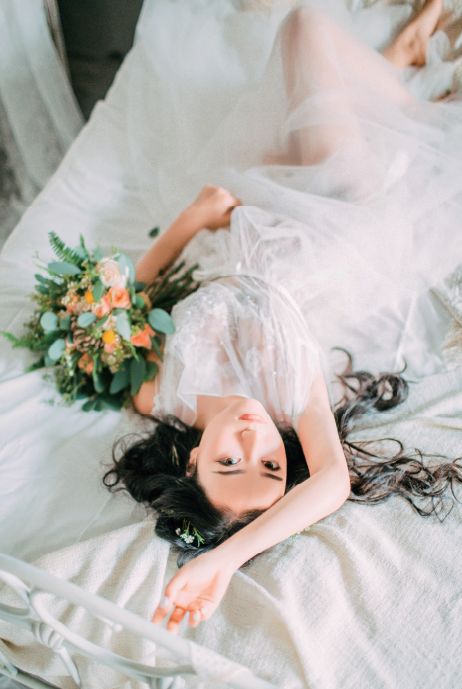
Lens: 35/1.4 Aperture: f/1.4 Shutter: 1/60 Sensitivity: ISO 500

Looking Down Close-up:

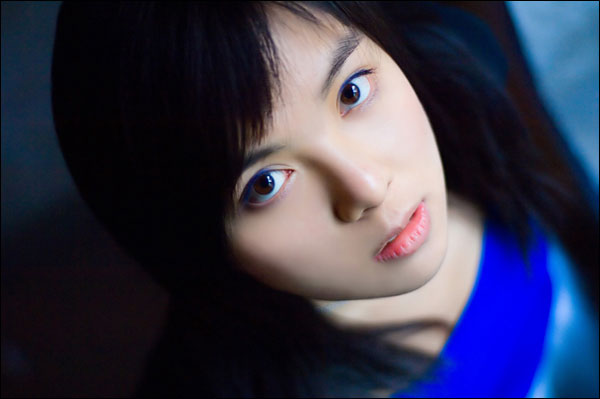
Looking down on the composition and shooting close-ups, with the help of the blur of the large aperture, the audience can focus on the eyes and blur the part outside the face. Suitable for shooting the moment when the model looks directly at the camera, the eyes and expressions are highlighted and magnified, and the red lips are also a bright spot in the picture.

The top view composition is also a composition method that can show a small face.
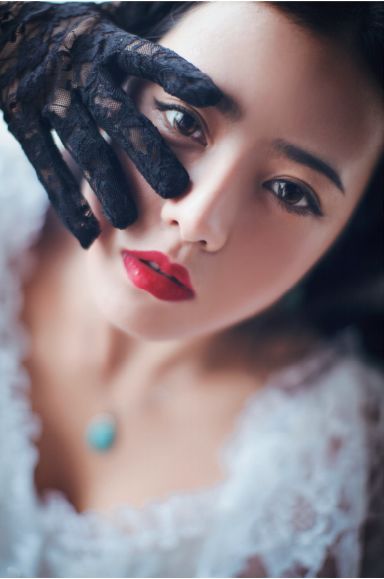
Lens: 50/1.2 Aperture: f/1.2 Shutter: 1/250 Sensitivity: ISO 250

Bottom View Composition:

Corresponding to the top view composition, the bottom view composition means that the camera is below the model’s eye level, allowing the model to stand higher or the photographer to squat down.

When shooting bottom view composition, if the model looks directly into the camera, it may feel that the face is not good-looking or the neck is not stretched enough. At this time, you can ask the model to give the camera a side face, or look into the distance, to bring a kind of extension or visual guidance to the composition. At the same time, it can also make the model’s body look more slender and stretched.
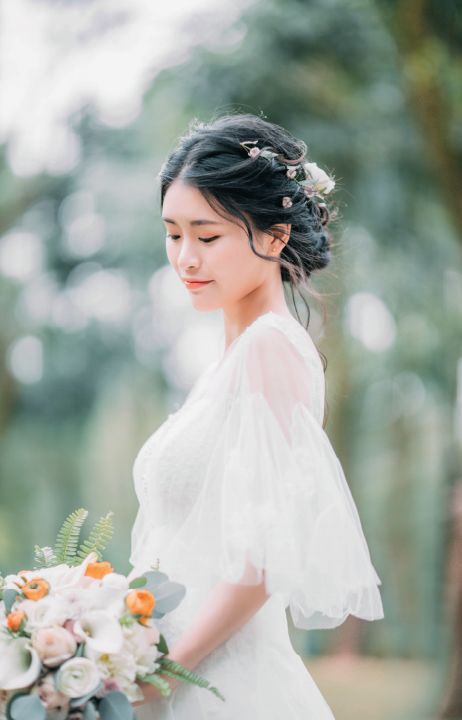
Lens: 85/1.2 Aperture: f/1.2 Shutter: 1/1600 Sensitivity: ISO 320

Partial Close-up:

Partial close-ups are a good way to convey emotions and enhance atmosphere in portrait photography. I also call it “close-up composition without eye-opening”.

In addition to the girl’s beautiful eyes and face, what else can be photographed? In fact, there are many more. Such as fingertips, collarbone, hair, lips, back, etc.

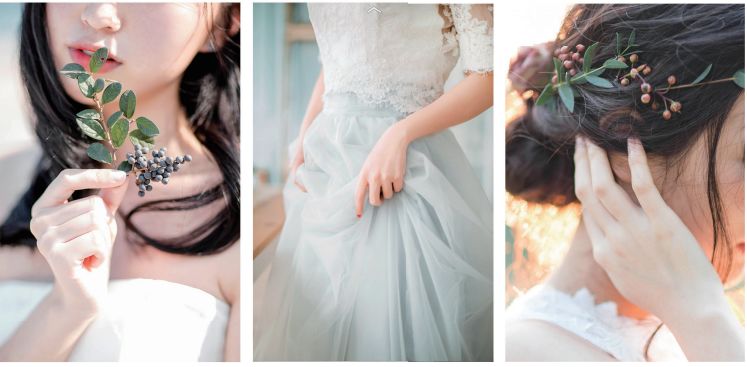
There are no eyes to convey emotions, and the emotional conveyance of partial close-ups relies more on body language. Catch the soft light and some small movements of the girl, or with the help of small props and trinkets, you can take very beautiful partial close-ups. These partial close-up details are often easier to bring the audience into the mood.

In the next shot, you can also try to take some beautiful and delicate small details of the situation. It should be noted that even if you only shoot a part, this part still belongs to the character as a whole, so don’t look at it separately.

For example, to take a good-looking hand, the whole body should be comfortable and relaxed, and the expression should be soft. If only the back of the model is photographed, the limbs also need to be stretched out.
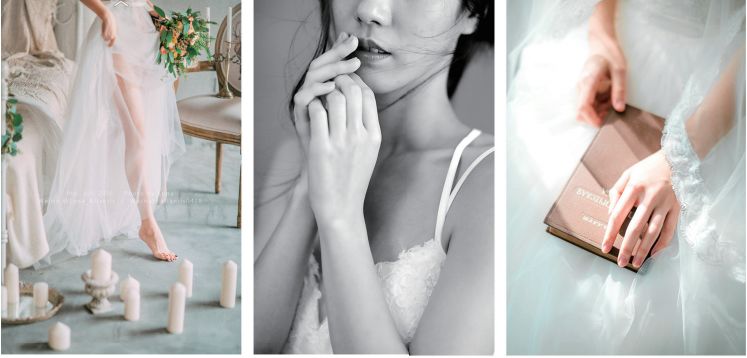
Lens: 85/1.2 Aperture: f/1.8 Shutter: 1/800 Sensitivity: ISO 200
Categories
Studio Lights Education

Photographic Composition Guide

Photographic composition is an expression of your innate sense of design. This guide can help you strengthen your inherent sense of composition and take better photos.

Photographic Composition Guide (1): Concise

Simplicity is the most basic and most important principle: find ways to make your photo subject have the strongest visual appeal. One way is to choose a simple background, so as not to distract the audience from the subject.

Photo 1 (Text on the right: Phone? Bridge? Or cactus?)

Let’s take a look at how to improve this photo by simplifying the complex. First, decide whether the subject is a public phone, a bridge, or a cactus.

Photo 2

We decided to use cactus as the theme, move the camera closer, and use a flat sky as the background to simplify the picture and improve the effect of the photo.

Photo 3

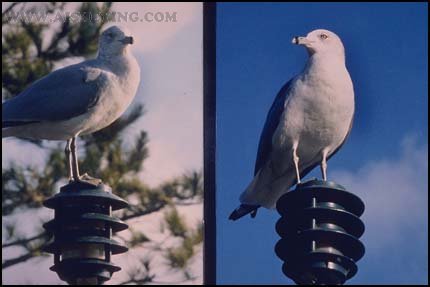
Of course we are close enough to the subject in the above two photos, but the background of the photo on the left is messy, covering the body of the seagull. Just move the camera’s angle of view a little bit, and the seagulls will stand out on the background of the blue sky.

Photo 4:

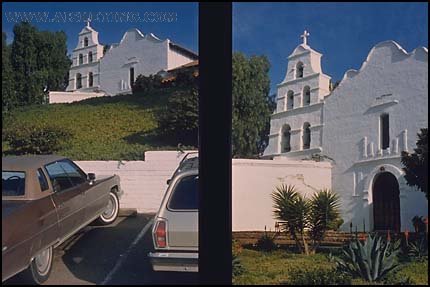
When composing the picture, you must clearly indicate your shooting intention, and arrange other objects outside the subject to make it a supplement to the subject. Most people will like the photo on the right because the parking lot under the photo on the left contradicts the antiquities of the theme ancient building.

Photographic Composition Guide (2): Rule of Thirds

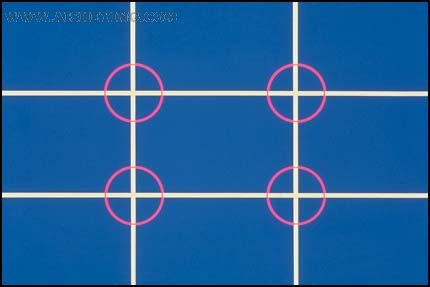
When placing the subject outside the center of the screen, the rule of thirds can be used as a composition guide, as shown in the figure below

Photo 1

Before taking a picture, imagine dividing the entire picture into three equal parts vertically and horizontally to get four intersection points. This is where the subject should be in a good composition. Where to put the subject depends on the subject and how you want to express it.

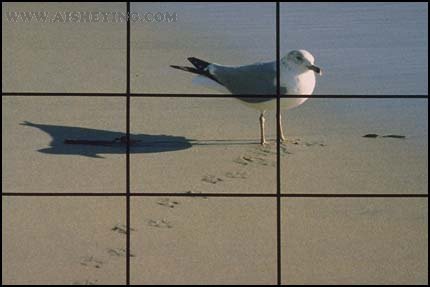
Photo 2

We place the subject at the upper right point so that we can show the shadow and the footprints that lead the vision to the seagull.

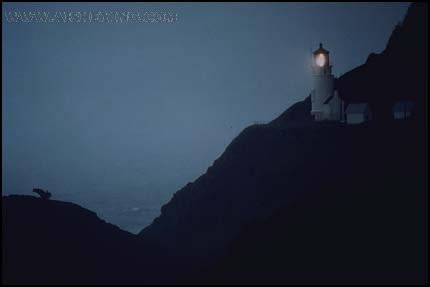
Photo 3

The lighthouse is located at the upper right point, because the trend of the rest is consistent with the layout of the screen.

Photo 4:

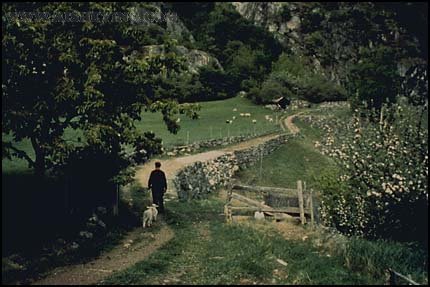
The theme is well controlled in this example picture. You can place the subject anywhere on the plank road. But according to the rule of thirds, the current position is the best. Moreover, this composition points out a clear path for the subject in the picture (thus creating a sense of distance and depth).

Photo 5:

In the case of the subject moving, the path problem must be considered. It is usually necessary to leave enough space in front of the direction of travel.

Photo 6

If you don’t do this, this is the consequence: the jogger seems to be going outside the photo.

Photo 7

Placing the main body at the bottom left not only conforms to the rule of thirds, but also leaves enough space for the main body to move.

The Rule of Thirds in the Vertical Separation

Photo 8:

The rule of thirds can also be applied when the screen is divided vertically. The ship and the horizon in the picture above are in the middle, giving people a static and dull feeling.

Photo 9:

Let’s raise the horizon to the upper third and place the ship on the left. Remember, what I’m talking about here are just guiding principles. If you don’t like this composition, try another one.

Photo 10

Like this, lower the horizon to the lower third. Generally speaking, the horizon should be placed one third in the wind and light, and rarely in the center.

Photo 11:

Just as the horizon is best not to be in the middle, longitudinal objects are best not to be in the middle. For example, in the picture on the left, the longitudinal object is in the middle, while in the picture on the right, the photographer only moves the camera to get a more expressive picture.

Photographic Composition Guide (3): Lines

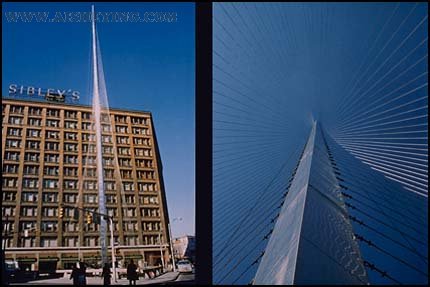
Lines play an important role in the composition. The sculpture has graceful lines, but the messy background obscures its characteristics. We tried to simplify the picture a bit and moved the camera to the bottom of the sculpture.

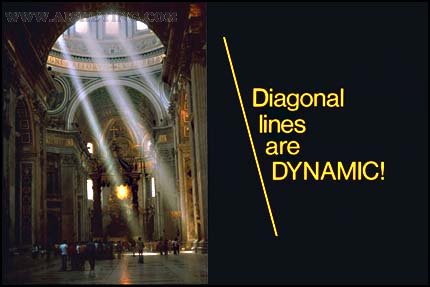
Now we can look up and find that these lines are set against the clear sky background. Because of the strong dynamic diagonal lines, the photo on the right is more expressive.

Imagine what happens if this photo loses the diagonal light? You might agree: the diagonal lines are more dynamic.

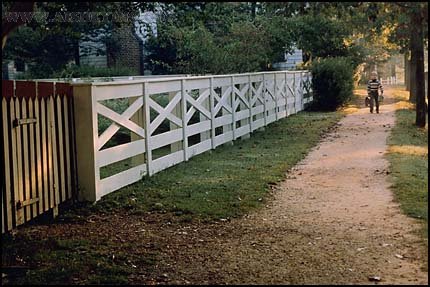
You can use the diagonal lines as a guide for the line of sight to enter the screen. This is a simple and easy way to make the viewer’s line of sight follow the line of guidance to the subject.

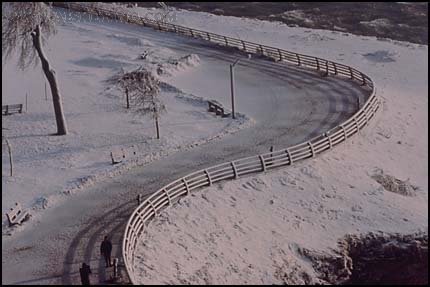
The most common and elegant line in the composition is the S-shaped line.

The S-shaped lines here also form a diagonal visual guide line, and the good position of the subject also enhances the photo a lot. The result of this composition is a compelling photo.

Photographic Composition Guide (4): Balance

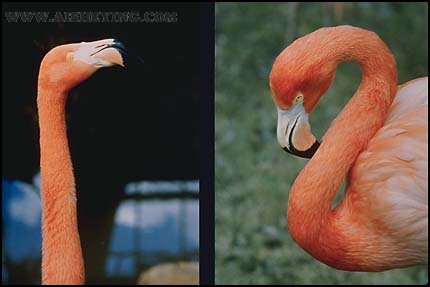
The photo on the right is what we want: the flamingo relaxes, the neck forms a pleasing S-curve, and the background is better. In photography, the S-shape is a very attractive form, which is worth looking for.

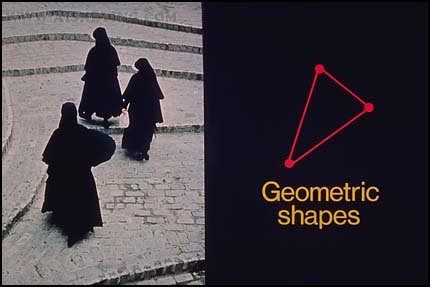
You can also use other geometric figures to help with composition. Can you see the triangle formed by the imaginary connection between the three nuns? It strengthens the overall sense of the photo.

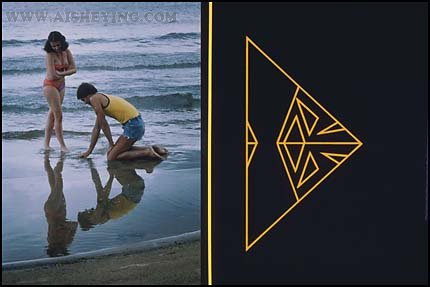
Please note how many triangles are formed by the pair of models and their reflections. Research and find out the power and balance of the lines and geometric figures in the picture to cultivate your artistic vision.

Balance is another principle for obtaining a good composition. Please note that the positions of the leaves, windows, and two models are just right. In order to obtain this balanced picture, the camera’s viewpoint and the position of the subject have been carefully arranged.

To master balance is to arrange the shapes, colors, and light and dark areas to complement each other and make the photo look balanced, rather than skewed to one side like this. Due to the lack of visual support in the photo, the little girl looked like she was about to fall out of the picture.

Now we adjust the camera’s angle of view to take photos of the wheels that are vital to support the subject. Although Karen is still off the center of the photo, the whole photo is balanced.

Photographic Composition Guide (5): Frame

No, this is not the framework we are talking about, although the principles are the same.

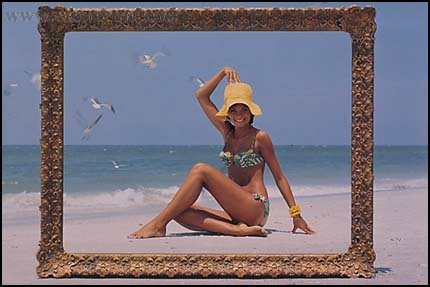
The frame we are talking about refers to the use of objects in the foreground to frame the subject. This can give the photo a sense of depth and make it different from ordinary snapshots.

Whether to use a frame in a photo depends on the subject, and the subject of each photo is different. Of course, the objects you use as frames will not be the same.

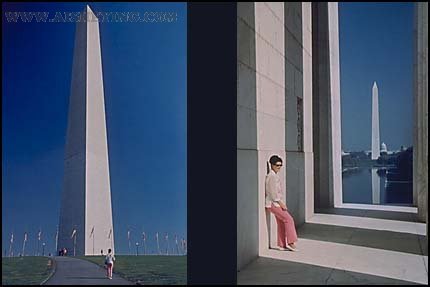
The Washington Monument in the photo on the left is located in the center without a frame, while the photo on the right clearly has a stronger sense of depth and a more complete picture language. This is entirely because the photographer has chosen a suitable foreground, which complements the monument well.

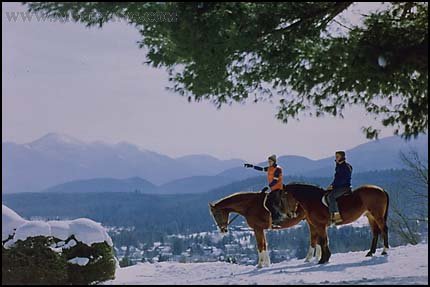
Horses and riders create a very flavorful foreground for the photos. The hanging branches complement the frame and add depth to the photos. When you use people for balance or as a foreground, make sure they face the center of the photo.

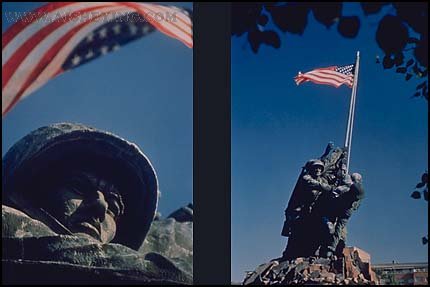
These two interpretations of the Iwo Jima battle commemorative sculpture effectively used the frame to add a sense of space and artistic conception to the photos.

No matter what subject you choose to shoot, be careful not to cover up the subject.

Photographic Composition Guide (6): Avoid Covering Up

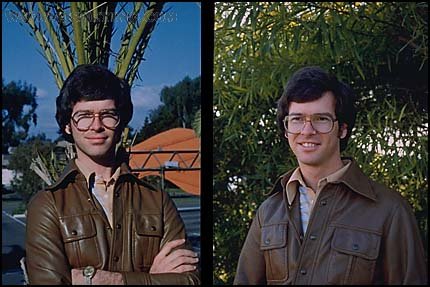
Avoiding obscuration is the sixth principle for us to obtain a good composition. The tree above the man’s head is so obvious, you may think that no one will not see it before pressing the shutter. But remember: the way people view objects is three-dimensional, so in fact it is easy for us to stare at the subject and ignore the background.

On the contrary, the camera always takes pictures of everything honestly. So before asking the model to pose, remember to find a clean background for him. In this case it is actually very easy to do this, the camera moved only a few feet when taking the left and right photos.

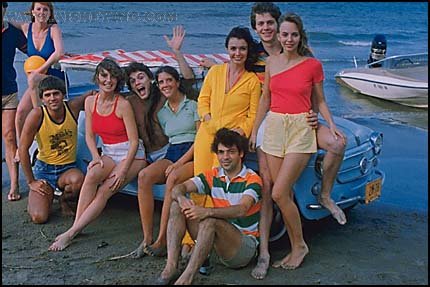
This is an interesting photo. But when we cut people in half or cut off their heads or feet, we made an “out of bounds” error. The reason for this problem is usually that the photographer’s eyes and the viewfinder do not cooperate well. When framing, be sure to keep your eyes straight and close to the viewfinder. Pay attention to adjusting the composition, leaving blanks on the four sides.

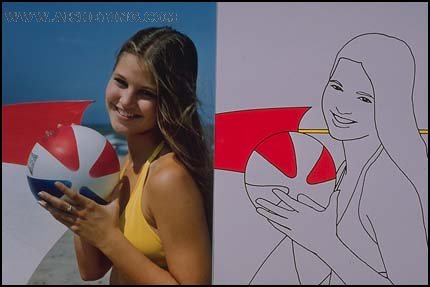
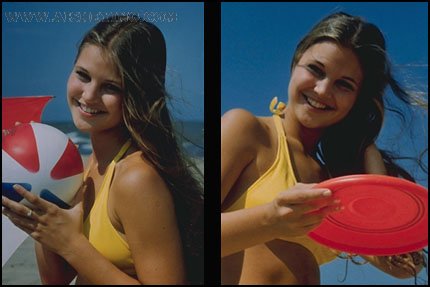
The distractions of proximity may not be that annoying, but they can still distract the subject. This interference means that certain objects and lines are too close to the subject. This is the case with the ball and umbrella side in this picture.

Let’s improve it with a low viewing angle. For simplicity, only the same props are used. Note that the frisbee should be far enough away from the model’s face to avoid interference. This is our sixth principle of composition.

Categories
Studio Lights Education

Composition and Practical Methods of Close-ups

Close-ups are the most direct and easiest way of expression in portrait photography. It can express the beautiful faces of the characters in a straightforward way. Close-up photos are simple, clear, intuitive, easy to learn and master.

Straightforward Performance is the Preferred Method for Close-ups

The most intuitive way to shoot portrait close-ups is to fill the picture with the person’s face and the camera close to the model. A part of the area can be reserved for composition space in the picture, but don’t charge too much body torso below the neck of the character. Grab the most exciting look of the model and press the shutter.

Although close-up shooting may seem simple, there are many details that need to be controlled.

First of all, close-ups are very demanding on models, and facial features and facial features must be correct. Secondly, since the close-up photo skin occupies most of the picture, the pre-makeup is very important. In addition, close-ups test the expressiveness of the model, and the model must be generous and confident. Finally, you need to pay attention to controlling character deformation. Because close-up photos are taken at a short distance, it is easy to cause deformation of the face and facial features. When shooting, control the angle and use the wide-angle lens with caution.

Shaping the Shooting Effect of Melon-seed Face

One of the keys to the success of close-up photo shooting is the control of the face shape. How to make the model’s face look thinner and more like a “melon face”? The answer is simple. In addition to the conditions of the model, the photographer can use the subtle changes in the shooting angle to control the final effect of the photo.

Use Shooting Angles to Create Changes

For photographers, there are not many auxiliary elements that can be selected in the composition of the picture for close-up shooting. At this time, you should grasp the precise shooting angle and create personalized close-up photos through the selection of the shooting angle.

If you can focus on the characteristics of the model, grasp the model’s most beautiful shooting angle, change the angle and try more when taking pictures, you can definitely make the photos look brilliant.

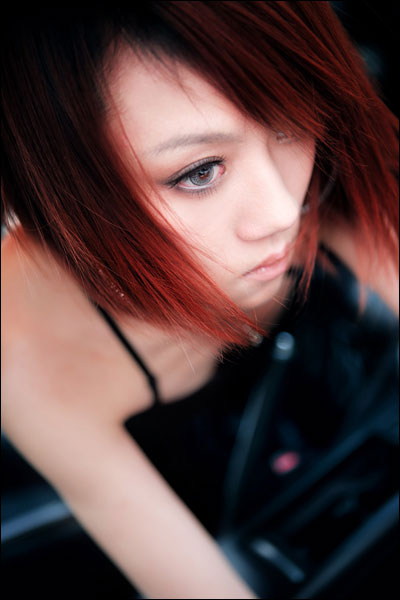
In this example, the photographer changed his position to observe carefully, and finally chose a shooting angle diagonally above. Through the occlusion of the hair, the blurred eyes of the model are expressed in close-up, creating a special picture meaning.

Using the principle of near-large-distance perspective distortion, the photographer shoots from a high angle, or shoots at a straight angle, with the model bowing his head slightly and retracting his chin. At this time, the contours of the model’s face in the picture will appear thinner. In addition, long-haired models can also use hair to cover them appropriately to modify the shape of their faces.

Light Can Create Atmosphere

Although close-up photos do not have a lot of white space on the screen, the effect of light on the screen is still very important. It can change the tone and atmosphere of the picture.

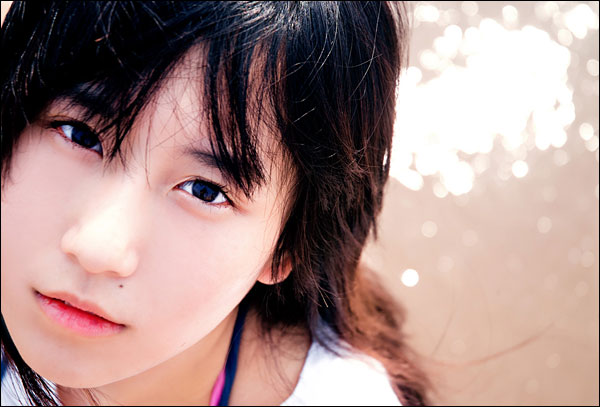
In the close-up creation, you can also use the backlighting method often used in portrait photography to create a high-key picture effect and a warm white tone full of sunlight through light. In the same way, the photographer can also use the side light technique to shape the contours and deep expressions of the characters’ faces.

In this example, the photographer used the technique of backlighting to create a special atmosphere of the picture, making the whole photo look dazzling and refined.

Use Flowers and Plants to Set off the Characters

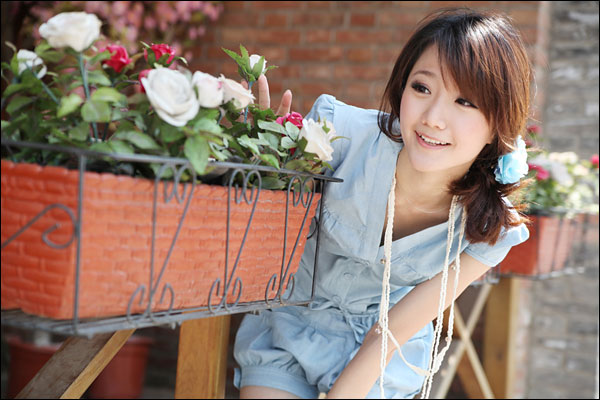
The photographer can place the model in the flowers, vegetation, and use the flowers as the foreground of the picture or the accessories of the model to decorate the picture. The vitality of plants and the colors of flowers and plants can reflect the youth and beauty of the model.

In the composition of the picture, the photographer needs to control the color of the flowers and plants to see if it matches the model’s clothing. At the same time, it is necessary to control the expression of the model, so that the model and the flowers and plants have a natural interaction.

A common shooting example is that the model is placed in the world of flowers and plants, creating a scene of intoxicating smell. Photographers can also take pictures of holding flowers, slender lady styles, or scenes where models dodge among the flowers to show the lively personality of the models. In short, the model and the flowers and plants in the picture should be natural and harmonious.

There are not many picture elements that can be used in close-up photos, but flowers and plants are still good shooting props.

Arm Posture in Close-up

In close-up portraits, the model’s arm is an element that can be used. The girl’s hands are slender and beautiful. Through gestures such as touching the hair, lifting the cheeks, pursing the mouth and smiling, the model can add more expressions and expressions to the plain close-up photos, and make the photos more vital and emotional.

The grasp of the arm posture is a difficult point in portrait photography. The movements of the model must be elegant, and the interception of the arms must be natural and appropriate when composing the picture. Otherwise, the presence of arms will destroy the overall effect of the picture.

The performance of the arms in the picture also depends on the model’s natural state, and no traces of posing can be left. Smart arm movements can bring a lively and natural effect to the photos.

Try Horizontal Composition for Close-ups

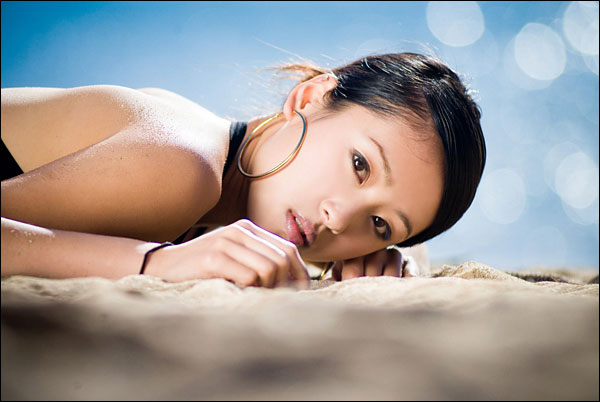
Close-up photos are rarely taken in horizontal format. But if you choose a banner composition in a specific scene or to match the pose of the model, you can often get unexpected and ideal effects.

When the model is lying, lying, sitting, etc., it is easier to use the banner composition to express the model’s posture and the dynamics of the picture. Using the model’s unconventional actions can bring a distinctive impact to the photos.

The photo in this example was taken on the beach, and the model was lying on the beach. In order to obtain the desired effect, the photographer lay down on the ground to shoot with a very low angle of view. This kind of perspective brings a refined performance effect to the picture, the picture is full of new ideas, and the model’s charming temperament is fully expressed.

Use Light to Create a Three-dimensional Sense of the Character’s Face

Most close-up portrait photos are taken in a straight light manner, and the performance is straightforward and lacks change. The model’s facial features are not strong. This is one of the reasons why most close-up photos are clichéd.

Photographers can skillfully use light when creating close-ups. In this example, the photographer uses the side light to photograph the model. Through the fine control of the model’s face angle, the light changes on the model’s face and hair can be grasped. For the face on the side of the shadow, use the reflector to carry out the corresponding fill-in light treatment. Through precise exposure, not only the picture has a sharp contrast between light and dark, but also the three-dimensional sense of the model’s five senses is well expressed.

Side light is not used much in portrait photography. But if used properly, it can not only create more light and shade changes for the photos, but also make the model appear more vivid and attractive in the picture.

Categories
Studio Lights Education

Tips for Taking Night Light Photos

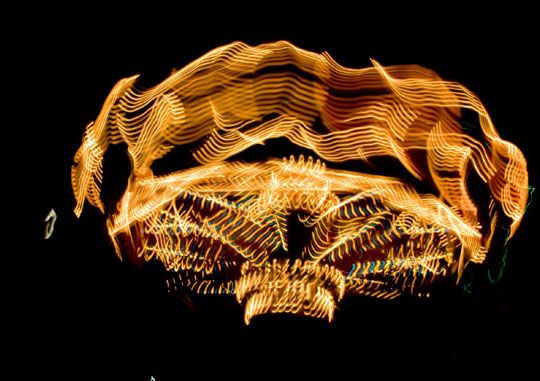
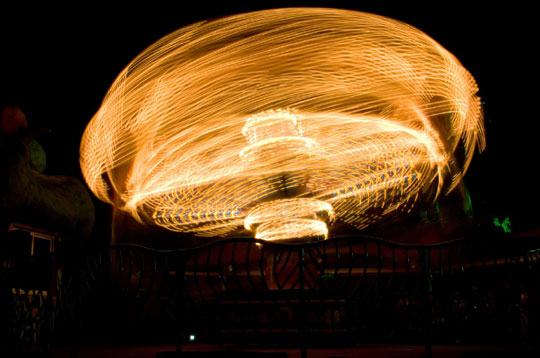
Slow trajectory

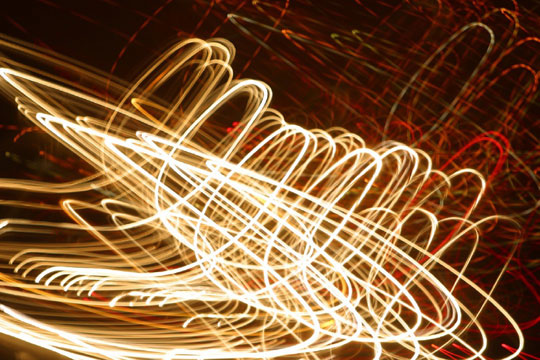
Shooting points: ordinary shooting will emphasize keeping the camera stable. Shaking the camera intentionally from time to time can create artistic photos.

Shooting mode: Shutter priority Shutter speed: 3 seconds ISO: 200 White balance: Auto

Real Shot Steps

Step 1 Set the shooting mode to shutter priority.

Step 2 Set a longer shutter speed of 1/15 second to 5 seconds.

Step 3 After pressing the shutter, the hand-held camera shakes regularly.

Set Proper Shutter Speed

When setting the shutter speed, be aware that the shutter speed should not be too slow or too fast. The shutter speed is too fast to show the effect of shaking. A too slow shutter speed will increase the difficulty of shaking shots. Before shaking shooting, it is recommended to place the camera on a tripod for stable shooting, and then determine the shutter speed required for shaking shooting according to the effect of stable shooting.

Through trial shooting, we determined the shutter speed to be 3 seconds.

The shutter speed is 1/15 second, too fast to show flowing lines

The shutter speed is 5 seconds. When the camera is placed on a tripod to shoot, the lines of the light track can be well expressed

The shutter speed is 0.4 seconds. Although there are lines, the lines are incomplete and the speed is still a bit fast

Pay Attention to the Direction and Law of Camera Shaking

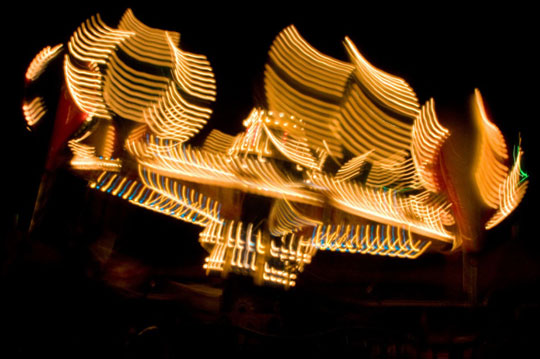
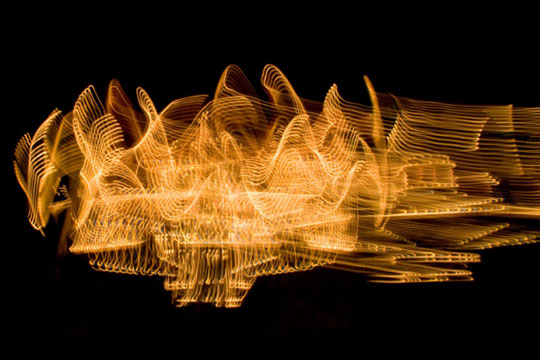
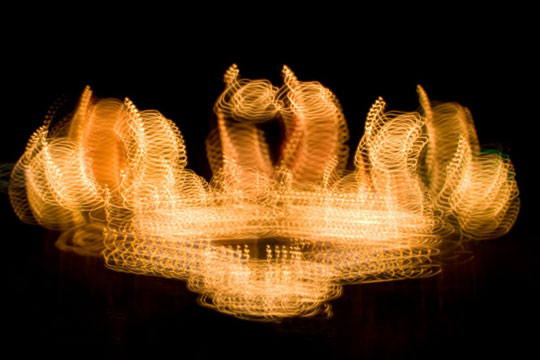
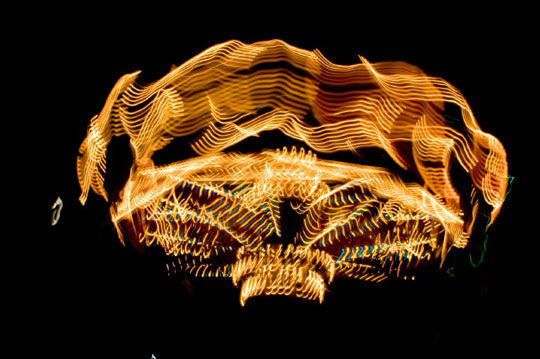
When you shake the camera, you can shake it up and down, left and right, or back and forth. Using different shaking methods will have different effects. However, it is best to consider the movement of the subject itself. For example, in the following group of photos, a small wave-like shaking along the direction of the main body’s rotational movement will have a better effect.

Unsatisfactory effect of large-scale shaking left and right

Large shaking up and down will destroy the original rotating line

A small wave-like sway in the direction of the main body’s rotational movement will have a better effect

Try More in the Night Scene Theme

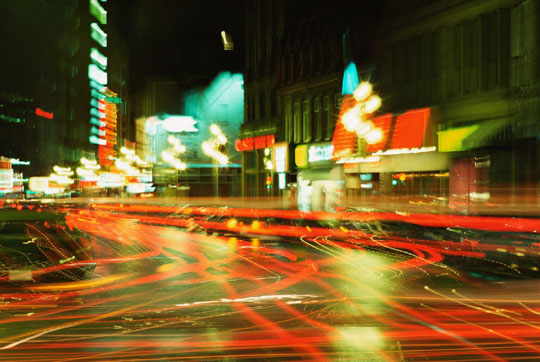
Shaking is a special technique for shooting night scenes. Especially when there is no tripod around, shaking the camera actively can often get a unique photo effect. Therefore, when shooting night scenes, in addition to keeping the camera stable in the usual way for long-term exposure shooting, you should also try shaking shots more. In this process, you will gradually master the laws of shaking and take more ideal photos.

Narrow the viewing area, aim the viewing frame at the light source, and shake the shot to show graceful curved lines

For long-term exposures, first keep the camera stable to make the part of the picture clear. Shake the camera before the shutter closes while capturing the light trails in the night

Choose a Darker Shooting Background

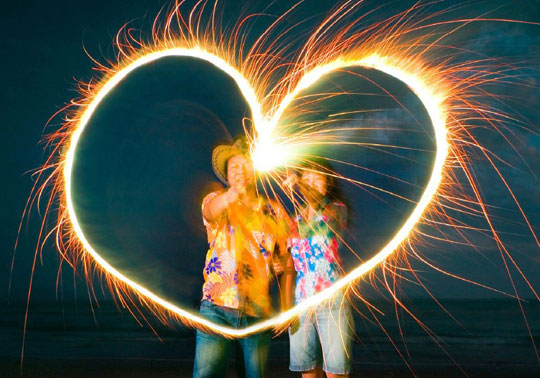
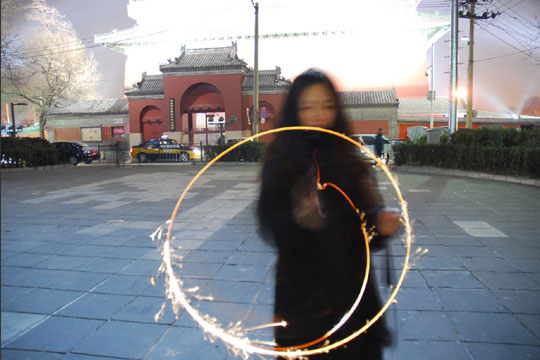
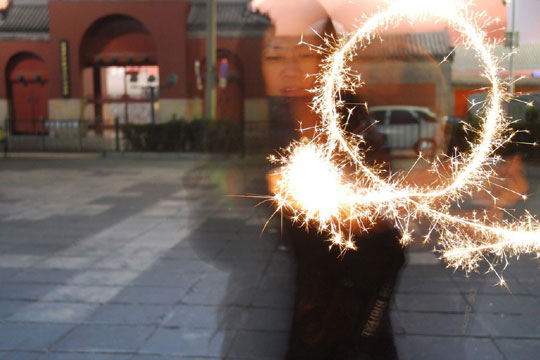
Light painting is a shooting technique that records the movement trajectory of the firework stick with a long time exposure, and then uses the off-camera flash to flash and freeze the subject’s movement.

It is best to choose a dark and simple background for light painting, which can better highlight the effect of the light track, make the picture layered, the main body prominent, and the effect is obvious. It should be noted that during a long time exposure, the surrounding stray light is likely to affect the shooting effect or cause overexposure.

Too bright environment makes the light painting effect not obvious

Try a Variety of Luminous Objects

In this example, a firework stick is used as a light painting “pen”. In fact, as long as it is a luminous object, it can be used as a light painting “pen”. For example, glow sticks, lighters, candles, matches, and glowing mobile phone screens. Try more other luminous objects, you may get unexpected results.

Use External Light Source to Assist Focusing

In a low-light environment, it may not be possible to automatically focus on the subject. At this point, you can first illuminate the main body with a flashlight or lighter. After focusing, switch to manual focus mode to lock the focus.

The Importance of Flashing to the Main Character

Because the exposure time of light painting is long and the subject is in motion, before the light painting is completed, the off-camera flash should be used to flash the subject to freeze the action of the person. Otherwise, the problem of ghosting will occur. Here, we are using an off-camera flash that is not connected to the camera itself. It can directly trigger the flash through the trigger button on the flash, flexibly control the flash time and flash output.

Before the light painting is completed, use the off-camera flash to freeze the action of the character, otherwise it is easy to appear ghost.

Categories
Studio Lights Education

Portrait Photography-Use Light to Determine the Personality of a Character_Part II

If you want to capture the personality of a character, you need to find different angles of light, or you need to pay attention to some skin details. The following is a more in-depth discussion of the use of light and dark levels, so that Model can jump out of the screen, and the use of light from the surrounding background to simplify the overly complex background.

The timely use of reflectors to correct the color tone in the picture is also a very important part. Later, I will tell you what to do to make the image of the screen more detached and outstanding!

Contour Light Highlights the Contour Lines of the Characters

Contour light is used to express the contour lines of the subject, and it is mostly expressed by backlighting. When the subject and background shades overlap, such as when the subject is dark and the background is dark, the contour light can achieve the effect of separating the subject from the background.

In the artificial light source, the contour light is often used in conjunction with the main light source and the auxiliary light source. It can give more layer changes to the tone of the picture and enhance the beauty of the picture.

The picture below was taken in a dark environment at night. The photographer uses artificial light as the contour light to express the contour lines of the subject. The screen is shot with backlighting. In order to avoid underexposure of people, the photographer combined other light sources to fill up the subject.

Background with Light and Dark to Enhance Picture Level

The background is an integral part of the image and an important factor that sets off the subject, and can highlight the subject’s performance more effectively.

In portrait photography, the use of light and dark backgrounds to highlight the characters can enhance the sense of layering of the picture. The background is also one of the elements that express the sense of space in the picture. Combining the foreground or the subject to create a three-dimensional space effect can highlight the subject.

The contrast of light and dark in the background of the picture is strong, and the contrast is large, which makes the picture more layered. The lower shooting angle shows the unique characteristics of the girl. The girl in the picture has a natural demeanor, and the look in the distance adds a dramatic effect to the picture.

Simplify the Picture with the Sky as the Background

Using the angle of upside-down shooting, with the sky as the background, makes the subject more prominent, and also enhances the sense of space in the picture, extending the line of sight to the distance.

People are used as the basis for metering to avoid overexposure of the sky and underexposure of people. The concise background is conducive to highlighting the main character. However, you must carefully choose the object to be exposed during exposure to avoid underexposure or overexposure.

The color of the shooting environment in the picture below is mainly green. In order to avoid the phenomenon of color cast in the picture, the photographer used the silver reflector to fill in the light of the person, and balanced the color of the picture, so that it was restored to normal.

Use a Translucent Plate to Filter the Light When Shooting in the Woods

When shooting in the woods, light passing through the tree canopy easily forms a spot of light, which makes the light distribution uneven. Such light will cause uneven distribution of skin tone. It is recommended to place the light-transmitting board above the character, and the light will be softened by the light-transmitting board, so that the contrast of light and dark is reduced and becomes more uniform.

In the picture below, the photographer placed the light-transmitting plate above the person to filter the light. The soft light makes the person’s skin tone even. Choose a background with a small difference between light and dark and avoid light spots in the background to reduce the picture contrast.

Waterside Shooting to Avoid Strong Reflections on the Water Surface

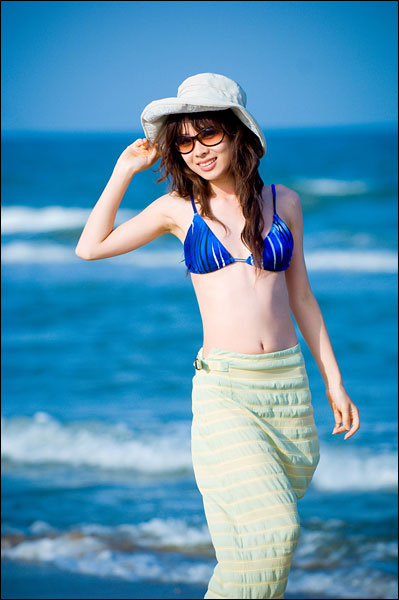
Shooting young girls at the water’s edge can express the beauty of young girls. But we all know that the water surface is easy to cause reflections under the sunlight, so as to destroy the effect of the picture. The use of a polarizer can eliminate or reduce the reflection of the water surface. In the absence of a polarizer, you should adjust the shooting angle and choose a non-reflective position for framing.

Combine the flash to balance the strong sun rays and make the subject stand out. At the same time, in order to avoid reflections on the water surface under strong light, the photographer chose to shoot at a low angle to obtain an ideal picture effect.

Use Reflectors to Prevent People from Turning Green When Shooting on the Grass

The environment can not only highlight the subject in the screen, but also express the shooting theme. The color of the surrounding environment often easily affects the color of the subject, and even causes the subject to have a color cast phenomenon. The reflector can reflect the light to change or compensate the color of the picture to correct the slight color cast.

In the picture, the main character is located on the green grass and the surrounding environment is green. In order to prevent the environmental color from affecting the color of the main character’s clothes, a reflector is used.

Reduce the Contrast of the Picture Under Direct Sunlight

Direct light is hard light, which can cause strong shadows on the subject. The contrast of light and dark in the picture is strong, and the contrast is big. This kind of tonal effect appears stiff, which is not conducive to the performance of the characters.

In such a light environment, the flash should be used to balance the light and reduce the contrast to enhance the expressiveness of the characters.

The image below was taken under direct sunlight. In order to avoid direct light from causing a strong shadow effect on the picture, the photographer uses a flash to balance the picture so that the picture contrast is relatively reduced and the picture tone becomes more harmonious.

Blue Background Light Adds a Sense of Mystery to Night Portraits

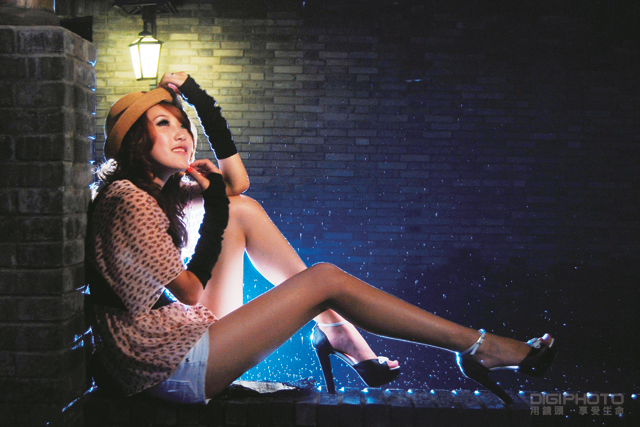
Blue is a cool, pure color, giving people a sense of melancholy, calm, and mystery. When shooting night portraits, using blue light as the background of the picture can create a mysterious atmosphere. When shooting night portraits, you can directly use the night portrait portrait mode provided by the camera, which is convenient and quick. At the same time, manual mode can also be used to express characters more accurately.

The image below is a portrait taken with dim light at night. The use of blue light as the background of the picture creates a mysterious atmosphere and at the same time outlines the outline of the subject.

Categories
Studio Lights Education

Portrait Photography-Use Light to Determine the Personality of a Character_Part I

When shooting portraits, I am most afraid that the facial features of the Model will be flat, and there is no memory. With the right light, you can create a unique portrait photo.

When shooting portraits, the first requirement is accurate exposure, otherwise the complexion will be dark, and the audience may be confused and unable to find the subject of the picture. If you use the right light, you should also pay attention to the performance of the model skin. Some people’s faces are oily, there will be too much reflection, which will destroy the overall beauty.

In addition to this, we will also tell you how to use light to perform micro-shaping on the face! how should I do it?

Aim at the mid-gray position of the person’s face for metering

The correct exposure is the basis for shooting portraits. When shooting, the person’s face should be metered according to the lighting environment of the scene to ensure the correct exposure. Set various parameters according to the metering value, and combine the composition, shooting angle, and the intention of the photographer to express to get the ideal picture effect.

In the picture, the photographer accurately metered the light in the gray position of the subject’s face, and obtained the picture effect of normal exposure. At the same time, the large aperture of F3.5 reduces the depth of field of the picture, and the background foreground is blurred, which enhances the sense of space of the picture.

Avoid excessive skin reflection

Shooting people, especially women, usually express the feminine beauty and delicate skin. Because everyone’s skin is different, there is often reflections due to oily skin during shooting. In the process of using lighting, avoid excessive reflections from destroying the effect of the picture. However, photographers can use a small amount of reflections on the model’s skin to create a highlight effect and improve the three-dimensional sense of the face.

To capture the vivid expressions of young girls, the photographer uses natural light to fill up the young girls’ faces. Take a lower shooting angle from the side to avoid excessive reflections on the skin.

Front side light makes the face shape more standard

The front side light is a kind of photography modeling light, also called oblique light. It refers to a horizontal angle of about 45° between the direction in which the light is projected and the subject and the camera. The front side light is more in line with people’s visual habits in daily life. Using the front side light to shoot people can well show the texture of the subject’s skin, making the picture richer and more three-dimensional. In particular, it can highlight the exquisite shape of the face.

The face shape of the girl who used the front side light to shoot is more standard, and the three-dimensional effect is strong. At the same time, the use of props enhances the visual effect of the picture.

Side light highlights the character’s personality

The side light, that is, the light from the left or right side of the subject, is at a horizontal angle of about 90° with the subject and the camera. This kind of light can produce a clear and strong contrast effect, making the shadows produced by the picture slender and expressive, and at the same time making every small ridge of the character’s face produce obvious shadows.

Using side-light photography, a stronger modeling effect can be obtained. In portrait photography, side light is often used to express the emotions of the characters, highlighting the personal characteristics of the characters. Sometimes the side light is also used as a decorative light to highlight certain details of the picture.

The photographer uses the side light shining from outside the window to take pictures of people. The character’s face has a strong contrast between light and dark, and the contrast is obvious, with obvious shadows, which makes the character’s personality more prominent.

Rembrandt’s lighting method shows the character’s perseverance

The Rembrandt lighting method is a lighting method obtained by the photographer based on the lighting method of the famous painter Rembrandt. The biggest feature of Rembrandt lighting is that it will form a triangular spot on the cheek of the character that receives less light. It can highlight the three-dimensional sense of the nose, emphasize the skeletal structure of the character’s face, and express the character’s sense of perseverance, personality, and melancholy. When lighting, a triangle spot can be formed by irradiating from a slightly side angle and higher position of the person’s face.

The light shines from a higher position on the right side of the character, forming a triangular spot on the left cheek of the character. The Rembrandt lighting method creates more shadows on the character’s nose, and the face has a strong sense of three-dimensionality.

Butterfly lighting highlights the delicate facial features

The butterfly lighting method will form a butterfly-shaped shadow on the underside of the character’s nose, and there are very few shadows in other locations. The butterfly lighting method is suitable for expressing women, and is conducive to highlighting the delicate features of the characters. It should be noted that the butterfly lighting method is not suitable for subjects with high cheekbones or thin faces.

The main light is located at the high light position to form a butterfly-shaped lighting, and the bottom light is used as an auxiliary light to reduce the shadows of the characters’ faces. The butterfly-shaped lighting can highlight the structure of the character and express the delicate feeling of the character’s facial features.

Flash makes people’s faces cleaner

Flash can be used as a way to increase exposure. The use of flash not only enhances the brightness of the picture, but also increases the shutter speed. When shooting people, the flash can also be used as the main source or auxiliary light source to express the delicate skin of the subject, make the face appear purer, and show the expression of the person.

When using flash to shoot people, you need to pay attention to the angle of lighting. The flash is mostly hard light, usually suitable for the performance of male figures. When shooting female characters, you need to select the lighting angle of the flash in combination with the surrounding light environment for shooting.

For portraits taken indoors, while the flash is used to enhance the brightness of the picture, the skin texture of the faces of the people also appears more delicate.

Slow flash synchronization for indoor portraits

Slow flash synchronization is a shooting technique in which the flash and the camera cooperate with each other. Using this method to shoot indoor portraits can more effectively express the personality characteristics of the characters. In different situations, different flash modes can be used according to the photographer’s shooting intention. Normally, second-curtain sync is more suitable for dynamic images, while still images of people can use front-curtain sync flash, which flashes after the shutter is fully opened.

Using slow flashing lights to synchronously shoot indoor portraits. Under the pure color background, the character’s modeling characteristics are realistically presented, and the expressions appear more vivid.

Master the lighting of portrait photography in the studio

Indoor portrait photography lighting methods generally require three light sources. If conditions permit, five light sources are better.

First, determine the light position of the main light, and then supplement the light with auxiliary light in the reverse and lateral directions of the main light. The intensity and irradiation area do not exceed the main light, so the main light is soft.

The second is the background light, which is used to distinguish the subject from the background. In addition, it can also be combined with hair light, eye light and other modifier lights to express details. At the same time, adding a reflector to some places that need to fill light can also show a richer picture effect.

In the shooting, a simple indoor studio lighting is used to enhance the expressiveness of the characters. Combined with the use of background, the main character is highlighted. The use of props also brings out the atmosphere of the shooting scene.

(To Be Continued)

Categories
Studio Lights Education

Practical Application of Exposure Compensation in Photography

What is Exposure Compensation

Exposure compensation is known to people with shooting experience. Light plays an important role in shooting quality. Photography is the “calculation” of light. Digital camera is both a shooting tool and, of course, a tool to “calculate” light.

Because the photographed object is in different ambient light, how to correctly control the exposure is very important. Flash and reflector are naturally very useful, and the correct and appropriate use of exposure compensation is another effective way.

Now commercial digital cameras generally provide exposure compensation function, and the adjustment range is generally about ± 2.0eV. EV value is called exposure value, which reflects the combination of aperture size and shutter speed. EV value is also related to scene brightness and film sensitivity. Generally speaking, the faster the film sensitivity and the brighter the subject, the greater the EV value. Accordingly, small aperture and rapid exposure should be used at this time.

Exposure Compensation Method

Exposure compensation is to allow the photographer to correct and adjust the exposure “amount” determined by camera metering, so as to obtain accurate exposure suitable for the correct performance of the subject.

Exposure compensation amounts are represented by + 3, + 2, + 1, 0, – 1, – 2, – 3, etc. “+” means to increase the exposure based on the exposure determined by photometry. “-” indicates reduced exposure. The corresponding number is the number of stages of compensated exposure. The compensation amount of our general civil digital cameras is generally within the range of ± 2.

The exposure compensation of the camera is divided into positive (+) compensation and negative (-) compensation, which are represented by “+ / -” on the camera. In short, in backlight photography, using positive (+) compensation (or taking the darker part in the viewfinder as the metering standard) can properly show the details of the subject, virtualize the background and obtain high-profile photos. Using negative (-) compensation (or the photometric standard at the brighter part of the viewfinder) to obtain the silhouette effect, obtain low-key photos, and show the relationship between light and shadow. For example, the following figure:

Exposure Compensation Example I

It was the sun at 4 p.m. and the light was actually very strong, unlike the light in the photo. When shooting, I used the aperture first shooting method, negative two exposure compensation, and then measured the light in the brighter place of the cloud to get such a silhouette effect.

Exposure compensation is used in backlight photography. The stronger the light, the greater the contrast, and the better the effect. Of course, photographers should pay attention to the use of light shields. If the light is too strong, you should also use an object (sunshade) to block the sun in front of the lens. Don’t let the sun direct the lens, otherwise it is easy to leave the spot of the sun on the photo, destroy the beauty of the picture and affect the definition of the image.

Exposure Compensation Example II

Let’s look at Figure 2. Figure 3:

Basically from the same angle, figure 2 is a photo with more details obtained by measuring light in the dark in the positive (+) two gears. Overall, the picture is messy. On the contrary, in Figure 3, I used negative (-) exposure compensation to shoot, and got the effect of silhouette. Some unnecessary details are removed, which can better highlight the theme.

From the above picture, we can see the important role of exposure compensation in scene performance. Some experienced photographers often use the words “white plus black minus” to explain the essentials of exposure compensation. Due to the different reflectance of various scenes, there is no specific standard for the compensation range. Therefore, photographers should form the habit of carefully observing the scene and analyzing the balance and reflectance between black, white and gray. Grasp the exposure essentials you need from thinking and practice, and shoot wonderful works.

Finally, the photographer must be reminded that after photographing with the exposure compensation method, don’t forget to set the compensation value back to “zero”. Otherwise, the photos taken later are either overexposed or underexposed.

Exposure Compensation Plus and Minus Principle

Reasons for Exposure Compensation

Experienced photographers know that the camera has defects when measuring light because it measures reflected light. Its photometric characteristics determine that the “exposure compensation” function must be designed on the camera. The principle of camera photometric design is to determine the exposure by reducing the subject to a medium brightness with 18% reflectivity by integrating the brightness and contrast of the subject. In the “look” of the camera metering system, the average brightness of all subjects should finally be restored to 18% medium gray.

Exposure compensation is mainly needed for objects with special tone. For example, particularly bright objects, contents dominated by white or light tones or shadows with particularly deep colors, such as people with darker skin color, mine scenery or people wearing black clothes, etc.

Because the camera treats these objects with special brightness as medium gray tone during metering and exposure, it will automatically reduce the exposure when displaying white or light tone objects with high brightness, which is prone to underexposure.

In the performance of black or dark tone objects, the exposure will be automatically increased, which is prone to overexposure. Therefore, in photography practice, photographers need to use the exposure compensation function flexibly. Generally, exposure “positive compensation” is required when shooting light tone objects, that is, increase the exposure. Photographing dark tone objects requires exposure “negative compensation”, that is, reducing the amount of exposure. Through different compensation and artificial control of exposure, the real color of the subject will be restored more accurately.

Control Mode of Exposure Compensation

Exposure compensation is also an exposure control mode, which is generally about ± 2-3eV. It is divided into positive (+) compensation and negative (-) compensation, which are represented by “+ / -” on the camera.

In short, in backlight photography, using positive (+) compensation (or taking the darker part in the viewfinder as the metering standard) can properly show the details of the subject, virtualize the background and obtain high-profile photos. Use negative (-) compensation (or use the photometric standard at the brighter part of the viewfinder) to obtain the silhouette effect, obtain low-key photos, and show the relationship between light and shadow. If the ambient light source is dim, you can increase the exposure value (e.g. adjust to + 1eV, + 2eV) to highlight the clarity of the picture.

When taking high-key and low-key photos, the exposure value needs to be corrected. The so-called high-profile photos are photos with clear tone. Most of the picture is occupied by light white tone, and the image is only a light image composed of middle tone. If you want to get high-profile photos, you generally need to increase one level of exposure based on the measured exposure value. The so-called low-key photos mean that most of the picture is dark tone, with only a small number of intermediate tones and strong light parts. When taking low-key photos, it is generally one level less than the measured exposure value.

Difference Between Exposure Compensation and Fill Light

Exposure Compensation

Exposure compensation “and” light compensation “are two concepts. They aim at and solve different problems.

Exposure compensation is an adjustment made to the photometric characteristics of the camera. The purpose is to accurately restore the original tone characteristics of the subject. The objects that need exposure compensation are specific objects that are brighter or darker. Generally, the “+” of exposure compensation on the camera is to increase the exposure, and the “-” is to reduce the exposure. In the case of aperture priority, “+ 1” means to reduce the shutter speed by one gear. For example, from 1 / 60s to 1 / 30s, “+ 2” means L / 15s, “1” means 1 / 125S, and so on. In the case of shutter priority, “+ 1” means to increase the aperture by one gear. For example, from F11 to F8. “+ 2” means to increase the shutter speed by two gears, i.e. f5.6, “- 1” means to decrease the shutter speed by one gear, i.e. F16, and so on.

light compensation

The so-called “light compensation” is mainly aimed at the problem of too strong picture contrast in order to obtain more rich and high-quality photos. The exposure tolerance of digital cameras is similar to that of traditional color reversal films. Unlike negative films, they can record a wide range of light and dark brightness, which is not suitable for displaying the content when the contrast is too strong.

When the brightness difference of the subject is too large, it is difficult to give consideration to the levels of high light parts or low light parts. Generally, it is necessary to add light to the dark part with the help of flash lamp or reflective screen. Increase the brightness of the dark part through “fill light” to reduce the brightness difference and improve the photo level.

Because the brightness of the dark part is relatively improved after light filling, it can ensure the performance of the dark part level to a certain extent and improve the photo quality accordingly. Therefore, the functions of “light filling” and “exposure compensation” are completely different.

The principle of increasing exposure is:

  1. When the shooting environment is relatively dark and the brightness needs to be increased but the flash cannot be used, the exposure can be increased appropriately. Generally, 0.7-2.0 gear can be added.
  2. When the photographed white object looks gray or not white enough in the photo, the exposure shall be increased. Because the metering system of the camera is based on 18% gray. It thinks that white objects should also be gray, so it is often underexposed. Generally, about 1 gear shall be supplemented.
  3. When shooting people in front of the beach, snow, sunny or white background, it is necessary to increase the exposure appropriately. Because the camera metering system will detect enough bright light. Reducing the exposure will make the subject underexposed. If it is completely backlight, you can fill 1.0-2.0. If the character subject is not completely backlight, you can fill 0.5-1.0.
  4. When shooting in front of sunny windows and backlit scenes, the exposure should also be increased, about 0.7-1.5.
  5. In cloudy days or heavy fog, although the environment is bright, the illumination of the main body is obviously insufficient, which is easy to make the whole photo dim. Properly increasing the exposure can make the brightness of the scene more natural. Generally, add 0.3-1.0 gear.
  6. When taking high-profile photos, appropriately increase the exposure to better reflect the photographer’s creative intention. Generally, increase 0.5-1.5 gear.

The principles for reducing exposure are:

  1. When shooting a person in front of a black or dark background, it is necessary to appropriately reduce the exposure to avoid overexposure of the subject. Generally reduce gear 0.5-1.5.
  2. When shooting a black or dark subject and the subject is basically full of the picture, the exposure shall be appropriately reduced. Generally, reduce 0.5-1.5 gear.
  3. When shooting the night scene, the exposure obtained by the metering system of the camera will make the picture too bright and lose the effect of the night scene, so the exposure should be reduced appropriately. Generally, the gear is reduced by 0.3-1.0.
  4. When taking low-key photos or deliberately pursuing dim effects, you should reduce the exposure to complete your creativity, generally by 0.5-1.0.

Precautions for exposure compensation

When using exposure compensation, three points should be noted:

  1. After using the exposure compensation setting, be sure to return in time to prevent exposure errors in future shooting.
  2. When the exposure compensation is uncertain, it is best to use the surrounding exposure function and take more pictures.
  3. Increase the exposure when the light is dim. It is best to use a tripod.

It should be noted that after shooting the subject with specific brightness, the “exposure compensation” should be reset to “0” in time to ensure normal exposure for future shooting.

During the shooting process of the digital camera, if half of the shutter is pressed, the LCD screen will display pictures similar to the final effect picture, focusing and exposure, and everything starts. The exposure at this time is the exposure of the final picture. If the picture is obviously bright or dark, it indicates that there is a large deviation in the automatic metering accuracy of the camera, and exposure compensation shall be enforced. However, sometimes, the brightness displayed during shooting is different from the actual shooting results. The digital camera can browse the picture immediately after shooting. At this time, you can more accurately see the brightness of the captured picture, and there will be no difference. If the shooting result is obviously too bright or too dark, re shoot and force exposure compensation.