Categories
Studio Lights Education

A Practical Guide to Lighting in Portrait Photography-Hue and Tone

The Role of Hue

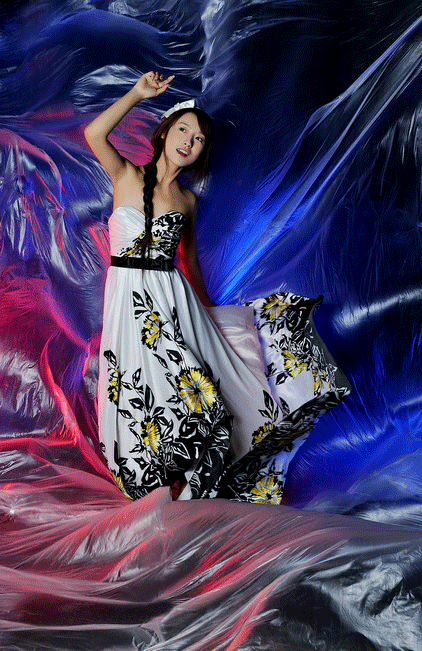
In addition to the different processing methods of tones in portrait photography, the tones can also be designed by ourselves to express different color tones.

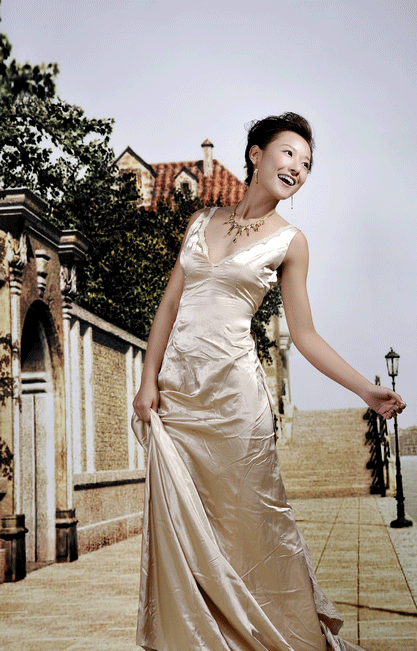
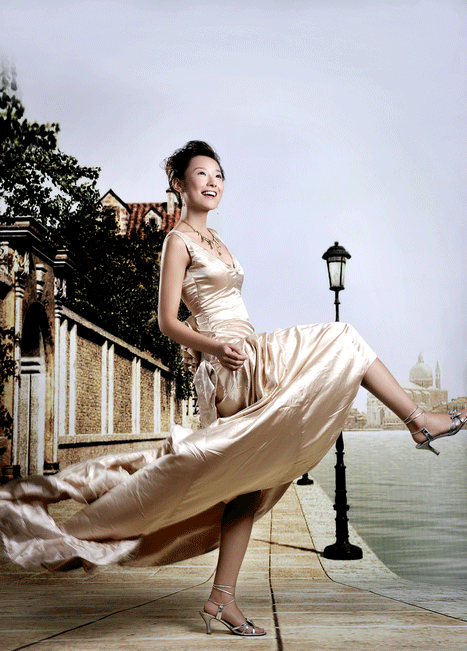
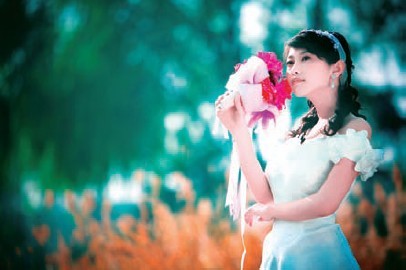
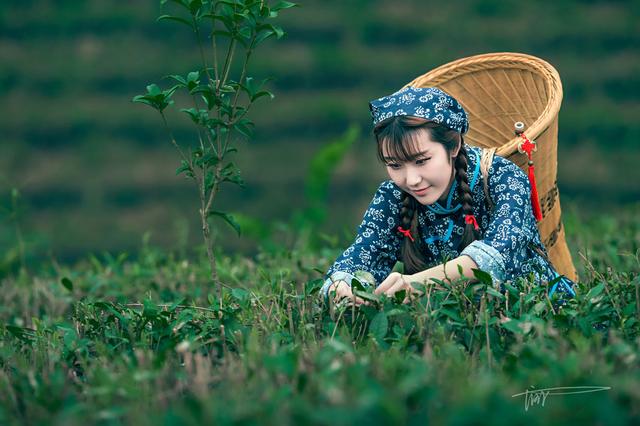
For outdoor photography, designing the colors of photos is more convenient than indoor photography. But the light is not easy to control. We can design the light by the color of the model’s clothing. We can also choose the color of the background to control the effect of harmony or contrast between the color of the clothing and the color of the background. You can also choose warm sunlight with a low color temperature to illuminate the model.  

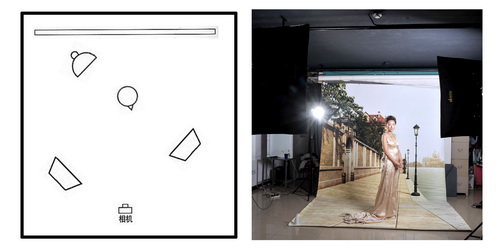
If you are shooting in a studio, the color design is much more convenient. We can not only choose the color of the clothing, but also the color of the background. We can also add colored light paper to luminaires to change the color of the light source and control the hue. The white balance function of the digital camera can also be used to control the color tone.

The Lighting Technique of Warm-toned Portraits

In the color science of fine arts, colors can be divided into warm tones, cool tones and mid-tones. Warm and cold colors are judged by the imagination and feeling that the color gives people. Red, orange and yellow give a warm feeling. So it is classified as a warm color. Colors that give people a cold feeling such as blue and cyan, which are cool colors. Gray, purple, and white are intermediate colors. But in many cases, cold and warm colors need to compare in order to get results, not absolute.

The traditional method of warm color processing in portrait photography is to make the subject wear warm clothes, arrange a warm background, and then use a low color temperature light source or install warm color chips on the lamps. In this way, the whole picture constitutes a harmonious warm-toned portrait work. We can also use the white balance setting of the digital camera to achieve the effect of warm colors.

Lighting Technique for Cold-toned Portraits

The shooting of cold-key portraits is similar to that of warm-key portraits. Just let the model wear cool color clothing, and install a cool color filter in front of the background light. We can also take advantage of the white balance function of the digital camera to shoot the cool tone effect. When shooting with flash, we set the white balance of the digital camera to incandescent mode. You can get the blueish cool tone effect of the picture.

Lighting Technique for Mid-tone Portraits

Use purple and green to form a mid-tone effect. And match the black, white and gray clothing or background to coordinate the picture. Only the “gray scale” of black, white and gray belongs to the “colorless system”. Use softer light for the overall lighting, so that too much light ratio is formed on the model. This will make the midtone effect of the whole picture more obvious.

The Lighting Technique of Contrasting Portraits

The color contrast mainly includes color contrast, brightness contrast, purity contrast, complementary color contrast, and cold and warm contrast. The law of color contrast is: in a warm-toned environment, a cool-toned subject is eye-catching. In the environment of cold tone, the main body of warm tone is the most prominent.

In addition to the contrast between cold and warm, the color contrast also includes color contrast, brightness contrast, and saturation contrast. In terms of lighting for portrait photography in contrasting tones, we can use color light to shape the contrast with the subject. You can also use colored light to illuminate the model to enhance the contrast between the model’s color and the background color model.

What is a Tone

The industry usually divide portrait photography works into high-key portraits, low-key portraits, mid-tone portraits, soft-tone portraits and hard-tone portraits by tone. These different tones can directly affect the viewer’s visual experience. A low-key portrait photo can give people a solemn and deep association. The so-called midtones are not composed of gray tones, but are relatively high-key and low-key. The tone of portrait photography, in addition to the difference between light and dark, there are also soft and hard tones.

Lighting of High-key Portraits

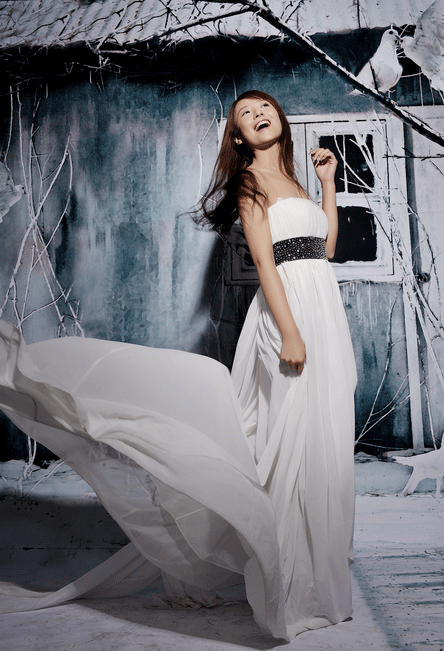
High-key portrait refers to the tonal composition in the picture is mainly light tones, try to avoid or use dark tones as little as possible. Simply put, when shooting black and white portraits, the combination of tones should be based on white, light gray and medium gray tones. When shooting color portraits, white and light colors with high brightness should be the main ones. This will make the model appear overall bright on the photo without obvious shadows. The overall style of the picture appears fresh, concise and soft.

In the studio, photographers use lighting to shoot high-profile portraits. In addition to letting the subject wear white or light-colored clothing and using a light-colored background, we should use forward light as the main method of lighting. In this way, the shadows caused by the light of the illumination can be reduced to a minimum.

Lighting Technique for Mid-tone Portraits

The shooting of mid-key portraits is neither dominated by light-colored tones like high-key portraits, nor do they focus on dark-heavy tones like low-key portraits. The photo will contain deep, medium and light tones at the same time. Therefore, the composition of midtones tends not to be bright or dark. The visual experience given to people is neither bright nor dignified. When shooting, there are no regulations on the nature of the light source and the lighting method. Generally, there are more illuminations using forward light and front side light.

Lighting Technique for Soft-key Portrait Shooting

The characteristic of soft-key portraits is that the tone of the picture is relatively hazy. Most of them use medium light and dark tones, with relatively few bright tones, and fewer or no dark tones.

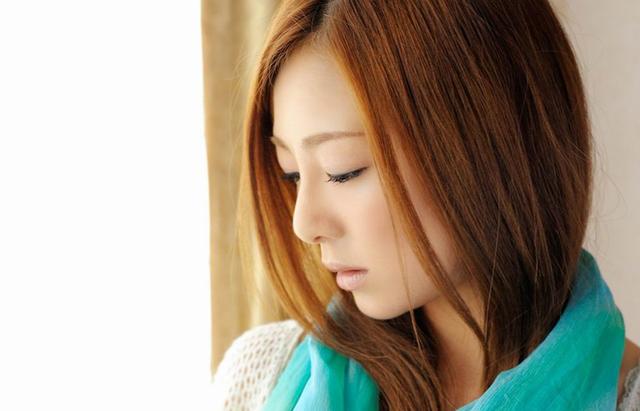
It will give the viewer a bright, light and pleasant visual experience. For soft-key shooting, use diffused soft light as much as possible. It is also necessary to control the light ratio to a minimum to avoid obvious dark tones in the picture. The lighting generally uses a large area of soft light and forward light lighting to avoid large areas of shadows on the model and affect the overall soft and hazy effect. And when shooting, you should use a soft lens or post-processing to soften the effect.

Lighting Technique for Hard-tune Portrait Shooting

Hard-key portraits mainly use shades of light and dark to form an image. The light ratio is large and the midtones are few. Photographers often use this tone to express the distinctive personality of the model. Use hard light when arranging lighting and control the area of the light source at the same time. Adjust the position of the light according to the photographer’s needs.

Lighting Technique for Low-key Portrait Photography

The characteristics and shooting requirements of low-key portraits are just the opposite of those of high-key portraits. The composition of its tones is mainly dark tones, and light tones are avoided or used sparingly. When shooting black and white portraits, the combination of tones is mainly black, dark gray, and medium gray tones. When shooting color portraits, photographers often use black, dark with low lightness, and colors with medium lightness. Low-key portraits should make the subject appear deep and dignified.

To shoot low-key portraits in the studio, the model should wear dark clothing and use a dark background. Generally, photographers use single-lamp side backlight or side light for lighting. This will make the shadow area of the model’s face larger. Photographers should control the light ratio at 1:4 to 1:6. Expose according to the brightness of the model’s face. The bright parts are reproduced as medium light and dark tones, and the shadow parts are dark tones.

Categories
Studio Lights Education

Understand and Reasonably Use Soft and Hard Light

Soft light and hard light are a pair of “worship” brothers, each with its own charm and individuality. When we are shooting, we often have to consider how to choose the light. Then in the five characteristics of light, the first consideration is light quality. Light quality is the nature of light, which can also be interpreted as the “soft” and “hard” of light.

What is Soft Light

Soft light is also called soft light, scattered light, etc. It is a kind of diffuse light. There is no clear directionality, the contrast on the illuminated object is small, and the projection is not obvious. Such as cloudy light, indoor studio flash with soft box, etc.

We can also use some accessories or methods to soften the light. If some devices (such as soft box, diffuser screen, soft light paper, reflective umbrella, etc.) that can diffuse light are attached to the flash, the light emitted is diffuse.

Soft light is characterized by soft light, uniform intensity, relatively small light, and the resulting image has little contrast. The photographed person is delicate and soft, and the color reproduction is relatively accurate.

Sculpting Result of Soft Light

Soft light (scattered light) illumination has soft light quality, no significant light-receiving surface and backlight surface, no significant shadows, soft contrast, and smooth shadows.

Generally speaking, the area of ​​soft light illumination is larger, the proportion of light is well-proportioned, and the brightness of the illuminated object is relatively close. Due to the lack of contrast between light and dark in soft lighting, the image is mediocre, which is disadvantageous to the three-dimensional expression of the subject, and the expression of texture is also weak. The embodiment of the subject’s body shape should be completed by the color of the subject and the difference between its own light and shade.

Soft Light Portrait Lighting

Soft-tone portrait lighting is a uniform lighting method in which the total tone is a neutral color. This kind of lighting basically uses multiple lamps and several reflectors to maximize direct, diffuse and reflect light to the model.

In order to achieve uniform, comprehensive, soft-toned and beautify the lighting effects of the model, photographers generally use 3 indoor studio lights and some reflectors.

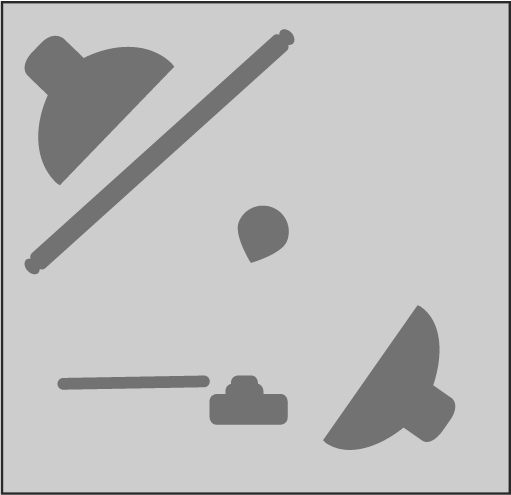
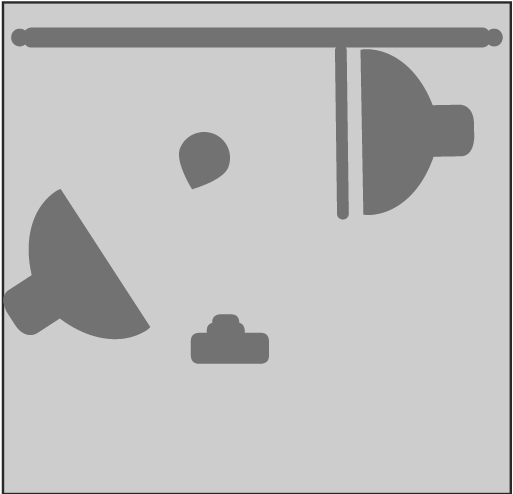
Use two large 300W spotlights with diffusers side by side in front of the model. The two lights should be at an angle to the model and the aluminum-coated reflector mounted on the bracket in front of the model. The reason why the uniform lighting effect can be achieved in this way is to maximize the intensity of the reflected light. Therefore, the reflector is a critical part of lighting. The hair light should be set quite high and placed on the left side of the model, just behind her head. Some reflectors can be placed behind and on both sides of the model to increase reflection.

Specific Usage of Soft Light

When shooting, first turn on the two soft spotlights in front of the model and angle them so that they can illuminate the model evenly. At the same time, the aluminum-coated reflector mounted in front of the model can reflect the maximum amount of light upward. A reflector is placed behind the model, and a white, long cylindrical reflector is placed on the left.

Then, set up the hair light and raise it to produce strong and uniform lighting on the model’s left shoulder. The headlight should be high enough to hit the light directly on the reflector mounted on the bracket in front of the model. Move your hand back and forth on each reflective surface to check its reflective effect. After finally deciding on the exposure level, you can start shooting.

Some special lamp types (such as milk white bulbs, frosted bulbs, etc.) are used indoors, or some accessories are installed in front of the lamp, which can also create a soft light result. Commonly used, such as installing a diffuser in front of a flash lamp or setting a diffuser and a soft umbrella in front of an incandescent lamp.

About Reflected Light

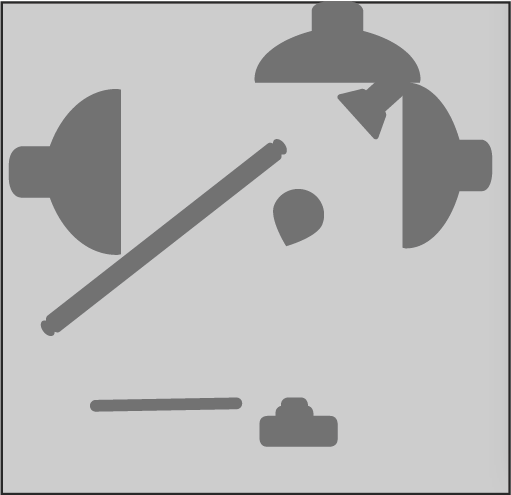
As shown in the picture, in order to reflect the model’s skin is smooth, transparent and sexy, a combination of double-sided inverse enveloping light was used when shooting. Most of them use the diffusion in the reflected light.

Put two reflectors in front of the model and on the left and right. And put a side backlight on the side and back of the model. In this way, the main light source comes from the side and rear of the model, which makes the model feel like double contour light.

The model’s face lighting mainly comes from the diffuse reflection of the reflector. This diffuse reflection is extremely soft, making the model’s skin delicate and rich in layers. When shooting, try to highlight the sexy and subtle light changes of the model. The seemingly soft light has a very important direction of ambient light. The overall tone of the picture should be controlled as far as possible in the middle gray area of the tone and the rich gradation changes in the sixth, seventh, and eighth areas.

About Softening Light

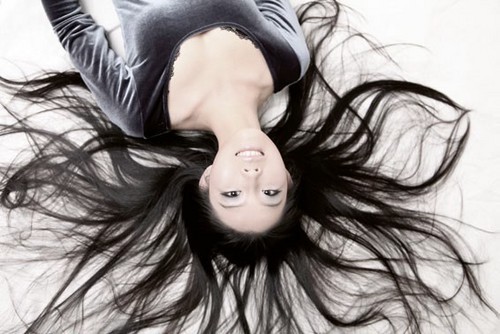
The picture above is an overhead view. The carefully treated long hair adds to the decorativeness of the picture. If you want to highlight the soft, dreamy, and romantic feeling in the lighting, soft light is most suitable. This time, I chose to use two larger softboxes for uniform lighting under the head. The large-area soft lighting is delicate and soft, with small contrast, forming a hazy and tender effect.

What is Hard Light

Hard light is strong direct light. Such as sunny sunshine, naked lights in studio lights, etc. The physical characteristics of the model surface illuminated by hard light are as follows: the light-receiving surface, the backlight surface and the projection are very vivid, the contrast between light and dark is large, and the contrast effect is obvious. Helps to express the details and texture of the light-receiving surface.

Hard Light Modeling Results

A projection can be formed under hard light. Not only can it increase the depth and perspective of the picture, but it also forms a rhythmic rhythm with the light and dark intervals of the bright part, increasing the atmosphere and beauty of the picture. Therefore, the hard light source is suitable for expressing the character’s personality, specific themes and creating the atmosphere of the picture.

Hard Light Portrait Lighting

Recommend to everyone to use the main and auxiliary two hard light sources. The two hard lights must first distinguish the primary and secondary. Then determine the contrast, and finally determine the theme of the picture. For example, in order to highlight the demeanor of the character, a honeycomb can be added to the main lighting lamp to make the lighting area of the hard light source smaller. There are more specific directions, pay attention to the lighting of the dark parts. So use another hard light source to fill the dark part of the character.

Highlight the Environment

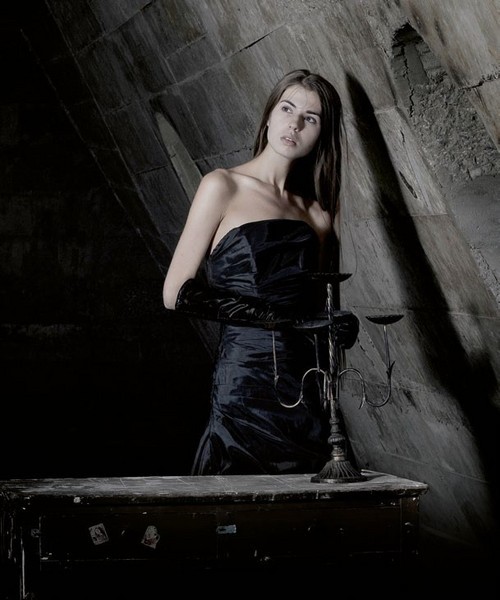
When shooting environmental portraits, the light must be in harmony with the environment and highlight the characteristics of the environment. As shown in the picture, in the cold and old environment, a large change in light and shade is needed to match the atmosphere and the mood of the characters. So use hard light naked lights to directly illuminate the characters, highlight the theme and darken the surrounding environment. And it created an obvious projection, which properly rendered the atmosphere. This is also a characteristic of hard light.

Show Personality

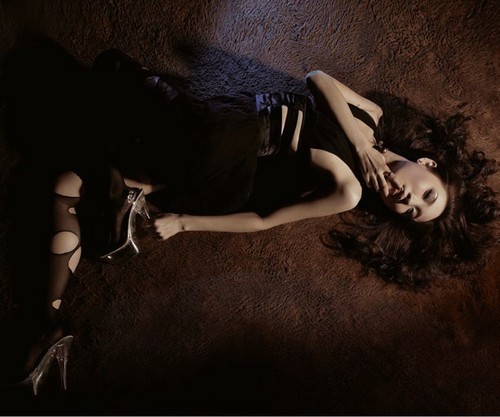
Photographers often use hard light to shape individual themes. As shown in the picture above. In order to reflect the personality and charm of the theme, a total of three hard light sources are used. A lamp illuminates the face of a character to create a three-dimensional main image. One lamp illuminates the legs of the figure, shaping the lines, and the third lamp is close to the ground. It usese a higher color temperature to enhance the atmosphere in color. The use of such a combination of hard light not only highlights the key points. But also distinguishes the primary and secondary. At the same time, there is also a change in color temperature. That is particularly prominent for the texture and texture of the model.

Reasonable Combination of Soft Light and Hard Light

Hard light brings a large light ratio, and soft light shapes a small light ratio. Hard and soft are not incompatible. Photographers often mix these two types of light.

The mixed use of soft, hard and light can well shape the three-dimensional feeling. And enhance the texture and clarity of the model. Soft light fill light is very convenient to control the level of dark parts and adjust the light ratio and contrast arbitrarily. It is also easy to achieve a bright and textured effect.

As shown in Figure 4 above, the photographer used a 600W hard light as the main light. And two 400W softboxes are to fill the shadows. In this way, the shadows are brightened to a small light ratio of 1:2 with the highlights. Figure 5 shows the light distribution method with large light ratio.

Pay attention to the height of the main light (hard light) when lighting, and carefully observe the projection direction it produces so as not to damage the structure of the character. Regardless of whether it is soft light or hard light, we have to choose the light according to the theme, character characteristics and customer requirements in the lighting. When choosing light, we basically start with five characteristics, namely, light quality, light position, light ratio, brightness, and light color. This is inseparable from any lighting.

Categories
Studio Lights Education

Shooting in Various Scenes

What is a Scene

The picture scene refers to the size and scope of the image of the subject in the picture.

There are two factors that determine the size of a scene: the actual distance between the camera and the subject and the focal length of the photographic lens, which is the shooting distance. Shooting distance refers to the relationship between the distance between the shooting point and the subject.

The choice of shooting distance, reflected in the photo screen is the change of scene. Through the change of the distance, the size of the scene image and the space range included are determined.

Under the premise of the same shooting angle, the change of shooting distance can change the size of the image of the picture. When the distance is close, the image is enlarged and the scene becomes smaller. Otherwise, the scene becomes larger.

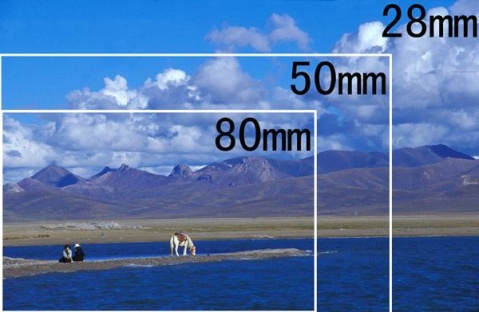
On the other hand, when the distance between the camera and the subject remains the same, you can also change the focal length of the photographic lens to change the scene of the picture. The rule is that the longer the focal length of the photographic lens, the smaller the scene. On the contrary, the larger the picture scene.

Division of Scenery

In theory, there is no scientific definition of the division of scenes, it only expresses a concept. The reason is the inconsistent standards for measuring the sceneries of the pictures. Some take the proportion of the subject in the picture as the standard, and the whole picture of the subject is the panorama.

Some take the structural methods of different scenes as the standard. Anything that shows a relatively complete thing or a whole closely connected thing is a panorama.

There are also adult bodies as the standard scale, and scenes are divided by intercepting a certain range of human body parts shown in the picture.

At present, most people agree to use the body of an adult as the criterion for classifying scenes. According to this standard, the scenes are divided into 4 levels, namely, distant view, panoramic view, mid-range view and close-up.

Different shooting scenes are used to express different effects and themes. The shooting methods and precautions for different scenes are different.

1. Shooting in the Middle Shot

The middle shot is a picture that shows the part of the human body above the knee or a part of a scene.

The characteristics of the mid-range scene: the scene is small, and the brightness change of the scene is not complicated. This kind of picture mainly shows the detail level, surface texture, color reproduction and expression of the subject. But there is not much to the whole picture environment. This kind of picture is conducive to expressing the relationship between people and things.
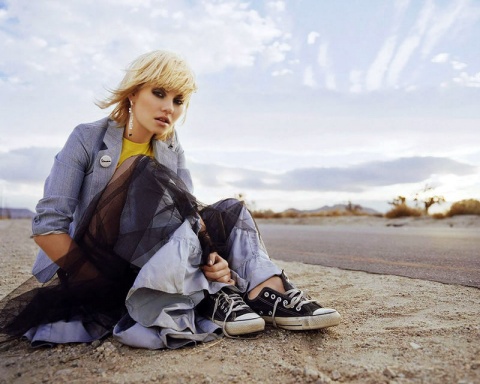
Compared with the panoramic view, the middle shot has a reduced range of performance and is closer to the subject. In addition to the subject, the surrounding environment related to the subject is shown in the screen. At this time, the environment and background factors play an auxiliary, foil or foil role, and express a relatively complete meaning together with the subject.

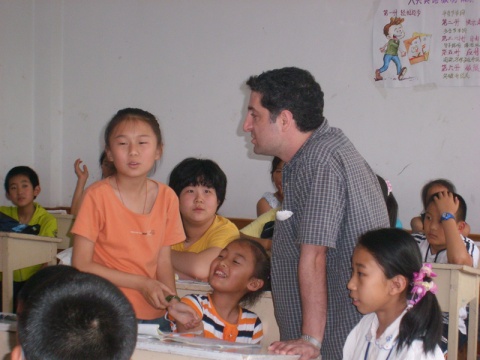
The middle shot is mainly used to reveal the subject’s emotions, identity, and action goals. For example, use the middle shot to take pictures of students answering questions. It can not only show the expression and attitude of the student answering the question, but also show the reaction of the next student (such as expressions, actions, etc.).
(1). Determination of Shooting Distance

The purpose of the middle scene is to show the expressive plot and action part of a certain event or object, show the focus of contradictions, and the emotional communication and connection between people.

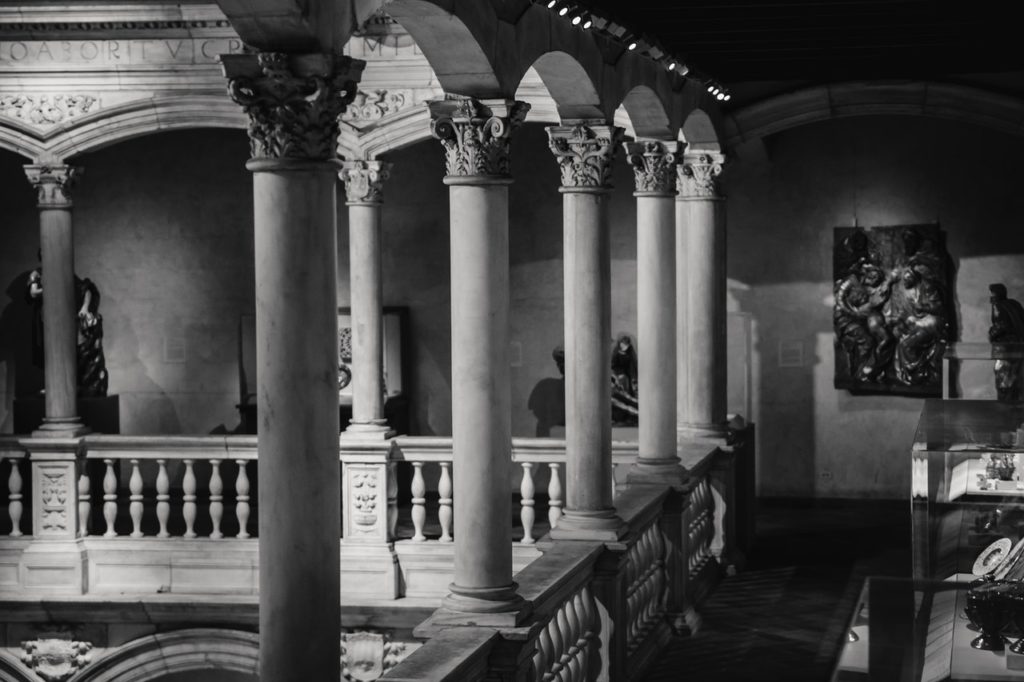
Mid-range often wins with action plots, and the environment drops to a secondary position. If it is a static object, always use the most interesting and noticeable part of the object. For example, the middle shot of Whitehall may be a row of imposing pillars protruding from the second floor. In the middle shots, gestures are often the main part of the picture.
Since the scene in the middle shot is relatively small and the object being photographed is relatively large, the distance between the camera and the subject cannot be too far. If the distance is too far, the subject will be affected by the large background. And if it is too close, it will also affect the subject. When shooting medium shots, the distance between the camera and the subject is generally 3~5m.


(2), the Determination of the Focal Length

Since the subject shot in the middle shot is generally relatively large, it is not difficult to see from the relationship between the focal length and the size of the object that the short focal length lens will not be used when shooting the middle shot. Generally, a standard lens or a medium-focus lens is used, that is, a lens with a focal length between 50 and 100 mm. If you use a zoom lens, you will be more comfortable when shooting.
(3) the Method of Exposure

Since there is a certain background in addition to the subject in the middle shot, if you use average metering, it will definitely affect the accuracy of metering because of the background. Therefore, the “close-up method” is generally used when shooting mid-range, that is, metering close to the subject. In this way, most of the subject can be filled with the picture, avoiding the influence of the background on the subject.

Of course, after the metering is completed, you have to return to the original shooting position and perform exposure based on the data just recently measured. This method is most common when shooting mid-range portraits. Generally, the distance of close measurement is between 10 and 30 cm.

(4). The Relationship Between Theme and Background

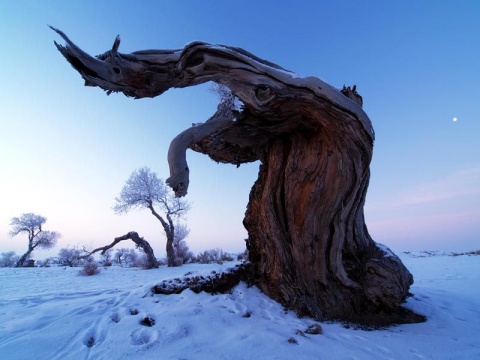
The background of the mid-range scene generally has the effect of setting off the main body and deepening the theme. However, a background that is too messy will play a role in overwhelming the audience and weaken the subject’s expressiveness. And an overly simple background does not serve the purpose of emphasizing the main body. Therefore, pay attention to the selection and arrangement of the background when shooting the middle shot, as shown in the figure.
2. Close-up Shooting

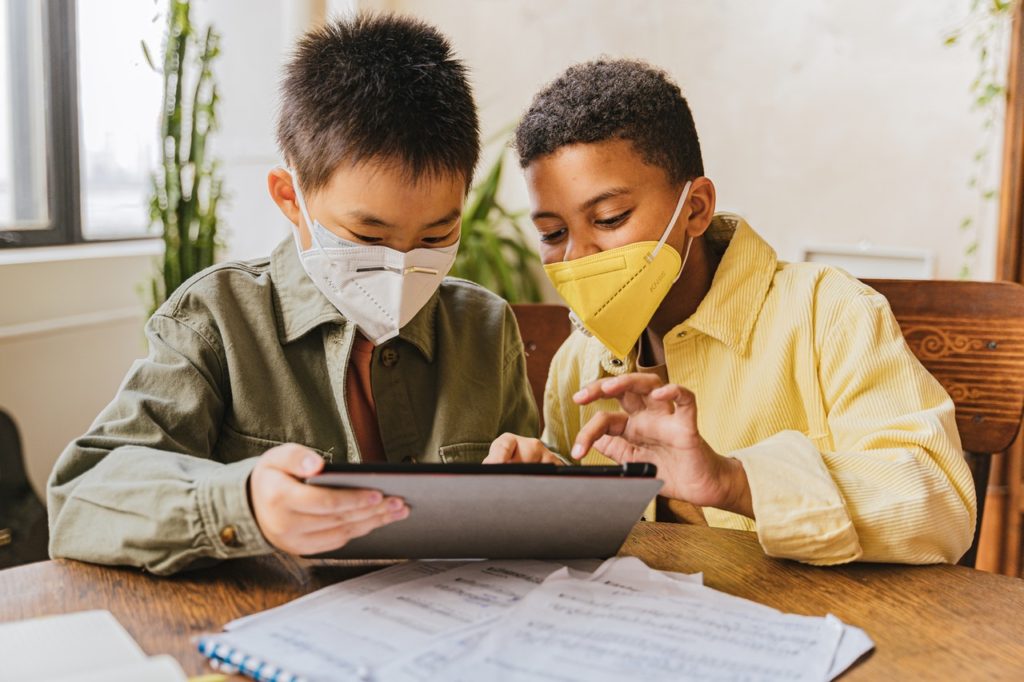
Close-up refers to the picture above the chest of a person or a part of an object. Compared with the middle shot, the space of the picture performance is further reduced, and the content is also more single. It is mainly used to express the actions and changes of facial expressions, etc., which can give people a sense of communication. For example, students answer questions, read aloud, do homework, do experiments, teachers give lectures, write blackboard books, do demonstration experiments, etc. This is the most commonly used scene in classroom photography.
(1) Determine the shooting distance

Close shots are mainly used to highlight the look of characters or the delicate texture of objects. This is the characteristic of close-up performance. Close-up shots of characters, facial expressions are the main content of the picture, and eyes become the central part of the picture. Therefore, close-up shots should be handled well and expressively. Use good light when shooting objects in close range, and express the texture and texture of the objects well.


Since the close-range scene is smaller than the middle-range scene, and the object being shot is larger than the middle-range scene, you should pay attention to it when choosing the distance between the camera and the subject. Generally, it is appropriate to be between 1m and 3m.
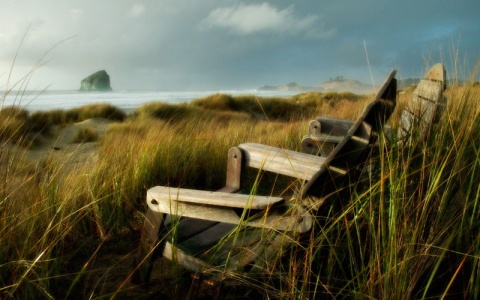
(2) Confirmation of focal length

The focus of the close-range image is the subject, and the close-range subject is larger than the mid-range. So when shooting close-up shots, the short focal length lens is also not selected. Generally, medium-focus lenses are more commonly used, with 70~100mm lenses being more common.

(3) Method of exposure

Since the subject itself is highlighted in the close-up, the status of the background becomes secondary.
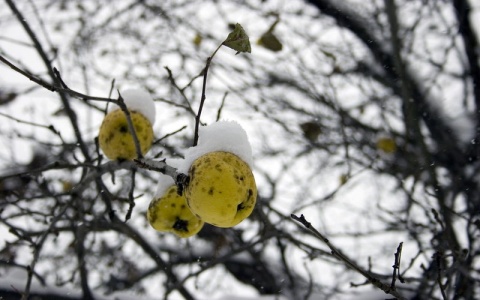
Many photos with close-up images have weakened the background to highlight the subject. So in close-range shooting, use the “average metering” method for exposure.

(4) Prevent distortion

Close-up images are generally close to the subject. But if you are too close to the subject, the effect of the shot will produce a kind of distortion. This distortion will be more obvious if you use a short focal length lens to shoot. You should pay attention to it when shooting.

3. Close-up Shooting
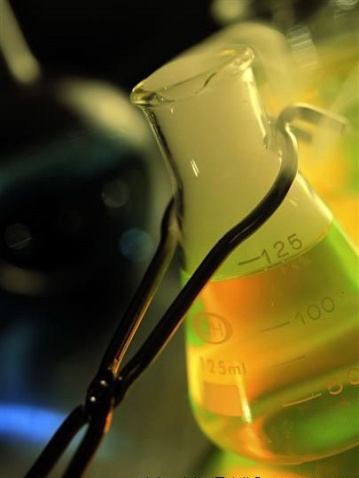
Close-ups are images of heads above the shoulders of the human body or the details of certain subjects. It is an enlargement of the small parts of things, giving people a strong visual impact, strengthening the audience’s understanding and feelings of the displayed image, and deepening the memory. Such as the content of writing on the blackboard, experimental phenomena, facial expressions and expressions of teachers and students, etc.

(1) Determine the shooting distance

The close-up is a step further than the middle shot, filling a certain part of the object in the picture, revealing the internal characteristics of the object from the subtle points. Compared with the middle scene, the close-up pays more attention to revealing the inner dynamics, looking at the essence through the subtleties.

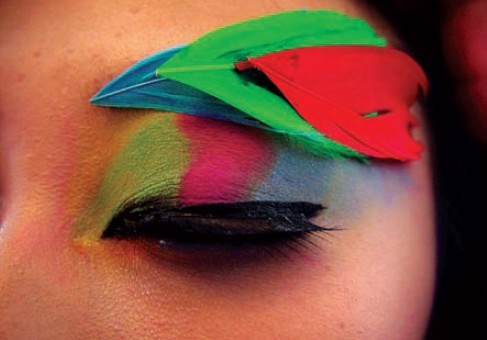
When shooting close-ups, the key to success lies in the unique ability of observation. This can capture some parts worthy of close-ups to open the windows through which the audience can see things inside. For example, the eyes of characters are often close-ups, because people often say that the eyes are the windows of the soul. Indeed, through human eyes, one can see the inner feelings of the characters.
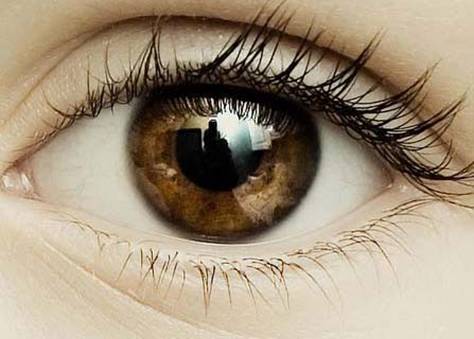
A close-up of the hand

Second, a close-up of a person’s hand. The hand is the focal point of a person’s behavior and movement. And we can see the characteristics of a person’s occupation, age, and so on. The hands also have rich “expressions”. In opera jargon, “finger can speak”. In daily life, people often use various gestures to help express their feelings.

Close-up of a small winter jasmine under a snowy branch, a small grass bud in spring, a lotus in summer. And a red leaf in autumn can all give people the joy of life. It is easier to touch the heartstrings of the audience than other scenes. Therefore, close-ups are often allegorical and lyrical, more subtle, and can inspire people’s imagination.

Because the close-up performance is mainly the local feature of a certain part of the subject. So when shooting, keep as close as possible to the subject, as shown in the picture above.

However, since the camera lens is limited by the recent focus range, once it exceeds this range, the focus cannot be adjusted. If the closest focusing distance of the camera is 0.8m, once it is less than this distance, the camera will not be able to adjust the focus clearly. Therefore, for shooting close-up pictures, the shooting distance should be based on the camera’s closest focusing distance.

(2) The choice of focal length

Medium and long focal length lenses are used for close-up shots. Generally, a lens with a focal length above 135~300mm is used, and a lens above 300mm can also take close-up pictures. However, considering that lenses with focal lengths above 300mm are generally bulky and will easily shake during shooting and affect the image quality, it is generally not recommended to use them.

(3) Selection of equipment

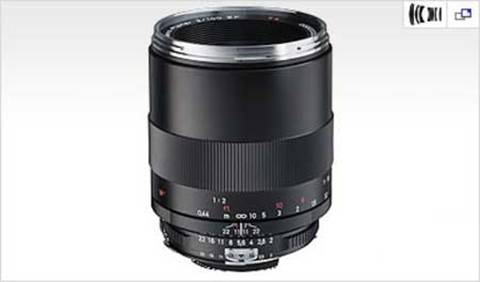
To overcome the limitation of the closest focusing distance, when shooting close-ups, it is best to use a macro lens that specializes in shooting close-up objects. Some lenses have a close-up function, which can also be used when shooting close-ups. Lenses with close-up function will be marked with “M” or “MACRO”.

(4) Method of exposure

Since the close-up picture mainly highlights the subject, any exposure error on the subject will be very obvious. Therefore, you must pay attention when shooting. Generally, spot metering is used when shooting, so as to ensure the proper exposure of the object being shot.


4. Shooting of Distant and Panoramic Views

Features of Long-range Images:

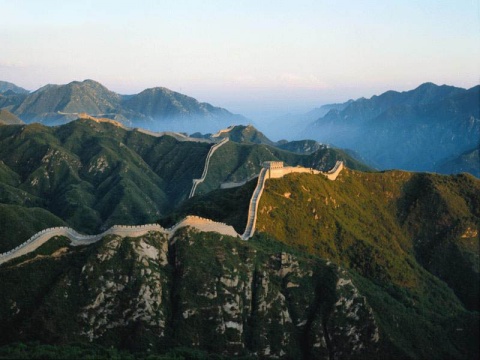
The long-term view is the one that expresses the largest range of space among all kinds of scenes. It is shot at a distance from the subject during shooting, and it includes a large range of sceneries.

The vision is mainly based on nature. The vision always wins with the aura of nature, showing the topographical features, geographical location, mountain and river situation and the environmental atmosphere produced by climate change. Therefore, to construct a long-term picture, we must look at the big picture, pay attention to the overall momentum, and handle the lines of nature itself, such as the ups and downs of the mountains, the direction of the river, the patterns of the fields, the unique tones and lines of the desert and the ocean, etc. And we must be good at using various flow factors. Such as atmospheric conditions, cloud changes, wind and rain, overcast and sunny. They are all moving factors in the distant picture.
Features of panoramic images:

The purpose of panorama is to show the whole picture of a certain subject and its environment. The panorama is used to explain the environment in which the event occurred and the relationship between the subject and the surrounding environment.

Compared with the vision, the panorama has a clearer content center. The size of the panorama range is always related to the main object, and is determined relative to the size of the main object. For example, the panoramic view of people and indoors is naturally much smaller than the panoramic view of Broadway. But it is called the panoramic view for the subject matter.

The structured panoramic picture mainly considers a certain relationship between the environment and the subject. Pay attention to the contour lines of the inherent characteristics of the main body as a whole, and the echoing relationship between the main body and the surrounding environment in order to achieve rich content and structural integrity.

However, this type of scene is not as good as the medium and close scenes in terms of the details and texture of the scene, as shown in the figure above.

(1) Selection of shooting location

Generally, taking long-distance, panoramic and other photos is to show the magnificent momentum and atmosphere of the whole picture. So when shooting, choosing the shooting location is a very important part.

When shooting distant scenes and panoramas, if you use head-up shooting, the effect of the photos you take may be very mediocre. If you change the shooting position, raise the shooting point, and use overhead shooting, the effect usually obtained is much better than that of head-up shooting.

(2) Confirmation of focal length

The perspective and panorama mainly express the overall sense of the picture. This requires the camera lens to have a large enough angle of view. So when choosing a lens, the medium and telephoto lenses are not suitable. Generally, short focal length lens and standard lens are used to shoot far and panoramic picture effects. Generally, a 24-50mm lens is appropriate.
(3) Method of exposure

Since there are many scenes in the distant and panoramic images, the choice of exposure depends on the specific situation. If the brightness distribution between the shots is relatively uniform, you can use the “average metering method” to determine the exposure value.

If the brightness difference of the shot scene is relatively large, and there is a clear contrast between light and dark, you need to change the metering method. On the basis of average metering, further measurement of local bright parts should be carried out. And the two metering results should be comprehensively considered to determine the appropriate exposure.

(4) Control of the depth of field of the picture

In order to enhance the sense of depth in the distant and panoramic images, line perspective and air perspective rules should be used when shooting. And sidelight, side backlight or backlight should be used as much as possible to shoot, while reducing forward light and top light.

Categories
Studio Lights Education

The Use of Diffuse and Soft Light in Photography

Diffuse soft light is a lighting form suitable for spring and summer photography, especially for light and thin clothing.

Basic Characteristics of Diffuse Soft Light

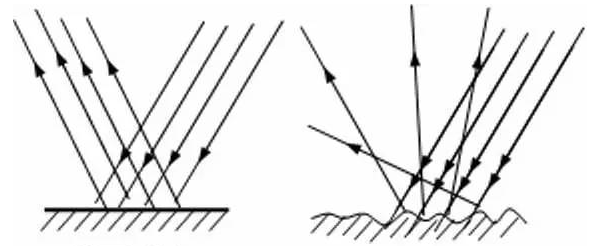
When a beam of parallel incident light illuminates the rough surface of an object, the direction of the reflected light is inconsistent due to the unevenness of the reflecting surface, and it is scattered randomly. This reflection is called “diffuse reflection”.

The main feature of diffuse soft light is that the illumination is uniform and there is no obvious directivity. It can be said that the best soft light is almost imperceptible. In other words, the light itself will not become a substantial compositional element in the photo.

Since the light travels in a straight line, when the light hits the object, all shadows will have the same angle. It is easy for us to judge its direction, and we can also figure out where the light comes from. But the soft light weakens the directionality of the light, making people feel that the light is shining from many angles around, but there is no obvious shadow.

Outdoors, cloudy weather is a typical diffuse environment. The diffused sunlight blocked by the clouds forms a uniform soft light that is brighter, less light, and has no obvious directivity.

The more common diffuse reflection light type in the studio includes: the light reflected by the reflective umbrella. With the help of large-area soft box and soft light cloth to soften the light. Scattered light formed by methods such as hitting the wall against the wall. And the light evenly emitted by multiple lights.

Use of Light and Fill Light

To turn the hard light of the artificial point light source into scattered soft light, we must first understand the different functions of the soft light curtain and the reflector.

Put a translucent material (diffuser or soft light cloth) between the light source and the subject to scatter the light beam. This turns the hard light from the flash into a soft diffused light. That is, the light irradiated by the artificial point light source produces diffuse reflection when passing through the soft light material, turning the original straight beam into a scattered beam with different angles. Some of the main beams will illuminate one side of the subject, while others will illuminate the other side of the subject (reflector reflection). As a result, both the light-receiving surface and the shadow surface of the subject are more uniformly illuminated, and the light ratio is reduced.

When we use soft light materials to fully diffuse the light, we need to place the reflector on the backlit side of the subject to further increase the brightness of the shadows.

Aperture: f/8.0, Speed: 1/125s, ISO: 100, Focal length: 40mm

Metering-

Using diffused soft light to shoot, the subject will not produce obvious contrast between light and dark and changeable light and shadow effects due to the direction and intensity of the light. Therefore, the splendor of the picture can only come from itself. For the photos taken at this time, the exposure control is easier due to the low contrast. For digital SLR cameras, shooting a scene in a diffuse light environment, as long as the use of basic evaluative metering can get a more ideal exposure effect.

Aperture: f/8.0, Speed: 1/125s, ISO: 100, Focal length: 55mm

Aperture: f/4.0, Speed: 1/125s, ISO: 100, Focal length: 50mm

Indoor Artificial Light Source to Shoot Diffuse Soft light

In the studio, use studio lights to create a diffuse light atmosphere. Common light types are as follows.

1. Soft diffused light

Use two high-power flashes behind the character, one with a small soft box and the other with a medium soft box. In this way, the light can not only illuminate the characters, but also take into account the background. In addition, a flash with only a reflective umbrella can be added in front of the character to illuminate the face of the character.

This light type is more suitable for light-colored clothing with a simple silhouette. The approximate light ratio is 1:2. Pay attention to other dark places in the scene, you need to use reflectors to fill in the light.

Aperture: f/4 Speed: 1/100s ISO: 200 Focal length: 85mm

2. Inverse diffused light on the soft side

This is a lighting method that creates a small backlight in the shed and adds diffusion at the same time. This is also a light type that many people like. It is more suitable for clothes with strong sense of lines and simple styles. Can better highlight the sense of shape of the clothing itself. The front-to-back light ratio is controlled at 1:3. When shooting with this type of light, pay attention to the front of the model to fill in the light, and at the same time place a light-absorbing plate in the dark part to increase the intensity of the shadow to emphasize the texture of the face.

Aperture: f/5.6 Speed: 1/160s ISO: 100 Focal length: 100mm

3. Small light is more diffuse than side light

This light type is more suitable for weaving or light-colored clothing with strong texture. The approximate light ratio is 1:3. Note that the dark part needs to be filled with light evenly through the butterfly cloth with a large soft box.

Aperture: f/5.6 Speed: 1/125s ISO: 200 Focal length: 90mm

4. High-angle diffused light

This kind of light type is more suitable for girlish or knitted clothing. The front-to-back light ratio is controlled at 1:1.5. Note that the face needs to be evenly filled with a soft box and butterfly cloth, and the ground is preferably light or white.

Aperture: f/5.6 Speed: 1/125s ISO: 100 Focal length: 70mm

5. Diffuse light with very small light ratio

This light type is more suitable for garments with embroidered pearl sequins and simple tailoring. The front and rear light ratio is 1:1.5. Using diffused soft light is easy to take photos “flat”, that is, lack of three-dimensionality and texture. It is necessary to use a light-absorbing board to enhance the shadows in the picture to enhance the three-dimensional feeling.

Aperture: f/4 Speed: 1/160s ISO: 200 Focal length: 50mm

6. Backlight diffusion with large light ratio and hard light

This kind of light type is more suitable for clothes with a strong sense of elegance and lines. The front-to-back light ratio is roughly 1:3. Pay attention when shooting, the diffused soft light from the rear adds hard light, and pay attention to the index of hard light when metering. The dark part of the face needs to be filled with light with a reflector.

Aperture: f/8 Speed: 1/125s ISO: 50 Focal length: 45mm

Diffuse and Soft Light Shooting with Natural Light

Application of diffused soft light shooting, in addition to fashion photography, is also widely used in other fields (such as portrait, photo, wedding, landscape, etc.). It can easily create a fresh and natural atmosphere. Because the diffused soft light will not overemphasize the tough edges, it can hide wrinkles. Even if the people in the photo don’t look younger, at least they won’t look older.

It should be noted that this lighting style is inherently low-contrast, which means that you need to use more energy to adjust the relationship between highlights and shadows.

Overcast and cloudy diffuse environments are very familiar to us. The light is sufficiently scattered, and the difference lies in the difference in brightness. Generally speaking, when shooting in a dark and cloudy day, the picture will appear dull, and the characters need to be moderately brightened and matched to the environment.

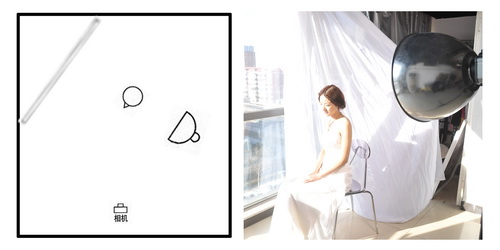
For outdoor shooting, if you want to shoot soft light effects in sunny weather with direct sunlight, then you need to make a soft light curtain. It’s actually very simple. All you need is a clean white cloth and a shelf to hang it on. That is, use cloth to block the subject to soften the direct sunlight, so as to achieve better shooting results.

If you are a professional photographer, you need a professional soft light curtain. Soft light curtains can not only be used for studio shooting, they can also be used for on-site shooting to soften the hard sunlight. These soft light curtains come in different sizes, and they can all be folded, so they can be easily taken outdoors.

Aperture: f/11, Speed: 1/250s, ISO: 400, Focal Length: 35mm

Aperture: f/11, Speed: 1/250s, ISO: 400, Focal Length: 35mm

Categories
Studio Lights Education

How to Eliminate the Shadows in Portrait Photography

When shooting portrait photography, many people regard shadows as objects that need to be eliminated. So, how to eliminate them?

From another perspective, portrait shadows are actually not that scary. In fact, as long as you know how to use it, shadows can also play a good role.

What I want to explain today are 5 ways to eliminate, control or use shadows to take better portraits. Those who love portrait photography, don’t miss it.

 Related Settings

Spot metering

When the light conditions are more complicated, you can try to use spot metering and place the metering spot on the bright part of the character’s face.

In this way, the highlights will be properly presented, and the scene will be treated as dark to highlight the subject. If the room is really dark, you may also need to manually increase the sensitivity.

Slightly overexposed

There is a principle when shooting scenery, “I’d rather not expose it.” Because in the post-processing link, the details that are seriously overexposed and lost cannot be retrieved.

However, when shooting indoor portraits, there is generally no “severe overexposure” due to insufficient light. The process of correcting under-exposed details often produces additional noise.

Therefore, when controlling the exposure, you can consider making the picture slightly overexposed (about one-third block). This can reduce noise and preserve certain details for the dark parts of the picture.

Auto white balance

The automatic white balance can moderately control the contrast of light and dark of the picture. It may not be a good thing when shooting landscapes, but it is very useful when shooting portraits. If you feel that this is not accurate enough, you can find a piece of white paper and try a custom white balance.

Single Light Source

A single light source (such as a small window or an open door) can do wonders for your image, especially when you are working in a dark space.

If the door/window of the room is facing north (rather than facing east to west), they tend to bring softer, more directional light.

The “magic” of window backlighting

You can also adjust the character’s orientation, the distance to the window and other parameters to obtain different picture effects.

The main body is facing the window, allowing the window light to evenly illuminate her silhouette. The black curtain behind her succeeded in turning the background black and accentuating the subject.

Light Location and Light Quality

Both light position and light quality play an important role in controlling the tone and mood of the image.

The strong and concentrated “hard” light can enhance the overall contrast and drama of the image, emphasize texture and detail, and create shadows with high-contrast edges. Soft light can reduce light and shadow, while weakening the expressiveness of texture and details, which can effectively cover up imperfections.

In terms of light position, the front light can provide uniform illumination without shadows, but it will make the face appear flat. By adjusting the angle of the side light, you can properly create shadows and make the five senses more three-dimensional.

Let’s look at an application example. The character is facing the window, so the lighting effect on the face is even. The person who is leaning toward the window has more three-dimensional facial features, but the skin feels more granular.

The backlight is suitable for shooting dreamy photos, but the details of the subject itself will be missing to a certain extent.

The Distance of the Light Source

The propagation of light follows the “inverse square ratio”, that is, as the distance increases, the energy decreases.

You can turn on the flashlight in the dark room and observe the beam. You will find that the beam is brighter and more concentrated near the torch. At a distance, it tends to diverge and the brightness decreases. You can use this feature to create special effects.

For example, you can place the model near the light source while keeping her away from the background. In this way, the main body will be illuminated, and the other places will become pitch black. On the contrary, if the subject is placed farther from the light source and closer to the background, the lighting will be more uniform and the background will be brighter.

You can also increase the light propagation distance through the reflector (or other reflective surface) to achieve the effect of “increasing the distance to the light source”.

Using props to “Renovate” the Light Source

You can use some window props to “renovate” the window light source.

For example, you can reduce the size of the light source and increase the shadow by partially drawing thick curtains. You can “filter” the light with thin curtains to reduce shadows. You can also do the opposite, using blinds or other objects to create projections of specific shapes.

Application of Light and Shadow

Photography is inseparable from light. Only when there is light, there is a shadow. The relationship between light and the subject is very close, which determines the texture and details of the subject. In different themes, only using different light processing methods can fully reflect the artistic conception that you want to express. The direction of light can be roughly divided into four types: forward light, back light, top light and side light.

1. Portrait Shooting Under Forward-light

The direction of shooting is the same as the direction of light, which is called forward light shooting. Downlight photography is easy to get the effect of adequate exposure, and the subject generally does not appear in obvious shadow areas. For example, the subject and the light source are in a straight line, and the photographer shooting between the two or behind the light source is classified as forward-light photography.

Portraits taken with forward light, uniform exposure but lack of three-dimensionality

It should be noted that if the light intensity is too strong when shooting in forward light, it is easy to overexpose. So we would recommend shooting under a softer forward light. The light in the early morning, dusk and cloudy sky is softer, and the details of the characters are also better. In addition, there are more high-light parts and few shadow areas of the subject in the light shooting, so the three-dimensional sense of the picture is relatively lacking.

Portraits taken in a cloudy sky with smooth light, with better details

2. Portrait Shooting under Side Light

The light shines from the side of the shooting direction, that is, side-light shooting. It is the most commonly used shooting method in portrait photography and is easier to master. It is not prone to overexposure or underexposure. The side light can well shape the lines and shapes of the characters, as well as form the light and shade and layers.

If it is irradiated from the front side, it is the front side light. If the light shines from the back of the character, it is the back light.

In addition, the strength of the side light can be roughly divided into three types: strong light, soft light and weak light. Soft light is the best light for shooting. The two time periods of morning and afternoon are very suitable for photometric portrait shooting. At this time, the exposure is sufficient, and the details of the characters will be very good. When shooting, make sure that the light hits the face of the person, and the exposure of the face is in place as much as possible.

Side-light shooting under soft light, full exposure and obvious details

It should be noted that when shooting with a mobile phone, the photosensitive element of the mobile phone is not large enough, and the ability to shoot in low light is limited. Therefore, try not to choose to use side light to shoot portraits in low-light environments, because this will not reflect the details of the characters. Taking portraits under strong light can easily lead to overexposure, which can lead to dead white exposure and poor details. So also avoid side-light shooting under strong light.

Side light shooting, soft light in the afternoon

3. Portrait Shooting Under Backlight

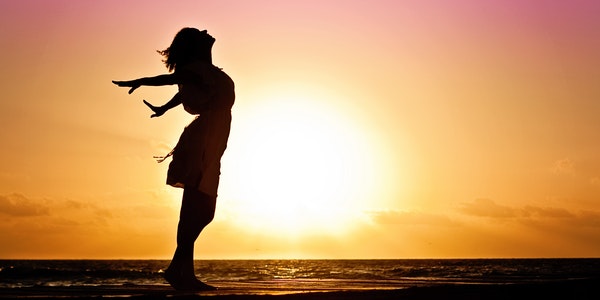
The direction of shooting is exactly the opposite of the direction of light, and the subject is between the photographer and the light source, which is backlit. Portraits shot in backlight are either severely underexposed or overexposed. Character details are also very bad. Therefore, backlight photography is not suitable for portrait photography. But there is another advantage to backlight photography. When we don’t pay attention to the details of the characters, it will have unexpected silhouette effects.

When shooting portraits under backlight, the focus should be on the sky, and at the same time, some exposure compensation should be appropriately reduced. At this time, someone asked, the portrait is already black, why lower the exposure compensation? Yes, the character itself is underexposed, even if we compensate for the exposure, the character can be brighter. But even so, the details of the characters are not ideal, and they are not in harmony with the overall picture. Instead of doing this, we went the other way, lowering the exposure compensation and making the characters darker. So you can have a silhouette effect.

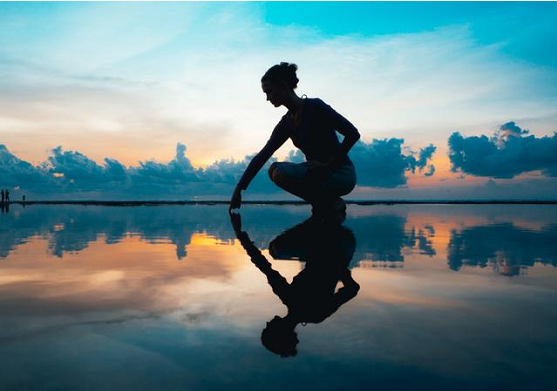
Silhouette effect shot with backlighting before sunrise

When shooting silhouettes of people, the background should be simple and clean, not too complicated. Such as rooftops, seaside, grassland and other scenes with a wide view and simple background. In this way, the outline of the main body of the character can be more prominent, and the body shape and contour beauty of the character can be reflected. Therefore, in the absence of details of the character, the expressiveness of the character is very important, and it is necessary to do some actions suitable for the silhouette.

4. Use Light and shadow to Shoot Portraits

In our shooting scene, the light on some scenes will cast very interesting shadows. Proper use of these shadows can not only enhance the artistic conception of the picture, but also make the picture rich in layers. This kind of shadow is called light and shadow in shooting.

The natural shadow of the character

The effect of light and shadow is easy to appear in the side light environment. For example, in the two time periods of morning and afternoon, because the sun is tilted down at this time, the smaller the angle, the longer the light and shadow. Use light and shadow to compose the picture, and look for places with more beautiful light and shadow to frame the shot. With the embellishment of light and shadow, the plain picture will be more artistic.

The light and shadow formed by the light passing through the window

In addition, when the light shines from the top of the head, the light source is at a vertical angle to the subject and the photographer. This is the top light. Top light is not suitable for taking portrait photos, because it will form a large shadow area and underexpose the face. Here we will not explain the top light.


Categories
Studio Lights Education

Shooting Skills-Shooting Snow Scenes

With its unique visual shock, the snow scene makes every photographer have the urge to press the shutter. However, the light is different in snow scenes, and you need certain shooting skills.

How to Use up the Snow Scene?

1. Try to avoid backlighting

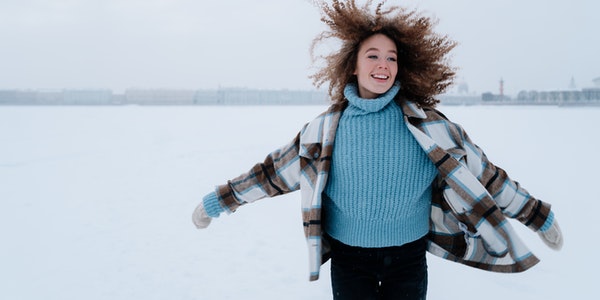
When shooting snowy portraits, in addition to reasonable composition, try to avoid backlighting. Because the exposure value of human skin and snow is very different, that is to say, in order to ensure human skin color, the snow will be pale and dull. Conversely, ensure the exposure of the snow, then the face will be underexposed and the color will be dark. Therefore, when shooting portraits, use 30-60 degrees of forward light and press the palm of the hand (female) and the back of the hand (male) to meter the light, and subtract one-quarter to compensate the exposure (when the exposure is not manually). This will ensure both the portrait and the background.

2. The use of side light

When shooting scenery with people as a foil, it is better to use side light. According to the metering result of the camera, the exposure can be normal. But also pay attention to the proportions of far, medium, and near shots, and the echoing relationship of colors.
3. Accurate metering

When shooting pure snow sceneries, the light consumption and metering must be very accurate, and it will fail if you are not careful.

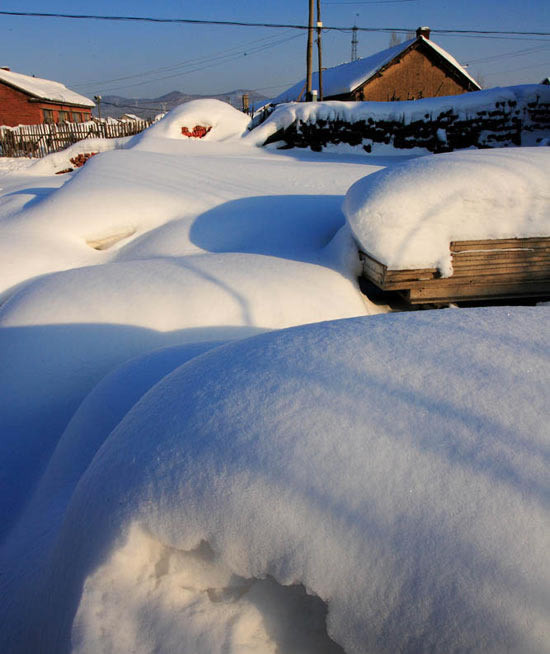
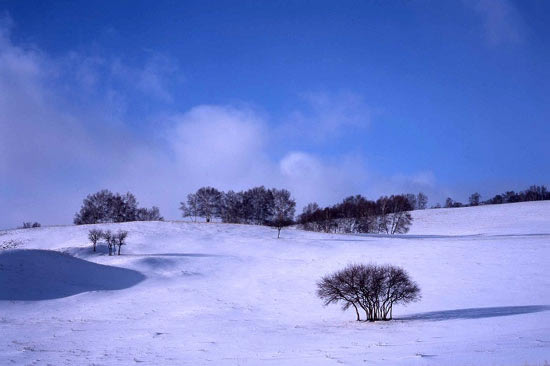
(A) When shooting large snow scenes, the exposure is based on the highlight area, so that the charm and lines of the shot are beautiful.

(B) When shooting a snowy forest with a 0.5-1 stop exposure, the black trees interfere with the camera’s metering.

(C) Choose to shoot morning and evening when shooting mountain snow scenes. Because the light at that time was very fascinating, and the shooting was based on average metering.

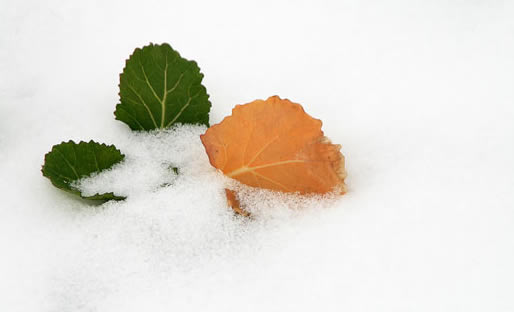
(D) The main consideration is to highlight the texture of the snow when shooting the sketch. Generally, the exposure is average or under-level, but sometimes the exposure is appropriately increased according to the brightness of the subject. The key is to see what you want to show.

(E) When shooting high-profile movies, generally choose “false cloudy” or misty weather, and increase the exposure by 1-2 levels.

Why It Is Always Recommended to Undershoot Exposure When Shooting Snow Scenes.

  1. First consider the fixed image medium, film and CCD.

(A) Under normal circumstances, the latitude of the negative film we use is -3 to +2 gears, which means that you can shoot at most 3 gears short and two gears behind when shooting. Once overexposed, the snow will lose its texture and layering.

(B) The CCD imaging latitude of a digital camera is even narrower, although only one block of overexposure, the texture and gradation will be lost.

  1. With the scanner we use now, the quality of the scanned image is particularly poor when the film is too thick.
  2. When shooting snow scenes, it is impossible for all the surrounding scenery to be white. Other objects and light shadows that are darker than snow will reflect our metering. Once the dark-colored objects and the light and shadow are too large, we will act according to the theory of over-exposure, and you can imagine the result.
  3. There must be room for later adjustments. As mentioned above, the latitude of the current cameras, especially the fixed images of digital machines, is extremely narrow. If the exposure is too high, adjustments will be difficult. If you follow the suggested approach, even if the exposure is not enough, there will be no major flaws, and it will be adjusted later.

Filter Application When Shooting snow Scenes

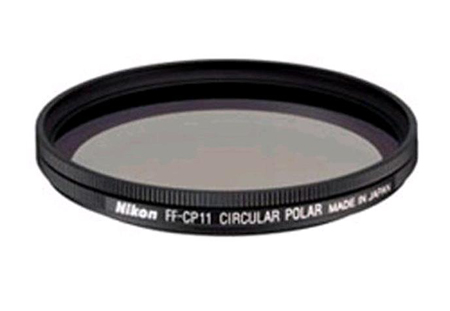
Digital cameras can already adjust various colors and effects in the later stage, so color filters do not need to be considered at all. In addition to the conventional protective UV mirrors, only two types of neutral gray mirrors and polarizers are enough.

The snow reflects the sun extremely strongly. Generally, everyone will choose to shoot on a sunny day. At this time, it is very likely that the light is too strong, and the shutter speed limit is exceeded or close to the limit. At this time, you need to use a gray mirror to darken the scene.

Some friends may say, is it enough to close the aperture? We must know that landscape photography is a harsh test for the overall performance of the lens. Generally speaking, the best performance of the lens usually appears when the aperture is reduced by 2-3 stops. It is impossible to receive the minimum aperture and maintain excellent quality. So it is very helpful to have a gray mirror.

Another thing that needs to be brought is a polarizer, which is used to filter out polarized light and strong snow and ice reflections, improve the sharpness of the entire picture and reduce glare. This is a technique that everyone knows, so I won’t talk about it here.

Categories
Studio Lights Education

The Use of Mixed Light in Portrait Photography_Part II

(2) Application of mixed light with different color temperature

i. Mixed light using different color films

This high and low color temperature mixed lighting method is suitable for some young people, fashionable, lively, and energetic people.

Precautions:

First, the red light level and the blue light level should be balanced and coordinated with each other when arranging the light level. Too much red light will make the picture warmer, and too much blue light will make the picture colder.

Second, the soft light of the main light must not only highlight the main character but not be too strong, otherwise the cold and warm light behind it will not be able to set off.

Third, it is reasonable to choose and use according to the personality, characteristics, and character of the main character.

Main light of normal CCT + auxiliary light of different CCT

The main light is normal color temperature (flash) + auxiliary light (color light of different color temperature)

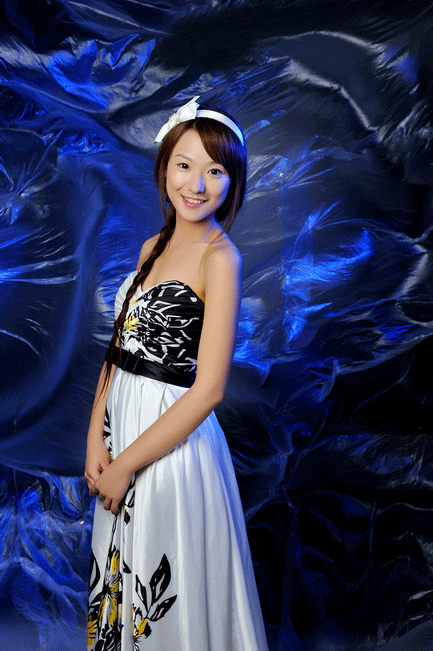
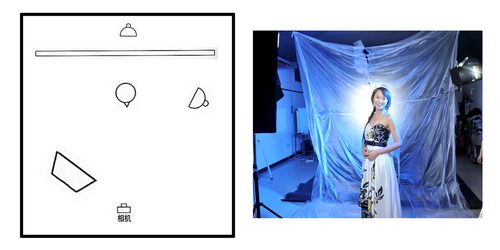
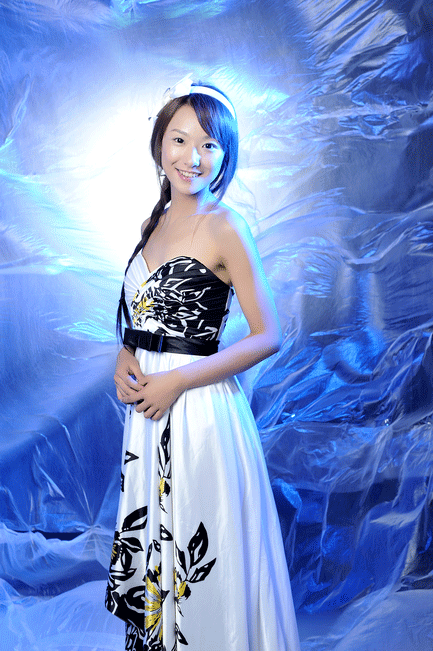
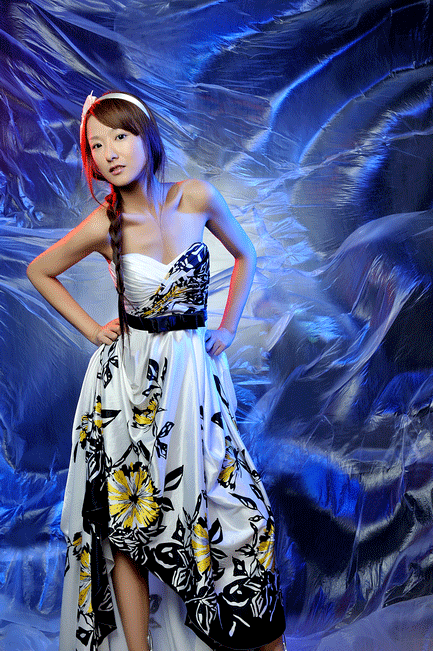
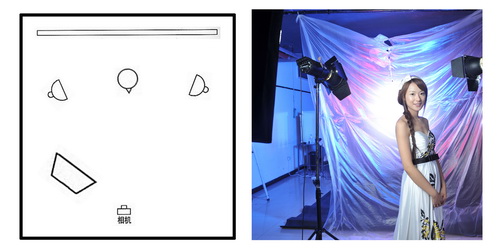
The use of this mixed light can make the picture produce a dreamy color feeling. In specific operations, two flashes of normal color temperature and a reflector are arranged in front of and on the side of the character. The dark part of the character uses color lights of different color temperatures as auxiliary light to change the color of part of the character’s skin color to produce the effect of ambient light.
As shown in the figure below, the blue light source is used as the auxiliary light to highlight the outline of the character. The blue auxiliary light can also illuminate the background so that the character and the background color are integrated and unified. The picture effects give people the feeling of dream, illusion, and movement. This lighting method can be applied to fashion, dreamy and other styles of shooting.

Precautions:

First, when arranging the light, pay attention to the reasonable control of the auxiliary color light intensity. Too strong will affect the subject’s skin tone. Too weak will have no effect. Comparing the following figure, it can be seen that if the blue light source is too strong, the skin color of the character will become gray or even abnormal. This would not meet the model’s normal aesthetic requirements.

Second, in the choice of white balance, we generally choose a white balance that is consistent with the color temperature of the main light to ensure that the main skin color of the person is restored to normal.

Normal CCT main light + low & high CCT auxiliary light

Main light is normal color temperature (flash) + auxiliary light low color temperature (red light) + auxiliary light high color temperature (blue light)

Use a flash with a normal color temperature as the main light, and a red light source and a blue light source as an auxiliary light to form a warm and cold change on the figure. Both colored lights hit the model’s face and body while illuminating the background. The picture is more varied, and the overall feeling is fashionable and jumping.

As shown in the figure below, the red light source is the side backlight, which outlines the body line of the person being photographed, and the dark part of the person uses a blue light source. On the front is a soft box with reflector as the main light source for the main body of the character to ensure that part of the character’s skin tone is restored to normal.

Precautions:

First, photographers often use this method of mixing light to shoot dynamic and fashionable shooting styles. People who are suitable for shooting can express lively and fashionable feelings as much as possible.

Second, pay attention to the strength and weakness control of the cold and warm when shooting, any color temperature of the light source is too strong will destroy the overall feeling of the picture.

Third, don’t ignore the frontal flash with normal color temperature, otherwise the color light will completely change the skin color of the person. Then the color change is too weird not only can’t produce the aesthetic effect, but also difficult for the model to accept.

ii. Mixed use of lamps with different color temperatures

When shooting with mixed light, unused lamps will produce different color temperature effects, such as warmer tones for quartz lamps and cooler tones for fluorescent lamps. The combination of different lamps will produce different picture effects.

The mixing of continuous light source and flash is a very common method of mixing light. The color temperature of the continuous light source is low, and the light source of the flash is high. Combining the two, the color changes in the shots are very subtle.
Under normal circumstances, we will use a weaker continuous light source as the main light and a brighter flash as an auxiliary. In this way, it will be easier for us to control the light ratio and depth of field. The following figure shows the effect of using continuous light as the main light and softbox flash as the auxiliary light. The flash used as auxiliary light can directly shine on the subject according to the actual situation, or indirectly shine on the subject through the reflection of the wall or reflector. The latter method produces a softer picture with more detailed and richer levels. But the clarity and sharpness are slightly weaker than directly hitting the subject.
(3) The use of mixed light from different light sources

From the perspective of physics, an object that can emit electromagnetic waves in a certain wavelength range (including invisible light such as visible light and ultraviolet light, infrared light, and X-ray) usually refers to the one that can emit light by itself, which is light source as we call it, or a luminous body. For example, the sun, stars, lamps, and burning matter are all light sources.

In portrait photography, our most common light source refers to artificial light: flash, tungsten lamp, etc. Outdoor natural light: sunlight, moonlight, etc. There are many forms of mixed light from different light sources. Here we mainly analyze the mixed light of two representative light sources used indoors.

i. Natural light source + continuous light source

We can take full advantage of the sunlight coming in through the windows and doors for shooting, and then assist artificial light to fill the light. Such as: natural light source + continuous light source, the light quality of continuous light is relatively soft. This is conducive to the embodiment of the level and color of the dark part of the character. And it will blend with the characters and the atmosphere of the scene.
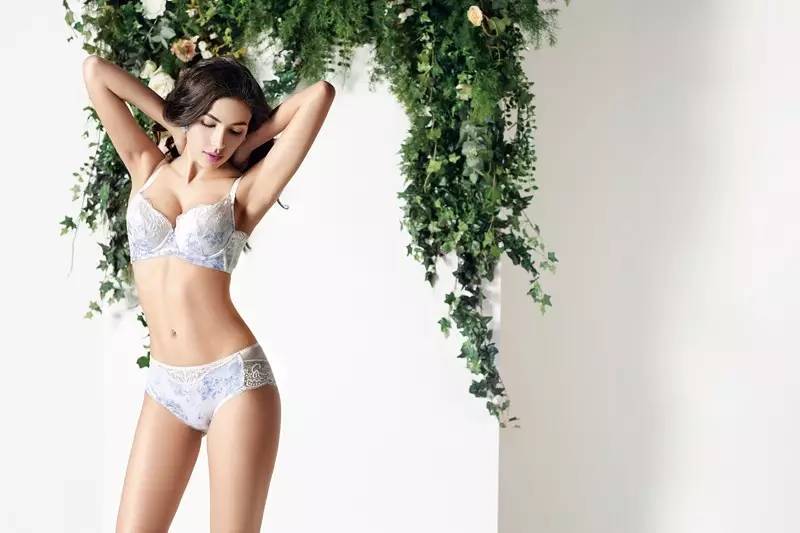
As shown in the figure below, the main character uses outdoor sunlight as the main light. And photographer use the quartz lamp as the auxiliary light. The picture is more integrated and natural. Highlight the environmental atmosphere of the picture, and have a certain expression of space and time.
This mixed-light shooting method is more suitable for expressing aesthetic, elegant, and noble subjects. And it reflects the inner temperament of the main character. Not suitable for character styles that express fashion and dynamics.

Precautions:

First, pay attention to the reasonable control of the distance between the quartz lamp and the person in the actual shooting. If the distance is too far, it will not play the role of supplementary light. Quartz lamp and natural light source should cooperate with each other, otherwise, the overall contrast is likely to be too large. So that the picture does not have a sense of hierarchy.
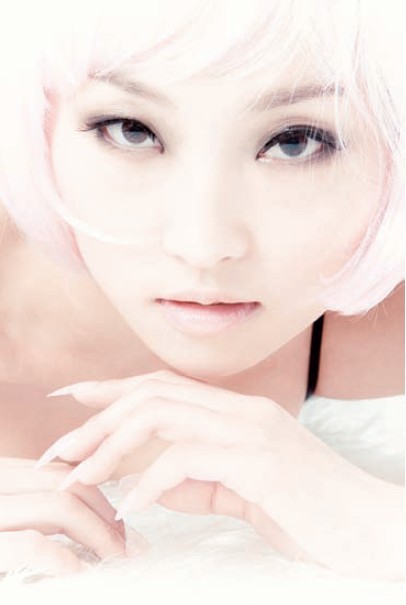
Second, if the outdoor sunlight is too strong, we can use translucent curtains to block or soften it. This can reduce the intensity of sunlight and make the light softer.

Third, because the natural light and continuous light of the windows are weak. It is best to use a tripod when shooting, so as to avoid slow speed or large aperture. And the camera shakes the picture during shooting.

ii. Natural light source + flash

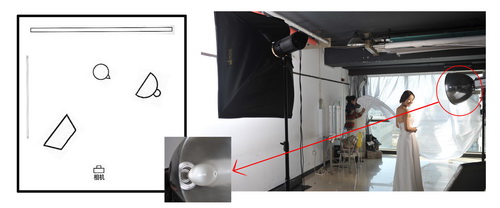
Use natural light with flash. The flash is brighter and harder, so we generally choose to use a soft box. This can not only play the role of supplementing light to the character as a whole, but also play the effect of emphasizing the subject’s texture.

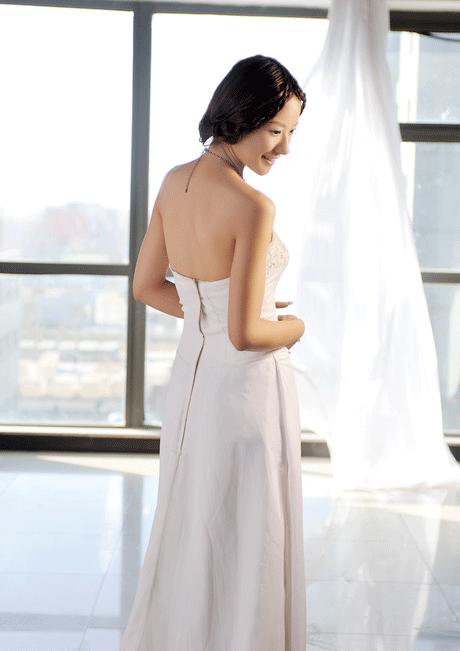
As shown in the figure below, the photographer used thesunlight as the backlight and ambient light by the window. And used the soft flash to illuminate the face of the person. The use of flash in such an environment will make the light of the picture feel natural and soft when the subject is exposed to normal conditions. This mixed lighting method can improve the clarity and sharpness of the picture, and make the picture more layered.

Precautions:

First, pay attention to the intensity setting of the flash and the distance between the flash and the subject in the actual shooting. Otherwise it is easy to cause the picture to overexpose too much and reflect the natural light effect that does not appear on the scene.

Second, pay attention to the angle of natural light outside the window. Too much direct natural light can easily cause people’s eyes to not open, making the subject’s facial expressions unnatural and inconsistent with the overall picture.

Pay attention to the time period when using natural light and artificial light in combination. Generally we will choose a few hours before and after noon, because this is the best time. At this time, the sunlight is the strongest time of the day. And the brightness is high and the brightness is easier to control. Too early or too late, the light will gradually weaken, not enough lighting intensity, no effect.

Categories
Studio Lights Education

The Use of Mixed Light in Portrait Photography_Part I

1. The Concept and Characteristics of Mixed Light

The changing use of light in portrait photography is very important. Among them, the use of mixed light is a more individual lighting method. The so-called mixed light is the mixed use of two or more different attributes and different properties of light. The mixed light in portrait photography has the characteristics of large changes, strong visual effects, and difficult to control. Here we will discuss how to use mixed light to shoot portraits.
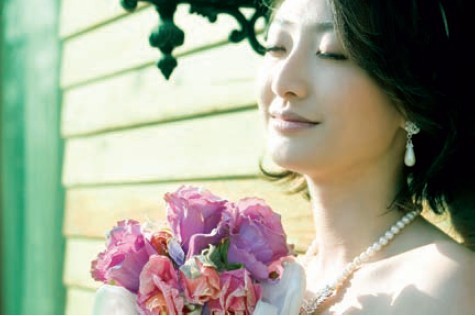
2. Specific Lighting Method of Mixed Light

From different perspectives, we can basically generalize mixed light into three forms, etc.: One is mixed light with different light qualities. The second is mixed light with different color temperatures. The third is mixed light without a light source.

(1) The use of mixed light of different light quality

Light quality includes hard light, concentrated light, soft light, scattered light, etc. The mixed use of light of different light qualities will produce different textures and levels of the main character in the picture, which has a visual impact.

i. Hard light (main light) + soft light

It uses hard light as the main light to illuminate the subject, while using soft light to increase the level and detail of the picture as the auxiliary light. Hard light is used as the main light, so that the character’s three-dimensional sense and texture will be prominently displayed. Soft light is the auxiliary light, which will make the dark parts of the characters distinct and moderately contrasted.
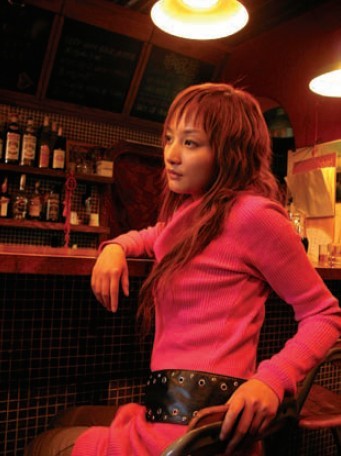
Both soft and hard, the effect of the picture is obvious, and the primary and secondary are distinct. The lighting method that combines hard light and soft light is widely used in portrait photography. Since hard light is used as the main light source, the overall feeling of light will be more three-dimensional, which is suitable for shooting some more fashionable, dynamic, beautiful and European-style shooting styles.
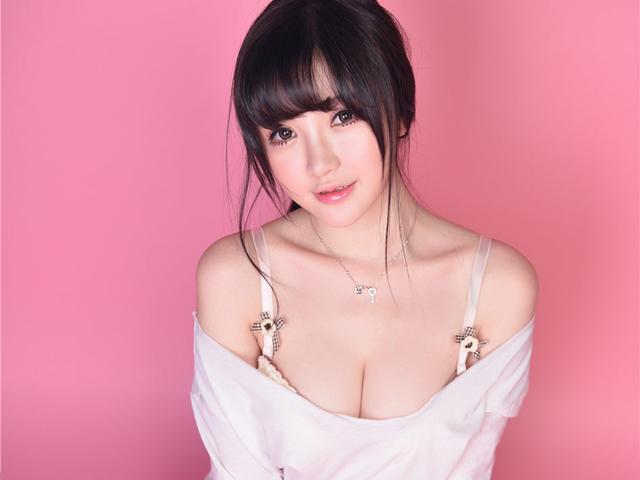
Precautions:

First, pay attention to the contrast between the two light sources when shooting. Make full use of the distance between the soft light and the characters to control the level, detail and contrast of the dark and bright parts of the picture.

Second, pay attention to the angle and projection direction and shape of the hard light on the face of the character, so as not to damage the structure of the character.

Third, pay attention to the direction of the hard light to avoid large-area projections on the background and destroy the pattern and effect of the background. You can use multiple soft lights for enveloping fill light.

ii. Soft light (main light) + hard light

Using soft light as the main light to illuminate the subject, the character’s face is soft, the level is delicate, and the contrast is soft, which is conducive to the aesthetic expression of the skin. At the same time, hard light is used as the contour light to outline the body lines of the characters, both soft and hard, and the picture effect is three-dimensional and beautiful. The lighting method with soft light as the main light and hard light as the auxiliary light is more suitable for beautiful, three-dimensional, and women who want to highlight the curves of the figure.

When shooting, soft light is the main method, and hard light can be adjusted according to the actual situation. If hard light hits the model’s head, it can be used as a headlight. The hard light hitting the edge of the character’s back can be used as a contour light to reflect the beauty of the character’s lines. It can be used as ambient light to render and set off the main character on the background.

Precautions:

First, pay attention to the light ratio of soft light and hard light in the picture. If the area of ​​hard light is too large or too strong, it will snatch the main body and destroy the body.

Second, too much soft light will reduce the sharpness and texture of the picture. The proportion between the two should be used appropriately to make the overall effect of the picture more harmonious and natural.

Third, we can use multiple hard lights and soft lights together. For example, use two hard lights to play double contour light, or one as a contour light, one as a head light, and so on. But to distinguish between primary and secondary, it can’t be too messy.

iii. Hard light (main light) + reflected light

A mixed light distribution method with hard light as the main light and reflected light as the auxiliary light. Hard light plays the role of overall plasticity, and reflected light plays the role of adding layers of rich details. The overall effect is more three-dimensional, with a strong sense of shaping. It is more suitable for European style, classical painting style, or when you want to highlight a special artistic conception of the picture. The three-dimensional effect of the picture is slightly stronger than the three-dimensional effect of hard light and soft light

Precautions:

First, the reflected light as auxiliary light belongs to scattered light. When shooting, the distance and angle of the reflection should be adjusted repeatedly according to the needs of the picture. When the reflected light is strong, it can be closer to the dark part of the subject, and when the reflected light is weak, it can be farther away from the dark part of the subject, so as to master the contrast of the picture.

Second, adjust the angle of the reflected light according to the location of the subject and the shooting light. Because the reflected light is weak and the sense of direction is not strong, it is not easy to observe directly. Some photographers ignore this problem, causing the reflected light to be inaccurate and not reflecting to the dark part of the character, only the form does not play a practical role.

Third, the choice of reflection tools of different materials can adjust and control the amount of reflected light. For example, foam reflectors, silver reflectors, golden reflectors and even white walls can all be used as light-reflecting materials. However, the reflection intensity of each material is different.

iv. Condensing light (main light) + soft light

Condensed light is a set of mixed light that matches the main light and soft light. The lighting effect of the spotlight is that the focus is prominent and the light is relatively large. The light ratio and contrast between the two can be adjusted appropriately by using soft light. It has the function of emphasizing key points, distinguishing primary and secondary, and outstanding performance.

Spotlight

Spotlight also belongs to hard lighting. The main difference between it and hard light is that the spotlight has strong directivity, small illuminated area and large contrast. It can emphasize the part of the main character. And the soft box with auxiliary light can increase the shooting details of the dark part, making the picture richer. The light of the picture is simple and not messy. You can use this mixed light lighting method to emphasize the subject you want to express in the picture.

Precautions:

First, the brightness of the spotlight is relatively strong. It is necessary to avoid overexposure of local highlights or underexposure of dark parts. That will result in lack of gradation and detail in the picture. Therefore, it is important to control the intensity of soft light. If the soft light is too strong, there will be no condensing effect. The soft light is too weak and the contrast is too large, and there is no level, and the aesthetic effect of the picture is lost. And it is difficult for the model to accept it.

Second, the combination of spotlight and soft light will highlight the local texture of the picture and enhance the sharpness of the picture. Therefore, those with too rough skin are not suitable for use.

Third, the spotlight has a small irradiation area, so the distance between the light and the person should be controlled reasonably to get a suitable irradiation range.

(2) Application of Mixed Light with Different Color Temperature

In portrait photography, the color temperature change of the light can be basically divided into two kinds. One is the artificial use of color plates to change the color temperature of the light. One is the color temperature of the luminous body itself. Therefore, the picture effect achieved in the use of mixed light is also different. The characteristic of the mixed light combination of different color temperature is that the effect of different color changes will appear in the picture. Key points such as cold and warm color changes, complementary color changes, etc., are used to render the atmosphere of the picture.

i. Mixed light using different color films

The mixed light of different color chips is to use color filters of different colors in front of the light to artificially change the color temperature of the light source and then cross-mix.

Normal CCT main light + Low CCT background light

The main light is normal color temperature (flash) + background low color temperature (red light)

The flash is used as the main light (color temperature is about 5400K). And the background uses red light (color temperature is about 3200W) as the background ambient light. The rendering atmosphere highlights the color changes of the picture, which is dramatic.

This mixed lighting method with different color temperatures is suitable for taking pictures of different tones, such as warm and cold tones. Because the main light of illuminating characters is normal color temperature, the color reproduction of characters is normal. In this way, weird colors due to different color temperatures are avoided, which meets the aesthetic requirements of ordinary people.

Precautions:

First, when arranging the light position, pay attention to that the red light in the background should directly hit the background cloth, not on the person’s body. The main body of the picture is separated from the background, making the whole picture more three-dimensional and spatial.

Second, reasonably control the light ratio between the main light and the background red light. If the main light is too strong, the red light will fade or even disappear. And the effect of the mixed light will lose consequently.

Normal CCT main light + Double background light

The main light is normal color temperature (flash) + background low color temperature (red light) + background high color temperature (blue light)

The main light is the flash, and the background light has a contrasting change of cold and warm colors, highlighting the personality and fashion. And the decoration is strong.

As shown in the figure below, use a soft light flash with a normal color temperature to illuminate the character to ensure the normal restoration of the character’s skin tone. Photographers often use lights with red (low color temperature) and blue (high color temperature) on the left and right of the background. The contrast effect of cold and warm appeared in the whole picture. The fluttering plastic interlining makes the picture not only fashionable, but also three-dimensional and dynamic. The overall feeling of the picture is not rigid and rhythmic.

(To Be Continued)

Categories
Studio Lights Education

The Secret to Successful Shooting

Real Portrait Photography Techniques

For photographers, portraits are one of the most frequently encountered shooting subjects. In addition to being very attractive in itself, it is also the most common in life. People are always the subject in front of the camera, but it is not easy to shoot portraits that are both pleasing to the eye and reflect a certain connotation. Here are some typical scenes in life to help you master the main points of portrait photography.

How to Shoot Shallow Depth-of-field Portraits with Bokeh

When expressing people, especially female portraits, in order to highlight the soft lines and facial features of women, it is often necessary to use shallow depth of field to highlight the characters. The result of this is that the main character is very clear and vivid on the paper, but the background behind it will be blurred.

To shoot such an effect, there are three ways to obtain it: a large aperture, the subject is far from the background, and a long focal length.

1. Large aperture

The relationship between aperture and depth of field is inversely proportional, that is, the smaller the aperture, the longer the depth of field, and the larger the aperture, the shallower the depth of field. Professional photographers basically use a large aperture of at least F2.8 to shoot such an effect. It should be noted that the image quality of any camera lens will be different when different sizes of apertures are used for shooting. When using the maximum aperture, almost all the imaging area of the lens is used. Due to the processing of optical glass and the design and manufacture of the lens, the image quality at the center of the lens is significantly higher than the quality at the edge of the lens.

Therefore, at the maximum aperture, the image quality tends to be reduced. Our suggestion is to lower the maximum aperture by 1 to 2 stops for shooting. For example, a 50/1.4 lens can be used for shooting with f1.8 or f2.0.

2. Long focal length

Under the premise of the same aperture and the same shooting distance, the relationship between the focal length of the lens and the depth of field is also inversely proportional. The longer the focal length of the lens, the smaller the viewing angle, the larger the image, and the highly compressed scene space. Therefore, a long focal length lens is easier to take a shallow depth of field effect. When using a long focal length, you need to pay special attention to the safety shutter. The safety shutter speed is the reciprocal of the focal length, that is, the safety shutter speed = 1/focal length.

For example, if you use a 50mm focal length to shoot on a Canon EOS 30D, then 1/50s is a safety shutter. In other words, a shutter speed above 1/50s can guarantee you a clear picture effect. If a focal length of 200mm is used, it will take more than 1/200s to ensure the stability of shooting. Below this speed, the shaking of the hand may cause the photo to be taken falsely.

In addition, the middle focal lengths of 85mm, 100mm, 135mm are generally selected for portraits. The perspective in the middle focal length is not exaggerated (to avoid over-protruding the nose of the character), and the picture is not distorted. And when shooting portraits, the distance is appropriate to facilitate communication with photographers and models. The middle focal length can well express the figure, facial features, facial expressions and skin texture.

3. Shooting distance

Under the premise that the aperture and focal length of the lens remain the same, the distance between the subject and the camera is different, and its depth of field is also different. The longer the shooting distance, the longer the depth of field and the greater the range of clarity. The closer the shooting distance, the shallower the depth of field and the smaller the clear range. At the same time, the further away the subject is from the background, the more blurred the background will be.

4. Light selection

If you shoot portraits under direct sunlight, the shadows formed will be very obvious. Therefore, try to choose morning, afternoon or cloudy, and shoot in soft natural light. If the light is too strong, use a large-aperture lens to avoid direct light and shoot in an environment where the light is more uniform. If you are shooting against the light, you need to use a reflector or flash to fill up the face of the person.

How ​​to Take Close-up Portraits

Portrait close-ups are widely used in fashion magazines and businesses, and are a popular type of portrait photography. We should note the following points when taking close-up portraits.

1. Cut boldly

The more parts are included in the photo, the more elements need to be controlled and the more difficult the composition. Bold cutting is a good solution! Every part of a person can become the subject, of course, the most common is to highlight the eyes and lips.

2. Create paintings

To shoot close-up portraits, you must pursue the feel of the picture. We can use makeup and props as part of the composition to create the atmosphere of the entire picture.

3. Eye contact

People’s eyes are often the most important part of the picture. In most portrait close-up shots, the model looks at the lens, which naturally causes the viewer to “communication” with the subject. This special “directivity” can sometimes get special effects if used properly.

When the model’s eyes are not looking into the lens, it is necessary to reserve some imagination space in the direction of the person’s line of sight, so that the gaze becomes an extension of the composition.

4. Mobilize the emotions of the model

The average photography enthusiast does not have too many opportunities to shoot professional models. Therefore, it is very important to mobilize the emotions of ordinary subjects. In order to increase the success rate, you can tell the subject before the shoot what you want to take a photo of what it feels like, and communicate with her more. In addition, when shooting, you must continue to encourage the subject and keep her focus on your lens. The continuous shooting made her feel that the shooting process was very happy and smooth. Even if she does not perform well during the shooting process, you must continue your shooting and encourage her to make her performance better and better.

5. Pay attention to beauty details

When shooting, you also need to pay attention to the characteristics of the model and the details of deportment. If the person’s face is wide, try to shoot from the side as much as possible. If the chin is longer, you can look down a little and shoot. If she has big beautiful eyes, then you might as well take close-ups that express the eyes.

In terms of overall posture, you also need to pay attention to the following basic points.

1) head and body

The character’s head and body should not become a straight line. When the front of the body is facing the lens, the model should slightly turn or tilt the head to the sides. When the head is facing the camera, the character’s body should be rotated a bit, so that the film will be very vivid.

2) legs and arms

Avoid parallel legs and arms. The specific method is to let the model put the center of gravity on one leg, and the other leg can be bent appropriately. Model can bend the arms all the way or form a certain angle. In this way, the photos will be very dynamic.

3) Sitting Posture

If the posture of the subject is sitting, arrange to sit in front of the chair as much as possible, and avoid sitting the whole body in the chair. In this way, it is easy for the subject to maintain a good posture.

4) hands and shoulders

The gestures of hands and shoulders are very important in portrait photography. Pay attention to the integrity of your hands when shooting, and don’t make them feel deformed, broken, or incomplete. For example, when you put your hands on your hips or put them in your pockets, you should expose some of your fingers to avoid the impression of being cut off. Keep your arms parallel to your shoulders, as this will make you feel rigid and mechanical. When shooting, you can make the subject’s shoulders one high and one low, or one behind the other. The model can place the hands on different parts of the body easily and naturally.

5) Hair Style

Professional fashion photography often needs a professional hair stylist. In fact, in ordinary shooting, let the subject’s hair naturally float to the face and in front of the eyes. And you may also obtain unexpected effects. It should be noted that, under normal circumstances, do not let your hair cover your eyes.

How to Shoot Portraits in Low Light Environment

Bars, cafes, indoor natural light, streets at dusk and other low-light environments often have interlaced light and shadow, blurred lights, and richer levels of light and shadow. For many portrait photographers, it can be said to be full of charm and challenges. When taking photos in such a low-light environment, the most prone problem is the blurring of the photos caused by the instability of the handheld. In fact, as long as you pay attention to choosing the right lens and master some shooting methods and techniques, you can also take professional photos in low-light environments.

1. equipment preparation

To take photos in low-light environments, it is best to choose a large aperture lens with f1.4~f2.8 and focal length between 35mm~50mm. Large apertures can achieve higher shutter speeds in poorly lit rooms. With a medium focal length, not only can you take close-up shots. But you can also take full-body shots, and the shooting method is more flexible.

If conditions permit, you can choose cameras and lenses with body anti-shake performance. For example, Sony α350 and α200 both have body anti-shake function. This can reduce blurring caused by camera shake. The anti-shake system is built into the camera body, allowing you to use a shutter speed 3-4 stops lower than theoretically. This means that you can enjoy the freedom of direct handheld shooting under conditions that normally require a flash or a tripod to shoot.

2. Use auxiliary tools to stabilize the camera

Large aperture lens, anti-shake body, and anti-shake lens are all for improving the stability of handheld shooting. If environmental conditions permit, you can also use tripods, desktops, railings, walls and other fixtures to support and stabilize the body and the camera.

3. Camera settings

In low-light environments, in addition to using a large-aperture lens to ensure sufficient light input, increasing the ISO can also achieve a faster shutter speed. Although the ISO setting of a digital SLR camera can reach 1600 or even 3200, noise and noise will be generated on the screen at a high ISO setting. Different brands and models of DSLR have different image quality performance under high ISO settings. We should testit to control the ISO setting within a tolerable range of picture quality. On the premise of ensuring a safe shutter speed, try to set a relatively low ISO value.

4. Light selection

In low-light environments, the light distribution is not even, and portrait photography needs to express facial expressions and demeanor well. Therefore, it is suitable to choose front light or side light, so that there is relatively sufficient light on the face of the character. And photographers will require the model required to keep still when shooting. If conditions permit, you can also use reflectors to fill the face with light. That will make the portrait effect more prominent.

5. Accurate metering

When shooting in low-light environments, accurate metering is particularly important. Because the photos taken under high ISO settings, if we brighten them later, the noise in the dark parts will be displayed very obviously. That will affect the picture quality. Therefore, we can set the camera to spot metering. Approach the model, fill the viewfinder with a uniformly lit area on the face of the person. And half-press the shutter to measure a set of aperture and shutter combinations. Then set the shooting mode to manual mode (M). And set the parameters according to the previously measured aperture and shutter values. So that you can ensure accurate exposure of people’s faces.

6. Focus

For portraits, photographwes usually use the central focus point for single-point focus, focusing on the model’s eyes. And then press the shutter button halfway to recompose the shot. In a low light environment, sometimes because the light of the subject is too dark and the contrast is too weak, it may not be able to achieve focus or focus. At this time, you need to use manual focus or use a lens with full-time manual function to manually adjust at any time.

Categories
Studio Lights Education

Indoor and Outdoor Portrait Shooting Skills

1. Choose a Suitable Shooting Location

When shooting beautiful women indoors, we can give priority to shooting near the window, using outdoor natural light as the main light source. Because on the windows, especially windows facing north, there will be very soft scattered light. If the window is dusty, the light will be softer. When the light projected into the window is direct light, the photographer can also draw a thin layer of curtains to relieve the intensity of the light.

Near the window, the main character can sit or stand. But it is necessary to control the distance between the person and the window, and at the same time make sure that the person being photographed can get light from outside the window. Adjust the shooting direction and angle. Try to let the model’s face and limbs receive even light. If there is too much contrast between light and dark, you can use a reflector to fill in the light to increase the brightness of the shadow area.

2. Use of Indoor Light

Indoor lighting includes the following 4 types.

1) Main light:

The main light is the preferred light that determines the lighting pattern of the subject, while other lights only play an auxiliary role. The main light used in modern studios is usually emitted by a soft light box. The exposure is determined based on the main light when shooting.

2) Auxiliary light:

As the name suggests, its role is to supplement the lighting of the shadow area and make the shadow lighter. In fact, the auxiliary light can be the same soft light box as the main light, and its light ratio to the main light can be controlled by adjusting the lighting distance or output power.

3) Backlight:

The background light can separate the subject from the background, making the lighting more three-dimensional and spatial. The use of background light should take care of the background color, distance and lighting angle. If you don’t handle it well, you will be self-defeating. Therefore, it is necessary to repeatedly adjust the background light to be just right. Therefore, in order to illuminate the background uniformly, two or more lamps are required.

4) Modification light:

Modification light is also called decorative light and effect light. It is used to highlight the texture of a certain detail of the object in order to achieve the perfect shape, such as eye light, hairstyle light, clothing light, etc. The lighting position of the modification light is determined according to the needs.

3. Use External Flash

The natural light of the shooting scene will change at any time. If the light is insufficient, in order to obtain the ideal exposure effect, the photographer can use an external flash to fill in the light. The photographer chooses to use the on-camera flash or off-camera flash according to the actual situation. Off-camera flash can better control the direction of the flash, and the fill light is more flexible, so many photographers like it.

In portrait photography, the flash is not only used to supplement the light, but also has the function of neutralizing the light, shaping the character and highlighting the characteristics of the character. The flash is often used to balance the brightness of the picture when there is sufficient light.

4. Use Ambient Light

If the light in the shooting environment meets the shooting needs or can obtain photos of people with different aesthetics, the photographer can observe the lighting settings of the venue, so as to make full use of the scene light to get a more realistic picture of people. But these scenes are usually very dark. We can use a tripod to shoot, which can effectively prevent camera shake. Secondly, we can appropriately increase the sensitivity or use reflectors to fill light.

5. Reasonable Composition and Props

When shooting, the composition method will change with the change of the character’s body posture. When shooting indoor beauties, the lines presented by the characters are even more charming. Photographers can use lines to express the unique charm of women. Soft and smooth curves can better show the feminine and sexy body of women. The diagonal line composition has a sense of visual instability in the picture, can enhance the sense of movement, and at the same time make the female figure look more slender.

Props can add interest to the entire scene. It can strengthen the theme of the portrait, highlight the beauty, set off the atmosphere of the picture, and better set off the character and mental state of the character. Choosing appropriate props and characters to match each other is a common technique in portrait photography.

Commonly Used Equipment for Outdoor Portrait Shooting

There are many styles of outdoor portrait photography. The more popular is the type with small depth of field and blurred background. Therefore, when shooting portraits, a lens with a large aperture is usually used to achieve the purpose of blurring the background and highlighting the subject.

The light board is a more commonly used photographic auxiliary tool. It can fill light, eliminate shadows, highlight eyesight, etc. The effects of photos taken with the use of reflectors to fill light are mostly different. If there is no reflector, the photographer can also use white clothes or other reflective objects instead.

A tripod is also a more commonly used tool. When the light is darker and the shutter is slow, the success rate of shooting with a tripod is much higher than without a tripod.

In the choice of focal length, the focal length of 50mm-135mm is usually used for shooting. Portraits taken with this focal length have less distortion and normal perspective. And the effect is more natural and real, in line with people’s visual habits.

But under certain circumstances, you can also use a telephoto lens for shooting. Selecting a telephoto lens for shooting can better blur the background, help highlight the subject, and make the picture more concise and clear. But it should be noted that the background blur of the telephoto lens may be slightly excessive, so that the picture looks unnatural.

In addition, wide-angle lenses are also favored by many photographers when shooting portraits. Using a wide-angle lens can better collect more picture elements, enhance the perspective of the picture. And thus it reflects the environment and enhance the atmosphere. But when shooting, try to avoid the excessive perspective distortion caused by the long-angle lens to the person, which causes the person’s face to be deformed.