Categories
Studio Lights Education

Photography Lighting Experience _ Part III

15. Types of Outdoor Studio Lights

Outdoor studio lights are the lights used when shooting portraits on location. Generally can be divided into: external battery flash, lithium battery flash, hot shoe flash and ring flash, etc. In terms of power, it is divided into: high-power flash and low-power flash. From the light source, it is divided into flash and continuous light.
16. Intensity Selection of Outdoor Studio Lights

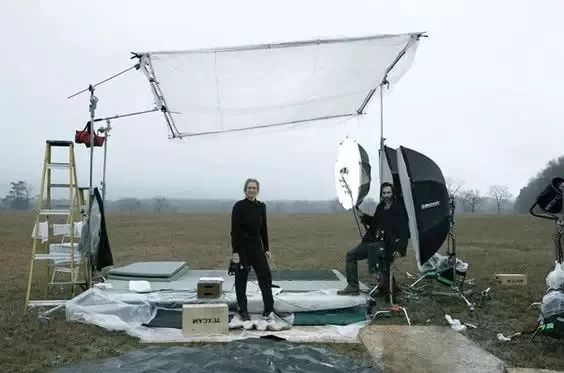
The use of outdoor studio lighting combined with the shooting settings of the camera can create a peculiar artistic effect that cannot be achieved by shooting with pure natural light. The use of outdoor studio lights in outdoor scenes is basically to achieve the purpose of supplementing light, suppressing the environment or increasing contrast. It is often necessary to contend with the sunlight, so the intensity of the outdoor light must be slightly higher or very high. Therefore, it is necessary to buy a higher power outdoor light, such as: 600W, 1000W, 1200W, etc.
17. Power Supply of Outdoor Studio Lights

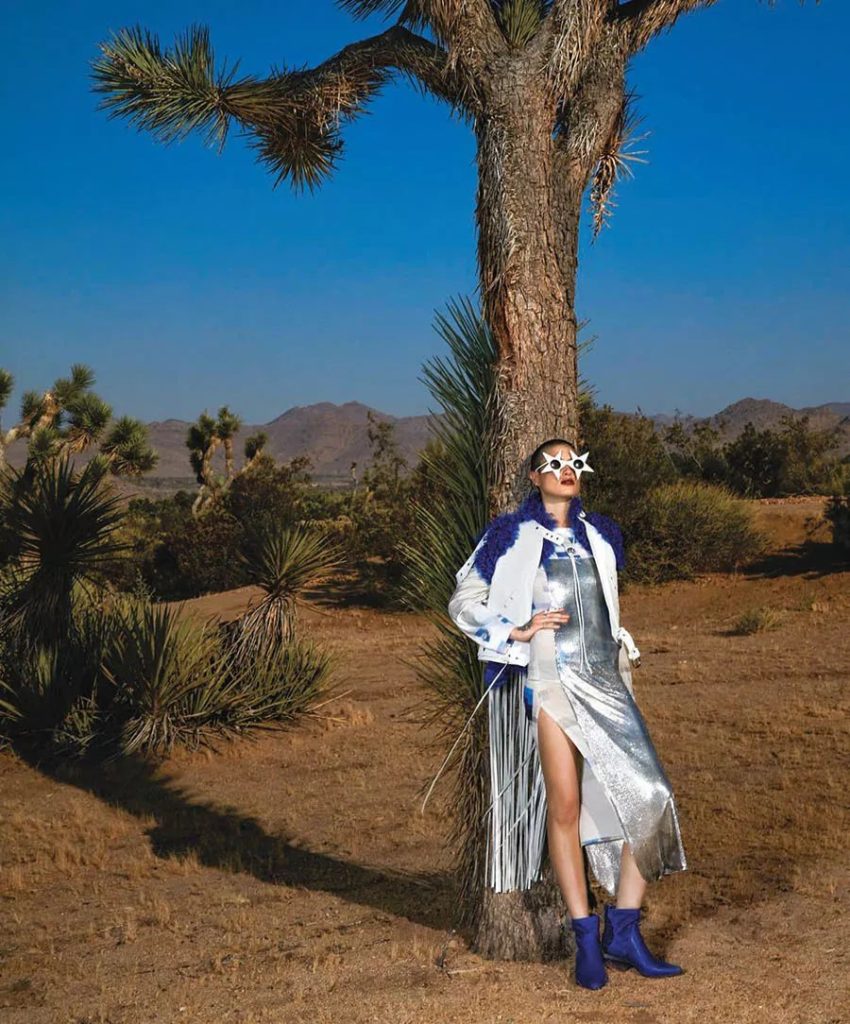
The battery of the outdoor studio light can make the light recharge quickly

For outdoor portraits, outdoor studio lights are generally used as auxiliary lighting when there is no power supply.

According to different power supply methods, it can be divided into two categories:

(1) Battery type. This type of lamp is powered by a large battery that can be recharged. Because the capacity of a battery can store more electricity than a dry battery, it can work longer than a battery-based portable flashlight. But its disadvantage is that it is relatively heavy, and it needs a dedicated person to carry it when shooting outside for location.

(2) Lithium battery type. This type of flashlight has only been produced and used in recent years. Because it uses a lithium battery as a power source, it is compact and light, making it very suitable for carrying. Strong power storage capacity and longer duration.

18. Portable Soft Box

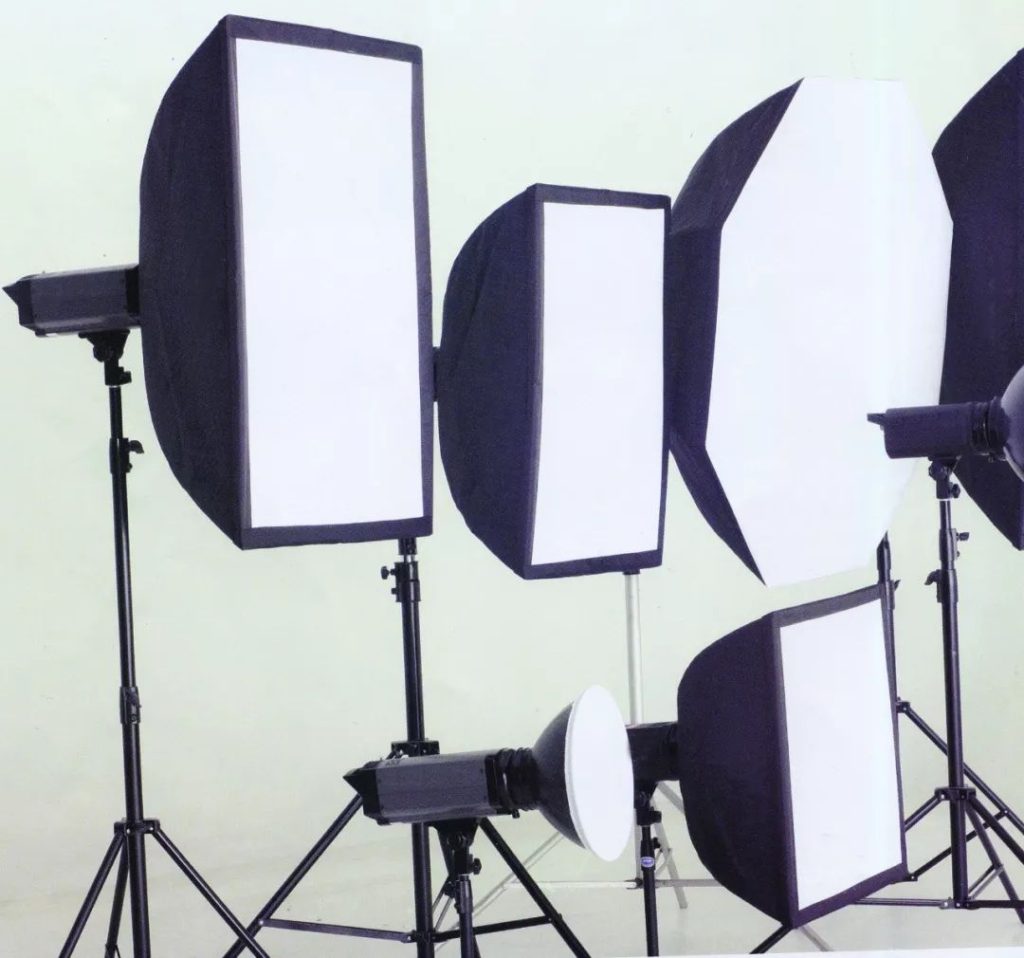
The portable soft box makes the outdoor studio light quickly soften

The outdoor studio has strong lighting and a clear sense of direction. This kind of light effect will make the person photographed have a greater contrast. Therefore, a portable softbox for outdoor shooting has become indispensable. It can soften the light, with less contrast, rich layers, and convenient, fast and easy to carry on location.
19. Trigger the Flashing of Outdoor studio Lights

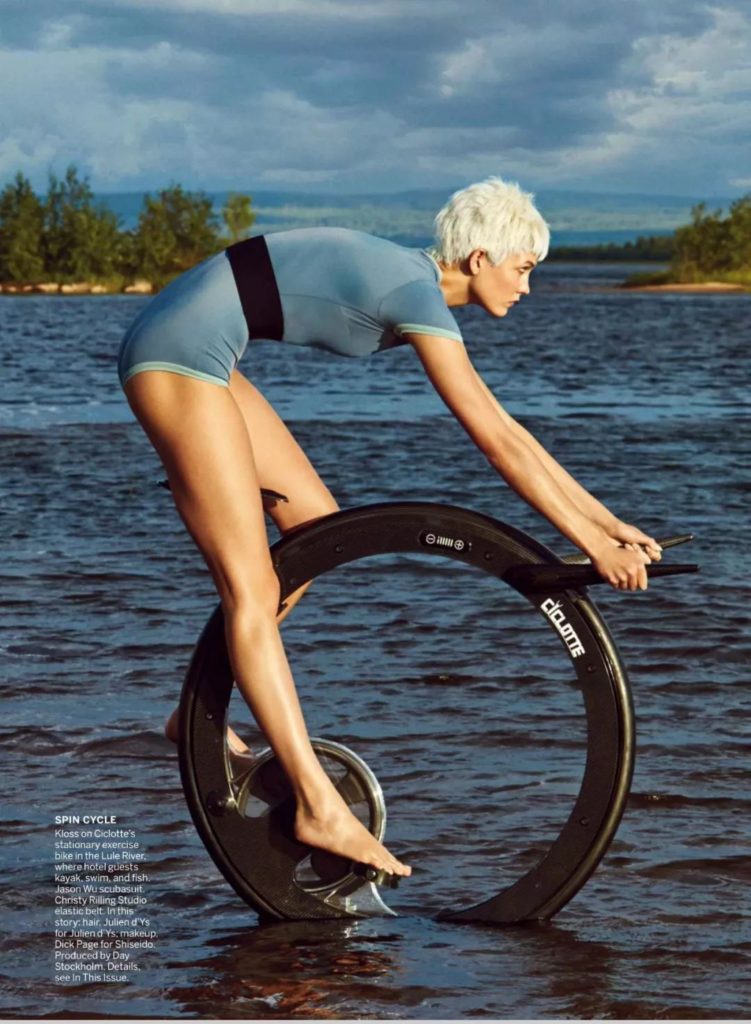
The use of outdoor studio lights first involves the issue of flash synchronization. In professional equipment stores, there will be flash triggers selling studio lights, and now they can be used in general indoor and outdoor scenes. The triggers used in location have different trigger ranges, ranging from tens of meters to hundreds of meters. There is also the function of triggering multiple outdoor lights at the same time, such as one with two or one with three. Pay attention to check or spare the special battery of the flash trigger before every outdoor shooting, so as to avoid depression and embarrassment caused by the dead battery in the location.

20. Combined Use of Outdoor Studio Lights

Generally, one outdoor studio light is used when shooting on location, but sometimes several outdoor lights can be used in combination according to the actual situation and subject needs. Such as: main light, auxiliary light, contour light, the combination of the three light effects can make the picture more refined.
21. Change the color temperature of outdoor studio lights

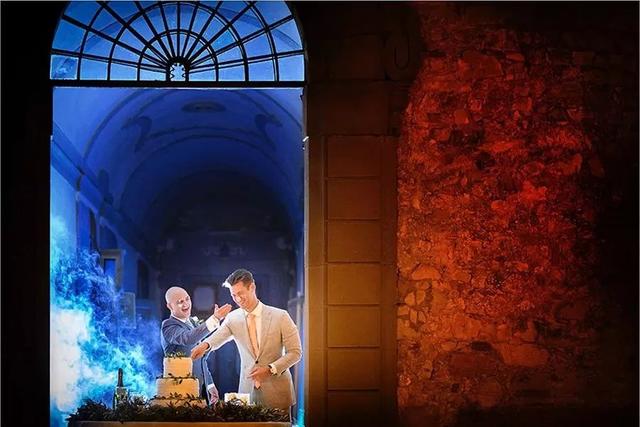
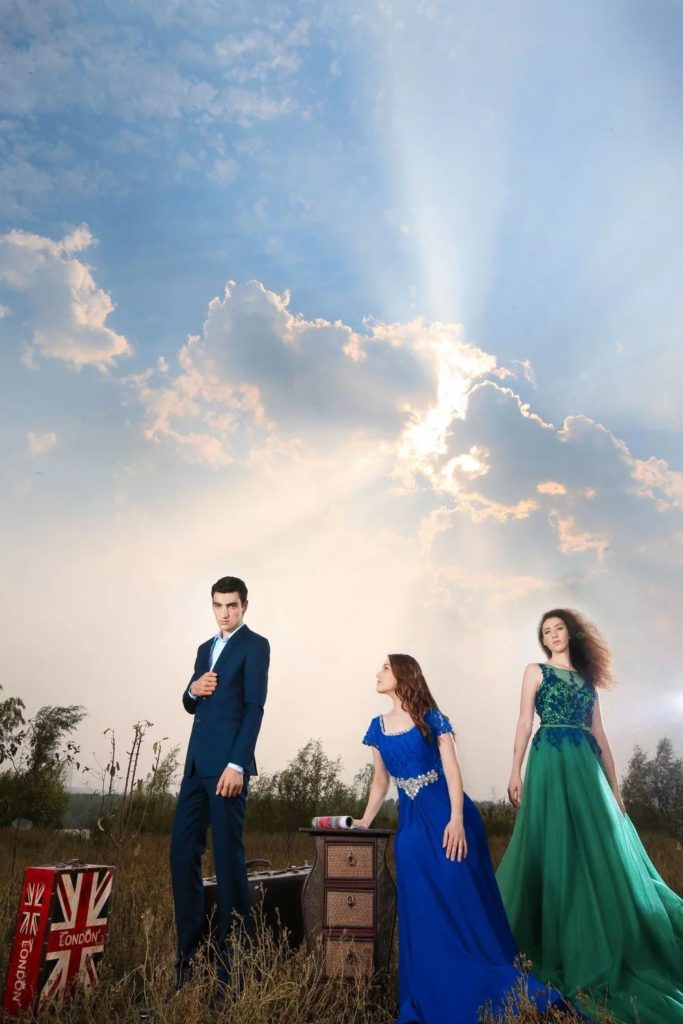
The normal color temperature of an outdoor flash is around 5600k. If you want to change the color during outdoor shooting, you can choose to change the color temperature of the lamp. The easiest way is to use a color chip in front of the lamp to directly change the color of the light source. You can also use the misaligned white balance to change. For example, set the white balance to incandescent lamp mode to use outdoor studio lights, so that the picture will appear blue-cyan.

22. Where is the outdoor studio light?

The light position of outdoor studio lights has always been puzzled by many photographers who use lights for the first time. The position of the light can basically be divided into: forward light, front side, front side, back side, backlight, top light, front top light and bottom light.

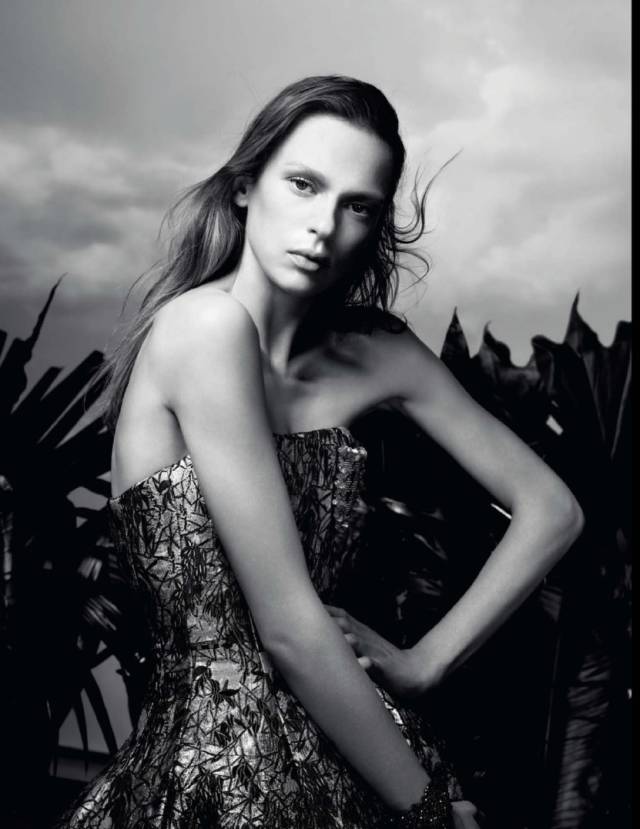
If the outdoor studio light is placed in the same direction as the camera, it is forward light. There will be a feeling that the light effect is too flat, a bit similar to the fool effect of the on-camera flash. Then, we generally put the outdoor studio light in the front direction of forty-five degrees in front of the model. Photographers use this direction a lot, but other positions are also available. And you need to choose according to different themes and subjects.
23. Use of outdoor studio lights for night scenes

High-power outdoor studio flash is not suitable for use at night, otherwise the background will be dark and without gradation. The high-power flash is suitable for use in the evening when the sky is still bright. In this way, the background can be darkened, the level of the environment can be maintained. And the characteristics of the night scene can be reflected.

At night, we can use a hot shoe flash with a soft umbrella or reflector. We can use a soft umbrella or reflector to reduce the intensity of the flash, so that we can better control the light ratio of the model to the background light. This is also a common method for shooting night portraits.

24. Outdoor studio lights darken the environment

When we shoot outdoor portraits, we often encounter excessive light ratios between the characters and the background environment, resulting in normal exposure of the model and overexposure of the background environment, or normal exposure of the background environment and underexposure of the model. Then, it needs to balance the light ratio between the model and the environment. So we use the external light to brighten the model and make the background exposure slightly underexposed. Darken the background environment to bring out the main character.

25. Outdoor studio lights enhance contrast

If the light is flat during outdoor shooting (such as cloudy, shadow, etc.), you can also use the external flash when shooting the model, and provide auxiliary lighting from the side of the camera lens at 45-90°. Improve the brightness of the side of the model, improve the light receiving situation, and enhance the three-dimensional sense of the model.
26 Outdoor studio lamp equalized light ratio

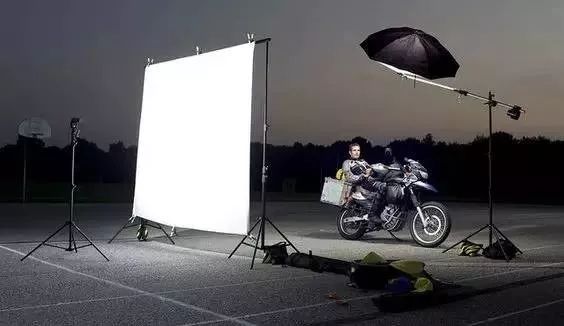
To shoot portraits on location under direct sunlight, use the external flash as the auxiliary light. And the purpose is basically the same as using a reflector. It is to weaken the excessive contrast between light and dark. So that the shadow surface of the subject has the appropriate tone and necessary levels, rather than eliminating the shadow. Therefore, it is also necessary to properly control the intensity of the external shooting flash to avoid excessively strong flashes and excessively brighten the shadows.

27. Backlit outdoor studio lights to create atmosphere

Backlight is the light shining from the back of the model towards the camera. In outdoor shooting, we can also use outdoor studio lights to artificially create backlighting effects. From the light ratio point of view, the model and the background are in a dark place. So the light ratio between light and dark is large, and the contrast is strong. From the perspective of light effects, backlighting produces contour light for opaque objects. Transmission light for transparent or semi-transparent objects. And flicker light for liquids or water surfaces.

28. Convenience of ring flashing light

The ring flash has the characteristics of uniform flashing, fast movement, convenient operation, uniform lighting, and suitable for capturing pictures. It is very suitable for outdoor lighting capture. The ring flash is a type of lamp with a ring-shaped light emitting tube directly mounted on the camera lens. The power is small, and photographers mostly equip it with effect lights. The light is uniform and there is no obvious projection. It can form a charming ring-shaped catch light in the model’s eyes, and is also suitable for shooting night portraits.
Categories
Studio Lights Education

Photography Lighting Experience _ Part II

9. Creation of Light and Shadow Atmosphere

The charm of light and shadow is endless. As a master said, using light means sculpting objects. Light and shadow is a magician, he can make the atmosphere of the picture be well expressed.

We can use the video lights to create the light and shadow changes of the picture according to the theme. Such as: Want a peaceful atmosphere or a world of images with interlaced light and shadow. When making light and shadow, the choice of light intensity is very important. If the light is too weak, the shadow is not obvious, so choose a lamp with a higher power. Secondly, some accessories should be used, such as the mottled light and shadow produced by the grille, the heavy light and shadow produced by the honeycomb, the soft light and shadow of the soft box, and so on. Finally, pay attention to the height of the lamp and the direction of projection, which will determine the direction of projection.

10. The Flash Can Get High-sharpness Pictures

The sharpness and clarity of photos are what we often require. The turbid and unclear pictures do not meet the requirements of photography under normal circumstances.

Then, we need to clarify the several conditions that determine the sharpness of the photo, namely, small aperture, stereo light, good imaging lens, high-pixel photosensitive material, and so on. Among them, the small aperture (a smaller aperture has a large depth of field and a long clear range), and the two points of the stereo light are related to the flash. When the light is illuminating from the side, the surface mechanism and texture of the subject can be expressed very well.

If we want to get a smaller aperture, then the flash must reach a certain intensity. Only in this way can we ensure that we close the aperture while ensuring adequate exposure. The different position changes of the flash can get different three-dimensional changes of the model, such as side light, front side light, side backlight, etc.

11. Pay Attention to the Temperature of the Tungsten Filament Lamp in the Continuous Light

Light that does not flash instantaneously, we call it continuous light. Among them, the tungsten filament lamp is the most typical. The light it emits is a kind of soft light, and the contrast between light and darkness caused on the model is small, and the projection is softer. The lighting area is large and the brightness is relatively uniform, which is suitable for uniform lighting of a large area. Tungsten filament lamps also produce relatively high temperatures during use, so be careful to avoid strong vibrations during use, and do not touch them to avoid danger.

12. Constant Lighting Makes it Easy for me to Control the Depth of Field

Although continuous light also has strong illumination brightness, it is still very weak compared with the flashing studio light. So when shooting indoors, if we want to get a smaller depth of field and blur the background environment, to a certain extent, we must first use a large aperture to shoot. A weaker continuous light can meet this requirement of ours.

13. The Color Temperature of Tungsten Light Will Make You Warm

The color temperature of light is different, the color presented is obviously different. The color temperature of a tungsten lamp is about 3200K. Under such light source illumination, the model will be biased towards the light source color. In this way, a light source with a lower color temperature will show a yellow and red color tendency, which makes the picture produce a warmer tone. This is suitable for shooting classical portraits. The light of the sunset in the evening is also close to the color temperature of the tungsten lamp.

14. Continuous Light Quality

Today’s continuous lighting is basically led by LED lights because of their high intensity. In terms of light quality,  we can basically divide it into soft continuous light and harder continuous light.

Soft LED continuous light is basically a weak light. The concentrating LED continuous light can make the model produce very obvious light and dark light and shadow effects. These are hard light. Due to the strong brightness, the model tends to feel dazzling. Therefore, when we use it, we basically use the soft continuous light as the main light. And use the concentrated continuous light as the auxiliary light, contour light or modification light. However, when performing drama or highlighting the personality of a character, we will use the condensing LED light as the main light, pursuing large light and shadow and contrast.

(To Be Continued)

Categories
Studio Lights Education

Photography Lighting Experience _ Part I

1. Flash recycling and fast continuous shooting

When photographers work, they often involve quick snapshots or continuous shooting, which makes the pictures easy and natural. Then, the old-fashioned studio lights in the past often failed to keep up and smoke. This is really annoying.

The flashlight flashes by the discharge of a capacitor. The recycle time is the time that the flash capacitor of the flashlight is discharged until the capacitor is fully charged and can work again. Then, for capturing-based shooting, the lamp must be recharged quickly and the output must be accurate.

At present, the better flashing lights adopt a voltage-stabilizing charging method that can be automatically controlled. This charging method has several advantages:

1) Charging is fast, all within 3 seconds. It is extremely convenient and effective for capturing the facial expressions at the moment.

2) When we charged it fully, the charging circuit will be automatically closed to protect the energy storage circuit.

3) Keep the flash energy at the rated value at all times to ensure that the brightness of each flash is exactly the same.

4) Even if the power supply voltage fluctuates within a certain range, the studio lamp can still maintain 100% output energy.

The flash recycling time is proportional to the flash energy. The greater the flash energy, the longer the recycling time. Therefore, we must select the appropriate light output energy when capturing.

2. The color temperature of the flash

In addition to the number of flashes and flash intensity, the most important factor that directly determines the tube of a flash is the color temperature. In order to calibrate the color temperature, a special coating process is usually customized for the lamp.

The normal color temperature of the studio flash is around 5600k. However, the color temperature of flashes produced by each manufacturer is not exactly the same. And there are individual differences even for products of the same brand. The use of soft light equipment and extended use of the year will cause the color temperature of the flash to decrease. If you are buying a set of lamps at the same time, you can measure whether their color temperatures are uniform if possible.

3. The impact of vibration on studio lights

We are shooting, in the process of moving and adjusting the studio flash, rough use and unscrupulous placement will cause damage to the studio light. The flash tube and analog light tube in work will be damaged due to vibration. So we should avoid vigorous vibration as much as possible in the actual shooting and lighting.

4. Capacitance of flashlight

The capacitor is the heart of the flash. There are three types of commonly used capacitors for flashing lights on the market: German capacitors, Japanese capacitors and Chinese capacitors. The first determinant of capacitance is discharge power. The larger the capacitor, the greater the power and the higher the price. In addition, the better the capacitor, the more fully discharged each time, the greater the actual power displayed. The second is the recycling time, a good capacitor will recharge quickly. Therefore, you must pay attention to the capacitor brand and performance of the lamp when choosing flashing lights.

5. Heat dissipation is the safety guarantee of studio lights

The heat dissipation function of studio lights is generally a key project in the design and manufacture of lamps. Studio lights generally have a high-temperature protection circuit cooling fan, built-in temperature protection circuit, built-in forced cooling system, etc. As we operate for a long time during shooting, the lamps will heat up. If the heat dissipation is not good, it will cause damage to the lamp. Therefore, the heat dissipation when choosing lamps and lanterns makes us the key point to be investigated.

6. Reflection can make the light soft

The industry divides the light quality of flash basically into hard light and soft light usually . Hard light is easier to show the three-dimensional shape of the subject due to the certain contrast between the light-receiving surface and the shadow surface. But the styling effect of the light appears harder.

So strong light is not very suitable for shooting beautiful portraits such as wedding dresses. Therefore, use reflection to soften harder lights. For example, the reflector reflects the flashlight back, also the ceiling  reflects the light back, and so on. Such reflected lighting cannot form obvious light-receiving surface, shadow surface and projection, and the light effect is relatively delicate and soft. The lines and tones of the captured images are relatively soft and rich in layers.

7. Softbox for studio lights

It cannot be used alone and is an accessory of the flash. Photographers often mount the soft box on the flash, and the light that it emits is softer.

The soft box has various structures. The conventional soft box is rectangular, like a bucket with a sealed bottom. Due to some differences in function, there are also octagonal, umbrella-shaped, column-shaped, bar-shaped, honeycomb-shaped, quick-installed and other structures.

There are various specifications of different sizes, as small as 40 cm, as large as more than 2 meters. There is also an ultra-small softbox specially equipped with an external flash, only a few centimeters in size.

The soft box is detachable and foldable, which is convenient for packaging and shooting out after we fold it. Open and prop up when in use. Then install it in front of the studio light so that the light emitted by the studio light can be transmitted from the soft box.

8. When do lamps and lanterns use soft boxes?

The light of a flash without a soft box will be harder. Like clear direct sunlight, the contrast between light and darkness is obvious, and the three-dimensional effect is strong. Therefore, when the characters we want to shoot have a strong sense of personality, a strong sense of three-dimensionality, and a large light and shadow effect, we can remove the soft box and directly use the flash lighting of the studio light.

Another point is that when our lighting is far from the model, the light after soft light is weak, and the lighting intensity is not enough if the distance is too far. At this time, you can also consider removing the soft box and flash lighting directly.

(To Be Continued)

Categories
Studio Lights Education

Clever Use of Contrast Between Cold and Warm Tones in Photography

The Effect of Contrast Between Warm and Cold Tones

The combination of warm and cold tones in the photo can create interesting contrasts. This makes the visual effect of the picture more vivid and prominent.

Basically all colors can be defined as cool or warm colors. Of course, this is a completely subjective color feeling. The red-orange-yellow tones are reminiscent of heat (fire, bulbs, candles, sun), and the blue-cyan-green tones are reminiscent of cold (water, sky, ocean).

Pursuing the blending of cold and warm tones in the picture is nothing more than attention: color and light.

Creating a contrast between cold and warm is a commonly used artistic expression technique when shooting. Most of the contrast effects of heating and cooling are realized by using the difference in the color temperature of different light sources in the environment.

Warm colors give people a feeling of closeness, friendliness, and enthusiasm. Cool colors will form a long-distance, calm, and reserved atmosphere in the picture. Our visual characteristics are very sensitive to the contrast between cold and warm colors, and even the smallest difference will not be ignored by us. Especially when they are placed in the picture in a contrasting way.

When the color temperature of the light is not prominent, if the inherent colors in the environment can produce a contrast between cold and warm, sufficient attention must be paid to the composition. Because of the

Several ways to create a contrast between cold and warm

1. During the clear day, take advantage of the blue in the shadows

Some places that cannot effectively reflect direct sunlight are greatly affected by short-wavelength light in visible light (because of its sufficient reflection and refraction). These places include cloudless sky, ocean, snow shadow, sunny day shadow, cloudy sky, etc. The color is mostly blue-purple, showing a high color temperature.

Therefore, the cloudless blue sky (different from the color temperature of the sun itself) has a high color temperature, around 10,000 k. When it is overcast and cloudy, the color temperature of scattered light from the sky is slightly lower than that of a clear day at noon, at 7000-9000k. The color temperature of the backlight shadow on a sunny day should also be higher than the color temperature of the sunny day.

2. The unmissable color of the sky at twilight

The warm tone at dusk is caused by diffusion. Due to the low angle of illumination, sunlight has to penetrate a thicker atmosphere, and the atmosphere is easier to absorb blue and violet (shorter wavelength) light, so that we can see a strong red.

The sun’s light changes most rapidly after a period of time (20-30 minutes) before and after submerging into the horizon. The color of the sky at this time is very dramatic. Shooting in a large scene with a wide field of view, the horizon is wide and less obstructed. This can highlight the beauty and romance at sunset.

When the sun begins to sink into the ground plane, the color temperature of the light gradually rises (cold tones), but the sun becomes more saturated (orange-red), creating a contrasting color effect between warm and cold in the sky. It is very suitable for shooting silhouettes or semi-silhouettes at this time. Determine the exposure value based on the bright and colorful part of the sky (the edge of the cloud).

3. “Moment with density” shooting

The color temperature of the sky before sunrise and after sunset is high, and metropolises appear blue-purple. At this time, the light ratio of sky light to ground light is basically 1:1. What appears in the camera is that the sky and buildings have details and colors. The overall effect is gorgeous and dreamy.

The high color temperature of the sky light and the low color temperature of the ground light source form an excellent contrast between cold and warm. What we need to do is to make the model stand out. In addition to using the lights in the room, street lights, etc., photographers often place the flash (with orange film) on the back of the model to create a contour light.

This method of shooting must take into account the ambient light. If it is too early and the sky is too bright, the full output of the flash will also be difficult to achieve the effect. If it is too dark, the sky cannot show the “density blue” and the necessary details.

4. When shooting indoors, the sky through the window contrasts with the indoor lighting

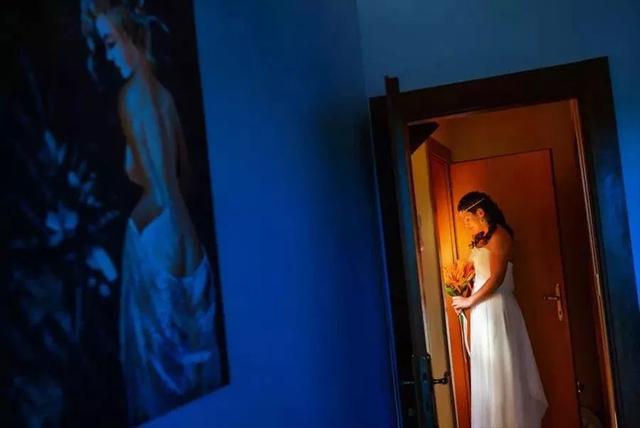
When the model is in the room, the white balance can be adjusted to daylight mode to restore the model’s skin tone normally. Use a low color temperature light source (warm light) to create interesting prospects and create a warm atmosphere. At the same time, it contrasts with the blue sky seen in the background window.

Tip: The lower the color temperature value, the warmer the picture tone. The higher the color temperature value, the cooler the picture tone. When shooting a combination of cold and warm images, it is necessary to make a more accurate judgment on the color temperature. So that we can accurately restore the colors or achieve creative effects based on subjective intentions. That is: when the white balance value matches the ambient color temperature, the color performance is restored normally. When the white balance value is lower than the ambient color temperature, the color performance becomes colder. When the white balance value is higher than the ambient color temperature, the color performance is warmer.

5. Warm foreground or background can express the mood of the picture

Using the difference of light color temperature to create interesting foreground or background will make the picture present a wonderful and dreamy color atmosphere.

To achieve this screen effect, you need to ensure the following three elements. First, there are lights of different color temperatures in the picture. Secondly, there must be bright “points” in the picture. That will become point sources of light under the light (or itself). Finally, use a large aperture to shoot, or there are other reflective surfaces in the picture. In this way we can blur the blurry spots.

The fill light rendering is quite important. The color temperature of the model received light is in contrast with the color temperature of the ambient light.

When the model is in a low color temperature light source environment, the cold light source is used to complement the light and the warm ambient light is echoed.

When the model is in a high color temperature light source environment, the warm light source is used to complement the light and the cold-tuned ambient light is echoed.

Categories
Studio Lights Education

Lighting Techniques for Portrait Shooting in Single Light Studio

Introduction

For every photographer who is the first to take portraits, people are always a little bit at a loss in lighting. In fact, as long as you master the basic lighting methods and prepare the necessary lighting equipment, indoor portrait shooting is far less advanced than imagined. Some simple use of light equipment can produce satisfactory portraits at home. The key lies in the familiarity and use of light.

Indoor portrait photography is an indispensable and important branch in portrait photography. Especially in commercial portrait photography, it is often encountered. When it comes to indoors, as long as the space is 20 or 30 square meters. It can be your own living room or a space without any storage. Putting it in the light is a temporary studio.

Single-lamp Studio Portrait Shooting

The so-called single light, as the name implies, is to use a single light for photography lighting.

The use of a single lamp for photographic lighting may be the need of the photographic subject itself, or it may be due to limited equipment conditions.

With reasonable lighting, a single lamp can also take a black and white portrait of a satisfactory photo.

Single-lamp lighting generally requires a soft box to make the light softer. You can also cover several layers of sulfuric acid paper in front of the standard lampshade to replace the large diffuser, which is especially suitable for single-lamp shooting women.

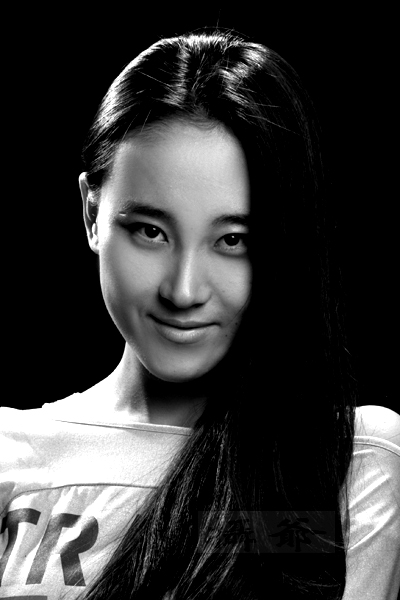
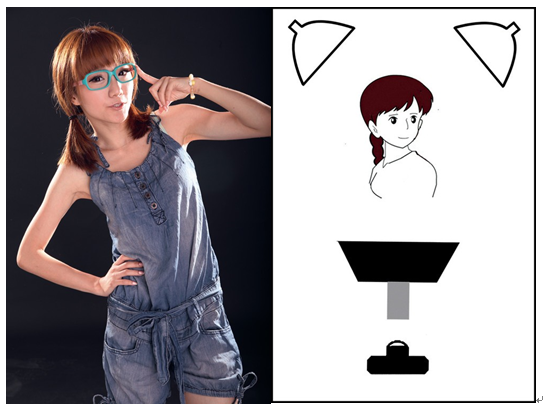
When shooting this group of female models, I only used a flash with a standard lampshade covered with sulfuric acid paper. The light shines at 45° from the oblique side of the model.

When shooting portraits, a large aperture can be used, but the focus must be placed on the eyes of the person to make the person clearer. Since the background is relatively dark, the blemishes on the skin of the person may be more obvious when exposed. In order to make people’s skin brighter, I increased the value of 0.3EV to shoot this work.

Double-lamp Lighting That Makes the Characters Artistic

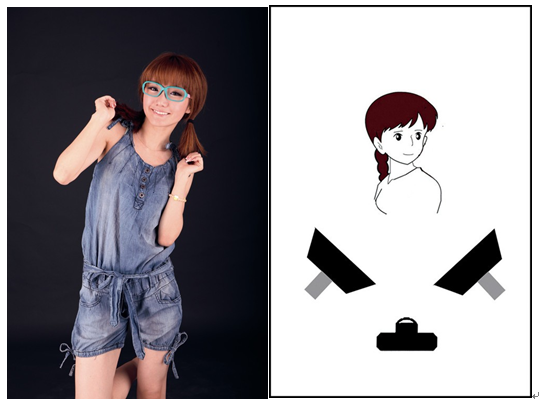
Compared with single lamp, double lamp is the more commonly used method of studio lighting. Double lamp means to use one lamp as the main light and the other as the auxiliary light or contour light.

The function of the main light is to provide the main light source. And photographers often use the contour light to express the contour lines of the subject, and it is mostly expressed by backlighting.

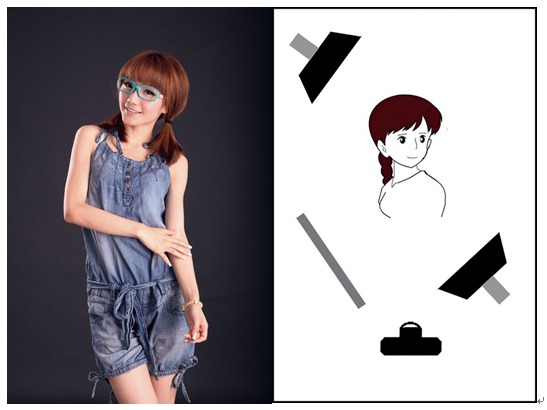
Especially when the subject is dark and the background is dark, the contour light can achieve the effect of separating the subject from the background. When taking this photo, I first placed the square soft box at 45° as the main light source. The main light source mainly falls on the character’s face, shoulders, hands and back.

Since the main light source is a rectangular soft box, the lighting range is relatively large. But the black background and black hair are blended together. Therefore, I deliberately placed a light behind the model so that the light, the model and the camera are in a line to form a contour light to separate the model and the background. effect. The picture below shows the shooting scene with dual-lamp lighting.

Among the artificial light sources, photographers often use the contour light in conjunction with the main light source and the auxiliary light source, which can give the picture more layer changes and enhance the beauty of the picture.

Classic Lighting scheme of Three-lamp Standard Set

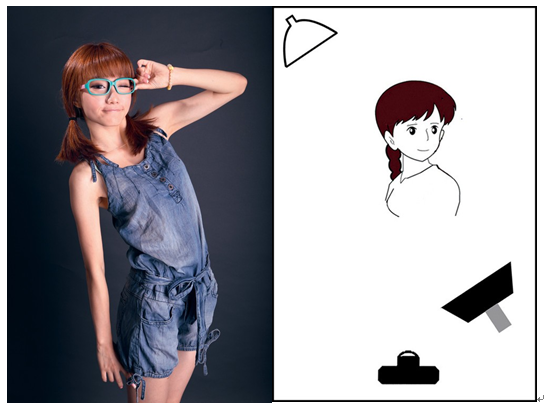
Buy a studio flash, usually three lights as a standard set. At the same time, photographer should equip it with necessary accessories such as soft box, honeycomb, and reflective umbrella. With the three-lamp standard set, a variety of classic lighting methods can be combined.

This photo is a typical lighting work in a standard set of three lamps. First, the photographer uses a rectangular soft box placed at 45° as the main light source. The main light source mainly shines on the model’s face, shoulders, and hands. Due to the limited range of the main light source, the illumination of one lamp will make the other side of the model dull. Therefore, the photographer put an auxiliary light with a honeycomb on the rear side of the model, allowing the auxiliary light to supplement the light and shadow effects of the model. Then put a hair light on behind the model directly above the model, the purpose is still to separate the black hair from the black background.

In fact, it is not difficult to take this kind of classic light-using photos. The key is to master the role and light ratio of the auxiliary light and the main light.

When the main light shines on the right side of the character, a heavier shadow will appear on the left side of the character. At this time, we can add an auxiliary light to the left of the character to reduce the shadow. It should be noted that the power of the auxiliary lamp is generally lower than that of the main lamp, so that the shot of the person will be more three-dimensional.

Four-lamp shooting high-profile solution

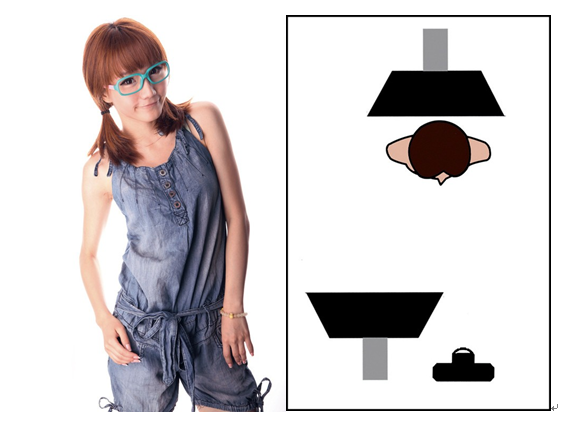
The so-called high-key is that the subject and the background are lighter tones, and the brightness of the light is higher, and the photos taken present a brighter and warmer style.

High-profile photos are mainly white, and white usually accounts for 75% to 95%. High-profile photos generally use soft light and choose a light or white background. When shooting, it is necessary to eliminate the shadows formed by the strong light projected on the background to ensure the cleanliness of the picture.

When shooting high-profile portraits with lights in the studio, except that the model should wear white or light clothing and use a light background, the lighting should be forward light.

The number of lights is usually more than four lights. The following high-profile work. The photographer shared four studio lights. First, put a studio light with a soft box as the main light source at a position of 45° in front of the model. Photographer has placed a studio lamp with a soft box on both sides of the model’s back against the white background cloth. Its function is to make the background have no obvious shadows and no projections, making it appear clean, bright and soft. Photographers can control the brightness of the illuminated background light at about two levels beyond the brightness of the model’s face.

Control light ratio

When shooting high-profile portraits, pay attention to the lighting light must be soft and well-proportioned. When taking close-up portraits, pay attention to the light ratio of the face not to exceed 1:2.

Keep a certain distance between the person and the background, and use stronger light for the background than the person. With model as the metering center, the background is overexposed to form a bright tone. But remember that the background brightness cannot be too strong than the model body, otherwise the highlights will overflow and the picture will have heavy fog. Because there are few external light meters in modern studios. Photographers usually deal with it through experience, and after regular light testing, increase the exposure by nearly one stop.

Concluding remarks

The use of lights in the studio is also an art. Each light has a different function. It’s not that the more lights, the better. Just like writing an article, the extra light is the extra nonsense in the article, and refinement is the key.

Categories
Studio Lights Education

Five Commonly Used Studio Portrait Lighting Methods

1. Double flash + Soft Box to Create Butterfly Light

The lighting method in which two flashes with soft boxes are placed at 45° left and right in front of the model is generally called the “butterfly lighting method” by photographers. This lighting method makes full use of the characteristics of soft light. Its characteristics are just like its name, it is softer, with less contrast, and can soften the skin of the characters. It is generally suitable for shooting female portraits.

An example of butterfly light shooting.

Aperture: F8, Exposure time: 1/200s, Sensitivity: ISO100, Focal length: 75mm

“Butterfly light” is a primary lighting method, which has certain shortcomings and limitations. First of all, it is difficult for Asians with black hair to show rich details when shooting with this lighting method. Secondly, although the soft skin without changes in light and shadow is eye-catching, it lacks realism and tends to give people a flashy, sweet and greasy visual experience.

2. Side Single Light and Headlight

Emphasizing the three-dimensional effect of the side single lamp and the creation of the headlight

In the previous example, the lighting method of two flashes and soft box is mostly used to take sweet-style portrait photos. But the light effect is relatively flat, and another result is that the three-dimensional sense of the characters is not strong. In this example, the photographer uses a flash and a soft box to light from the front. As a result, the light-receiving surface of the character is uneven from left to right. This can help produce a strong sense of three-dimensionality.

Example of shooting with side single-lamp lighting.

Aperture: F10 Exposure time: 1/200s Sensitivity: ISO100 Focal length: 59mm

At the same time, the photographer also set up a flash for the model to brighten the hair. Headlight is a kind of effect light, usually hard light is used to create it.

The black hair of Asians is often overlooked in studio shooting, resulting in dead blackness and loss of details. Therefore, the creation of headlights is even more important.

In this example, the photographer set up a high-height flash with a standard cover at the rear right of the model. Light it towards the head of the model to create the highlights and reflections of the model’s hair in the picture.

3. Use a Soft Box to Create a High-gloss Background

This high-profile shooting method is very interesting. The photographer guides the model to lean against a large soft box while setting up another large soft box in front of the model. Use the first soft box and the subsequent flashes as the background, and “face to face” with the soft box of the other flash. When the photographer presses the shutter, the camera flashes the flash behind the model through a flash trigger. The soft box becomes a pure background in the picture under strong light.

Example of shooting with softbox lighting.

Aperture: F8, Exposure time: 1/200s, Sensitivity: ISO100, Focal length: 65mm

At the same time, the silhouette and skin texture of the model are outlined by highlights. Highlights can even produce a “overlight” effect on the model’s skin. This method of lighting can express a sense of holiness and mystery. There are two points to note. First, this lighting method requires a higher quality of the photographer’s lens. Secondly, this lighting method is not conducive to expressing colorful shooting subjects.

4. Double Lights to Create Head light, Single Light to Fill Light on the Front

The directionality of the hard light and its outline characteristics for the model and the subject’s lines can also create a character’s headlight. In this example, the photographer uses two flashes to project hard light on the model at a certain angle from the back of the model. This effectively creates the model’s golden hair glow. At the same time, the contour of the model is clearer and the three-dimensional effect is stronger. At the same time, on the front of the model, the photographer used a third flash with a soft box to fill in the front of the model to portray the details of the model’s face.

Examples of shooting with three lights

Aperture: F8, Exposure time: 1/200s, Sensitivity: ISO100, Focal length: 75mm

This lighting method is more complicated. In order to better express the headlight, the photographer should set the position of the two flashes behind the model slightly higher. In the selection of the lens, a lens with excellent anti-glare quality must be selected. and a suitable lens hood must be installed to prevent the glare of the rear flash from entering the lens and affecting the image quality of digital photos.

5. The Combination of Main Light and Auxiliary Light and the Application of Reflector

In this example, the photographer used the lighting method of arranging a flash with a soft box on the left front and right rear of the model.

Examples of shooting using reflectors.

Aperture: F9, Exposure time: 1/200s, Sensitivity: ISO100, Focal length: 75mm

The flash on the left front of the model is used as the main light to illuminate the main body of the model. Since the lamp position is 45° from the model, it can create the three-dimensional sense of the model’s facial features. At the same time, the flash on the right rear of the model played a role in delineating the body line of the model. That makes the outline of the left part of the model full of light in the picture.

In the live shooting, in order to create the model’s three-dimensional effect while not making the light ratio of the picture too large. The photographer placed a large-area reflector on the right front side of the model to fill the model with light. This has achieved a more desirable effect.

In the practice of lighting in the studio, the photographer needs to adjust the number of lights, light positions. So do the number of reflectors according to the quality of the shooting effect. Through the contrast effect of real shots, the photographer finally chooses the lighting method with the most ideal performance.

Categories
Studio Lights Education

How to Use Hard Light with Other Light Sources in Portrait Photography

1. Indoor Hard Light

The role of the hard light source is to add a touch of color and impact to the portrait photo. Highlight the shape of the model and enhance the sense of three-dimensionality.

In the studio, this kind of light is usually a small range of unscattered hard light. It can often bring people a sense of vigor and vitality. And with obvious directionality, it will make the model have a sharp contrast between light and dark, which will help the performance of texture.

Hard light is usually used to focus on the description of hair, human body contours and the environment. Below we introduce several ways to use hard light with other light sources.

First, let’s take a look at the most commonly used hard light source in photo studios-floodlights. The light it emits is direct hard light, with high brightness, strong directivity, high contrast, and dense projection. In addition, the light value is high in the center of the optical domain, and the edge is significantly attenuated. So the distance between the light and the characters is particularly important.


1) Hard Light + Umbrella Light + Soft Light

Reflective umbrellas of different textures and specifications are installed on the floodlights to become umbrella lights. Umbrella lights are characterized by large light-emitting area, soft light, and weak contrast.

Adding a diffuser to the caps of various flash lights becomes a soft light. The light emitted by the soft light is formed by mixing the direct light emitted by the flash with the reflected light of the reflector, and then transmitting and diffusing through the soft light.

The feature of soft light is that it can provide average and sufficient lighting. The light it emits is soft, but the direction is generally stronger than that of umbrella lights. The contrast is clear, the projection is thicker than the umbrella lamp, and it has a good level of performance. Sometimes in order to increase the color atmosphere of the picture, adding a whole piece of colored paper in the diffuser will make the transition of the color and light effect better.

The effect of combining hard light and soft light

The combination of the above two light sources and hard light sources can make up for each other’s shortcomings and add more atmosphere to the picture. Under normal circumstances, we first use the umbrella light source and soft light source to illuminate the model’s face while illuminating the background. The main purpose of this is to make the model skin look more delicate and make the entire picture have a balanced brightness, and its position does not need to be moved.

Adding a hard light source to illuminate the model can increase the three-dimensional sense of the picture and improve the clarity. However, this kind of emphasized light cannot be fixed at an angle, so it can be changed according to the basic light rule and the person’s turn according to the effect the photographer pursues. Its intensity can exceed the first-level aperture of soft light and umbrella light. Due to the difference in light quality, even if the intensity of a hard light source is the same as that of soft light and umbrella light, it will produce a very vivid effect.

2) Hard Light + Color Light

Color light refers to adding color chips to various flash lamp caps to change the light color, thereby playing the role of creating an atmosphere. The color chip can be made into different sizes, which can be placed in front of the hard light source or added to the outside of the diffuser.

3) Color light hard light source + continuous hard light source

A continuous light source refers to an artificial light source that emits light for a long time. Generally, there are many kinds of color temperature of this artificial light source. Among them, the lower color temperature will make the skin of the person look healthy. But usually the color temperature of this kind of light will be slightly lower than 3200K, if the flash white balance mode is used, the picture will have a serious color cast. Therefore, it is recommended to use the incandescent white balance mode, because it will achieve good shooting results. If the picture is a color tone, the atmosphere will appear monotonous, so use the instant light source to add color films to create the atmosphere to achieve better results.

2. Outdoor Hard Light

For outdoor photography, the hard light sources usually used include direct sunlight or artificial flash light sources. Of course, sunlight is restricted by time, climate, and direction, and artificial light sources can make up for its shortcomings. It is worth noting that the flash does not have to be dim in order to use the flash. The advantage of using the flash is to highlight the subject with natural light.

1) Direct sunlight + ambient light

Usually direct sunlight is our most common kind of hard light source. It has the advantage of high luminous intensity, and proper use will make the picture look rich in layer changes and make the characters have a clear outline. However, the brightness of the ambient light will be much lower than direct sunlight, so it is not suitable for shooting at all times. Usually avoid the midday sun.

Direct sunlight makes the picture look rich in layer changes, so that the characters have a clear outline

2) Direct Sunlight + Artificial Light

Direct sunlight is a hard light source. The main purpose of using man-made equipment is to make up for the dark side of people when the sun shines on them. Usually we use reflectors to fill in the light. However, for direct sunlight, soft reflectors (such as foam boards, KT boards, etc.) cannot achieve good results, so hard light reflectors (such as tin cardboard, mirrors, steel plates, etc.) should be selected.

Of course, the outdoor flash is our better choice. We use it in combination with sunlight, there will be more variability. Photographers can use it as the main light to illuminate people. Or as a contour light to highlight the three-dimensional effect.

3) Scattered Light + Artificial Hard Light

The contrast of the picture taken in a cloudy sky is small. So the use of hard light can improve the three-dimensional degree of the picture. We should determine the exact amount of exposure when taking pictures on a cloudy day. But you can also try to slightly underexpose. Because the normal exposure is often not as good as the slightly underexposed effect on cloudy days. The exposure level minus 0.5-1 level will not affect the performance of the bright and light parts of the object illuminated by the cloudy scattered light. But will help the dark and dark parts to accentuate the tones. And increase the tonal contrast of the entire picture.

At this time, the intensity of the outdoor light can exceed the environment, and the ratio is usually 1:2. Because the brightness of the whole environment is not high, it is easy to control the tonal relationship between the character and the environment after adding the outdoor light. If a larger light ratio is used, it is very easy to shoot the day into the night.

4) Night Environment + Artificial Continuous Hard Light Source

The light environment at night is very complicated. And all possible ambient light sources should be used as much as possible to meet the shooting needs. Even so, the ambient light at night is not enough to illuminate the characters. So artificial continuous hard light sources should be added for use. Usually you can use a high-brightness handheld flashlight. Of course, it is most convenient to choose an outdoor flashlight that has both a flash function and a continuous light source. If the venue conditions are good, we can also use spotlights.

The night light environment is complicated, and photographers generally use artificial continuous hard light sources to shoot

Categories
Studio Lights Education

Techniques for Constructing Perfect Portrait Photography Composition

The basic photography principles must be followed: the main body is prominent, the picture is concise, and the disturbing scenery is removed.

Tip1: Choose a Background That is as Concise as Possible to Highlight the Characters

To take an excellent portrait photo, the first consideration should be to find a suitable environment for shooting. The principle of selecting the environment should conform to the principle of subtraction of photography, that is, the environmental characteristics should be as simple and simple as possible. Only simplified background elements can highlight the main character. Photographers must remember that portrait photography is not a commemorative photo. Those looking at bright, colorful, and strangely shaped scenes are not suitable backgrounds for portrait photography.

The Layout of the Background in the Studio

It is relatively easy to control the background in the studio. A simple monochromatic background is a common choice. But avoid being too monotonous at this time. For high-key portraits, you can add background lights to control the light and shade and light and shadow changes; while low-key photography. The rendered background cloth is also a good choice.

Outdoor Background Selection

On the contrary, the simple sea, open grass or woods with uniform colors will play a better role in setting off. After finding a suitable environment, the next thing to consider is to blur the background to highlight clear characters, that is, use the aperture value to control the depth of field.

For simple sky, sea and other backgrounds, we can set the aperture to a slightly smaller f/8 or f/11 to make them appear clearer. For slightly messy woods, etc., you can use f/4 or f/2.8 to make them more blurred. These are classic techniques for concise pictures.

In the composition, pay more attention to the horizon in the distance. Try not to pass the character’s neck, otherwise it will easily cause the sensation of cutting the throat. If you want to blur the building on the horizon, the best way is to be farther away, so that it can reduce the proportion of the picture it occupies, and it is easier to blur it.

Tip2: Coordination of Characters and Environmental Background

Shooting environmental portraits requires more consideration from the photographer in terms of creativity and composition than pure portrait photography. At this time, the photographer not only has to consider the character’s styling and lighting, but also the environmental characteristics and lighting effects. And organically combine the two, harmonious and set off each other.

If the environment in the home is a bit messy, you can use the effect of using a long focal length lens, a large aperture and a shallow depth of field. Try to blur the scenes before and after, especially for scenes with a lot of small decorations in front of the table. Use the backlight of the window to shoot and increase the exposure to form a high-key background effect, avoiding the impact of dark scenes in the home on the picture.

Basic Elements of Indoor Background

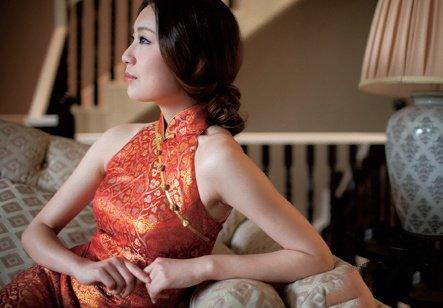
This is a group of home portrait photos taken by the photographer. The photographer chose the living room as the shooting location. This is usually the largest and widest room in the home, which can be used by photographers to take pictures freely. The photographer took great pains when framing the scene. The character sits obliquely in a corner of the sofa. The middle shot is a part of the porcelain table lamp, while the blurred staircase forms a texture to increase the sense of change in the picture.

Home portrait photography, because of the influence of space, mostly busts, so it even tests the photographer’s styling ability. The facial expression, orientation, body posture, and hand movements should all be delicate and in place, otherwise it is easy to make mistakes.

Principle of Lighting for Indoor Photography

For indoor portraits, the photographer needs to arrange the characters in a place where the light is appropriate and the background is coordinated and not cluttered. The dining table and sofa in front of the living room window, and the bedside in the living room are all good choices. Here you can usually get closer to natural light instead of being so cluttered.

Of course, before shooting, it is best to clean up the messy knick-knacks to keep the environment clean and tidy as a whole. Some of the methods of home furnishing photographers are worth learning: helping the owner clean up the house before shooting can greatly improve the effect of the picture.

For indoor portrait shooting, natural light should be used as much as possible to create a soft light effect. If you want to brighten up some dark corners in the room, try to use a soft box. Let the face of the character face the light of the window, and the wide light source of the window can be used to form a soft and bright catch light in the eyes of the character, which has an excellent effect.

Tip3: Increase the Prospect of Blur

Photographers with a little basic knowledge usually know to use a long focal length lens (above 150mm) to shoot portraits. This is more conducive to blurring the background, so as to highlight the performance of the characters. A more creative approach is to use a medium and long focal length (85mm~135mm) lens to shoot, and deliberately increase the foreground in front of the lens.
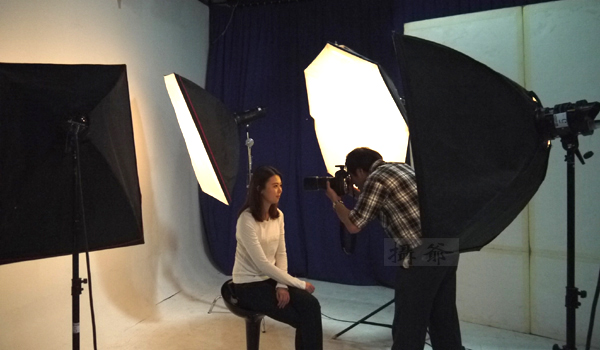
When shooting with the help of blurring the foreground, you can first step back away from the person. Observe what colors and shapes match the scene as the foreground. When choosing the foreground, it is best to focus on natural scenery, such as grass, flowers, branches and leaves, etc., which are relatively light and have a certain degree of light transmission. The artificial objects have rigid lines and dull colors. Even if it is blurred, the effect is too standard.

When the photographer is shooting, he actually uses the blurred foreground as a picture frame. Using its concealing effect, it highlights the characters who do not occupy a large proportion of the picture. This creative method can be described as killing two birds with one stone, that is, emphasizing the subject euphemistically, and adding a sense of depth to the picture.

The Role of Blurring the Outlook

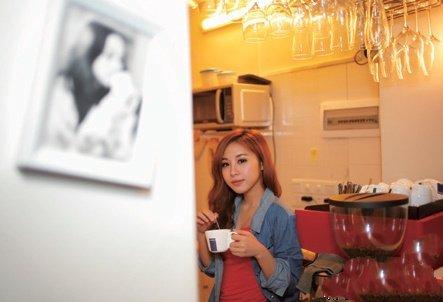
The technique of blurring the foreground is conducive to improving the effect of too rigid environmental portrait composition. The photographer used the daily living environment of the characters as the background when shooting this daily home environment work, and used a wall with the owner’s photo as the foreground, and the effect of large aperture and shallow depth of field made the foreground blurry to a certain extent.

This helped the photographer to form a creative shooting technique. The warm-colored environment is the normal state of daily life, while the walls and photos in the foreground are black and white images. There is a strong contrast between color and black and white, clarity and blur. If the characters’ movements are more distinctive, the work will be more successful.

This method not only integrates the blurred background technique, but also uses the blurred foreground technique to increase the overall depth of the picture. The clear character is highlighted by a dual approach.

In practice shooting, you can choose some leaves or flowers as the foreground. Arrange it on the edge or one side of the screen. And keep it as close to it as possible to keep a distance of about 20~30cm. In this way, the effect of small foreground depth is used to form a foggy effect with bright colors. The blur effect is much stronger than the blur of the background. This shooting technique is widely used in the creation of photographs, portraits and documentary portraits.
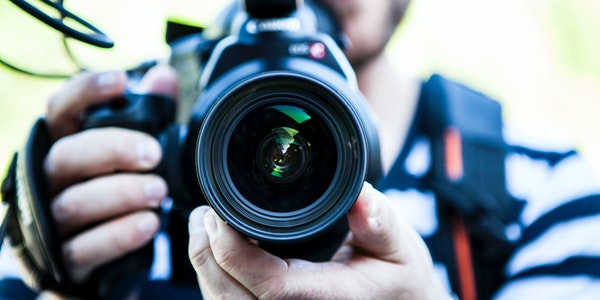
The Role of Focus

The choice of focus point is very important when shooting. It is best to use the edge focus point that covers the person to complete the focus operation. Otherwise, the camera’s automatic focus will give priority to the closest flowers or leaves. Don’t worry about the leaves or flower edges in the foreground blocking the characters. Under the bokeh effect of the large aperture, the sharp edges will form a blooming effect, which is more artistic.

Tip4: Let the Character’s Eyes Look Straight into the Camera

The look in the eyes in portrait photography is an important point of creation that requires special attention. A portrait photography with eyes directly outside the frame will make the audience stay. In the exchange of eyes, the audience can experience the inner feelings of the characters. This reflects the importance of the eyes in the painting.

The model’s body is facing the camera directly, and her eyes are also looking directly at the camera. This is a strong impact effect. Especially when the character’s expression is serious, it gives people a feeling of resistance. Show the bold and cool style of the characters. Traditional Oriental women have weak personality characteristics, so this style of photos is not common.

During shooting, professional models can easily look directly at the camera and show different emotional characteristics through their eyes. But when ordinary people are shooting portraits, it is difficult for them to express any feelings for the cold machine of this camera. And she will even develop a sense of fear.

Traditional shooting techniques

It is better to learn the techniques of traditional photo studios. Fix the camera on a tripod, use the wireless remote control to press the shutter. And the photographer faces the model and guides the person’s eyes to the lens through words and gestures. Usually this kind of warm communication will relax the model. And the eyes and body posture will be much more natural.

Before shooting a smiling camera, be sure to remind the model not to turn his body when turning his head. Keep your face as close to the front shoulder as possible, which is the most beautiful shape. Of course, when the model turns his head, the photographer must observe carefully. And when reaching the best angle, he must stop. Keep the model’s movements for a few seconds and finish the shooting quickly.

Tip5: Leave Enough Space for the Eyes to Extend

If you are shooting someone you are not familiar with, even a professional model will feel a little nervous and restrained when looking directly at the camera at first. These expressions will be revealed in the works, forming defects. Therefore, it is better to let the model’s eyes look out of the lens at the beginning to relieve her tension. Let the model’s eyes look out of the camera, you can intentionally slow down the shooting rhythm. Let her relax for a while and immerse herself in her own thoughts. At this time, you can capture her shy and reserved beauty.

When shooting a woman with her eyes down and her head down implicitly, it is easy to have the effect of lowering her eyebrows and drooping her eyes. Therefore, when shooting, we should emphasize reminding people to raise their eyes to keep their eyes wide open. Use reflectors near the waist of the character to create catch light in the pupils.

Extended space for eyes

The gaze direction outside the lens can be divided into three types: head-up, upward and downward. The upward direction of gaze is a metaphor of hope and yearning. Heading up brings a state of concentrating thinking. And downward is shy and shy. No matter adopt which direction, the photographer needs to let his eyes have more space on the screen when composing the picture.

Backlighting in front of the window to shoot high-profile works, not only needs to increase the exposure appropriately, but also needs to fill in the light from the front of the person. Otherwise, the contour lines of the characters facing the light will blur and disappear. The posture of the characters’ arms in front of the table is exquisite: the elbows are as close as possible to form a V shape. This can make the upper body of the character more beautiful.

Looking up from the perspective to show a tall figure

When shooting portraits, different shooting heights will affect the visual perception of the characters in the frame. Under normal circumstances, the photographer takes an upright posture to shoot. That is, the eyes of the photographer and the subject are at the same height. This is in line with our usual appreciation habits. Therefore, the characters in the screen conform to the normal physical characteristics.
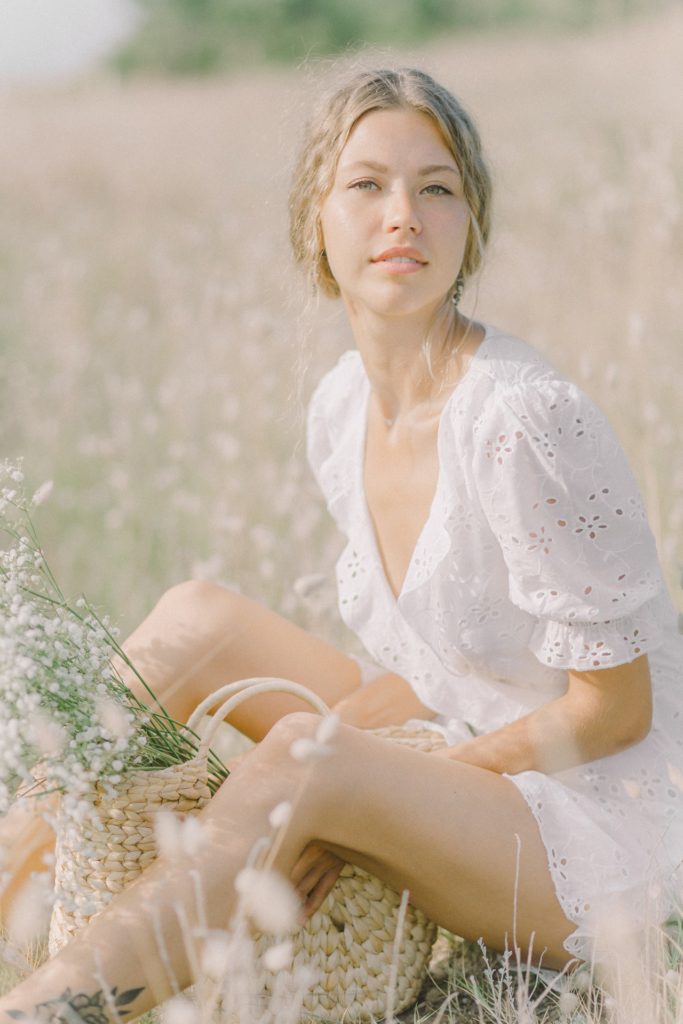
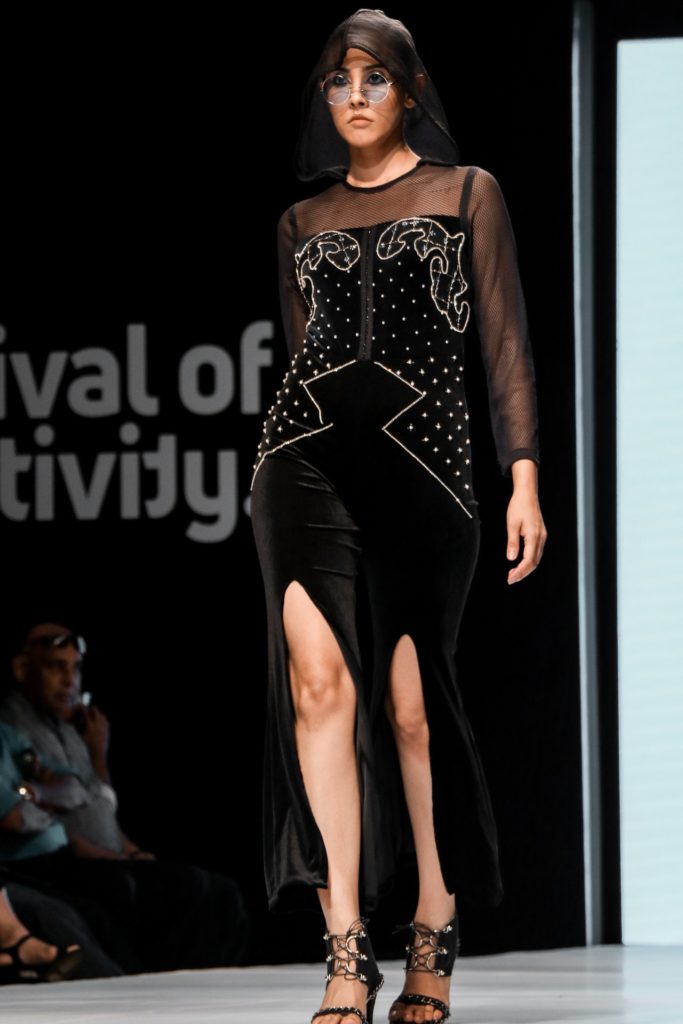
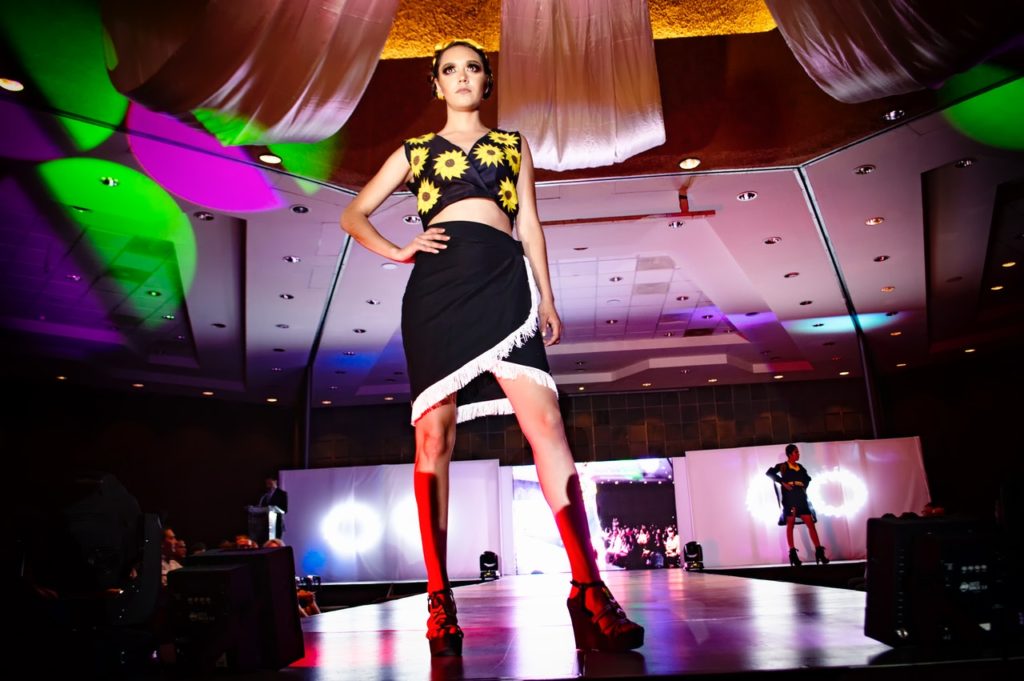
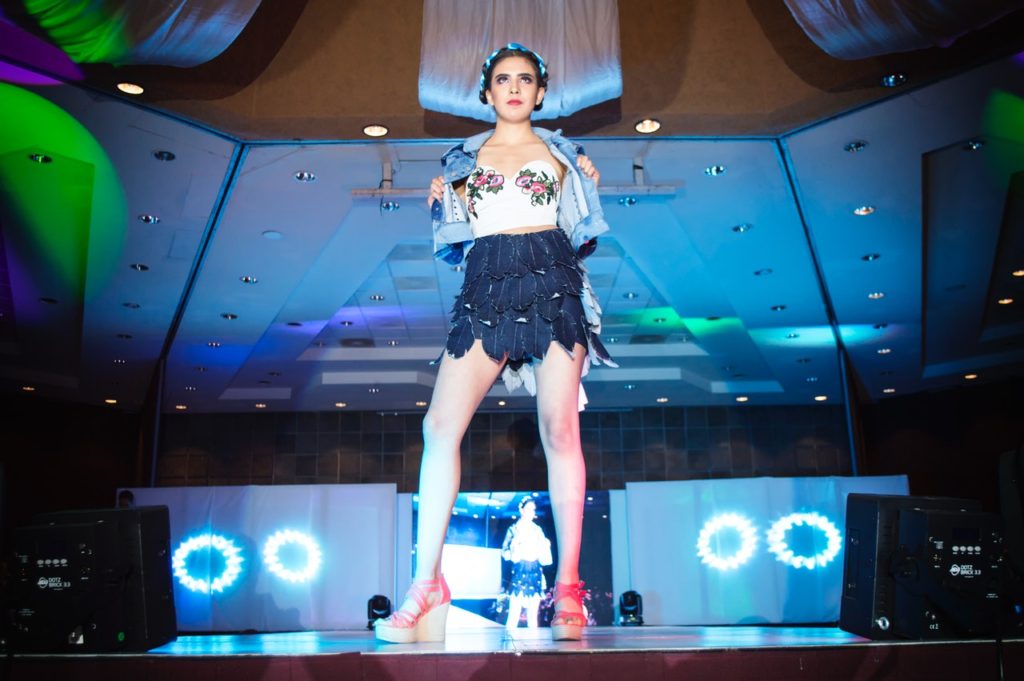
Generally, the head-to-body ratio of a person is 1:6 to 1:7. And the head-to-body ratio of a professional clothing model can reach 1:8. The larger the head-to-body ratio, the taller and more refined figure. Therefore, the photographer asked the model to stand on a small high platform, take a shooting height that is level with its calf, and deliberately use the upward shooting angle to shoot. Under the effect of perspective deformation from near to far, the head of the person is far away from the camera. The proportion becomes smaller, and the figure appears extraordinarily slender. This is also the angle of shooting the catwalk model. So we see the model photos in fashion magazines, the reason is that the legs are extraordinarily long.

But for different shooting subjects and shooting creativity, we might as well try different shooting heights and tilt angles when shooting. For example, when photographing children, you need to squat down and shoot at the height of the child’s eyes. In this way, children’s body proportions will be normal, and the common big head doll effect will not appear. To shoot a model from a lower height will exaggerate the length of the model’s legs, and reduce the proportion of the head. This results in a slender figure and a beautiful visual effect with an enlarged head-to-body ratio.

Categories
Studio Lights Education

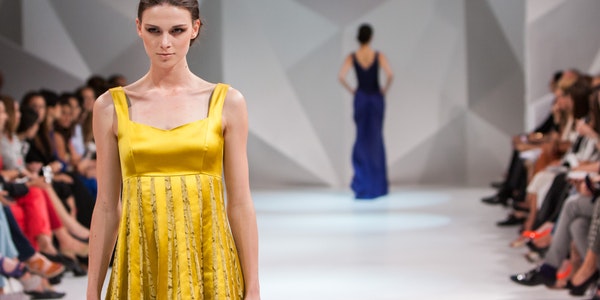
Master the Four Principles of Catwalk Photography

1. Prepare Equipment to Ensure Clarity

It is best to prepare two SLR cameras, a digital camera with 8 to 16 million pixels, and a film camera. One body is equipped with a 28-135mm lens, and the other is equipped with a 70-200mm lens. This makes it easier to capture. If you use black and white film, you can choose ISO400 and 800 professional high-speed film. When shooting, try to use a large aperture, which can increase the shutter speed and avoid blur.

 2. Observe with Two Perspectives

In order to capture the best moments, we can see the personality of the models by observing the models wearing different styles of clothing. Selectively capture valuable moments, so that readers can see the unique artistic wisdom and keen observation and judgment ability of the photographer when they appreciate the pictures.

Because shooting fashion shows and model competitions is a category of photography between photojournalism and art photography, photographers must have a good artistic accomplishment and a keen sense of news. Only by observing, photographing, and thinking diligently in the shooting can we shoot outstanding and outstanding works.

Photographers who have the conditions can use two perspectives to watch from the whole process of tracking the model to shoot the location, to the rehearsal or preliminaries.

1), from the perspective of the judges:

See which models have the best temperament through live viewing, and they may become the champions of this competition. Be clear about the focus of this shooting.

2) Using the photographer’s perspective:

By watching and shooting previews, preliminaries, familiar with the entire performance or competition procedures, to understand the display ability and temperament of all models. Know which moments have news value and artistic value, and be familiar with specific clothing styles to determine the best shooting angle. In this way, you can have a good idea in the formal capture, that is, grasp the key models, key moments, key scenes, key light effects and key shapes.

3. Snapshot Essentials

Whether it is a fashion show or a model competition, it must be observed, understood, and refined on the spot.

On-site observation is to carefully observe the posture, clothing, and style of each model, and to dig out his rich facial expressions and body language in various poses. Observe the dense relationship between the model and the dress and the background when the model walks on the stage, and capture the movement of the model’s dress during the movement, and so on.

When capturing, hold a camera to track and focus the model in motion, and capture the beautiful posture and shape of the model in the display. Don’t put down the camera to watch, if there is a beautiful moment at this time, you will be caught off guard and lose the opportunity.

On-site understanding and on-site refining means that in the wonderful interpretation of the model, the body shape is understood as the point, line, and surface in geometry. Through judgment, the model’s body shape, curve, personality and fashion factors of clothing are frozen into a work in an instant.

Lighting Settings

Due to the needs of the display, with the rhythm of the music and the artistic effects of the stage design, the illuminance of the light changes impermanently. To ensure accurate exposure, you can set the camera to the aperture priority in advance and the aperture to the maximum value.

During shooting, the camera’s shutter will automatically adjust with the intensity of the lighting, so that the captured image is clear. If the light is dim and the shutter speed is too low, you can increase the camera’s sensitivity to ISO400 or 800, and if necessary, you can also increase it to ISO1600. But generally, the particles of the images taken with ISO1600 are very coarse. And the saturation and transparency of the colors are somewhat reduced.

Generally, the color of the light source on the catwalk is warm and white. Adjusting the color temperature of the camera to about 3200K before shooting will reduce the yellow component in the photo. The metering mode should be determined according to the subject being shot. Either center-weighted metering or average metering can be used. For large scenes or medium scenes, average metering can be set. When shooting close-ups, the metering mode should be set at the center focus.

4. Shooting Highlights

Don’t leave the scene immediately after shooting a wonderful model contest. As the saying goes: “The good show is behind.” In my personal experience, wonderful tidbits often appear after the game.

After a brutal competition of “choose one from a thousand miles”, after all, there is only one safflower. When they were about to separate, some hugged each other to congratulate them because they won the prize. And some walked to the side and cried secretly because they were eliminated. These touching tidbits and moments of true feelings are a good time to take pictures.

Four Essentials of Stage Photography

Stage photography has long been familiar to people. On the surface, stage photography and other photography categories (such as portrait photography, landscape photography, etc.), the basic shooting requirements and artistic processing methods seem to be no different. But after careful analysis, it is still different. The main difference is that shooting stage photos often requires feeling and experience to complete the composition in a very short time and press the shutter quickly. This requires the photographer to have excellent shooting techniques and artistic processing skills.

However, stage photography creation also has rules to follow. Especially in terms of technology, some methods can become essentials, so that beginners can avoid detours. Taken together, there are four aspects.
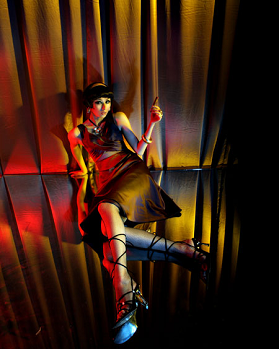
1. Selection of Shooting Location and Angle of View

To take stage photos in a theater or a square, you must first choose a shooting location and angle of view.

Generally speaking, it is good to find a position that is a little bit off, and it will not hinder the audience. The viewing angle is also very important. If the angle of view is too high, the characters will be distorted. The angle of view is low and the feet of the person cannot be seen (it is a different matter to shoot a part or close-up). The angle of view is better to be able to see the stage surface.

Beginners often like to find a location in the middle of the theater to shoot. Thinking that it can capture the front of the character and the complete stage scene. As a result, the body shape of the photographed characters is dull, the lighting shape is dull. So the picture effect will be mediocre.

This is because, usually, the layout of stage lighting is that the front light is stronger.

This kind of front light will weaken the relationship of the characters’ sketches. And the sense of space and layering of the characters’ modeling will be diluted. The light and shadow effects are also dull. Choose a slightly off angle to shoot.
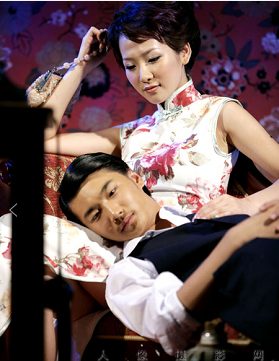
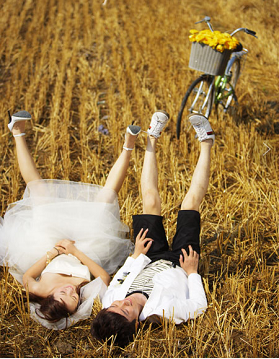
The characters have a combination of front light, side light and back light, plus a variety of different color light sources. The layering and light and shadow effects of the picture will naturally be reflected, especially the sense of space flow. Will be enhanced.

2. Try to Stabilize the Camera as much as Possible

To take good stage photos, the stability of the camera is very important. Usually, when taking stage photos, the shutter speed is often controlled at 1/60 second. The purpose of this is to make the movement move and the quietness to go down. So that the photographs taken have a clear main image, and the picture has a sense of flow.

To achieve these goals, the camera’s stability cannot be ignored at a shutter speed of up and down 1/60 seconds (especially less than 1/60 seconds). Another factor, because in order to achieve the effect of making the picture have virtual and real changes. Often the aperture should be enlarged as much as possible. Doing so will cause the depth of field to get shorten, the camera shakes slightly. And the sharpness of the picture will be affected. Therefore, using a tripod or monopod to increase the stability of the camera is quite critical. 

3. Don’t Use Flash for Exposure

Stage photography has gradually developed from a purely documentary type in the past to a creative type now. This change is also the process of stage photography from being practical to artistic. Shooting with the help of a flash is nothing more than trying to capture the picture more clearly. The consequence of this is that the light of the flash dilutes the unique lighting and color effects of the stage. And even the stage effect is completely lost. And these effects are precisely the essence of stage photos. Therefore, strictly speaking, it is not advisable to use flash when shooting stage photos. Of course, sometimes because the stage light is too weak, or just to take a still photo, flash can also be used. But the photos you take will definitely lose the stage effect.

4. It is Important to Set a Proper Aperture

As a means of controlling the depth of field, the aperture is also quite knowledgeable in stage photography. If you use it properly, the photos you take will have better results.

Set the aperture according to the distance

In live shooting, there is a certain distance between the camera and the stage. And the stage itself has a depth, the sum of the two is generally more than 10 meters. If you don’t use a large aperture, the picture you take will be unobstructed, lacking a sense of primary and secondary, let alone a change in reality.

Especially in non-theatre (such as stadiums, squares, etc.) to take stage photos, most of the background (sky curtain) is relatively simple. If the background is clearly taken into the picture, it will inevitably affect the overall effect of the photo. And by zooming in the aperture to control the depth of field, the background can be blurred. The blurred background accentuates the front subject. After the background is blurred, the hazy effect has a more formal beauty.

The effect of aperture on exposure

Even when taking stage photos in a formal theater, the proper use of the aperture is also very important. Because the shutter speed is controlled at about 1/60 second, the aperture should be adjusted according to the intensity of the stage light. This adjustment must not only adapt to the shutter speed determined by the speed of the people on the stage. But also take into account the effect of different depth of field due to the size of the aperture. If the aperture is set too large, it may underexpose. If the aperture is too small, the effective range of depth of field will be too long. And the background will not be blurred.

It is a consensus that photographers require a large aperture to take stage photos. However, the appropriate aperture should be determined according to actual shooting needs. It is based on what kind of picture effect the photographer needs to achieve to determine how large the aperture should be opened and set the corresponding shutter speed. The size of the aperture will directly affect the effect of the picture.

Categories
Studio Lights Education

Detailed Portrait Photography Techniques

1. Choose a Vivid and Concise Background

A good portrait photography work should strive to highlight the model, distinguishing the primary and secondary, in order to achieve a concise and bright artistic effect. The focus of portrait photography is to reflect the appearance and temperament of people. The background should be as simple and vivid as possible. In this way, there is more space to express the main character. So as to avoid the unclear subject and make the characters more vivid.

Highlight the characters with a concise background

To obtain professional results, it is necessary to minimize distracting background factors. A concise and coordinated background can better highlight the characters. The walls of the building are the easiest monochrome background to find. Can avoid the cluttered background distracting the audience’s attention. The gray walls of modern buildings have wider adaptability.

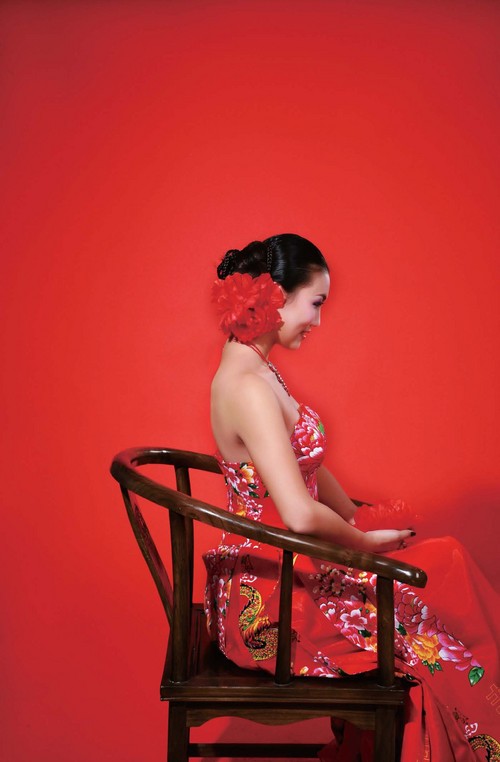
Classical girl in front of the red wall

The red walls of ancient buildings are very suitable for traditional clothing such as cheongsam, expressing the classic and subtle beauty. When shooting such scenes, try to choose the same color of clothing and props, so that the whole picture is integrated. The subtle and introverted expressions and movements can also better express the classical charm.

Tips:

Pay attention to the choice and matching of clothing. When choosing the wall, try to avoid complicated patterns to distract the audience. The gray walls and glass curtains of modern buildings are also good choices. Clothing should be able to form a sharp contrast with the background. Dark clothing should be set against a bright background, and bright clothing should be set against a dark background, so that the model will stand out more.

When shooting in an open area, the trees, pedestrians, and the horizon behind it can easily divide the background, interfere with the line of sight, and make the picture appear cluttered. You can look down, try to shoot from a high place or let the model lie down to shoot, the grass itself is a good background.

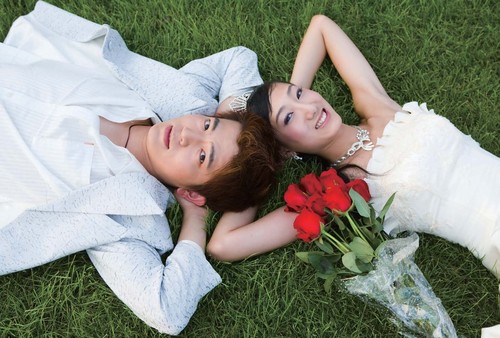
Lovers on the grass

The fresh grass is like a big carpet, simple and full of life. Take the grass as the background and take the shot from above, which can effectively avoid the interference of the surrounding environment. A bunch of red roses with small dots creates a romantic and beautiful atmosphere while enriching the colors and layers of the picture.

2. Choose an Infectious Background

When using a wide-angle lens to shoot portraits, the scope of the environment is very large, and it is difficult to highlight the characters with a shallow depth of field. In this case, you need to choose the background more carefully. An effective method is to separate the characters from the picture first, and see if the environment itself is a good scenery or sketch work after removing the characters. If this requirement is met and the characters are arranged in a suitable position, a satisfactory work will usually be obtained.

Girl in the morning light

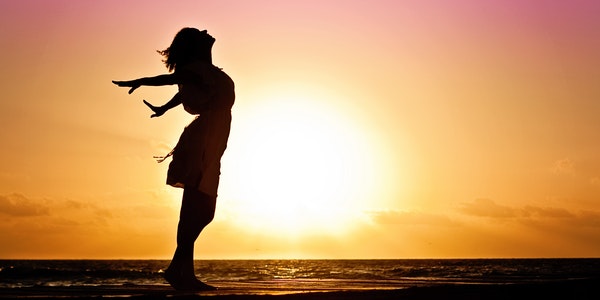
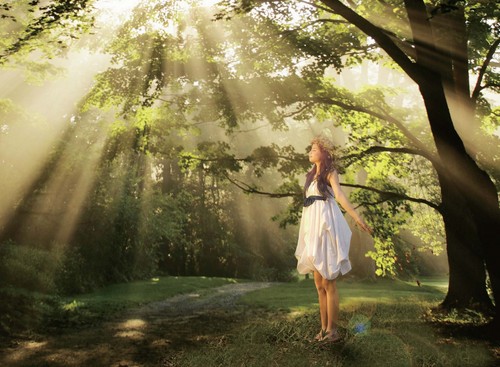
In the early morning, the warm sunlight pierced through the layers of leaves, emitting strands of light. This in itself is a beautiful landscape photography. Arrange the position of the model according to the rule of thirds, with the eyes closed slightly, and enjoy a good time in the sun.

Use Shallow Depth of Field to Blur the Background

Portrait photography often uses a large aperture around f/2.8. In addition to getting enough light in a dark environment, the most attractive is the shallow depth of field effect of the blurred background. The charming background blur will make the background more concise.

When you want to blur the background, pay attention to the following points:

★Professional photographers usually use large-aperture lenses with a maximum aperture of at least f/2.8 to shoot such effects. 70mm~200mm f/2.8, 24mm~70mmf/2.8, 50mm f/1.4, 85mm f/1.2, 135mm f/2, these are more common lenses for shooting portraits with shallow depth of field.

★Avoid using the maximum aperture of the lens. The maximum aperture image quality of each lens has been reduced. The aperture value for the best image quality is to reduce the maximum aperture by 1 to 2 stops.

★ Avoid using too large apertures such as f/1.2 and f/1.4. If the aperture is too large, it is easy to focus errors or have clear eyes and blurred nose.

11Close to the subject, keep the model away from the background and use a longer focal length to shoot, it is enough to enhance the blur effect.

Blur the Messy Background

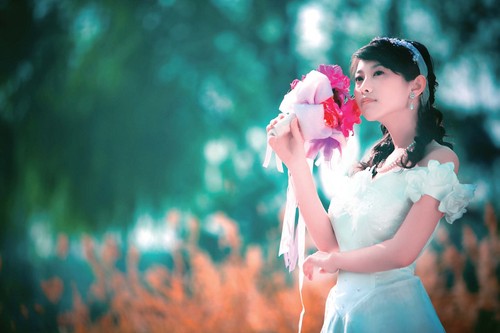
Using shallow depth of field to blur the background can better highlight the feminine lines and facial features. When choosing a background, you should also pay attention to the cleanness and elegance of the picture, emphasizing the warm and romantic style. You can’t choose scenes without principle just because the background is blurred.

Create an Atmosphere with a Blurred Foreground

In addition to shooting shallow depth-of-field portrait effects with blurred background, you can also create a different atmosphere by designing and arranging the scene to make the blur appear before the portrait.

Aesthetic atmosphere with blurred foreground

In this work, photographer has arranged some small branches specially on the left front of the model, and then shot it with an aperture of f/2.8 and a telephoto of 148mm. Since the focus is on the subject portrait behind the leaves, the foreground is out of the depth of field, so it is naturally blurred.