Categories
Studio Lights Education

Photography Skills_Part V

How ​​to Use Both Virtual and Real in Shooting

The role of virtual and real

When the human eye sees near objects, distant objects are illusory. When viewing distant objects, near objects are illusory. This phenomenon goes unnoticed because the human eye has the ability to rapidly change focus.

Although the camera is not as sensitive as the human eye, it has the same function. It can adapt to the physiological needs of the human body when shooting. The camera determines the depth of field by adjusting the aperture size, so that objects within the depth of field are clear, and objects outside the depth of field are blurred, so as to obtain different virtual and real effects.

Practice has proved that if a photo shows all the objects together and shows them naked, the form of the photo will be less lively and more rigid. The content of the photos will also make people clear at a glance, lack of meaning. It will also form trivial details, mottled colors, and bit of fun, and the main body of the family life photos – the characters – the same situation, which is not conducive to highlighting the characters.
The role of foreground blur

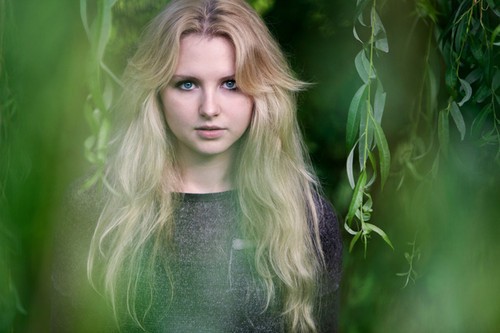
When shooting, experienced photographers always carefully design and arrange carefully, reluctantly give up the foils other than the characters, and boldly blur them. If family life photography can start from the difficult point and use more blurred expressions, the photos will have a new and more beautiful appearance.

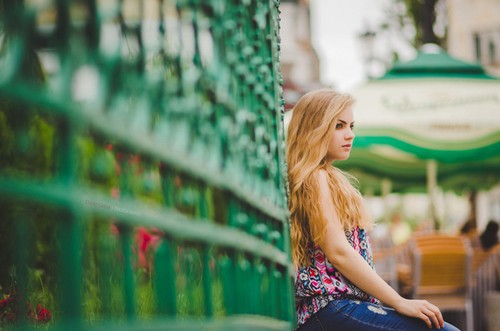
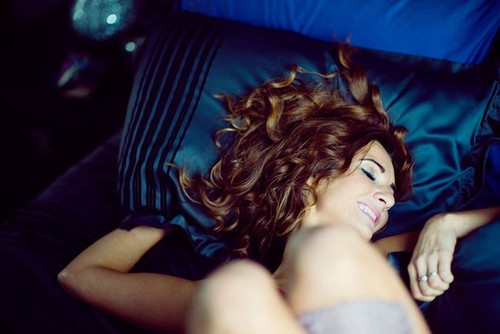
Family life photography uses the most blurred foreground. The blurring of the foreground adapts to the physiological function of the human eye when viewing objects near virtual and far real, and provides a natural process for appreciation.

When the viewer’s eyes are on the photo, the blurred foreground will not interfere with the line of sight, and the eyes will naturally fall on the “real” characters in the distance, forming a clear visual center, and the characters are prominent and pleasing to the eye.

The blurring of the foreground creates a feeling of close-up objects, which can easily make the appreciator connect the foreground, characters and background objects, form a comparison of the three, and strengthen the feeling of space depth. The three-dimensional impression of characters and scenery will also be distinct and clear.

Bokeh foreground also softens colors. The blurring of the foreground blurs the colors of some objects in the photo, creating a soft blend of tones, radiating a strange brilliance, giving the content of the photo a subtle and hazy connotation. It also enhances the form of the photo, adding a soft color decoration to the photo.
How ​​to Use Virtual and Real Correctly

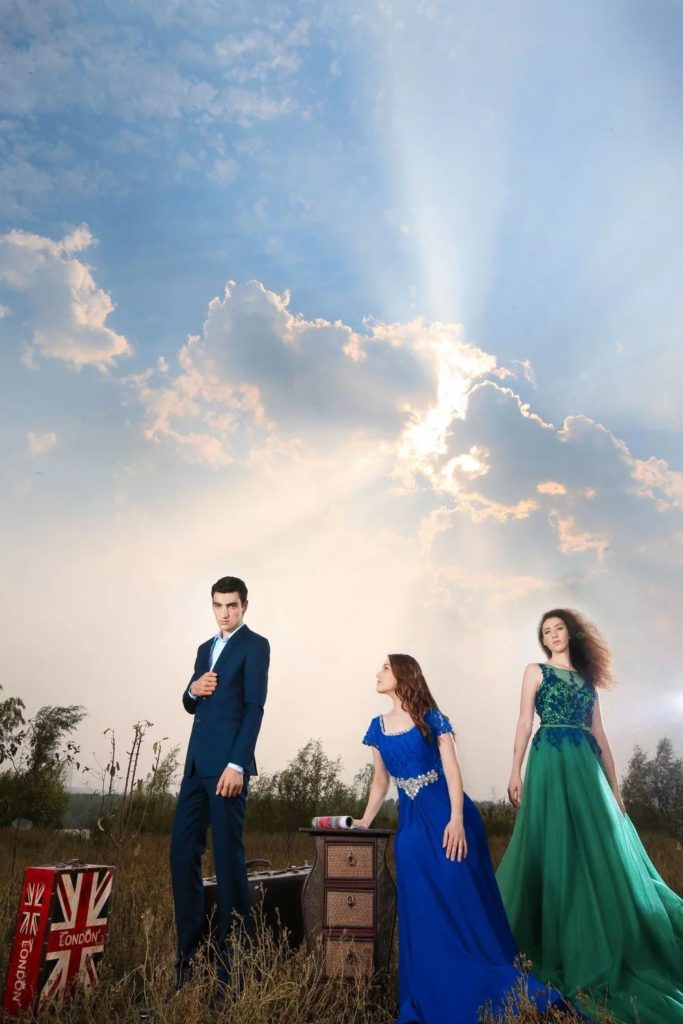
In the creation of artistic photography, large areas of objects are often blurred to create artistic conception. In general, family life photography should not have too many blurred objects. Especially when capturing a beautiful background object, the background object should not be blurred.

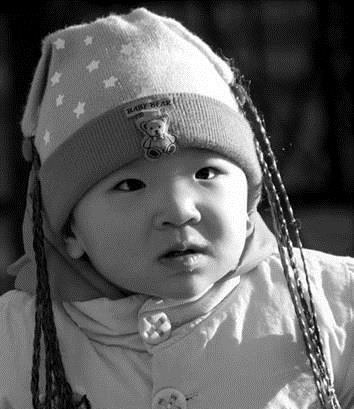
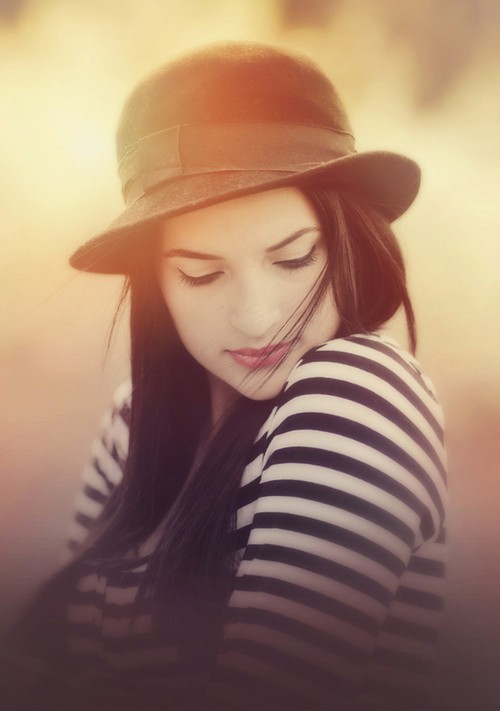
Close-up photography focuses on expressing the mental outlook of the characters. The blurring of the background makes the characters stand out against the clear and subtle background. The beauty of the form and the meaning of the content will be enhanced accordingly.

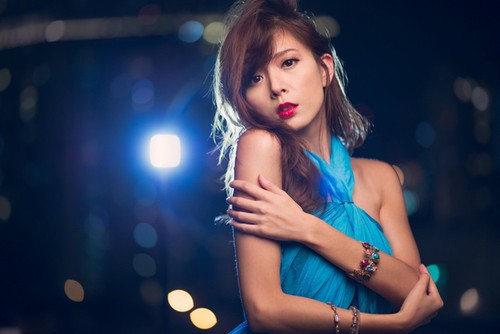
Therefore, in close-up family life photos, it is often essential to use a large aperture to blur the background. Close-up shots can also blur certain parts of the person’s body to highlight certain important parts.

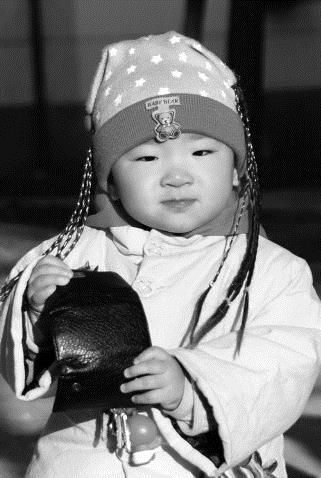
In most cases, the faces of the characters are clear, and the accompanying objects—such as head decorations, hand movements, etc., are blurred. The blurred part is not optional, it plays the role of expressing the content of the photo from the side, implying the overall image of the character, and strengthening the sense of form of the photo.

The realization method of photo blur

A photo has both the unreal and the real, the real objects are more distinct and prominent, and the virtual parts show their beauty in the comparison of the real. The characters and the scenery are in contrast to each other, and the colors are mixed in shades and shades, which are both unified and changing, both contrasting and harmonious, so that the content of the photos is connected with each other, the virtual and the real are combined, the ordinary is turned into the magic, and the artistic meaning is very strong.

The blurring of objects in family life photos is mainly through the use of the principle of the camera – that is, the aperture is large, the depth of field is small, the blurred area is large, the aperture is small, the depth of field is large, and the blurred area is small. In this way, different virtual and real effects can be achieved. The use of a long focal length lens has its own uniqueness in shaping the blurring effect of objects.

Classification of virtual and real

In addition to the relationship between the virtual and the real in the form of the above photos, there are also the virtual and real in the content, the virtual and real in the tone, the virtual and real in the color tone, and the virtual and real in the emotional expression of the characters.

The imaginary and real in the content means that the image displayed in the photo is real, and the association and imagination generated by the image are fake.

The virtual and real on the tones generally indicate the proportional relationship between the different areas of the shadow tones.

The virtual and real colors generally refer to the warm and cold relationship of colors. In the photo, warm tones are dominant, and cool tones are solid. The cool colors are the main ones, and the warm colors are the real ones.

The relationship between the virtual and the real in the character’s modal means that the modal of the photo that flows on the surface is false, and the modal that comes from the heart is true. These are all things family life photography can learn from.
How ​​to Blur the Scene

1. Use the shutter skillfully.

Shoot moving subjects with a shutter speed of 1/30 second or less. During the shooting process, the image of the moving body moves on the film, creating a virtual shadow, giving people a sense of movement. Shutter speed is slower than the speed of the moving body, and ghost images can be left.

2. Open a large aperture and shorten the depth of field.

When the background or foreground of the subject is cluttered and affects the prominent subject, the inverse proportional relationship between aperture and depth of field must be used to enlarge the aperture and place the background or foreground outside the range of depth of field to blur it, giving people a sense of spatial depth.

3. Follow the subject.

When taking pictures of moving objects, make the camera follow the moving objects to move in the moving direction. The result is clear moving objects and blurred background or foreground flow, adding movement, rendering atmosphere, and expressing the movement and speed of the subject. In addition to parallel following, there are also vertical following, arc-shaped following, and circular following. The effects are also unique.

4. Take advantage of natural phenomena such as clouds and fog.

In the early morning, evening or cloudy and rainy days, the sky is cloudy and foggy, and the distant scene is generally shrouded in clouds and fog, only showing the outline of the scene. Especially in landscape photography, the use of clouds and mists, distant mountains and sparse forests, near and far, pale, powerful and sentimental, and imaginary in the spirit, it seems that the mountains and rivers are both grand and deep, and ethereal and meaningful.
5. Apply the zoom lens.

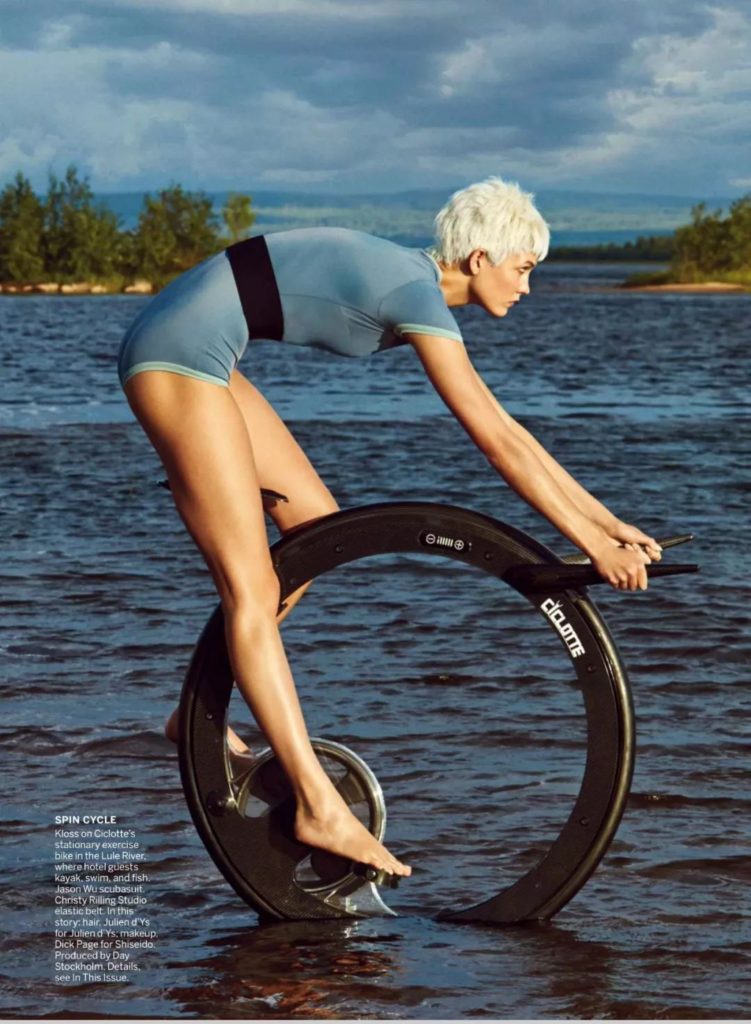
A varifocal lens is a new type of lens that can change multiple focal lengths. People use the variability of the focal length of the lens to push and pull the lens during the exposure process, and overlapping virtual shadows can be formed on the negative to set off the subject and create an atmosphere.

6. Multiple exposures.

Multi-exposure is generally to fix the camera, change or not change the aperture and speed, and take two or more exposures to shoot the object, so that some objects on the negative have a virtual effect. This technique is mostly used for night shots.

How ​​to Master the Perspective Law of Photos

Spatial dimension of the scene

Most of the scenery around us has three-dimensional space, but photos can only show two-dimensional space. It is one of the most important tasks of photographic composition to use the illusion of human vision to reflect the photographed scene in three-dimensional space on the photo plane in two-dimensional space.

There are three conditions for photography to make the picture in two-dimensional space show the form of three-dimensional space and outline. The first is the perspective of lines. The second is the perspective of shades. And the third is the direction of light.

The effect of light has been explained before. Here we mainly talk about the laws of perspective in photography.

In life, we can often see that the outlines of many objects will form certain lines. For example, the trees on both sides of the road are originally parallel. But when viewed from a distance, the trees become more concentrated as they are farther away. And finally gather at one point. This phenomenon is called line perspective phenomenon.
How ​​to master the law of perspective

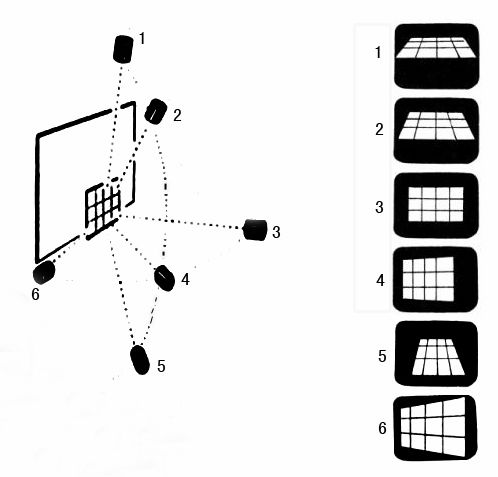
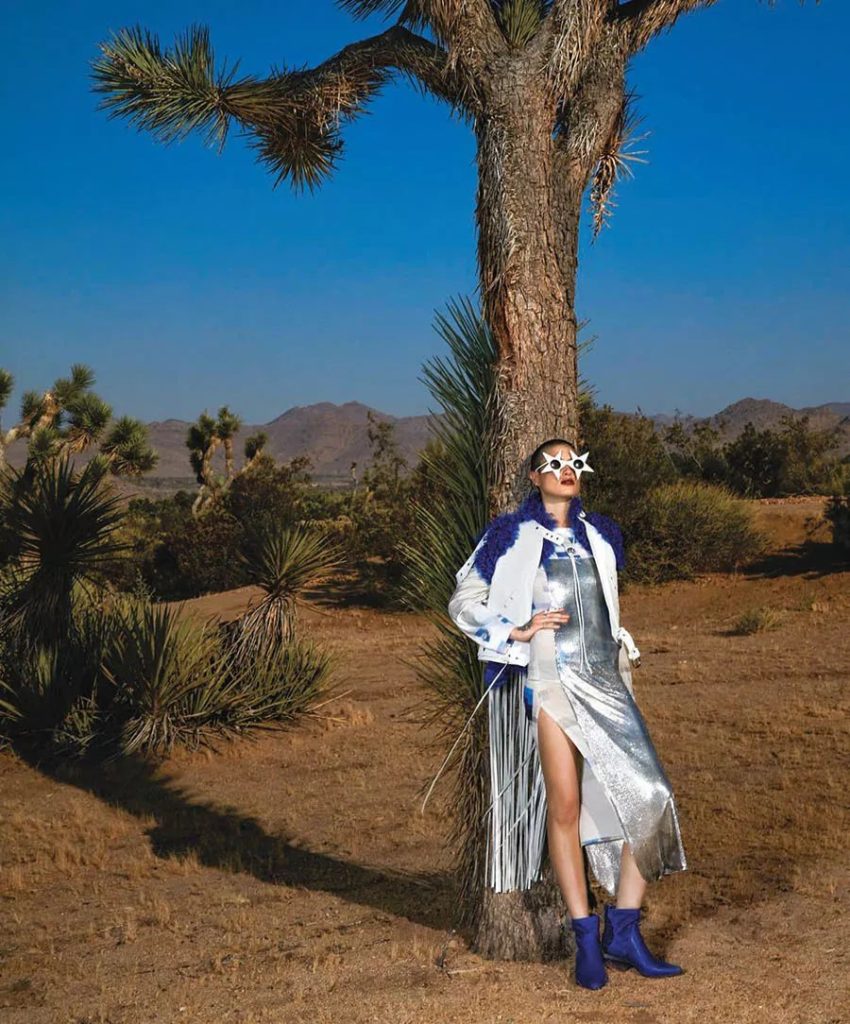
In photography, to emphasize or weaken line perspective, mainly by choosing different shooting points. That is, the closer the distance between the object and the camera, the more exaggerated the line perspective, and vice versa.

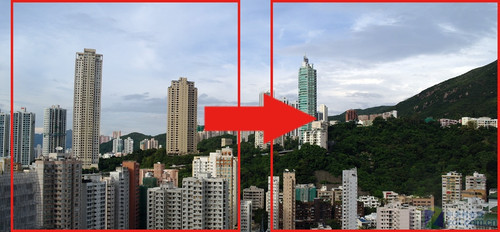
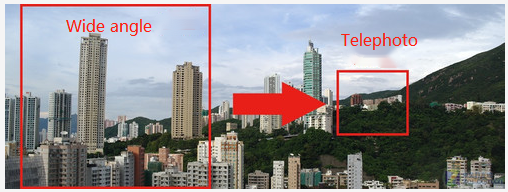
Wide-angle lenses include many scenes and often need to be shot close, so that the line perspective is more exaggerated. A long focal length lens includes less scenery and needs to be shot from a long distance. That reduces the effect of line perspective.

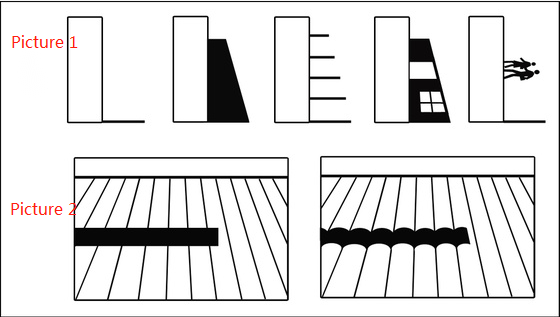
Another phenomenon can also be seen in daily life. That is, objects in the distance are brighter and the contrast is lower than those close by. The sharpness of outlines and the saturation of colors are worse than near objects. We can use these phenomena consciously in photography to enhance the spatial depth of the picture.

For example, when shooting some larger scenes (especially landscape photography), you can choose a darker foreground and a brighter background to enhance the depth of the picture. Enhancing the three-dimensional and spatial depth of the picture is an important expression skill in photography.

How ​​to Express the Profoundness of Photographic Images

Expressing a sense of depth in a photo does not mean that the subject extends into the distance to express the sense of depth. Because any picture is a plane composed of length and width. And the sense of depth seen on the picture is caused by the illusion of the human eye.

A flat photo, coupled with the illusion of the human eye, appears in three-dimensional space. And the photo has a sense of depth, which increases the expressiveness of the picture. In order to better express the sense of depth, in addition to deliberate composition, but also to use some specific shooting methods. The methods commonly used by photographers are as follows:
1. Shooting method with overlapping scenes:

When several scenes with similar beginnings or several objects of the same kind are placed on top of each other, from perspective, the scene appears large when it is close. And it appears small when it is far away, and the front and rear are clearly separate. Especially when shooting with a telephoto lens, using the overlapping method to express the sense of depth is the most effective method.

2. Use perspective scales:

The vision of general objects is – the closer an object is to the human eye. The larger it appears, and the farther it is, the smaller it appears. In daily life, people naturally use this habit to judge the distance of objects. The perspective ratio of the camera lens performance is more obvious. Therefore, when taking pictures, the use of this perspective principle can show the depth of the scene.

Generally, when shooting with a wide-angle lens, the distance between the front and rear scenes increases sharply. Especially when shooting close to the subject, you can consciously increase the sense of depth. And the wide-angle lens takes in a lot of scenery.

3. Use leading lines to add a sense of depth:

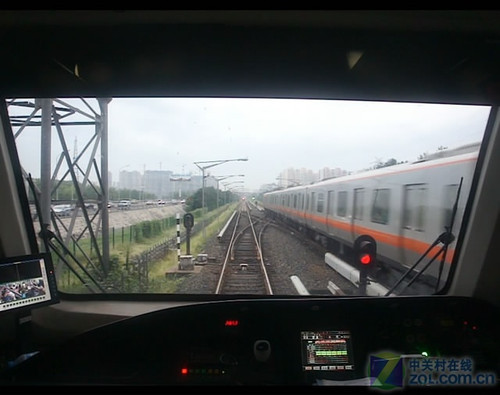
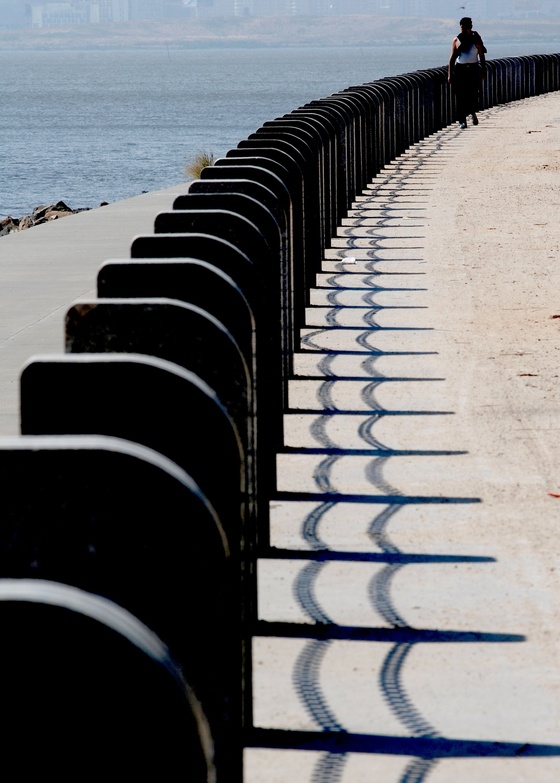
For example, when shooting streets, boulevards, river banks, and railways, the photographer finds a suitable position. Let some scenes that play a straight line start from the close to the lens. And gradually enter the center of the lens and extend into the distance.

For example, when photographing the aforementioned scenes such as streets or boulevards, river banks, railways, etc., you should not stand in the middle of them. But should lean on one side and squat down to shoot. So that the buildings on one side or the trees next to boulevards and railways start at the upper corner of the photo. A diagonal line comes into being, gradually extending to the center of the picture and extending into the distance. Both standard and wide-angle lenses have this effect.
4. Use aerial perspective to create a sense of depth:

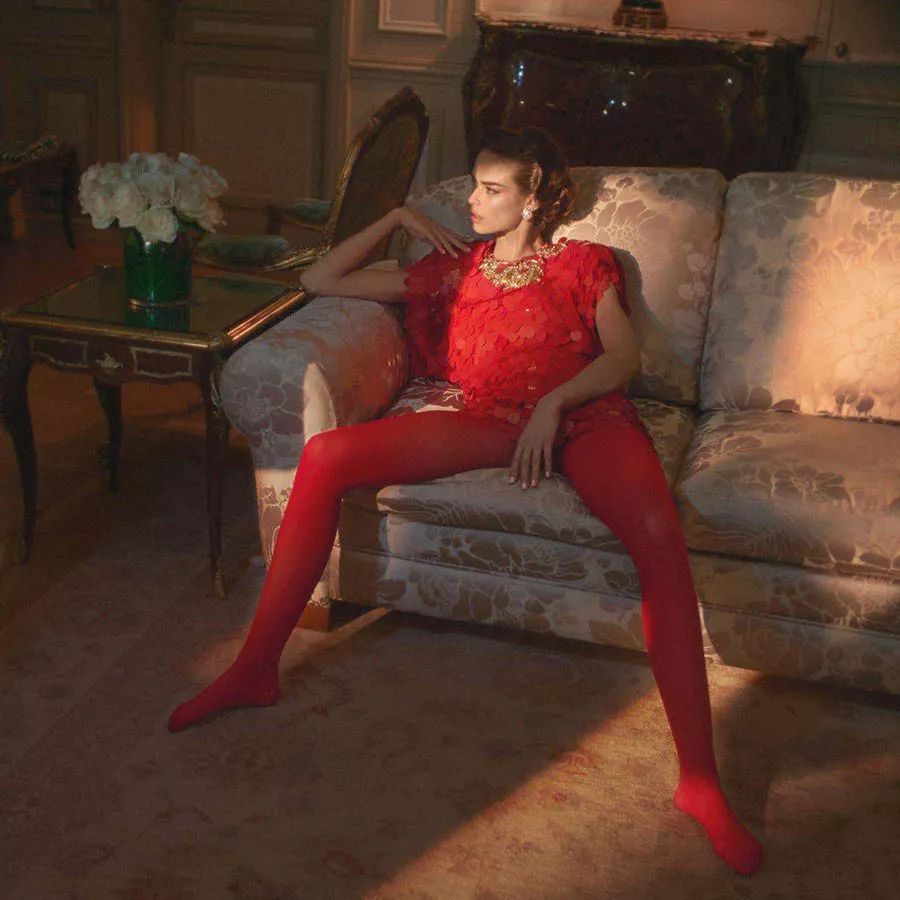
The atmosphere contains various degrees of small steam, dust, smoke and other floating objects. These are the material bases from which air perspective is created. Aerial perspective can create a sense of distance because light is diffused by fog, dust, etc. as it travels through the air. The diffusion near the camera is not obvious, and the color is close to the original color of the object. The farther away from the camera, the more obvious the diffusion phenomenon, and the lighter the color of the object.

After the diffusion effect, only the blue light in the spectrum can pass through the impurities in the air. So when looking at the distant mountains, they all appear blue or blue-purple. Combined with the fact that the film is particularly sensitive to blue light, the effect of air perspective becomes particularly evident.

(To Be Continued)
Categories
Studio Lights Education

Photography Skills_Part IV

How ​​to Use Color Correctly in Photography

The role of color in photography

The colors of various objects in nature are formed by the selective absorption and reflection of the sun’s rays on the objects. Light and color are closely related. Where there is light, there is color.

When photographing, you must master the knowledge of light and color, be able to distinguish different colors, observe the brightness and purity of different colors, and then take good photos in color photography.

Color can also reflect people’s feelings. In the long-term production and life practice, color is endowed with emotion and becomes a symbol representing a certain thing and thought and emotion.

Different colors can give people different psychological effects, can stimulate people’s emotions, and resonate psychologically and emotionally. At the same time, when taking pictures, it is necessary to study the relationship between color and human psychology, and play the role of color.

For example, red symbolizes joy, yellow symbolizes nobility, green symbolizes life, blue symbolizes tranquility, white symbolizes frankness, and black symbolizes terror. In photography, you must understand the relationship between color and emotion, use color purposefully, and further express the theme of the work.

There are many kinds of colors. In addition to the seven kinds of light of red, orange, yellow, green, cyan, blue and purple, there are several intermediate colors. There are about 180 species that can be identified with the naked eye. Through observation and testing, the general feeling of various colors is different.

Color configuration

The application of color in photography should be reasonable and exact, emphasizing that it is consistent with people’s feelings, and emphasizes the foil to the theme. Such as wedding photos, the more red, the stronger the atmosphere.

At the same time, the color processing should be in line with people’s psychological state. In line with people’s living habits and appreciation habits, the expressive power of color can be improved.

The configuration of colors in photography should be carried out in accordance with the requirements of artistic laws. The color configuration should set off the atmosphere and highlight the theme. Strict framing and composition, clever use of light, and reasonable configuration of colors, to achieve the purpose of expressiveness, freehand brushwork, and lyricism.

In color photography, the more colors on the screen are not necessarily the more beautiful. Do not pile up and list, giving people the feeling of disorganization. You have to give up in order to gain something. It is necessary to be good at daring to give up and take things in the use of colors, to be good at refining, summarizing and processing colors, burying the colors in bright but not vulgar, elegant and extraordinary, and integrating beauty in the plain, so that the photographic photos can achieve the artistic effect of painting and coloring.

How ​​to Measure Lens Angle in Photography

When taking pictures, what we see with the naked eye is a three-dimensional object. But what you see in the camera viewfinder is a flat image, and the viewing angle is also limited.

The human eye has a wide viewing angle, and its perspective is equivalent to that of an 85-90mm mid-focus lens mounted on a 35mm camera. When people have a specific interest, they focus on the main points of interest and ignore objects other than the main points. In this way, the scene seen by the naked eye is sometimes equivalent to the viewing angle range of a lens with a longer focal length.

On the whole, the human viewing angle is similar to that of a 150° wide-angle lens. If there is an object in the line of sight, it occupies an angle of view of about 50°, which is close to that of a standard lens. If we find that this object has some details, the angle of view of the naked eye quickly becomes that of a long focal length lens of about 2.5°.

There are many lenses with different focal lengths for us to use, corresponding to the angle of view of the object observed by the naked eye. Each lens has its own angle of view. It is difficult to remember which lens is what angle of view. Many lenses are not known until they are attached to the camera.

Here we can use a certain part of our body as a standard to get a rough idea of ​​the angle of view of the camera. For example, straighten your arms and bend your palms inward. The coverage of the two palms, including the fingers, is equivalent to the field of view of a 100mm focal length lens on a 35mm camera.

How ​​to Choose the Shooting Angle

The importance of shooting angle

The angle from which the photo is taken not only plays an important role in expressing the content of the shot, but is also an indispensable part of forming a beautiful composition. Different shooting angles, the photos taken are very different. Changing the angle can directly affect the structure of the picture.

For example, three photos are taken at the same distance, at the same height, and with the same focal length, using the elevation, flat, and depression angles. Although the front and rear scenery does not change, the content included in the picture is different.

If you use different heights, at the same distance, and take three more photos with elevation, flat, and depression angles, you will find that the foreground and background change greatly. This means that the angle of the camera and the subject is different, and the effect is not the same. The height of the lens angle directly affects the change of the horizontal line and spatial depth in the picture.

The use effect of depression angle, flat angle and elevation angle

Depression angle, that is, the position of the camera is higher than the object when taking pictures, and the picture is taken from top to bottom. It is characterized by a wide field of vision, a large scene, and a complete view of the whole scene. This method is mostly used for shooting large scenes, such as shooting large-scale harvests of grain, grasslands and groups of livestock, transportation hubs, water surfaces, etc. If the depression angle is large, although there is no broad scene, it also has its unique effect when shooting special subjects.

Flat angle, that is, the camera and the subject are roughly on a horizontal line. This angle is close to the habitual impression of the human eye. The characteristics of the head-up composition are that the perspective effect is good, and it is generally not easy to produce deformation. This method is easy and convenient, and does not require any additional equipment. But the resulting photos are rarely changed or new. Photography beginners are accustomed to taking pictures with a head-up angle.

elevation angle, which is shot from bottom to top. The camera is lower than the subject, resulting in a photo with a low horizon. The feature of elevation angle shooting is that it can make the scene look magnificent and tall. Such as shooting buildings, there is a sense of straight into the sky. Taking high-altitude diving, with the blue sky as the background, shows the athlete’s momentum and the feeling of flying in the sky. When shooting at a low angle, the cluttered background can also be discarded, so that the picture is concise and the subject stands out.

The combination of shooting angle and the horizontal angle of the scene

While choosing the high and low angle, you should also choose the horizontal angle of the scene. Take a building as an example, whether to photograph the front, side or back requires multiple observations.

After setting the angle, compose the picture. For another example, when taking a portrait of a person, you might as well surround the subject, combine the characteristics of light, face shape, etc., observe carefully, and shoot at the most beautiful and ideal angle.

The choice of angle is mainly subject to the needs of the content. Which aspect can best reflect the characteristics of the subject and is the most expressive, just shoot in which position. Front, side, and back shots, each with its own characteristics.

The frontal composition, the line structure is symmetrical and stable, with a solemn and majestic atmosphere. However, the front composition lacks a sense of perspective and is easy to be rigid.

The side composition has a strong sense of three-dimensionality. That can produce a sense of space and the effect of line perspective. If you shoot portraits from the side, you can fully display the graceful posture and facial expressions. Using the contrast of light and dark, the three-dimensional effect can be enhanced. This is the angle that is usually used more.

Shooting from the oblique side, the scene has a part of the front and a part of the side in the picture. The entire outline of the subject can be highlighted.

Most of the back compositions are used for the special needs of the content and can show special effects. There are also many impressive and good works in the back shot, which must be experienced and explored in practice.

How ​​to Use Lines in Photography

The role of lines

All objects are made of lines. For example, houses are composed of vertical and horizontal lines. Mountains and rivers are composed of curved lines. Trees are composed of vertical lines. And spheres are composed of curved lines.

When the object moves, the lines change. For example, when a person stands, it is a vertical line and when running, it becomes an oblique line. Mastering the structural changes of lines plays an important role in the composition of photos.

horizontal lines.

It enables the human vision to observe from left to right or right to left. This results in a feeling of expanse and calm. The line structure of the sea, grassland, seedling fields and wheat fields are all horizontal lines. Looking at it makes one’s heart open.

vertical lines.

An image that can make people feel the scene from top to bottom or bottom to top. Gives a solemn and great feeling. Such as sturdy trees, standing chimneys, towering derricks, tall statues, etc., are all represented by vertical lines on the screen.

Slash lines.

If the scene shows a diagonal structure on the picture, the space end of the picture will obviously expand or shrink. It gives people the feeling of movement. Oblique lines can lead people’s eyes to the depths of the space. It forms a vision of near big and far small. The take-off of the plane, the fast running of the athletes, and the shooting of artillery fire are all represented by slashed lines.

Curved lines.

Curved lines can give people a twist, jump, and intense feeling, which increases the beauty of the picture. Rolling mountains, galloping seas, winding trails, and winding rivers are all curvilinear structures. Curves can vividly reflect the characteristics of the scene.

How ​​to use lines

When taking photos, be good at using lines. Every picture should have a main line. It unifies the scattered lines around it, forms the center of the picture. And it leads people’s vision to the main body. At the same time, the change of lines is used to express the perspective effect and sense of space of the photo.

When taking pictures, we must be good at grasping the main line. And at the same time use the thickness and depth of the line to form a certain rhythm and rhythm through combination, giving people a sense of weight, speed, and strength. Express the photographer’s thoughts and feelings and reveal the subject of the photo.

For example, the lines of the front composition are symmetrical and stable. This can give people a solemn and majestic atmosphere. Another example is the contour line has the function of indicating the shape and posture of the object. In particular, the figures, the rocks on the mountain peaks, and the dancing postures are all the use of curved lines. By making good use of the contour lines, you can truly and vividly reflect the original appearance of things. And achieve the purpose of vivid shooting.

There are two kinds of lines on the picture, intangible and tangible. The visible lines are visible on the picture. The invisible lines are drawn from the inner intention of the scene in the photograph. Such as the aspect of movement, the direction of people’s eyes and sight, etc. When using, it is necessary to take into account both of them, so that they both get satisfactory performance.

(To Be Continued)

Categories
Studio Lights Education

Photography Skills_Part III

How ​​to Correctly Press the Shutter When Shooting

The function of the shutter

The shutter is the device on the camera that controls the exposure time of the photosensitive film. The shutter opening time, in seconds. The slowest speeds are 1 second, 1/100 second, 1/500 second, 1/1000 second, etc. The more precise the camera, the more complete the shutter equipment, the more the shutter series, and the more it can adapt to the needs of various shooting situations. The various shutter speeds are generally engraved on the lens.

The camera shutter also has T and B slow-moving devices. The door opens when the camera button is pressed, and closes when the finger is lifted. The T door opens when the button is pressed, does not close when the finger is lifted, and only closes when the shutter is pressed a second time. T-gate can shoot slower film.

The shutter opens and closes, usually by pressing the shutter button directly with your finger. If you use a slower shutter speed or a longer exposure time, use a cable release to prevent camera shake. During photography, in order to obtain good shooting results, in addition to accurate distance measurement and exposure, it is also necessary to press the shutter correctly. To master the essentials of pressing the shutter, and gradually achieve the unity of mind and hand.

How ​​to Use the Shutter Correctly

Press the camera shutter, stand with your feet balanced, and hold the camera firmly with both hands. Don’t shake your hands, put your fingers on the shutter in advance, and don’t press too hard. Do not tilt the camera to avoid blurring the image. While shooting with a speed of less than 1/30 second, stop breathing when pressing the shutter, and do not shake the camera.

When shooting at slow speeds, try to mount the camera on a tripod. While there is no tripod, try to choose a place with support, so that the body or arms have support points to facilitate stability.

When shooting with bulb B or bulb T, use a shutter release to control time and reduce camera shake. Usually, you should practice slow-speed photography or dynamic photography more to master the essentials of pressing the shutter and improve your reaction ability.

How ​​to Avoid Abnormal Electronic Shutter

How ​​the electronic shutter works

Camera shutters with automatic exposure function are mostly electronic shutters. This shutter works with the suction of an electromagnet, so the exposure time is precise. Some are in accordance with the traditional mechanical shutter division, the implementation of 1 second to 1/1000 second manual exposure. Others implement stepless (no division) automatic adjustment of exposure according to the intensity of the lighting at the shooting site.

Generally speaking, electronic shutters do not suffer from inaccurate shutter speeds caused by “spring fatigue”. However, this phenomenon often exists in actual use, which is mostly caused by the following reasons. As long as you pay a little attention, you can keep the electronic shutter working normally.

How ​​to ensure the shutter works normally

  1. Cameras of “point-and-shoot” type with attached flash will consume a lot of power when the number of flashes is high. Continuing to reluctantly perform flash charging when the battery is low on power may result in the electronic shutter not working properly or even not working and not firing.
  2. When shooting night scenes, the slow exposure of bulb B is often used. Because the electromagnet sucks the rear curtain of the shutter for a long time to keep the shutter fully open, it consumes more power. When the battery voltage is not sufficient, the electromagnet loses its suction power, and the B door will suddenly close by itself in the middle of the exposure.
  3. When taking pictures in the cold zone, because the temperature is too low, the energy of the battery will be reduced or even no power will be supplied. To this end, the camera and battery should have a certain temperature (the photographer can cover the camera in his coat and take it out only when shooting), so as to keep the electronic shutter with the proper power supply and work normally.
  4. If there is a strong magnetic field or a strong electric field at the shooting site, it will often interfere with the electromagnet of the electronic shutter, resulting in abnormal operation of the electronic shutter.

    How ​​to Use the Stand-alone Light Meter

    There are two types of stand-alone light meters according to the metering method. One of them is to measure the reflected light of the subject, called a reflected light type photometer. Today’s stand-alone photometers are generally general-purpose.

    Usage and Features of Reflected Light Meter:

    Reflected light meter is used to measure the reflected brightness of the subject. Point the light meter at the subject when measuring the light. When using it, pay attention to the following points.

    1. Next to the camera, point the light meter at the subject to measure the light.
    2. The light-receiving angle is close to the viewing angle of the standard lens of the camera, which is about 30°~50°. In the case of a dual-purpose photometer, the diffuse reflector should be removed.
    3. The reflected light meter is suitable for situations where the distribution and range of bright tones and dark tones are roughly equal, and it indicates the average exposure.
    4. If the contrast between the light and dark of the scene is prominent, you can measure different parts of the subject closely, and select the average exposure.
    5. If the subject background is too bright, the light metering juice should be looked down slightly for measurement.


    Usage and features of incident light type photometer:

    Incident light type photometer is a kind of light meter used to measure the illuminance of the subject. It is not to measure the light at the subject, but to place it in the position of the subject and measure the light in the direction of the camera.

    When using it, pay attention to the following points.

    1. The light-receiving angle of the illuminance meter is generally 180°, and when in use, it is directed towards the camera and directed towards the subject.
      1. A hemispherical diffuser should be added to the photometric element before use.
      2. It is not necessary to approach the subject to measure the light, but make sure that the light meter is in the same lighting range as the subject.
      3. To determine the exposure of distant subjects, an incident light meter is better.
      4. For objects with a bright background, it is more accurate to use an incident light meter.
      5. Do not let shadows and your own shadow block the light meter.

      How ​​to Determine Exposure Without a Light Meter

      If I use a camera that doesn’t have a meter (though there aren’t many of them anymore), and I don’t have a separate meter, how do I determine the exposure? This requires artificially determining the exposure combination through visual inspection and combined with actual shooting experience.

      There are many factors that affect the exposure of film. If there is no light meter, the exposure should be determined according to the following main factors.

      1. The brightness of the photographed object:

      The brighter the scene, the brighter the reflection will be, requiring less exposure. The darker the scene, the lower the brightness of the reflections, and more exposure is required.

      2. The intensity of the lighting light:

      Natural light

      The brighter the lighting is, the brighter the subject will reflect, and the less exposure you will need. The weaker the lighting, the less bright the subject will reflect, and the more exposure it will take.

      The intensity of sunlight is constantly changing at different times of the day. Among them, the sunlight at noon is the strongest, and the light in the evening and early morning is weaker. The brightness between them is many times different.

      For example, the exposure combination for shooting a scene at noon is f/16, 1/250 sec (using ISO100 film). In the same weather conditions, such as at 10 am or 3 pm, the exposure combination is approximately f/15, 1/250 sec. If the time is earlier than 10 am or later than 3 pm, change the exposure to f/11, 1/125 of a second, or increase the exposure.

      The influence of the weather on the exposure is roughly as follows:

      In sunny weather, the scene is the brightest. If the exposure is f/11, 1/125 seconds, then, in sunny, cloudy, cloudy, cloudy and other weather conditions, the exposure should be increased by one stop. . The intensity of the sun’s rays varies depending on the season. The light is the strongest in summer, and the exposure is increased by one stop in spring and autumn, and one stop in winter than in spring and autumn.

      Artificial Light

      The situation with artificial light is more complicated. The most commonly used artificial light source is the 10,000-shot flash. When shooting with a flash, the aperture size is determined based on the flash guide number and the distance of the subject from the flash.

      3. The sensitivity of the film:

      The higher the sensitivity of the film, the less exposure is required, and the lower the sensitivity, the more exposure is required.

      The sensitivity of film is currently expressed in ISO system, such as ISO100, ISO400, etc. The difference in film sensitivity is doubled, and the exposure is doubled (i.e., open the aperture one stop up or down, or increase and reduce the shutter speed one stop). For example, the exposure combination when using ISO100 film is f/11, 1/125 sec. If you change ISO200 or ISO400 film, the exposure is reduced to f/16, 1/125 sec (or f/11, 1/125 sec), f/22, 1/125 sec, respectively.

      4. Filters

      When shooting with a filter, such as adding a filter in front of the photographic lens, the filter will inevitably absorb part of the light passing through the lens. So increase your exposure accordingly. Increases exposure by a factor determined by the exposure factor of each filter. For example, taking a black-and-white photo with a medium-yellow filter Y2 requires doubling the exposure.

      How ​​to Correct the Exposure of the AE Camera

      The so-called AE camera, is the use of automatic exposure control camera. Take pictures this way. Correct exposure is not difficult, but some people feel that sometimes the results of shooting with AE are not ideal, and the exposure is not right.

      Exposure characteristics of AE camera

      Problems like this main rise up by not understanding the exposure characteristics of AE cameras. Because the metering system of the AE camera belongs to the reflection type, and the reflection type is based on the reflectivity of 16-18% as the exposure benchmark.

      For general subjects, the average reflectance generally does not fall within the above range. Exposure results are fine. However, exposure problems can arise with subjects with high or low reflectivity. That is, subjects with high reflectivity (like white) will be underexposed (gray). While subjects with low reflectivity (like black) will be photographed overexposed (gray).

      This is not a problem with the camera and operation. Instead, the camera’s self-exposure system faithfully executes exposure at a reflectance of 16-18% according to the results measured by the metering system.

      Exposure Correction Measures

      From this, we can draw a conclusion that when the reflectivity is high or low, corresponding corrective measures need to be taken. Overexposed white objects to reflect the original white, and underexposed black objects to reflect the original black. This is the exposure correction measure, also as we all know as “exposure correction”.

      So, how to do “exposure correction”? It depends on what camera you use when shooting. The operating system design of various cameras is not the same, and the correction methods are not the same.

      First, look at exposure correction for pocket cameras. If the film sensitivity of this camera is not set automatically, you should lower the sensitivity if you want it to be overexposed. Such as ISO100 film adjusted to ISO50 or lower. If you want to underexpose, turn to a high sensitivity file.

      Many of these cameras currently on the market are equipped with “DX”, which is an automatic sensitivity setting function. This can’t correct exposure by setting the sensitivity, but these cameras have a “backlight correction” button or “AE lock”.

      Exposure correction for DSLR cameras

      SLR cameras have more exposure correction methods than pocket cameras, and can do subtle and subtle adjustments.

      As with pocket cameras, changing the ISO setting is the most basic correction. Most SLR cameras have exposure compensation and AE memory functions, which can add or subtract 1/3 stops of exposure, and the degree of addition and subtraction can reach up to three exposure levels. Less can reach two levels, that is, 2EV to 3EV.

      The fastest action is the “AE memory” button. It depends on what part of the exposure will be benchmarked. For example, when shooting a backlit image, if you mainly shoot the face of the person, then approach the subject, press the “AE memory” button with the lens facing the face. Then return to the best position for the composition, and then press the shutter to take a picture.

      It doesn’t matter how much exposure you need to compensate for. To change the sensitivity and correct the exposure through the exposure compensation button, you need to measure the exposure required for correction first. And then set the sensitivity line compensation dial scale.

      Of course, cameras with multi-zone integrated metering capabilities such as Nikon FA and Olympus OM4 can automatically perform compensation and correction during metering, so the exposure will be very accurate, although it does not “AE Memory” button or “Exposure Compensation Dial”.

      (To Be Continued)

Categories
Studio Lights Education

Photography Skills_Part II

How ​​to Use Mixed Light in Color Photography

The color temperature of light is directly related to the color effect of color photography, so in color photography, always try to balance the color temperature. Such as using sunlight-type or light-type color films, adding color filters to raise and lower the color temperature, choosing the ideal lighting light, and adding color films to correct color casts when making color photos.

Therefore, when shooting, it is very taboo to mix lighting with multiple light sources with different color temperatures. However, if the mixed light is used skillfully according to the needs of photographic creation, good color performance will also be achieved.

For example:

1. In a dark environment, use daylight-type color flash to shoot side portraits, and add electric light to illuminate the model with backlight to obtain a decorative effect with normal overall color and golden outline light. On the contrary, if the light-type color film is used, the main light is iodine and tungsten lamp milky white light, such as flash backlighting, the bright blue outline light effect can be obtained.

2. Use daylight-type color film to take a close-up shot of two children watching the lantern with great interest under natural indoor light conditions during the day. Adding ordinary electric lights to assist the lighting of the child’s face can form the effect of fiery red light like a lantern.

3. Whether using daylight-type or light-type color film, when shooting a character with a specific occasion, a specific taste or a stage image, mixed lighting can be applied to one front and one side, which can produce exaggerated colors or strong contrast effects.

How ​​to Photograph in Diffuse Light Conditions

Scattered light is the light formed by the sun’s rays being blocked by clouds or fog. We often encounter scattered light weather, such as thin clouds covering the sun, cloudy days, rainy days, snow days, and weather before sunrise and after sunset, and scattered light will appear.

Under scattered light conditions, the tones of the scene are easy to appear flat, and the colors are relatively dull. But photographing in diffuse light conditions can sometimes achieve unique color effects.

When shooting under scattered light conditions, color processing is very important.

Try to choose dark and brightly colored scenes as the foreground to improve the contrast of the picture tones and avoid flat scenes.

If there is a large area of ​​lead-gray clouds in the sky on cloudy or drizzly days, try to take as little or no part of the sky as possible when framing the scene, so as to avoid the sky appearing dead white after taking the photo.

The shooting distance under scattered light conditions is proportional to the reproduction of color saturation. The closer the shooting distance, the more vivid the color of the scene. The farther the distance, the lighter the color. Therefore, try to choose some medium shots, close-up shots or specific shots. It is not suitable to shoot some large scenes with panoramic views.

The exposure control of the scattered light scene should be based on the brightness of the scene on the ground, and the darker foreground is the main basis. Don’t use a distant view or sky as your exposure basis, or you’ll fail with underexposure. At the same time, it is suitable to use color film with medium photosensitive speed and high contrast ratio, so that the contrast of the picture can be better displayed.

How ​​to Prevent Red Eye in Shooting

Red eye is a phenomenon that any camera will encounter when using the flash. The reason for its formation is very simple. Red eye occurs because the light from the flash enters the pupil of the human eye and hits the blood vessels in the eye.

Red eye tends to be more noticeable the closer the flash is to the lens of the camera. Conversely, the farther the flash is from the lens, the less chance of red-eye. According to this situation, it is effective to solve the red-eye phenomenon. Move the detachable flash a distance so that it provides enough light for the shot without causing red-eye.

However, for those pocket-sized built-in flashes, that doesn’t work. In portrait photography, if the model occupies most of the picture, the red-eye phenomenon is more prominent. Therefore, when taking such photos, you should pay attention to let the model move back as far as possible, so that the red eye will not be so obvious.

Pocket cameras with built-in flashes are more likely to experience red-eye than other cameras. This is because the flash is too close to the camera lens. The flash mounted on top of a regular SLR camera also produces red-eye. Especially when the flash is directly facing the model, the situation is more serious.

Many medium and large flash units can be rotated both horizontally and vertically. You can take advantage of this feature for bounce flash. This will definitely prevent the red-eye phenomenon from happening. Even if direct lighting is necessary, it is best to keep the flash farther away from the optical axis of the lens. A pulsed line with a bracket or a flash with an inductive sync is ideal.

How ​​to Choose the Shutter Speed According to the Focal Length of the Lens

Classification of focal lengths

The lenses of modern cameras, especially those used in single-lens reflex cameras that can be interchanged with various functions, have different focal lengths.

According to the ratio of the focal length to the diagonal of the film, various lenses can be roughly divided into four types:

A lens with a focal length shorter than the diagonal of the screen is a short focal length lens.

A standard lens whose focal length is close to or consistent with the diagonal of the screen is called a standard lens.

A lens with a focal length that is approximately twice as long as the diagonal of the screen is called a medium focal length lens.

A lens with a longer focal length is called a telephoto lens.

The field of view of the picture captured by a short focal length lens is wider than that of a standard lens, so it is called a wide-angle lens. The long focal length lens has a narrow angle of view, and the image of the distant object appears larger, so it is also called a telephoto lens or a telephoto lens.

Shutter selection

Usually photography generally does not need to use a tripod, mostly handheld cameras. In order to prevent jitter and blurring of the scene, the reliable way is to choose the shutter speed as fast as possible. But sometimes due to exposure, depth of field and other reasons, it is impossible and unnecessary to use all high-speed shutters.

Under normal circumstances, similar shutter speeds can be selected according to the focal length of the lens. For example: 1/30 sec for a 28mm short focal length lens, 1/60 sec for a standard lens, 1/125 sec for a 105mm medium focal length lens, and 1/250 sec for a 250mm long focal length lens. Because, the length of the focal length of the lens is directly related to the narrow and wide imaging field of view. The longer the focal length of the lens, the narrower the field of view, and the longer and heavier the lens itself is, and the slightest vibration can cause ghosting or blurry images. Therefore, it is necessary to increase the shutter speed at the moment of exposure accordingly.

Of course, choosing a shutter speed stop based on the focal length of the lens is just a general measure to help avoid virtual motion. Occasionally it may also be necessary to shoot with a slow shutter speed while holding a camera with a telephoto or zoom lens attached.

But in either case, it is necessary to adopt the correct posture for holding the camera and the lens. And to develop the good habit of pressing the shutter button steadily and calmly. In this way, the imaging effect of the captured picture can be kept as clear as it should be.

How ​​to Control the Shutter Speed When Shooting Moving Objects

In ordinary shooting, you can first determine the aperture size. And then match with the appropriate shutter speed, you can shoot.

However, in the shooting of moving objects, due to the displacement of the subject, in order to make the image clear, we must first consider controlling the shutter speed. And the conditions that determine shutter speed are complex. Shutter speed that is too fast or too slow will result in blurred images.

How to Control the Shutter Speed When Taking Moving Photos?

1. Speed

The shutter speed that should be selected should be determined according to the speed of the subject itself. Such as pedestrians and cars, the speed is different, the choice of shutter speed is also different. The selection principle is to make the selection of speed to capture the instantaneous posture and action of the moving body. And to narrow the aperture as much as possible to increase the depth of field range. So that the moving body has a sense of movement and the scene is clear before and after. Aperture and shutter speed should work well together. Generally, the faster the object moves, the faster the shutter speed should be.

2. Distance

Determine the shutter speed based on the distance from the moving object. The further the distance, the slower the shutter speed. The closer the distance, the faster the shutter speed. Because the distance of the moving body is small, it takes a long time to go beyond the visual range of people. So the speed is slow. Otherwise, the speed appears to be faster.

3. Orientation

Choose the shutter speed according to the direction in which the moving subject is being shot. There are generally three angles for the direction formed by the camera and the moving body. That is 0°, 45°, 90°. Shooting at the above three different angles requires different shutter speeds. When shooting at a 90° angle, the moving body is passing in front of it. And the speed is very fast, so a high-speed shutter should be used.

When shooting at a 45° angle, the speed is between 0° and 90°. When shooting at an angle of 0°, the moving body is approaching or driving backward, its position changes gradually. And the speed is slower. A slower shutter speed should be selected. For example, when shooting at a 0° angle with a shutter speed of 1/100 second, at a 45° angle, use a shutter speed of 1/200 second. And when shooting at a 90° angle, use a shutter speed of 1/500 second.

4. Focal length

Choose the shutter speed according to the focal length of the lens. The longer the focal length of the lens, the shorter the distance between the lens and the moving body. So the faster the shutter speed. The shorter the focal length of the lens, the smaller the negative image, and the slower the shutter speed.

5. Aperture

Adjust the shutter speed according to the size of the selected aperture. When the aperture is selected to be large, the amount of light passing through is increased. And the shutter speed can be accelerated. When the aperture is small, the shutter speed can be slowed down. When shooting, you can adjust the aperture and shutter according to your needs.

In general motion photography, when the distance is 15 meters, the focal length is 50mm. And the angle is 0°, the shutter speed varies according to the movement speed of the subject. 1/10 of a second to walk, 1/25 of a second to run, 1/50 of a second to race a horse. And 1/100 of a second to a car. When the angle is 45°, the shutter speed is doubled. At a 90° angle, the shutter speed is increased by 4 times.

(To Be Continued)

Categories
Studio Lights Education

Basic Shooting Techniques_Part III

Lighting Techniques for Photography

Light is the life of photography, and photography cannot exist without light. The art of photography is the art of light and shadow. The appearance, texture, shape and color of all scenes need to be illuminated by light to be expressed. There are two functions of light in photography: one is to fully illuminate the subject and meet the light required for exposure. The second is to meet the photographer’s requirements for the shape of the subject.

Type of Light

1. According to the source of light, it is divided into natural light and artificial light

Natural light: refers to the light emitted by the light source originally existing in nature, such as sunlight, sky light (sky light), moonlight, etc. Natural light is relatively stable, but cannot be controlled by humans.

Artificial light: refers to the light emitted by the light source of luminous objects, such as candle light, match light, incandescent light, tungsten halogen light, flash light, metal halide light, fluorescent light, darkroom light, etc.

Artificial light is divided into solid light source (heat radiation light source) and gas light source.

The advantages of solid light sources: low cost, good electric startability, and good luminous performance. Disadvantages: glows and heats up at the same time.

Gas light sources include fluorescent lamps, electronic flash lamps, mercury vapor, xenon lamps, and metal halide lamps.

2. According to the nature of light, it is divided into hard light and soft light

Hard light (is a direct form)

The so-called hard light (also called direct light) refers to strong direct light. Under hard light (direct light) illumination, the subject has a light-receiving surface, a backlight surface and a shadow. This is an effective effect of forming a three-dimensional form of the subject.

The brightness distance between the light-receiving surface and the backlight surface of hard light illumination is relatively large, that is, the contrast of the scene is large. It can create a modeling effect with strong contrast between light and dark, which is suitable for expressing rough surface texture. Such a modeling effect makes the lifted body form an image of a clear outline shape. This light effect can achieve a “power” and “hard” artistic effect.

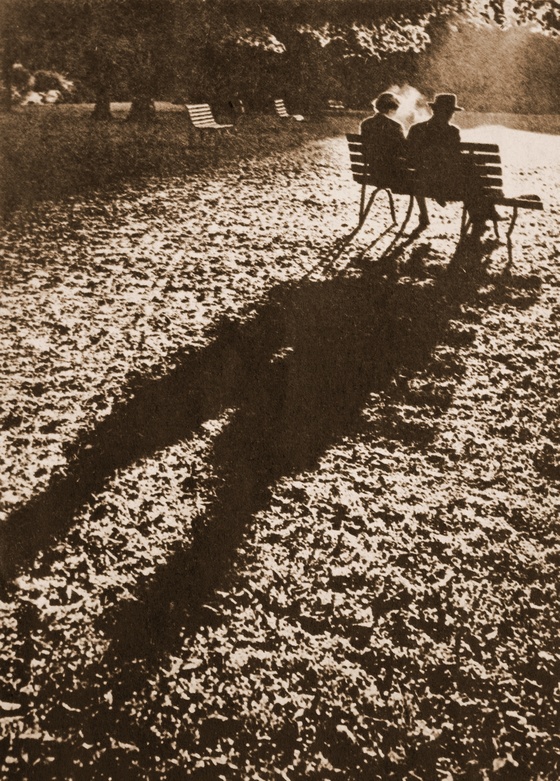
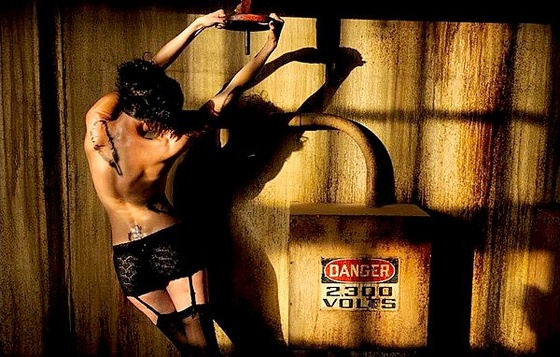
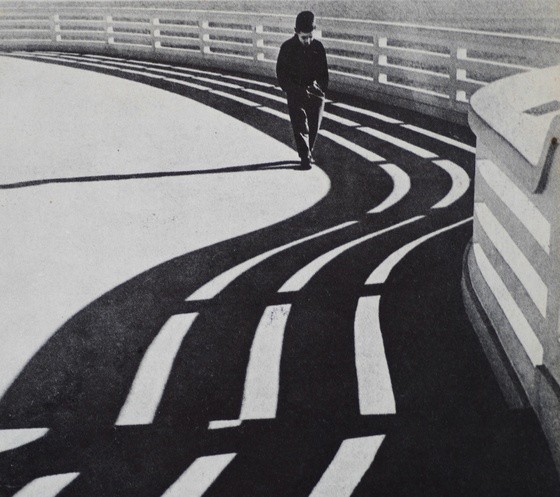
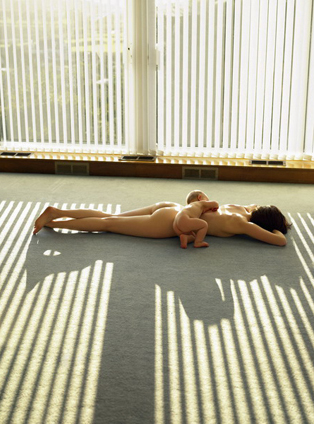
Shadows can be formed under hard light (direct light). The shadow of some scenes is very expressive, it can not only increase the depth and perspective of the picture, but also form a rhythmic rhythm with the light and dark interval of the bright part, increasing the beauty of the picture.

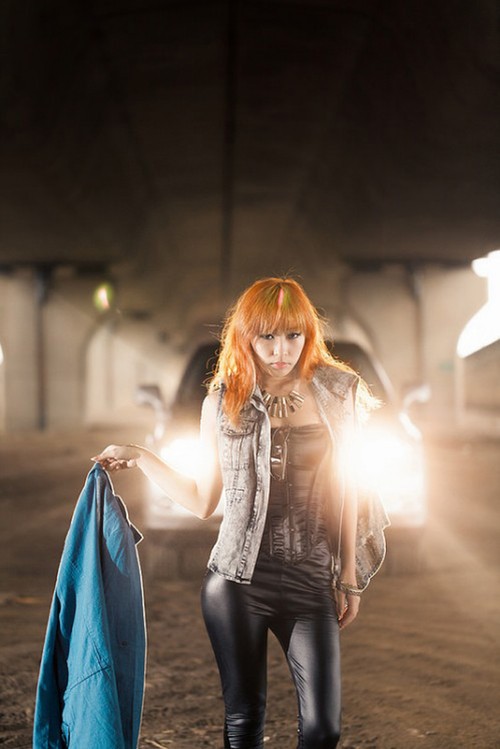
Shooting portraits with hard light (direct light) as the backlight will produce a beautiful rim light around the subject. The character’s face is supplemented with soft light to form a harmonious lighting effect. When taking this kind of photo, pay attention that the auxiliary light on the front should not be too bright. If it is too bright, the light effect of the backlighting will be weakened, and the light perception will be unreal.

Disadvantages of Hard Light

Due to the large contrast between light and dark, the hard light lighting is too hard, especially the color, quality and even shape of the dark part will be damaged to a certain extent.

▲ Examples of hard light shooting

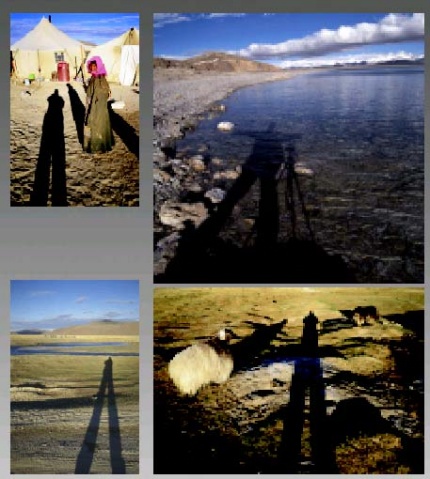
The above set of shadow-themed photos were taken using direct sunlight from the sun. The strong sunlight widens the contrast between light and dark of the picture, and the shadows cast are clearer. Generally, the light intensity is high, the light direction is single, and the light and shadow effect is relatively hard. The light intensity is weak, the light source is scattered, and the light and shadow effect will be relatively soft.

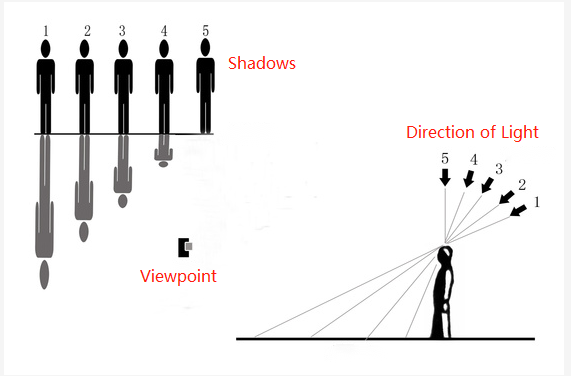
In addition, under strong light irradiation, the distribution of light and shadow is also closely related to the irradiation angle of the light source. The length of the shadow cast by the scene varies with the illumination angle of the light source.

Soft light (scattering form)

Also known as “scattered light”. Outdoors generally refer to sunlight passing through clouds, or being reflected by the ground, walls, etc. The characteristic is that there is no clear directionality, and the relationship between light and shade is not very obvious when it is illuminated on the subject. The intermediate transition is rich in layers, and the image is softer. This kind of light is ideal for shooting portraits, and the performance of the skin level of the characters is very rich.

Position and Lighting Skills of Various Lights

1. Use of natural light

In natural light, direct light on sunny days, scattered light on cloudy days, and indoor natural light have different lighting effects and image quality. Photographers should pay attention to their respective characteristics and corresponding lighting techniques.

(1) Various light positions and light skills of direct light

Forward light:

Also called positive light, flat light. The light shines from the front of the subject. The characteristic is that all subjects are exposed to light, and the light brightness is high. The image is flat and the color reproduction is good. But the light is relatively flat, and it is difficult to show a three-dimensional effect. This light is especially suitable for expressing the smoothness of the skin of women and children. The frontal light not only makes the skin appear white and delicate, but also makes the face that is too thin to appear plump. At the same time, its metering and exposure are relatively easy.

Side light:

The light comes from the side of the subject. It is usually divided into front side light and rear side light. The characteristic is that the subject has an obvious three-dimensional sense, and the tone levels, line outlines, etc. are more abundant. Can better describe the appearance of characters and facial expressions.

If this kind of picture match with a dark background, it is very beneficial for the representation of men or the elderly. It can highlight its mature and calm personality. However, when shooting portraits with this kind of light, it is possible to form irregular bright spots of semi-darkness and half-darkness on the face of the subject. For this reason, the light can be properly supplemented from the backlight side, and the above-mentioned situation can be avoided by reducing the contrast.

Front side light:

(2) Lighting tips on cloudy days

Generally people do not think that cloudy days are a good time to shoot, but only on cloudy days with thick clouds or cloudy days with rapid climate change will it really pose a big technical challenge to photographers.

On cloudy days, since clouds block the sun , the light on cloudy days has no obvious directivity, and the light belongs to diffuse light. In an open place, the light is too bland, and there is no layering of light and shadow. Therefore, it is best not to shoot subjects that want to express texture and three-dimensionality on cloudy days.

The brightly lit, cloudy and cloudy days are just right for portraits. Soft light, especially soft tones when shooting portraits. It is suitable for expressing the texture of the skin, but the whole picture is easy to appear dull. If you want to take good portraits on cloudy days, you must pay attention to at least three important factors: correct exposure, correct white balance, and good use of color.

If you need to shoot a contrast between light and dark on a cloudy day, you will need some auxiliary tools, such as using a light-absorbing plate (the opposite of the color of the reflector, which is black).

(3) Indoor natural light

Indoor natural light refers to the light that enters a house from a window. Although indoor natural light is not as strong as outdoor natural light, the contrast of light and dark is also very large, and the directivity of light is also relatively strong. The farther away from the window, the lower the intensity of the light and the lower the brightness of the subject.

And if the distance is too close to the window and the light is too strong, it is difficult to grasp the exposure when shooting. Therefore, when shooting in indoor natural light, pay attention to the control of its light ratio. You can hang a layer of gauze white curtains on the windows, so that it will not affect the light effect too much, and the light will be softened by the blocking of the curtains. In this way, you can control the exposure effect very calmly when shooting again.

2, the use of lighting

The use of indoor lighting is relatively simple, and we can adjust it more flexibly and conveniently to obtain a richer picture effect. We should notice the following points when using lights.

(1) Mastering the color temperature of the light source

When discussing the problem of light in color photography, photographers often refer to the concept of “color temperature”. We know that the light human eye usually see composes of a spectrum of 7 kinds of light. But some of the light is bluish and some is reddish.

Color temperature is a method specifically people use to measure and calculate the color components of light. The specific standard sets on the wavelength emiting from a black body radiator. Color is actually a psychophysical effect. All color impressions are produced by the intermittent response of the spectrum on the eye. So the industry only use color temperature to express the visual impression of color.

Color temperature is a physical representation of various types of light. It is the human eye’s perception of a luminous body or a white reflector. People can artificially change color temperature on TV (illuminators) or photography (reflectors). For example, in photography we use a 3200K incandescent lamp (3200K), but we add a red filter to the lens to filter out a little red light to make the photo look a little higher in color temperature.

The color temperatures of some common light sources are:

A standard candle is 1930K (a unit of temperature in Kelvin).

Tungsten filament lamps are 2760-2900K.

Fluorescent lamps are 3000K.

The flash is 3800K.

Sunshine at noon is 5400K.

Electronic flash is 6000K.

Blue sky is 12000-18000K.

(2) Effects of different light types

The effect of different light types

light type effect
key light Responsible for illuminating the main subject  to display the texture and shape of the subject
fill light We use it to illuminate the places where the main light cannot be illuminated. It can show the detail level of the shadow and reduce the contrast of the subject.
Contour light The light that can illuminate the outline of the subject, the backlight and the side backlight belong to the outline light
background light Light exclusively responsible for illuminating the background
Grooming light Specially add lighting to local effects of the subject to enhance the picture effects, such as catch light, glow, etc.
(3) Precautions for using light

To learn to use light to shape, that is, to use different light to shape different picture effects. Highlighting the edges with backlighting and illuminating the subject with forward light are all essential techniques. At the same time, we should also pay attention to the use of different fill light methods for different light.

Note the changes brought about by changes in different light levels. For example, for the same subject, you should pay attention to the intensity of the light when shooting at noon, and pay attention to the direction of the projection and the atmosphere of the whole picture at dusk.

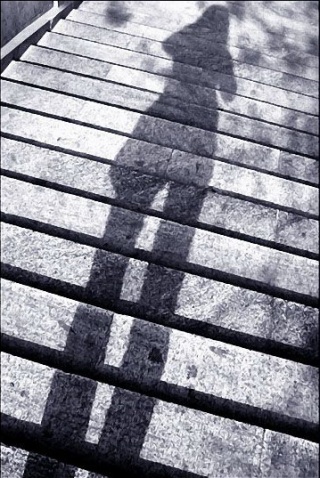
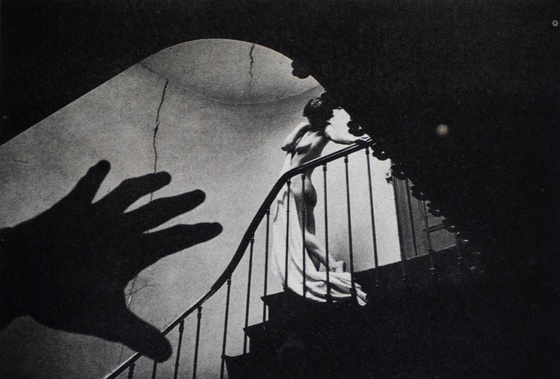
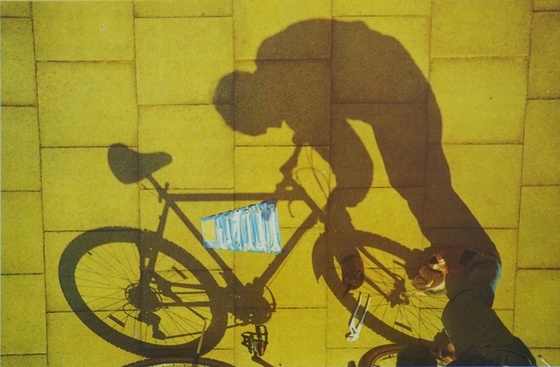
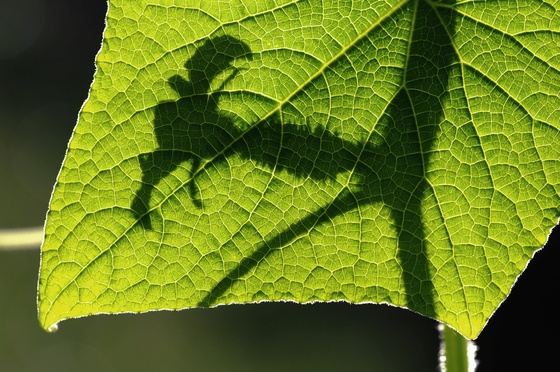
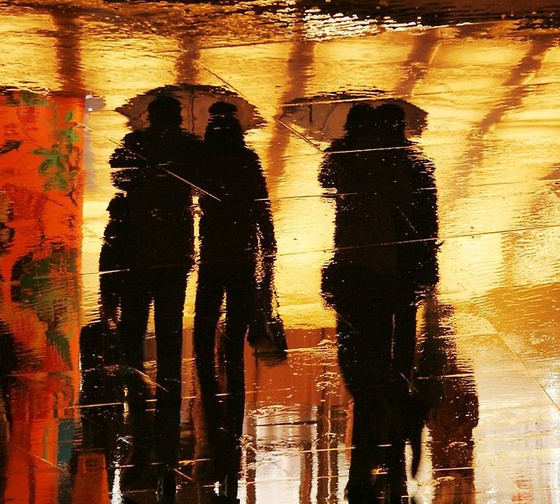
The use of light should not only pay attention to the light itself, but also pay attention to the effect of light and shadow. When there is light, there is shadow. While shooting, you can use projection to balance and modify the picture. When applied properly, shadows can also be highlights in the picture, as shown in the picture.

Categories
Studio Lights Education

Basic Shooting Techniques_Part II

Specific Application of Metering Method

The above types of metering systems are most common with center-weighted metering in reverse. There are many ways to use the in-camera metering system.

1. Direct measurement method

Measure the subject directly at the shooting location. It is suitable for situations where the scene is not large and the subject does not have strong contrast between light and dark. If the photographed scene is too large or there is a relatively obvious difference in light and dark tones, the use of the straight-side method is prone to metering deviation.

2. Near measurement method

It is to put the camera close to the subject and try to make its main part fill the entire viewfinder, that is, to measure its local brightness close to the subject. In this way, the exposure value can be measured more accurately. When shooting people, the distance is about 10cm. When you are close to the side, you should pay attention to your shadow. Do not meter against the shadow, otherwise the metering will be inaccurate.

3. Gray board method

It can be directly metered against a standard gray card with a reflectivity of 18%. This is an accurate and simple method of common light metering. When using the grayboard method, you should approach the grayboard so that it fills the frame of the camera. Make the gray card under the same light receiving conditions as the subject, and measure the light at a distance of about 10 cm from the gray card, so as to avoid the shadow of the light meter on the gray card. The result of this measurement is more accurate. Of course, the gray plate should receive the same light as the subject.

4. Alternative method

That is, the light is metered at objects other than the subject. The most commonly used proxy measurement is to measure the back of the photographer’s own hand. When you can’t get close to the subject, you can use the back of your hand instead of the gray card. Because the skin color on the back of the hand is close to the reflectivity of 18% gray card.

The premise of the substitution method is that the light received by the back of the hand is the same as that of the subject. When metering, you need to point the lens at the back of your hand, let it fill the screen, and don’t let the projection fall on the back of your hand.

The Combination of Aperture and Shutter

No matter which metering method is used for metering, whether it is a manual camera or an automatic camera, there will be a problem with the aperture and shutter coordination in actual shooting.

1. The cooperation of aperture and shutter of manual camera

Hand-held manual camera for shooting metering, generally through the internal metering system to determine the exposure value. Generally, a manual camera presses the shutter lightly, and a corresponding symbol will appear on the right side of the viewfinder to remind you whether the exposure combination is appropriate. The metering results and reasons are shown in the table.

Metering Results and Reasons

Metering results reason Adjustment method
a green or yellow circle Moderate exposure Shoot with this exposure combination
A “+” sign appears overexposure Speed up the camera shutter, or stop the lens aperture a little
A “-” appears underexposed Slow down the shutter speed of the camera, or open the aperture of the lens a little wider
A green or yellow circle appears together with the “+” and “-” signs The exposure is basically moderate


If the image requirements are not very strict, it can also be regarded as a moderate exposure and shoot

There is only one appropriate exposure for the subject, but the way to achieve this appropriate exposure, the combination of aperture and shutter, is not the only one.

This mutual conversion relationship between aperture and shutter in controlling exposure is called the “reciprocity law” of aperture and shutter. Through the conversion of the “reciprocity law”, different exposure combinations can be used to obtain the same exposure effect in an environment with the same lighting intensity.

2. the cooperation of automatic camera aperture and shutter

Compared with manual cameras, the operation of automatic cameras is simpler. Because it can automatically measure the exposure, and automatically adjust to the corresponding shutter and aperture value. There is no need to adjust aperture and shutter like manual cameras.

When shooting with an automatic camera, pay attention to the metering mode the camera is in. Different metering methods have different metering effects. When shooting, you must pay attention to whether the scene you are shooting is consistent with the selected metering method.

In addition, in some special cases, when the exposure value measured by the automatic camera cannot be directly photographed, such as shooting in a relatively dim scene, the automatic camera may give a value of 1/4s, f4.5. But the minimum shutter speed for handheld shooting is 1/3s, and photos taken below this speed are likely to be unclear due to camera shake.

Auto Camera Exposure Mode Selection

The automatic camera technology has now developed very maturely. Modern automatic cameras have several exposure modes, and making good use of these exposure modes can make shooting more efficient. The first contact may feel a little at a loss, here are some commonly used exposure modes for reference when using.

1. Manual (M) mode

Manual (M) mode is the most basic exposure mode and is mostly used by professional photographers. In manual exposure, the combination of aperture and shutter speed must be manually selected before each shot, which takes more time than automatic exposure, but it has the advantage that the photographer can actively control the image.

Adjust the camera’s mode dial to M to achieve manual exposure control. In this mode, both aperture and shutter speed need to be adjusted manually, the camera’s original automatic exposure function will be blocked, and the exposure effect is completely controlled by the photographer.

2. Aperture priority and shutter priority

These are two automatic exposure modes on automatic cameras. The photographer chooses to set the aperture or shutter speed first according to the actual situation. During the shooting process, the camera will automatically select the appropriate shutter or appropriate aperture according to the results obtained by metering. , to match the preset aperture and shutter speed.

(1) Aperture priority (A or As)

In aperture priority mode, the photographer freely adjust the aperture of the camera . When the aperture is selected, an electronic program in the camera automatically selects the appropriate shutter speed based on the metering results. For many digital cameras, the shutter of the camera is infinitely variable at this time, so a more accurate exposure can be obtained.

Note that manually adjusting the aperture is too large or too small, causing the maximum shutter speed to exceed the camera’s limit or be lower than the minimum shooting speed for handheld shooting. This shooting mode is more suitable when you have enough time to carefully compose the shot, and close the aperture to get the effect of large depth of field. At this time, you can put more energy into the composition and find some beautiful lines. When shooting portraits, you can also use aperture priority mode to shoot with a wide aperture and a shallow depth of field.

Often used in situations where depth of field is a priority. Adjust the exposure mode of the camera to A or Av block, select the aperture, and the camera will select a suitable shutter speed according to the measured exposure value to complete the shooting.

(2) Shutter priority (S)

Contrary to aperture priority mode, shutter priority exposure mode means that the photographer freely adjust the shutter when shooting. After setting the shutter OK, the electronic program in the camera will automatically select the appropriate aperture according to the results of the metering, so as to obtain a more accurate exposure.

We often use it for subjects that have certain requirements for shooting speed, such as shooting moving objects. Adjust the exposure mode of the camera to S block, set the shutter, and the camera will automatically select a suitable aperture to shoot according to the data obtained by metering.

The camera will warn you if the manually adjusted shutter speed is too high or too low to exceed the aperture limit. Using shutter-priority photography, you can precisely control the degree of motion of moving objects.

(3) AUTO (automatic) exposure mode

AUTO exposure means that both the camera aperture and shutter speed are automatically adjusted by the camera. Simply put, this is a fully automatic exposure mode. In this mode, the camera will automatically complete the selection and adjustment of metering, aperture and shutter, and all the photographer has to do is press the shutter, which is very convenient to use. This is very similar to the point-and-shoot camera that people often use, so this exposure mode is also called “point-and-shoot mode”.

When you face some pictures that neither need high shutter speed nor pay attention to the effect of depth of field, you may as well use the AUTO (automatic) exposure mode to shoot directly. Because after saving the link of adjusting the aperture and shutter, what we win is the time for quick capture. This mode is more suitable for shooting works with documentary themes such as humanities and festive scenes. However, we should note that the exposure of the camera may be biased in complex lighting situations.

(4) Image Mode

Some automatic cameras have convenient image exposure modes, the common modes are as below in the table.

Common exposure modes of automatic cameras

model Features
portrait A picture with a clear subject and a blurred background can be obtained, making the subject stand out more
landscape The camera will automatically stop the aperture, so you can get a relatively clear image quality
macro Using the close-up function on the camera, you can shoot some familiar subjects, such as flowers, insects, etc.
Moving Sub Mainly shoot moving objects, the camera will automatically choose a higher shutter speed to shoot, in order to get the corresponding clear image
night view Mainly used for shooting night subjects. The camera will automatically select a suitable exposure to avoid underexposure caused by dim lights at night

We should note that no matter which exposure mode we use, we cannot rely too much on the accuracy of its exposure. Because most program exposures use average metering modes. Therefore, the exposure is more accurate when the scene light is relatively average. But for complex lighting occasions, we need to adjust it according to human judgment.

(To Be Continued)
Categories
Studio Lights Education

Basic Shooting Techniques_Part I

Moderate Exposure

Load the film into the camera, adjust the focus, and press the shutter button to shoot. When the shutter button is pressed, the shutter of the camera is opened, and the silver halide coated on the film is irradiated by light and changes, resulting in a latent image. This process is called exposure.

The camera can control the amount of light that enters the camera, that is, how much exposure is made. By judging the light and dark conditions of the scene, adjusting the amount of light entering the lens, and then accurately imaging the film on the film, it is a moderate exposure.

The meaning of moderate exposure is to form an image with proper density, clear layers, and accurate color reproduction in light and dark parts on the negative. Overexposure and underexposure can result in images that are too bright or too dark and lose detail and depth. Therefore, proper exposure is a very important part of photography.

Metering

Metering is to test the exposure of the scene to be shot to determine a moderate exposure value. When metering, it is best to use the help of an instrument, that is, the metering device to be introduced below.

1. Type of metering device

The types of light metering devices are generally divided into two categories, one is the in-camera light metering system, and the other is the light meter that can be used alone.

There are many types of light meters: incident, reflective, and spot side light meters. The display of the light meter is either analog or digital.

In-camera metering systems are: pointer type, light-up type and exposure indicator type.

2. Metering method

Determining the correct exposure is actually measuring the unknown variables, and combining the measured numbers with the information already in the light meter and processing them together to arrive at a set of optimal speeds and apertures that can be used directly on the camera. There are two main types of light metering: incident light metering and reflective light metering. Detailed descriptions are given below.

(1) Incident metering

Incident metering is to point the meter at the camera from the position of the subject. This method mainly measures the intensity of light, and does not consider the reflection of the subject at all. Obviously, metering from the subject’s position is only necessary when the lighting conditions vary greatly within the scope of the shot.

If artificial lighting is used at close range, the light will decrease significantly with increasing distance, so the correct intensity of the light must be measured from the position of the subject. When shooting outdoors in sunlight, always meter close to the camera.

Since incident light meters measure light that is projected on a flat surface, the light receiving angle of the light meter must be large enough to cover a 180-degree range. To do this, add a spherical diffuser to the meter’s aperture. The numbers thus measured are based on the average reflectivity of the subject of 17%.

For objects with high contrast, certain corrections must be made. Negatives should be exposed slightly more than the light meter shows, and reversal films should be slightly less exposed. Since this method of metering cannot perform selective metering and spot metering, in order to achieve good results, some estimation work must be done, and some experience must be used.

If the light is difficult to measure, it is usually necessary to measure the reflected light again in order to compare it with the number measured for the incident light. If the difference between the two is too great, you should find out the reason for the difference and correct the exposure accordingly.

2) Reflective metering

When metering in this way, always point the meter from the position of the camera towards the subject. For accurate results, the metering angle of the light meter and the angle of view of the lens used should be roughly the same. If the metering angle greatly exceeds the angle of view of the lens, the meter should be placed closer to the subject, so that the field of view of the meter is roughly the same as that of the lens.

In reflective metering, the light meter shows the average reflected light from the subject. At the same time, it also measures all other reflected light within the metering angle.

As long as the measurements of the strongest highlights and darkest shadows are not too different from the average measurements of the focal points of the entire scene, this metering method will always provide an accurate exposure value. If there are small areas of extreme light or darkness in the scene, the overall average measured must be corrected. The degree of correction depends on the type of film used and how important these extremely bright or dark parts are on the frame.

3. Types of in-camera metering systems

The camera’s internal metering system measures reflected light, but different cameras have unique metering modes.

(1) Average metering

Average metering is the most widely used metering mode that cameras basically have. That is, all areas in the viewfinder are the range of light metering, and the camera measures an average value according to the light level of all the scenes.

This metering method is relatively simple. The disadvantage is that if the measured scene has areas with very large differences in tonal levels, the average metering will not be able to distinguish them very well. Still can only be metered according to the average mode, which can easily lead to exposure errors.

(2) Center-weighted metering (or simply: center-averaged metering)

Center-average metering is the most widely used metering mode. Almost all camera manufacturers use center average metering as the camera’s default metering method.

The central average metering is mainly considering that the general photographer is accustomed to placing the subject, that is, the thing that needs accurate exposure, in the middle of the viewfinder, so this part of the shooting content is the most important. Therefore, the sensory elements responsible for metering will organically separate the overall metering value of the camera. The metering data in the central part occupies most of the proportions, while the metering data outside the center of the screen is used as a small proportion to play an auxiliary role in metering.

The camera’s photometric data is obtained by the ratio of the weighted average of these two grid values ​​by the camera’s processor. For example, Nikon cameras use center-weighted average metering. The central part of the Nikon camera accounts for 75% of the entire metering ratio (this ratio varies from brand to brand), and the metering data from other non-central parts that gradually extend to the edge accounts for 25% of the ratio.

Center-weighted metering is a very useful and widely used metering mode for most shooting situations. But if the subject you need to shoot is not in the center of the frame or if you’re shooting in backlit conditions, center-weighted metering won’t work.

Center-weighted metering is a traditional metering method. The metering algorithm of most cameras pays attention to about 2/3 of the center of the screen, and also gives some consideration to the surrounding area. For photographers who are accustomed to using center-weighted metering, it is easier to control the effect with this method than with multi-zone evaluative metering.

(3) Partial metering (or called: central partial metering)

Center partial metering and center average metering are two different metering methods. Center average metering is a metering method in which the center area is the main area and other areas are auxiliary. The central part of the metering is only a central area of ​​the screen for metering, the metering range is about 3% to 12% for metering.

The central part metering mode is suitable for some scenes with more complicated lighting, and more accurate exposure is required at this time. Using central partial metering can result in a photo with an accurate exposure of the subject.

The central part metering can be applied to some special harsh shooting environments, which can ensure that the camera processor can calculate the exposure required for the main object part in the center of the screen. This mode is most suitable for scenes such as stages, performances, and backlighting. However, due to the rise of split metering (matrix metering) mode, this mode has gradually appeared in cameras less and less.

This allows cameras without spot metering to reduce the effect of light on the subject when taking pictures in some complex lighting conditions.

Partial metering method is to meter a certain part of the screen. This metering method is most suitable when the subject and the background have a strong contrast between light and dark, and the subject does not occupy a large proportion of the screen. In this case, partial metering is more accurate than the first and second metering methods. Unlike the spot metering method, which requires a certain amount of metering experience because the metering spot is too narrow, it is not easy to make mistakes.

(4) Multi-area metering (or split metering)

Multi-area metering modes are mainly matrix and cellular. The matrix metering method is unique to Nikon automatic cameras, while the cellular metering method is set for Minolta automatic cameras.

Split metering is a relatively new metering technology that has been around for less than 20 years. The biggest difference between split metering and center-weighted metering is that split metering divides the framing screen into several metering areas. After each area is independently metered, the overall exposure value is integrated and weighted to calculate an overall exposure value.

The split metering introduced at the beginning generally has a relatively small number of splits. They were analyzed independently after photometry. The difference is only in the distribution of the metering area or the analysis algorithm. This is not only dependent on the hardware performance of the camera itself, but also closely related to the processing power of the camera and data analysis algorithms.

Multi-zone evaluative metering is the most advanced intelligent metering method at present. It is a judgment that simulates the human brain for uniform or non-uniform lighting conditions that are often encountered when shooting. Even people who are not familiar with metering can generally get a more accurate exposure film in this way.

This mode is more suitable for photos of large scenes, such as landscapes, group photos, etc. It works best when shooting scenes with more positive light sources and more uniform lighting. It has become the most commonly used metering method for many photographers and photography enthusiasts.

(5) Spot metering and multi-spot metering

Spot metering only accurately measures the light in a small area, and the brightness of the scene outside the area has no effect on the metering. Therefore, the metering accuracy is very high. Its purpose is mainly to meter light in a specific small area in the distance. Mastering this metering method requires the photographer to have a certain understanding of the spot measurement characteristics of the camera used, and to know how to select a metering point with a reflectivity of about 18%. Or exposure compensation can be made empirically for metering points above or below 18% reflectivity. The spot measurement method is mainly used by professional photographers or people who have a good understanding of photography techniques. Improper use of the point measurement method will cause confusion.

Multi-spot metering is also known as “zone integrated metering”. It is an advanced metering system. This light metering system uses multiple light metering elements, each of which measures light to a predetermined area of the screen, and then inputs the respective light metering data into the camera’s microcomputer, which is calculated by the computer to obtain accurate automatic exposure data.

Applicable shooting purposes: stage photography, personal art photos, news feature photos, etc.

(To Be Continued)
Categories
Studio Lights Education

Shooting Skills Analysis of Dynamic Shooting Composition

Reserve the Dynamic Area of the Subject

In the general shooting process, the camera has an unparalleled advantage in dynamic aspect with its dynamic video presentation technique. It is the most common thing for us to photograph people or things in motion in our daily life. But not many people know how to shoot video clips that they are satisfied with.

In addition, when we want a static object (such as a building) to achieve a dynamic display effect, how do we achieve it? I believe that after reading this article today, you will be able to use the knowledge in it to help you shoot satisfactory dynamic video effects.

What is Dynamic Shooting

Dynamic shooting can be interpreted as a composition shooting method in which the subject and the structure of the picture change. We roughly divide it into several aspects to explain. The first situation is that the camera is in a fixed state and the subject is in a moving state. The camera exhibits a fixed spatial extent in this state. In the process of shooting composition, it is necessary to leave room for the movement of the subject. When we shoot an action-based subject, we must first understand the movement range of the subject, and then set aside the frame range of the picture based on this basis.

The part outside the red frame is reserved shooting space

We try to avoid the main part of the subject rushing out of the frame when shooting. For example, the limbs, head, etc. of characters. For example, as shown in the picture above, because the characters have to jump high, it is necessary to ensure that there is more space at the top of the picture when shooting. In this way, when the action of the subject is finished, it will always remain in our picture.

golden ratio chart

When the subject enters the picture, it becomes the visual center point of the picture. For example, as shown in the first picture, before its movement route is formed, we can predictably reserve more space above to ensure that the subject is in the center of the picture. However, when we are shooting, we also need to consider some composition skills of the golden section. After all, placing the subject stupidly in the center of the picture is not aesthetic at all. According to the sign of the golden ratio map, try not to place the subject in the center of the screen.

Camera Motion Shooting

The second category is that the subject is not necessarily moving, but the camera position is moving. Such a shot can show a shifting, constantly changing azimuth pair and scenery, and different means of perspective.

There are four main ways to shoot dynamic shots: push, pull, pan, and shift. Before shooting, we can simulate shooting once to improve the success rate. The application of pushing the lens is often the focus of expressing the subject. The main object must be selected correctly before pushing the lens, and do not select it during the pushing process. Pushing the camera aimlessly can make you feel dizzy.

The shot before the lens is pushed

The shot after pushing the lens

Pan-shots

During the push-pull shooting process, pay attention to placing the subject in the center of the vision from beginning to end, but not necessarily the center of the picture. Just like the golden ratio diagram shown on our first page. According to the center point of vision, the landing point of the left push-back lens is carried out.

Pan from left to right (non-push lens)

Pan the lens from left to right (push the lens)

Panning is almost the same as panning. Be clean when shaking out the subject. There is also a case of switching the subject, then in the process of pushing and pulling the lens, adding a panning lens component can complete the conversion of the subject position as soon as possible.

To shoot moving objects, the camera can also use the follow-up mode to shoot. At this time, the composition of the picture should be based on the movement of the subject. The subject should always be in the center of vision and maintain relative stability. Fortunately, the anti-shake effect of many mainstream cameras is outstanding. When we shoot, we should leave more space in front of the direction of the moving subject.

Use the Lens to Change the Speed

When we shoot high-speed moving scenes, the movement of the camera can well represent the speed of the subject. When shooting with a sports lens, the movement speed of the subject is often shown by the moving speed of the background and the scene in the environment. If the background is relatively simple, this presentation technique is less obvious.

Speeding train (another car sets off the speed)
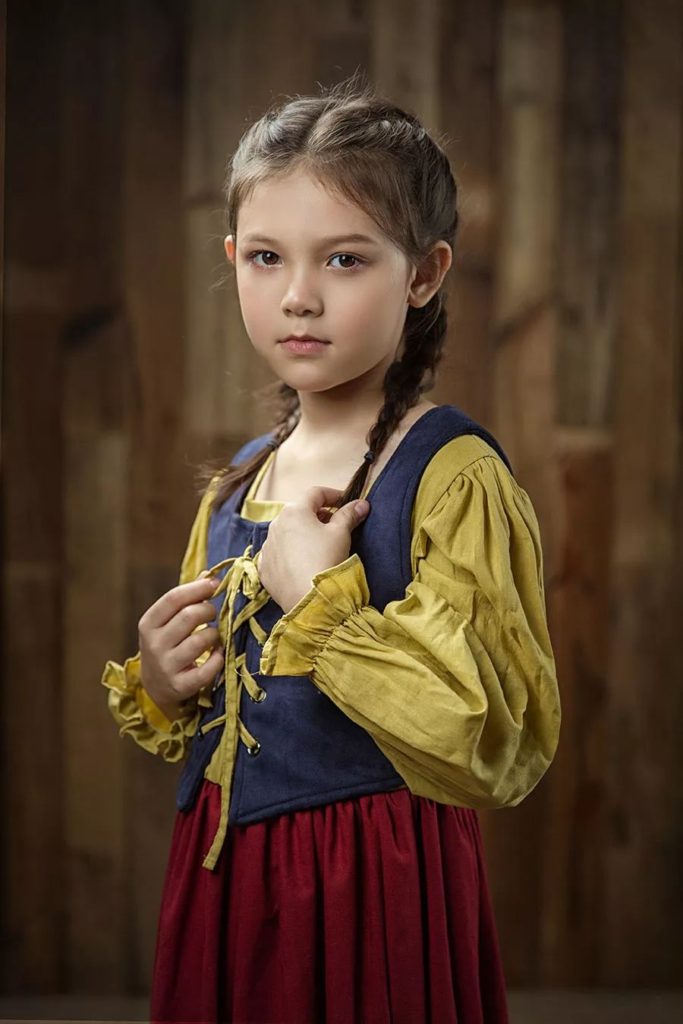
At this time, we can exaggerate the expression of speed by pushing and pulling the lens or panning the lens in reverse. First, let’s talk about the way the camera is pushed and pulled to express speed. When our subject is facing the camera, in the same scene, pulling the camera will appear relatively slow, while pushing the camera will appear faster.

For the dynamic composition of some sports, we should mainly pay attention to the changes in the shooting direction, the speed of the subject, the overall shooting rhythm, and the subject and range. In addition, a lot of shooting can also allow us to understand the shortcomings of shooting in actual use, and slowly through practice, you can shoot better video clips.

Categories
Studio Lights Education

Aperture and Speed_Part II

Exposure When Shooting Bright Scenes

Different subjects have different intensity of reflected light. When shooting bright scenes and dark scenes, exposures cannot be the same under certain lighting conditions. Generally, when shooting dark scenes, increase the exposure by one level than bright scenes.

What is a bright scene? Such as the seashore, snow, milky white buildings, people wearing light-colored clothing, etc., can be viewed as bright scenes. A gray scene can be viewed as a generally bright scene. Scenes under the shade of trees, dark buildings, and people wearing dark or dark red and dark green clothing can be viewed as dark scenes.

This kind of bright and dark performance is often not very obvious. When the photographer controls the exposure, he must learn to grasp the subtle changes in the light and shade of the actual scene and treat them differently.

Backlight photos should increase 1-2 levels of exposure than side-light photos, and side-light photos should increase 1-2 levels of exposure than forward light photos. For example: forward light takes pictures with 1/125 second, 8 aperture. For side-light photography, if the light conditions remain unchanged, you should switch to 1/60 second, 8 aperture, or 1/125 second, 5.6 aperture. Use a slower shutter speed or a larger aperture for backlit photos.

There are many factors to be considered in order to master accurate exposure. So when you hold a camera and choose an exposure combination, you should calmly compare the above factors and choose a set of exposure combinations. Don’t face the subject, get excited for some reason, choose the exposure combination and lose sight of the other, causing the exposure mistake and regret it.

Exposure for Indoor Natural Light Photography

In indoor natural light photography, it is difficult to master accurate exposure. Indoor natural light includes the light that is directly injected into the room through doors and windows, the light that is reflected into the room, and the original light in the room. How to get accurate exposure when taking pictures in indoor natural light? In this section, we will discuss the various factors that affect indoor natural light photography and the basic methods of indoor natural light photography.

Factors Affecting Indoor Natural Light Photography

We’ve covered the various factors that affect accurate exposure outdoors, and the same applies to indoor natural light photography. However, there are some unique factors that affect indoor natural light photography, such as: the influence of sunlight on indoor direct sunlight and reflection, the influence of the number of doors and windows, size and opening direction of the house, etc. Taking pictures in such an environment, in order to be successful, the photographer needs to shoot more, experiment more, and accumulate more experience. If you can use the light meter as a staff, you will have a greater grasp of accurate exposure.

When shooting indoors, artificial lighting is often required due to limited light. In this case, mixing light sources with different color temperatures should be avoided. Indoors with low natural light, the aperture used is generally larger and the shutter speed is slower. Therefore, the photographic equipment used can choose a camera with a larger aperture and a B-door device. Photosensitive film can choose ISO200/24° or ISO400/27° fast film, as far as possible equipped with tripod and shutter release.

Indoor natural light is limited by the number, size and opening direction of doors and windows, so when determining the exposure combination, the photographer should fully observe and consider these conditions, and also pay attention to the influence of outdoor weather.

Features of Indoor Natural Lighting

Another feature of indoor natural lighting is that the subject is bright on the light-receiving side and dark on the back. The contrast between light and dark is very strong. Therefore, if you are shooting moving subjects indoors, try to adjust them near the doors and windows to reduce this contrast.

When moving the subject, pay special attention not to place half of it in direct light and the other half in a place without direct light, so as to avoid a half-dark and half-bright picture. When necessary, curtains and white paper can be used to block the light directly entering the room, so that the light can be as soft as possible.

If the subject is light in color, its brightness should be higher than that in darker color, so the exposure can be less. Different materials have different reflective properties. For those with strong reflective ability, the exposure can be reduced; for those with weak reflective ability, the exposure should be increased.

Notes for Indoor Natural Light Shooting

In photography practice, the photographer can shoot with a light-colored subject in front of a dark background, or shoot with a dark-colored subject in front of a light-colored background. This will make some weakly lit subjects stand out from the frame. Use a fluorescent lamp indoors and place the subject in front of a dark background to make the person stand out.

Use indoor natural light to take pictures, pay attention to the direction of the light source, generally it is better to use side light or forward light. If you use backlight to shoot medium shots and close-ups, you should not choose the window as the background, because the contrast of the light ratio is too large, which will cause the color temperature to lose balance. If you must shoot against the light, you must fully consider the shooting effect. Is it a photo with a silhouette effect, or is it required to reproduce the details of the subject? If it is the latter, the photographer should add auxiliary light, or use a reflective object, or increase the exposure by 3 to 4 stops.

Exposure for Artificial Light Photography

Artificial light photography refers to the use of artificial light sources for indoor photography, such as iodine tungsten lamps, spotlights, ordinary lights, etc.

Taking pictures with artificial light sources, if you need to accurately control exposure, the factors to consider are:

The brightness of the artificial light source is determined by the number of lights, the level of illumination, and the distance of the subject from the lights. There are also factors such as the ability of the subject to reflect light, the influence of the surrounding environment, etc.

If it is a certain light distance and aperture, 100 watt light, the exposure takes 1/30 of a second, switch to a 200 watt light, and the exposure takes only 1/60 of a second. This shows how many times the lumen of the lighting light is increased, and how much the exposure time can be reduced accordingly.

The distance of the subject from the light determines the amount of exposure. To estimate accurately, apply the inverse square law calculation. If the distance between the subject and the light is changed from 5 meters to 1 meter, the light received by the subject is increased by 25 times, and the exposure should be reduced to 1/25 of the original.

Lighting for Artificial Light Photography

Using artificial light photography, mastering accurate exposure is only one aspect, it also has a problem of how to set the light. In color photography, there is also the issue of the color of artificial light. In general, artificial light can impart color casts to daylight-type color films.

How to master accurate exposure when using artificial light photography, the above is just a hint, and you need to experience it in practice. When there is a certain amount of experience accumulated, it is not difficult to accurately grasp the exposure.

Flash Flash is an artificial light source commonly used by photographers. It is easy to carry and use, and is not limited by day and night and space.

General Performance of Flash

With the development of modern technology, flashlights are becoming more and more perfect, and there are more and more types of flashlights. No matter what kind of flash it is, from its appearance, it generally has two parts: power supply and flash. The power supply part consists of batteries, transformers and capacitors. The flash part includes flash tube and fixed reflector, light handle, switch and other components.

At present, the flash tube of the flash can flash multiple times, so it is also called a thousand-time flash. The flash has been continuously improved, becoming lighter and lighter, and also increased the photosensitive sensor device, special color film, etc., and the functions have gradually increased. Some can automatically control the light output of the flash, and adjust the output light output arbitrarily. Some flashes can adjust the beam angle it emits to adapt to the different lighting needs of wide-angle lenses, standard lenses and medium-telephoto lenses.

Light Characteristics of Flash

Generally, the flash is designed with the light required for taking pictures with a standard lens. It emits a beam angle of 50 degrees. The duration of the flash varies from light to light, some on and off time can be as short as 1/5000 second, and some can be as long as 1/120 second, which can basically meet the needs of all levels of shutter speeds in the mirror.

Using a photosensitive control circuit flash composed of integrated circuits and blue silicon transistors, it can also control the amount of light emitted by the flash according to changes in the shooting distance and the strength of the subject’s reflective ability. The distance is short, the reflection ability is strong, and the flash time is short. The longer the distance, the weaker the reflection ability, and the longer the flash time on and off.

In short, the 10,000-time flash has the characteristics of bright, strong adaptability, wide application, high speed, economical and convenient, and is widely used by many photographers.

The light characteristics of the flash are:

①High brightness,

②The direction is controlled by the photographer,

③ The color of the light is similar to that of sunlight.


Categories
Studio Lights Education

Light in Photography (4) – Shadows and Their Function and Control
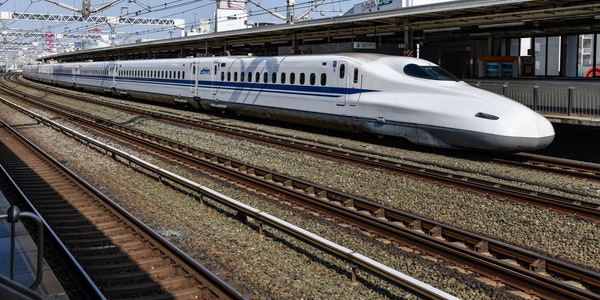
The Concept of Shadows

Usually called a shadow, in photography it is called a projection. Refers to the area where the light from the light source is blocked by the object and forms a darker image on the background.

There are three factors in the formation of shadows:

  1. Strong directionality of light,
  2. Light transmittance of the object is pretty weak,
  3. The light and the object form a certain shadow-bearing angle.

Evenly scattered light or objects with high transparency are generally difficult to produce shadows. Forward light causes the shadow of the subject to overlap with the subject.

Shadows are divided into the following categories:

Primary shadows – projections on the subject itself, caused by its own surface contours (such as nose shadows).

Secondary Shadows – Shadows cast by the subject on nearby interfaces such as on the ground or walls.

Tertiary Shadows – Shadows cast by other nearby objects on the subject. Generally, it is deformed by being projected on the outline of the subject.

Assortment of Shades

There are pure shadows and light shadows, as well as false shadows and penumbras. Pure shadow refers to a completely black shadow caused by the light source being blocked by an object. Light shadows are shadows with varying degrees of brightness.

To deal with shadows well, it is necessary to understand the relationship between light and shadows. In general, the farther the light source is from the subject (point light source), the more pronounced the shadow will be. The closer the light source is to the subject (the larger the light emitting area), the easier the shadow will be blurred.

This may not be easy to understand. It will be helpful if we use the street lights on the street to do an experiment. The method is that when you are close to the street light pole, the shadow of your body on the ground is short (see the picture below) and blurred. As you move away from the street light, the projection gets longer and clearer.

Figure: Length of shadow:

Light angles from small to large, shadows from long to short

Figure: Distortion of shadows. When the camera, light, and shadow are in a line, and the background is perpendicular to this line, the shadow distortion is minimal. When the camera or light angle is gradually changed, the distortion of the shadow also becomes larger.

In addition, as the background or medium that produces the shadow changes, the shape of the shadow changes accordingly.

The Role of Shadows

Shadows play an important role in photographic styling. From the composition, strengthening of lines, picture tone processing, the performance of the three-dimensional effect of the scene, to the shadow processing of the characters, the processing of the shadows of the mountains, buildings, trees and other scenes, it plays an important role in expressing the image of the scene and creating the atmosphere of the environment.

In addition, it also has the functions of expressing the concept of time, strengthening the rhythm of the picture, giving people associations, making the picture dramatic, and revealing or concealing the subject.

Regrettably, the role of shadows is rarely noticed and valued by photographers, and is often overlooked. Of course. This is related to the photographer’s creative thinking ability and the ability to control and use light. Although they are present in the images of many photographers from time to time, some are “unintentional” or subconscious, as if they were “natural” things.

Shadows work roughly as follows:

1. Strengthen the Effect and Attract Attention

In low ambient light conditions, cast primary or secondary shadows onto a brighter background to create sharp silhouettes and create a special artistic effect. This presentation will attract attention.

We often see it in film and television works: before the person arrives, the shadow first enters the picture. In some night scenes, the shadows also show dark blue color, giving people a feeling of terror, secret, and misery, indicating that something unfortunate will happen.

This method of expression requires the photographer to have a richer imagination and the ability to control (or choose) light. However, it must be used appropriately, handled with care, and must not be far-fetched, and must be recognized and accepted by the appreciator.

Legend: The hand shadow on the screen can be a projection or a silhouette. We can imagine, if there is no “hand” in the picture, what effect will the picture be? How would you interpret this photo?

2. Reveal the External Form or Hide Some Kind of Defect

The use of shadows to reveal the shape of the subject is usually carefully arranged. It is necessary to control or select the shooting angle and light conditions so that it can express certain characteristics of the subject.

Revealing Shadows: Figure 1 Shadows reveal hidden object shapes and depths. Figure 2 Shadows are cast on surfaces, revealing objects outside the painting and the contours of the surfaces on which the shadows lie.

Example: Projection allows us to have a chain connection between each stone pillar and its state

Of course, we can also hide the imperfections of the subject by cleverly using shadows to make them less visible. Most photographers know that when taking close-up shots of people, try to use the left side of the person’s face as a close-up shot as much as possible. Using the perspective relationship, the asymmetry of the left and right faces of the characters is correct.

Utilizing a certain flaw in shadows to hide subjects has wider utility, especially tertiary shadows. Whether it is the defect of the subject or the object, we can use the secondary projection or artificially “manufacture” the tertiary projection for occlusion and concealment. It is more common to dispose of the subject’s background in shadow. In this way, the darker background will be more monotonous and “clean”, which will help the subject stand out.

Example: Use the low-angle hard light in the evening to hide the scenery downstairs and the sundries in the sunken part of the roof in the shadows. The picture forms a high contrast, and the bright lines outline the outline of the building.

3. Render the Atmosphere of the Environment

Long shadows indicate morning or evening hours. It can conjure up expressions of tranquility or sadness. Long dark blue moonlight shadows can feel eerie, secretive, and cold. When the low-angle light in the room casts an exaggerated shadow of a person on the ceiling, what can we imagine and feel? Just imagine.

Example: Low-angle light forms long shadows. In addition to expressing the concept of time in the evening, it also expresses the happy and comfortable life of the old couple. The long shadow guides people’s eyes into the picture and is the main body of the composition.

Example: The ambient atmosphere effect created by the window shadow will make people think of this space state.

4. Shadows and Composition

In photography, all light or shadows, projected patterns, and light strips will affect the composition effect (for example: the shadow cast on the wall by the shutters, etc.), and become the elements of the picture composition.

Sometimes, photographers also artificially create shadows, patterns or light strips to emphasize the characteristics of the subject or a certain artistic conception and enhance the expressiveness of the picture.

Note: This is just a brief talk about the impact of shadows on composition.

Shadows form line patterns on lighter ground, adding to the beauty of the composition. The strong contrast of black and white with hatched lines serves the main characters with their heads down, walking slowly and contemplating, making the picture more expressive.

Example: Curtain shadows are cast on a light-toned rug, which together with the curtains form a graceful line pattern. The picture is elegant, quiet and peaceful.

5. Shadow as the Subject

Sometimes shadows also appear as subjects, but relatively less.

There is another kind of shadow, that is reflection. Reflection refers to the reflection of the scene reflected on the surface of a smooth object. Such as calm water surface, smooth metal surface, glass, mirror surface (a real image), etc. Reflections are very common as the representation of the subject. Although the reflection is not included in the shadow, it is briefly discussed here with a legend.

Example: Shadow as the main body

Example: The subject is a projection through a semi-transparent object

Figure: The subject is a reflection (silhouette), which mainly gives people a hazy beauty. And give the appreciator an imaginary space for the image of the subject (this is different from subjective consciousness and self-impression).

Whether it is projection, silhouette or reflection as the subject, the difference between it and real-life photography is only the difference between the “virtual” image and the “real” image of the subject.

Note: Projection and silhouette are upright shadows, while reflections are upside-down shadows)

There are many photographic illustrations in which the reflection is not the subject of the subject. And we have not listed it here.

Shadow Control

If the shadow is too obvious, and you want to reduce the prominence of the shadow, there are several methods:

  1. Lower the camera position to reduce or obscure the shadow.
  2. Change the composition of the picture and handle the shadows outside the picture.
  3. Select light conditions where scattered light does not cast shadows.
  4. Handle the shadows so that the shadows do not obscure the background or hide in the foreground or use a reflector (indoors, with lights) to eliminate or dilute the shadows.
  5. Artificial light photography, you can adjust the orientation of the light source.
  6. Use shadowless lighting.
  7. Increase the distance between the subject and the background or tilt the background back.
  8. Partial occlusion or rubbing of the light that causes shadows (also suitable for other unnecessary diffused light treatments).
  9. If it is a small subject, place it on a glass plate at a distance from the background to eliminate shadows.
  10. The subject is on a transmissive flat plate with diffused light.

If you need to emphasize or accentuate shadows, it’s basically the inverse of the controls.

In the photography studio with artificial light, the shadows produced are relatively complex due to the large number of light sources. In controlling the shadows, be careful not to affect the modeling effect of the light.

(To Be Continued)