Categories
Studio Lights Education

How to Prevent Lens Flare

Brief Introduction

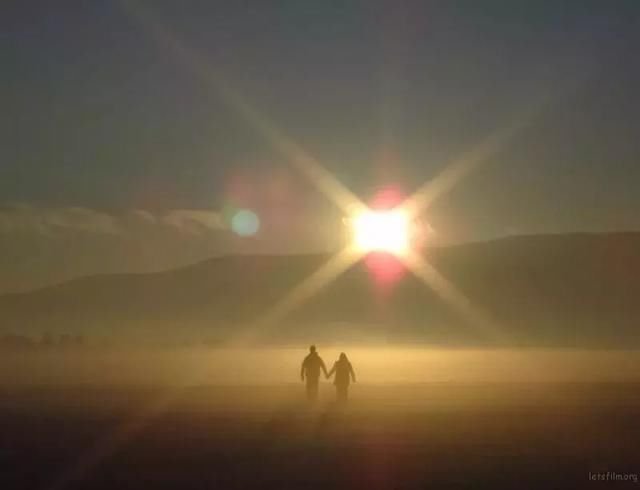
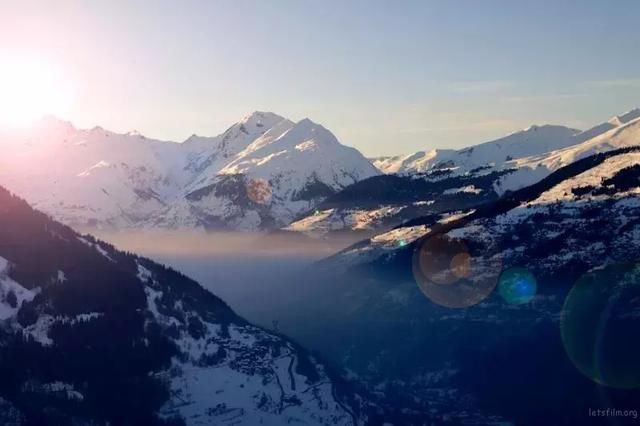
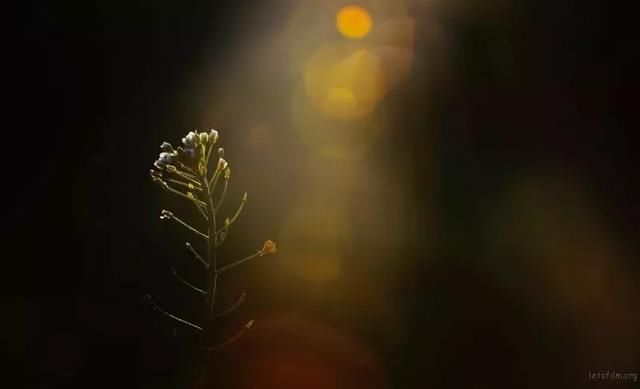
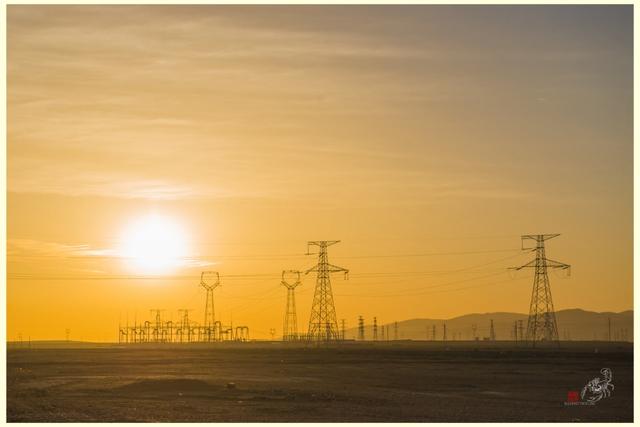
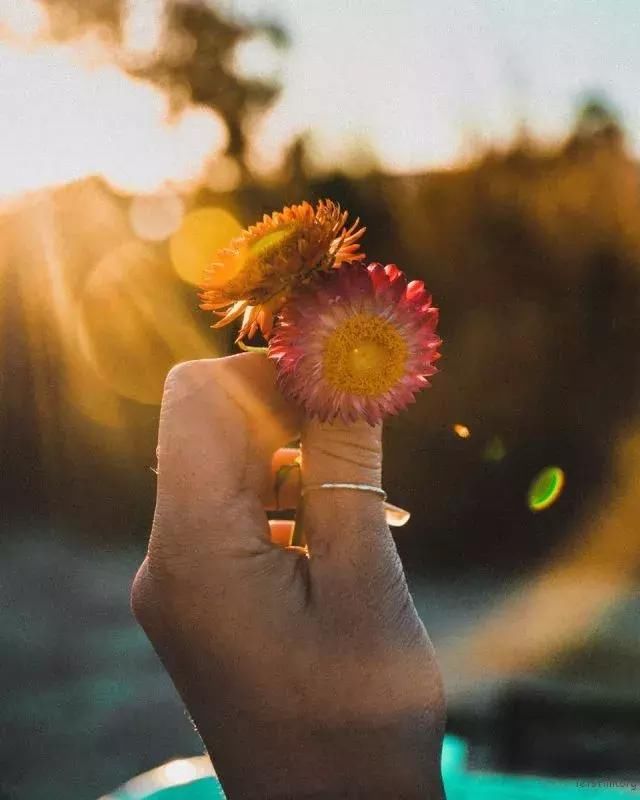
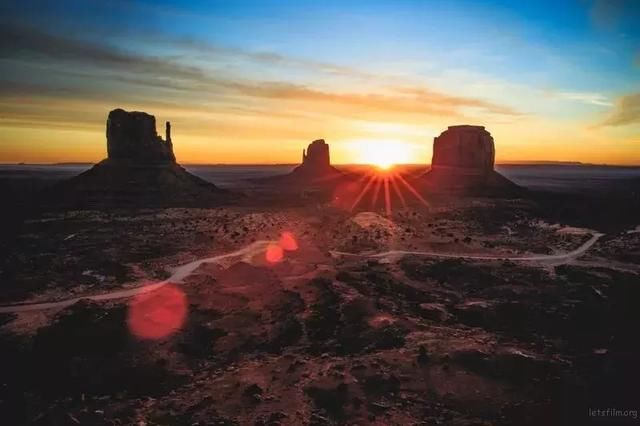
You may have experienced glare when taking pictures under strong light sources. There may be times when you think it’s cool to be able to shoot with glare, but in fact most of the time glare affects the picture.

Lens flare is prone to occur when bright non-imaging light from the sun or other light source hits the front lens of the lens, and is often accompanied by haze that significantly reduces the contrast of the picture.

While glare is sometimes presented as an artistic effect, most of the time it can be a highly unwelcome addition to a photo and something that photographers try to avoid.

Let’s take a look at what methods can help us avoid glare in the process of shooting.

Use a Hood

The easiest way to do this is to use a hood. Most lenses will also be equipped with a hood. Because most of the glare is caused by direct light, the hood can help us effectively prevent the light from directly hitting the front mirror of the lens.

Not only can it avoid glare, the hood can actually help us protect our camera from minor impacts.

When using the lens hood, it is best to use the original lens hood, because they are specially designed for this lens. Using a third-party lens hood may cause vignetting due to incompatibility, especially when using shorter focal lengths.

Typically, round hoods are suitable for lenses with longer focal lengths, while petal hoods are suitable for lenses with shorter focal lengths.

Cover with Hands

It doesn’t matter if you don’t have a hood, the urgent solution is to cover it with your hands. We just need to cover the direction of the light coming from the front of the lens, form a C-shape, and constantly adjust the angle of the hand until the halo completely disappears. Be careful, however, that your hands don’t get too far inward and block what the lens is capturing.

Check Your Filters

While filters are an essential addition to landscape photography, extra lenses do increase the chance of glare. Low-quality filters, in particular, tend to cause more problems with images.

If you find that your picture is plagued by glare, and the current environment does not require a filter, try removing the filter.

Block the Light

Generally speaking, the reason for the formation of halos is that the strong light source directly shines on the lens. Therefore, sometimes when we take pictures, we can try to recompose the picture to make some elements in the picture become blocking factors to block the light source, so as to avoid flare.

Adjust the Angle

If you see halos in the viewfinder, try adjusting your shooting angle. Change the angle at which the light source enters the lens, look for an angle that doesn’t create glare, and avoid direct sunlight hitting your lens.

Classic and Practical Photography Tips

Photography is a skill as well as the accumulation of experience. Below are six of the most classic and practical photography tips from the experience of countless photographers. Keeping it by heart will help you deal with many difficult-to-control shooting situations

1. Sunny16 Rule

The “Sunny16 Rule” is a method for correctly estimating exposure values in sunlight without a light meter. So this rule is only suitable for use in sunny conditions. Set the aperture to F/16 and the shutter to sync with ISO, or slightly faster. For example, when the ISO is set to 100, the shutter should be set to 1/100 of a second (1/125 of a second). So, according to this rule, you should use F/22 aperture when shooting on the beach, and F/11 aperture when it is cloudy.

2. Moony 11,8 and 5.6 Rules

If you want to photograph the moon, here’s a good rule of thumb. When the shutter is in sync with ISO, use F11 for a full moon, F8 for a crescent moon, and F5.6 for a new moon.

3. Camera-Shake Rule

When you shoot with a handheld camera, the shutter speed cannot be slower than the reciprocal of the focal length of the lens. The slower the shutter speed, the more likely you are to lose sharpness when shooting shaky. If you use a 50mm focal length, the shutter should be at least 1/60 of a second. Only when the environment is really dark, use a flash, a tripod, or place the camera on a hard object to prevent shake.

4. Anatomical Gray Card

Carrying 18% medium gray board with you is a good tool for shooting. But what if you don’t have a grayscale board? You can open your palms to face the sun, meter your palms, and then add one stop exposure.

5. Depth-of-Field Rules

The back depth of field is 2 times that of the foreground

When the subject is relatively deep, the focus point should be selected in the first 1/3 of the depth of field. Because of this, the depth of field behind the focus point is twice as high as before. This rule can be used for various aperture and focal length combinations. Remember, the smaller the aperture, the shorter the focal length, and the further away you are from the subject, the greater the depth of field.

6. Largest Digital Print Rule

If you want to take your work into a large size photo, the size of the photo should not be larger than the digital image’s length and width pixels divided by 200. If you are very demanding about your work, then at least divide by 250.

Categories
Studio Lights Education

Shooting Tips with Digital Cameras_Part I

People and Animal Photography Skills

Here we introduce from the aspects of digital camera settings and composition.

(1) Shooting skills of characters

A. Digital camera settings and lighting skills

Whether it is portrait photography or animal photography, they all have one feature in common: using a large aperture or long focal length to achieve a shallow depth of field (the subject is solid and the background is blurred). Usually shoot with medium and long focal length, the most ideal focal length is 80mm-135mm. However, using the wide-angle end to shoot people, based on the optical characteristics of the wide-angle lens, may be deformed due to improper control of distortion in close-up photography.

Of course, in some occasions where you need to emphasize fun, deliberately shooting people at the wide-angle end may get peculiar visual effects. When shooting static people and animals, use aperture-priority exposure mode more often. Conversely, use shutter-priority exposure mode for shooting moving objects.

The key to portraiture is the use of light. In addition to the front light, the ideal light also has the backlight from the back as the rim light, and its intensity is greater than that of the front light. A rim light can be either a light or sunlight. The front can be illuminated with lamps or reflectors. If there is no light on the front, the eyes will be dull.

If the subject has only one side of the light, it is best to use a side light. For example, on the right side of the character, the facial contour and hair color of the character will be properly framed.

B. people shooting composition

Character shooting is usually divided into three main scenes: head portrait, half body and whole body to form the picture. Portrait photography can best express the facial expression and texture of the subject.

Half-length portraits are most suitable for expressing the character and graceful posture of the subject. Full-body portraits can fully express the environment in which the characters are located, especially the slender figure and graceful posture of women.

When taking full-length or half-length portraits of people, the pose and shape of the subject matter. There are a few important tricks you need to master to make your subject pose beautifully.

The head and body should not be in a straight line

If it is in a straight line, it will inevitably feel rigid. Therefore, when the body is facing the camera, the head should be turned slightly to the left or right, and the photo will look elegant and vivid.

Abs and legs should not be parallel

The proper way is to have one song all the time or both to form a certain angle, so that it can not only create a sense of dynamism, but also change the posture.

 Try to make the body shape curve clear

For female subjects, it is necessary to show their attractive curves, and it is better to stand on side legs than side by side. It is usually better to have one leg of the character actually support the whole body weight and the other leg to be slightly elevated.

Sitting posture taboo

The correct way is to let the body move forward, sit close to the side of the chair, and keep the chest and abdomen up. This can avoid the phenomenon of shoulder drooping belly bulge.

 highlight a detail

You don’t have to take the whole headshot, you can also take a part of it. It can be the eyes, mouth, nose, and anywhere with bumps.

 Snapshots with action

Compared with the common posing, the snapshot with action is more natural.

Control of depth of field

The depth of field is shortened accordingly due to the close distance when shooting the head portrait. The aperture should not be opened too large, and the aperture should be appropriately narrowed, otherwise the depth of field is too shallow and difficult to control.

 Shooting with specular reflection effect

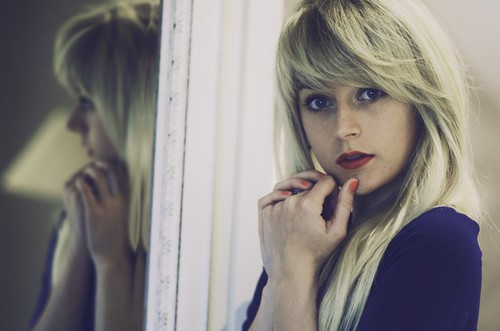
Looking for different perspectives, such as clever use of specular reflections, can spice up an otherwise difficult-to-compose headshot.

Extreme shooting increases the movement of portraits

Half-body or full-body photos are different from avatar photos, and focus more on the actions and physical effects of the characters. You can also use props appropriately to enhance the vitality of body language.

Using sunlight as the contour light, shooting against the light can make the outline of the person plated with a layer of gold. But at the same time, pay attention to use the flash or reflector to fill in the light, otherwise the facial expressions of the characters will be darker.

In full-body photography, the horizontal camera position is usually a medium-range shooting angle. And sometimes a unique perspective can bring extraordinary effects to the picture. Try shooting up or down and don’t limit yourself to one angle.

C. Small aperture to take souvenir photos

Different from ordinary portraits, environmental portraits do not use a large aperture to shorten the depth of field, but use a small aperture to increase the depth of field, so that the photos taken can ensure the clarity of the environment within a certain range.

When taking travel commemorative photos, you should choose the most easily recognizable local features to shoot. Many people like to take pictures by rivers and lakes, although he himself knows where it is, but when others see photos, it is no different from any river or lake anywhere. When the background is far from the subject, you should  use a small aperture  to increase the depth of field. At this time, it is different from general portrait photography, which is similar to the requirements of environmental photography (landscape photography), and the clarity of the background is also very important.

When taking travel photos, people should not run into the scene (this is a common problem for many people taking travel photos). That way the characters will be small and become part of the background. The subject should be close to the camera, so that the characters are bigger and the picture comes with layers.

D. Selection of the best shooting location for fashion models

When photographing fashion models, the best location is not as close to the runway as possible. Because the photo is taken close to the T stage, the model’s body will be deformed due to the excessive elevation angle. The best position is to take a photo with a telephoto a little further away, which can avoid the problem of elevation angle.

Fashion models usually stand down when they reach the end of the runway, and pause for 1 to 2 seconds for each action. This is the best time to take pictures.

If the camera position is very close to the T stage, in order to avoid the model being too close to cause deformation or not being able to shoot at all, you can take pictures while the model is on the move instead of waiting for the model to come close.

Because the frontal light on the catwalk is often very strong, it is easy to overexpose a person by taking a frontal photo. It is best to stand on the oblique side to take pictures to avoid too strong direct light, and you can also use the reflection of the T platform to increase the sense of hierarchy.

E. High-speed shutter to capture stage characters

It is more difficult to shoot on stage because the lighting on the stage is more complicated. Whether it is to highlight the entire stage effect or to highlight the characters, the most important thing in stage shooting is the use of light, and it is necessary to ensure that the characters are clear under strong lighting. To shoot the entire stage, you can use center-weighted metering and appropriately reduce exposure compensation to ensure that people are not exposed.

When shooting people under the spotlight, because the background is black, you must not use average metering, otherwise the people will be overexposed under strong lighting. Use the spot metering mode to aim at the people to meter the exposure to ensure the accuracy of the exposure.

Since the actors are moving, a safe shutter speed – not lower than the inverse of the focal length of the lens – is necessary so that the captured image does not become blurred.

When shooting on a large stage, do not get too close to the stage. If it’s too close, the shot will appear too large for the stage effect.

Use a high-speed shutter to capture dynamic pictures. The effective way to increase the shutter speed is not only to open a large aperture, but also to appropriately increase the ISO sensitivity. When the consumer-grade digital camera exceeds ISO400, and the DSLR camera exceeds ISO800, there will be obvious noise, but it is better than blur.

F. Choose the best scene to capture street people

When capturing portraits on the street, the portraits captured not only have very distinct characteristics of the times, but also are real and natural because they are captured. The person being captured is usually walking, so it is necessary to use a relatively fast shutter speed, which is not lower than the reciprocal of the focal length of the lens. For example, to capture at 200mm focal length, a shutter speed of 1/250 sec or above is best.

Street photography is based on the principle of not interfering with the normal life of others. The main purpose should be to express the beauty of passers-by, and we suggest not to vilify others, otherwise it will cause disputes. If others complain about being filmed, they should respect the will of the other party.

To capture children, it is necessary to show their lively side, and jumping and jumping can show the characteristics of children.

The capture action must be fast. Especially when capturing a group of people, you can shout to attract their attention and take pictures immediately when they come together. Otherwise, it will become a pose shot, and the subject’s expression will be unnatural.

Street photography is often an important part of travel photography. When capturing people on the streets of other places during travel, it is best to have the background on the street, otherwise there will be no local characteristics.

(2) Animal photography skills

A. Telephoto lens to photograph wildlife

Shooting of large animals

For those animals that cannot be approached, a telephoto lens is undoubtedly a powerful tool for shooting. The depth of field of the telephoto lens is shallow, so it is more important to focus accurately. For large animals photographed vertically, the focus is more important due to the longer body. So focus on the head (eyes, nose).

It is advisable to use side lighting and side backlighting to shoot animals. That can make the three-dimensional effect strong and rich in layers. It’s important to show the animal’s eye light when shooting. If used well, the animal’s eyes shine like jewels and appear piercing. Otherwise it looks dull.

Taking more pictures of the movements of animals is more helpful for expressing the characteristics of animals. For moving animals, be sure to focus accurately. You can switch the camera’s focus mode from ONE SHOT mode to AI SERVO mode for follow-focus shooting. It can autofocus as the animal moves.

Be careful when photographing multiple animals, wait for the moment, find the most interesting pose of the animal and press the shutter.

Shooting of birds

In addition, birds are a relatively special kind of wild animals. There are few birds in the zoo, and generally people choose wild birds for photography. Because these birds are very timid and take off immediately when they are frightened, they need the attention of the photographer.

In the wild, when you find a bird to photograph, you should take one to several pictures on the spot. And then consider the light and composition. Slowly approach the bird to photograph, and take another shot at a more ideal location. Take another shot when you are close to the bird, which will make it easier for future selections.

Different birds have different living habits. Understanding the living habits of various birds is the key to taking bird photos. For large birds, the photographer can wait in advance where the birds often appear. And take pictures when the birds appear. Of course, as the title says, you need to use a telephoto lens to shoot.

(To Be Continued)

Categories
Studio Lights Education

A Collection of Exposure Parameters for Common Scenes in Photography

The following are some suggestions for the parameters of the scene. Remember, these parameter suggestions are only suggestions, and beginners can use this to get started quickly. However, it may not be suitable for specific situations. Everyone should be familiar with photography theory and use it flexibly.

When Aperture Priority

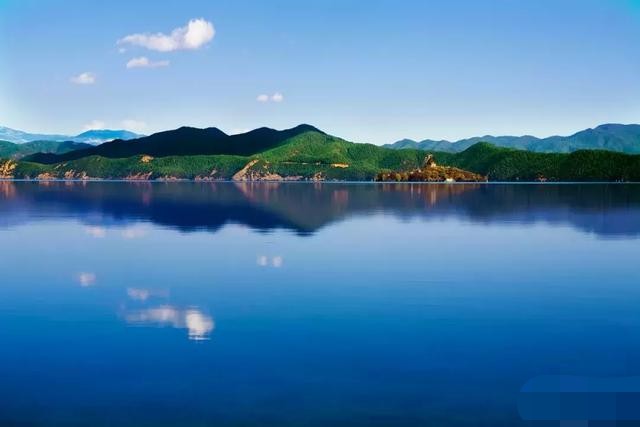
Take a landscape photo in the front light – F8-F11, exposure compensation 0.

Generally speaking, a small aperture can help us more easily get clear photos near and far. But now shoot, try not to use a particularly small aperture. On the one hand, there are more and more pixels on the sensor, and the density is getting higher and higher, and the small aperture is prone to diffraction effects. Simply put, the picture quality is not good.

On the other hand, in the design of the current lens, the image quality of the large aperture will be guaranteed as much as possible, so the very small aperture will actually deteriorate the image quality from the lens point of view.

F8-F11 have very good picture quality, F16 is okay, but F22 is really bad.

When shooting with forward light, generally we can keep 0EV for landscapes.
When taking portraits

——The maximum aperture or the maximum aperture is reduced by one stop, the face of the model is spot metered, and the exposure compensation is 0.

When shooting portraits, many times we need to blur the background. A wide aperture would definitely help.

So if you have a wide aperture lens, don’t waste it, just use F8. Now the lens design, is to try to take care of the image quality of the full aperture. So please rest assured to open the aperture. For older lenses, a stop down is fine.

If you don’t want the bokeh effect, of course don’t use such a wide aperture.

As for exposure compensation, for portraits, it is generally enough to spot the model’s face at 0EV, unless you shoot blacks or particularly white whites.
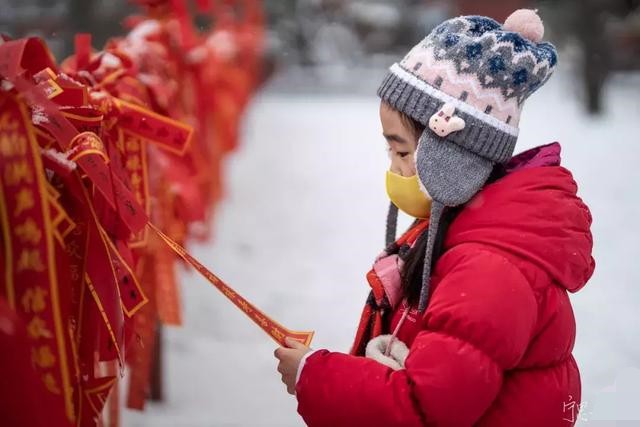
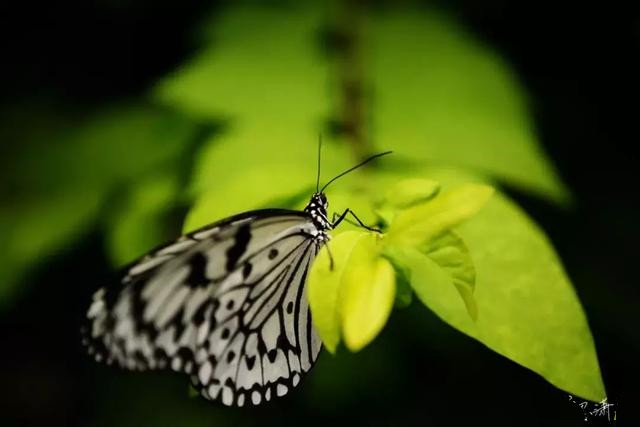
Macro shooting

Since you’re going to be shooting so close, you’re going to be very easy… I should say you’re going to get a very shallow depth of field image. If you don’t want the depth of field to be a shallow line — only this line is sharp, the rest is blurry — then try to use a smaller aperture.

When it comes to small apertures, the first thing that comes to your mind is F8-F11.
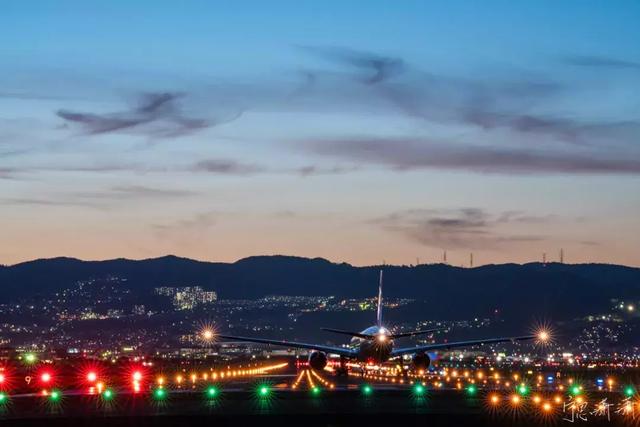
Shooting starburst effect – F8-F11

When shooting night scenes, we hope that the lights will show the starburst effect. In fact, a small aperture can be achieved.

Small aperture? F8-F11 you should blurt out.

However, please note that the starburst effect cannot be captured by mobile phones.
When Shutter Priority

General body movements

——more than 1/60 second

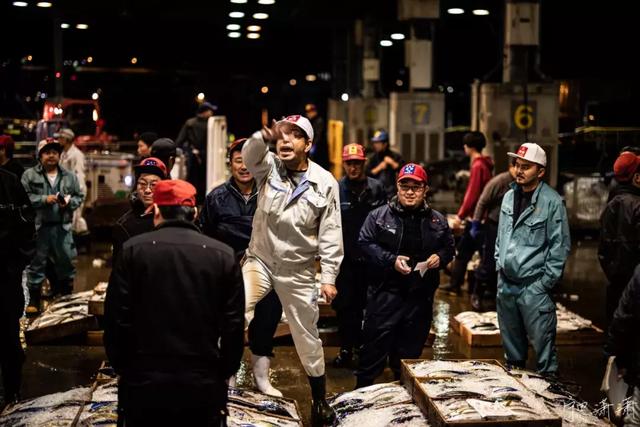
As long as the movement is not very violent, more than 1/60 of a second can freeze the moment of body movement. For example, the following picture of the uncle holding seafood was taken in 1/60 of a second. His movements ranged between vigorous and non-violent. So we see that the uncle’s arm in the picture is slightly empty.

But especially violent movements, such as the white hat uncle who auctioned seafood in the picture below, because the movements on his hands are very fast, even if the shutter speed of 1/125 second is used, it is still false.
Walking

——1/125 second or more

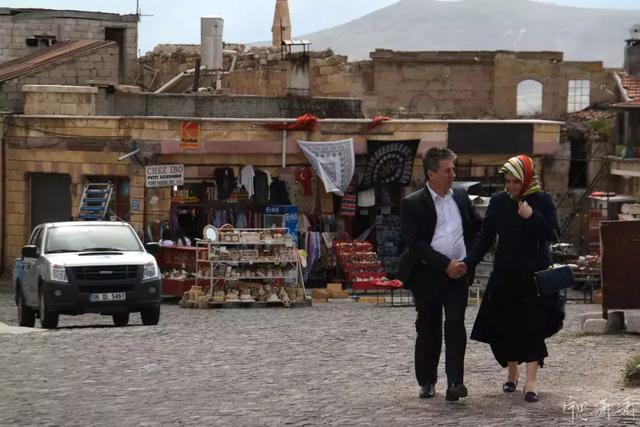
For walking slowly, the movement of the character can be frozen for more than 1/125 second.

The movements of the two people in the picture are completely frozen, and the shutter speed at this time is 1/250 second.
Fast moving portrait

——1/500 second or more

But if the character walks fast, or the walking person is very close to you, then the character moves very fast in the picture. Then obviously 1/125 of a second won’t work. We need shutter speeds above 1/500 of a second.
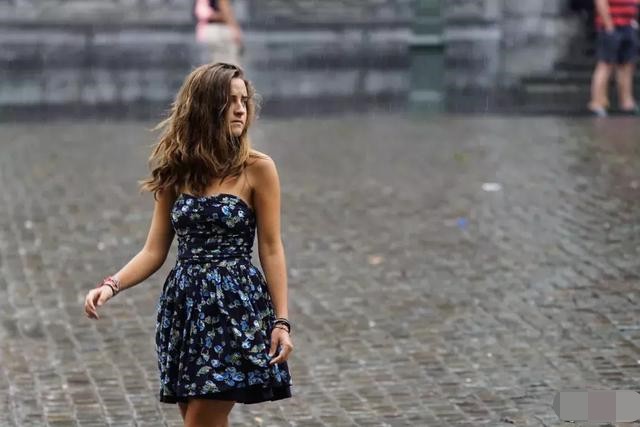
Of course, if you want to blur the walking characters, naturally as long as your shutter speed slows down, it will be blurred. This photo was taken at 1/20 of a second. The characters who walked were very vain. Then all I have to think about is the highlights. One is that the monk facing me can stay still during this exposure time, and the other is that the camera in my hand can be held steady.
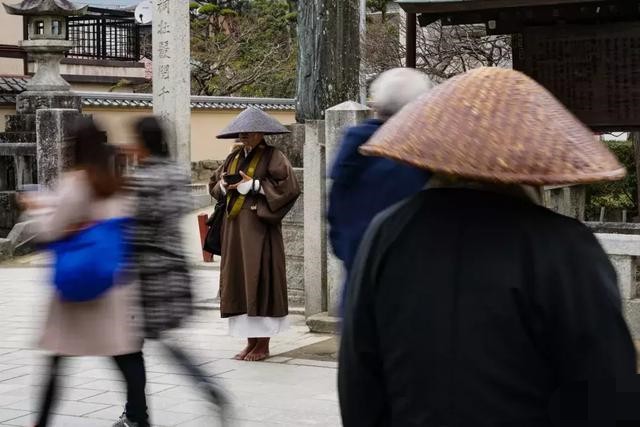
At the same time, we should also be able to see from this photo that the monks in the vicinity are a bit phantom, while those in the distance are very clear. In fact, at that time, on the one hand, the monks in the vicinity might move more than those in the distance. 1/20 of a second, he couldn’t hold on.

Running

——1/1000 second or more

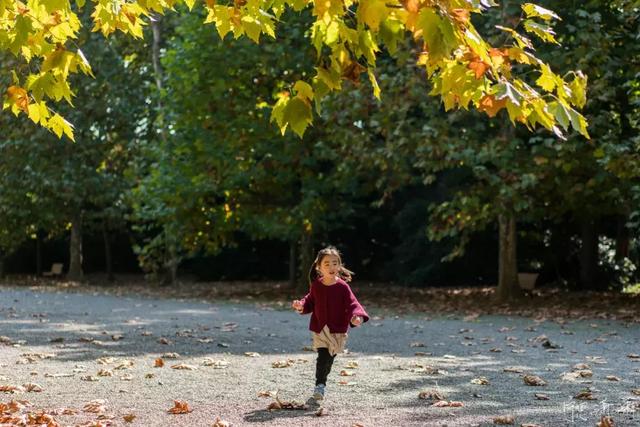
If you want to freeze the running person, I recommend using a shutter speed of at least 1//1000 second. And it is recommended to turn on continuous shooting.

This is because the running person moves erratically, not only moving back and forth, but also ups and downs. At the same time, the movements of the hair on the hands and the movements of the feet are very fast.

Fast shutter speeds freeze the moment, and continuous shooting helps you capture good moments.
Car is driving at normal speed

——More than 1/4000 second (the same when you shoot the ground scene in the car)

So how do you photograph cars? The shutter has to be one stop faster when shooting. And I don’t recommend photographing fast-moving cars that are particularly close to you, because of the danger.

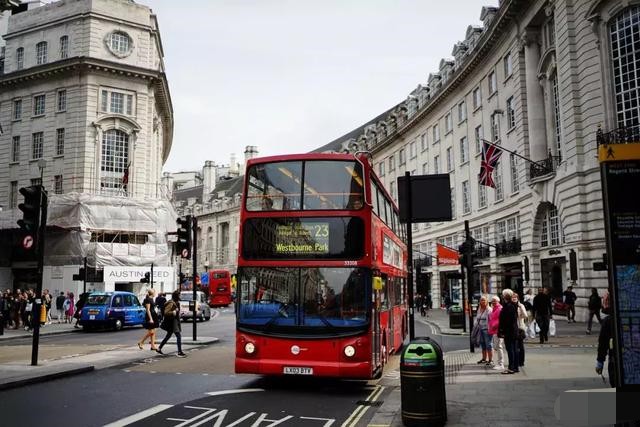
This double-decker bus I photographed in London is not very fast when turning, but it will also have a speed of about 20km/h. I even used a shutter speed of 1/8000th of a second just to be safe.
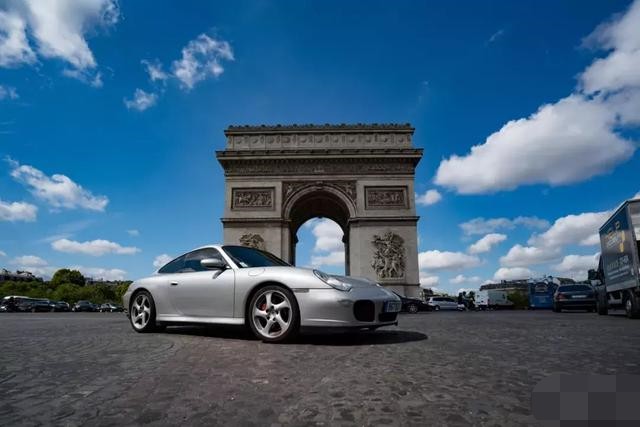
Of course, if the car is moving very slowly, the shutter speed may not necessarily be so exaggerated. This Porsche slowing down to turn at the Champs-Élysées intersection is actually slow. So a shutter speed of 1/1600 second is enough to freeze.
 Follow Photography

——1/4 second ~ 1/60 second
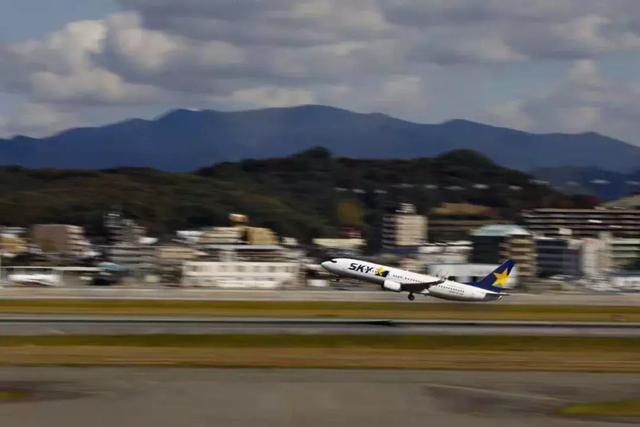
The choice of shutter speed is based on tangential movement speed and distance from you. So if you shoot bikes, just go to the sidewalk and practice. If you’re photographing cars, I recommend staying away. If you’re shooting airplanes…then go further.

How far is appropriate? According to the shutter speed of chasing photography, 1/4 – 1/60 seconds, you can take a shot and try to catch up. If the subject is particularly virtual in the picture, it means that the subject is too close or the subject is too fast. Find a way to stay away. If not, then give up.

Street car light line and surface boat light line

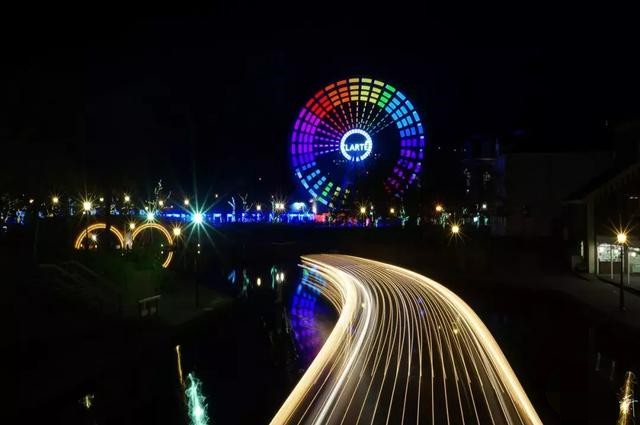
——The exposure should be as long as possible, ISO 100, F8, and the exposure compensation will be reduced by about 1 stop.

Although it is M file, we still have to refer to exposure compensation for such a scene. Since it is a night scene, consider reducing the exposure compensation a bit. If the street is bright, reduce it a little or not at all. In the case of the river, it is generally darker, so it needs to be reduced a little more.

By how much? Take a picture and see.

Then according to the reciprocity rate, we set the aperture and sensitivity, adjust the shutter speed, and make it as long as possible while satisfying the exposure compensation. If you find that, oops, the shutter speed is still not slow enough, then adjust the aperture a little bit smaller. If you find that the shutter speed reaches 30 seconds, it is still not bright enough, you can consider increasing the sensitivity or opening a large aperture.
Summary of Elements in Photography Concept:

1. The camera controls the three elements of exposure

Aperture, Shutter, Sensitivity

The larger the aperture, the brighter it is.

The slower the shutter, the brighter it is.

The higher the sensitivity, the brighter.

2. Four elements of exposure

Scene Brightness, Aperture, Shutter, Sensitivity

The stronger the scene brightness, the brighter

Others are the same as above.

3. Five elements of flash exposure

Power, distance, aperture, sensitivity, focal length

The higher the flash power, the brighter it is.

The closer the flash is, the brighter it is.

The larger the aperture, the brighter it is.

The higher the sensitivity, the brighter.

The longer the focal length, the brighter.

4. Three elements of depth of field

Aperture, focal length, focus distance

The larger the aperture, the shallower the depth of field.

The longer the focal length, the shallower the depth of field.

The closer the focusing distance, the shallower the depth of field.

5. Four phrases for blurring the background

Background far, camera close, large aperture, long focal length

6. Three characteristics of light

Intensity, direction, color temperature

Intensity – that is, whether it is bright or not.

Direction – is where the light comes from.

Color temperature – is what color light is.

7. Three types of light

Natural light, scene light, artificial light

Natural light is generally the source of sunlight.

Scene lights are often other light sources indoors.

Artificial light is studio lights or flash.

8. Three characteristics of color

Hue, Purity, Lightness

Hue – what color

Purity – is saturation

Brightness – how bright or dark the light is

9. Four bad performances of sensitivity improvement

Loss of sharpness, loss of detail, increased noise, color shift

The loss of sharpness and loss of detail results in unsharp photos – the first thing to do.

Increased noise makes the picture unclean – but that’s the least of the matter.

Color shift is when there are a lot of dirty patches, the hue of the color changes – it’s bad.

10. The three major problems of shooting unclear

Focus is not accurate.

The relative displacement of the camera and the subject during the exposure time.

Mechanical or electronic problems.

11. Three elements of flash parameters

GN index, maximum flash sync speed, sync method

The GN index expresses the power of the flash and is equal to the aperture multiplied by the distance.

The maximum flash sync speed indicates the fastest shutter speed at full power output.

The synchronization method includes high-speed sync flash and slow flash, and slow includes front-curtain sync and rear-curtain sync.

12. Four elements of lens parameters

Focal length, maximum aperture, minimum focusing distance, magnification

The focal length represents the framing size and variable range.

The maximum aperture represents the light transmission capability of different focal lengths.

Closest focus distance means, uh, the closest focus distance.

The magnification indicates how much the object to be photographed can be enlarged on the sensor.

13. Three elements that determine image quality

Lenses, Sensors, Image Processing

The quality of the lens has an impact on the quality of the image, and the light enters the photo through the lens.

The sensor is mainly manifested in the pixel density. The lower the density, the better. This is the process of converting light signals into electronic signals.

Image processing is the process of finalizing the electronic signals collected by the camera into photographs.
Categories
Studio Lights Education

Interpretation of Landscape Photography_Part II

Use Forward Light to shoot Landscapes

The light in the direction of the light that is in the same direction as the camera is called forward light.

Since the front of the forward light-type subject is uniformly illuminated, and the shadow of the scene is cast behind, there are few shadows in the picture taken by the forward light, and the front is often brighter. The level of the picture is mainly conveyed by the difference in brightness or tone relationship of the subject itself.

The advantage of forward light shooting is that the tone in the picture is soft, which can better convey the color of the scene itself.

However, in some cases, using forward light to shoot landscapes, if the foreground part is in the shadow and the background scene is brighter, the spatial stereoscopic effect of the scene will change. In addition, when shooting with forward light, especially the forward light of low light light, it is easy to leave the photographer’s own figure in the picture. This should be avoided.

Use Side Light to Capture Landscapes

Advantages and Disadvantages of Side Light

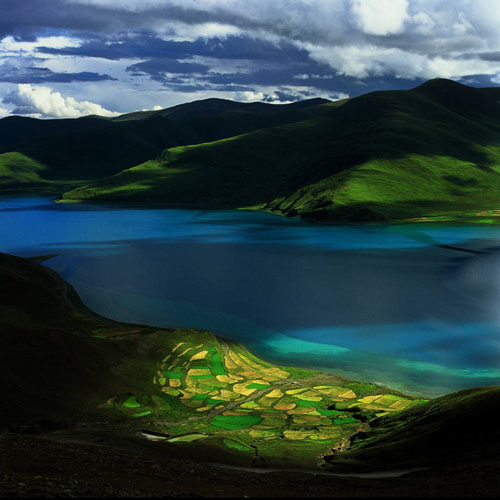
The light radiating in the direction of about 90 degrees from the camera shooting direction is called side light. Scenes that are edge-lit have a clear contrast between light and dark. This light can well represent the shape, three-dimensionality and texture of the scene being photographed. The structure of light and shadow is clear and strong.

Due to side lighting, the backlit side of the scene will leave a shadow shape. The length of the shadow as well as the shadow and the scene itself will constitute a colorful modeling effect.

Shooting with side light also has its downsides. There is a large light ratio contrast between the light-receiving surface and the non-light-receiving surface of the scene, and this gap often exceeds the latitude range allowed by the film. The level and texture of the scene will be somewhat lost.
 Accurately grasp the side light

Side light is one of the lights that is often used when photographing landscapes. In order to accurately grasp the light and shadow effects of the scene, the exposure calculation for side-light shooting is very important. Specifically, both the data measured with the spot light and the exposure compensation are taken into account. The general rule is: when shooting in side light, spot metering should be performed on the highlight part of the scene, and a half-level exposure should be added on this basis.

Top light

The direction of the light and the shooting direction of the camera are roughly perpendicular to the light, which is called the top light. This light generally appears around noon.

Top light actually belongs to the category of side light, but the projection direction of the light is bottom-up, the upper part of the scene will be brighter, and the lower part will leave a heavy shadow.

In landscape photography, top light is the more difficult light to use. But nothing is absolute. By choosing the right scene and using the lighting characteristics of the top light, you can also shoot the ideal picture.

Since the top light illuminates the scene from top to bottom, the occlusion of clouds or the natural scene itself will form heavy shadows on the ground, so how to use these shadows becomes the key to shooting. The existence of light and darkness on the ground is also the existence of contrast. The contrast effect of light and dark naturally adds layers to the picture, which is the value of using top light to shoot landscapes.

Photographing Landscapes with Backlighting

Benefits of backlight

The irradiating direction of the light is opposite to the shooting direction of the camera and the light coming from the back of the subject is called backlight. The edges of the scene illuminated by the backlight are illuminated. Since the light-receiving area is small, only the effect of clear contour light is formed. It is an effective means of expressing the outline shape of objects and distinguishing the boundaries between scenes.

Backlight photography can well express the three-dimensional sense of the scene, and at the same time can express a strong aerial perspective effect, so that the tones and layers of the picture are very rich. Backlight shooting will cause a large area of ​​shadow in the foreground, which is an important factor in the dark effect of the picture, and the dark background is an ideal means of hiding.

The effect of backlight on landscape photography

Backlight photography is also one of the methods often used in landscape photography. In addition to using the light and shadow effects of backlighting, sometimes we also put the light source of backlighting – the sun – into the picture, especially in the morning or evening. At this time, the brightness of the light source needs to be considered.

The best time to shoot is when the sun is not bright and dazzling. And the color is duck egg yellow. The photos taken at this time have warm tones, saturated colors. And the contrast of the scenery is not strong. If you happen to catch the beautiful colorful clouds in the sky when shooting the scenery against the light, don’t miss such a good opportunity. What we want to express is the colorful clouds in the sky. So the area of ​​the sky must occupy the main part of the composition of the picture. And other scenery should obey this theme.

The disadvantage of backlit photography is roughly the same as the disadvantage of side-lit photography, namely the loss of level of detail in parts of the frame. When shooting against the light, put the sun into the picture, and if it is not handled properly, “sun flares” will appear. And the effect of the whole picture will be displayed.

Photographing Landscapes with Diffused Light

Light scattering refers to a phenomenon that occurs when the light emitted by the light source encounters occlusion and interference before reaching the ground scene. In nature, when sunlight encounters thick clouds in the atmosphere, the sunlight is reflected, refracted and absorbed in the clouds due to the occlusion of cloud materials. And finally the light passing through the clouds has become scattered light.

Scattered light is closely related to landscape photography. In actual creation, we often encounter the daytime when the sun cannot be seen. And the light at this time is scattered light. Some people think that it is impossible to take pictures with strong visual impact in such light conditions. Indeed, under this kind of scattered light, the light perception effect of natural landscapes is not very strong. And the visual beauty and color impact of landscape photography are diluted.

But it is precisely this kind of scattered light that has no obvious direction of illumination that creates a good atmosphere for us to take pictures of landscapes with a soft and lyrical tone. Because the scattered light is relatively soft, the scene can hardly see shadows under the illumination of the scattered light. And the subject is easy to lack the sense of the main body. Therefore, the photographer’s choice of the form of the scene is very critical. Just as there are sonorous and powerful marches and soothing and peaceful serenades in music, scattered light brings us a more peaceful and more realistic nature.

Scenery with area light

Area light means that a certain area of the scene is illuminated by light.

This kind of light is also called stage light. Because a spotlight on the stage only moves with the protagonist, so it gets this name.

This light is often encountered in nature, especially in cloudy weather conditions. Due to the blocking of the clouds, the sunlight cannot illuminate the earth. But is regionally divided into bunches of “stage lights”. And with the continuous movement of the clouds, the regional light will also continue to move.

Area lights work best before a thunderstorm. Generally, the cloud layer before a thunderstorm is thicker and the wind is strong. The area projected by the sunlight on the ground has a great contrast between light and dark. And the cloud blocks move faster under the action of the wind. This provides many opportunities for us to capture the desired effect of the picture. But as the opportunities increase, it also increases the difficulty of shooting. The first is to shoot fast, pressing the shutter when the area light hits the desired location. This may be a few seconds. Secondly, it is very critical to accurately grasp the exposure data. The range of metering must be based on the highlight part (the location illuminated by the area light). And then compensated according to the actual situation.

In landscape photography, you need to grasp the movement direction of the area light and predict the light and dark effects of the scene in the picture. Waiting is sometimes the way to go.

Shooting Landscapes in Low Light

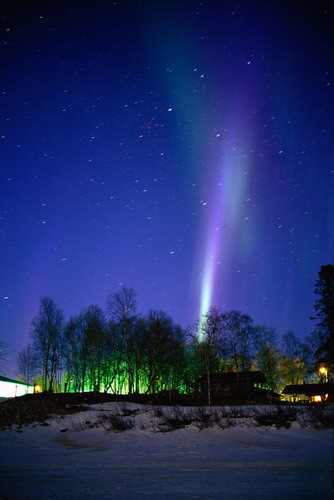
Low light refers to starlight, moonlight, and weak sky lights at night.

The light source of weak light is diverse, and the illumination intensity of the light is very small. The contrast of the light ratio of the photographed scene will be relatively small. And the color reproduction will be very poor. The level and texture of the scene will be greatly affected by the weak light. Therefore, in the creation of landscape photography, low light is often ignored by people.

Shoot the sunrise in the morning, the sunset in the evening, and find a place to rest at noon. This is the creative rule of most landscape photography enthusiasts. Following this unwritten rule, photographers work hard from morning to night to create. Although they have been to many places, in addition to the differences in regions, the single creative method and thinking mode make the pictures taken have many similarities.

Taking pictures of landscapes at night not only extends our creative time, but also the huge difference between the shape, color, and state of natural scenery at night and daytime. That expands a new perspective for our creation. The scenery shot with low light as the main light source has a strong sense of mystery. It is very beneficial to the expression of artistic conception.

In landscape photography, using weak light as the main light source for shooting, the difficulty lies in the accurate grasp of exposure time. Inexperienced people often get twice the result with half the effort, or even work in vain.

Only by mastering the rules of night and daytime landscape photography can we achieve all-weather landscape photography in the true sense.

 Four Heights of Landscape Photography Art

If learning landscape photography is compared to a high jump, there are at least the following four heights:

The first height: mastery of technology

The second height: the use of skills

The third height: the discovery and creation of photographic beauty

The fourth height: the formation of a unique artistic style

There is a close relationship between the four heights of landscape photography art. It can be said that technology is the foundation, skills are the means. And the creation of photographic beauty is the goal. And the formation of a unique style is a sign of a photographer’s artistic maturity and the pursuit of a higher level of photographic beauty.

There is no skill without technology. Without technology and skills, there is no photography creation. Without a long-term and extensive creative practice, there will be no formation of a personal unique style.

Categories
Studio Lights Education

Interpretation of Landscape Photography_Part I

How to Understand the Composition of Landscape Photography

The visual elements of beauty are all around us and occupy such a large part of our daily lives that most of us turn a blind eye to it. In landscape photography, whether bland or majestic, it contains an infinite amount of visual beauty. Sometimes it only exists for a moment, fleeting. Sometimes it hides under a very ordinary exterior, making it difficult to identify. In fact, it’s the hidden visual beauty that is truly magical and interesting.

Aesthetically pleasing lines, tones, shapes, and textures are found in natural landscapes, brought into viewfinders, processed in the photographer’s own way, and then photographed so that the viewer can see them at a glance. That’s what composition is all about.

Composition is a thought process that seeks order from the chaos that exists in nature. It is an organizational process that brings together a large number of scattered compositional elements into an understandable whole. Composition is the process of reacting to these elements and finding ways to organize them. The aim is for these elements to convey to people the excitement, reverence, fear, wonder and empathy that the photographer has already experienced. The atmosphere expressed by the composition is sometimes calm, sometimes powerful or firm, and sometimes active. Nature itself will show the photographer the emotions to be expressed.

Some people compare the composition of painting with the composition of photography, and come to the conclusion that the composition of photography is a subtraction, and it is a refinement of the natural scenery of the world. There is some truth to this statement. Whether it is addition or subtraction, there is only one purpose, that is, to reproduce the feeling that nature gives us through composition, and to convey this feeling to the viewer with the camera.

The Spatial Division of Landscape Photography

In a square or rectangular viewfinder, the natural scenery is reasonably distributed among them, which is the spatial division of landscape photography. The natural spatial arrangement is nothing more than the proportional relationship between the landscape and the sky, and between the landscape and the landscape on the ground. For example, in terms of the layout of the screen, whether there are more sky and less land, or less sky and more land, should be decided according to the actual situation and personal subjective.

The general rule of space division is that which part is exciting, which part should occupy a larger area. But it is worth noting that the main body of landscape photography is the natural landscape on the earth, and the sky is more often used as a foil. Therefore, when the sky part does not have the creative elements we need, it should be completely cut out of the composition. If the sky is the main body of the picture, we should also keep some of the ground on the picture. Without the background of the earth, the expressiveness of the sky will be greatly reduced.

When shooting landscapes dominated by the ground, it is also necessary to consider the sense of spatial distance between the scene and the scene. Using the focal length of the lens, the air perspective relationship and the radioactive lines, the three-dimensional space effect of the natural landscape can be displayed to the maximum extent in the picture, so that the viewer has a sense of being there.

The Location of the Subject in Landscape Photography

No matter what the content or object of landscape photography creation, there are primary and secondary points. The subject is the focal point of the picture and the main expressor of the subject idea. The main body can be one, or two, three or several. The status of the main scene should also be superior to other scenes in the picture, and it should be in an obvious position.

But not all subjects must be arranged in the center of the picture, which would be rigid and not meet the aesthetic requirements. Regarding the position of the subject in the picture, the commonly used method is to draw the picture into a “#” shape, and place the subject at any cross point of the # shape. This method of handling the body is worth referring to. The specific placement location, we also have to vary depending on the scene, depending on the situation. It is necessary to pay attention to the laws of aesthetics and to dare to break through and innovate.

Accompanying Landscape Photography

Accompanying body refers to other scenes after the subject is determined. It is second in the picture, but it is extremely important to highlight the main body in the picture. It mainly sets off the subject and assists the subject to complete the task of expressing the author’s emotions. In addition, if possible, decorate and beautify the picture, unify the tone, express the atmosphere and express the depth of space, and cover up some deficiencies. Therefore, the choice of companion should not be the same color, tone, and shape as the main body, but should be different. The relationship between the subject and the companion is both contradictory and interdependent.

Depth of Field for Landscape Photography

The scene is formed into a relatively clear image on the photosensitive material. And the longitudinal depth of the scene with a clear image is called the depth of field. That is to say, when we take a landscape photo, the distance from the closest clear scene to the farthest clear scene is the range of the depth of field. Most landscape photography requires as much depth of field as possible, making every part of the frame sharp if possible.

There are several factors that affect the depth of field: the size of the aperture. That is, the length of the focal length, and the distance of the shot. The larger the aperture, the shorter the depth of field. The smaller the aperture, the longer the depth of field. The longer the focal length of the lens, the shorter the depth of field. The shorter the focal length, the longer the depth of field. The closer you shoot, the shorter the depth of field. The further away you shoot, the longer the depth of field.

To sum up, when shooting natural scenery, in order to maximize the panorama depth. That is, the maximum sharpness range of the photo, the most effective method is to use a lens with a short focal length (wide-angle lens) and a small aperture (F11, F16, F22 ), to capture the scene at a longer distance (about two meters away). Using the above three methods at the same time ensures the maximum sharpness of the photo.

Aerial Perspective for Landscape Photography

Aerial perspective is a phenomenon in which the details of distant objects are blurred. The greater the distance between the photographer and the scene, the thicker the layer of air the scene’s light needs to penetrate. The distant scene seems to be immersed in a hazy fog. And the aerial perspective will make the distant scene blurred.

But it is this visual phenomenon of near-clear and distant blur that gives our photos a sense of depth and space. Photographers also take advantage of this visual phenomenon to take landscape pictures with three-dimensional space effects.

In nature, in addition to the influence of the distance of the shooting distance on the aerial perspective effect. The change of the weather plays a decisive role to a certain extent. When shooting in sunny and windy weather, the air perspective is good, and the landscape clarity is high. In foggy weather, the air perspective is poor, and the spatial clarity of the landscape is limited.

Therefore, after mastering the basic relationship between aerial perspective and shooting, we can freely choose the shooting scene in any weather conditions. That is, when the air perspective is good, you can take pictures of large scenes and distant scenes. When the air perspective is poor, take some small and close-up photos.

Metering is the Basis of Exposure

Standard grey reflectivity

The design principle of modern cameras and professional light meters is based on the standard reflectivity of 18%. That is the reflectivity of a standard gray plate. But in the thousands of scenes in nature, different substances have different colors, light-sensing and light-receiving directions. Therefore, when we are faced with intricate and ever-changing scenes, how to measure the reflectivity of the subject becomes the key to correct exposure.

In the face of different scenes and different illumination directions of light, the metering methods used are also different. When we want to know the reflectivity value of the subject, we should use the reflective metering method. If we want to know the intensity of sunlight or sky light, we should use the incident light metering method. Whichever metering method is used, it is a relative basis for exposure values.

This value is not necessarily the most correct. The correct exposure value should be the data obtained after comprehensive analysis based on many factors such as weather, season, area of ​​illumination, and the reference point of metering.

Reflective metering

Taking reflective metering as an example, the range of the metering point is sometimes the subject itself. And sometimes the sky overhead. For example, it is necessary to use the brightness of the sky light as the metering point. That is mostly used before sunrise and after sunset. During this period of time, the scenery on the ground is not directly illuminated by sunlight. And the intensity of the reflected light cannot be accurately grasped by the light meter. The sky part is within the range of the sun. It can effectively reflect the intensity of light. At this time, the direction we measure should be the sky, not the scenery.

Whether to use incident metering or reflective metering, there are certain rules to follow in actual creative activities. On cloudy days, the scattered light of the sky is softer and the illumination is average. So it is more convenient and accurate to use the incident light metering method. If the light is relatively strong, whether it is shooting in backlight, front light, side light or area light, it is better to use the reflective metering method. Reflective metering can accurately measure the light ratio contrast value of the bright part and the dark part of the object. It provides a reliable basis for us to accurately calculate the correct exposure data.

Exposure is the Key to Landscape Photography

Effects of exposure

Using the shutter speed and aperture size of the camera, a certain amount of light is refracted through the lens and onto the photosensitive material. This process is exposure.

The exposure value determines the image effect of the shooting screen. Overexposure will result in a lighter image, and underexposure will result in a darker image. Only when the exposure is correct, the color of the scene can be truly restored. And the level and texture of the object can be fully expressed.

Exposure Compensation and Correction

In actual shooting, we not only have to learn the way of metering, but also understand the compensation and correction of exposure.

When shooting high-key and low-key photos, the exposure value needs to be corrected. The so-called high-key photo is a photo with bright tones, most of the screen is occupied by light white tones. And the image is only a light image composed of intermediate tones. If you want to get a high-key photo, you generally need to increase the exposure by one level on the basis of the measured exposure value.

A low-key photo is one where the majority of the image is dark, with only a few mid-tones and highlights. When taking low-key photos, it is generally necessary to reduce the exposure by one stop from the measured exposure value.

This is the actual application of the exposure principle of “white plus black minus” in shooting. In addition to the above-mentioned principle for the tone of the picture, the depth of the subject’s color also applies to this principle.

Not all works require accurate exposure. The amount of exposure depends entirely on our understanding of things and the effect we want to express.

Exposure increase and decrease

We must understand the following knowledge: within the allowable range of exposure latitude. When the exposure is less than half a stop or one level, the color of the highlight part of the scene is more saturated. On the contrary, the color of the highlights will be faded.

The mastery of exposure requires continuous accumulation of experience, and some ready-made rules should also be memorized. For example: To shoot a snow scene, increase the exposure by 1.5 stops. Shooting a landscape illuminated by area light, after metering according to the highlight area, reduce the exposure by half a stop. To shoot a darker scene, increase the exposure by one level after metering. Shooting a river in backlight, after metering the highlights in the river, reduce the exposure by one level.

When shooting the sun at sunrise and sunset, if you put the sun that is not dazzling like a duck egg yolk into the frame, the exposure data is F/16. And the speed is 1/15 second (100-degree reversal film). When shooting landscapes on cloudy and rainy days, shoot according to the data obtained by incident metering. Generally, there is no need to increase or decrease exposure. And the color reproduction of the scene is true and full, and so on.

(To Be Continued)

Categories
Studio Lights Education

Exposure and Metering_Part II

In the previous article, we learned about the concepts of “exposure”, “correct exposure” and “sensitivity latitude”. To get the correct exposure, evaluation must be done to determine how much exposure is required. In this article, let’s learn how to meter light. Different metering methods need to be used in different situations to allow us to get the correct exposure. At the same time, mastering the metering can allow us to better utilize the creativity of light and shadow, and shoot extraordinary works in ordinary scenes.

Metering Mode

First, let’s understand the mode of camera metering.

Metering mode: Now SLR cameras and digital cameras basically have the following three metering modes:

1. Average metering:

The metering value is averaged over the entire framing area.

This is the default basic metering mode of general cameras, and the usage rate is the most common. In the case where the light is relatively uniform within the framing range and the contrast between light and dark is not large, you can almost get a satisfactory photo.

Figure 1. Cactus.

The scene at that time was very flat, and the color and light of the cactus in the framing area were relatively average. Using the average metering mode, you can get a photo with the correct exposure.

2. Center average metering.

The metering mode is based on the average metering of the area around 30% in the middle of the framing range.

When the subject to be represented is in the middle of the framing range, and there is a big difference between the ambient light and shade and the subject, choose the central average metering, and focus on metering most of the central area, which can make the subject’s exposure more accurate.

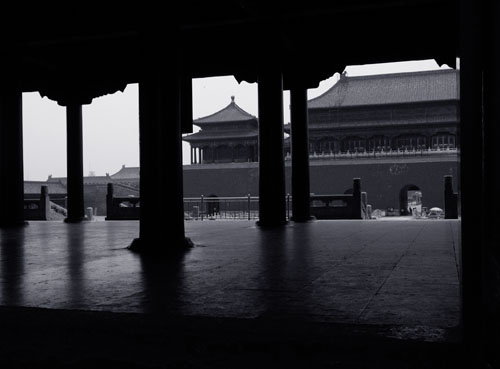
Figure 2. The Forbidden City.

The idea of this film is to use the foreground to highlight a sense of oppression and to express the majesty of the Forbidden City. When shooting, the light ratio of the main tower and the foreground is quite different. Using the center average metering mode, the overall metering is mainly based on the tower in the middle part of the framing, and the subject is properly exposed, and the foreground becomes a silhouette photo, which is in line with the conception goal. With average metering, the subject may be slightly overexposed, leaving too much detail in the shadows in the foreground, cluttering the frame.

3. Spot metering.

Also known as spot metering, it is metering within the 1%-5% area of the framing range.

The spot metering mode is rarely used and difficult to master. But in some cases, spot metering can play an important role. Knowing when to use spot metering, and being able to use spot metering correctly, will allow you to accurately expose your subject while using “sensitivity latitude” to create amazing pictures that you can’t see in reality.

How to use spot metering? The following will illustrate how to use the spot metering mode well.

The situation where the spot metering mode is applicable: The spot metering method is applicable when the light distribution in the framing is uneven and the contrast is large. In this case, if spot metering is not used, it may result in incorrect exposure of the subject that needs to be expressed, too bright and too white, or too dark without details.

Exposure Lock

Exposure Lock: Before using the spot metering mode, you need to understand the use of exposure lock.

The metering point of camera spot metering is in the center of the framing area. When using spot metering, you need to align the center point of the framing area (the metering point of spot metering) at the subject to be expressed for metering. If in the framing you want to express, the subject is not at the center point, you can first use the spot metering point to aim at the subject for metering. And use the camera’s exposure lock function to lock the data of the subject’s metering, and finally recompose the picture according to your own ideas, and press the shutter after focusing.

Most cameras have exposure lock buttons that allow us to easily reconsider the composition after exposure lock. But there are also some cameras where exposure lock and focus are achieved by pressing the shutter halfway. If the metering point and the focus point are not consistent, for example, the metering point in Figure 2 is a cloud near the sun, and the focus point is a building, you need to meter the cloud point first, then lock the exposure, and then recompose the image to focus on the building.

Some cameras do not offer separate exposure lock and focus lock, or you can spot-meter the subject and then record the exposure data. Then set the camera’s shooting mode to M mode, set the exposure data according to the data of spot metering, and then compose and focus.

Use Cases of Exposure Lock

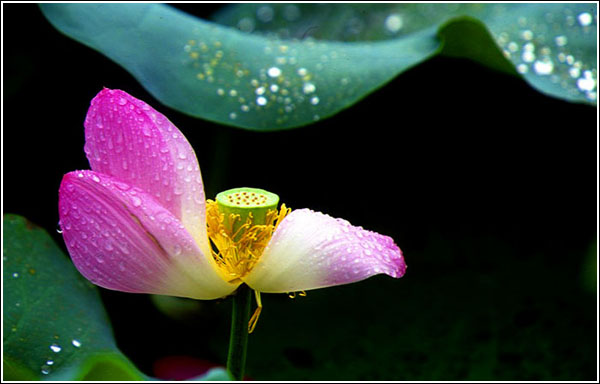
Figure 3, from the perspective of the framing environment, the main lotus flower that needs to be represented is brighter. While the lotus leaf is darker, and the staggered stems affect the composition. If the average metering is used, the average metering value will be biased towards the light intensity of the darker environment. The result of shooting is that the flowers, leaves and ponds are correctly exposed, while the subject lotus we want to express is pale (overexposed).

When shooting this film, because the lotus flowers have more reflections, the lotus leaves and ponds have less reflections. Using the camera’s spot metering function to spot the subject lotus petals, you can correctly expose the lotus, highlighting the lotus with good color and good details. While the pond is underexposed, the darkness hides the layered stems and better emphasizes the subject lotus.

Effect of photosensitive latitude

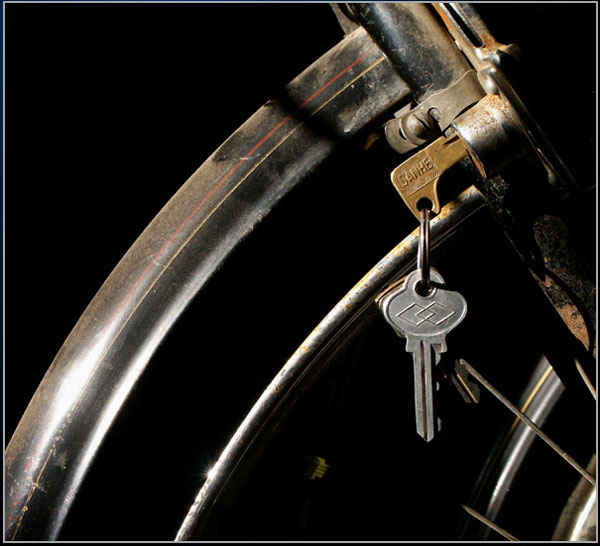
Figure 4. This is a bicycle placed in the house. It was probably in the afternoon, the lights were not turned on in the house. And the sun shone in from outside the door. In the framing range, the light distribution is extremely uneven and the contrast is relatively large. And the naked eye can clearly see the bicycle tires and the background behind the car.

When shooting, turn on the key of the light meter. After locking the exposure, recompose the shot. Because of the strong reflection in the front, the background is almost pure black. It makes the picture quite concise and highlights the local lines and arcs of the bicycle.

In fact, this is the beauty of photography. Although it reflects the real, but because the film (or CCD, etc.) sensitivity latitude is too narrow, it is not the same as the real one. It can be said that if it is not taken with a camera, such an effect cannot be seen with the naked eye.

Through the understanding of the sensitivity latitude, predict the effect of shooting. And use spot metering, so as to extract this interesting film in the messy and ordinary scene.

The Importance of Metering for Portraits

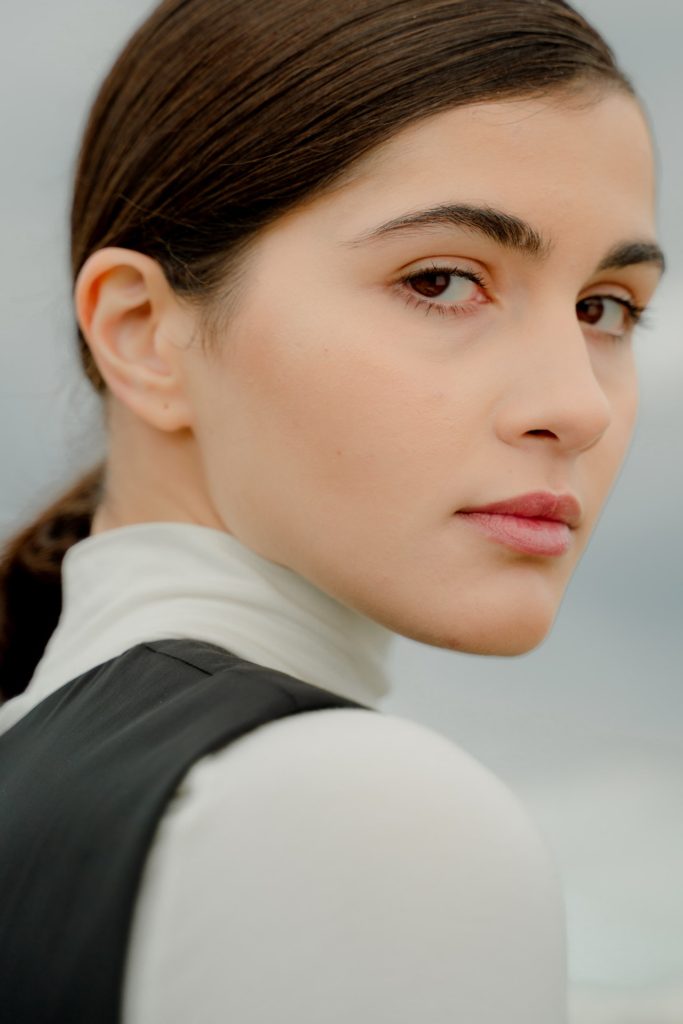
Figure 5. Pay attention to metering when shooting people. The most important thing in portrait photography is usually the expression of the human face.

This image was shot using natural light and spot metered the face to expose the face correctly. The surrounding environment and clothing become dark due to underexposure. The picture is simple and the characters stand out, similar to the feeling of using a background cloth in a studio. If the metering is average, the surrounding environment will be clear, and the face will be overexposed and appear pale.

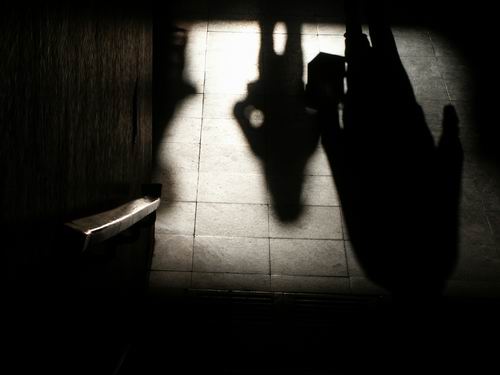
Figure 6. This work was taken during the COVID-19 period. At the entrance of the subway, the reflection of sunlight is strong, the shadows are long. And the surrounding environment is dark, giving people a feeling of unknown and fear. In fact, when shooting, the environment seen by the naked eye is very bright. And the ground that reflects the sunlight is measured as the exposure value. That darkens the surrounding environment and highlights the reflected light and shadows, thus creating this feeling. If you use average metering, you get a film with a normal exposure and brighter surroundings.

DCF 1.0

Identification of Several Metering Modes

Reading this article will help beginner photographers:

1. Understand the application of average metering mode, center-weighted metering mode and spot metering mode.

2. Learn how to use exposure lock.

3. Use the “spot metering” method to obtain accurate subject exposure.

Through the understanding and mastery of the above basic knowledge, and then through the actual trial and experience accumulation, I believe that beginner photography friends can also take satisfactory and surprising photos.

Categories
Studio Lights Education

Exposure and Metering_Part I

Introduction to Photography

Photography is an amazing experience. In the journey of life, every unrepeatable moment, we can use the camera to freeze it forever, making this moment a beautiful memory that can be preserved and shared for a long time.

Before the advent of automatic cameras, photography was often seen as a professional technique, and the process of learning this technique was so tedious and difficult.

With the development of photographic equipment technology, the development and popularization of automatic cameras has brought great convenience to people, and shooting technology is no longer the threshold for photography enthusiasts. However, for beginners, even with an automatic camera, in the face of the beautiful scenery and beautiful moments of Xun Li, the photos taken are often bland or even unsuccessful. Why?

A successful photo is not only obtained by skilled shooting technology, but also needs to pay attention to the conception and composition of the external and internal performance. But mastering the necessary shooting techniques is definitely the basis for getting satisfactory photos.

This article aims at the key basic knowledge of light metering, trying to use simple words and legends to explain, hoping to be helpful to beginner photographers.

What is Exposure

First let’s talk about what exposure is. In a very simple way, exposure is when a film or a digital photosensitive component (CCD, etc.) receives light from the lens to form an image. When we take a photo, if the scene in the photo is too bright, and there is no layer or detail in the bright part, this is overexposure. On the other hand, if the photo is dark and cannot truly reflect the color of the scene, it is underexposed.

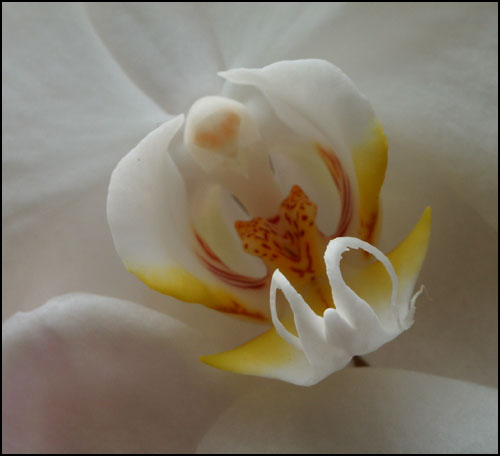
In Figure 1, since it was not considered that the screen is mainly white, the exposure needs to be increased. This photo shoots the light pink and white Phalaenopsis into off-white, which is a failed film with insufficient exposure. When shooting, increasing the exposure by half a stop to 1 stop will make the photo get the correct exposure. It`ll show a romantic pink and white tone.

DCF 1.0

Figure 2. Although the foreground exposure of this film is basically correct, as the main part of the performance, the color and cloud details of a large area of the sky are lost due to overexposure. So it is an overexposed failed film. If you can use the exposure of the sky as a benchmark, and reference the exposure of the mountains and the foreground, you can get a quiet morning photo of the rising sun slanting the mountains, the foreground forming a silhouette, and the purple-blue sky and white clouds as the main performance.

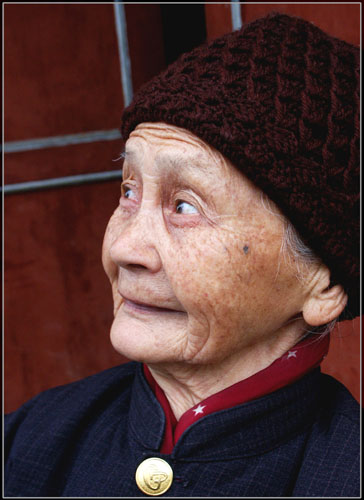
Figure 3. In this portrait photo, the face part is exposed correctly, which captures and expresses the character’s demeanor very well. The darkening of the background accentuates the characters and is a properly exposed photo.

DCF 1.0

What is Correct Exposure

 Correct Exposure

We already know what exposure is, so what is correct exposure?

In fact, correct exposure is relative. Under the same lighting conditions, the light and dark parts of an object reflect differently. In order to correctly represent objects with film (or electronic photosensitive devices such as CCDs), the exposure for light and dark parts is also inconsistent.

That is to say, within the same shooting framing range, as long as the reflection of the object is different, there must be some areas underexposed and some areas overexposed. So in this case, as long as we can achieve the correct exposure of the subject we want to express, this photo can be said to be correctly exposed.

Cameras these days basically have automatic metering, which allows us to take photos with the right exposure in most situations. But in some cases, there are also unsatisfactory exposures. It is often the scene that our human eyes can see. After taking a photo, the gap will be very large. What is the reason for this? We also need to understand the knowledge of photosensitive latitude.

Sensitivity Latitude

The human eye can see a wide spectrum of color spectrum, from brightest to darkest. But film (or an electronic photosensitive device such as a CCD) can represent a much smaller range than the human eye can see. This limited range is the sensitivity latitude.

After understanding this concept, it is not difficult to understand why the human eye can see the backlit buildings (dim) and the dazzling sky clouds (bright) under the condition of backlight. Once shot, either the clouds are gorgeous and the buildings become black silhouettes. Or the buildings are clearly detailed and the originally beautiful clouds become white.

Correct use of photosensitive latitude

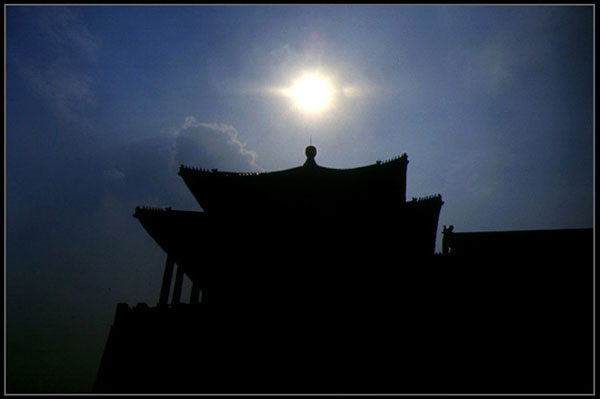
Figure 4. Because the contrast between light and dark is too large, the cloud layer is exposed correctly. But the building is severely underexposed, and there are no color details, and it becomes a black silhouette. But that’s exactly what this image wants to show. So even though the building is severely underexposed, this image can still be said to be “correctly exposed”. In fact, the human eye can basically see the details of the building. The photographer used the principle of “sensitivity latitude” to correctly expose the clouds. And made the building a silhouette, giving the film a mysterious and majestic feeling. If the architectural color details need to be expressed, then the sky will be completely white.

Correct use of photosensitive latitude

Figure 5. Considering the problem of light sensitivity, when taking this photo, the photographer chose to shoot on a cloudy day. So that the light difference between the front and the back is not much different. As a result, the exposure of the foreground is correct, and the background is also reflected in the details. If you shoot at a time when the light is strong, the foreground may be exposed correctly while the background is almost completely black with no detail.

DCF 1.0

It can be seen that with proper use of exposure and understanding light sensitivity issues, you can create high-quality photos. The next shooting class will tell you about light metering.

(To Be Continued)

Categories
Studio Lights Education

Photography Composition Tips

1. Regarding the Screen, Adhere to Two Basic Principles

(1) Concise

That is, the screen is concise. It refers to the principle of making the picture look concise and clear, with prominent key points and prominent subjects through means of composition and post-processing.

The simplicity of the picture is the only rule of thumb for making the point of a photo clear at a glance. Because there are not too many elements or companions to interfere with the main body and focus of the picture, such photos are the easiest for people’s vision to find the focus that the photographer wants them to focus on in a short period of time.

There are two easy ways to get a clean picture. The first is to use a large aperture to blur the background, resulting in a photo with a prominent subject and a clean picture. The second is to make the picture look concise and charming by leaving a large blank area in the picture, that is, “white space”.

(2) Balance

That is, the balance of the picture. Refers to the photographic composition, as far as possible to avoid the instability of the upper and lower weights and the left and right vacancies in arranging the scene of the picture.

People’s vision tends to be balanced, which is partly determined by physiology. Therefore, the image of photographic works and the connection between them should also conform to people’s visual habits and physiological balance needs, so that people can feel natural and comfortable. Otherwise, it will cause a sense of psychological imbalance and instability. It should be noted that balance refers to the macroscopic visual impression of the picture, not the microscopic requirements of the partial impression of the picture, and definitely does not refer to the averaging and symmetry of the picture.

In the creation of landscape photography, special attention should be paid to the effect of horizontal and vertical lines in the picture on the balance of the picture. For example, the horizon is tilted and positioned incorrectly, which can make the viewer feel out of balance. If the relatively long vertical line cannot be perpendicular to the ground or the horizontal line, it is easy to give people a feeling of instability. This is evident when photographing trees and architectural subjects.

Simplicity and balance are the two rules for arranging a good picture.

2. About Composition, Understand 3 Basic Components

A photo is mainly composed of three basic elements:

(1) Subject

The subject is the center of the composition of the picture, and refers to the main object of interest in shooting. It is the main component of the composition of the picture, the visual center that concentrates the line of sight, and the main embodiment of the content of the picture. The subject can be a person, a thing, or anything that can carry the content of expression.

A beautiful photo will have various elements such as subject, companion, foreground, background, etc. But the position of the subject cannot be changed, and the perfect combination of other elements is to highlight the subject, and arrange the position and proportion of the subject for this purpose.

To stand out the subject in photography, we can use a variety of means. The most commonly used method is contrast, for example, virtual and real contrast, size contrast, light and dark contrast, dynamic and static contrast, etc.

(2) Accompanying body

The images used to accompany the subject in the photographic picture are collectively referred to as the accompaniment.

Accompanying body plays a foil role in the picture, as the so-called “safflower needs green leaves to support”. Even the most beautiful safflower will lose its vitality without the presence of green leaves. When “green leaves” serve as a foil, it serves “safflower”. It is important to distinguish between the main and the secondary, and avoid arrogantly taking the lead.

In general, you can use the direct method and the indirect method to deal with the companions in the picture. The direct method is to place the accompanying body in the picture, but it should be noted that the accompanying body cannot overwhelm the subject, and is often arranged in the corner of the foreground or background. The indirect method, as the name suggests, is to arrange the accompanying body outside the screen. This method is more subtle and more flavorful. This helps to create an invisible voiceover, so that there is a picture within the picture and a picture outside the picture.

(3) Environment

The environment highlights the subject and creates a sense of hierarchy.

Genarally speaking, the environment refers to the scene near the subject. It is neither the foreground nor the background. Environment can be scenery or objects, or birds or other animals. The environment sets off and illustrates the role of the subject.

In a photographic work, in addition to seeing the subject and companions, we can also see some elements as the environment. These elements set off the theme and plot, further emphasize the expressive power of the theme idea, and enrich the level of the picture.

Reasonable arrangement of subject, companion and environment are the three rules of picture composition.

3. Environment

Regarding the environment, make good use of three basic factors.

A photo will be more expressive and attractive if it uses and handles the three environmental factors of foreground, background and white space.

(1) Prospect

The foreground is the scene closest to the lens on the screen or the scene in front of the subject can be called the foreground.

The foreground can help the subject form a complete visual impression in the picture. Because some shooting themes rely on the subject of the picture alone, it is difficult to explain the whole picture of facts or things, and even make the audience unable to understand the intention of photography. There is no special regulation on the position of the foreground when shooting, and it is mainly determined according to the main characteristics of the subject and the needs of composition.

(2) Background

The background usually refers to the scene behind the subject, which can be simply understood as the scene and object farthest from the photographic lens.

Different background choices and different expression techniques can make your pictures look more artistic.

Leonardo da Vinci once explained the role of the background, “Dark objects on a bright background will appear smaller than the original, while bright objects on a darker background will appear larger.” This explanation of the trompe l’oeil effect fully demonstrates the influence of the background on the subject.

In the actual shooting, usually a large aperture is used to blur the background, so that the background can form a beautiful blur effect. In addition to that, it is possible to brighten the subject and dim the background through metering tricks. Or darken the subject and brighten the background to contrast the subject of the picture.

(3) White space

White space is the blank part of the screen.

The blank size of the picture determines the orientation, size and distance of the form in space. Blank and form constitute the overall spatial system of the picture. It not only plays the role of communication and connection form, but also plays the role of creating the artistic conception of the picture.

But white space in photography is not necessarily white in the actual sense. It can be a large piece of the same color or the same type of scenery, such as sky, sea, mountain, grassland, land, etc. When shooting, the purpose of leaving blank space is to suddenly change in the peace of the blockbuster, so as to create a center of interest, to highlight and express the subject, and to make people feel the mood of silence rather than sound.

Reasonable layout of foreground, background and white space are the three rules for the composition of the picture environment.

You’ve matured when you’ve left the rules of composition behind and you can rely on your own intuition to compose a picture freely. You can become a master just around the corner.

Categories
Studio Lights Education

How to Take Better and Clearer Photos

Anti-Shake

Users who are new to digital cameras ignore the focus link and generally cannot take clear photos. The development of science and technology makes the anti-shake technology gradually become the standard technology of digital cameras. Image stabilization is generally divided into optical image stabilization and electronic image stabilization. For entry-level digital cameras, since they only have electronic image stabilization technology, increasing the ISO value can increase the shutter speed.

High-end digital cameras will be equipped with optical image stabilization. The principle is generally by adding a reverse complementary displacement device to the lens or photosensitive element mechanism to correct the shaking of the human hand, effectively reducing the safety shutter. Optical image stabilization is a technology that does not damage the image quality. We recommend you to use it with a certain range of electronic image stabilization.

Shutter Speed

Another factor that affects the sharpness of the photo is the slow shutter speed of the shot. In terms of increasing shutter speed, aperture setting and ISO setting are a must.  We can consider the minimum safe shutter for a handheld camera to be about the reciprocal of the focal length of a 35mm camera. For example: We use 28mm focal length to shoot, the minimum safe shutter speed should be 1/30s, and the minimum safe shutter speed for shooting with 400mm end is 1/400s.

Photos taken with shutter speeds slower than the safe shutter speed are prone to blurring if shooting in low light conditions. Generally speaking, the aperture of automatic exposure will be automatically adjusted by environmental changes, and when shooting with an M-speed camera, you can increase the shutter speed by increasing the aperture. Increasing the ISO value can also increase shutter speed, but often at the expense of image quality. It is up to the user to choose the best available ISO value depending on the camera.

Exposure

Optimal exposure is the key to obtaining high-quality images. Accurately exposed images with saturated, vivid colors. Underexposed images will appear dull. Overexposure, and the level of highlights in the image disappears, and the photo appears to be washed out. Although digital photos can facilitate post-processing of underexposed photos, photos with abnormal exposure often lack light and dark image data, and the role of photo post-processing is limited.

When many users shoot with digital cameras, they will use automatic exposure mode to shoot in most cases. However, automatic exposure requires accurate metering. To accurately meter light, you must grasp the characteristics of light metering, use metering mode, exposure compensation, exposure bracketing, and scene mode use.

Digital camera metering modes generally include center-weighted metering, spot metering, multi-zone metering and so on. In most cases, the exposure will be processed automatically, but in different scenarios, the digital camera will still appear unintelligent and need to be corrected manually.

For example, when shooting against the light, the center of the screen will be blocked by objects with high reflectivity. Shooting night scene photos For very bright or dark tones in the picture, the silhouette effect of normal exposure is light background, dark background increases or decreases EV value, etc. Underexposure, accurate exposure, and overexposure are one reason that affects photo quality.

The performance of LCD screens on digital cameras varies from model to model when we look to see if the LCD screen photo exposure is optimal. We can use the playback effect to see if the exposure is accurate. Accurate exposure photos, the screen display effect is good.

Framing

Most digital cameras have a grid-assisted framing feature. The grid assist function helps users determine the position on the screen of a photo. Usually we want the photo to be square and the people in the center to make the photo more beautiful.

When shooting landscapes, use rich tonal layers to draw people’s attention to the depths of the picture. In addition, there is a more practical principle, that is, the black color of the picture is deep and the area assembly produces a sense of depth, and the white color is deep and the area assembly produces a sense of vastness.

To express the sense of space in the picture, you can also use the area of ​​the subject and the height of the lens, the position of the subject in the picture, and the distance between the subject and the background. The scenes we are accustomed to in our lives are in a limited frame. And the performance of various equipment and techniques creates many pictures that we cannot see with the naked eye.

Expressing visual impact can create visual impact through color, deformation, movement, and virtual reality. The performance of color is our first impression of a photo. Bright, bright and cool colors can play a certain role in expressing emotions. Since our human eyes have a fixed sense of color and lack of freshness due to seeing too much, a photo with unique colors can often bring infinite reverie. Light can render the environment, and photos can express inner emotions.

Screen Structure

By taking advantage of the wide-angle and telephoto distortion of the lens, we can highlight the structure of certain pictures more. Exaggeration can bring a lot of rendering to the momentum or space of the picture. Appropriate distortion at the wide-angle end can increase the momentum of the picture. Shooting dynamic pictures often have strong artistic appeal. When shooting, you can use the flash strobe to create the effect of multiple subjects moving in a single photo. Or you can use tracking or zoom when shooting to blur out-of-focus objects.

The focus change of the human eye makes it difficult to detect out-of-focus objects. But digital cameras can easily do this with the sensor behind the lens. The combination of virtual and real can play a role in highlighting the main picture. There are still many ways to express visual impact, and users need to discover and create by themselves.

There are many factors that affect the clarity of photos. We have to use the advantages of digital cameras to achieve the best results.

Categories
Studio Lights Education

Strobe and High Speed Photography

1: Strobe Photography

Also known as flash photography. It is to record the continuous movement process of the moving body on a negative film with the help of continuous flashing of the stroboscopic light source. Due to the limitation of a single negative, the moving speed of the objects under study is often not very high and the movement time is not very long.

Strobe light sources are generally divided into two categories. One is to use automatic frequency electronic flash (referred to as electronic strobe) to shoot. And advanced points often use laser light sources. The second is to use the ordinary flash group to shoot. Due to the different shooting tools and methods, the effects of strobe photos are also unique.

Electronic Strobe Light

Electronic strobe light is a new type of photographic lighting fixture. When this light is fully charged, it can flash frequently one after the other, like a repeating pistol. The flash frequency of the high-frequency electronic strobe light can be adjusted as required. The higher the flash frequency, the more exposures the film takes and the more images appear on the photo.

Generally speaking, the number of flashes of this kind of light can reach dozens or even hundreds of times per second. When shooting a moving object with an electronic strobe light, dozens of overlapping and well-patched images can be left on the screen. These images, which are generated at regular intervals, can give people a visual experience with a strong sense of rhythm. It can make people feel novel. Because the visual effect of freezing the scene on a picture with high-speed frequency is more invisible than usual with the naked eye.

A black background should be chosen for strobe photos taken with electronic strobe lights. Keep the subject as far away from the background as possible to avoid the stroboscopic light from illuminating the background and affecting the subject. If the subject is relatively close to the background, it is best to make the flash and the subject form a side light and side backlight illumination angle. And the subject should also have obvious outlines, so as to prevent the image and the background from mixing.

Ordinary Flash

If there is no strobe flash, we can take strobe pictures with normal flash. Take strobe photos with multiple flashes forming a set of light sources. Since the shooting interval of the flash group cannot be very close, the continuous flashing of the ordinary flash group can only produce a few complete and relatively clear images. The images generally do not overlap each other, and the sense of movement and rhythm is relatively poor.

When shooting, first of all, it is necessary to determine how many images are to be left on the screen. How far apart the images are, and whether to use virtual shadows to connect the images. Then decide on the location and number of flashes.

Next, choose a dark background. It is usually better to shoot at night, with a low angle, with a dark sky as the background. Or find a spacious room to ensure that the image of the moving object is not disturbed.

In addition, in order to make the picture clean and the subject stand out, it is best to turn off the other light sources except the flash used for the main lighting in the shooting scene. If you are shooting character dynamics, in order to let the characters know the direction of movement, you can place a small amount of very dim lights on the scene. The light source should be as close to the ground as possible, at an angle of backlight illumination with the subject.

Notes When Shooting

When shooting, open the camera’s B door, lock it with the shutter release, and keep the camera’s shutter open. Then let the moving body begin to move, and the photographer manipulates the flash by hand. Flashes successively according to the different movement postures of the moving body. If you need to shoot three images, use the three flashes to fire three times one after the other. If you need to shoot six images, you can use the three flashes to fire two times each. Or you can use the six flashes to fire six times in succession. It is best to find multiple assistants to operate the flash separately. After reaching a tacit understanding, the effect is ideal.

If the moving speed of the moving body is relatively slow and the movement process is long, a single ordinary flash can be used for shooting. This stroboscopic method is to charge the flash fully. Lock the camera B door, fire the flash at the moment when the moving body starts to move, and record the first image. When entering the next look, flash again and record the second image. In this way, after many flashes, many images of moving bodies with different poses will be left on one photo.

 Exposure for Strobe Photography

How should the exposure of strobe photography be mastered? If several images are separated from each other, the exposure is calculated as usual with a single flash. If several images are closely connected and partially overlapped, the exposure of these images will increase with the number of flashes. Therefore, in overlapping bursts, the exposure should be reduced by 1-2 stops.

In order to provide a larger range of motion for the moving body, and at the same time to facilitate the recording of the movements of the moving body at each stage, it is best to use a wide-angle lens when shooting. In order to be more sure, it is best to carry out several tests before shooting, let the moving body or person practice several times within the determined shooting range, so that both sides of the shooting can cooperate tacitly. So that the photographer can shoot with confidence.

2: High-speed Photography

High-speed photography, as the name suggests, is a photography method that shoots very quickly and has a short exposure time. From a scientific point of view, high-speed photography is a dynamic subject that studies the instantaneous change process of the material world. And is an important branch of the field of optics.

It adopts the technology of “fast shooting and slow playback”. It slows down the rapidly changing flow process to the level that the human eye can distinguish. In addition to the strong visual shock that may be brought, high-speed photography technology is also widely used in various fields. In the field of scientific research, this technology is often used to record and analyze the movement changes of objects, military, industrial and even the movement of biological organs, microorganisms, and molecules.

A scene of puncturing a balloon filled with water with a needle, the white part is the balloon

Application of High Speed Photography

This kind of photography technology is also indispensable in modern industry. The modern industrial standard is efficiency and quality, often dozens of hundreds of processes per second. While reducing labor costs, often if a small mistake is not discovered until the end, the loss is also huge.

Today’s industrial equipment is running faster and faster, and the technical requirements are getting higher and higher. For example, some of the current welding robots are equipped with high-speed cameras to analyze the quality of the weld in real time. There are also cigarette machines that roll tens of thousands of cigarettes a minute. Except for the high-speed camera, I couldn’t see anything at all.

Our knitting machine was 1 meter long last week, with 1,000 or 2,000 knitting needles inserted. And sometimes another needle was inserted between the two needles. For example, when filling a glass bottle with beverages, if the filling speed is too fast, the container may break. But if the process is too slow, then the cost goes up. So, in order to see a little bit more clearly and get a more scientific design, it is necessary to take some pictures to show the weak links in the production line.

For example, using high-speed photography to record the changes of various parts and the force of the human body model at the moment of the collision of the car can produce a car with a higher safety factor. People film the crash and then show it at a very slow speed to see how the body deforms during the crash and find weak spots.

High Speed ​​Photography & Sports

In the past half century, the level of human competitive sports has made great progress. Several previously considered limits of human athleticism have been broken one after another. High-speed photography also contributed to the improvement of competitive ability. People use high-speed photography technology to analyze the technical characteristics of elite athletes, find out the gaps and deficiencies of their own athletes, and improve training methods in a targeted manner. So that the level of competition can be rapidly improved.

The History of High-speed Photography

When it comes to high-speed photography, people quickly think of the role of high-speed shutter freezing the moment. Indeed, at the end of the 20th century when electronic cameras were popularized, the shutter speed of some film SLR cameras reached 1/12000th of a second. That  made it possible for any photographer to freeze the moment of high-speed movement. In fact, the development process of the shutter from 1/1000th of a second to 1/10,000th of a second has been less than half a century. But the work of high-speed photography is older than the high-speed shutter of the camera. What is going on? In fact, the answer is very simple. The key to achieving high-speed photography is the use of light.

Light and Camera Speed

According to records, as early as 1851, the British chemist, linguist and film pioneer Henry Talbot used the flash from the Leiden battery to clearly record the moving entity. And committed to high-speed photography research and success is Professor Harold Edgeter of the Massachusetts Institute of Technology. The strobe light he eventually invented allowed exposures of 1/1000,000th of a second. So that bullets in flight could be photographed as clearly as stationary.

In 1957, Professor Edgeter successfully photographed the shape of a drop of milk splashing after it fell on a plate. That became a classic of high-speed photography. It can be seen that the key to the success of high-speed photography is not entirely the maximum shutter speed of the camera, but the use of light.

For example, in a very sunny environment, the shutter speed of the camera can be set very high. And the water splashed on the ground can be photographed like a glass artifact. But in most cases, high-speed shutter is required to rely on strong flash to complete. Usually, cameras with mirror shutters can achieve full-speed synchronized flash. However, our most commonly used SLR cameras have a synchronization speed limit. And beyond the synchronization speed limit, a complete picture cannot be captured. In this case, the flash with high-speed sync flash function will show its power.

At present, many cameras and advanced flashes have a tell-sync flash function. The so-called high-speed sync flash is the long peak flash. Flashes with longer peaks can support all shutter speeds, even 1/8000th of a second or higher.

Although it is impossible for ordinary photographers to shoot flying bullets, there are still many subjects that can be photographed with high-speed shutter, such as splashing water droplets, moving insects and so on.