Categories
Studio Lights Education

Photography in Various Light Conditions_Part II

Shooting in Various Weather Conditions

Shooting Under Rainy Conditions

Shoot in Rainy Days

Note for shooting in rainy days:

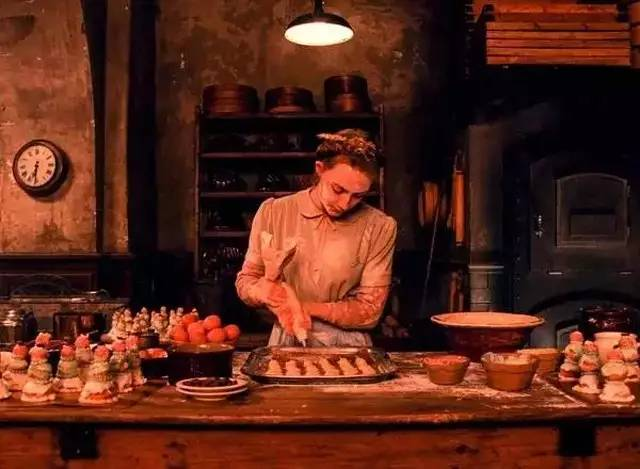
1) When it rains, you should choose a dark background to set off the shape of the rain, and the shutter speed should not be too high. Generally, a shutter speed of 1/30-1/60 seconds is appropriate to express the feeling of rain. If the shutter speed is too slow, the rain water will be drawn into long strips and become raindrops.

2) When shooting natural scenes, it is advisable to choose scenes with contrasts between far, middle and near scenes to enhance the performance of the sense of spatial depth.

3) When shooting color films, use bright colors to decorate the picture to make the picture vivid; such as colorful clothes, beautiful and gorgeous umbrellas, etc. to decorate the picture,

4) Pay attention to the impact of ground rain reflection on exposure,

5) Take care to protect the camera to prevent it from getting wet by rain. The lens should be equipped with a hood to prevent rain from splashing on the lens glass.

Snow Scene Shooting

There are two situations for shooting snow scenes: shooting in snowy weather and shooting in clear skies after snow.

  1. Shoot in snowy weather

On snowy days, the brightness of the sky and ground sceneries is higher than that on rainy days.

Characteristics of light: diffuse and soft, poor visibility. The white snow has a higher reflection law, and the contrast between snow and no snow is often extremely large.

When shooting people or scenery in a snowy sky, you should find the exposure reference point. People use the light on their faces as the basis for exposure. The scene should be based on the brightness of the shadows in the snow as the basis for exposure.

When the contrast of still life is too large, necessary supplementary light measures should be taken to reduce the contrast of light and darkness in order to obtain a proper tonal transition. A reflector or flash can be used as auxiliary light.

To express the scenery of flying snowflakes, the shutter speed is generally 1/60-1/30 seconds, which can show the movement of falling snowflakes; choose a dark background to bring out the snowflakes.

Using the snowy foreground can enhance the three-dimensional sense of the picture and enhance the expressiveness of the snow picture.

  1. Shoot when it’s snowing and sunny

Snow can reflect most of the sunlight, resulting in extremely bright shooting conditions and shooting environments. The contrast between light and darkness in snow-covered and non-snow areas is often extremely large, and it is necessary to use supplementary lighting measures to reduce the contrast and obtain an appropriate tonal contrast effect.

The exposure of people is based on the light on their faces. To express the texture of snow, side light, side backlight and back light must be used to enhance the three-dimensional effect. If the brightness of the entire scene is too large, a polarizer can be used to reduce the brightness. When shooting black and white photosensitive films, orange, yellow, and red filters can be used to absorb the reflections from the snow, which not only enhances the texture performance of the snow, but also reduces the brightness of the snow and adjusts the contrast.

When shooting on a snowy day, you should place the camera under a coat or other warm place. One is to prevent the shutter from being out of adjustment caused by excessive cold, and the other is to protect the energy of the camera’s battery. When returning to a warm room from the outside, moisture will appear on the lens, so let it dry naturally.

Fog Scene Shooting

Fog can create a soft light effect and make the scene present a rich layer. The foreground, middle ground, and background are relatively in the fog, and there is a strong sense of spatial depth. In a foggy scene, the picture can be concise and rich, and the picture is expressive.

When shooting foggy scenes, you should pay attention to choosing the position of the foreground, middle ground and background to enhance the performance of the sense of space. The foreground and middle ground should be dark and dark scenes.

Bright colors can enhance the vitality of foggy scenes and should be used carefully.

Photography should be mist. Some filters can be used to enhance or weaken dense fog, such as yellow and orange filters, can reduce the effect of fog.

Using a green filter can eliminate the brown fog caused by urban smoke and dust, and enhance the clarity of the picture.

There is too much water vapor in the fog, so care should be taken to protect the camera lens.

Sunrise and Sunset Shooting

Sunrise and sunset are beautiful and spectacular natural scenes. The light at this time has some characteristics different from sunlight in the general sense:

  1. The light changes greatly, and the brightness of the sun changes rapidly during sunrise and sunset.
  2. The spectrum component is mainly red,
  3. Accompanied by beautiful sunlight and colorful cloudscape,
  4. The light is softer and not dazzling.

At this time, the brightness of the ground scene is low, and compared with the sun itself, the brightness is very different.

Matters needing attention when shooting at sunrise and sunset:

1) The exposure control should be adjusted continuously to get the correct amount of exposure. It is best to use metering to control the exposure.

If you need to express ground scenes or people, use flash as auxiliary light to illuminate scenes or people.

2) When the sun does not look dazzling, the sun can be directly taken into the picture; when the sun is dazzling, it may reflect light on the lens and destroy the picture effect.

3) In order to create a sense of spatial depth, an appropriate foreground should be selected to create a contrast between the near and far and form a sense of depth.

4) If you want to show the radiant effect of the sun, you should use a small aperture, such as f/16 or f/11.

5) Pay attention to the decoration effect of sunlight and colorful clouds on the sunrise and sunset scenery. They can not only cooperate with the sun to make the picture complete and balanced, but also render the effect of sunrise and sunset, making the scenery more beautiful and spectacular.

6) Seasonal changes, different sunrise and sunset times, different locations, and different light effects.

According to these characteristics, we should grasp the timing of shooting sunrise and sunset. These changes also vary from place to place. If you arrive at a new place, you should inquire about the local climate characteristics, or observe the changes for a day or two before you can clarify the above-mentioned changes.

When shooting color films, daylight-type photosensitive films should be used to show natural colors.

When the light is dark at sunrise and sunset, the camera should be fixed on a tripod to ensure that the camera is stable, and the shutter cable should be used to activate the shutter to avoid vibration caused by hand movement.

Night Photography

  1. The characteristics of light source and light at night

The main light sources at night are: moonlight, starlight, and artificial light such as lights and firelights.

The brightness of moonlight is very low. Lights and fires are generally weak and uneven.

  1. Methods of shooting at night

1) Long exposure

The main technique for shooting night scenes is to use bulbs for long exposure. Use a tripod to keep the camera stable. There are shutter releases that cooperate with each other.

Control of exposure for shooting night scenes:

###Use long time exposure to make the light source produce special effects due to its own motion;

###Intentionally reduce some exposure, darken the sky and darken the ground, in order to preserve the special atmosphere of the night.

###Operate the camera carefully and move lightly to avoid changing the angle of view or shaking the camera.

2) Double exposure or multiple exposure function

The double exposure method refers to the use of the camera’s multiple exposure function to perform two exposures on the same film. When using this method, a tripod is required to fix the camera.

### Double exposure shooting moon scene

For the first time, the amount of exposure is controlled according to the light reception of the ground scene, so that the scene under the moonlight can be correctly exposed, while leaving the position of the moon on the screen. Generally in the upper half of the screen.

For the second exposure, place the moon in a reserved position and correctly control the exposure according to the brightness of the moon itself.

###Street view shot with multiple exposures for a long time

Fix the camera on the tripod and use the shutter release to open the door B.

When passing cars pass by, the lights will leave the car’s “trajectory” on the film, drawing long and bright colorful lines.

If the moving direction of the vehicle is chaotic, the lens cover can be used to cover the lens, and then the lens cover should be removed when shooting.

The action should be light during operation, and the camera must be kept stable.

3) Use auxiliary light to enhance the lighting effect

If there is insufficient light in the scene, auxiliary light can be used to enhance the illumination of the scene, so as to obtain the correct sensitivity of the scene.

When shooting night scenes, attention should be paid to maintaining the effect of the on-site light. The position and direction of the auxiliary light should be consistent with the on-site light; the auxiliary light cannot become the main light source, which is not a night scene.

Using a slow shutter speed to feel more on-site light is the main way to take good night scenes and express the atmosphere of the night scene.

Whether you are using flash photography to shoot night scenes or shooting news events, you should pay attention to controlling the angle of the flash and the intensity of the flash, and you must pay attention to preserving the night atmosphere.

If night flash photography is well controlled, the picture can be simplified and the subject prominent.

The famous American news photojournalist Vigie (1899-1968) was famous for taking night news photos, using all flashes to photograph news events that took place at night.

4) Use the reflections of water, ice, and smooth roads to render the night scene atmosphere

Water, ice, and asphalt roads on rainy days can reflect light and reflect reflections of scenery.

Reflecting light can enhance the brightness of the scene;

Reflected light and shadow can produce special effects in the picture and enhance the expressiveness of the picture.

If you use color films to shoot night scenes, you should choose light-type color films to correctly record the lighting effects.

It is also possible to use special effect filters such as rice-shaped mirrors (starlight mirrors) to make the lights form regular patterns and shapes to create special effects.

(To Be Continued)
Categories
Studio Lights Education

Photography in Various Light Conditions_Part I

Changes in light in sunny days: forward light, metering, backlighting, top light, sunny shadows and how to shoot. Shooting of cloudy, cloudy, rainy, snowy, and foggy. Matters needing attention when shooting sunrise and sunset. Method of shooting at night. Features of indoor natural light and precautions for shooting.

Light: It is a pen used by photographers to paint. Light energy shapes the subject, creates a unique atmosphere and adds mood. Photographers must be familiar with the characteristics of light, master the laws of light, and use light well.

The types of light sources are roughly divided into two categories: natural light and artificial light.

Natural light comes from the sun’s rays and the sunlight, moonlight and stars reflected from the vast sky.

Artificial light includes fire light, light, etc.

Natural light is the main light source for photography, and it changes due to changes in weather, time, and geographical environment. In this chapter, the changes of natural light in the virtual table and the corresponding shooting methods.

The influence of light changes on exposure has been introduced in the chapter “Exposure Control”. Here we discuss the different effects caused by various changes in light and the special requirements for shooting.

Shooting in various weather conditions

Weather changes are divided into: sunny, cloudy, overcast, rain, snow, fog, etc. Different weather and different lighting conditions directly affect the shooting effect.


Light changes in sunny days and shooting methods

On a sunny day, the brilliant sunlight shines on the scene, which will cause the scene to have an obvious light-receiving surface and backlit surface, and make the scene produce a clear projection.

As the position of the sun changes, the light receiving angle and light receiving range of the scene change accordingly.

The changes in the light receiving conditions of the scene can be divided into several situations such as forward light, side light, side backlight, back light and top light, and under the shadow of a sunny day.

(1) Features and performance methods of forward light

In the forward light, the light comes from the front of the scene, and the scene has the largest light-receiving area, and the light is evenly received.

Advantages and disadvantages of taking pictures with forward light:

Advantages:

1) The subject’s light is evenly received, and the exposure is relatively easy to grasp. The average light metering method can make the subject’s scene get the correct sensitivity;

2) The photographed scenery is closest to its prototype, which is more conducive to the expression of texture;

3) The colors can be restored correctly, with high saturation and vivid colors.

Because of the above-mentioned characteristics of smooth light, novice photographers are the easiest to master exposure, and they are also willing to use this kind of light.

Disadvantages:

1) The projection of the subject is almost invisible, the picture lacks contrast between light and dark, and the stereo perception is poor.

2) The subject and the background receive the same light conditions. There is no significant change in the brightness and tone of the distant and near objects, and the performance of the sense of spatial depth is also poor.

From a professional point of view, forward light lacks expressiveness, and the photos taken are mostly two-dimensional planes, lacking a sense of three-dimensional space. Therefore, photographers mostly use side light and backlight.

In addition, when shooting people in the light, the subject is likely to feel the light is dazzling, which is very uncomfortable.

However, if the subject is a large scene that requires average use of light, or when there is no need to pursue a sense of three-dimensional or spatial depth, the use of smooth light meets the needs of performance.

(2) Features and performance methods of side light

In side lighting, the light comes from the side of the subject, one side of the scene receives light, and the other side is in shadow. According to the ratio of the light-receiving area and the shadow part, it can be subdivided into oblique side light and side light.

When the oblique side light is used, the light-receiving area of ​​the subject is larger than the area of ​​the shadow part, and the light comes from the front left or right side of the subject, which is the front side light. The strong contrast of light and dark makes the scene appear three-dimensional.

In side lighting, the light comes from the right or left side of the subject, and the light-receiving area and shadow area of ​​the scene are roughly the same. The whole scene is bright and dark, showing a strong three-dimensional shape and a sense of three-dimensional space.

Sidelight is the most commonly used light in photography. The advantages are:

1) Conducive to the expression of three-dimensional and spatial depth;

2) Conducive to showing a clear outline of the subject;

3) Conducive to the performance of the level of tone and contrast.

Its limitations are: the contrast between light and dark is large, and the contrast of tones is strong, which is not conducive to expressing the texture of the details of the scene.

When the contrast is too great, the method of supplementary light should also be used to make the light and dark sides of the subject scene appear to have shadow lines, thereby enhancing the performance of the level of rigidity.

If you want to pursue the performance of texture and fine shadow lines of the scene, metering is not suitable. The side light performance color is not as good as the forward light effect.

(3) Characteristics and performance methods of backlighting

When backlit, the light comes from the side or back of the subject. Backlight is also called contour light. Divided into side backlight and backlight.

When the side is backlit, most of the subject is in shadow, and only the bright part appears on the back oblique side. At this time, the outline of the subject is sharp.

Features of backlighting:

1) Only the edge outline of the subject is illuminated by light, which outlines the outline of the entire scene, and the light is vivid. Conducive to the performance of the outline of the scene.

2) It can strongly express the sense of spatial depth and three-dimensionality, but it is not conducive to the performance of the level of scenery.

3) Can’t express delicate texture, backlight is not conducive to color restoration and performance.

Backlight photography is generally based on the shadow of the scene to light. It should be noted that the photosensitization should be correct and sufficient.

In addition, when the angle of light irradiation is low, the background brightness of the scene or the brightness of the bright part of the screen can be used for light exposure, which can produce a silhouette effect.

For example, at sunrise and sunset, the sky can be used as the basis for exposure, and people can be photographed as silhouettes to create vivid and interesting pictures. When shooting a silhouette of a person, the person generally appears in profile, which helps to express the silhouette.

In short, there is no fixed mode for lighting, and the use of light should be selected according to the characteristics of the subject, the content of the performance, the situation of the scene light, and the different modeling characteristics of the various subjects.

For example, backlight cannot express delicate texture. If you need to pursue texture performance, you should choose forward light and scattered light.

(4) Features and performance methods of top light

Top light refers to the light from the top of the subject. The protruding parts of the scene will produce projections in the recesses, the light is strong, the contrast between light and dark is great, and the tonal contrast is rigid.

Generally, the top light should be avoided when shooting. This kind of light should be used when the top light is needed to express the outline of the subject.

When shooting people with top light, heavy shadows will appear in the eye sockets, the lower end of the nose, and the bottom of the chin, and the phenomenon commonly known as “panda eyes” will appear.

If you are not shooting with overhead light, use auxiliary light to eliminate or weaken the shadows.

(5) Characteristics and performance methods in the shadow of sunny days

The light in the shadow of a sunny day does not come directly from the sun, but from the reflection of the sky and the environment.

All parts of the scene receive uniform light, and the light is soft, because it is scattered light, there is no distinction between light and dark sides of the scene.

Due to the above-mentioned characteristics of light in the shadow of a sunny day, it is conducive to the performance of the details and delicate texture of the scene.

Using this kind of light to photograph people can give a delicate expression of the skin texture, especially for women and children, which can make their skin appear smooth and tender.

Because the composition of light in the shadow of a sunny day is different from that of daylight, when shooting color films, there are more blue-violet light components, which is prone to color cast. Shooting in the shadow of a sunny day is also not conducive to expressing the three-dimensional sense of space and the sense of spatial depth of the picture.

Cloudy weather and photography performance

In cloudy weather, the clouds cover the sun, the sunlight becomes scattered, and the brightness of the entire sky and ground scenes is not very dark, but relatively bright.

The light is scattered, soft and uniform, which is very conducive to the performance of delicate texture and fine shadow lines. It is ideal for shooting portraits, especially for women and children.led-hard-&-soft-2-in-1-lights

Shooting color film, the scene color is soft and bright, which is conducive to the correct presentation of the color.

Shooting delicate texture of still life, can well show the fine texture of the texture. Still life such as knitwear, porcelain or glassware.

The light of cloudy weather is closer to the spectral composition of sunlight, the light is sufficient, and the exposure is easy to grasp. It can be said that cloudy weather is the ideal shooting time for certain shooting subjects.

However, the three-dimensional sense of the scenery and the sense of spatial depth in cloudy weather are poor.

Shooting under cloudy conditions

Cloudy sky refers to the weather in which dark clouds cover the sun, and the entire sky and ground scenes are very dim.

On cloudy days, the overall light is weak and the exposure is difficult to grasp, so you should pay attention to full exposure.

The cloudy scene receives the light evenly, there is no difference between the light and dark sides, it loses the sense of hierarchy, is flat and lacks vitality.

When shooting natural scenery on a cloudy day, you should choose images with different sceneries such as foreground, middle ground, and background to create a sense of spatial depth.

It is not suitable to shoot portraits on cloudy days, as the light will lose its brilliance.

Color casts appear when shooting color films on cloudy days. When shooting on a cloudy day, bright colors should be used to decorate the picture to enhance the vitality of the picture.

For example, pay attention to using red, yellow and other high-brightness and bright colors to pretend to be dead or let the subject wear brightly colored clothes to enhance the performance of colors and make the picture vivid.

1000W-Soft-Panel-LED-Light

Shooting under rainy conditions

The light changes in rainy days are complex and changeable, and the exposure should be constantly adjusted according to the changes in light to ensure correct light sensitivity.

The rainy scene has the following characteristics:

1) Rain, water vapor, and fog are permeated, the natural scenery is rich in layers, the colors are rich and light, and there is a special atmosphere, artistic conception and taste;

2) The image of the scene is hazy, looming, vivid and full of change;

3) The light is soft and the scene contrast is small;

4) Water on the ground area can reflect light, increase the brightness of the environment, cause reflections of the scenery, and increase the interestingness of the picture. Especially when shooting night scenes, the colors are more vivid.

(To Be Continued)

Categories
Studio Lights Education

Selection of Composition Direction and Height of Portrait Photography

Composition is derived from painting and refers to the layout and composition of the picture. Photography also involves composition, which refers to the whole process from framing the shooting to the tailoring of the photo. The composition of character photography mainly expresses the form of the character in the photographic picture, and uses all the styling factors to shape the image of the character to form a perfect picture as much as possible.

There are many similarities between photography and painting. Both are graphic art and both must be concerned with composition. However, photographic composition is very different from painting composition. The composition of painting is a composition based on subjective design, while photography is a composition based on objective selection. In painting, you can choose the material at will, and compose the picture according to your own ideas; photography is to choose the material on the spot, and directly use the viewfinder to choose and compose the picture on the spot. Photographic composition is to transform the real life image into a plane image with frame restrictions.

The Choice of Shooting Direction

“Looking horizontally as a ridge and a peak on the side, the distance is different.” From different angles, the scenery has different shapes. This is the case when shooting scenery, and the same is true for shooting people. People from different angles will have different appearances. To determine the shooting angle, the first is to choose a different direction.

Shot from the Front

The camera is facing the subject, and the person is photographed from the front. Frontal portraits generally require that the ears of the person can be seen. If only one ear can be seen, even if most of the face can be seen, it cannot be counted as a frontal portrait. The frontal image is symmetrical with the facial features, which makes people feel more real, so it is used as the standard image.

Half Side Shot

The camera and the subject form an angle of 25°-50°, and the face of the person faces the lens from the oblique side, which breaks the lack of symmetry and stability of the frontal image, making it more lively. The angle of the half side can be adjusted flexibly, and the face can be exposed a little more or less, which is a commonly used angle in portrait photography.

Shot from the Side

The camera and the subject are at a 90° angle, and the person is facing the camera, only half of the face can be seen, half hidden and half exposed, which is more subtle. When viewed from the side, the faces of the characters are clearly defined and can leave a deep impression on people. However, the lack of perspective changes on the side is not as lively as the half side, which is a less commonly used angle.

Shot from the Back

The camera is facing the back of the subject, at a 180° angle to the person’s line of sight. Because the face of the character cannot be seen, the expression of the character cannot be expressed, and the thoughts and feelings of the character are indirectly expressed mainly by the figure’s body movements.

Photographing the characters on the back can leave a rich imagination space for people, allowing readers to make associations through the relationship between the main character and the environment, or through the plot formed by the front and back characters in the picture, so as to experience the theme of the work.

The Choice of Height When Shooting

Choose the shooting angle, in addition to the choice of aspects, but also the choice of height. Changes in height will also have a great impact on photographic composition.

Head-up

Head-up refers to the height of the camera and the subject’s head, and the optical axis of the lens is parallel to the person’s line of sight. The photos taken by head-ups are in line with people’s usual

His visual habits give people a sense of intimacy and equality in psychology. Head-up shooting, the character’s face is not easily deformed, the composition is stable, and it is conducive to the performance of the foreground. However, in scenes with a large number of people, people in the front and rear rows are prone to overlap and obscuration.

Overview Shooting

Elevating the position of the camera and shooting from top to bottom can form a larger spatial layout, and the front and back figures do not block each other, which is conducive to shooting scenes with a large number of people. Shooting children from a bird’s-eye view is like an adult watching a child, and it is more in line with people’s visual habits. However, a person who is photographed from a bird’s eye view is prone to a certain degree of deformation. If a wide-angle lens is used to shoot at a close distance, the person will appear to have a big head but very small feet.

Shoot from the Angle of Looking Up

Lower the position of the camera and shoot from bottom to top, the figures appear tall and majestic. If you use a wide-angle lens to take a close up shot, the figures are big and small, standing tall and straight, which will produce an exaggerated visual impact. Looking up can lower the horizon and let the sky become the background, which can make the picture more concise. However, looking up at a scene with a large number of people, the people on both sides of the screen look like they are leaning toward the middle, and the people behind will also be blocked by the front row.


Categories
Studio Lights Education

Skillfully Use Hard Light to Shoot High-contrast Dramatic and Moving Portraits

In many articles that involve lighting in portraits, it is recommended that you use various methods to soften the light, such as putting a soft cover on a flashlight, or using a soft box to create soft light in a large area of scenes.

The reason is also very simple, soft light is not easy to produce too bright highlights and too dark shadows, large-area soft light can create a beautiful and dreamy effect with low contrast;

In addition, the soft light can “smooth” the blemishes of the characters’ faces, making them look less obvious, and it has a better expressive power on the texture of the skin, which is very popular among female friends.

Large area soft light beautiful private portrait

  Soft light does have a lot of benefits, and it’s not easy to make mistakes. So, do you just need to use soft light to shoot portraits? (Editor’s note: Many newcomers really think so~)

Here I want to solemnly declare that hard light is also an organic part of the light used in photography. It is very wrong to use soft light instead of hard light, just like a painter using red instead of green.

In fact, hard light also has its own unique effects. It is very good at adding contrast to the picture and creating drama and connotation. Learning to apply hard light is of great significance to improving the level of photography.

This article will start with a set of fashion blockbuster shooting scenes, and explain how to apply hard light and related precautions.

Let’s take a look at the final film effect first, who said that only soft light is good?

The final film, before and after retouching

For this shooting, this group of photos needed to show strong contrast and at the same time be dramatic. And soft light doesn’t do much in this respect-especially in smaller spaces.

The scene shot this time was in the office of a local businessman. This high-end office provides a good background for photos, but there is not much space for equipment.

Therefore, the photographer decided to use reflectors and honeycomb covers (the role is to filter out the scattered light to form a directional area lighting) to complete the shooting.

Shooting scene, gorgeous decoration but lack of space

  When considering and planning before shooting, the photographer chooses a simple three-point lighting, including main light, auxiliary light and side light. The main light source is placed in the house space on the left side of the camera, but because there is not enough space, there is a window on the right side, and the side light source cannot be placed.

Fortunately, there is a terrace outside the window, and there are power sockets on the terrace, so the photographer stretched the light stand to the longest, hung a sandbag at the bottom to ensure stability, adjusted the flash to the maximum power, and placed it outside the window.

In the office, the photographer used an exposure meter to measure the light in the direction of the light side light, and then set the camera to ISO100 and f/5.6 according to it.

Since the flash is used and the scene environment is not too bright, the photographer set a relatively high shutter speed of 1/160 second to ensure that not too much ambient light is captured.

This first light will act as a side light at the shooting scene.

First, take a test shot on the spot under the condition of “side light only” to observe the lighting effect of the side light.

The results of the test shooting with only the side light are as follows:

There is a problem with hard light as the main light source: you may need to brighten the shadows so that they are not too dark. Use a large soft light source to fill the shadow area, because this soft light is very similar to ambient light.

At the shooting scene, the photographer used a medium soft box to soften the auxiliary light and placed the auxiliary light behind the camera slightly to the right.

The position of the auxiliary light

  Since the tone of the shooting scene is dark brown and the model is also wearing dark clothes, it is easy to get dark, so the output power of the auxiliary light cannot be too low, otherwise the shadow part will appear black.

Finally, the reading of the auxiliary light on the light meter is f/3.5, which is slightly lower than the camera’s reference value of f/5.6.

After setting the side light and auxiliary light, test shooting, the effect is as follows:

Finally set the main light.

The photographer placed the main light source in an open space at the door, with the light facing the left side of the camera, slightly above the model.

According to the shooting requirements, the photographer needs to focus the light on the model while not illuminating the wall too much, so a 20-level grid is installed on the lamp to control the light distribution.

Also, since most of the shooting scenes are dark brown, the photographer set the main light at a level higher than the camera’s reference value of f/5.6. After adjustment, the aperture value displayed by the exposure meter is f/8.

There are main light and metering, test shooting without auxiliary light. Note that the shadow is completely black without auxiliary light:

You may have noticed that although the main light aperture value is one level higher (left: f/8, right: f/5.6), the main light on the model’s left face is not as bright as the side light on its right face.

This is because the side light is placed further back, while the main light is directly on the left side of the model. Due to less reflected light, the side light shining on the model’s skin appears brighter than the main light.

Once the light placement and output power have been set, the model can be put on the designated clothing, POSE is placed, and the formal shooting begins.

After the three light sources are set, the effect comparison before and after the software is used to retouch the picture:

There is a big advantage of arranging the positions of the main light and the side light in this way, that is, they can both “play two roles”: when the model’s face changes direction, they can exchange roles and complement each other.

This kind of lighting setting makes it possible to have suitable short-distance light hitting the face no matter where the model faces, creating a picture effect that meets our needs:

Whether the face is facing left or right, the light is quite suitable

Finally, we want to encourage photography enthusiasts to innovate, experiment, and use new methods to apply hard light to their photos. Hard light is not limited to male photo shoots.

The lighting settings in the picture below are the same as the lighting settings in the male photography described above, and the effect is also good:

But it is still necessary to say with caution, hard light will completely expose wrinkles and spots. If you use hard light to shoot women, you must be very careful with the placement of your lights.

Categories
Studio Lights Education

A Guide to Light in Portrait Photography-Grasp the Light Around You

Low Angle Sunlight:

When the sun is low on the horizon, you can use side lighting (splint lighting) to make the shape of the subject have a good performance. At this time, half of his/her face is almost in the shadow, while the other half of the face is in highlights. So let the model turn his face to the light, so as not to create too deep shadows on the smile lines and eye sockets. If you take a group photo, you also need to carefully arrange the location of the subject so that one person’s head does not block the light from the next person.

There must be sufficient auxiliary light from the shadow side so that the shadow area will not become dead black. If you use a flash to fill light, you should make the amount of flash output equal to the daylight exposure value, or about one block lower than daylight. If you use a reflector, you should carefully adjust the angle to ensure that sunlight can be reflected back to the shadow side of the face.

In the composition of portraits under direct sunlight, it is also important to check the background. Since the brightness is significantly higher than in the shade, it is recommended to use a shutter speed of 1/125s or faster and a smaller aperture than normal, such as f/11. A small aperture can make the background clearer and visually separate the background from the subject. You can observe the background imaging effect by previewing the depth of field. If the shutter speed is faster, the lens aperture needs to be opened wider to fully blur the background image. Increasing the shutter speed may invalidate the flash, so have a reflector on hand for backup.

This image by Martin Schembri was taken in the middle of winter, and was completed when there were only about 5 minutes left for natural lighting throughout the day. The shooting took place in a city square surrounded by many stained glass curtain walls. The bride was arranged to look up to face one of the glass walls in order to fill in the light and illuminate the shadows. Use a reflector to reflect some light under the eyes. The main light is actually behind the groom, shining through his left shoulder. Martin managed to keep the auxiliary light ratio at 1:1. The image was taken digitally.

After sunset: Just like the illustrations provided by many great photographers in this book, the best time of the day to take pictures is just after sunset. At this time, the sky is like a huge soft box, and the lighting effect is balanced and soft, without sharp shadows.

There are two problems with working with this kind of super light: First, the light is dim. You need a medium to fast ISO sensitivity combined with a relatively slow shutter speed. If there are children in the shooting scene, there is a problem: you have to use a larger aperture to deal with the diminished light, and the shutter speed and depth of field are limited.

The second problem is that the portraits taken in the morning and twilight have no catch light, that is, the white flare in the eyes of the subject. Therefore, most photographers use flash to enhance the effect of morning and evening light, and use flash bubbles or soft boxes to add luster to the eyes. The flash intensity can be more than two gears lower than that of daylight, which can fill the eyes well to form a catch light.

Reflector

When you are looking for an outdoor scene illuminated by natural light, you must be dominated by natural conditions. Sometimes it’s difficult to find the right type of light you want, so it’s a good idea to carry a portable reflector with you. The size of the reflector should be quite large, the larger the more effective. Like Portable Lite Discs, it is a reflector made of a flexible foldable circular or rectangular frame. It has different diameters and is a very effective source of supplementary lighting. Many manufacturers produce and sell this product, available in silver (maximum auxiliary light output), white, gold leaf (warm auxiliary light) and black (matting effect).

This is another way to deal with overhead light. Use a light-shielding sheet or a light-blocking object to prevent the overhead light from directly illuminating the subject, so that the light is softened and incident from the side, creating an ideal lighting pattern and light ratio. Charles Maring is here to give the couple a black umbrella as a prop, thus achieving the purpose of transforming the overhead light. Pay attention to the highlights on the black umbrella, you will find that although the light has been scattered, it is still almost directly above the head.

Placement position: If the shadow formed by the scattered light is deep and clear, or you want to add a little catch light in the eyes of the subject, you can use a large reflector (or several reflectors). Ask an assistant to help (or use several brackets with clips), and you can set the reflector very accurately, but make sure that its position is outside the screen.

You may need to adjust the reflector several times to get the appropriate supplementary lighting. Remember to observe the effect of the lighting from the position of the camera. Be careful with light reflected from below the subject: incident light below the eye-nose level is very unpleasant. Try to focus the reflector (you really need an assistant here), so that only the shadows that need to be filled can be filled with light.

The window light is scattered twice here-the glass of the window and the veil of the bride, resulting in a beautiful, soft and directional light. Photographer Charles Maring let the model face the light, and he moved to the shady side of the bride’s face to capture the light and shadow effects of the interaction of highlights and soft shadows.

The metal foil type reflector is used close to the subject, sometimes suppressing the surrounding light, creating a pleasant and admirable lighting pattern.

Natural reflector: Many times you can find natural supplementary light in the natural environment: small pieces of gravel soil, light-colored bushes, or nearby buildings may provide the auxiliary light you need. But be careful, the auxiliary light reflected from the ground up to the subject cannot brighten the main light. The light shining from below the eye-nose level is very annoying, so it is often referred to as “the light of the corpse thief”.

Multi-function Reflector

Fuzzy Duenkel uses a self-made reflector, which he calls “Fuzzy reflector”. It is two hard double-sided reflectors with a size of 4 x 4 feet, hinged in the middle to make the whole part stand up.

Since there are a total of four faces, it is possible to form four different brightness levels of light reflectivity. The surface of the polyester film provides strong reflection, which can accurately reflect the light as the main light under bright sunlight, or become the contour light that shoots from behind the subject. The silver-painted surface can provide effective and color-balanced fill light in a short distance. The white surface provides a softer auxiliary light, and the black surface can achieve a matting effect.

Since the reflector can be placed in an L shape to stand on its own, it can be used as both a light shield and a reflector. Another way to use a reflector is to place it under the subject’s chin and reflect the light onto the face. If a tripod is used, one side of the reflector can be leaned against or locked on the tripod, or an assistant can hold it and point it to the auxiliary light accurately.

Fuzzy Duenkel is a master of light, he can transform daylight into soft and elegant light similar to studio lighting. Here he uses a separate gold foil reflector (as described below) to reflect the light back to the subject, forming the main light on her left. You can see the shape of the reflector in the light of her eyes.

Attenuate some of the light

Excessively scattered light: In some cases, the light is scattered to a great extent, and it is no longer able to shape the characteristics of the face. In other words, the light has no three-dimensional effect and directivity. In this case, you can place a black matting card (also called a light shield or a light barrier) close to the subject to block (or absorb) part of the light so that it cannot illuminate those critical areas. The effect is to make one side of the subject’s face extinct, artificially creating a stronger effective light ratio. Compared with the plain scattered light, the illumination light changed by this method can better show the three-dimensional sense and contour lines of the subject.

When you have two light sources of the same intensity and each is strong enough to act as the main light, the black matting plate (or light barrier) comes in handy. In the case of using direct sunlight and polyester film reflectors, black matting plates (or light barriers) are also quite useful. The side of the black matting board close to the subject can reduce the intensity of the light and create the light ratio required for shooting.

Top light: If you find a good location to shoot portraits, but the light source is on the “top of the head” of the subject (it will make the eye sockets too dark and produce unpleasant shadows under the nose and chin), you can use a light block to block The light from the top of the head. The illumination direction of the top light is changed to pouring down from both sides of the light barrier instead of directly shining on the subject. The top light whose direction has been changed will also be refracted from both sides to the subject to become the main light. This is like looking for a corridor or a clearing in the forest to block the direct light from the top of the head.

However, there are two disadvantages to using overhead light barriers. First, you need one (or more) assistants to hold the visor high on the subject’s head. Second, it reduces the light level overall, which means you have to use a slower shutter speed or a larger lens aperture than expected.

You might think that this exquisite dessert was shot in the studio by Mercury Megaloudis, then you are wrong. Mercury filmed this scene under a tree outdoors, using the sunlight through the branches. He placed a large translucent water bottle on the side of the plate and fruit to filter and soften the transmitted light. On the shadow side (that is, the right side of the camera), he used a small cosmetic mirror to reflect the highlights towards the fruit`s surface. He also placed a large silver reflector on the edge of the table on the side of the shadow to illuminate the shadow and reduce the overall light ratio of the subject.

Categories
Studio Lights Education

Several Ways to Take Professional Portraits

When it comes to shooting portraits, there seem to be a variety of styles, but the truth is true. No matter what kind of occupation they are in, everyone wants to have a portrait photo of themselves, and also hope that this photo can show their style well.

Generally this kind of portrait shots are mainly head shots, and many portrait photographers will “disdain” this because they think this kind of portraits are too monotonous and lack creativity, but this is not the case! Today, I specially summarized a few small points for everyone, and teach you how to elegantly shoot portrait head close-ups!


  1. The model poses appropriately

When shooting close-ups of the head, the pose is particularly limited. Why do I still say that I have to pose as a model? This is because all parts of the body are coordinated and connected, and the overall continuity can have a huge impact on the head and shoulders. You can also use the method of shooting a photo to relax the model, try to guide it, and then appropriately grab the scene from the head to the half-waist position to capture the natural expression. To say something more, head close-ups are not strictly necessary to only shoot the head, and it is also ok to appropriately widen the viewfinder to the waist.

In terms of facial expressions, smiles and natural expressions are very suitable, so try both. Even if the models say which specific expressions they want, you actually guide them actively, and you may be able to capture more natural expressions without spending a minute. In this way, at the end of the final shooting, it can also give the model more room for choice.

  1. Appropriate lighting

The most common way to shoot in the studio is to use 1-2 main lights and a soft box to provide the main light source. The function of the soft box is particularly critical. It allows you to get a more uniform diffused light when taking pictures, and it is best to cooperate Use reflectors together to reduce shadows.

The lighting can also be as simple as possible. In the case of only one light source, the soft box can be placed slightly higher than the model’s head and tilted down 45°. This method is quite effective because it can not only Provide uniform light for shooting and show the shadows under the nose. At this time, if you add a reflector under the chin to soften the shadows, it will be perfect!

If you still want to get a more three-dimensional portrait, you might as well try Rembrandt’s lighting method, which is also relatively simple, but the effect will be different. It relies on strong side lighting to make one side of the model’s face present a triangular shadow, which can make the model’s face split into two but looks different. The specific operation is to place the softbox on the model’s side. It is about 45° above the head. Of course, it would be better to have reflectors to soften the shadows.

  1. Pay attention to camera settings

For portrait shooting in the studio, camera settings are also very important. Since many conditions in the studio are not as good as outdoors, it is necessary to shoot in M ​​gear (manual mode), and control all conditions in your own hands! The automatic or semi-automatic mode of the camera will often provide incorrect exposure. Don’t underestimate the factor of exposure. It is often that these details are not paid attention to, and the rejection rate is high!


Under normal circumstances, shooting in the studio, at ISO 100, the best picture quality can be obtained, and the shutter speed should be set to synchronize with the flash (or as close as possible), which is about 1/200 second. In this case Keep the aperture at F8 to get a clear image. If there is a shooting need, the aperture can be adjusted to a value around F11, and there is no problem. Finally, don’t forget to focus. Set the focus mode to single-point focus and manually select the focus before shooting.


  1. Metering and setting the lamp frequency

Metering must be done before shooting, because you cannot accurately determine the parameters of the lamp frequency, and different studios and flashes have different power, so it is impossible to accurately set the power setting of the lamp by feeling. The most stable way is to set the camera’s exposure parameters after metering, and then make fine adjustments.


After setting these up at the beginning, the subsequent shooting will be more effective! If the photo taken is too bright, just reduce the output power; on the contrary, if it is too dark, increase the output power. If the output power is already at the lowest level and the image is still overexposed, you can choose to adjust the lens aperture to F11 or move the light source to a slightly farther place, depending on the situation!


  1. How to get a shallow depth of field effect

When you use a studio light source to shoot, it is quite difficult to achieve the model’s main body with sufficient and uniform light, and at the same time to obtain the effect of shallow depth of field with a large aperture. Generally speaking, it is impossible. To get the effect of shallow depth of field, there is a simple and rude way, which is to set up your lighting equipment and set everything as you expect. At this time, the aperture should be set to F8. Perhaps you can also use a filter to assist in shooting, and then increase the aperture to obtain depth of field.

In this process, one thing to note is that the camera’s autofocus may not work well when the light changes, so it is recommended to switch to manual mode. During this period, remember to be patient during the focusing and focusing process.

  1. Recognize the white background

You may think that most people use white backgrounds for portraits, which is too similar. Maybe you want to change to a gray, but there is no existing gray background in the studio. What should you do? At this time, the white background can help you. In the lens, it changes to gray or even black. It all depends on the distance between the portrait and the background, as well as the angle of light.

If you want to get a medium gray background, you only need to keep the model and the background at a distance of 1-1.5 meters, because the drop of light will underexpose the background, and the original bright white background will magically turn gray! By the way, if you don’t have a white background, it is perfectly fine to find an ordinary white wall!

Head close-ups may not sound like the most exciting portraits, but their shooting can also be given creativity. From postures to lighting, props and even background selection, once you pay attention to it, think and explore, you will find that it can also be very interesting!

Categories
Studio Lights Education

The Use of Light Skills-Portrait Thematic Photography_Part V

Posture Processing and Expression Capture

When shooting, if you feel that the subject is too nervous, you can appropriately borrow scenes or props. This is a coup for taking portrait photos. Many photographers will take advantage of this. We often see the classic posture of “leaning against the wall”. In addition, holding something, or lying on something, can also be a good choice.

Emotion capture

Taking a good portrait photo requires not only mastering the photography technique, but also understanding the psychology of the subject, and fully expressing their personality by capturing the posture and expression of the person. Most of the characters in our shots are not professional actors. Many people get nervous as soon as they get to the camera. Without effective guidance, they can get a dull or one-sided portrait photo.

The key to getting the subject to get rid of the restrained look is to distract him and make him forget that he is taking a picture, so that there is the possibility of true feelings being revealed. For example, to eliminate the uneasy emotions of the character, the best way is to communicate with him more and relax slowly, instead of encouraging him, strengthen his self-confidence; if his posture and expression are not in place, don’t rush to correct it and encourage him continuously. It is worthwhile to guide you step by step during the process, even if you waste a few pieces of film. In the process of guiding, sometimes you can find some common topics to chat together. When he is relaxed and focused, the best time to shoot has arrived, because the focused eyes are the most real, without hypocrisy and strangeness.

When capturing the expressions of characters, the expressiveness of the mouth is often involved, that is, the question of whether to laugh or not. If you blindly ask the subject to “laugh and smile again” during shooting, the result often makes the characters lose their individuality. We do not reject all laughter, but as portraits, what we should pursue is the beauty of normalcy. Between laughing and not laughing, it is a mystery to anyone. As long as you relax and show your true feelings, laughing or not laughing is secondary.

The posture of the body is also closely related to the expression of expressions. First, the posture of the human body is required to be as relaxed as possible, and then it can be further guided. For example, when a character is sitting and leaning forward slightly, it will often give people a friendly and easy-going feeling, which can induce a relaxed smile; on the contrary, when a character leans back slightly, it usually gives a haughty impression. Might as well let him understand where he is, and enhance his self-confidence, so that his arrogant expression will naturally show.

The true expression lies in the guidance, and the final credit lies in the capture. Remember this quote from the famous Canadian portrait photographer Kashi: “The inner thoughts, spirit and soul of a character are sometimes expressed through his eyes, hands and body in an instant-this is what needs to be held tightly. The most important moment that is fleeting.

Precautions for portrait photography

  1. Lens

Which lens is the best for taking portraits?  It is better to shoot portraits with medium and long focal length lenses. If you use 35mm film to shoot, this means you should use a lens with a focal length of 85 to 135mm. Because of the short focal length (under 50 mm) shooting portraits will produce more serious deformation, often exaggerating the characteristics of the face of the person, sometimes making the nose appear larger than the actual appearance, which has a side effect on the appearance of the subject.

When using a longer lens of 85 to 135 mm, which is often referred to as a portrait lens, perspective can compress the space so that the facial features of the subject will show the correct proportions, which will be more prominent and eye-catching. If you want to use a long focal length lens of 200 mm or more, it will make the face look too flat.

  1. Use a large aperture

When shooting portraits, be careful to avoid using small apertures from f/11 to f/22. Using a small aperture is good for shooting scenery under strong light, but it will be problematic for shooting portraits. A small aperture can make the background look quite clear, which will divert the attention of the subject. The large aperture of f/1.8 to f/4 can blur the background, make it out of focus, and make the subject the only focus in the photo.

However, a large aperture may make the depth of field too shallow. If one eye of the subject is further away from the camera than the other, the eye that is farther away may be out of focus. The remedy is to abandon the background when framing, so that you can use a smaller aperture, or adjust the position of the head of the reporter so that the distance between the eyes and the camera is equal.

What you want to show is your subject rather than the background. In Figure 1, the background is quite clear on the portrait shot at f/16. People will try to distinguish what it is or where it is. On the more powerful portrait taken at f/2.8 in Figure 2, there is no such thing as a background distraction. People’s attention will be focused on what the photographer wants: the subject.

However, blurring the background is not always necessary. You might as well try shooting an environmental portrait. To this end, you need to keep the surrounding background clear and introduce the subject through the characteristics and details of the environment.

Figure 1

Figure 2

  1. Try the vertical composition to shoot

One of the common mistakes made by novices in portrait photography is to take portraits in landscape orientation. This horizontal composition is good for group portraits, but when you shoot a single person, you need to turn the camera to the vertical position. Jian frame framing is more suitable for single portraits, because this frame corresponds to the vertical rectangular shape of the head itself or the upper body.

There are some issues to be aware of when using horizontal format. For example, the banner portrait on the left is good, but please note that the author’s cut from the chest makes the picture seem rigid and unnatural. The most natural tailoring of the characters should be selected on the narrowest parts of the body, such as the neck and waist. The image on the right uses such a cut for the subject’s vertical viewfinder to achieve a relatively balanced and satisfactory composition.

  1. Get closer

Another reason for the failure of inexperienced portrait photographers is that they did not get as close as possible when shooting. If the person you photograph is too small on the screen, so that their face and expression cannot be the center of expression in the photo at a glance, then the effect will be poor. The solution is to get closer to shooting. You can go forward and get close to the subject, or use a longer focal length lens to shoot. Nearly produces beauty. The famous war photographer Robert Capa said that if your photos are not good enough, it is because you are not close enough. This is certainly true for portrait photos.

The photo above was taken at a distance of 15 feet. It is neither a portrait nor a cityscape photo. In the picture below, because it is close to the subject, no one suspects that it is a portrait, and it is a successful portrait. By the way, there is another common problem in the above picture, that is, the head of the character is in the center of the screen. When composing a portrait, try to make the key part in the upper half of the screen.

  1. Avoid glaring light

The most taboo thing about portraits is to use direct sunlight from the top of your head. It will cause dark shadows in the eye sockets, around the nose and under the chin. In order to avoid this destructive light effect, professional portrait photographers like to choose open and shaded venues. For example, under a big tree on a sunny day, there is a large amount of reflected light around it that can fill the local shadows, forming smooth and shadowless lighting on the faces of the characters.

If you have to capture a portrait at noon, you can easily create an open and shaded condition by yourself, that is, let the subject face the sun. Technically speaking, this is called backlighting. This will pose a challenge to your camera meter. The methods described below can solve this problem.

In order to improve the effect of photograph A in direct sunlight, a translucent white umbrella can be used to block the noon sunlight. Another way is to use shading lighting to solve the problem, but the strong light around the subject will interfere with your light meter and cause underexposure of people. To avoid this, you should get close to the subject and take exposure readings directly from their face. Or if your camera is equipped with spot metering, then use it to measure the reflected light from the subject’s face.

  1. Choose simple clothes

Dazzling colorful costumes will only divert the audience’s attention to the subject. To adopt a simple design and calm colors. If you plan to shoot some casual portraits, you can always have a simple undershirt on hand.

If you take a photo for a celebrity, put a piece of red or blue satin material around her upper body and use it for external fixation, which can replace a strapless or open-necked evening dress.

If you encounter the subject wearing out-of-the-box clothing when shooting, you have to find ways to change this. You can make the picture more compact in the composition, so as to avoid the flashy shirt, or leave the shirt part in the shadow when lighting, and make the face relatively brighter.

Keep the character’s dress simple. The fancy dress will make people turn their attention to the features of the subject to the characters. In terms of color, keeping a simple dress is usually effective.

Bright primary colors can add life to portraits. But pay attention to choosing clothing that matches the true nature of the subject. If possible, let the subject choose the color of his clothes. This effect will be the best. Almost everyone knows what color will make them look best. If he or she is dressed in color matching clothing, the subject’s sky blue or colored eyes will be more obvious.

Categories
Studio Lights Education

The Use of Light Skills-Portrait Thematic Photography_Part IV

Portrait Photography Skills

④ Studio lighting techniques

  1. Choose the right light distance

First of all, the size of the lamp distance directly affects the light intensity of the subject. The received light intensity of the subject changes according to the reciprocal of the square of the lamp distance, and the light intensity varies greatly with the lamp distance. In addition, the size of the light distance will also affect the contrast between light and dark of the subject. When the lamp distance is small and the area of ​​the light source is smaller than the subject, the light source can be regarded as a point light source, and the contrast of the subject is relatively large. Conversely, when the lamp distance is large, the light source can be regarded as a surface light source, and the contrast of the subject is small.

  1. Use as few lamps as possible

In lighting, it is not that the more lamps are used, the better. Too many lamps and lanterns are used, which not only makes the lighting arrangement appear complicated, but also brings chaotic projections. The elimination of these projections is often difficult. Therefore, in the lighting, it is necessary to use as few lamps as possible, and when necessary, a reflector can be used to fill the light.

  1. Multi-purpose reflector

It is recommended to use more reflectors in lighting. In addition to it is unlikely to produce disgusting projections, it also lies in the fact that various reflectors can provide reflected light with different light properties, and it is easy to control the effect.

The reflector can not only illuminate the main light, but also illuminate the dark part of the subject. It can even be cut according to the needs of lighting and the shape of the subject to fill some parts of the subject. So as to control the light domain extremely well.

In advertising photography, there is often a phenomenon that the number of reflectors used is more than the number of lamps. For an advertising photographer, whether the reflectors can be used flexibly and effectively is a sign of whether their lighting is mature.

  1. Proper light ratio control

The light ratio control in lighting involves the contrast of the subject itself and the contrast between the subject, companion and background in the picture. It also determines the tone of the entire picture and the texture and detail of the subject.

The light ratio control in lighting is generally based on the principle of truly representing the inherent surface brightness, texture and color of the subject itself. If you want to show its elegance and cleanliness to the white subject, the subject should be treated with a high profile. The black subject should show its depth and dignity, and the subject should be treated as a low-key. Of course, under the premise of not violating the advertising creativity, photographers can also creatively control the light ratio according to their own personality and habits, in order to obtain new ideas in lighting.

(2) Choose the shooting angle

The basic method of choosing the shooting angle to modify the subject is to make full use of the perspective phenomenon. Generally, the blind spots and perspective habits of the eyes are used to highlight the parts that you want to beautify, and to transfer the defects you want to cover to places that you can’t see.

For example, using a lens with a longer focal length to shoot 3/4 side of the subject can shape the wider face to be thinner, and you can also place the insufficient part on the 1/4 side that is out of sight. superior.

Not only that, choosing different shooting angles can also make the advantages of the subject more obvious. For example, when shooting women, choosing the front side or the side can well highlight the beautiful body curves of women, and the effect is much better than that of frontal shooting.

Compared with the lighting method, the application range of selecting the shooting angle is wider. Of course, it has great flexibility in application, and it is even more difficult to master. Therefore, the choice and determination of the shooting angle should be studied.

The choice of shooting angle includes the choice of shooting direction and shooting height. The choice of shooting angle is very important in portrait photography. A slight change in the shooting angle will have a significant impact on the image and posture of the subject.

The selection of the shooting direction refers to the change of the front, back, left, and right positions of the camera in the horizontal position with the subject as the center. Sometimes you can ask the subject to change the direction to get the shooting effect in different directions. There are mainly the following options for shooting direction in portrait photography:

front Photo

Taking pictures of people in a frontal direction can well represent the frontal characteristics of the subject. All parts of the person’s face are in equal symmetrical positions, giving people a sense of quiet, solemn, and solemnity.

Front side view

This shooting direction is the most commonly used in portrait photography, because this shooting direction can not only show the front structure and side structure of the subject, but also can well show the ridgeline of the combination of these two surfaces, making the subject The image, contour and three-dimensional effect of the camera are fully expressed. The characters shot in this direction are not in the same position in all parts of the picture. Therefore, the image in the picture appears lively and full of changes. The whole picture has momentum and obvious directionality.

Side view

When shooting, the camera is facing the side of the subject to shoot to show the profile image and line structure of the subject. Since shooting in this direction can fully express the profile of the subject, this shooting direction is often used when shooting silhouette photos. At the same time, side-side shooting has strong momentum and directionality, so when shooting people moving forward at high speed, side-side shooting is often used.

Back photo

In portrait photography, it is rare to shoot from the direction behind the subject, and it is only used in some special circumstances. Backside shooting can show the characteristics of the subject’s backside and guide the viewer’s vision to develop in depth. When choosing the back direction to shoot a person, we must pay attention to the characteristics of the subject’s back.

Under the premise that the shooting direction remains the same, changing the shooting height will change the perspective relationship of the captured picture. In portrait photography, due to changes in height, the following shooting angles often appear.

Elevation shooting

Using a low angle to shoot the person upside down can show the tall image of the subject while also purifying the background. A full-body photo of a person from the back can show the subject’s slender legs. It is not advisable to take a frontal angle for people with a large face, so as not to expose their shortcomings too much.

Horizontal shot

Refers to the height of the eyeglasses when the subject is upright. The perspective relationship of each part of the scene in the picture taken from the head-up shooting angle is in line with the psychology of normal people’s visual observation, and the composition is stable without special changes.

Overview shooting

When shooting close-up shots of people, if you use a high degree of tilt, it is easy to form large and small deformations. When shooting young girls, using this angle to shoot is easy to form a beautiful “melon seed face” effect. For women with wider and fatter faces, you can choose this height for shooting. But for those who are thinner and have a bald face with a big face, this angle is not suitable for shooting. When shooting full-body photos, generally do not use this angle of shooting.

It should also be pointed out here that in portrait photography, choosing different shooting angles will produce different compositional artistic effects in the shots of people. The choice of shooting height should be determined according to the specific situation of the subject and his own creative artistic concept.

Makeup

The use of makeup techniques to conceal the defects of the subject is also a very common basic technique in portrait photography. Such as removing wrinkles on the hands and face, changing the reflection of the face and cheekbones to help change the shape of the face, etc. But when you make up, you must remember to be modest, otherwise the effect of make-up is too heavy and it looks too false.

Makeup is just one of the styling techniques, there are two taboos: messy and excessive. And the ultimate goal of makeup styling should be to make the audience invisible in the final photo that the subject is shaped by makeup styling.

Posture processing and expression capture

Handling of posture

In portrait photography, you often encounter the problem of posing the subject. In fact, the postures and gestures of the characters are expressive and expressive. Therefore, the character’s posture and the handling of hands and feet are an important part of portraying the character’s character and forming the visual beauty of the picture.

The expression of the posture is mainly expressed by the posture of the head and the posture of the body. The orientation of the face and the tilt of the face are all different. Generally, facing the right face is more in line with people’s visual habits, and facing the left can increase the mystery.

The body posture generally does not take the frontal straight line, because taking the frontal straight line will appear serious and dull. The body is expressed in a curved line, and the face half side facing the camera is more expressive. There should be a certain difference in the orientation of the face and body, so that it will appear natural and full of change.

Of course, as the most expressive human body in the world, it is difficult to apply any fixed style. Especially modern portrait photography pays more attention to simplicity and nature. Here is a brief introduction to the general principles of posture and gesture arrangement in portrait photography.

  1. Models should be relaxed and casual

The Creator has created the most harmonious and perfect body for mankind, so we often see a lot of well-proportioned girls, no matter how they move, they are beautiful. Because human joints and lines almost contain the rhythm of art. Relaxation and randomness can make the body’s own beauty be fully utilized. On the contrary, pretending to be a posture and being confused about what to do will destroy the innate beauty of people. Generally speaking, no matter what the posture, as long as the subject feels relaxed and comfortable, others will look more natural, and will not feel rigid and rigid. Therefore, the arrangement of posture and gestures in portrait photography must first make the subject feel natural and relaxed.

  1. The model’s posture and gestures should be consistent with emotions

The hands, feet and body posture are the same as the face and eyes, which are important parts of expressing emotions. Therefore, the hands, feet and body posture should be used to portray the character of the character. If the hands, feet, and body posture are inconsistent with the character’s expression and personality due to pretentious posture or rigidity, they will look uncomfortable. If the hands, feet and body posture can be integrated into the overall emotional expression and character portrayal of the character, and make it an inseparable part of the image expression, then the handling of the hands, feet and posture will be successful.

  1. The author should often study and imitate successful portrait works

There is no shortage of classic and famous portrait photography works at home and abroad. The postures and gestures of the characters in these works can be said to be varied and natural and harmonious, and they are worthy of our imitation and reference. It should be said that learning the arrangement of postures and gestures in portrait photography should start with imitating famous classics, find out the rules from them, and practice for a long time, and finally achieve the ability to independently design and create photographic portraits with personal style.

Professional photographers have also summarized some of the more commonly used postures for us. You can see that various postures including lying, sitting, lying, squatting, standing, etc. are summarized. Among them, there are 8 choices for the hug posture. Of course, postures including headaches, toothaches, and backaches are also summarized here.

(To Be Continued)

Categories
Studio Lights Education

The Use of Light Skills-Portrait Thematic Photography_Part III

Portrait Photography Skills

③General steps and rules of studio lighting

Studio lighting is not like natural light. Photographers can use skilled lighting techniques to create wonderful light and shadow effects based on subjective ideas and performance needs. However, due to the large subjective and randomness of the lighting in the studio, it allows the photographer to maximize the effect of lighting on the one hand, and on the other hand, it increases the difficulty of lighting. . In order to improve the effect and speed of lighting, the following steps and rules should generally be followed when lighting.

  1. Determine the main light

The main light is the dominant light source, which determines the main tone of the picture. In lighting, it only makes sense to determine the main light and add auxiliary light, background light, and contour light. In the process of determining the main light, the lightness, intensity and coverage of the main light source should be based on the subject’s modeling characteristics, texture performance, light and dark distribution, the separation of the subject and the background, and the distance between the background and the subject, etc. .

For most of the subject matter, generally choose softer light, such as reflector, soft light and fog light as the main light. Direct floodlights and spotlights are rarely used as the main light, unless the picture needs to bring a strong contrast effect from them.

The main light is usually higher than the subject, because the most comfortable and natural lighting is usually the light effect that simulates natural light. The main light is too low, the subject will form an abnormal bottom light illumination, and the main light is too high will form the top light, making the side of the subject contrast with the top surface.

  1. Add auxiliary light

The illumination of the main light will cause shadows on the subject, unless the photographic picture requires a strong contrast. Generally, in order to improve the gradation and tone of the shadow surface, auxiliary lights should be added when lighting.

The auxiliary light generally uses soft light, and its light position is usually on the opposite side of the main light. When adding auxiliary light, pay attention to controlling the light ratio. The appropriate light ratio is usually between 1:3-1:6. The light ratio should be smaller for light subjects, and the light ratio for dark objects should be smaller. bigger.

When adding auxiliary light, you should also pay attention to avoid that the auxiliary light is too strong. If the auxiliary light is too strong, it will easily cause the light to be clamped and produce redundant and awkward shadows. In order to control unnecessary shadows, in addition to making the auxiliary light weaker than the main light when lighting, sometimes the method of appropriately lowering the light level or placing the auxiliary light as close as possible to the camera position is used to project the projection to the back of the subject.

1000W-Soft-Panel-LED-Light

According to the needs of the picture effect, the auxiliary light can be one or more. While using various lamps as auxiliary light, don’t forget to use reflectors as much as possible, which can often produce unexpectedly good results.

  1. Set the background light

The main function of the background is to set off the main body or render the atmosphere. Therefore, when dealing with the background light, it is necessary to pay attention to contrast and harmony.

When shooting small objects, it is often difficult to light the background separately because the subject is very close to the background. At this time, the main light doubles as the background light. In the specific control of the ratio of the main light to the background light, it can be controlled by selecting the appropriate lamp distance, orientation and illumination range, or using various translucent diffusers or opaque shading objects at the appropriate position on the main light and background axis Perform occlusion to get proper brightness.

When the subject is large and there is enough distance between the subject and the background, the background can be illuminated separately. The background light generally does not interfere with the lighting of the subject, and it is easy to control the coverage, brightness and uniformity of the background light.

In the specific lighting process, special attention should be paid to whether there will be a phenomenon of “merging” between the subject and the background with similar brightness, or whether the illumination of the center and surrounding areas of a large-area background with uniform brightness is indeed uniform.

In these two situations, don’t trust your own visual inspection too much. It is best to use a light meter for serious detection, because the human eye is often insensitive to small changes in brightness, but the film will faithfully record it.Portable Studio Lighting

In addition, when lighting the background light of frequently shot high-key or low-key photos, it should be understood that their background light is not as bright as we imagined, or the darker the better. If the background brightness is too strong, the diffused light produced will not only easily cause glare to the lens, but also affect the light effect of the subject.

It is not necessary to control the background too dark when taking low-key photos. Generally, it is more appropriate to control the background brightness to an EV value higher than the brightest part of the subject when shooting high-key photos, and to control the background brightness to one EV value lower than the darkest part of the subject when shooting low-key photos.

  1. Add contour light

The main function of the contour light is to produce a bright and bright outline of the subject, so that the subject is separated from the background. Contour light is usually projected back and forth from above or above the side of the background. Generally, there is one light position, but sometimes two or more are available as needed.

Contour light usually uses spotlights, which are strong and hard, and often produce heavy projections on the screen. Therefore, it is necessary to weaken or eliminate these messy projections when arranging the contour light. To eliminate or weaken these projections, in addition to adjusting the lamp position, sometimes clever use of reflectors for contour light projection will have unexpected effects.

When arranging the contour light, you should also pay attention to the light ratio of the contour light and the main light. Usually, the contour light is brighter than the main light. In addition, when lighting, you should choose hard light or soft light as the contour light according to the needs of the subject.

There are usually two ways to obtain soft light. One is to put umbrella lights, soft lights, etc. as close to the subject as possible, so that the brightness of the contour light is higher than the main light, but this is often more laborious. The other method is simpler, just use the diffuser in the spotlight to soften the light. It should be clear that contour light is not a necessary light for every picture. It is only added when the picture needs it, otherwise, it will be superfluous.

led-hard-&-soft-2-in-1-lights

  1. Add decorative light

Decorative light is mainly used to decorate certain parts or details of the subject, and it is a partial, small-scale use of light. The difference between decorative light and auxiliary light is that it does not aim to increase the brightness of the dark parts, but to make up for the lack of image shaping of the main light, auxiliary light, background light and contour light.

Catch light, luminescence, key projection light on the bright part of the subject, and partial lightening at the edge are all typical decorative lights. Generally, the decoration of decorative light should not be too strong or too hard. Too strong or too hard will easily produce light spots and destroy the overall perfection of the lighting.

  1. Review

In the above lighting process, since the light is added in one kind, the latter kind of light is likely to have an impact on the previous light effect. Therefore, after the lighting is completed, it is necessary to carefully examine the overall light effect. For example, whether the lighting is obviously lacking or unreasonable, whether the projection density meets the requirements, whether the projection position is appropriate, whether the lighting of each light source is interfered, whether each light source enters the viewfinder screen and causes halo, etc. Examining these details can avoid the abandonment of previous efforts due to a momentary negligence.

④ Studio lighting techniques

In order to achieve the ideal light and shadow effect, in addition to following the above-mentioned lighting steps and rules when lighting the studio, special attention must be paid to the following skills and essentials.

  1. Control the light source area and degree of diffusion

The size of the light source area is directly related to the light-emitting properties of the light source, and the light-emitting properties of the light source affect the contrast of light and dark of the subject. Therefore, controlling the area of ​​the light source and the degree of diffusion of the light source can better control the contrast effect of the subject. When low contrast is required, the light source has a large area and a large degree of diffusion, so that the light coverage exceeds the subject. When high contrast is required, the area of ​​the light source should be small, and the degree of diffusion should be small, so the light has directivity.

  1. Ensure sufficient lighting brightness

Sufficient lighting brightness allows us to freely control the required depth of field through the aperture. Although the method of prolonging the exposure time or performing multiple exposures can be used to solve the problem when the lighting brightness is not enough, these two methods will bring inconvenience to the shooting. Extending the exposure time will easily cause the exposure reciprocity law to fail, resulting in coarser film grains, reduced contrast, and color deviation. However, the use of multiple exposures requires that the positions of the subject and the camera remain stationary during the exposure, and the calculation of the exposure is also more complicated, which greatly increases the difficulty of shooting.

(To Be Continued)

Categories
Studio Lights Education

The Use of Light Skills-Portrait Thematic Photography_Part II

Portrait Photography Skills

  1. Shape shaping

(1) Lighting method

In photography, lighting is a creative work, it not only reflects the photographer’s personality and style, but also related to the success or failure of a work.

The basic method of using lighting to decorate and shape the image of a person is: use purposeful to highlight the shape and characteristics of the subject, while using shadows to cover certain defects of the face.

For example, when shooting with front metering, a shadow will be formed on the backlight side of the subject’s face. At this time, by adjusting the illumination angle of the light source, the shadow part is moved to the bright part, so that the area of ​​the shadow is increased, and the light is bright. Department shrinks. Once the shadow area is larger than the bright part, the subject will look thinner.

And conversely, let the bright part move to the shadow part, when the area of ​​the bright part is larger than the area of ​​the dark part, it will make the subject feel fatter.

The lighting method is not only used to cover up defects, but also often used as decoration. For example, after the light of the subject has been determined, a backlight or side backlight is appropriately added to brighten the outline of the subject, or it can be used directly to enhance the texture of the hair, which can also achieve further beautification of the subject Effect.

①Light characteristics

In photography, the study of light characteristics generally starts from six aspects: luminosity, light quality, light position, light type, light ratio and light color.

  1. Luminosity

Luminosity is the most basic factor of light. It is the general term for the luminous intensity of the light source and the brightness of the light on the surface of the object. Luminosity is directly related to exposure. Large luminosity requires a small amount of exposure; low luminosity requires a large amount of exposure.

In addition, the size of the luminosity also indirectly affects the size of the depth of field and the clarity or blur of moving objects. Large luminosity is easy to produce the effect of large depth of field and clear image, while small luminosity is easy to produce the effect of small depth of field and blurry moving image.

  1. Light position

The light level refers to the direction of the light source and the position of the light source relative to the subject. In photography, the light position determines the location of the subject’s brightness and darkness, but also affects the texture and form of the subject. The light level can be ever-changing, but when the position of the subject and the camera is relatively fixed, the light level can be divided into six types: forward light, side light, back light, top light, foot light and scattered light.

  1. Light quality

Light quality refers to the hard and soft characteristics of light. The so-called hard refers to the clear and dense shadows produced by light, with sharp contours and high contrast. The so-called soft means that the shadows produced by the light are soft and unclear, with gradual contours and low contrast.

Hard light has obvious directionality, it can make the subject have a sharp contrast between light and dark, which is helpful for the performance of texture. Hard light often gives people a sense of fortitude and life. Soft light has no obvious directionality. It is suitable for reflecting the shape and color of objects, but it is not good at expressing the texture of objects. Soft light tends to give people a soft and delicate feeling.

  1. Light type

As far as the subject is concerned, there is often more than one type of illuminating light, and various types of light have different functions and effects. Light type refers to the effect of various light on the subject during shooting. Light types are usually divided into five types: main light, auxiliary light, contour light, decorative light and background light.

Main light

The main light is the main illuminating light of the subject, and it plays a leading role in the expression of the shape, contour and texture of the object. When shooting, once the main light is determined, the basic lighting and tone of the picture can be determined.

It should be noted that for a subject, there can only be one main light. If several light sources are used as the main light at the same time, the subject will either receive the light equally, and the main light cannot be distinguished, and the picture will appear flat. Either several key lights simultaneously cast shadows on the subject, and the picture appears chaotic.

auxiliary light

The main function of the auxiliary light is to increase the brightness of the shadow parts produced by the main light, so that the dark parts also show a certain texture and level, and at the same time reduce the image contrast. In the use of auxiliary light, it should be clear that the intensity of the auxiliary light should be less than the intensity of the main light. Otherwise, it will cause an overwhelming effect, and it is easy to have obvious auxiliary light projection on the subject, that is, the phenomenon of “light clamping”.

Contour light

Contour light is the light used to outline the contour of the subject. Contour light gives the subject a sense of three-dimensionality and space. Backlight and side backlight are often used as contour light, and the intensity of contour light is often higher than that of the main light. A dark background helps to accentuate the contour light.

Decorative light

Decorative light is mainly used to decorate a part of the subject or display the level of details of the subject. The decorative light is mostly narrow light. The eye light and luminescence in portrait photography and the flares of jewelry in commodity photography are all typical decorative lights.

Background light

The background light is the light that illuminates the background, and its main function is to set off the subject and render the environment and atmosphere. Both natural light and artificial light can be used as background light. The background light is generally wide, soft, and uniform. In the use of background light, special care should be taken not to destroy the tone coordination and main shape of the entire picture.

  1. Light ratio

The light ratio refers to the difference between the light intensity of the bright part and the dark part of the subject. The light ratio is large, the contrast between the bright part and the dark part on the subject is large; on the contrary, the contrast between the bright part and the dark part is small.led-hard-&-soft-2-in-1-lights

Generally, the intensity of the main light and auxiliary light and the distance from the subject determine the light ratio. Therefore, there are two ways to adjust the light ratio when shooting:

①Adjust the intensity of the main light and auxiliary light. Increasing the intensity of the main light or reducing the intensity of the auxiliary light will make the light ratio larger, and vice versa, the light ratio becomes smaller.

②Adjust the distance from the main light and auxiliary light to the subject. Narrowing the distance between the main light and the subject or increasing the distance between the auxiliary light and the subject will make the light ratio larger, and vice versa, the light ratio becomes smaller.

  1. Light color

Light color refers to the “color” of light, and is also commonly referred to as color temperature. For black and white photography, light color is not very important. But in color photography, the color of light is very important. When shooting, you must choose a lighting source whose color temperature is consistent with the balanced color temperature of the film. Otherwise, the captured image will appear color cast.

②Commonly used studio lamps

The lighting method is more suitable for indoor portrait photography, you can freely increase or change the light position and effect of the light, and it can be said to be relatively simple in shaping the shape of the character.

Portrait photography has extremely strict requirements for the reproduction of images. Therefore, many subjects are placed in the studio for lighting and shooting. There are two kinds of light sources for studio lighting: tungsten lamp and electronic flash.

Because the electronic flash has the advantages of high luminous intensity, stable color temperature, low heat generation and low power consumption. Therefore, the current portrait photography studio lighting mostly uses electronic flash. Among them, umbrella lights, soft lights, fog lights, flood lights and spotlights are more commonly used.ledsfilm-2-in-1-studio-lights

  1. Umbrella lights

Reflective umbrellas of different textures and specifications are mounted on the floodlights to become umbrella lights. Umbrella lights are characterized by large light-emitting area, soft light, and weak contrast.

  1. Soft light

Adding a diffuser to the caps of various flash lights becomes a soft light. The light emitted by the soft light is formed by mixing the direct light from the flash lamp and the reflected light of the reflector, and then transmitting and diffusing through the soft light. The characteristic of soft light is that it can provide average and sufficient lighting, and the light emitted is soft, but the direction is generally stronger than that of umbrella lights. The contrast is clear, the projection is thicker than the umbrella lamp, and it has a good level of performance.

  1. Fog lights

Fog lamps are a special kind of lamps. The head of the fog lamp is made of a special flash head, and there is a reflective glass in front of the flash tube, and all the output light is the transmitted diffused light reflected by the reflector. Fog lights are particularly suitable for shooting commodities (especially objects with high finish). The feature of fog lamps is that they can provide very average and large-area lighting, with soft light, and excellent performance in detail levels and color saturation.1000W-Soft-Panel-LED-Light

  1. Floodlight

Floodlights are the most commonly used lamps, which consist of an electronic flash with a reflector. The light emitted by the floodlight is direct hard light, with high brightness, strong directivity and high contrast, and the resulting projection is dense. In addition, the light value is high in the center of the optical domain, and the edge is significantly attenuated.

  1. Spotlight

Spotlights are usually equipped with a mirror spherical reflector behind the light source. The light projected by the light source is reflected by the reflector and focused by the front condenser to emit a parallel beam. Spotlights are characterized by emitting parallel or nearly parallel beams, with low light attenuation, high brightness, strong directivity, extremely hard light, and high contrast.

(To Be Continued)