Categories
Studio Lights Education

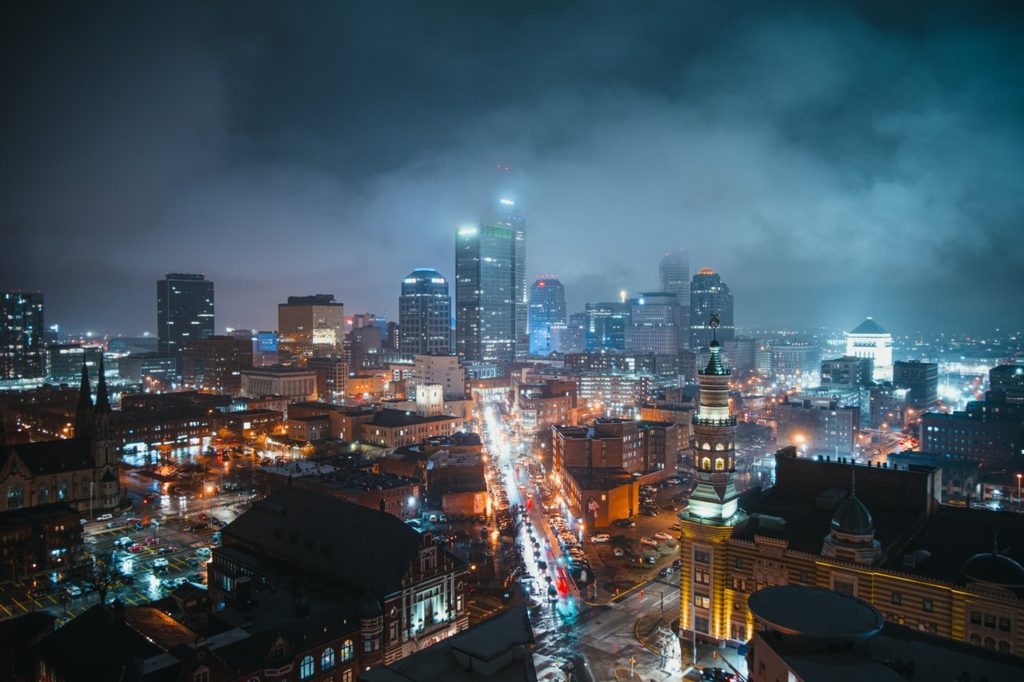
Night Scene Photography Skills

Do you want to look for photography opportunities? In addition to those daytimes that can produce fascinating images, you may occasionally hear that some photographers use the afterglow of the sunset or the sunlight before sunrise to shoot—about 30 minutes. How often have you heard about photographers using another 9 to 10 hours to shoot magical outdoor night scenes? This is really a shame. Lack of imagination will be the most fatal weakness in working as a photographer.

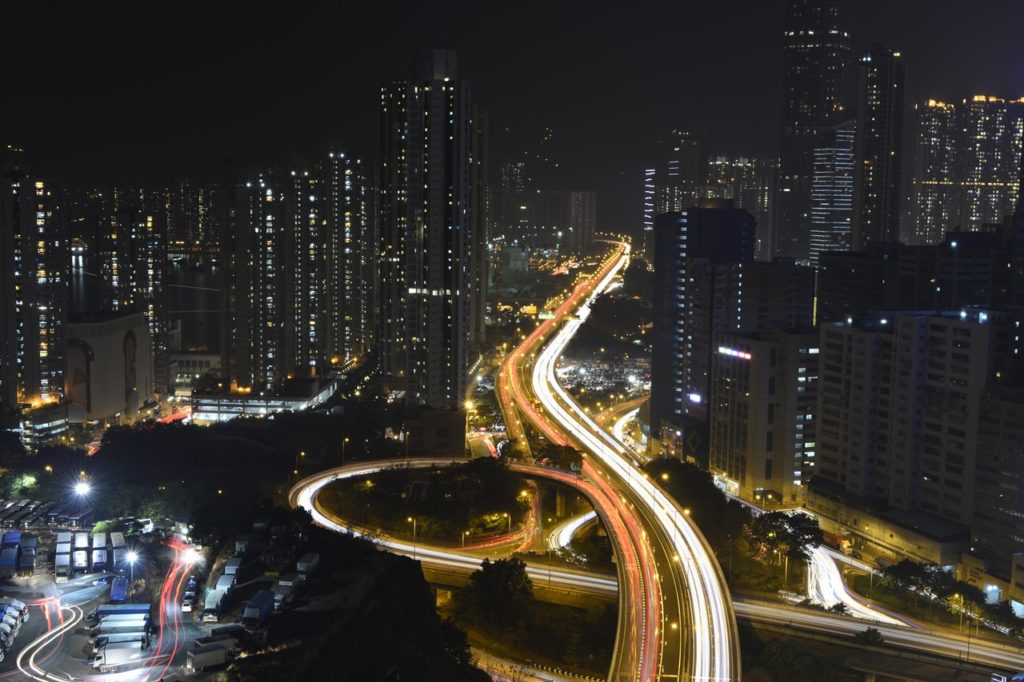
For night scene photography, every shot requires careful planning. Because we usually don’t see the results until the negatives are developed, we have to conceive the photos to be taken in advance, and then design a shooting plan to achieve this goal. Think about it, what happens if we open the camera shutter for 10 hours? If we give the foreground enough lighting, and the afterglow in the sky retains the original light effect, what will happen to the scene in front of us?

Photographic Equipment

A sturdy tripod is first and foremost. I used a Manfrotto tripod and modified a tripod for surveying for photography. A shutter release is also necessary, and don’t forget to bring a flash. I think that kind of small flash is great. It uses two AA batteries (the same as those used in my camera and electronic flash) and is very convenient to put in your pocket or camera bag. In addition, there is another thing you can use at any time is a notebook, you can use it to record everything you have experienced.

The magnetic compass is very useful, because if you want to capture the entire trajectory of the stars orbiting the north or south pole, the compass will make it easier for you to design your photos before it gets dark.
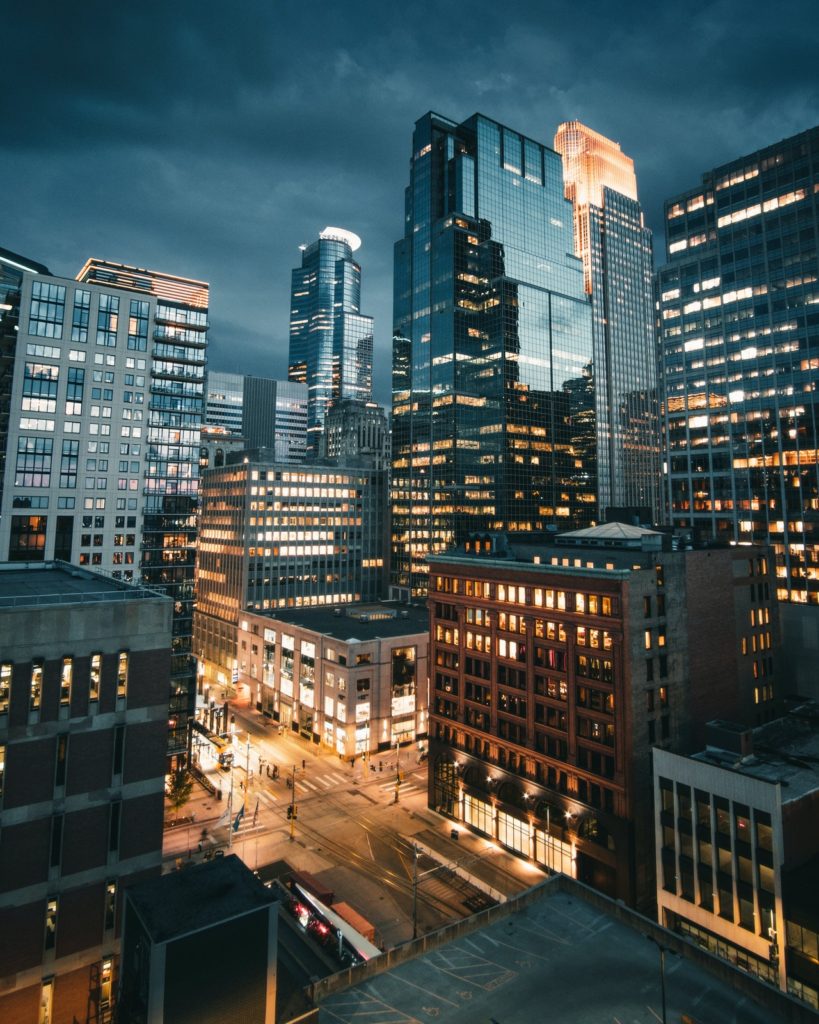
I use a spotlight or an electronic flash to illuminate the subject. As for which one to choose, it depends on the size of the subject.

Most of my night scene photos are taken with a wide-angle lens-a 35mm camera with a 24mm lens, and a 6×6 cm format camera with a 40mm lens. Occasionally, I also use a 35mm camera with a 50mm lens, and a 6×6cm format camera with an 80mm or 150mm lens.

Film

The choice of film depends on personal preference. For short-time exposures, you can use commonly used films. For long-time exposures, you may try to use some other types of films.

All my night scene photos are taken with daylight type reversal film. For this kind of film, the use of electronic flash can achieve good color reproduction, and the use of spotlights will have some yellowishness. For many of my subjects, this is not a problem-the stone doesn’t care about this color cast. However, sometimes I also add a light blue gel film in front of the spotlight. This can make the flash closer to white light, but will lose about 1/3 of the amount of light.

Give it a try

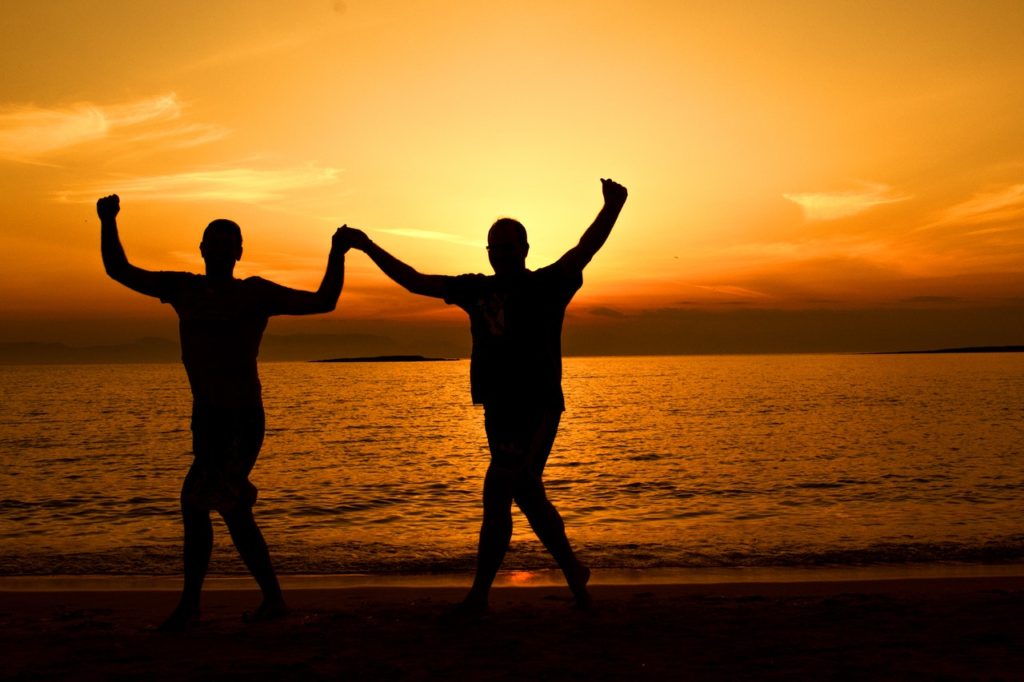
Afterglow: When the sun just sets, the afterglow of the sunset doesn’t look very spectacular, but its beauty and glory will gradually be revealed. Then it will quickly disappear into the darkness. The photos taken at this time have almost no shadows (most of the sky is like a huge light box) and show a warm tone (because the sky is usually orange at this time).
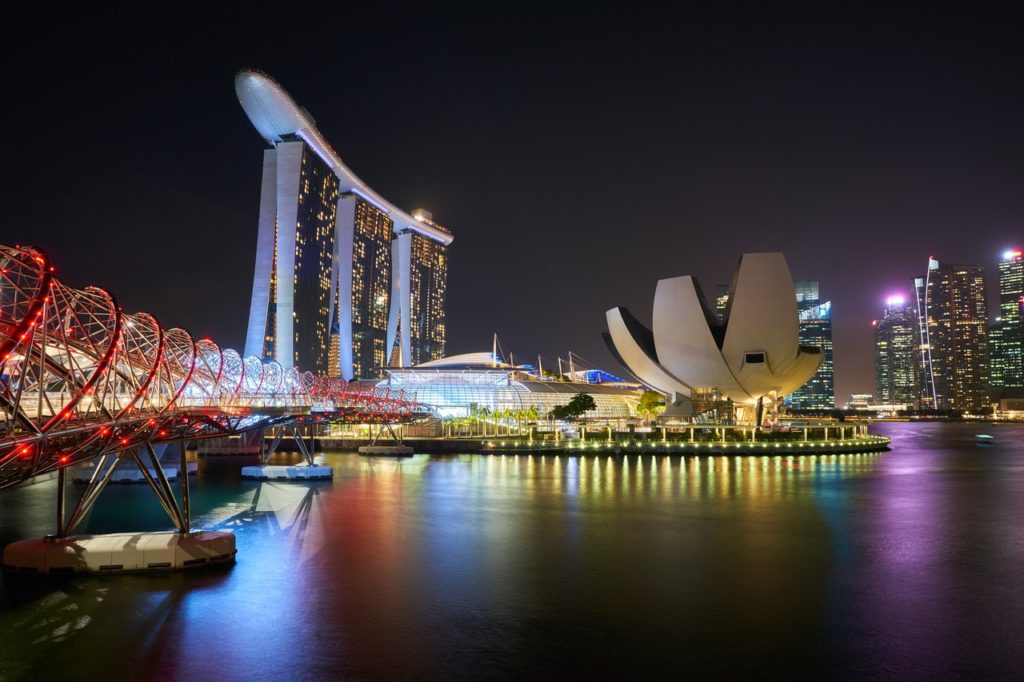
Maybe a telephoto lens that is not too long will be useful at this time. In this way, more brilliant afterglow can be incorporated into the lens, and the black sky can be reduced at the same time. Objects in the foreground can be photographed as silhouettes or illuminated with artificial light. If you decide to brighten the foreground, then the action must be fast so that the afterglow in the background is not overexposed. The above suggestions are also suitable for shooting sunsets.

Brighten the foreground: If you need more time to illuminate the foreground, try a double exposure. Put the camera on a sturdy tripod and correctly expose it according to the setting sun for the first time. When it’s dark enough at night, turn on the camera for regular exposure, while illuminating the subject with a spotlight until enough. Between two exposures, during the second exposure, when you set the shutter speed to Bu, be careful not to move the camera.

Moonlight: You can easily take pictures of the moon every moment when it goes from full to missing. When the full moon illuminates the earth, I use ISO 100 film, f/4, 15-60 minutes exposure. (At this time, the moon is used as the main light source, not part of the composition).

Pay attention to the orientation of the camera, the moon may move to the front of the camera during the exposure process, which is extremely unfavorable for shooting, so you need to use a hood. If moonlight hits the lens directly, it will cause flare.

Moonlight, plus flash or spotlight, can also be used to control the contrast between the foreground and the background. If you use artificial light to illuminate the foreground object and the exposure is correct, the density of the background of the film (lit only by moonlight) will change with the length of the exposure time.
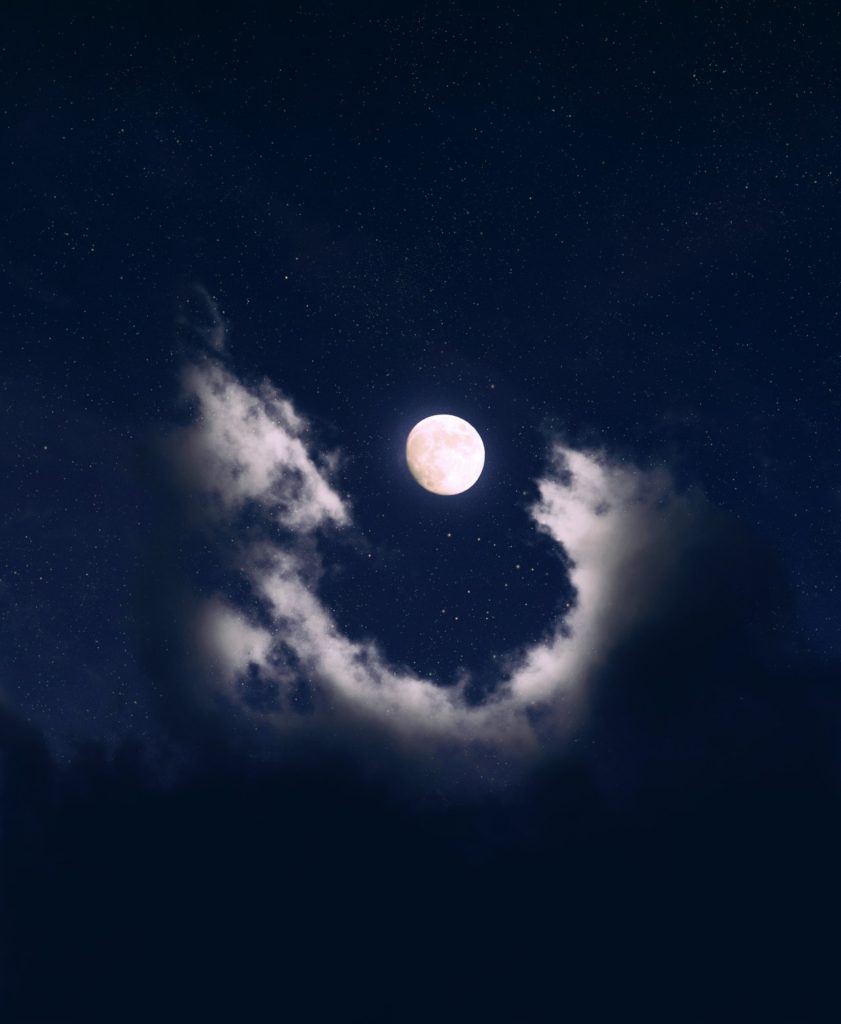
Moonlight can also be used as a light source. In some cases, people will not suspect that the photo was taken at night. Moonlight is the reflection of the sun on the surface of the moon. It is not exactly the same color as the light at noon, but the difference is subtle.

People often see landscape photos with a bright moon added later. You can also add more than one moon to illustrate how the moon rises.

In order to achieve this goal, I use multiple exposure techniques to shoot the basic components or foreground of the picture. It can be a rock. To make it underexposed, use an aperture that is about one stop lower than at sunset.

After dark, mount the camera on a tripod and add the moon to the picture. Pay attention to carefully determine the position of the moon, so as not to make the moon fall on top of a certain foreground detail. To incorporate multiple moons into one film, the exposure must be at least 2 1/4 minutes apart, otherwise the moons will overlap. I found that 5-6 minutes is the best exposure interval. When the full moon is full, I shoot at f/8, 1/125 second (ISO 100), and add a moon to the image every 6 minutes.

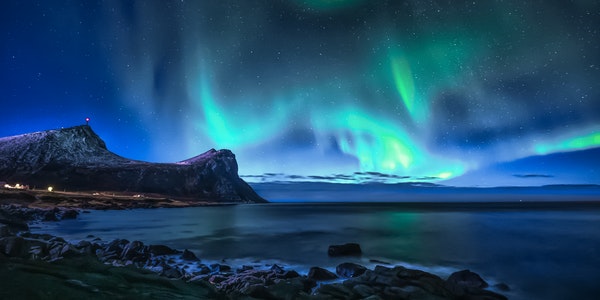
Star trails: Another night scene photo I took was to illuminate the foreground with artificial light, and then open the shutter to expose for 10 hours. This means that the sky is not pitch black, but the trails of stars in the blank spaces of the photo.

Such a long exposure can only be attempted at the new moon to avoid overexposure while keeping the sky and the trajectory of the stars in good contrast. Aperture setting between f/5.6-f/2.8 works best, and the foreground lighting is calculated based on the selected aperture.
The Use of Light Skills

For subjects such as trees and small rocks, electronic flash lighting is very effective. To illuminate a large subject requires a 12V, 100W handheld lighting device, which is powered by a portable, completely sealed motorcycle battery. In this way, the flash can gradually illuminate the subject, and the whole process can be controlled by itself, from 1 minute to 1 hour.

When using an electronic flash, I did not attach the flash to the camera because it was too dark. I use 1 or 2 flashes around the subject to outline the outline of the subject from different angles. Usually take one side of the subject as an important part, and use more fill light illumination. The subject captured in this way has a three-dimensional effect, without the flat effect caused by the flash from the camera position.

When you use flash photography, you can hide behind trees, rocks or other objects. This is the most reliable way to ensure that your figure does not appear in the lens. To set up the camera during the day, find out the location of the subject you want to illuminate, mark it with rocks, sticks, or other obvious objects, and determine the number of times you need to light each location.

Under normal circumstances, the index of the flash is designed according to indoor conditions and is not accurate outdoors. Outdoors, I usually increase the aperture by 1 1/2 levels to make up for the loss caused by the lack of reflections from walls and ceilings, and subjects like stone buildings are usually darker.

When you want to flash a tree at night, there will always be some problems, so you must use the flash at night when there is almost no wind. Otherwise, the positions of leaves and branches will slightly change with each flash. In order to fully illuminate the entire canopy, some additional flashes are required. Take a small tree as an example: aim the flash at the trunk from the left (the focal length is set at 50 mm), aim at the canopy with 2 flashes (the focal length is set at 85 mm), and aim at the trunk at the right with 2 flashes (50 mm), right The quasi-canopy flashes 3 times (85 mm).
Common Problems with Night Scene Shooting

Dew and fog are really troublesome, but they are not common in some places. I find that they are generally predictable and avoidable. In case of dew, cover the camera with a thin plastic bag. If the dew condenses on the lens, the image will gradually disappear.

For night scene photography, semi-arid areas are more suitable. You can easily find a suitable shooting spot, set up the camera there and wait for it to shoot after dark.

If you are going to shoot star trails with long exposure, clean air is the first condition. Find a place far away from all kinds of pollution caused by dust, fog and city lights, and look for a sky where no planes pass by. If an airplane passes the camera’s field of view during the exposure process, it will produce a frustrating line on the film. Satellites and meteorites may also produce light streaks in photos. You have nothing to do with the meteorites, and if you wait an hour or two when it is dark at night, the satellites can be avoided.

If people don’t know what you are doing, then someone may curiously turn around in front of your camera with a flashlight. This will bring trouble to your shooting, and you must be prepared for this.

At first you may think that the failure of the reciprocal law is a problem, but it is not. You can usually shoot according to the lighting conditions you have used under the same conditions. Remember I mentioned that I need to prepare that notebook?
Some Other Tips

The camera is set up at dawn, and it is easier to compose the shot at night. If your tripod is not strong enough, try the following suggestions: Drop something heavy (such as a stone or sandbag) in the center of the stand, press some stones on the legs of the tripod, or fix the legs with tent nails.

Put some rubber bands in your camera bag, and you can tie the camera strap and cable release to the tripod during the exposure process to prevent them from drifting in the wind.

Don’t forget to remove the lens cap. For people who use single-lens reflex cameras, this sounds strange, but the reason is simple: usually when there is still light, we set up the camera and do a series of preparations: make sure the level, framing the picture, and wait for everything to be in place After that, close the lens cover and wait for it to get dark. We started shooting when it was dark, because at this time the light was too dark to observe the viewfinder, so we won’t go to viewfinder again, then you might forget to take off the lens cap. This is why you have to get in the habit of removing the lens cap before starting the exposure.

Once you start taking pictures after sunset, you will soon have other shooting ideas, then in the end, I hope you can achieve more happiness and take more interesting photos by realizing these ideas.
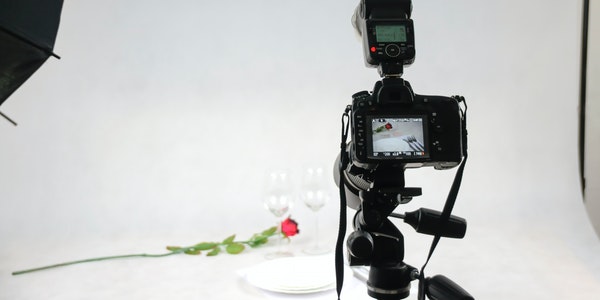
Categories
Studio Lights Education

Techniques for Shooting People Against the Light

Character Backlight Photography Skills

Backlight shooting is a means of light in photography. Should include two kinds of full backlight and side backlight. Its basic feature is: from the light position, the full backlight is facing the camera, also known as “backlight”.

The side backlight is the light that hits the subject from the rear side of the camera at 135° to the left and right. The light-receiving surface of the subject occupies 1/3, and the backlight surface occupies 2/3. From the light ratio, the subject and the background are in a dark place or 2/3 of the area is in a dark place, so the light ratio between light and dark is large, and the contrast is strong. From the perspective of light effect, backlighting produces contour light for opaque objects, transmission light for transparent or semi-transparent objects, and flicker light for liquids or water surfaces.

In a backlit scene, the hair of the character will be more obvious and beautiful, the edge of the body will also be presented, and the whole character will become more three-dimensional. This is an important reason why many people like to shoot against the light in the field of photography.

Taking portrait photography as an example, the sun (or light) is behind the portrait, and the light distribution of the entire scene, the face and front of the portrait, will appear relatively dark. This is the so-called “backlight shooting.”

Most cameras use the entire viewfinder screen as the basis for metering by default. Due to the backlight environment, the back light of the portrait is relatively strong. After the average calculation, the camera will think that the front of the portrait is normal. This is the reason why the “big black face” will be photographed in the backlight environment.

Solution

  1. We can use the concept of “exposure compensation” to deal with “backlit photography”, that is, increase the exposure to make the face brighter, but this method will increase the brightness of the entire photo, so not only the face If it becomes brighter, the background will also become brighter, resulting in the loss of background details.
  2. A better way is to use a reflector to reflect light on the face of the person. For example, in the picture below, since light enters from the back of the model, we use a reflector in front of the model to reflect the light on the face of the person. Then you can easily reach the light of the face, which is a normal exposure situation.


Choice of reflector

In the bright sun, you can use a white reflector to make the light soft, and in a cloudy day, you can use a silver or golden reflector to reflect more light.

In fact, you can also make your own reflector, using styrofoam board, silver paper, and cut into your own reflector.

Backlight photography is a commonly used technique. Appropriate application of reflectors or other light-filling equipment will make the shooting results have unexpected effects!

Basic Light Quality in Portrait Photography

Detailed Explanation of Basic Light Quality

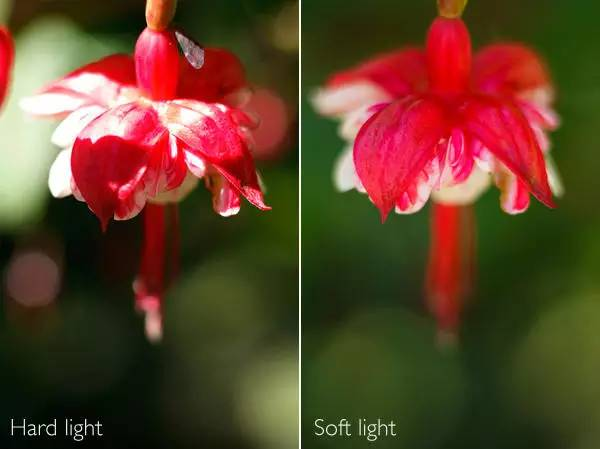
Different types of light play different roles in photography. From the characteristics of light, there are three types of light: direct light, scattered light and reflected light. The direct light and scattered light in natural light correspond to the hard light and soft light in studio photography, respectively. Next, we will introduce the characteristics and functions of direct light, scattered light and reflected light.

1. Direct light

In sunny weather, sunlight directly hits the subject without any occlusion, the light-receiving side of the subject will produce a bright shade, and the side that is not directly light-receiving will form obvious shadows. This kind of light is called It is direct light.

Under direct light, there will be a very obvious brightness contrast between the light-receiving surface and the non-glossy surface, so it is easy to produce a three-dimensional effect. Under normal circumstances, when shooting under natural direct light or hard light conditions in a studio, photographers often use reflectors to fill in the shadow of the subject to a certain extent, so that the picture effect will look more natural .

For beginners, if you don’t have a reflector and other photography accessories, you can use a whiteboard, white paper, or white clothes with strong reflections to reflect a certain amount of light.

2. Scattered light

When sunlight is blocked by clouds or other objects and cannot directly illuminate the subject, but can only illuminate the subject through an intermediate medium, the light will have a scattering effect. This type of light is called scattered light.

Because the light-receiving surface and shadow surface formed by scattered light are not obvious, and the contrast between light and dark is weak, the resulting picture effect is relatively flat and soft. For digital SLR cameras, when shooting objects in a scattered light environment, beginners can get very ideal results as long as they use the camera’s evaluative metering.

3. Reflected light

Reflected light refers to the light emitted by the light source, which does not directly illuminate the subject, but first illuminates the object with a certain reflective ability, and then illuminates the subject by the reflected light of the reflector.

The lighting properties of the reflected light are affected by the surface texture of the reflector. The light reflected by a smooth mirror-reflective object has the property of direct light, while the light reflected by a rough reflective object has the property of scattered light. In ordinary photography, the most commonly used reflective tools are reflectors and umbrellas. Especially in studio photography, photographers often use reflected light to make certain creations.
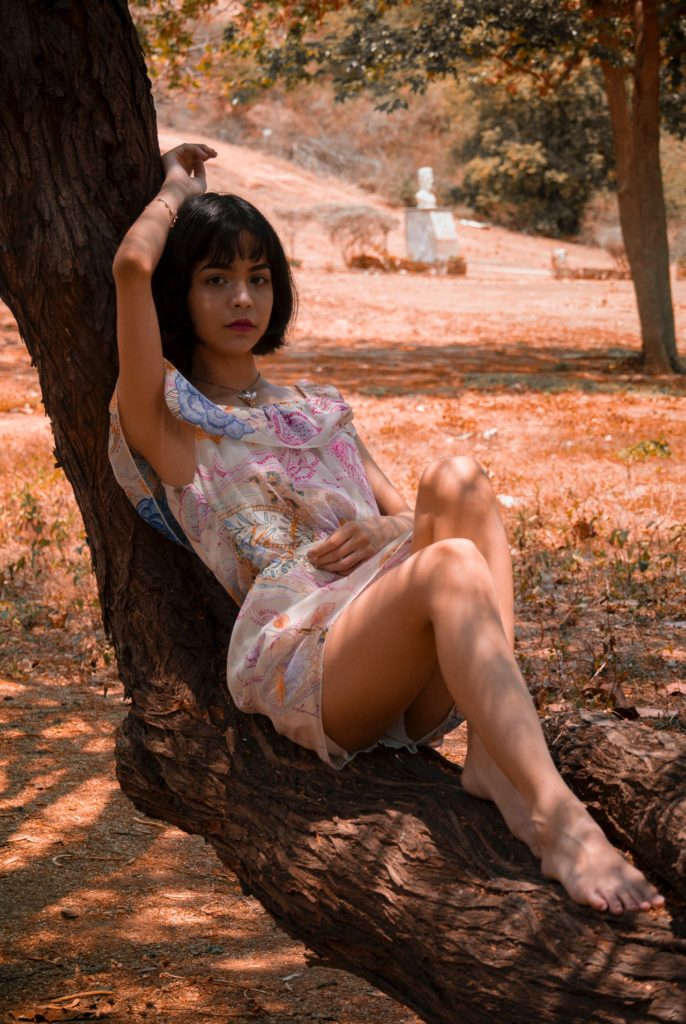
 

The Direction and Use of Photographic Light

In the process of shooting, the illuminating direction of the light is different, and the picture effect produced by it is also different. According to the different shooting directions, light can be roughly divided into: forward light, oblique side light, side light, back light, side back light and top light.

1. Forward light

Forward light is the most common lighting condition, and the lighting direction of the forward light is consistent with the shooting direction of the camera. Therefore, in actual shooting, the utilization rate of forward light is relatively high. Due to the direct projection of light, the light is evenly illuminated and the shadow surface is less, and the unevenness of the surface of the subject can be concealed, making the image of the subject more clear. However, forward light is difficult to express the sensitive level and line structure of the subject, which easily leads to a flat picture.

2. Oblique side light

Oblique side light means that there is an angle difference of about 45° between the photographer’s shooting angle and the irradiating direction of the light. Oblique side light has been widely used in landscape photography and architectural photography. When shooting with oblique side light, the shadow of the object will appear in the photo, which is helpful to increase the three-dimensional effect of the picture. But on the whole, the subject and most of the scenes in the picture are still within the range of normal light exposure, and the picture still maintains a bright tone. In this way, the control of exposure is relatively simple.

3. Side light

Sidelight means that the angle of light irradiation and the shooting direction of the photographer are basically at an angle of 90°. Sidelights are mainly used in photography creation where a strong contrast between light and dark or the contour of an object needs to be displayed in shooting scenes.

When using side light to shoot human subjects, it often produces the effect of yin and yang face. At this time, you can consider using reflective objects such as reflectors to fill up the dark areas of the face to reduce the contrast of light and dark on the face. When expressing individual characters or expressing the masculinity of men, photographers often use side light.

4. Backlight

Under backlight conditions, the photographer’s shooting direction is completely opposite to the light irradiating direction. The effect of photos taken under backlight conditions is completely opposite to that under forward light conditions. When backlit, there will be a great contrast between the subject and the background.

Since the light source is behind the subject, the light source will draw a bright outline on the edge of the subject. Some subjects, such as petals, leaves, etc., will be penetrated by light when backlit, making them more beautiful. However, photographers should pay attention to that, when shooting against the light, it is best to use a hood to avoid glare.

At the same time, if the subject is not filled with light, the effect of silhouette is likely to appear. At this time, the photographer needs to use the camera’s spot metering method to meter the subject, which is often easy to get a dark background. Of course, for beginners, if you are not sure how to expose in this environment, you can use the bracketing function of the digital SLR camera to get a more accurate exposure.

5. Side backlight

There is a 45° deviation between the side backlight and the light direction of the backlight. Compared with the backlight, the side backlight can bring a more obvious three-dimensional object and a more easily controlled shooting angle and method. Since the side backlight does not need to look directly at the light source, the photographer can more easily avoid the appearance of glare. At the same time, exposure control under side backlighting is easier than backlighting.

6. Top light

Top light refers to the light that forms a 90° angle with the camera from the top of the head. For photographers, it is very difficult for the top light to show the perfect light and shadow effect in the photo. When shooting landscape themes, the top light is more suitable to express the relatively flat surface of the scene. If the top light is used properly, it can also bring saturated colors, uniform light and shadow distribution and rich picture details to the picture. At the same time, for beginners, the metering of top-light scenes is relatively easy to master.

Categories
Studio Lights Education

6 Ways of Darkening and Backlighting

Basic Features of Dark-tone Backlighting

Compared with high-profile photos, the emotional color is more melancholic and heavy, and it can focus the viewer’s attention on the characters and emotions on the screen. In the autumn and winter dark-tone fashion film, the dark tones account for most of the picture, and the characters are in the bright area of the whole picture. This kind of expression is easy to highlight the characters in the picture.

Generally, when shooting, side backlight or backlight will be used as hairstyle or contour light. Separate the character from the background by highlighting the outline and hair of the character, making the spatial hierarchy effect stronger. Especially when shooting with a single lamp, the effect of side backlighting or forward backlighting is more obvious, which can prevent characters from blending into the background and weakening the sense of space of the picture. When the side backlight is used, it is mostly a hard light source, such as a honeycomb lamp, which can well control the range of light exposure.

Use Light and Fill Light

When shooting dark-tone backlight photos, try to use side light or side backlight as much as possible to create shadows, plus glow or contour light, so that the light casts a large area of shadow between the model and the camera. At the same time, the background is suppressed to create a low-key picture atmosphere, which can not only form a strong dark tone effect, but also show a moderate spatial level.

Metering

Whether shooting indoors with a flash or outdoors under natural light, considering the strong contrast between people and the background or backlight, it is recommended to use the spot metering mode when metering. Or use a light meter to measure the light and dark parts of the person separately to determine a more accurate exposure and light ratio.

However, the light meter gives only reference values, we still have to make appropriate adjustments based on actual needs, such as the light intensity, the distance between the light and the character, the distance between the character and the background, the intensity and distance of the fill light, etc.

Create a Dark Atmosphere in the Shed

Common light types and methods

  • Hard light

Silver reflector fill light

This kind of light is very suitable for all kinds of clothing products. When the silver reflector is used to fill the light, the reflected light is harder, which can well express the leather fabric material, giving people a hard feeling, and the light ratio can be controlled at 1:3.

TIPS: As the silver reflector is used, the reflection index is strong. The reflector should not be too close to the model to avoid damage to the backlight.

Aperture: f/5.6, speed: 1/160s, ISO: 100, focal length: 60 mm

  • Soft fill light

Top side backlight

In many scenes, because there is no transparent space behind, if you give a beam of backlight directly, the picture will appear blunt. So at this time, you can use the light with a standard cover to brighten the wall behind the character, and use the bounced light to render the character to form a top contour light. The light ratio is controlled at 1:5.

TIPS: The front only needs to be filled with light evenly.

Aperture: f/8, speed: 1/160s, ISO: 100, focal length: 45 mm

  • Backlight

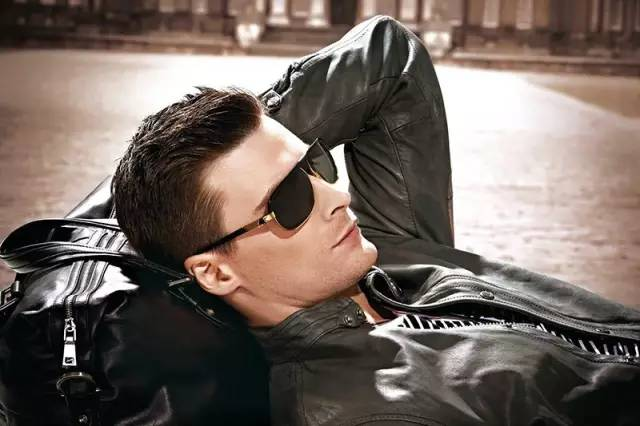
Leather clothing is very suitable to use side light or side backlight to express luster and texture. Note that the light ratio is controlled at 1:4.

TIPS: The bottom of the leather jacket can be filled with light properly, but it can’t destroy the light effect of the character’s face.

Aperture: f/5, speed: 1/125s, ISO: 100, focal length: 85 mm

  • Backlight fill light

When we use backlighting as the main light, remember to use reflectors on the front to increase the three-dimensionality and quality of the characters and clothing. The time ratio is controlled at 1:7.

TIPS: When the model has light hair color, the effect is particularly obvious. The front side uses a white reflector to supplement the eye light and dark details.

Aperture: f/5.6, speed: 1/125s, ISO: 100, focal length: 85 mm

  • Side backlight

This kind of light is suitable for all kinds of clothing, but due to the large shooting range, it is recommended to use a soft box, so that the light exposure range can be expanded, and the light hardness is more suitable. The light ratio is controlled at 1:6.

TIPS: Due to the large picture contrast and the large shooting scene, the model’s face and body are prone to uneven light. If you want to achieve uniform light, you must control the light more finely.

Aperture: f/8, speed: 1/160s, ISO: 100, focal length: 50 mm

  • Plywood light and backlight

This kind of light is more suitable for men and hard-wearing clothing types. Since the main light comes from the left and right sides and the rear of the model, the contrast of the picture is very large. When using this kind of lighting, it is difficult to express the emotions of the characters if the model’s eyes are not obvious. At this time, remember to use a large soft box on the front to supplement the eye light and highlight emotions. The light ratio is controlled at 1:6.

TIPS: When supplementing the catch light with the front softbox, it must not destroy the overall dark tone effect of the photo.

Aperture: f/8, speed: 1/160s, ISO: 100, focal length: 85 mm

The photography technique is often a layer of window paper, which breaks after a poke, but we still don’t have to hide our privacy. Working hard with you is very tiring, but we work hard to have the confidence to stay with the cause that we love most.

Categories
Studio Lights Education

Some Tips for Outdoor Portrait Shooting

13 tips for Outdoor Portrait Shooting

Nowadays, more and more people tend to go out of the indoor studio and shoot outdoors. Compared to indoor shooting, everyone is more willing to have an intimate contact with nature. The corners of the clothes that are raised in the wind, the feet covered with soil, the messy hair in the air… all these make the photos look more real and moving. Because there are many uncontrollable factors in outdoor portrait shooting, portrait photographers always face various unknown challenges when shooting.

Today, let’s take a look at 13 suggestions for improving outdoor portrait photography given by photographers, hoping to help everyone who is trying outdoor portrait photography.

Three simple points, as long as you do it, you can guarantee the quality of all the photos you take, including portrait photography, of course. That is proper exposure, accurate white balance and clear focus. These three basic shooting points, so far, I have not found a way to replace them.

  1. Choose the focus by yourself

When you select the camera’s autofocus option and let the camera help you select the focus point, your shooting will embark on a path that lacks originality. The camera’s autofocus function is usually designed to automatically focus on the object closest to the lens. Like my 1DS Mark III, it automatically selects the group as the focus point, and then calculates an average distance as the “best focus” among all the selected focus points, which is completely trivial. Therefore, you should choose the focus point yourself when you take a photo, because you are the final decision maker for your photo.

  1. Always focus on the eyes

The eyes are the windows of the soul. You will find that in any good portrait photo, the eyes are an element that cannot be ignored. Of course, the decisive factor that constitutes an excellent portrait is not only the eyes, but more importantly, the strong feelings that the eyes convey. Therefore, when you shoot, you should make the subject’s eyes the sharpest point in the photo. Moreover, when you use a large aperture to focus on the model’s eyes, the lens will blur the background and make your skin look softer and smoother.

  1. Use a large aperture to get a shallow depth of field

There are many reasons to buy a large aperture lens, the most important reason is that it can help us get a shallow depth of field when shooting. You can use F2.8 or F4 large aperture lens to get the soft natural light needed for portrait shooting, and it can naturally blur the background.

  1. Try not to shoot portraits with a focal length less than 50mm, use a focal length of 70mm or longer

You may always hear complaints about “why my face looks so big” from the subject. You should know that any focal length below 70mm will more or less cause distortion of the subject, although it will not be noticeable before it is below 50mm. Therefore, it is best not to shoot portraits with a focal length less than 50mm. The compression effect of using a telephoto lens can increase the degree of blurring of the background bokeh. Therefore, most of my portrait shots use a focal length of 120mm to 200mm.

  1. Shoot in RAW format

I have said this sentence more than a thousand times, and I will certainly say it tens of thousands of times. The RAW format is a compilation of unmodified data recorded by the camera’s sensor during exposure, and is the original digital source of the photo. When you shoot in JPEG format, it seems to be no different from using RAW format, but when you edit images, you will find that images shot in JPEG format are missing a lot of data, and RAW format images can allow us to be bigger Edit photos to a degree.

You can recall that when the camera’s white balance is set incorrectly, you have to spend a lot of energy and time trying to adjust the color cast afterwards. At this time, if you shoot in RAW format, you can easily save the photo because it allows you to restore the original color of the image.

  1. Carry a gray card with you to adjust the white balance

When you open Adobe Camera Raw or other RAW image editing software, there will always be an option in the application asking you to choose a custom white balance. It is usually a dropper-style icon. You can adjust the white balance of the image by clicking on the neutral gray that you think is correct.

Imagine you changed 4 scenes and took nearly 800 photos in one shot, but those photos were all taken with the automatic white balance set by the camera for you. There are 800 different white balance values ​​for 800 photos, which is simply a nightmare for the later stage.

If you can set the white balance with a gray card in the first shot according to your shooting theme in every scene, you will save a lot of time in later stages. As long as you open the photo you are most satisfied with in the post software, and then use the eyedropper to select the white balance, then you can synchronize the white balance adjustments of the rest of the photos, thus saving a lot of precious time. (If you plan to make better use of your time, the smartest way is to set the white balance every 30 minutes or as the light changes during shooting.)

  1. Avoid direct sunlight

Direct light is dazzling, it is easy to squint your subject, and produce thick shadows on the face. You can avoid shadows by not shooting under direct light. I have always believed that only soft light can portray the natural appearance of people, and proper exposure and correct white balance can make your photos more eye-catching.

  1. Be more careful when shooting on a cloudy day

The cloud layer is nature’s soft box, the appropriate thickness of the cloud layer can enrich the color of your photos, and refract unexpected light.

  1. Use reflected light

Learn to control the direction of light, use reflected light, and try to simulate the lighting effects of a photography studio. It is not a good idea to place the subject directly opposite the sun, unless you want a sharp silhouette. An effective method is to wait for the clouds to move to cover the sun, which can often produce a very obvious contrast effect.

  1. Use existing reflected light

For example, you can use a large white car nearby as a ready-made reflector when shooting, as long as it is not painted with a layer of off-white. (A color tone that can change the white balance of a photo.)

  1. Understand the F16 guidelines

You must have a correct exposure benchmark in your mind, especially when you lack metering tools on the scene. The F16 criterion is that when you set your camera’s aperture value to F16 under sunny conditions, the shutter speed will be the reciprocal of the current ISO sensitivity. For example, if your camera ISO is set to 100 and your aperture is set to F16, the shutter speed should be one hundredth of a second. In cloudy conditions (or when shooting in the shadows), you just need to use an F8 aperture instead. Of course, if you have a light meter or a gray card, it is best to accurately measure the exposure. (Note: The procedure of measuring exposure with a gray card is not the same as setting a custom white balance.)

  1. Bring a sheet and some clips from home

Do you have used old silk sheets in your storeroom? Go find it out. Of course, you can also choose to buy the cheapest white bed sheet. A king-size bed sheet can be made into a magical and cheap diffuser. The way the bed sheet becomes a diffuser for sunlight: wrap the edge of the bed sheet on a branch or rope to filter the direct sunlight, especially the light from directly above the subject. (Note that the bottom of the bed sheet is tied with a string of stones to prevent the bed sheet from being blown into your shot by the wind.)

  1. Don’t let irrelevant scenes into the picture

We have already said to keep the camera focused on the eyes of the person and let your mind focus on the overall idea of the photo. Wires, billboards, weeds, garbage, and sometimes even trees can disrupt the focus of people’s attention to the photo, so make sure the picture is tidy. The last and most important point: enjoy the whole shooting process, the emotions you indulged in the shooting will finally be reflected in the photos.

Shooting Skills Under Rainy and Cloudy Conditions

Clouds are indescribable. As we said before, they are like a huge blanket that can disperse the direct light of the sun, giving our photos richer colors and tension. In the same way, clouds can deceive you in ways you can’t imagine, allowing you to shoot with the white balance that you think is correct throughout the day.

When you are shooting on a cloudy day, the custom white balance is particularly important. Each photo has a completely different color, and each color depends on two factors. First, for different time periods, as most people know, white balance changes with the time of day. Second, you must consider the unknown reflections of the light before it hits the subject. Different reflected lights can form different colors.

Also, pollution is changing the color of sunlight minute by minute. Even though it is not visible to the naked eye, the camera can sensitively catch this change. On a cloudy day, pollution particles and tiny water droplets were suspended in mid-air. The prism formed by the sunlight passing through the water droplets will reflect light in multiple directions on the polluted particles. This is the reason why the light is complicated in rainy weather.

You know, light is everywhere, it is just spread, softened and dispersed. In a cloudy day, the sunlight still has directionality, and things still have a back light. Use the compass to find out the position of the sun, then press the shutter crazy with your back facing the sun!

Categories
Studio Lights Education

Photography Techniques for People and Portraits

Shooting in Direct Sunlight

Sometimes, it may not be easy to find usable shadows around. When shooting at noon, this is inevitable. But you can let the object create its own shadow.

Rotate the subject to find a good angle, so that the sun shines directly behind the subject’s head, so that the person’s face is naturally in her own shadow.

Rotating the subject to find a good shooting angle for shooting is not as easy as imagined. Using this technology will also make the subject’s shoulders and head areas appear too bright. To avoid shadows on the face, make sure that the person’s face is fully exposed.

It is best to use center-weighted metering or spot metering, and you can also use exposure compensation +2/3 aperture, or both.

It is also worth noting that direct sunlight falling behind the subject may cause the lens to shine. Therefore, it is necessary to properly shield the lens (translator’s note: you can use a hood) to prevent lens flare.

Let the child face the sun so that his face is completely in shadow, so that he can see his eyes and face. The ISO is 200, the exposure time is 1/640, the aperture is f/5, the exposure compensation is +2/3, and the white balance is set to shadow.

If the direction of light is not just the direct light from the top of the head, it is helpful to make good use of light from other directions according to local conditions to highlight the characters in the photo. When the light is low in the sky, it is a good choice as a backlight. The low light is projected behind the object, so that the edge of the object is surrounded by a touch of bright color.

The contour light makes the hair look very conspicuous, where the white balance is set to shadow and the ISO is set to 100. The exposure time is 1/320 second, the aperture is f/2.8, and the exposure compensation is +1/3 gear.

Such a scene is suitable for lens flare, but remember that the specific exposure must be for the face, otherwise the exposure is based on the hair, then the face may be underexposed. Setting up the camera to increase the aperture by 1/3–1/2 stops overexposing can be helpful.

Create Better Lighting

Above we introduced how to look at the light better to take an infectious photo, and then we will learn how to create your own lighting. With the help of a few gadgets and tips, you can create better lighting effects and further increase the spatial effect of light in photography.

In fact, in some types of outdoor photography, shadows can help create the contours of objects and produce some dramatic effects. However, in portrait photography, shadows should never appear under normal circumstances.

How ​​to Use Fill Light

To put it simply, fill light is fill light, in fact you are trying to add light to the shadows. If the contrast of light and dark on the face is too strong, it will usually seriously weaken the expressive power of the portrait. In fact, the problem of using a simple mirror can be solved. The light can be returned to the shadow through the mirror, thereby increasing the brightness of the scene, making the details of the face of the person clearly visible.

In fact, there are no restrictions on the reflective equipment, as long as it can reflect sunlight into the scene-a piece of white cardboard or white foam cushion, a cloth covering a frame, a person wearing a colored shirt, or It is a commercial reflector that can be used as a reflector.

Among them, the most popular reflective device is a floppy disk, which is available in white, silver and gold. The disk can be unfolded by a plastic frame. When not in use, the plastic frame can be folded and the disk can be placed in a small bag.

It may take some time to learn how to use the reflector. It is recommended that you find someone to hold the reflector or find a stand and clamp. The easiest way to use the reflector is to backlit the subject, and then aim the reflector at the subject’s face.

Keep the reflector under the light and move it around. In bright sunlight, it is obvious that the reflected light will hit the subject. In low light conditions, things may not be that simple.

Pay attention to the angle of the reflector and how to adjust the angle according to the position of the sun and the person. In some cases, the reflector is almost horizontal (it will be at a 180-degree angle to the ground), sometimes it is almost completely off the person, and sometimes it is directly facing the object. If you can’t see the light hitting the subject, first make the reflector face the sun, and then slowly rotate the reflector toward the subject. Generally speaking, between these two points (the sun and the object), you can find a point with the most ideal reflection effect.

In addition, by comparing the before and after use of the reflector in the scene, it will help determine the amount of light needed to fill the shadows. In many cases, if sufficient effects are not obtained, the reflector needs to be brought closer to the object.

The reflector material is different, the reflected light will also be different. The reflective effect of the silver reflector is much worse than that of the white reflector, and the reflected light of the golden reflector is relatively warmer. In the image above, you can see that a white reflector is used in an extremely backlit scene.

You don’t have to go outside and try it yourself, just think about the reflection effect of the golden reflector and the silver reflector. But if you want to test the real effect, you can wrap a piece of thick cardboard with tin foil and spray white or gold paint on one side. You can also go to a hobby store to buy a gold or silver matte board.

No matter which method you choose, you only need to spend less than $10, which is enough to show the reflective effect obtained by using other reflective materials.

Through a simple white cardboard, the light is reflected into the shadow of the backlit portrait scene. Exposure index: ISO is 200, exposure time is 1/250, aperture is f/5.6.

In some cases, the mirror only reflects a small part of the light, so that the light does not appear too monotonous. In addition, it also helps to maintain the exposure level so that the background is not too overexposed.

Even when the mirror is placed in a darker area, bringing the white mirror close to the subject will illuminate a small part of the scene.

How ​​to Use Fill Flash

At noon when the sun is shining brightly, turning on the flash seems unnecessary and unnecessary, but for a rookie, turning on the flash in all situations may be the best way to take good pictures.

When people are in a darker environment (especially under the sun), the shadow area can be filled with the help of flashlight, while ensuring that it will not cause any impact on the bright area. The flash just makes the exposure of the shadow area closer to the exposure of the illuminated area, and the exposure of the entire image is more balanced.

Sunlight shone on this woman from the left, casting his (her) eyes and half of his face into shadow. But if you put a flash on it, the shadows will “clouds and mists”. Exposure index: ISO 200, shutter speed 1/640 second, aperture f/4.

Today’s digital cameras, software technology has been quite advanced, the camera can fully automatically balance the flash and sunlight, so as to obtain the best exposure index. However, just a few years ago, photographers/photographers had to use charts and histograms to perform complex calculations based on factors such as flash subject spacing, ambient exposure, and flash output level; the fact is that the flash has entered the “settings” Good; don’t worry about the state of “no longer.”

The flash flashes. Within milliseconds after the shutter is released, the light-sensing element and the computer can accurately determine the light required for the correct exposure, and then make the flash fire accurately.

In addition, the use of flash fill for portraits can well add a little life to the characters. Even if the subject is in good light quality, it is okay to use flash fill on the subject outdoors. After turning on the flash, you can illuminate the face of the character, make the eyes sparkle with a smart light, and let the hair show some luster and soft shadows.

In the image, the exposure index is: exposure time 1/250 second, aperture f/5, ISO 100. The light meter gives the specific guide number, the flash accessory is set to TTL metering, and the flash exposure compensation is set to –1/3 to reduce the flash brightness.

During the day, when the light becomes weak, you can use the fill flash to light the object so that the object does not appear as a silhouette. The role of supplemental light is especially obvious when shooting against the light at sunset. In the image above, the daylight behind the subject is very bright, so the exposure index should be set according to the background to maintain the tone and color richness of the entire picture.

Using the flash in TTL mode can keep the flash brightness consistent with the background exposure brightness. If the subject appears too dark or too bright relative to the background, using flash exposure compensation can increase and decrease the size of the flash intensity.

Silhouette Lighting

Just like in a sunset scene, when the subject is placed in front of a bright background, the person will almost always appear as a silhouette when shooting. Sometimes it is necessary to use a little bit to fill the flash, as shown in the figure below. It is very important to set the index that allows the background to be correctly exposed. Manually set the exposure between the frames (Translator’s Note: metering scene and actual shooting scene).

In the above scene, the background sky appears too dim, and the shooting is based on its normal exposure value, and no details of the subject can be seen.

The brightness of a dark subject is very important. However, if you just blindly fill in the light to highlight the object, the effect is not ideal. In this case, you can use flash exposure compensation to set the intensity of the flash to –2/3 steps while keeping the exposure value unchanged.

To further ensure that only a small amount of flash hits the subject, manually enlarge the reflector to a long focal length In addition, the head of the flashlight should be tilted upward so that the light only hits the subject’s head.

When you use the camera to take a low-angle shot of an object against a dark cloud background, silhouettes will inevitably appear. Using a little fill flash can show the details of the shadow without sacrificing the dramatic effect of the image.

Flash Sync Speed

The flash sync speed is the shutter speed when the flash fires. In most cases, the fastest shutter speed that can be used with the flash is about 1/125 second or 1/250 second, but the specific speed needs to be determined by consulting the user manual. If the actual exposure time does not meet the flash synchronization speed, digital cameras equipped with built-in flash and special devices will usually not flash.

After the shutter is released, the first leaf (curtain) opens the shutter; the second leaf closes the shutter. Increase the shutter speed to the maximum flash synchronization speed. Within a fraction of a second of the shutter speed, the shutter curtain will be fully opened. At the same time, the shutter speed is the time from when the shutter is pressed until the flash fires.

If the shutter speed is greater than the fastest flash sync speed, the shutter curtain will actually start to close when the opening blade is not fully opened, thereby blocking the flash from entering the lens. This will cause black bands to appear throughout the image.

However, sometimes a slower shutter time is preferable, especially in the case of lower brightness. In most cases, when the sky gets dark, the camera’s default flash synchronization time is 1/60 second. This synchronization time may be destined to produce a very dark background.

By using manual exposure (but still keeping the flash set to automatic mode), the photographer can reduce the shutter speed to the desired speed to obtain the desired background brightness. But remember that as the shutter speed becomes slower, the camera shake will increase accordingly, resulting in blurred images. Some cameras allow you to set the default shutter time to any value in the open interval of “the fastest flash sync time to 1 second”.

Categories
Studio Lights Education

How to Take Good Natural Light Portraits

The Characteristics of Light

With the continuous improvement of the performance of software and hardware equipment, today, it is more and more meaningful to talk about how to take good natural light portraits. Natural light portrait is a big topic, this article only gives some valuable hints through a few excellent natural light portrait photography works.

The control of light has always been the core technology of portrait photography. Compared with the freely controllable lighting system in the studio, the characteristic of natural light lies in the word “natural”. You cannot control it, but you have the right to choose. Once you have mastered the essentials of selection, it is equivalent to indirectly controlling it and letting it serve your shooting.

how to choose? Obviously, we must first understand the characteristics of light quality. The rising morning light at dawn and the sinking light in the evening obviously have different light qualities, depending on the photographer’s hobbies and practical experience. Take the dimming evening light as an example. This light has a soft tone, rich in drama, and gives people a calm and deep feeling. It is the light that many photographers like. Be sure to pay attention to the transition between highlights and shadows, and don’t leave shadows with sharp edges on your face. If you are shooting in a wide space, it is best to find a place to block direct light.

There are several elements created on location, which have an important impact on light quality and deserve attention. Such as sunlight, fog, Tyndall phenomenon, and so on.

Light Direction

You should usually follow the direction of the light (not necessarily the standard frontal light, in fact, you often have to form a specific angle), try to change the angle to obtain different effects, and carefully control the shadows. Sometimes it is necessary to take some creative images, but in any case, you should avoid “dead black” on the model’s face-this can only bring discomfort to the viewer. Take backlit (including side backlight) portraits, try to use reflectors to fill the face with light. The key issue is that to try various angles, the distance and angle between the camera, the light direction and the model usually form a complicated contrast relationship. Only by practicing diligently can you find the right combination-of course there are many combinations.

Dramatic Light

We often hear the term “dramatic”. What does the drama of portrait photography mean? I think it lies in the action contained in the picture and the atmosphere of the movie lens version. The action is achieved by the photographer’s lens capture ability, and the atmosphere comes from the light control.

Natural light shooting cannot freely combine light, and at the same time you have to be aware that the light is changing at any time. This requires an accumulation of experience in light changes that are usually encountered, and the ability to predict and predict.

There are certain light effects that are a panacea for the dramatic atmosphere: backlight photography, contour light performance, and extreme silhouette shooting-all of which have the function of creating atmosphere, but not enough for drama.

It must be supplemented with action to make the drama truly manifest. Scene design, momentary capture, angle arrangement, and sensitivity to certain details are the key to filming theatrical elements.

Common dramatic light elements include: backlighting, dramatic effects brought by window light, and special visual beauty created by special elements such as shadows, contours, and silhouettes. Please observe the dramatic elements of the work.

Post Processing

The post-processing of natural light photography is particularly critical, because there are a lot of things you need to correct. Experts recommend that you try to use RAW raw data files to store data instead of JPG. The original shooting data retained by RAW, no matter in terms of exposure correction, color correction and latitude adjustment, there are these that cannot be effectively completed when processing JPG images.

In the initial stage of data processing, it is recommended to use raw data file processing software such as Lightroom to set the exposure and color to produce image files with minimal loss. After that, if you have further requirements, use tools such as Photoshop to adjust.

Photography Techniques for People and Portraits

When taking photos of people with lighting, it takes time and effort to take beautiful photos. Sometimes, it is inevitable that beautiful photos cannot be taken just because the lighting is not ideal. Always pay attention to the work scene, you may inadvertently find that the best light comes from a place you never expected.

Build Connections

Many photographers prefer to shoot objects like landscapes and flowers because the subject is still and easy to grasp. Human expressions are fleeting. When shooting portraits, the photographer’s goal is to show the essence of the subject vividly and vividly through the partial expressions of the subject.

When taking photos of people, lighting is important, but it is also indispensable to understand how to show the emotions of the subject. It takes time and practice to learn to work with portrait subjects. The photographer and the subject must respect each other, but the most important thing is to ensure that the subject remains solid and relaxed in front of the camera.

The photographer and the subject should have a cordial conversation. Even a few minutes is better than no communication. Explain to the subject what you are trying to express in the photo. What kind of emotion do you want people to have when they see the photo? What is the overall feeling of the photo?

By discussing the above things with the photographic subjects, it will help you to establish a better connection and thus better coordinate and cooperate in your work.

Aperture Priority

When shooting portraits and people, the first thing to consider is to set a larger aperture. Use a larger aperture (smaller aperture value), the resulting depth of field will be shallower, so that the object is more sharp, the background will become more blurred. In this way, the object will appear more and more completely different from the background, and the character will be more prominent.

When this photo was taken, the ISO was set to 200, the exposure time and shutter were 1/80 second and f/4. Because of the large aperture and the telephoto zoom lens set to 175mm, the background of fallen leaves in the autumn sky has completely turned into a fuzzy yellow carpet.

Using a telephoto lens or a compact camera that can zoom at close distances can create a bokeh effect in the photo. Another advantage of a larger aperture is that you can use a faster shutter speed for shooting, which better prevents the effect of shooting due to the movement of the subject. This is crucial when shooting young children.

It is helpful to use aperture priority in portrait photography. On the one hand, this can control the depth of field; on the other hand, the camera’s exposure meter can automatically control the shutter, making shooting faster. According to this, you can hope not to miss a beautiful moment. When the light is insufficient, be sure to monitor the shutter speed and ensure that the shutter speed is fast enough to prevent any blur.

Search for Open Shadows

Some people think that when shooting portraits outdoors, the “best by nature” lighting is natural, and there is no need to worry about it. This is as easy as going out for a walk. Is that really the case? In fact, it is not necessarily.

Generally speaking, the best lighting effect for portrait photos comes from the warm sunshine, and the bright sunshine is not beautiful. The soft light makes it easier to see more details of facial expressions, without covering the face with heavy shadows.

At noon, the biggest problem faced when taking photos of people is that direct sunlight on the head will cause strong contrast and shadows on the face. Direct shots will form shadows in the eye sockets, making people look like funny raccoons.

Even when it gets dark, the contrast between light and dark is usually very strong. At this time, half of the portrait is in direct sunlight, while the other half is in shadow, so half of the face will either turn white or sink into dark shadows.

In most cases, the softer light is not something you can meet but you can’t ask for it; you just need to spare a moment to look around and you can find it by your side. The light environment you are looking for is called an open shadow. Light haze, big trees or even the other side of a building can be ideal environments for creating open shadows.

When shooting under direct sunlight, people often squint their eyes. This is rarely the case when shooting in open shadows. When the subject is under the canopy of a big tree, the soft light shines on the person’s face, making people seem to be bathed in light from all directions.

Spot metering is used in the photo to get the normal exposure value of the little girl’s face. Exposure index: ISO is 200, aperture is f/2.8, and exposure time is 1/160 second.

In open shadows, there are a variety of metering methods. In most cases, the light meter is sufficient, but overexposing the aperture from +1/3 to +2/3 stops will greatly increase the brightness of the scene. In addition, for dark environments, ensure that the white balance is set correctly.

If the white balance is not set correctly, the captured images will often appear too blue. Using the correct white balance will not spoil rich skin tones. In addition, try to keep the subject as close to the edge of the shadow as possible, which helps to add more brightness and texture to the face.

Handle Darker Shadows

Under the same lighting conditions, exposure may be limited when shooting people in darker shadows (like shadows formed by buildings or large eaves). Using close-range metering can reduce the external background light entering the lens, which is a good way to get the correct exposure value.

Dappled sunlight (like the light spots created through the sparse foliage of a tree canopy) can be particularly difficult to deal with. The contrast of the spot needs to be reduced, but don’t reduce the brightness of the spot on the subject too much.

In an environment like the picture above, the most important thing to pay attention to is not to overexpose any small spot of light on the character, especially the light spot on the face.

Exposure compensation can be used if necessary, but generally speaking, a well-observed light position is sufficient. In this scene, the model can move, the light breeze can make the trees sway, and of course the sunlight also moves along the sky. Therefore, it is important to always pay attention to the position of the light.

Exposure compensation is set to +1/3 to ensure sufficient brightness for shadows and dark backgrounds. In addition, the photo was processed into a sepia tone using PhotoshopElements, adding a warm tone to the black and white image.

When the sky is slightly overcast (or cloudy), it may be very suitable for shooting people. At this time, the projection is mostly soft and straight light, and some very beautiful highlights may appear in it.

In this environment, make sure that the light is soft enough or can be adjusted so that shadows do not appear on the subject’s eyes.

It is very important to use center-weighted metering so that the bright sky can be excluded when measuring exposure.

Categories
Studio Lights Education

Photography Techniques-Composition Techniques in Negative Space

What is Negative Space

Photography is a subtractive art. In the face of a scene full of eyes, the more you want to express, the more difficult it is to express. It is a good way to reduce complexity. We can use negative space (blank) techniques to create.

Maybe you are preparing a photography project right now. Working on a photographic project really helps to improve one’s photographic skills. In this article, we will discuss a photographic technique-negative space in composition.

Negative space is a composition technique that can create attractive photos. As long as it is used properly, it can greatly improve the level of photos.

In a photo, there are 3 composition elements:

  1. Picture frame: Picture frame refers to the outer edge of the picture.
  2. Positive space: the subject of the photo, which is usually the area where the camera focuses.
  3. Negative space: the picture space except the subject, located between the positive space and the frame.

When considering composition, many people pay too much attention to the positive space and less consider the problem of negative space. Even if it is considered, it is often only noticed after the shooting. This method can only take second-rate photos. If it can be used reasonably, negative space can perform two very important functions:

  1. Negative space can help determine positive space;
  2. Negative space can assist positive space and strengthen the attractiveness of positive space.

Negative space helps determine positive space by arranging other details. For example, a photo may only take a part of a bridge. However, there are other details in the negative space that can be used to determine the specific location of the bridge. Is it in a downtown, a city park, or a forest? These questions cannot be answered in close-up photos. If the photographer still captures some landscapes, it creates a negative space where the positive space can be determined. Therefore, this photo is also better.

Making good use of negative space can enhance the photo, but there is one thing that must be avoided: negative space can never be more eye-catching than positive space, otherwise it will ruin the photo.

Emphasizing positive space is another function of negative space, because negative space can be used to control the audience’s attention. The way to achieve this is to direct the viewer’s gaze to the positive space, such as making the negative space lack details (which may lead to the risk of no details at all).

In short, both positive and negative space should be considered when considering composition. Both are of the same importance and should be treated equally. Doing this will help improve your shooting skills.

Negative space (blank) is not much in the composition of the picture, which does not mean the lack of overall aesthetics. In fact, negative space often adds more imagination and makes your photos more atmospheric.

In photography practice, when we find an interesting subject, we have to use various composition methods to express the prominent subject. Appropriate use of negative space will bring a more artistic effect.

To show characters in a landscape, the more you want, the harder it is to express well.

It is a good way to use the composition technique of “negative space” to “de-complicate and simplify”.

The content of negative space composition is not much, but it does not mean that the overall beauty is lacking, or the amount of information is insufficient. In fact, negative space tends to make the subject more distinct, the picture more artistic, and it can arouse the viewer’s infinite imagination.

Advantages of Negative Space Composition

In the practice of portrait photography, we always want to use a variety of composition techniques to express and contrast the characters. Appropriate use of negative space techniques to create will make the theme more vivid, the characters more prominent, and the picture more artistic, which can effectively evoke the composition. Its structure attracts the audience’s attention and triggers infinite associations.

  1. In a minimalist environment, highlight the characters and the artistic conception

The most common negative space composition often chooses a single tone and form of background, which can be fog, sky, water, grassland, land or other scenery.

  1. Clever use of environmental elements, do addition in subtraction

Purposeful selection of the picture, as far as possible to reduce the interference elements in the negative space, to make the negative space more “negative”, this is the main idea in the selection and composition of the scene, but this does not mean abandoning all environmental elements. On the basis of simplicity, selecting one or two representative and styling elements into the picture can better achieve the purpose of emphasizing people in the environment.

  1. Find the best location in a beautiful scenery

Could it be that negative space can only choose the background of a single element? Of course not, those vast and beautiful scenery are also suitable for negative space.

  1. Play space fun in negative space

White space is a major feature of negative space composition, but white space does not mean white space, and styling elements are also needed in negative space. In the dark negative space, use light to add elements, create an atmosphere, and create interest.

  1. Use lines to enhance the depth of negative space

Some people think that although the negative space composition highlights the characters, it reduces the environment to a lack of space. How to break this situation? The answer is-lines.

  1. Follow the light and use light to transform the negative space

In a dark environment, it is often easier to highlight bright elements. We can let light participate in the composition, use light to grasp the structure and hierarchy of the picture, simplify the complex, strengthen the key points, set off the characters, and express emotions.

Under the action of light, the lines can be highlighted and the structure can be more clear. For an environment that lacks a sense of structure, it can be transformed by the Tyndall effect of light to create a more three-dimensional, agile and dreamy negative space. It should be noted that in order to form a clear beam or line, two conditions must be met. The machine position must be in a backlight or sidelight position, and there must be dust, water droplets, smoke, fog and other particles in the air. Attention should also be paid to comprehensively considering the light receiving conditions of both light and dark, and control the contrast and the range of light exposure to achieve the ideal form of beauty and mysterious atmosphere.

Categories
Studio Lights Education

How to Properly Use Backlighting to Shoot Portraits

How ​​to Use Backlight Correctly

Sunshine is endowed with a symbol of beauty, but at the same time, it is a difficult problem for photographers. Especially the low-angle backlighting at sunrise and sunset often brings strong shadow contrast on the subject, resulting in a large difference in light ratio, and there are always many details in the light receiving and backlighting parts that cannot be taken into account.

Even with tens of thousands of high-end lenses, it is inevitable that there will be glare and auto-focus obstacles in the case of complete backlighting, which is even more serious for ordinary lenses. However, as long as it is used properly and combined with a good composition, you can also get beautiful effects when shooting against the light.

1. Metering a bright background without filling the foreground at all can get a contrasting silhouette effect and a good rendering atmosphere.

2. Use a reflector or flash to fill the foreground appropriately to get more details.

3. When shooting with backlight, it can produce dazzling contour light around the object, which strongly outlines the appearance of the object.

Try to avoid direct sunlight at noon when shooting portraits. But nothing is absolute, sometimes just when you think sunlight is quite unsuitable for shooting and you are ready to put away the camera, you can get some unexpected effects.

4. When shooting forest plants and other subjects that are easy to transmit light, you can adopt the backlight position, the illuminated subject will show a stronger texture, and the feeling of the light beam will make the picture full of mystery.

5. When there is severe halo in the lens, pay attention to the composition and slightly adjust the lens position to avoid the flare covering the subject.

6. Backlight shooting will affect the auto focus accuracy, you can switch to manual mode for precise focusing.

In terms of metering, it is recommended to use spot metering on the face and increase the exposure by at least one stop at the same time, because the metering on the face will not be very accurate when it is backlit, especially when shooting portraits with strong backlighting! If you want the photo to have flare, the lens must include the sun when framing the lens. At this time, focusing will be very difficult. At this time, using manual is a good choice. We recommend that the aperture value should not be too large, so as not to get too much sunlight and burn the sensor. It’s not worth the loss!

If you use a reflector to fill the light, do not let the light reflect from the bottom to your face, because the shadows formed by the strong sunlight obliquely hitting the face when shooting against the light will be very ugly. The correct way is to lift the reflector. Let the sun shine directly on your face from diagonally upwards, don’t doubt its feasibility, just try it!

7. Side backlight-looking for the beauty of light contrast

This photo is a good example of the dramatic contrast between light and shadow. It is not necessarily a good portrait if there is no shadow on the model’s face. Controlling the angle and range of the shadow is also a good portrait work. This feeling will be good at the same time. The atmosphere reflects the atmosphere at that time!


Key Points for side-backlight Shooting:

Use the warm sun in the afternoon and look for the presence of light and shadow. Use “spot metering” (higher light ratio) for focus metering, so that we can accurately grasp the correct exposure value when shooting. Use aperture priority mode (AV mode) to shoot and measure well The exposure value can also be adjusted in the cloudy white balance (high color temperature) by using the M file, so that the picture presents a warmer tone. Try bold composition and backlight shooting. Control the camera’s exposure compensation (+/-EV) in time, and use natural light and shadow to shoot portraits outside. , No specific shooting technique is required, just put the character in a light position and match the ideal angle, you will have unexpected gains! Try it when you are out shooting!

Use the flash cleverly when shooting against the light

In the case of strong backlighting, clever use of the forced flash method to fill light on the subject can make the protagonist of the photo look clear in the subject, with obvious contours, and more fashionable. If the weather is good, the reflected blue sky will be bluer. For example, in the daytime, you need to use flash fill light and enlarge the aperture to blur the background. If the flash sync speed is low, you need to use a neutral density (ND) filter to dim the lens.


This backlit photo uses flashing lights in the evening to cleverly make the sunset just right on the edge of the screen and form a strong warm and cold effect with the blue sky background, making the theme stand out and hard light dazzling. After turning on the flash, pay attention to the unity of artificial light and natural light. Often the background sunlight will be warmer and the flash output will be colder, so try to reduce the flash value, or use auxiliary equipment such as diffusers and reflectors.

Hair glow effect—When shooting with the light behind the subject, the best thing is that the subject will be surrounded by a halo. When light penetrates any translucent object, it will illuminate the person or thing.

In this photo, the sunlight is behind the subject. At this time, the model’s hair is bathed in sunlight. The high-speed TTL flash is used to fill the shadows of the model’s head, face and hair. The model’s face is exposed to normal exposure, and the soft sunset light lines give The whole picture creates a golden atmosphere, a great sugar water portrait!

Although photography is the art of using light, human thought is more important. This is like writing essays when you were a child. If you don’t know what the central idea of your essay is, then what is the use of gorgeous words? In addition, for photography, “feeling” is also very important, especially the touch of that moment.


Categories
Studio Lights Education

The Application Skills of Light Quality in Portrait Photography

The importance of light in the field of photography is self-evident. Light is the soul of portrait photography. In our portrait photography, with the illumination of light, the picture will produce light and dark levels, tones, lines and tones.

From the perspective of the characteristics of light, light is mainly divided into direct light and scattered light. Different types of light play different roles in photography. The direct light and scattered light in natural light correspond to the hard light and soft light in studio photography, respectively. Next, this section mainly introduces the application skills of light quality in portrait photography.

Direct Light

  1. Natural direct light

In sunny weather, sunlight directly hits the subject without any occlusion, the light-receiving side of the subject will produce a bright shade, and the side that is not directly light-receiving will form obvious shadows. This kind of light is called It is direct light. Under direct light, there will be a very obvious brightness contrast between the light-receiving surface and the non-glossy surface, so it is easy to produce a three-dimensional effect.

The direct light at noon is relatively abundant, the contrast of the scene is strong, and the tone is hard. It is suitable for subjects with strong and tough personality or subjects with rough skin. The effect is excellent. Shooting in direct sunlight, because of the strong light, we should use the fill light tool to fill the dark shadows of the characters appropriately.

The daylighting methods of direct sunlight are mainly side light, side backlight, and back light. The fill light tool can be a reflector, an electronic flash or an outdoor light.

Sunrise and sunset portraits are the best moments for photographers to shoot. At this time, the direct sunlight is relatively soft, and the picture will form a harmonious and rich tone and tone. Silhouette or semi-silhouette portraits can be represented in the expression technique.

  1. Hard light in the studio (direct light source)

Generally speaking, it refers to the formation of shadow light that can produce contrast between light and dark on the surface of the scene. The biggest feature of hard light is that it can produce clear shadows. The difficulty is to control the contrast of light and dark and the light ratio of the picture. But when shooting with hard light, the easiest way to control the light ratio of the picture is to use a reflector to fill in the light. This reflected light reduces the contrast of light and dark on the face of the person.

Indoor hard light portrait (direct light)

Hard light sources are very suitable for creating light and shadow effects. Light and shadow are an important means of rendering the atmosphere of the picture and shaping the mood of the characters. The light in the picture can infect the emotions of the characters. It is not only reflected in the portrayal of the characters, but also in the color tone, light and shadow Atmosphere. It is very important to use light to create the right atmosphere of the picture.

When using hard light to express portraits in indoor studios, due to the large contrast of hard light sources, we can also use auxiliary light sources or reflectors to transition to preserve the details of the dark parts as much as possible. At the same time, the intensity of the hard light source for auxiliary supplementary light must be weaker than Main light (commonly used accessories for hard light sources include standard cover, radome, beam tube, condenser, etc.)

Scattered Light

  1. Scattered light under natural light

When the sunlight is blocked by clouds or other objects, it cannot directly illuminate the subject. Any sunlight that is blocked by clouds, fog or tall buildings will illuminate the subject in a diffuse manner; the light will have a scattering effect, which This kind of light is called scattered light.

Because the light-receiving surface and shadow surface formed by scattered light are not obvious, and the contrast between light and dark is weak, the resulting picture effect is relatively flat and soft.

Cloudy, foggy, and rainy days are all soft scattered light. Because the light is flat, flash or reflector can also be used for auxiliary lighting when shooting natural light portraits to increase the brightness of the subject, improve the light receiving situation, and enhance the three-dimensional feeling.

When the outdoor sunlight is too strong, it is not suitable to shoot portraits under strong direct light. At this time, you can look for shade to provide good conditions for shooting. There is not only soft scattered light under the shade of the trees, but also mottled shadows that can add highlights to the picture. The rich type of light under the shade of the tree makes the picture very attractive. The scattered light is evenly irradiated on the model’s face, and the skin texture is perfectly reproduced.

  1. Soft light in the studio (scattered light source)

In artificial light, any light with direct light properties is added with astigmatism material (soft cloth, reflective umbrella, gauze, curtain, etc.) to illuminate the subject after it is blocked, which belongs to scattered light illumination.

Under the scattered light illumination, the light ratio of the subject is small, the contrast is small, the tones are soft, and the layers are rich, which can express the texture of the subject’s skin very delicately.

Sunlight entering through the window is generally scattered light. Its characteristics are: the lighting area is large, and it is soft and uniform, which can not only reproduce the rich layers and texture, but also can better express the three-dimensional feeling. It should be an ideal choice for shooting indoor portraits. The natural light thrown into the window affects the bright surface of the subject. The reflection intensity of indoor walls, floors, furnishings and other reflective surfaces directly affects the dark side of the subject, that is, the shadow part, which also determines the light ratio of the person.

Soft light can highlight the texture of the character’s skin and make it whiter and more transparent. Indoor studio soft boxes, soft walls, reflective umbrellas, etc. can all be used as light softening devices. The light ratio control of soft light should be controlled at around 1:2-.

Learn to Use Light in Photography: the Magic of Soft Light

Many beginners think that the best way to take pictures is to take pictures on a sunny day. Of course, there will be blue sky and white clouds when shooting on a sunny day, which is very suitable for landscape photos, but for other shooting subjects such as portraits, flowers, buildings, etc., it is different.

In these shooting subjects, “soft light” is the kingly way. Soft light can eliminate shadows, highlight the details and true colors of objects, and make the sensor of the digital camera perform its best, keeping the light and shadow within the acceptable dynamic range, that is, there is no over-brightness or over-darkness. .

Method of Creating Soft Light

To produce soft light, we can refer to the following methods:

  1. Shoot in cloudy weather

When it is cloudy, the sky seems unsightly, but in fact, the clouds are like a large reflector that softens the sunlight, which is useful when shooting portraits or buildings.

  1. Use white reflectors

Sometimes shooting in strong sunlight, we can put the white reflector on top, let the subject in the shadow of the reflector, forming a temporary soft light area.

  1. Use flash with soft box

To shoot at dusk or at night, use a flash with a soft box to make soft light. Especially used when shooting portraits.

On the comparison between this flower under “hard light” and “soft light”, the flower under soft light can present a more comfortable effect.

In addition to flowers, you should also try to use “soft light” when shooting close-ups of small objects to make the details better:

Of course, using soft light when shooting portraits can avoid strong shadows and highlight the beauty of portraits. Unless you want to use shadows for special effects, or want to take “calendered” photos, then shoot in the sun.

Categories
Studio Lights Education

Photography in Various Light Conditions_Part III

Indoor Natural Light Photography

The change of indoor light is complicated. Outdoor weather conditions, the height of the house, the size of doors and windows, the number and orientation of doors and windows, the distance of objects from doors and windows, the color depth of indoor walls and furniture, and whether there are tall trees and buildings outside doors and windows will affect the light receiving of the subject. The above factors should be comprehensively considered when shooting.

Characteristics of Indoor Light

  1. The light is soft but the illumination is uneven.

Indoor light comes from doors and windows. Although it has a certain directionality, it is scattered light rather than direct light, so it is softer than direct sunlight. The distance from the door and window, the change in the amount of light received by the scene is different, not as uniform as the light under the shadow of a sunny day outdoors.

  1. The difference in light ratio is large, and the contrast is extremely strong.

The light-receiving conditions of the light-receiving parts and shadow parts of the scene are quite different, sometimes exceeding the tolerance of the photosensitive film.

  1. The brightness changes greatly.

As the distance between the scene and the doors and windows increases, the brightness of the scene decreases sharply.

Precautions for Indoor Natural Light Photography

The above-mentioned characteristics of indoor natural light put forward special requirements for shooting.

  1. The contrast of the scenery should be effectively controlled. Reflectors are often used to fill in the shadows, or flashes are used as auxiliary light.

When using the flash as the auxiliary light, the brightness of the flash should be controlled, and the flash should not be too strong, which will destroy the effect of indoor natural light, and the film will be out of the atmosphere of indoor natural light.

  1. The brightness of indoor natural light is very different from outside light, and the naked eye sometimes cannot get the correct amount of exposure. It is best to meter the light to determine the exposure. When there is no metering equipment, the principle of exposure should be more than less, so that the photosensitive film can be fully exposed.

The human eye is very adaptable to light, and it often overestimates the brightness of indoor light.

  1. Effective use of tripod and slow shutter

If the shooting scene is static, you should fix the camera on a tripod and use the slow door for long-term exposure to record the strong scene atmosphere of the indoor natural light.

  1. Avoid direct sunlight shining on the subject through doors and windows.

The difference in brightness between direct sunlight and indoor light is too great, far beyond the latitude of the photosensitive film, and cannot accurately record the gradation and tone of the scene.

Use of Flash in Photojournalism

As early as the 1970s, electronic flashes with high luminous intensity and compact size were developed to work in sync with cameras. However, the opinion that flashing lights destroy the news scene has always existed in the photojournalism community. Many photographers try to shoot without flash.

The unreal and unnatural causes are not only related to the flash, but also related to the photojournalist’s light-using skills.

Photographers must be aware of the pros and cons of flash. In many environments, it is impossible to obtain ideal photos without flash. In addition, using flash on certain occasions can improve the visual effect of the picture and even take some interesting pictures.

Note When Using Flash:

  1. Guide number

It is clear that the guide number of the flash used, that is, the intensity of the light emitted by the flash in an instant, is set during the design and production of the flash.

  1. Flash distance

Consider the aperture size and flash distance to determine the exposure value. The light intensity of the flash changes with the distance, the distance between the flash and the subject increases, and the degree of light attenuation is the reciprocal of the square of the distance.

  1. Choose the shutter speed

When using flash in photojournalism, first pay attention to choosing the shutter speed.

In order to ensure that the flash fires exactly at the moment the shutter is opened, the shutter speed and the synchronization speed of the flash must be coordinated. For example, high-speed flash can freeze the athlete’s momentary actions in sports photography, and photographers don’t have to worry about shaking the camera to take unclear pictures.

Tips for Using Flash:

Correspondingly reducing the shutter speed can increase the exposure time of the film and compensate for the exposure to natural light. Combining the flash and slow shutter speed to shoot moving objects, it instantly freezes the movement of the subject while adding a sense of movement to the subject.

The second is to avoid direct light from the front. Use reflective lighting, or clip a white cardboard or diffuser that diffuses the light to make the light soft.

The flash light from the top or side of the camera will give direct light to the subject, and the strong shadows produced by the background will often ruin the picture.

The top light will produce unsightly shadows on the subject, and the use of flash as an auxiliary light source can eliminate the annoying shadows on the subject.

The flash can be used as a supplementary light source when the light is insufficient, but the shooting effect of the built-in flash or the external on-camera flash is not very good. Close-up shots of people will definitely appear to be too bright, causing overexposure of the face, and other problems.Portable Studio Lighting

For example, using flash for close-up portrait photography may also produce some purple fringing and red eyes, making the final photo effect unnatural.

Therefore, when shooting under bad lighting conditions, you can consider using a larger piece of white paper or foam board as a reflective fill light. The effect is much better than using the built-in flash to force the flash. Or combine the performance of the current digital camera to increase the sensitivity and shoot directly without a flash. So choose a scene with better light, and directly use the digital camera to turn off the flash to shoot, you can get a pretty good picture effect.