Categories
Studio Lights Education

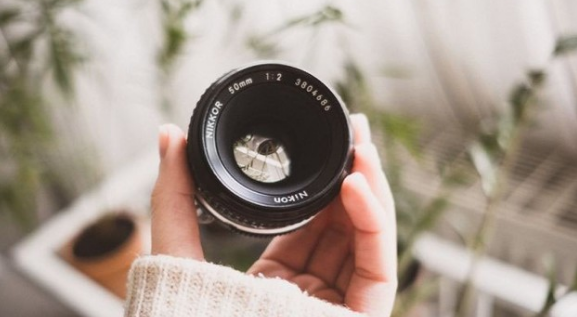
What is the Best Aperture of the Lens

I believe many people have heard that “it is best not to use the maximum aperture of the lens when taking pictures to avoid loose images. If the aperture is closed too small, the image will be reduced.” And within a certain aperture range, the image of the lens is drawn. The quality is the best, and this aperture range is called the “best aperture”. So how to master the best aperture range of the camera lens?

Aperture Series

To understand the aperture, actually imagine it as the pupil of the eye, and adjust the amount of incoming light through different aperture values. The aperture size actually refers to the size of the camera’s aperture hole, which is often expressed in numerical values such as f/1.4, f/2, and f/2.8. The smaller the number, the larger the aperture. Usually we adjust the aperture step by step, the common full-level aperture values are f/1.4, f/2, f/2.8, f/4, f/5.6, f/8, f/11, f/16, f/22 and f/32.
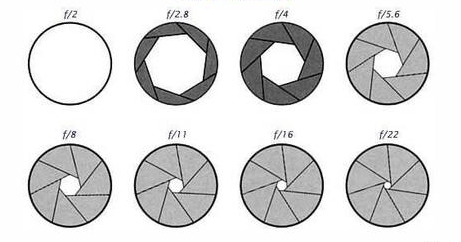
The relationship between the adjacent positions of these gears is a multiple of two.

Some cameras add one or two small gears between these adjacent gears, as we often say, increase 1/3 gear, or 1/2 gear, and so on.

Best Aperture

Each lens is different. Depending on the optical design of the lens, we generally think that an aperture 2-3 stops smaller than the maximum aperture is the best aperture for this lens.

For example, the EF 16-35mm f/4L IS lens in Canon’s “Small Three Elements” lens has the best aperture value, which may be between f/8 and f/11. For some fixed-focus lenses, such as the 50 1.4 lens, the aperture with the best image quality may be between f/2.8-f/5.6.

Of course, this is only a theoretical value, and there will be some differences depending on the optical design of each lens, but it is generally within this range.
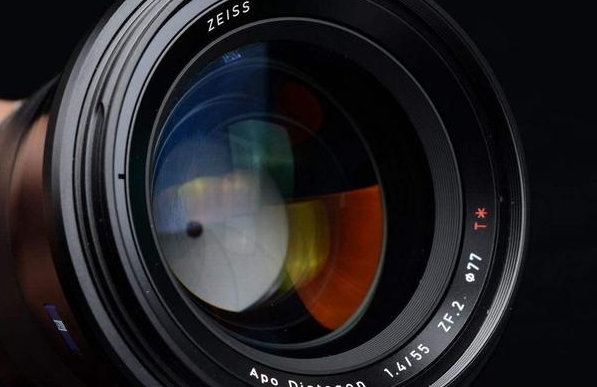
The best aperture of the lens

​ But should I use the best aperture for all photos? That’s not necessarily. Sometimes when shooting portraits, you will pursue a large aperture and shallow depth of field, so you may have to abandon part of the image quality in exchange for a shallow depth of field, so you have to choose the appropriate aperture value according to the shooting needs.

Large Aperture

  1. 1. Shallow depth of field-highlight the subject and increase the level of the pictureA large aperture can bring a good blur effect, that is, the effect of a small depth of field, which is often used when shooting portraits.

    ​【Common applicable subjects】: portraits, sketches, (part of) still life

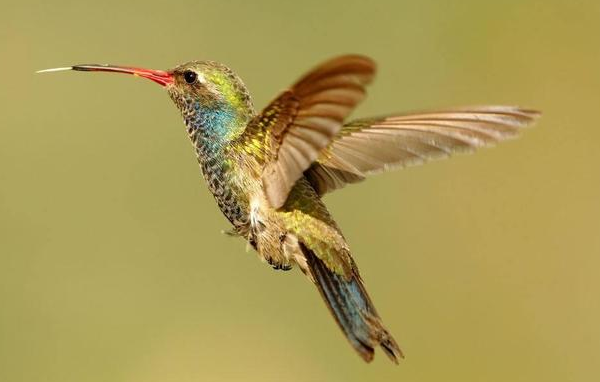
    2. High shutter-condense the high-speed momentUse of high-speed shutter for bird photography

    【Common applicable subjects】: Sports photography, animal photography

    Although a large aperture is good, try not to open the aperture to the maximum limit, because it is easy to cause the loss of light at the edge of the lens in the lens, causing the picture to produce vignetting, scattering and other phenomena, resulting in a decline in image quality. Or cause out of focus, causing the focus of the picture to deviate.

    Small Aperture

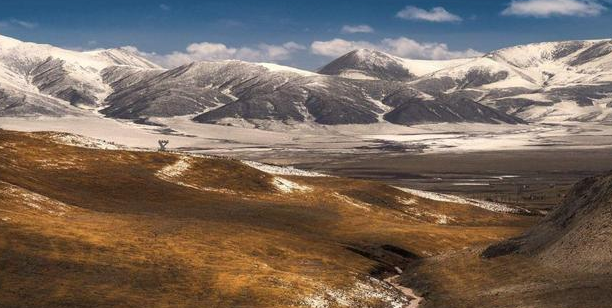
    1. Large depth of field-both distant and close views are clearA small aperture can bring a clear picture, which is often used when shooting wind and light.

    【Common applicable subjects】: landscape, architectural photography

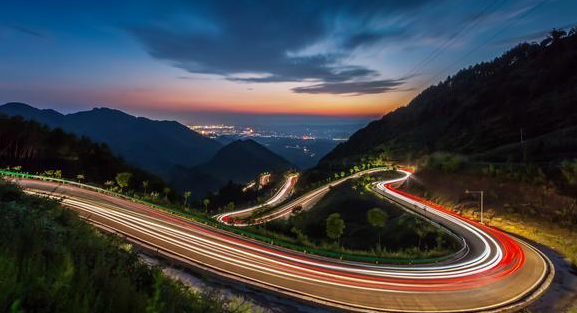
    2. Low-speed shutter-keep the movement track and show the dynamic feeling of the pictureLight track photography

    [Common applicable subjects]: slow door scenery, light track photography, light painting

    Although closing the aperture by 2-3 stops, the optical performance will be better than the full aperture, but this does not mean that the aperture is minimized, and the image quality is the best. Generally, we will only close the aperture to f/11. If we narrow the aperture value, diffraction will occur. This is because the aperture diameter is limited, the aperture exceeds the physical limit, but the optics will drop, causing the image to become loose and hazy.

    The comparison of the same lens at f/8 and f/22 shows that if the aperture is closed too small, diffraction will occur and the photos will be loose.

    In addition, when facing some point light sources, different apertures may have different effects. When using a large aperture, a strong point light source (such as the sun or light) will form a glare on the surface of the lens and cause flare in the picture, and when using a small aperture, the point light source will emit star rays. The number of astral rays is related to the blades of the aperture, the number of rays is equal to the number of blades for even-numbered blades, and the number of rays is equal to twice the number of blades for odd-numbered blades.In fact, what we have to make clear is that the best aperture of the lens does exist, and under that aperture, the best performance image quality of this lens can indeed be taken. But this is only a technical theoretical best. After all, content is the key element that affects the quality of a photo, and image quality is just a basic carrier. When shooting, these are just one of the aspects you need to control within a few millimeters.

    Reasonable Use of the Best Aperture Value of the Lens

    When we are shooting, we often encounter such problems in some places: using a large aperture to make the blur beautiful, but the focal point will be a little soft, and there will be entanglement such as dispersion. According to the habits of everyone, the answer may be different, but the answer that may be generally obtained is: just close the lens aperture by one stop. Because every lens has an optimal aperture, under this aperture, the picture quality of the lens will be the best, not the bigger the better, and the smaller the better.
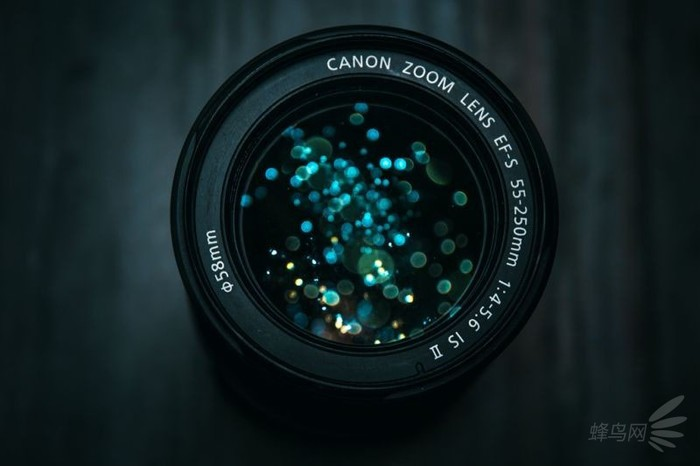
    But the best aperture of this lens does not necessarily mean the best aperture for the scene. Many times we will fall into a rigid mindset, thinking that we must use the best performance. But in fact, the optical design of modern lenses has been done very well. Although the lens has the best aperture value for image quality, it is actually difficult to distinguish the performance in other aperture values by our naked eyes.
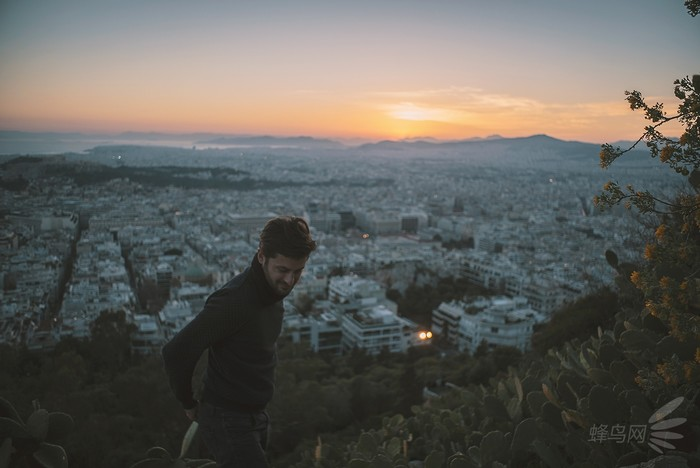
    A large aperture is used to shoot images with shallow depth of field. For example, when we need to highlight a shallow scene, we need to use a large aperture to focus on the foreground, so that the background will be blurred. And when the ambient light is very weak and we don’t want to use a long exposure, we also need to increase the amount of light by opening the aperture to achieve the purpose of exposure balance.

    However, the limitation of using a large aperture is that the focal plane in the picture is too narrow, and the picture quality will be reduced, but these are acceptable in emergency situations. Because sometimes it’s more important to get a good shot than a good shot, or the atmosphere under a large aperture is more important than the image quality.

    The main reason for choosing a small aperture is to expand the focal plane as much as possible so that everything in the landscape is within the focal range. Another point is that when we need to shoot long exposures, a small aperture helps to reduce the amount of light, so that we can use a longer shutter.

    But despite this, the aperture is not as small as possible. In addition to the factors of the best aperture of the camera mentioned above, if the aperture is too small (f/16 and below), the diffraction effect of the photoreceptor may occur, which will affect the image quality.
Categories
Studio Lights Education

Common Exposure Techniques for Portrait Photography

If you want to elaborate on the lighting of portrait photography, you can make a separate book. Because different directions and intensities of light will produce different picture effects.

Today we will briefly introduce several common or commonly used exposure and lighting methods. On this basis, everyone can learn from each other and create their own style of lighting methods for portraits.

Accurate Exposure is the Basis

Taking portrait photos, accurate exposure is the basis. What does it mean?

That is to say, to take portrait photos, first of all, we have to clearly present the people we want to take in the picture through the camera in our hands. The picture will not show a large area of darkness due to underexposure, nor will it show a large area of bright white due to overexposure.

The characters in the picture are moderately light and dark, and the details can be clearly presented. To achieve this effect, it can be said that it is a portrait photo with accurate exposure.

Of course, due to some special needs, we will also shoot portraits that are underexposed or overexposed, which will be discussed later.

Accurate exposure of the portrait photo, the face of the character is moderately light and dark, and the details of the skin can be clearly presented. Focal length 50mm, aperture f/3.2, shutter 1/160s ISO100

Appropriate Overexposure Makes People’s Skin Fairer

For us yellow people, fair skin is definitely a very important criterion for judging whether a woman looks beautiful.

The so-called “one white covering one hundred ugliness” means this. For portrait shooting, proper over-exposure can make people’s skin appear more white and tender.

Therefore, in order to make the beauty of the beautiful woman’s skin look better, you can choose to overexpose a little bit. If the initial shooting does not achieve the desired effect, it is easy to adjust the exposure in the software later.

Properly let the exposure a little, the skin of the model’s face appears fairer. Focal length 50mm, aperture f/2.5, shutter 1/160s ISO100

Underexposure Creates a Unique Atmosphere

When taking portrait photos, in addition to taking regular normal exposure photos, sometimes in order to express a special mood and create a unique atmosphere, you can also take underexposed photos.

If the picture is underexposed, the overall effect will be dark and low-key. Portrait photos with this effect will give people a mysterious, cold, and secluded feeling.

The underexposure gives the overall picture a low-key effect, giving a sense of mystery. Focal length 140mm, aperture f/2.8, shutter 1/500s ISO2000

Backlight Shooting Portrait Silhouette Effect

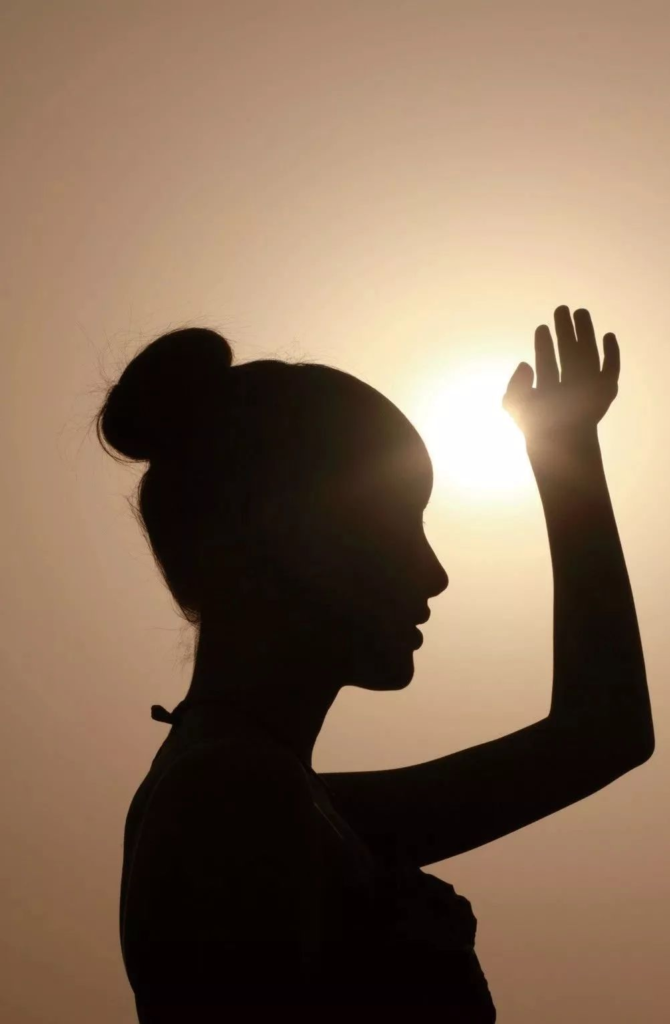
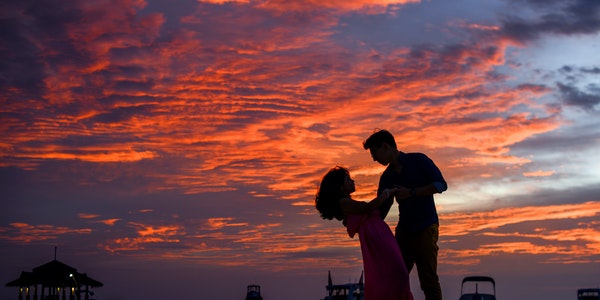
When shooting a portrait in a backlit environment, if the subject is severely underexposed, it will appear in a silhouette state, which is also a way of expression often used in portrait shooting.

To shoot wonderful portrait silhouette photos in a backlight environment, you must first choose to shoot in the early morning or dusk. At this time, the angle of the sun is very low, the intensity of the sun’s rays is not strong, and the color of the sky at this time is also the most charming of the day.

Therefore, to shoot portrait silhouettes, you must first choose the shooting time.

In the actual shooting, in order to make the silhouette effect more obvious, you need to adjust the camera’s metering mode to spot metering. Then the light is measured for the brightest area in the background, so that the brightest part of the photo can get the correct exposure, while the main character will be suppressed, showing a clear silhouette effect.

If the silhouette effect is still not obvious, we can further darken the picture by reducing the camera’s exposure compensation to make the silhouette effect more obvious.

In addition, because the silhouette of a portrait can only show the silhouette of the person, the pose of the person must be graceful when shooting, and try to choose the angle that is the easiest to show the beauty of the person’s silhouette, such as the side.

If there are a lot of people being photographed, you can use the silhouette effect to interpret the relationship between the characters, or let the characters pose in various poses to make the shape of the silhouette more exciting.

Shooting the side of the model, even if it is a silhouette, can make the outline of the model’s facial features clearly presented in the picture. Focal length 85mm aperture f/19 shutter 1/500s ISO125

Main Light Positioning Work Style

In the studio portrait photography, the key light is the important light source that we need to determine first.

The intensity, position, and angle of the main light often determine the style and tone of a portrait work. For example, when we need to shoot high-key style works, the light intensity of the main light is usually stronger, and the angle with the model is smaller, so that even and sufficient light can make the picture brighter.

When we need to shoot portraits with a strong sense of three-dimensionality, the main light is often on the oblique or front side of the person. Such a light angle can bring a clear contrast between light and dark to the picture, and make the three-dimensional sense of the picture more prominent and clear.

In the picture above, I arranged the main light at a 45° angle obliquely in front of the model, and the attachment is an octagonal softbox with a diameter of 140cm. The height of the main lamp is about two ends higher than that of the model, so that the light covers the characters evenly. Also set the aperture to f/11. (Focal length 50mm shutter 1/125s ISO100)

Since only one main light is used for shooting, and no reflector is added, you can see that the model’s left face has obvious shadows, which can make the face look three-dimensional and increase the sense of mystery.

The Auxiliary Light Reflects the Details of the Work

If the main light determines the overall style and tone of the photo, then the biggest role of the auxiliary light is to solve the problems left by the main light.

The main function of the auxiliary light is to supplement the lighting of the shadow area of the picture, presenting more dark details. Therefore, the light intensity of the auxiliary light is usually lower than that of the main light, so that the picture can show a clearer and moderate contrast effect of light and dark, and highlight the three-dimensional effect of the picture.

From the picture above, we can see that the main light is in the direction of the model’s right face, and the attachment is an octagonal soft box with a diameter of 140cm. (Focal length 50mm aperture f/11 shutter 1/125s ISO100)

In the direction of the left face, a 1m×2m foam reflector is used as an auxiliary light, which makes the light transition from left to right in the whole photo more natural, and the left face has only a small shadow. The overall picture is transparent, the hair has more details, and the skin will look fairer.

Background Light Makes the Characters Jump Out of the Screen

In portrait photography, the main function of the background light is to separate the main character from the background and make the character more prominent and clear.

It should be noted here that the background light is usually used in a dark background, and the light background should not be illuminated by the background light as much as possible, otherwise the background will be too bright.

The placement of the background light also has certain skills. When the light source is directly facing the background, a circular light gradient will appear behind the character that diffuses from the center to the surroundings. And when we let the background light source and the background present a certain angle, the background light behind the character will show a certain angle of gradual effect.

The addition of background light enhances the sense of space in the entire work. Focal length 120mm, aperture f/22, shutter 1/125s ISO100

In the picture above, we can see that the background light is arranged directly in front of the dark background. The light source uses a round hood, and behind the model there is a round light effect that diffuses from the center to the surroundings.

At the same time, because of the appearance of the background light, the model in dark clothing is well separated from the dark background, and the three-dimensional picture is enhanced.


Hair Glow Makes the Hair Transparent and Layered

Hair glow refers to the special effect of making the character’s hair brighter and more textured through the illumination of the light source. Under normal circumstances, top light, backlight or side backlight is the best angle to make hair glow.

The main light or auxiliary light can complete the manufacture of Hair glow. Backlight or side backlight is to arrange the main light or auxiliary light directly behind or behind the person.

It should be noted that this arrangement needs to properly fill the shadow of the model, otherwise it will leave a very obvious shadow area on the model’s body, which will seriously damage the details of the picture.

The top light means that the main light is arranged at a higher position above the head of the character, covering and illuminating from the top to the bottom.

Such a light source is similar to simulating the sun’s rays, and the model’s hair will have a very clear and bright effect due to the illumination of the top light.

This lighting method can make the model’s hair form a beautiful golden color. Focal length 120mm, aperture f/4.3, shutter 1/125s ISO100


In the above figure, a main beam is used to illuminate from a 45° angle of oblique square, and the attachment is a 140cm diameter softbox. Arrange a light emitting light on the diagonal of the main light for shooting, and the accessory is a 35cm×140cm narrow soft box.

Raise the height of the lamp holder to the highest, forming an oblique angle, and illuminate the model’s hair to form beautiful highlights.

Feather Light Shooting Dignified and Generous Style

When shooting a dignified and generous style, we should try our best to ensure that the light is soft and even. Strong contrasting light tends to produce intense and emotional visual effects, so avoid using side light, side backlight and backlight as much as possible.

Front light or feather light (part of the light on the edge when the light is illuminated) is our best choice.

Under normal circumstances, a single light + reflector can complete this type of subject shooting. Of course, if we want the picture to have richer light and more prominent picture effects, we can appropriately add a light source. But don’t increase the light source too much, too much light source will bring cumbersome and complicated visual atmosphere to the picture.

With this lighting method, the overall model looks dignified, gentle and beautiful. Focal length 50mm, aperture f/1, shutter 1/160s ISO100

In the above picture, a flash is used as the main light source, and the overhead light holder is used. The accessory is a 120cm octagonal softbox, placed on top of the model’s head, but not overlapping the model’s head, so that the light is evenly irradiated from the front of the model’s face.

Add a 1m×2m foam reflector on the left and right sides to eliminate the shadow on both sides of the model’s face, but the shadow on the chin should be preserved to make the model’s face more three-dimensional. The whole picture feels pure and simple.

Taking Sweet and Soft Magazine Style

The feeling of the soft magazine style is: soft light, fresh and beautiful colors, and the characters are sweet and pleasant. Generally, the choice of accessories should be considered when arranging the lights, and the soft box is the best choice.

Compared with the tough style of European and American magazines, when shooting soft and sweet styles, we will arrange the main light directly in front of the model, so that the light can also form beautiful highlights on the hair.

Use a larger softbox as much as possible, generally you can choose a size over 140cm, so that the light will cover a wide area and there will be no dark corners on the background paper. When shooting, both the front and the side can be shot, and the model has a large range of activities, which is more conducive to shooting.

The model can choose a slightly softer posture, and the expression is mainly soft.

When shooting soft-style portraits, you can choose a fresh and bright light blue. With the sweet smile of the model, the work looks very soft and beautiful. Focal length 90mm aperture f/8 shutter 1/125s ISO100


In the above picture, a flash is used as the main light source, and the attachment is a 140cm soft box, placed directly in front of the character, and the height is about two ends higher than the model. The model is very close to the background paper, only a few centimeters.

Because it is a soft box, there are moderate soft and hard shadows underneath, and the whole photo feels very soft and beautiful.


Win-win for Texture and Detail

When shooting portraits in the studio, the choice of accessories can be determined according to our needs.

If you want to shoot a style work between Japanese magazines and European and American magazines, it feels harder than the Japanese style and softer than the European style, we can choose to use a 140cm octagonal soft box + two reflectors plate.

In this way, the details of the photo are more, and the texture of the picture is more moderate.

This lighting method can make the face of the model delicate, but without losing the texture, it can be described as both texture and detail. Focal length 70mm, aperture f/11, shutter 1/125s ISO100

In the above picture, a main light is used in front of the model, and the attachment is a 140cm octagonal soft box. Add a 1m×2m reflector on the left and right sides. The moderately soft and hard light makes the model’s skin soft without losing texture, both fashion and sweetness. This is the style that most beauties like.

Categories
Studio Lights Education

The Main Elements in Photographic Composition

Image elements are divided into:

  1. Light
  2. Color
  3. Tone
  4. Lines

Light

Photography is mainly based on the color temperature and intensity of light to control the picture. Incorporate personal emotions into photos through the angle of light. When selecting and processing light, it is necessary to consider the influence of the environment around the subject on the light and shadow structure of the screen. Natural light cannot be controlled, but it can be adjusted by blocking, reflecting and other methods. Artificial light can be controlled. We can control the styling effect at will and make it change.

According to the characteristics of light, it is divided into: direct light, scattered light and reflected light.

Direct Light

In clear weather, sunlight directly hits the subject without any occlusion, the subject will have a bright tone on the light-receiving side, and the non-light-receiving side will form obvious shadows. This kind of light is called Direct light.

Under direct light, the light-receiving surface and the non-glossy surface will have a very obvious brightness contrast, so it is easy to produce a three-dimensional effect.

Taking pictures in direct sunlight is a very dangerous thing. This kind of light is too strong, it will bring dazzling highlights and dark shadows, and it will also make the subject’s eyes unable to open. Taking pictures under such light is not only a torture, but the effect is also unsatisfactory.

Scattered Light

When sunlight is blocked by clouds or other objects and cannot directly illuminate the subject, but can only illuminate the subject through an intermediate medium, the light will have a scattering effect. This type of light is called scattered light.

Because the light-receiving surface and shadow surface formed by scattered light are not obvious, and the contrast between light and dark is weak, the resulting picture effect is relatively flat and soft.

Reflected Light

Reflected light refers to the light emitted by the light source, which does not directly illuminate the subject, but first illuminates the object with a certain reflective ability, and then illuminates the subject by the reflected light of the reflector.

The lighting properties of the reflected light are affected by the surface texture of the reflector.

The light reflected by a smooth mirror-reflective object has the property of direct light, while the light reflected by a rough reflective object has the property of scattered light.

In ordinary photography, the most commonly used reflective tools are reflectors and umbrellas.

Different light irradiating directions produce different effects. According to the illumination direction, it can be divided into: forward light, oblique side light, side light, side backlight, top light, and bottom light.

Direction of Light

(1) forward light

Forward light is the most common light irradiation condition, and the direction of forward light is the same as the camera’s twisting direction.

In actual shooting, the use of forward light is higher.

Due to the direct projection of the light, the forward light is uniformly illuminated, with fewer shadows, and can conceal the unevenness of the subject’s surface, making the subject’s image more clear.

However, forward light is difficult to express the sensitive level and line structure of the subject, which easily leads to a flat picture.

(2) Oblique side light

Oblique side light means that there is an angle difference of about 45 degrees between the shooting angle of the photographer and the irradiating direction of the light.

Oblique side light has been widely used in landscape photography and architectural photography.

When shooting with oblique side light, the shadow of the object will appear in the photo, which is helpful to increase the three-dimensional effect of the picture.

(3) Side light

Sidelight means that the angle of light irradiation and the shooting direction of the photographer are basically at a 90 degree angle.

Sidelights are mainly used in photography creation to express strong contrasts between light and dark or to show the widening shape of objects in shooting scenes.

When using side light to shoot human subjects, it often produces the effect of yin and yang face. At this time, you can consider using reflective objects such as reflectors to fill up the dark areas of the face to reduce the contrast of light and dark on the face.

When expressing individual characters or declining men’s masculinity, the photo shooter often uses side light.

(4) Backlight

Under backlight conditions, the shooting direction of the photographer is completely opposite to the direction of light irradiation. The effect of photos taken under backlight conditions is completely opposite to that under forward light conditions.

When backlit, there will be a great contrast between the subject and the background.

Since the light source is behind the subject, the light source will draw a bright caster line on the edge of the subject.

Some subjects, such as flowers, leaves, etc., will be penetrated by the light when backlit, making them more beautiful and moving.

But it should be noted that when shooting against the light, it is best to use blackout leather to avoid glare. At the same time, if the subject is not filled with light, the effect of silhouette is likely to appear. at this time. Photographers use the camera’s spot metering method to side-light the subject, so that it is often easy to get a dark background.

(5) Side backlight

There is a 45 degree deviation between the side backlight and the direction of the backlight.

Compared with backlighting, side backlighting can bring a more obvious three-dimensional object and easier control of shooting angles and methods.

Since the side backlight does not need to look directly at the light source, the photographer can more easily avoid the appearance of glare. At the same time, the exposure control under side backlighting is easier than backlighting.

(6) Top light

Top light refers to the light that forms a 90-degree angle with the camera from the top of the head.

Top light is difficult to make photos show perfect light and shadow effects.

When shooting landscape themes, the top light is more suitable to express the relatively flat surface of the scene.

If the top light is used properly, it can also bring saturated colors, uniform light and shadow distribution and Fenggong’s picture details to the picture.

(7) Bottom light

Light that illuminates people or scenery from below.

The front light is called the front bottom light. This kind of modeling light forms a bottom-up projection, producing an abnormal shape. It is often used to express natural lighting effects such as oil lamps, table lamps, and campfires in the picture. Or it can be used as a modeling tool to portray special characters, special emotions, and render special atmospheres. It can also be used as a retouching light for the face.

The back light is called back light. This light illuminates the hair of a person, especially a woman’s long hair or the details of a scene, to modify and beautify it. It is often used as an effect light in studio shooting.

Colors in Photography

Color composition starts from people’s perception of color and psychological effects, and uses certain color rules to combine and form the interrelationship between elements, thereby creating a new and ideal color and shadow effect.

In the process of photography, the use of different colors can make the picture present different moving effects. The presentation of this kind of color can not only be accomplished by the color of the subject itself, but the photographer can also use certain shooting techniques to achieve a certain color and shadow effect.

(1) White series

White can convey a variety of emotions to people: bright, clean, cheerful, simple, elegant, pure and so on.

It does not have the strong personality of red, nor can it arouse taste associations like orange, but it can comfort people’s hearts in the simplest way. Whether it’s alone or in combination with other colors, it also gives people unlimited reverie.

For example, the white snow in winter, no matter where it falls, can always show people a beautiful picture.

(2) Black series

Black often gives people a feeling of solemnity, mystery, or death or terror.

In the process of photography, the expression and transmission of black is often used by the photographer using certain photographic methods, such as controlling the exposure, to make the picture present an abstract sense of darkness, rather than the color presented by the subject itself.

(3) Red series

Red represents more intense emotions such as enthusiasm, unrestrainedness, joy, and progress.

Whether in movies or in ordinary life, red is a favorite color of people, and of course, photography is no exception.

Red can give people a strong visual impact, and most of the expression of this color is presented through the actual color of the subject or some kind of special effect lighting or natural light.

(4) Blue series

Blue represents calm, tranquil, deep and other meanings.

When it comes to blue, people think of blue sky, blue sea, etc.

In landscape photography, blue is often applied to the picture, and the performance of this color is usually achieved by matching other colors or objects.

(5) Yellow series

Yellow has given people a noble and untouchable feeling since ancient times. In real life, yellow can also bring people feelings of warmth, open-mindedness, and liveliness.

The expression of yellow is the same as red, mainly from the color of the subject itself and some special environment and light effects.

(6) Green Department

Green represents a kind of vitality and vitality.

When it comes to green, people always think of green leaves, green grass and other objects with vigorous vitality.

We often find that in many photography works, green leaves are always used as a foil for red flowers, or as a background. In fact, when the green objects such as green leaves are expressed separately, it will show people another unique sense of beauty and vitality.

(7) Pink series

Pink represents sweetness, tenderness, romance and innocence, and represents tenderness and cuteness. Pure pink is like a girl’s dream.

Pink represents youth, immature, romantic, bright, tender, sexy, and good memories.

Pink is mostly used in cute and fresh shooting styles.

Tone in Photography

Red, light color, orange, etc. are called warm tone. Blue, green, etc. are called cold tone.

1. Warm Tone

If the picture is formed by most warm colors, the overall color of the picture will be red, and the tone of the picture will be warm.

Warm colors can give people a positive, lively, enthusiastic, unrestrained and warm feeling. It is mostly formed by the color of the object itself and special lighting effects.

It is suitable for showing some of the most popular, female images or documentary themes with exotic styles.

2. Cold Tone

If the picture is formed by most of the cool colors, the overall color of the picture will be blue, and the tone of the picture will be cool.

Cool colors give people a feeling of quiet, stability, peace and cold.

Its representative themes are blue sky, water surface, mountains and forests, etc.

Categories
Studio Lights Education

Outdoor Portrait Photography Flash Use Skills

The Importance of Flash

For ordinary portrait photography enthusiasts, there may be a misunderstanding about the use of flash. They think that flash is used for lighting. In outdoor portrait photography with strong sunlight during the day, flash is useless. Of course, this understanding is rather one-sided. People who only use natural light to take photos don’t necessarily use flash. Those who can master flash must know how to use natural light. Therefore, truly outstanding flash works are not necessarily pure flashes, but a proper combination of natural light and artificial light.

Although natural light has the advantage of being real and natural, making good use of natural light can properly express the atmosphere of the scene when shooting, but natural light is not perfect, and it cannot appear in every place that needs to be illuminated. So adding a flash can help make up for the lack of natural light and improve the quality of the photo. Once you have mastered the technical skills of the flash and incorporated it into your future creations, you will find the same content and the same pictures, but the work is “on the next level”.

Daytime Outdoor Portrait Fill Light-Flash as Fill Light

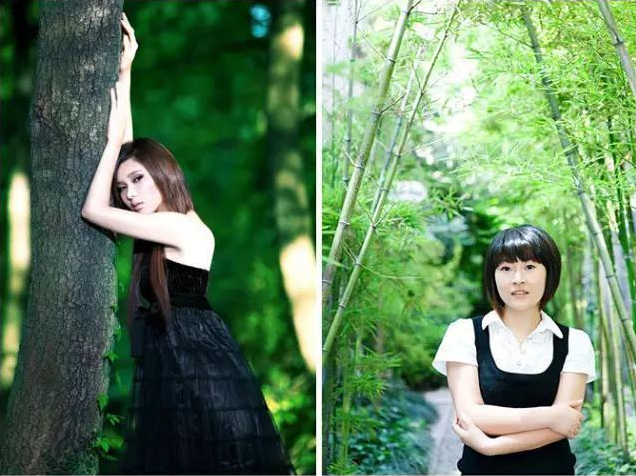
Don’t think that you need to use the flash only when the light is low. Sometimes when the light is sufficient, you must use the flash to fill up the light. One situation is that when shooting against the light, the contrast between the subject and the background is great. If the subject is exposed, the background must be overexposed, and the background is restored normally, and the subject is underexposed. At this time, you need to use a flash to fill up the light.

The shooting environment was under the sun at 4:30 in the afternoon. Although the ambient light dimmed with the sunset, the light was still very bright due to the impact of the backlight. The character is backlit and her face is dark. When taking this photo, the environment is metered first, the metering data is aperture F3.5, shutter is 1/250. After the metering is completed, switch the camera to M gear, set the aperture and shutter, turn on the flash, TTL mode, reduce the output by 1.5 gears, and finally take the finished picture. The face of the character is exposed normally, and the atmosphere of the environment is also better reflected.

The backlight draws a circle of warm lines around the girl’s hair and sweater, which isolates it from the background, while also accentuating the subject of the character. The front flash fills in light. When framing the shot, be careful to slightly block part of the sun’s subject with the subject to avoid excessive glare.

Shooting Steps:

Generally, portraits are taken in a sunny environment with blue sky and white clouds. Because the light difference between the subject and the background environment is too large, it is not easy to take into account the normal exposure of both at the same time. If the face of a portrait is used as the basis for metering, the background will be overexposed and there will be no details. If the blue sky is used as the basis for metering, the face of the portrait will be underexposed, or even become a silhouette.

It is an effective method to use TTL flash or automatic flash to fill the subject with light:

  1. 1. Start metering against the background. Then switch to M mode, set the aperture and shutter value to the metering results just now. (It should be noted that the shutter must be within the synchronous shutter range of the flash).
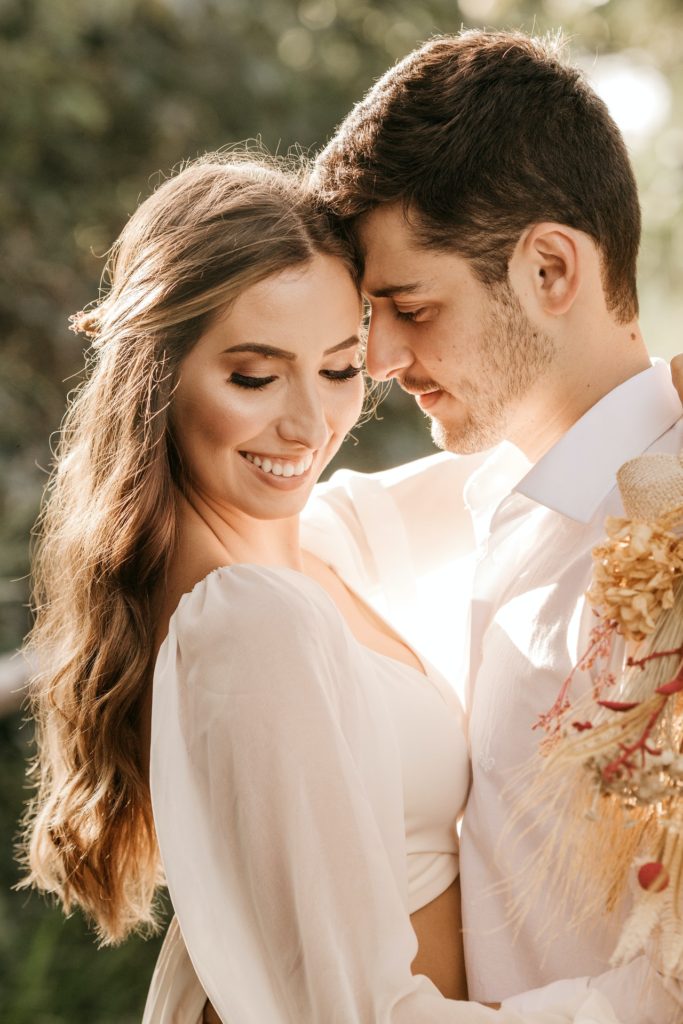
  2. 2. Use TTL flash or automatic flash to aim at the subject to fill light.For the shooting of couple films, the use of backlight shooting techniques to highlight the warm and warm emotional atmosphere of the picture. The flash reduces the output by 1 stop.
    Precautions:

    In backlight photography, in order to enrich the picture level and obtain a good color reproduction, you need to use the flash as a supplement light. Generally speaking, when used as fill light, the flash does not need to exert strong power lighting, but attention should be paid to control the flash brightness to avoid excessive fill light. Generally, it can be set to about two levels equivalent to normal underexposure. If you use the wide-angle end of the camera’s zoom lens or the angle of view equivalent to that of a standard lens, set the flash to the “lower” level to prevent excessive fill light.

    Tips:

    Add a diffuser on the flash head. The light of a small flash is relatively hard, so you can add a diffuser. If not, cover it with a layer of paper towels. This way the light can be softer.

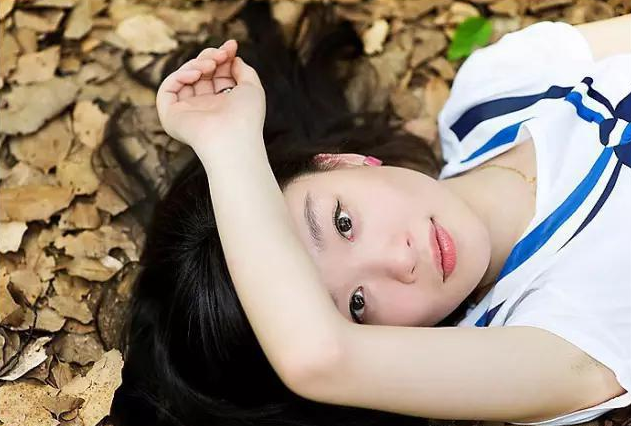
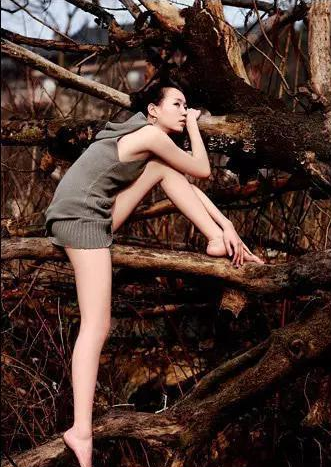
    In the daytime outdoor photography, there is another situation, we also use the flash to fill the light. For example, in a cloudy environment, or in other scenes such as the shade of a tree, the outdoor light is even. We use flash to fill up the character, which will make the skin color of the character more smooth and bright. In this case, the fill light, because the light is uniform, we can directly meter the shot. Of course, the flash must generally reduce the output of about two gears to weaken the traces of strong light. As shown in the picture below: the model is lying on the leaves, and the flash is output with reduced files, and the color of the characters is bright.

    In the Daytime Outdoor Portrait Fill Light-flash as the Main Light.

    In outdoor portrait photography, when we use the flash as the main light of the photography, the flash can suppress the ambient light, the blue sky can be bluer, and the environment level is more distinct. The picture effects presented often have strong individual characteristics, strong texture and rich details. Using flash as the main light for shooting, we can summarize the idea of shooting in one sentence: use the aperture to control the brightness of the flash on the face, and use the shutter to control the brightness of the environment.

    As shown in the figure below, we first meter the ambient light, and the data obtained by metering is that the aperture is F11 and the shutter is 1/125. After getting the environmental metering data, we set the intensity value of the flash, set it to F11, and the shutter can be set to 1/250. In this way, the brightness of the characters is ensured, and the environment is also darkened by a level, which highlights the fashion sense of the picture. If you feel that the ambient light is still too strong, you can continue to adjust the exposure combination.

    Daylight is a backlight light source, and the front flash fills in light, and the intensity is over one level to slightly darken the background.

    Shooting parameters: aperture F8 shutter 1/125 second

    photography skills:

    If you want to express the blue sky and white clouds, if you want to make the sky bluer in the light conditions, you must use the front light of the outdoor shooting light to complement the natural light to achieve the effect of enhancing the illuminance. Increase the ratio of front light to background light, making the sky bluer. Under backlight conditions, first measure the natural light data, and then use an external light to fill in the backlight direction. The flash data must be 0.5 or 1 block higher than the natural light to achieve a bluer sky.

    Precautions:

    The flash duration is very short, generally within one thousandth of a second. Therefore, the camera control that controls the exposure of the flash is only related to the aperture and sensitivity settings, and has nothing to do with the shutter speed.

    As long as the shutter speed is within the flash synchronization range, no matter how it changes, as long as the aperture and sensitivity settings remain the same, the flash exposure is the same.

    We can use flash as the main light source for the subject and sunlight as the light source for the environment. Select and fix a correct flash exposure aperture value for the subject, and then adjust the speed gate speed during shooting. At this time, the exposure of the subject has been fixed by the aperture and almost any change occurs, the ambient brightness can be drastically suppressed, and the subject and the environment can be separated.

    Tips:

    The flash for outdoor shooting can be equipped with many light effect accessories. Adding a diffuser can make the light quality very soft. With the light barrier, the light can be used more accurately. You can change the color of the light by inserting different color chips.

    If the outdoor light is only used for supplementary light under natural light conditions, it can directly illuminate the reflector at any desired position to generate supplementary light for the main body, with greater controllable intensity and more free adjustment in position.

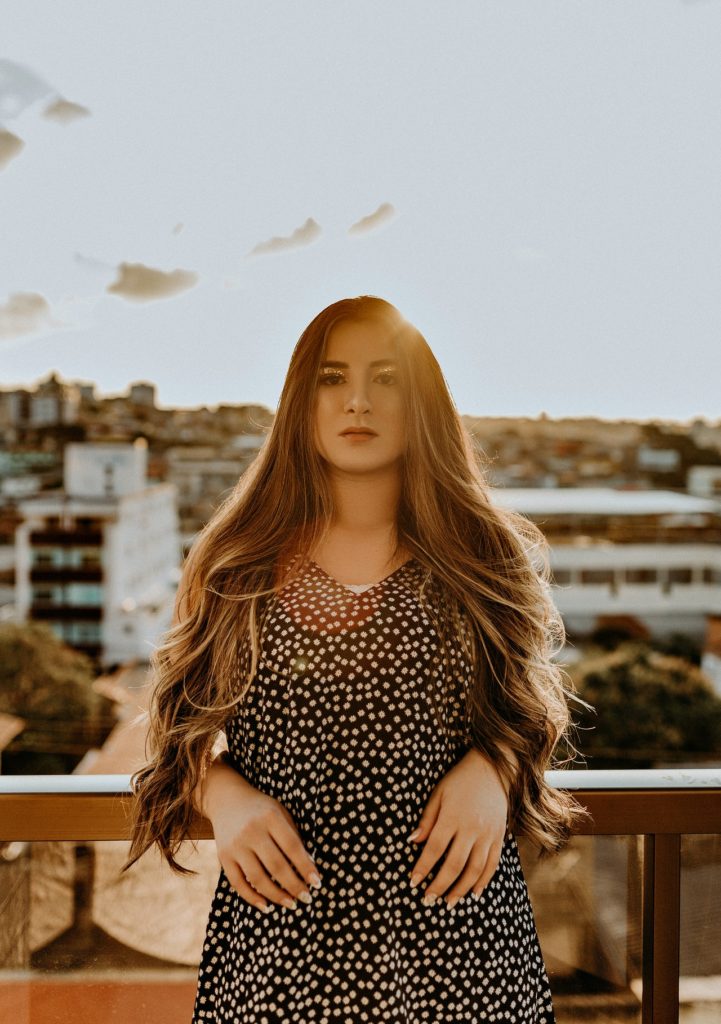
    Shoot on the balcony, set the metering data on the camera M file, adjust the aperture value, darken the background, and separate the characters and the environment to express the atmosphere of the picture.

    Shooting parameters: aperture F13 shutter 1/100 second

    Night Portrait Photography

    Generally speaking, it is not advisable to use flash when shooting night scenes. The use of small apertures and long exposures can show beautiful night scenes. The flash is generally used to shoot portraits at night. If you directly turn on the flash to shoot portraits, the restoration of the characters is normal, but the night scene behind is very dark and cannot be restored, so you need to use the slow flash function at this time.

    In general night scenes, the background is usually very dark. In order to make the lights and colors of the background appear, this time may be 1/10 second, or it may be longer. For the foreground model, because we used a flash, it actually only takes about 1/100 second to complete the exposure.

    We first metered the background and found that aperture 2, shutter 1/10 second, can achieve accurate exposure of the background. We directly manually adjust the exposure combination to aperture 2, shutter 1/10 second, and then we choose to turn on the flash, TTL mode, downshift between 1.5 and 2 to reduce the flash marks of people.
    With the effect of shooting in this way, we can see that the faint light in the background and the face of the model are fully exposed, and the light in the background creates a soft atmosphere. The model is organically integrated into the background, making the entire night scene more attractive.

    Shooting steps:

    First meter the environment and set the camera aperture and shutter combination. Then turn on the flash, TTL mode. Set the flash reduction on the flashing light. The value of this setting can be set according to the specific situation, generally around 1.5 levels. Put the camera on a tripod. When shooting, unless special effects are taken, remind the model not to move after flashing, because for the background exposure is normal, the shutter time is relatively long, 1/10 second or longer, if the model moves, the character It’s blurred.

    Precautions:

    If you don’t have high-end equipment in your hand, it means you can’t use high ISO to increase the shutter speed to achieve handheld shooting. Therefore, you have to prepare a stable tripod, which is an indispensable condition for obtaining beautiful night portraits.

    Tips:

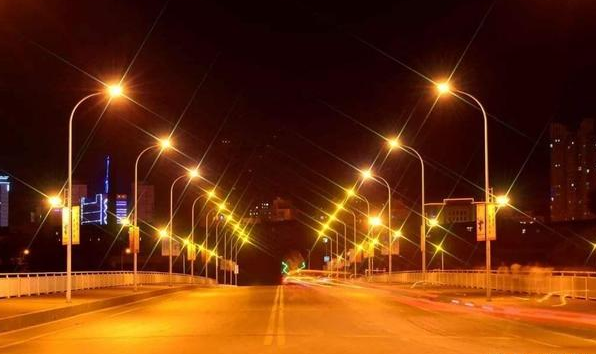
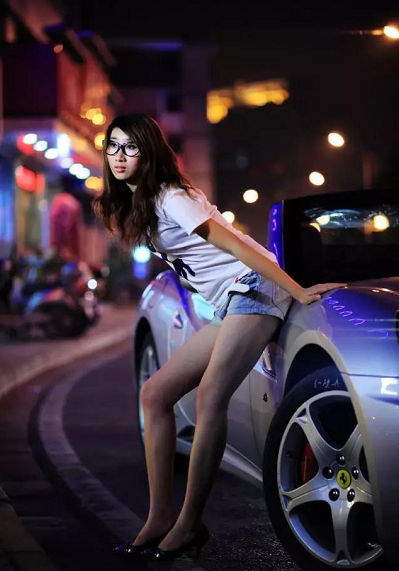
    To shoot night portraits with dreamy spots, the choice of scene is particularly important. We generally choose places with abundant neon lights, street lights, and car lights, such as squares, shopping malls, and pedestrian streets, so that the photos have such an effect.

Categories
Studio Lights Education

How to Control Shadows in Photography

The Importance of Shadows in Photography

Walking into a dimly lit room can be the photographer’s worst nightmare. Dark walls, low lighting, and strange shadows are enough to make even the calmest photographer anxious. Does this sound familiar? When I first started, I was considered a nature photographer.

Because we are facing it, I don’t know how to use my flash, and more importantly, I don’t know how to read the light. Yes, I am right. As a photographer, not only can you see the light, you also need to learn to read the art of lighting-the type of light, the quality of the light and how the light affects your final image.

The more people and locations I start to photograph, the more I realize, but finding light in the shadows is not really that scary or daunting.

Master the shadows

Imagine if you could walk into any indoor lighting environment and think about yourself, “Yes, I got it”, you would feel confident. I’m not saying that off-camera flash or flash is used to light up the entire scene like the firework show on July 4th. I mean only use the available light to create some magical photos.

Don’t get me wrong now, I still like photos taken under natural light because they feel really relaxed, ventilate, and invite me. But low-key shooting, embracing the shadows to create some dramatic portraits, is equally interesting and exciting.

In the past few years, I have only taken photos in bright, open, natural light conditions. Living in Chicago, our summer is very short, and autumn is usually a mixture of rain, thunderstorms and rain. I quickly learned that I need to get out of my comfort zone, figure out how to take pictures indoors, and do it creatively.

What I learned quickly is that shadows play a very important role in shaping light, setting mood, rendering depth and creating drama. In the absence of floor-to-ceiling multiple windows, shooting in a well-lit room, embracing the shadows may be the perfect solution to unleash your creativity.

1. Gear Selection

If you choose between the main lens and the zoom lens, choose the former. The material is generally considered to be a fast lens with an aperture of f/1.8 or larger and allows light to reach the camera’s sensor. My Canon 50mm f/1.2 spends 80% of the time shooting indoors on my camera.

Make sure to also measure appropriately. I use spot metering most of the time and set my center point on the brightest area on my subject’s face/skin. This in itself will help to obtain a clearly illuminated image. It will expose the highlights correctly and allow the rest of the scene to provide shadows for various tones.

Make sure you expose it correctly. If the capture is underexposed, trying to correct it in post-processing will only increase the noise. In general, no matter where I shoot, I tend to overexpose at least 1/3 of my photos. I find that this allows me to minimize noise and preserve as much detail as possible in the shadows.

My white balance is set to automatic. You can choose to set the white balance through the custom Kelvin function to reduce processing time later. I found that in most cases, it works well in Auto, and I can make adjustments in post-processing if necessary. Learn to deal with some noise by increasing the ISO, especially if the room is really dark.

2. Single Light Source

A single light source, such as a small window or an open door, can do wonders for your image. When you work in a dark space and limited light, you will be surprised at the light you actually need.

If you have windows facing north, they tend to bring a softer, more targeted light, rather than facing east or west. Depending on where the sun is in the sky at the time of shooting, these lighting will bring intense light.The magic of backlight
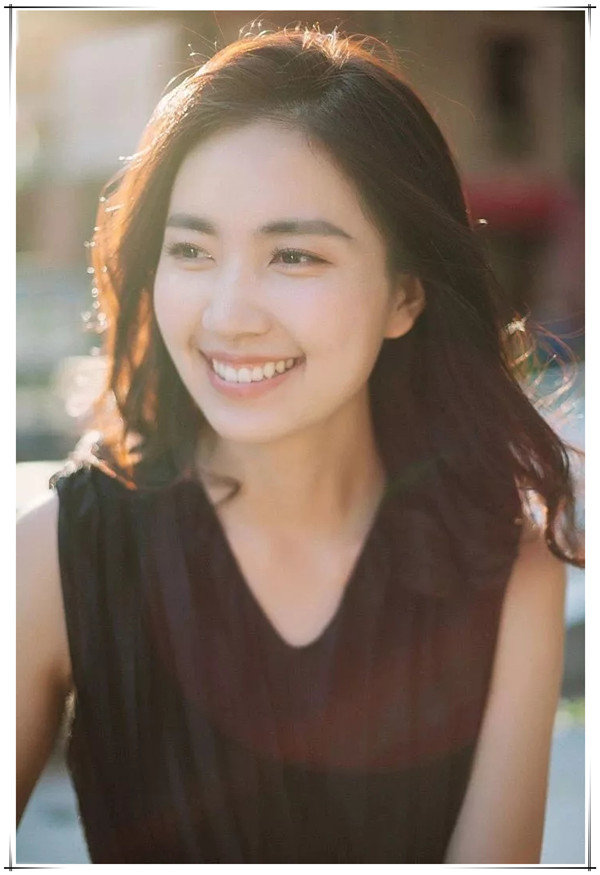
The woman is facing the window, her figure is evenly illuminated. But the black curtain behind it makes the background almost black-I really like the light and dark drama that takes place in this photo-by placing the subject in a specific position.

3. Direction and Quality of Light

The direction and quality of light play an important role in the mood of the image. Therefore, understanding the type, nature and purpose of each method will help you make an informed decision on how to achieve your ultimate goal.

Emphasizing focused light tends to enhance the overall drama of the image, emphasize texture and detail, and produce sharp, sharp-edged contrast shadows. The soft diffused light gives soft shadows, and the feathered edges gently recede (make them tremble), making it smoother and more flexible for human subjects to minimize texture and details (ie defects).

The angle and direction of the light you choose depends on your shooting style and your intentions for the image or session. Normally, I would not place the subject at the position of the light source because it can provide a flat one-dimensional appearance to the features of the subject. I prefer to illuminate the depth and size of my subject from the side to give the subject’s functionality and the rest of the frame.

Backlighting themes have their uses, especially if your purpose is a somewhat abstract theme to get an airy, dreamlike feeling.

On the left, the bride is facing the window, so the light on her face is gentle. On the right, the bride faces the window, but at an angle of 45 degrees. So her portrait is a more dramatic light and shadow.

4. Mathematical Photography

The mathematical law of inverse square describes how the illumination of a light source decreases in distance.

Imagine that the beam of a spotlight widens and dims in the distance. Now focus the beam close to the spotlight, the light will become harsh. But if you move the subject in a straight line 6 feet away from the light, how much light will the subject reduce? As the distance doubles, the light hitting the subject is reduced by three-quarters.

In the real world, suppose you have a background you can use, maybe a surface can reflect light. Add all types of diffusers and filters to modify the light source, and choose the position of the object relative to the background and light source, as well as the placement of yourself and the camera.

Normally, you can add drama to the image by placing the subject close to the light source and away from the background. The light will illuminate the subject, and everything behind you will turn into a shadow. This is a quick and easy way to create a dark background in the camera. Conversely, placing the subject closer to the light source will illuminate the light and shadows more evenly (the background will also become lighter).

On the left, the woman is farther from the light source, so compared to the image on the right facing the window light, she is more in shadow and closer to the light source. So there was more light coming down her face from the window.

5 Modify or Mold Your Light Source

If you find yourself well-lit, using modifiers is an easy way to control the amount and intensity of the object’s lighting.

Tulle curtains and blinds can be used to reduce or diffuse light, making it softer and more subtle. You can reduce the size of the light source by using blackout curtains or partially closing the door to increase shadows and increase drama. Remember, the more light you shine, the less intense the shadow.

Categories
Studio Lights Education

Studio Portrait Lighting Techniques

Flash Light Holder

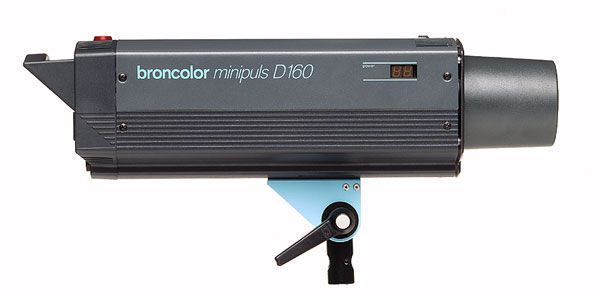
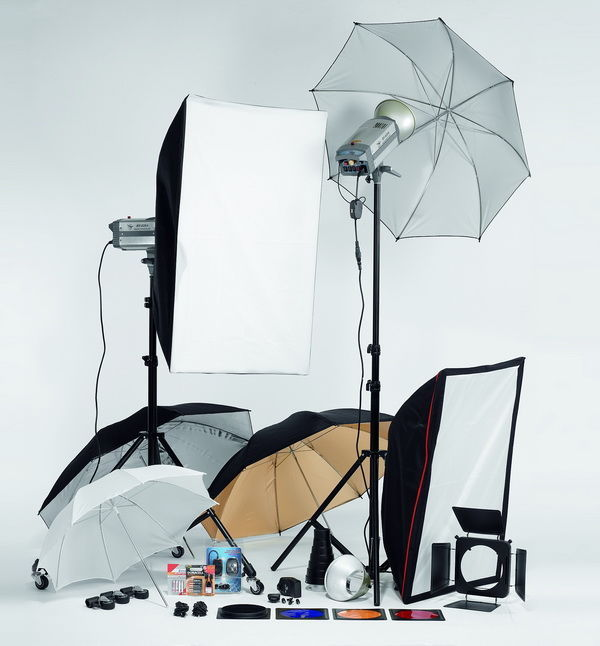
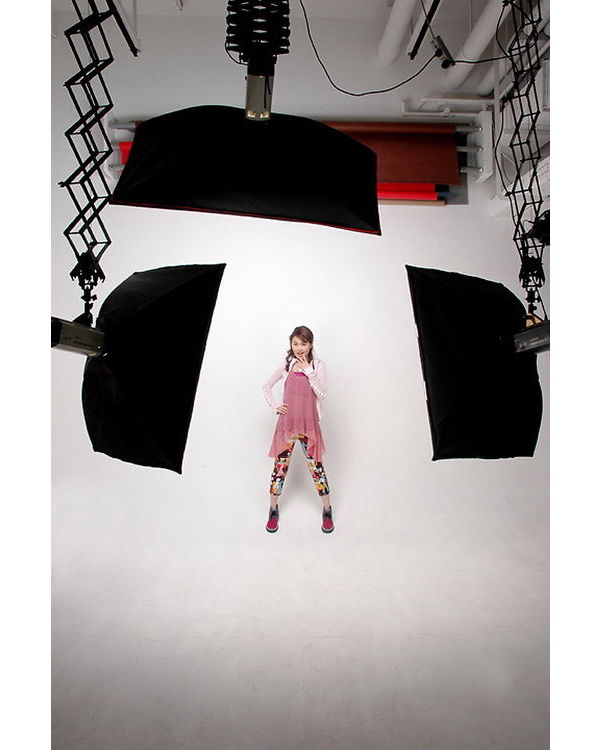
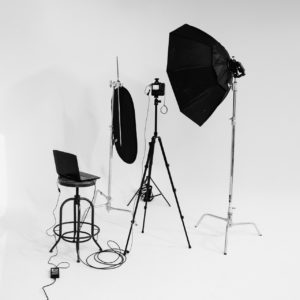
The core equipment of the studio is the flash lamp head. There is not much difference between the working principle of the independent large flash and the external flash on the camera. Both use the capacitor inside the lamp holder to store energy and emit light instantly. But compared with a small flash, it does not have a built-in diffuser, so the light it emits has to go through a special lamp head attachment for softening control or convergence control.

Standard Hood

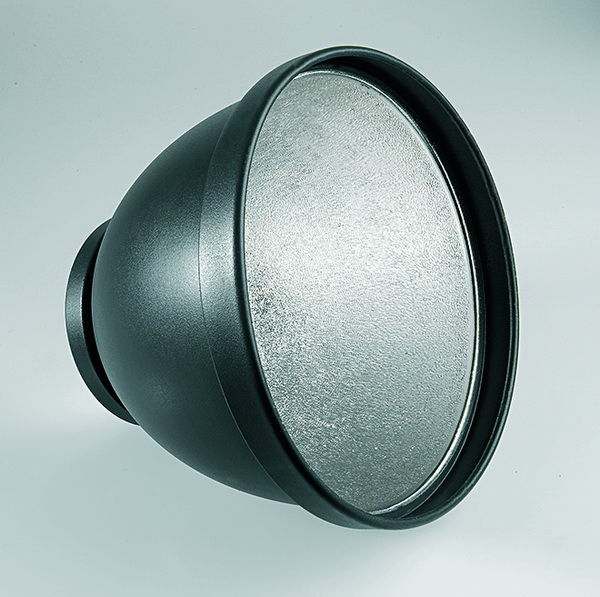
The standard cover is the basic accessory that comes with the flash at the time of purchase. The lamp holder flashes with the standard cover, which has a certain convergence effect on the light, and can get a strong contrast and a certain directional light effect. The assembly and disassembly of the standard cover is the same as other accessories at the front end of the lamp cap. When installing, find the bayonet at the connection between the lamp cap and the standard cover, align it, and then rotate it, and then remove or install it at a certain angle.

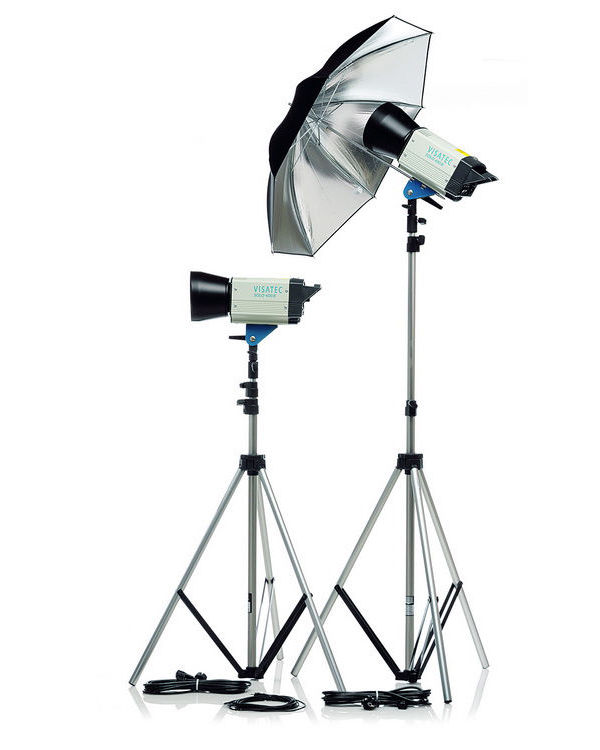
Flash Light Stand

The flash lamp holder, like a digital SLR camera, also needs a tripod for support. This special tripod is called a flash lamp holder. Due to the different interfaces, the tripod used by the light stand and the digital camera cannot be used in common. The flash lamp holder does not need to be extremely stable, so it is generally rough to make and the price is low. In addition, in order to meet various lighting needs, the strobe lamp holder can reach a higher height. In order to facilitate the movement, the bottom of some advanced lamp stands is designed as a movable pulley structure. In this way, the bulky light stand can be easily moved in the studio without disassembly.

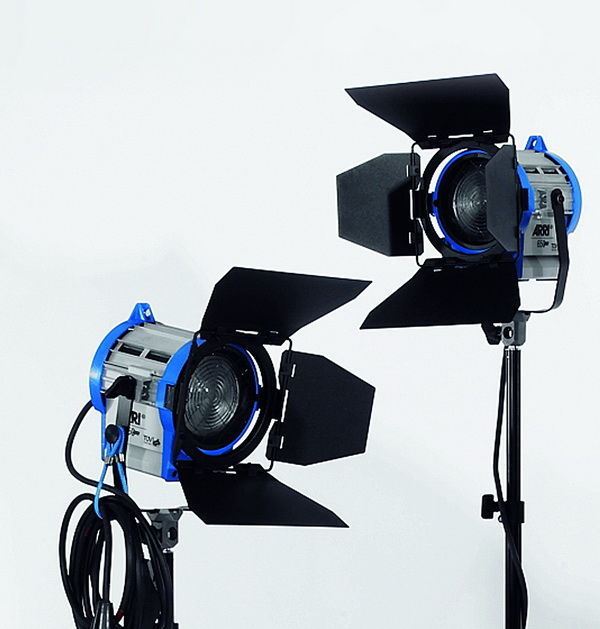
Multi-effect Four-page Light Barrier

The four-page light barrier, like the standard cover, is an accessory that can be easily installed in front of the lamp head and simply controls the light direction and color of the light. The four black plates mounted in the front are very convenient for adjustment and can easily control the direction of light irradiation. In the center of this accessory, a honeycomb cover or color filters of different colors can be installed to obtain a rich and varied color effect.

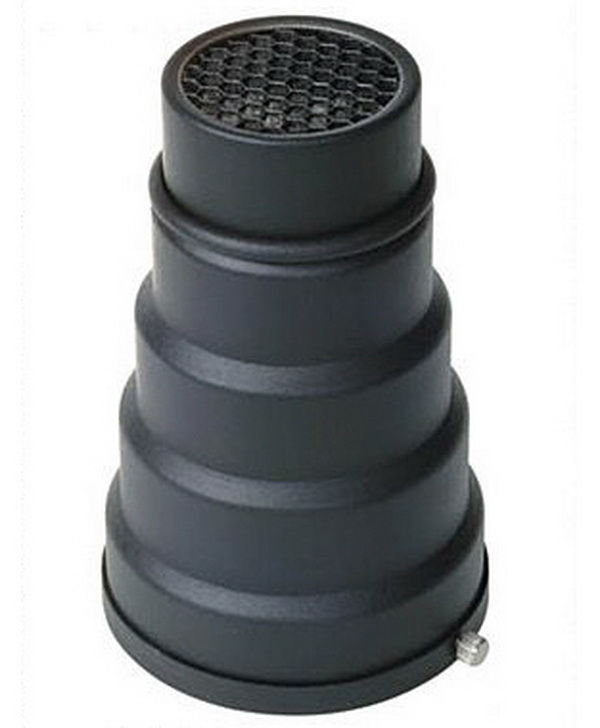
Condenser

The condensing cover is cone-shaped, which is a lamp holder accessory that is installed at the front end of the lamp holder and has the function of converging light. The condenser can concentrate the light in a small area of the subject, producing a shooting effect similar to a spotlight. After the light from the flash lamp head is collected by the condenser, the angle of the beam is about 10°. Condensing masks are often used to light people.

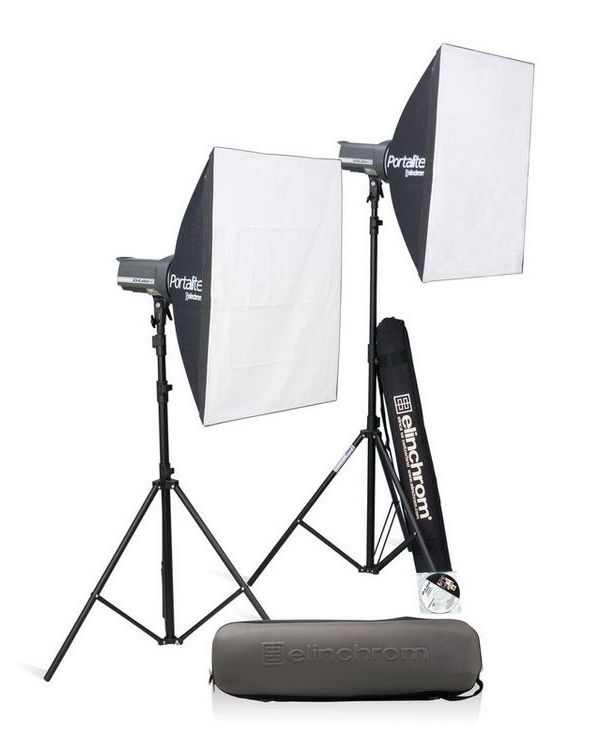
Softbox

The softbox is the most commonly used flash lamp head accessory in studio portrait photography, and its volume is even many times larger than the flash lamp head. Therefore, when installing, pay special attention not to damage the bulb, and consider the load of the lamp holder when supporting it, so as to avoid the lamp holder from toppling.

The soft box is composed of some metal brackets and a tent-like polygonal box cover. The white fabric at the front is composed of synthetic fibers, which has a semi-transparent effect. The light of the flash lamp head will be scattered and softened when passing through the soft box, and the light irradiation angle will be wider, so it is especially suitable for shooting female portraits.

According to the size and the number of angles of the polygonal box cover, the soft box is divided into a variety of specifications. The height of some large softboxes can even exceed the height of a person, and there is more than one lamp holder behind them. The large soft box can make the light more uniform and natural when the photographer is shooting full-body portraits.

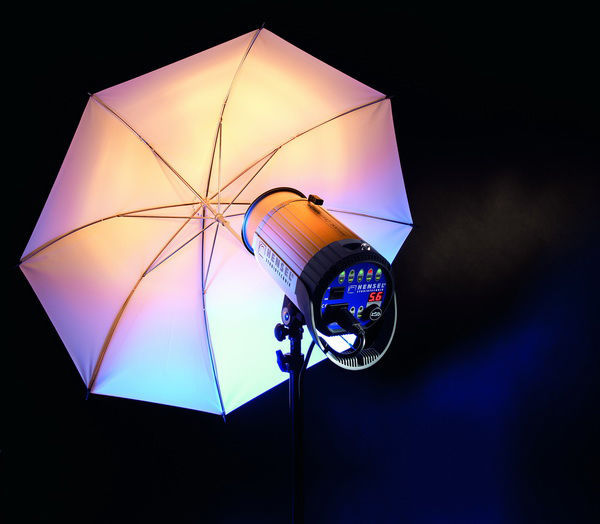
Reflective Umbrella

Reflective umbrella is a lamp holder accessory that looks like an umbrella installed in front of the lamp holder. The reflector umbrella is always used in conjunction with the standard cover. It can reflect the light from the flash lamp and soften the light to a certain extent.

The working principle of the reflective umbrella is very simple, that is, when the light hits the inner surface of the reflective umbrella, it will reflect the light. By changing the distance between the lamp holder and the reflector, the angle of light can be adjusted. The inner surface of the reflective umbrella is made of different materials. The performance of the golden and silver reflective umbrellas is different. The biggest advantage of the reflective umbrella is its convenience and a certain soft light effect.

Filter lens group

The color filter of the flash can be installed on the multi-effect four-page light barrier and the condenser. Photographers can add heat-resistant color filters of different colors according to different portrait shooting themes, and change the color of the light source as desired to create colored light and light effects of different color temperatures.

Reflector

The reflector not only plays a role in outdoor portrait photography, but also plays a role in controlling the intensity of shadows and the size of the area when shooting in the studio. In studio shooting, several reflectors are often used as an aid. First, it can reduce the difficulty of controlling the light source. Second, the effect is often more natural and soft than the multi-light effect.

The role of the reflector is to control the contrast. In addition to the common foldable oval standard reflector, the reflector used in the studio also has a rectangular reflector similar to a plastic foam board, which has an even better reflection effect. All these equipments can be purchased at very low prices in the photographic equipment market.

background

Portrait photography is inseparable from the creation of the background. The background paper or background cloth of the studio can provide photographers with a variety of different options. The background of the studio is generally divided into two types: a pure color background or a simulated natural background. The former is a standard configuration, while the latter is mostly used in a studio.

The background shooting effect can also be changed by using light, composition and other techniques. Many photographers also bring their own background when shooting according to shooting needs. In short, the background board is not only one of the necessary hardware in the studio, but also one of the issues that photographers should consider before each shooting.

Categories
Studio Lights Education

Studio Flash Operation Guide

The Creation of Soft Light

The nature of soft light is softer. People under soft light receive more uniform light on all parts of their body, with less contrast, which can soften the skin of the person being photographed, and is generally suitable for shooting female portraits.

In portrait photography, the use of soft light is more common. The creation of soft light depends on the photographer’s control of light. The light from the flash lamp is originally very dazzling, even if the bowl-shaped standard cover is used, its intensity is still high.

There are many ways to soften this kind of light, and the most common softening method is to use a soft box. When the light passes through the soft box, it diffuses and reflects inside the soft box, thereby being softened. In order to provide a better soft light effect, many soft boxes contain a layer of fabric of the same material in addition to the translucent fabric on the outer layer of the soft box. At the same time, the larger the soft box, the larger the irradiation range, and the better the softening effect of the light.

The creation of hard light

In the studio, the light produced by using the flash lamp head to match the standard cover, condenser cover, etc., without any soft light equipment, is hard light.

The light created by the reflective umbrella is between soft light and hard light, and the properties of hard light are more obvious. Hard light is similar to direct light in nature, with strong light and clear directionality.

Creating with hard light will produce obvious bright and shadow areas in the picture, forming a great contrast and a clear border between light and dark. It is generally suitable for shooting situations that require a clear outline of the object.

For example, in the multi-lamp lighting combination, it is generally the task of creating hair and contour lighting for the characters. In addition, it is also used to shoot male portraits alone.

In recent years, European-style portrait style, that is, a shooting style that advocates a strong sense of three-dimensionality and depth, has become popular, and hard light has also been applied to mainstream female portrait shooting. Due to the strong directivity of the hard light, the control of the hard light should be more precise. When hard light is used as the main light, if the light ratio is too large, it should be supplemented by a reflector or other soft light source.

Hard light can create a strong contrast between light and shade and a three-dimensional effect, creating a strong fashion sense of portrait photos

Flash power and performance

Power is the most important technical indicator of a studio flash. The greater the power of the flash, the better its performance.

In the shooting process, photographers often use a small aperture to shoot to obtain a greater depth of field, so the supplementary performance of the flash is very important. At the same time, when conditions permit, in order to obtain a more perfect effect, the distance between the flash and the model is often adjusted farther.

In addition, photographers often use accessories such as softboxes and reflective umbrellas, so while obtaining soft light, the power of the flash is artificially reduced.

In summary, the greater the power of the flash, the more adaptable it is. The power of common flash lamps on the market is around 300W ~ 1000W. The studio flash is compared with the on-camera external flash commonly seen by movie friends. A studio flash with a power of about 300W has the same power as an on-camera external flash with a guide number of about 55. Another feature of the studio flash is that it is equipped with a modeling bulb. The modeling bulb is a constant light bulb, which allows the photographer to preview the lighting effect before flash shooting.

Studio metering and camera operation

Compared with outdoor creation, portrait shooting in the studio has many differences from shooting mode to metering and composition methods. This article will focus on the analysis of shooting modes and metering techniques in studio photography.

The fastest flash sync speed

Flash synchronization means that the flash is triggered and flashed during the exposure time of the index code camera, and the effect of the subject being illuminated is successfully recorded. With the increase of shutter speed, due to various technical limitations, the flashing moment of the flash may deviate from the moment of exposure of the camera, which does not coincide. The fastest flash synchronization speed is the highest shutter speed value at which the exposure and flash of the index code SLR camera can be synchronized. This value is generally between 1/200 second and 1/500 second.

Manual exposure mode

Photographers often use the M manual exposure mode when creating in the studio. In manual exposure mode, photographers can set the aperture size and shutter speed according to their needs. In order to minimize the impact of hand shake on the camera, the shutter speed of the camera is mostly set to the fastest flash synchronization speed of the digital SLR camera. The aperture is adjusted according to the value measured by the light meter, and is usually set to F8 to F11. This aperture setting can bring excellent imaging quality and a large enough depth of field to ensure a clear picture.

Learn to use the light meter

The light meter is divided into an incident light meter and a reflected light meter. The function of the light meter is to measure the light intensity of various parts of the model’s body in the studio and the background to determine the details of the next step of lighting or the accurate value of the digital SLR camera’s exposure. In the film age, the role of the light meter is extremely important. Nowadays, the “snap-and-see” function of digital SLR cameras weakens the role of the light meter. But photographers with rigorous creative styles still use light meters, because the precise settings in the early stage can bring convenience and excellent picture quality in the post-processing.

Light Classification and Application of Studio Portrait Photography

Main light

The main light is the main light that illuminates the model and creates the image of the character in the studio portrait photography. The main light determines the distribution of the overall bright and dark areas of the character. The main light should have relatively strong directivity, and its light position determines the light effect of the photo. Therefore, the position of the main light and even the slight change in the distance between the main light and the model may affect the exposure and even the overall effect of the photo. In the lighting link, the main light is the priority factor, and the auxiliary light or the background light must be consistent with the tone of the main light. In terms of technical applications, the main light of most portrait photography is soft light. Soft light is more uniform and easier to control than hard light.

Auxiliary light

Auxiliary light, as the name suggests, its purpose is to fill the dark or shadow parts of the picture. Its existence maintains the brightness balance in the picture and avoids excessive contrast. The ratio of the brightness of the light-receiving surface of the subject to the brightness of the shadow surface is called the light ratio. The brighter the shadow surface, the smaller the light ratio of the screen.

The irradiation direction of the auxiliary light is mostly near the axis of the digital SLR camera, so as to avoid a large deviation from the irradiation angle of the main light, which may cause a messy projection of the screen. Auxiliary light is mostly soft light to fill light evenly and naturally.

Background light

The light used to illuminate the background alone is called the background light. The role of the background light is to separate the main character from the background to better express and highlight the character and enhance the three-dimensional sense of the picture.

The background light only illuminates the background. One or more flashes can be used to create the background light and control the brightness of the background. According to shooting needs, you can choose soft light or hard light as the background light.

Soft light is mostly used to create a pure color background with higher brightness, while hard light is mostly used to create a stylish and avant-garde background. In order to set the background light, the model should be separated from the background by a certain distance when lighting. The creation of background light should be conducive to the shaping of the subject to enhance the appeal of the picture.

Examples of portrait photography with lighting. In this example, the main light, background light, and effect light are used. The main light is used to illuminate the character, the background light is used to shape the gradient background, and the effect light is used to brighten the model’s hair and create a luminous effect.

Effect light

The main function of the effect light is to emphasize the subject, modify the human body or conceal imperfections. Contour light is a relatively common effect light. It can better highlight the figure’s body. Generally, it is projected on the character’s hair, face, shoulders and torso from the side reverse direction of 150°~170° to form a bright contour line. The use of contour light and other effect lights can more powerfully highlight the characters and enhance the artistic expression of photos.

Light ratio

In studio portrait photography, photographers often use two flashes or one flash and several reflectors. Therefore, on the different light-receiving surfaces of the characters, there are often obvious differences in the intensity of light on the bright side and the dark side, which is called the light ratio.

Controlling the light ratio can produce diversified effects when shooting. Common light ratios are 1:1, 1:2 and 1:4. After the lighting is completed, use a light meter to measure the light ratio between different faces of the model. The light ratio is small, the light is relatively flat, which is conducive to expressing the feminine beauty. When the light ratio is large, the three-dimensional sense of the characters is stronger, which is conducive to the performance of male characters or female portrait photos with specific themes and styles.

Categories
Studio Lights Education

Key Points of Backlight Photography

Avoid too Dark Face: situations that Need toBbe Filled with Light

Backlight shooting often results in underexposure of the face, and most of the time we need to supplement the light on the face of the person.

A typical portrait of a backlit portrait with the face in the center of the frame, with light shining from the left back of the head. The backlight here outlines the cheeks and contours of the characters, while shining golden hair. Coupled with the blessing of the front and back glare, the whole picture will not look too monotonous, and the appearance of the backlight glare is very important for the expression of the character’s temperament.

Such photos need to fill the face with light. Many people say that a flash or a reflector must be used to fill the light. Of course, it is best to have the above equipment. But enthusiasts take a simple photo of a person and most of the time they will not go out with too many things. At this time, it is very important to use the on-site environment flexibly.

The reason for using back light instead of forward light here is simple. Only the backlight can show the transition of light and dark on the subject’s shoulders, and at the same time, it will not make the subject’s eyes unable to open in the sun.

If you happen to have a reflector and are willing to take it out, then asking an assistant to help light it is the best way. Of course, the reflector is not a panacea. If the light on site is too weak or the angle is wrong, it will not produce good results.

Even if you use a reflector, you still have to pay attention to the effect of the light on the subject’s face.

Sometimes the subject’s face is not completely facing the lens. At this time, the reflector is even more important. The light reflected by the board can ensure the basic details of the subject.

An example of indoor natural light backlighting. Sunlight came in from outside the window, and there was no other light source in the room. Obviously this is also a backlit environment, and we need to solve the problem with the help of wall reflectors.

If it is too far away from the wall, the light on the subject’s face may appear too wide.

The light comes entirely from the glass behind, and the sunlight outside the window is very weak due to the haze. At this time, the backlight situation also requires the use of reflectors to fill up the face.

Taking pictures of people with the evening sky as the background is also a kind of backlight. If the sky is too dark to use the reflector, then flash (artificial light) will be the best feasible method. How to use light correctly is a university question, and it can’t be expanded too much due to space limitations. Here is an example of fill light using a small lamp.

When the flashlight is in different positions and matched with different accessories, it will have completely different effects. In addition, there are index, color temperature and so on. You can start with a bare lamp in the early stage.

How ​​to improve the quality of photos

Although we will have a clear subject every time we shoot. For example, your model when shooting portraits, for example, your cats and dogs when shooting pets, or the small object you want to express most when shooting still life. But no matter what, for a photo itself, the subject is not enough. To make the subject more colorful, we also need to use a suitable background to set off it.


In fact, although background and subject are equally important, they are often the most overlooked part. But don’t forget that a background has enough ability to influence the subject’s expression. In ordinary shooting, how do we choose a suitable background?


  1. Keep the background clean

In most cases, we need to keep the background clean. Of course, the cleanness here does not mean that there is nothing in the background, but that our background needs to be relatively clean and there will not be too many interference elements to affect the subject’s expression. Especially when shooting outdoors, this is difficult to control, after all, we cannot change the environment.


But when the background is too messy, you have to think about re-framing, otherwise it will be a waste of effort for the subject to look good and not show it.


When shooting indoors, this is very convenient. We can change the background according to our needs, but the main premise is not to let the background have extra interference elements.

  1. Blurred background

When the background cannot be changed, and the background really affects the subject too much, we can achieve the effect of separating the subject and the background by blurring the background with a shallow depth of field.

The blurred background is very useful when shooting portrait photography or product photography, and can directly highlight the subject.


  1. Close to the main body

When blurring can’t satisfy the separation of the subject, we can only get close to the subject and let the subject fill our frame as a whole, making the subject the only one in the picture. Although it may not always work, sometimes you have to try it. This is mainly to eliminate all interference in the photo, so that our subject can dominate the entire picture.


  1. Use contrasting colors

The power of contrasting colors, that is, complementary colors, must not be underestimated. When contrasting colors appear in the picture, the contrast between the two contrasting colors will definitely become the center of the picture.

Because, analyzing your subject, and then choosing a complementary color for your subject as the background color can also highlight the subject, allowing the viewer to immediately focus on the subject you are shooting. Like a red bird on a green background, or a model wearing a yellow dress on a blue sea and sky background, they will definitely become the focus of the picture.

However, since it comes to complementary colors, it is also important to note that two similar colors in the color wheel should not be used as the hue of the main body and the background at the same time. It’s easy to confuse the primary and secondary, such as red and pink, blue and cyan.

  1. Change the perspective

When we feel that the background in the environment is not good-looking, we might as well change our perspective. Previously, we used eye-level framing to shoot the model, which is a head-up model, so the background is naturally the environment behind the model.

If the environment behind you really does not satisfy you, then you can lower your posture and squat down to take the view from the bottom up, so that the background becomes the environment above. Generally speaking, a higher background can effectively eliminate the messy factors that we see in daily life, and make the picture more pure.


  1. Let the background speak

The background is not only an aid, the background can also become the theme of the picture. The model is the flashpoint, and the background is the environmental factor that detonated the flashpoint.

Influential photos can always tell the audience a story, and the background must be an important part of the story. The background can bring a lot of information and help the subject to express their story.

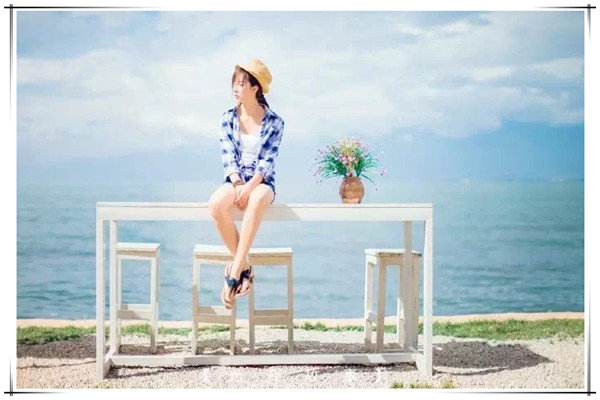
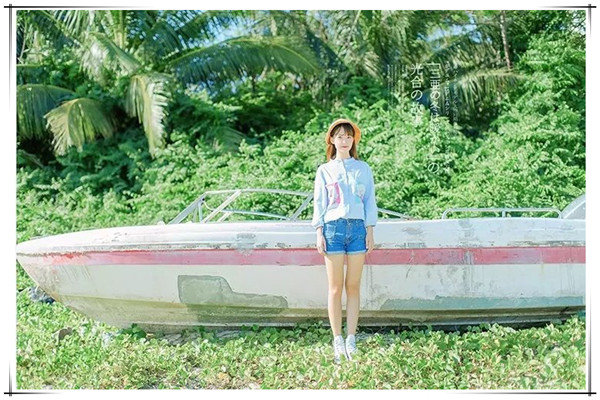
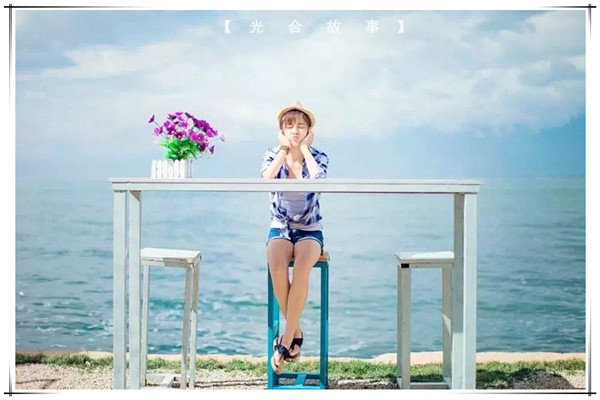
Small and fresh shooting guide for location

It looks easy to be fresh, but it is not easy to shoot. Everyone usually sees the surface of the small fresh photos: whether the color of the photo is transparent, whether the model’s movements are natural…These are the most basic of small fresh photos. But the most important thing for fresh is to control the expression of the model’s emotions. For example, you will laugh happily, or your expression will be cute. Although there are a lot of photos taken online for this kind of freshness, there is not too much feeling that there are people and scenes in one.


1. Every choice has a different achievement

First of all, let’s talk about the preliminary preparations. You must have your own ideas, that is, you choose places, costumes, models, and props. If you don’t prepare the early stuff, you may feel that the film you come out is different from others. I took the photos in the same place, but because your costumes don’t match the scene well, or the props are not in place, the photos that come out are not the same.

(1)Venue selection: green, color

Generally speaking, the site chosen by the small fresh style can be richer in green, such as schools, groves, rice fields, etc., as well as places with richer colors.

(2)Model selection: cute, cute

The model is best to choose a little cute, a little cute, or a clear and simple eyes. Short hair and long hair are fine, but try not to be in the middle, or it will look more mature.

(3)Clothing selection: fresh and elegant

It is best to prepare some fresh and elegant clothing, do not choose too dark or dark clothing.

(4)Prop selection: the key is to match

After choosing costumes and scenes, we need to prepare props. For example, if you are in school, you may need to prepare school-related books and sports equipment. If you go to the fields, prepare insect nets and the like. The props we prepare must match the scene. The choice of costumes, scenes, props and models is indispensable!

  1. The small freshness framed

When we are ready in the early stage, all that is left is how to compose the shots, which can make the photos cleaner and more refreshing.

Framing Tip 1: Four Elements

Except for the main person, there should be no more than four other elements: the first is the sky, the second is the mountain, the third is the sea, and the fourth is the sand. These are the four elements. If there are other elements added, and there are people or boats behind, the picture will look messy.

Framing Tip 2: Sky

What elements are there except people in the above picture: one is the sky, the other is green plants, and the third is a broken ship, three elements. But we must remember: location shooting, but 90% of them will have the element of “sky”, why?

Because after adding the sky, there will be a sense of space in the photo, which will make people think that this is a big space, giving people a kind of imagination. Let’s take a look after cutting off the sky.

It looks like the picture is equally clean, but because one element of the sky is missing, the whole scene seems to be relatively narrow, not so wide, and a bit depressing. When we take pictures, we try to have an element of sky. So don’t have too many photos of a group of photos from the top-down angle, because if you take the top-down view, there will definitely be no sky.

  1. The horizontal composition is very different from the vertical compositionIn the above two photos, the framing is actually the same, but I will make the viewer have a different feeling by changing the horizontal composition and vertical composition.
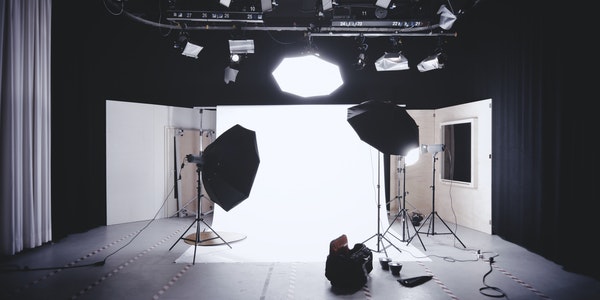
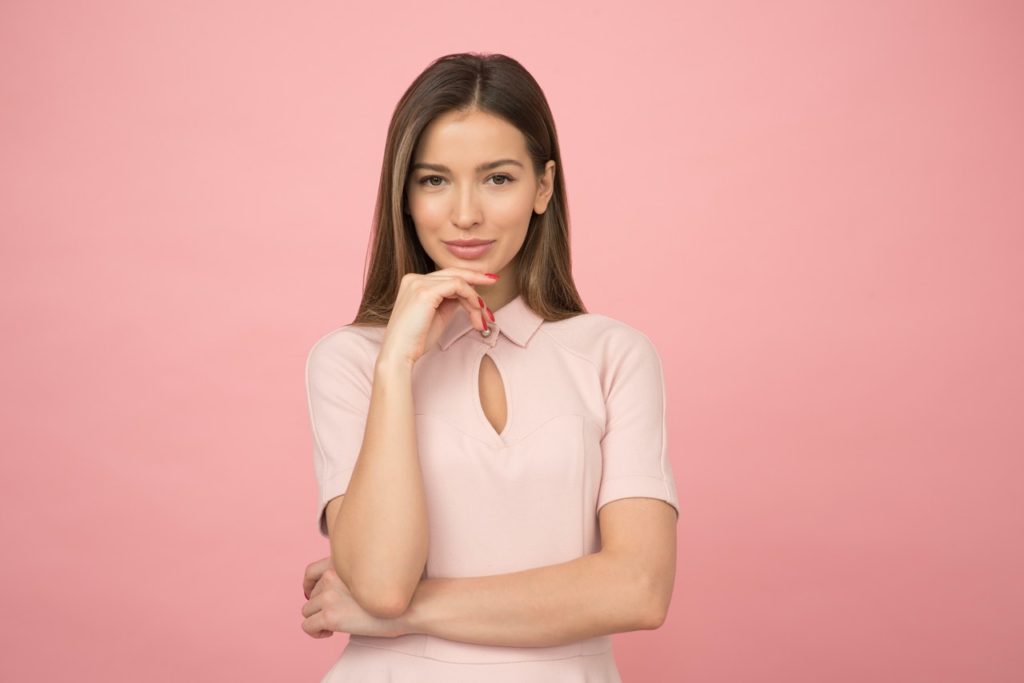
    In these two photos, the model’s movements have not changed much. I would stand a little closer and take a horizontal composition and then take a vertical composition a little further away, which will give the viewer a different feeling. When taking pictures, you can also make different changes to the viewer by switching between horizontal and vertical composition and distance.


    1. Far and near, high and low, each has its own style

    When shooting, you can also take a close-up of the head portrait, or the half-length or full-body environment according to the specific conditions of the model itself and the surrounding environment, and finally show it in the photo.

Categories
Studio Lights Education

Detailed Breakdown of Indoor Photography Light Layout

If the subject of the shot is a person, then the expression of a person’s facial expression to reflect a person’s character is the fundamental starting point we want to express in light use. In portrait shooting, there is nothing more than a frontal face and three points (3 /4) Three face directions: face and side face. In this sense, we can talk about the use of portrait photography from three aspects:

Use of Frontal Facial Light

On the front face, all the faces of the characters face the camera, and each part of the face is symmetrical, but lacks a sense of depth.

At present, the three-lamp lighting used in most photo studios can easily make the characters appear fat. Then the most suitable lighting for the front face is the middle light at the middle position (approximately at 40-45 degrees). The portraits taken by the lights in this position have a good three-dimensional effect and can be used for various types of portrait photography. People are also familiar with the effects of light.

The character is illuminated by the light directly above, the face is evenly illuminated, the face is symmetrical, and has a coordinated light-dark contrast relationship. The butterfly light we are familiar with belongs to the light of this position. In actual shooting, as long as the person is facing the front face to the camera, the butterfly light, which was once favored by Hollywood photographers and is still commonly used by fashion photographers, is the best choice.

It should be noted that in the daily shooting of our photo studio, due to the particularity of commercial photography, we need fast and convenient lighting, so the high and low lighting is a very good photo studio lighting based on the butterfly light. It makes the character’s face get soft and even illumination, and produces a faint shadow on both sides of the cheeks to give the character a three-dimensional effect.

Pay attention to two points when shooting with high and low light: one is to add reflectors on both sides of the person to reduce the light ratio, so that the light transition is more natural, and the other is that the person should be located near the vertical intersection of the two light planes.

Another characteristic lighting for the front face is the double-edge light at the horizontal or middle position as the main light. The lighting effect is symmetrical, with bright edges on the entire outline of the head.

This lighting is the only lighting method on the front face that uses two lamps as the main light. Some photographers also call it clip light, which means that the left and right lights sandwich the person in the middle to shoot, and the person has a strong sense of three-dimensionality.

When this kind of lighting is used in the studio, attention must be paid to the use of frontal auxiliary light. Generally speaking, high and low light can be used to illuminate the face directly in front of the person. The intensity of the double edge light is one to two levels higher than that of the high and low light. The exposure is based on the front light.

The final light-receiving effect of the character is that the front face is evenly lighted, and the two sides are exposed to strong light to produce a contrast effect of light and dark. The picture is beautiful and translucent. Not only for group photo shoots, but also for shooting magazine covers and other bright types of shooting.

Use of Light on 1/3 of the Face

The three-point face position starts from the moment one eye can be seen until the end of the nose and the contour line of the cheek are on the same line. This position can give people a sense of depth and three-dimensionality in particular. Therefore, when using light on the three-point face, the main light is generally used on the narrow side of the person’s face (the side away from the camera), which is basically the mid-light or cross-light position.

The three-dimensional sense of the characters in this position is very strong, and the picture has a sense of stability. The auxiliary light is used directly in front of the face, which is the center position, and a reflector is added to the camera position. If the light ratio is controlled properly, the character’s face starts from the far side to the near side at this time, the light and dark tones gradually transition, the light is uniform and natural, and the three-dimensional effect is strong without lack of softness.

In addition, the main light is also often used directly in front of the character’s face. The approximate location is in the middle of the center (about 40-45 degrees). The lighting in this position makes the character’s three-dimensional appearance also behave very well, the cheek line effect is strong, and the portrait looks very pleasing to the eye. But because there is a large shadow on the side of the head, we need to place an auxiliary light between the camera and the main light (near the face) or at the camera position and control the appropriate light ratio. The tonal transition must be natural, without harsh shadows.

The seven-point face (7/8) is closer to the three-point face. The seven-point face is between the front and the three-point face. The principle of using light is closer to the three-point face, so we won’t repeat it.

Tips for Arranging the Light on the Side Face:

The side face is easier to understand. In portrait photography, when we want to emphasize the contour lines instead of the flat effect and perspective effect, we can use the side position.

The side light, the main light is mostly used in the front position of the character (medium or middle-high center position). In this position, the lighting effect is good, the near cheek lines perform well, the three-dimensional effect and expressiveness are quite good, and it is suitable for general portrait photography.

The whole picture appears smooth. When the main light is in this position, the auxiliary light should be used in the middle of the camera and the main light or the camera position. Do not place the auxiliary light on the other side of the main light to avoid unnatural tonal transitions on the character’s face.

When the main light is used in the far side middle position and the far side cross light position, the three-dimensional effect is good, the style is strong, the near side facial lines are strong, and the contours are obvious.

At this time, the auxiliary light is mostly used in front of the person’s face or in the middle of the camera and the main light, and in order to obtain a soft light transition, you can add a reflector at the camera position or the other side of the main light to improve the brightness of the shadow.

At present, the lighting method commonly used in most photo studios is the lighting method of three main and auxiliary lights in front of the characters. So in shooting, no matter the front face, triple face or side face, we can actually simply follow this principle: the main light should generally be adjusted accordingly with the change of the character’s face. It is mostly used on the narrow side of the character’s face. The height of the auxiliary light is slightly lower than that of the main light and is used on the narrow side of the character’s face. In most cases, the ground light follows the main light. According to this principle, we can not only ensure that the characters receive the light evenly, but also enhance the three-dimensional sense of the characters.

Of course, there are many lighting methods for portrait photography. Every mature photographer can design a reasonable lighting according to his own intentions and specific shooting themes, because the lighting of portrait photography is ever-changing.

How to Use Flash and Reflector Umbrella

The reflective umbrella was hit too low, illuminating the waist of the model’s handicrafts, and shadows on the face.

The general idea is to use a light to illuminate a half-length portrait. Naturally, let the light illuminate the upper body of the model. So there is such a way of lighting: the flash is facing the middle of the reflective umbrella, and the reflective umbrella is pointing to the upper body of the model.

This is not an ideal lighting method. But from its effect, it can help us understand the lighting characteristics of “flash + reflective umbrella”: the flash is facing the middle of the reflective umbrella, so the light reflected from this part is the strongest. The further toward the edge of the umbrella, the weaker the light. If you want to focus on which part you want to illuminate, let the handle of the reflector point to which part. Understanding this feature is the basis for us to use the reflective umbrella in the next step.

In addition, before introducing the use of flash, we must first understand the white balance. Any kind of light source has a certain color temperature. Only when the color temperature of the camera is set close to the color temperature of the light source can a more accurate color reproduction be obtained.

Generally speaking, the color temperature of the flash is close to the color temperature of daylight, which is 5500K-5600K. When using the camera’s built-in flash, the camera’s automatic white balance can be automatically set accordingly. However, when using an external flash, because the flash does not emit light before taking a picture, the camera cannot determine the color temperature of the light. According to the ambient light setting at the time, the automatic white balance will fail, so you need to manually set the white balance.

When shooting indoors with a flash, you can set the camera to “daylight” white balance. Of course, it is best to set the color temperature accurately with manual settings. With the same set of lights, the color temperature will not change much, so once the setting is accurate, you can always use this setting.

Use a Reflective Umbrella as the Main Light Source

From the above sample, although the model’s face is well illuminated, and the light is reflected by the reflective umbrella, it is much softer, but if you carefully observe the lighting effect, the light ratio is still too large, and the model’s forehead and nose have bright spots. .

In order to reduce the light ratio, we might as well move the light source farther. Because the closer you are to the light source, the more concentrated the light. Do a simple test, point the light at the wall, you can see obvious spots, and even the shape of the filament. Pull it farther, and there is only an illuminated area. The use of reflector umbrellas only partially changed the light quality, and the law of distance is still the same as that of direct lighting. When the irradiation distance is lengthened, there is no longer an obvious bright area, but the entire range is illuminated.

After the distance is opened, the light ratio is significantly reduced (of course, the light becomes weak, and the camera aperture needs to be opened accordingly). The shadow on the model’s face is not so heavy, the light is no longer as harsh as the direct sunlight, and it looks more like the effect of natural light from a window.

In order to further reduce the shadow on the right side of the model, another method is to change the angle of light, move the light closer to the camera, close to lighting from the front.

In terms of lighting pattern, this result would be more of a loop, referring to the small “loop” of shadow under the nose, and less of a “Rembrandt”, typified by the upsidedown triangle of light created on the cheek from light spilling across the bridge of the nose

In general, this effect is more satisfactory. If you want to use a single light to shoot portraits, this lighting method is a successful example. Although there are still shadows, it has weakened a lot, and the facial features of the model perform well. This lighting is not too dramatic, but it is very practical.

Categories
Studio Lights Education

7 Key Elements of Portrait Photography

Portrait photography is a kind of photography in which static or dynamic people are taken as subjects, and their appearance and mental outlook are emphasized, thereby directly expressing people. As one of the most common photographic subjects, what should we pay attention to in the process of learning?

1. What is the key to the success of portrait photography?

What is portrait photography?

All subjects that involve characters but take characters as the main body belong to the category of portrait photography.

Since the birth of photography in 1839, people have always been the most important subject in the art of photography, and the key to the success of inductive portrait photography lies in “both form and spirit.” In real life, everyone’s appearance and personality characteristics are different, and their mental outlook is ever-changing.

A photo of a person, if it captures the subject’s look and emotions, but does not perform well, it cannot withstand close scrutiny and lacks the artistic expression that it should have; on the contrary, if the appearance is similar, but the look and emotion are not. Scribing, the character performance is bound to be dull and lacking in flavor.

Therefore, portrait photography should not be limited to shooting images, but should focus on the subject’s appearance and avoid weaknesses to highlight the beauty. In order to better convey and depict the spiritual outlook of the characters through the appearance, so that the characters in the photo look more beautiful, more vivid, and more energetic than the real subject. Only when it is “like in shape” first can it be vivid.

In order to make portrait photography meet the requirements of “both body and spirit”, photographers should not only master the camera use technology correctly, but also observe excellent photographic works and learn relevant photography knowledge, and often carefully observe various characters in life. Think hard and develop quick thinking and judgment skills. So that in the practice of portrait photography, you can have a distinctive eye, deliberately seek novelty, choose the subject without losing the opportunity, and capture the typical and vivid moments of the subject, and take pictures of lifelike characters.

2. How many shooting methods are there for portrait photography?

The shooting methods of portrait photography are nothing more than posing, snapping, and a combination of posing/grabbing. Each has its own characteristics and requirements, but also interacts and cooperates with each other to form an indispensable modeling technique for portrait photography.

(1) Posing

That is to say, during the entire shooting process, the subject is always fully aware that someone is taking a picture of himself, so that the photographer can have more time to complete the shooting after preparing for the shooting and placing the subject at the mercy. Therefore, this shooting method is often used for portrait photos, portrait photos, advertising photos, etc. But under the circumstance of mercy, the photographer should do everything possible to relax the subject’s mind in order to cooperate with the shooting.

(2) Snapshot

That is to say, during the entire photography process, the subject is not allowed to know that someone is taking a picture of himself, and the photographer directly captures the typical and vivid moments of the person’s activities. When shooting in this way, the composition and lighting may be unsatisfactory, but the subject being photographed is in a state of unrestrained activity, with a more natural look and behavior.

But photographers need richer life experience and keen eyesight. They are good at capturing the most typical, perfect, and most eye-catching moments of the subject in the fleeting activities of various characters, and press the shutter in time.

(3) Combination of posing and snapping

That is to say, during the whole photography process, although the subject knows that someone is taking a picture of himself, the exact shooting time is not informed, so that the subject’s attention is still focused on the things they are engaged in, and the photographer can have a certain degree of Time, choose the best angle and light, and after a smaller range of adjustments and manipulations, press the shutter at an appropriate time. This shooting method takes into account the advantages of both posing and snapping.

3. Which camera should I choose for portrait photography?

Although general cameras can be used for portrait photography, their performance and features vary depending on their model and structure. How to choose a camera for portrait photography? Usually, it can be considered from three aspects: the purpose of photography, personal hobbies and economic conditions.

(1) Photography purposes

This refers to the scope of use of the camera. Beginners who just want to take family photos, personal commemorative photos of the whole body and half of the body, etc., can easily deal with it by buying an ordinary entry-level digital SLR. This type of camera is generally equipped with a kit lens, which can basically control most portraits.

If you plan to use the camera for character art creation, you should consider buying a full-frame SLR or mirrorless camera. This type of camera has excellent performance and better picture quality, and can be used to take photos of various subjects such as full-length, half-length, and specific avatars.

(2) Personal hobbies

Every photographer has different hobbies, some like full-frame (135) cameras, and some like medium-format (120) cameras. These two types of cameras have their own strengths and characteristics. Generally speaking, full-frame cameras are small and exquisite, easy to carry, convenient to use, and relatively low cost. Due to the large size of the negative film, the medium-format camera has a relatively more delicate and soft picture, which can easily make the character’s face show the effect of rich layers and real texture.

(3) Economic conditions

On the market, there are many camera models with different functions and different structures. Although the basic performance is roughly the same, the prices are quite different from each other. When purchasing a camera, you must consider its price to adapt to your own economic conditions. Under normal circumstances, buying a mid-range camera can be suitable for all kinds of portrait photography.

You must realize that the quality of the camera is not necessarily related to the quality of photos of people. Using a high-end camera does not guarantee that every picture is of good quality. Using a normal camera, you can also take high-quality photos of people. The important problem is that you must be familiar with the structure and performance of the camera, and be able to master the operation technology proficiently.

4. Which lens should I choose for portrait photography?

Although the various lenses of the camera can be used for portrait photography, strictly speaking, the lens for portrait photography should have the following optional requirements:

(1) Imaging

The image quality of a portrait photography lens requires a clear image and a soft effect. Because portrait photography generally focuses on the expression of the face, the image quality of the lens should be able to meet the requirements of rich layers, real texture, full details, and moisturizing skin.

(2) Focal length

Everyone’s most common standard lens (50mm) is only suitable for taking full-body or half-body photos. If it is used to shoot half-length portraits or close-up portraits, the distance will often cause the perspective distortion of the portrait images, and some lenses cannot be brought into a clear focus if they are taken at close to the specified minimum shooting distance.

Therefore, to shoot avatars or close-ups, it is necessary to use a medium-focus or telephoto lens, whose focal length generally needs to exceed the standard lens by 1-2 times. Taking a full-frame camera as an example, the focal length of the lens should be above 105mm. In this way, the distance between the camera and the person can be maintained at least 1.5 meters, which not only makes the focus clear, but also avoids deformation such as big nose and small ears.

(3) Aperture

To shoot close-ups of busts and headshots, the larger the maximum aperture of the lens, the better, so that there is enough space to make the subject clear, the background is slightly blurred, and the perspective of near and far space is enhanced to highlight the subject. In addition, the lens has a larger aperture, so you can still use a faster shutter speed when shooting in a slightly darker light without a flash.

5. What photographic equipment and accessories should I bring when I go out to take portraits?

The principle of consideration for the photographic equipment to be carried for outdoor portraits is “lightweight + efficient”.

(1) Photographic equipment

You can take pictures of ordinary life with a mobile phone. But if you are going to further engage in portrait photography creation, SLR (micro-single) is a must-have option, coupled with a standard 24-70mm zoom. One machine with one lens adapts to the needs of photography and can reduce the size of the equipment. Or, while using the original standard lens of the camera, it is also possible to configure a wide-angle lens and a medium-focus lens at the same time to facilitate emergency.

(2)Necessary Accessories

No matter what camera you are carrying, the lens hood, related filters and tripod are best equipped. If conditions permit, you can also bring a small electronic flash or self-made reflector for auxiliary lighting. In order to keep the camera and lens clean at all times, you should bring lens paper and lens brush. It is ideal if you can bring a blower. The most important thing is a suitable camera bag, which can well protect your camera lens, hold more necessary accessories, and reduce your burden.

6. What are the basic principles of portrait photography composition?

The composition of portrait photography should be based on the requirements of the subject, simplifying and excluding everything that has nothing to do with the subject, and placing the main character in the dominant position. This dominant position should not be in the center of the picture, because it seems to divide the picture into two halves, appearing dull, blunt, and lacking in artistic expression.

Usually, the main character can be arranged on the aesthetic point of the golden section. The so-called golden section is one of the composition rules of plastic arts, that is, a line segment is divided into two parts, so that the ratio of the larger part to the whole is equal to the ratio of the smaller part to the larger part, and the ratio is 1:1.618.

It is necessary to draw two straight lines horizontally and vertically on the photographic picture, so that the picture is roughly divided into nine grids, and the four intersections formed by these four straight lines in the picture are taken as the golden section. Generally speaking, these four intersections are recognized as having aesthetic value. No matter which one of them, it is an ideal position for arranging the main character. Because this position not only changes, but also has a sense of stability and comfort, which meets people’s aesthetic requirements.

In addition, you must also pay attention to the arrangement of characters and other sceneries. Sometimes, in addition to making appropriate arrangements for the position of the main character, it is often necessary to use another character and scene to play a role of cultivating or balancing. With regard to photos of dynamic characters, such as toddlers, bicycle races, etc., leave more blank areas in front of the dynamic characters so that there is room to stretch forward, so as to conform to the usual habit of observing things.

7. How to master the picture balance in portrait photography?

Equilibrium is a concept in mechanics. When applied to portrait photography composition, it means that the subject in the picture is in a relatively balanced state, so that the photo of the person can be visually stable and comfortable. In order to master the picture balance of portrait photography, generally pay attention to the following aspects:

(1) The character’s head and face

The head and face of portrait photography, visually, the face is heavier and the back of the head is lighter. Therefore, when shooting a profile image, the image needs to be rearward, and there is even no space behind the back of the head, so that the space in front of the face is larger than the back of the head. In this way, it can not only give the face’s line of sight to stretch out, but also maintain the balance of the weight of the picture. But there are also some themes that express the plot of “impulse force”. The space in front of the characters’ faces is smaller than the back of the head, so that the picture has a sense of weightlessness. This is a special location arrangement according to the needs of the subject.

(2) Subject aspect

In the inequality of portrait photography, the posture of the subject such as pitching, tilting or tilting often leads to the feeling of weightlessness and instability. For this reason, the subject’s own shoulders or hands and the props related to the theme can be used as “pads” to make the weightless subject play a stable role.

(3) Subject and foil

The subject of portrait photography with scenery as a foil, visually, the characters are more important, and the scenery is lighter. For this reason, the space occupied by the characters can be arranged smaller, and the space occupied by the scenery can be arranged larger to achieve a balanced picture.

(4) Light and shade

In portrait photography composition, the visual importance of lightness and darkness is also different. Generally, dark colors are more important, and light colors are lighter. Generally, a small area of ​​dark block surface can be balanced with a large area of ​​gray or light block surface. If a certain part is too deep or too shallow, and the weight is not coordinated enough, you can choose a light-colored scenery as a “liner” for the part that is too deep. You can also choose a dark scene as a “liner” in the part that is too light.

However, we must pay careful attention to the fact that there must be a certain degree of contrast between the deep and light scenes in order to increase or decrease the weight and balance the picture.

(5) In terms of color

Different colors have different visual components. Generally, warm colors and bright colors are heavier, and cool colors and dark colors are lighter. The law of balance should also be based on the warm or bright color of the small surface corresponding to the cool or dark color of the large surface. For example, around a small area of ​​a character’s face, a warm color can be arranged with a larger area of ​​cool color. When taking photos of warm-tone people, you should make the facial skin color as bright as possible, and make the surrounding warm colors darker, so that it is easy to highlight the subject and make the picture more balanced.