Categories
Studio Lights Education

Fill Light Techniques in Macro Photography

When it comes to supplemental lighting, people often think of portraits, especially commercial portraits, and various supplementary lighting techniques emerge in endlessly. In addition to portraits, there are also many techniques for ecological lighting. The special topic introduces a variety of ecological lighting techniques, guys who have never known it, come and learn.

Continuous Light Source

Continuous light sources include tungsten filament lamps, quartz halogen lamps and LED lamps. The biggest advantage of tungsten lamps and quartz halogen lamps is that they allow you to accurately predict the final image effect. However, it generates a lot of heat and is not suitable for delicate living bodies. They may have to cooperate with a slower shutter speed, so they are not suitable for shooting moving subjects. However, the LED lamp solves the heat problem very well and reduces the heat to a minimum.

The Brightness Range of the Subject

Under normal circumstances, a digital camera cannot capture all the tones that the human eye can see. On a sunny day, the brightness range may far exceed 8 stops, and the bright area may be thousands of times brighter than the shaded area.

An ordinary digital camera can usually only record a brightness range of about 5 files. This means that details in shadows or highlights may be lost, or both. We can change the light in many ways. For example, a diffuser or reflector can also be used to fill up the shadows with an electronic flash. Each accessory has its own characteristics, it is worth trying more to see which is more suitable for different subjects.

Reflector

The main purpose of the reflector is to reflect light to the shadow area of a scene, brighten it, and reduce the overall contrast.

We can use many things as reflective surfaces, such as white cardboard, silver reflectors, mirrors, etc., which can reflect light onto shadows. Different surface materials and sizes determine its own characteristics.

Some manufacturers produce a series of circular reflectors, which can be folded into a portable pouch. Some companies produce all kinds of reflectors, including white, silver and gold.

For most close-up and macro photography, you may only need a small reflector with a diameter of 30 cm. They are only about 10 cm in size when folded, and white and silver are the most commonly used. Small pieces of white cardboard, silver cardboard or mirror cards are also worth keeping. The silver lid of the food packaging can be changed to a useful reflector.

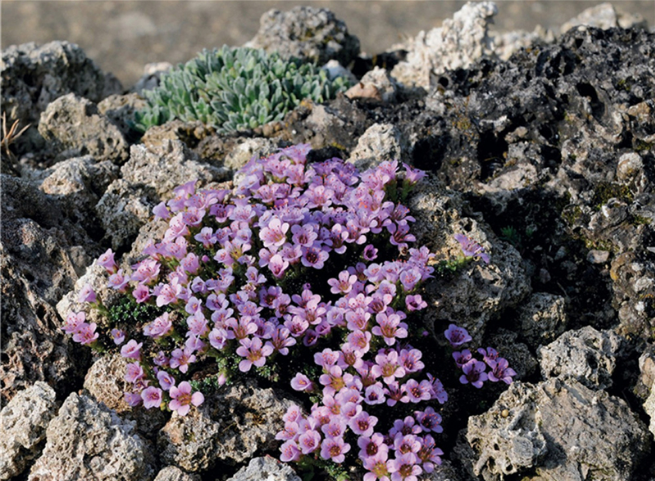
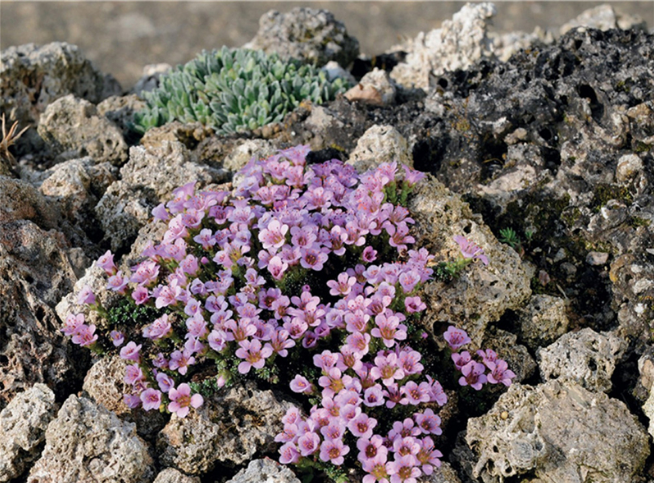
The lighting of this alpine plant in the picture below is too strong, creating a deep shadow. A white reflector is placed on the right side of the picture below to reflect the light onto the shadows, thereby obtaining a more pleasant effect.
Diffuser

The diffuser is placed between the light source and the subject to soften the light, creating an effect similar to clouds covering the sun.

Like reflectors, they come in many types. Round foldable diffusers or umbrellas are available on the market, but they can also be randomly replaced with drawing paper or gauze that covers greenhouses.

If you use other materials instead of professional diffusers, such as drawing paper, you may need to verify whether its color is neutral and not cast. The simple way is to shoot 18% gray cards or similar objects under the light of a softbox.
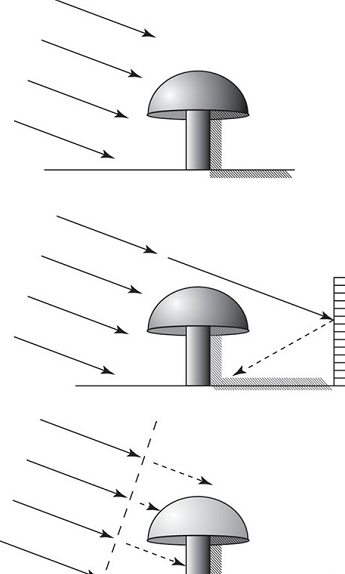
(1) The harsh sunlight casts deep shadows. The brightness range of the subject is larger than the range that the camera can record, and the effect is a black shadow without details.

(2) The reflector can be used to reflect light back to the shadow, reducing the overall contrast. Silver reflectors are better than white reflectors. If there is a highlight on the upper right of the subject, using silver will not affect it.

(3) Put the diffuser between the subject and the sunlight, it will soften the sunlight like clouds and dilute the bright highlights.

Flash

The electronic flash is characterized by small size, high power, and consistent light. When used with a digital camera, it can be used as the main light source or as an auxiliary light in daylight, just like a reflector.

It is generally believed that flashlights can “freeze” moving subjects, but the flash duration of many flashlights is only about 1/500s, which may cause blurring of objects moving at high speeds.

Photographer Stephen Dalton uses special high-speed flash equipment when photographing insects in flight, and the flash can reach 1/25000s or less.

If you want to take photos in this regard, you need to check the technical specifications of your flash. When shooting indoors, you can completely use the flash to light the subject. When shooting outdoors, the flash can be used in combination with daylight in various ways.

No matter how you use the flashlight, the general rule is that its effect should not be too conspicuous, the more natural it looks, the better.
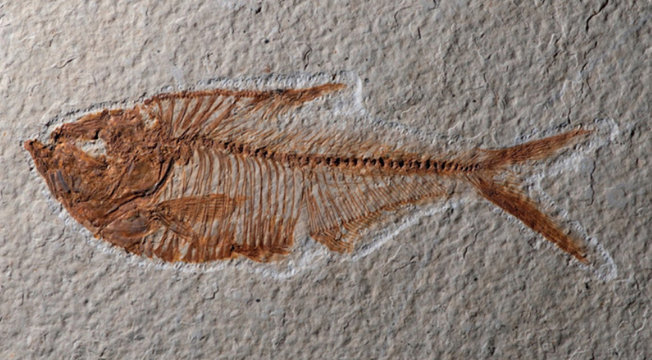
Fish fossil embedded in a flat limestone. In order to emphasize the surface texture, the photographer placed a small flash at an acute angle to the specimen. Note the ruler next to the specimen. 1/60s, f/11. Nikon D300, Nikkor 105mm macro lens.
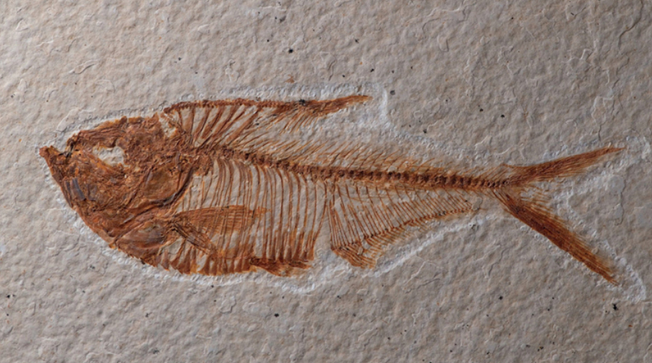
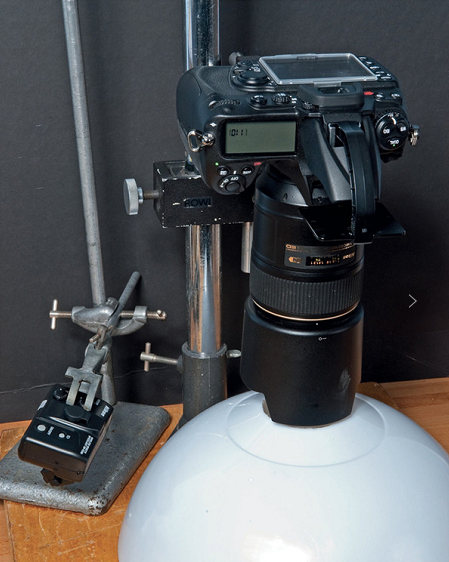
The fossil is placed in a diffuser (a white plastic lampshade) to produce a softer effect, and the details of unevenness are reduced. 1/60s, f/11. Nikon D300, Nikkor 105mm macro lens.

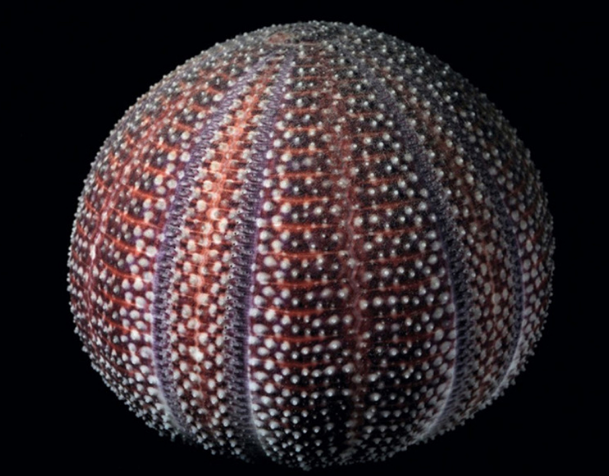
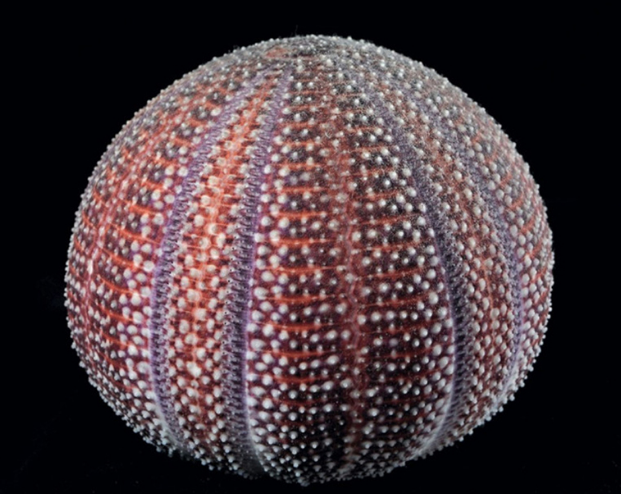
(A) Use a lamp to light the sea urchin from the left. The image has a high contrast and lacks details in the shadows.

(B) A silver reflector was used to fill in the shadows on the right side, but the back of the sea urchin and the background were a bit blurred.

(C) A flash is placed behind the sea urchin to separate the subject from the background.Picture A
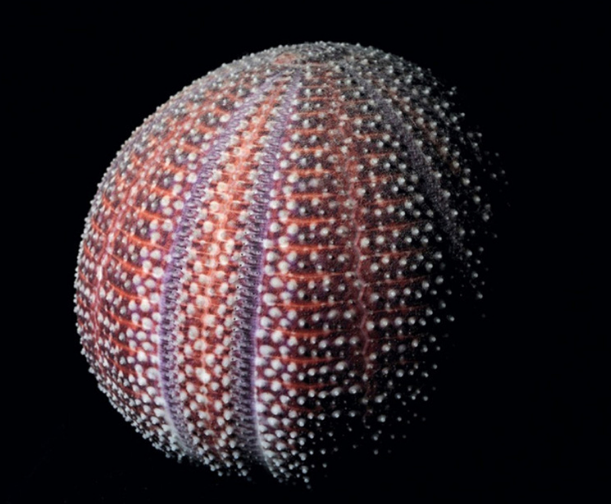
Pictrue B

Picture C

Combination of flash and daylight

The combination of a small electronic flash element and daylight can balance the light ratio. The output of the flash can be adjusted according to the intensity of sunlight, thereby adjusting the intensity of the flash to achieve various light effects. There are two main ways to use it:

  1. Mainly natural light, supplemented by flash.
  2. The flash is the mainstay, and the natural light is the supplement.

★ Mainly natural light, supplemented by flash

Suppose you are shooting mushrooms in a harsh environment (assuming the brightness range of the subject is 400:1). The camera’s TTL metering gives an exposure of 1/60s, f/11. If you add a flash to this setting and set the flash output according to f/11, the subject will be overexposed at this time because it has been correctly exposed twice.

However, if the flash is adjusted to -1 EV exposure compensation, daylight will be used as the main light and the flash will be used as the auxiliary light. You can try different exposure compensation settings. For subjects whose midtones are dominant, the exposure compensation of -1.7EV may work well. For subjects with shallower tones, -0.7EV is sufficient.

(1) When the light ratio is 400:1 (highlight reflects 400 units of light, while shadows reflect 1 unit of light), the flash is used to add one unit of light to the entire scene.

(2) At this time, the light ratio becomes 401:2 or 200.5:1, and the contrast is reduced by half. Note that in this case, the shadows are affected far more severely than the highlights. This is also one of the reasons why wedding photographers like to use flash to fill light on sunny days-the contrast between the bride’s white wedding dress and the groom’s black suit is too strong. Similar techniques are often used by bird and wildlife photographers, such as increasing the brightness of feathers or adding a little highlight to the pupils.

★ Flash is the mainstay, natural light is the supplement

If the same mushroom grows in a dense woodland with dark light, you can use flash as the main light source and add some “sparks” as supplementary light.

You may need to use the off-camera hot shoe connection to place the flash on a side above the subject, or behind or on the back. First adjust the aperture according to the flash (such as f/11).

If the standard speed of flash sync is 1/125s, the background will be very dark, even black. On the contrary, assuming no flash, use the corresponding shutter speed of f/11-in some cases it may be as low as 1/2s or more than 1s. Press the shutter, and the flash will first correctly expose the mushrooms.

At this time, the shutter remains open for a long time, which will fill in the shadows produced by the flash and shoot the background. This technique has an obvious disadvantage: if the subject is moving, such as swaying in the breeze, although the flash will freeze the subject for a certain moment, its exposure under natural light will form a “ghost”.


Almost every outdoor shooting situation is different, you should try more according to different subjects to achieve the desired effect.

We are now discussing some basic principles of daylight combined with flash. Some advanced flashes, such as Nikon SB800, can save us a lot of calculations. For example, many cameras have the “slow sync” function, which can automatically balance the ambient light and flash, and will prevent the background from becoming too dark by using a longer shutter speed.

Wireless flash devices such as the “Nikon Creative Lighting System” can flexibly adjust the position and brightness of the flash without worrying about extension cords.

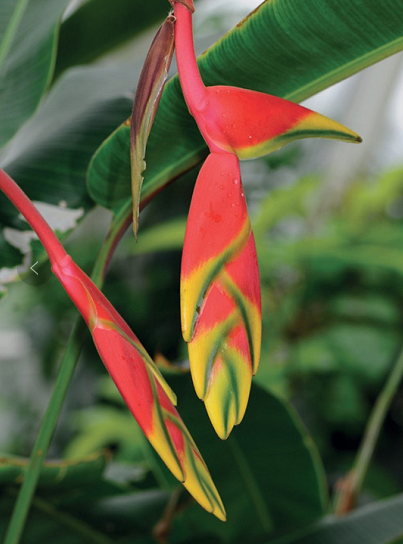
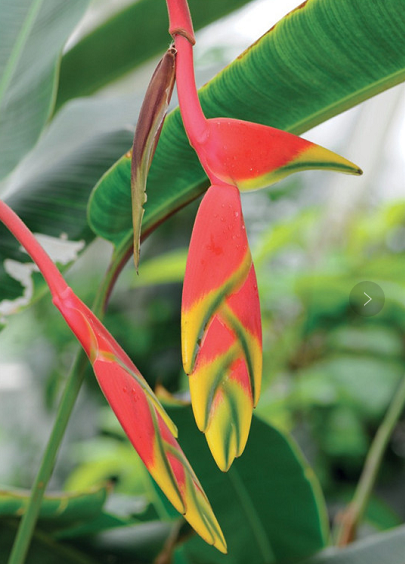
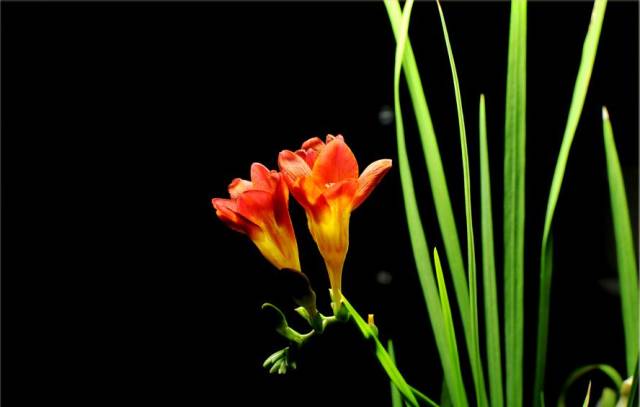
Lobster flowers (Helena) in a glass greenhouse.

(1) Shoot in daylight, 1/40s, f/8. The picture looks flat due to scattered light.

(2) Using two Nikon SB-R200 macro flashes, 1/60s, f/8, the photos look contrasted.

(3) Using two Nikon SBR200 macro flashes, 1/30s, f/8, the photo shows more daylight and gives a more natural effect. Nikon D300, Nikkor 105mm macro lens.Picture A
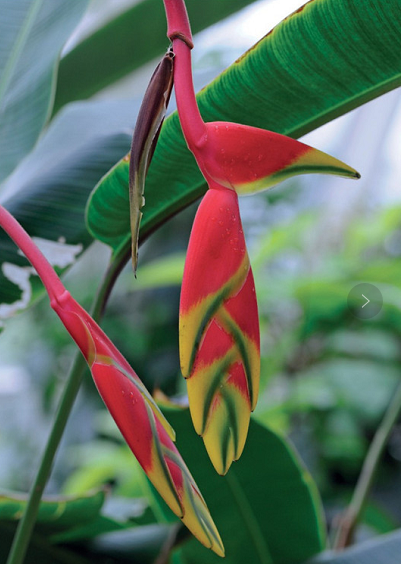
Picture B

Picture C

Ring flash

The ring flash is a circular flash tube that can be installed in front of the lens to provide an average shadowless illumination for the subject.

Initially they were used more in medical fields, such as dental or surgical photography. Since the lighting has no special features, it is only used for certain subjects, such as illuminating the internal structure of the bellflower.

Some components can be combined with two or more ring flashes and can be controlled independently, thus creating creative light effects.

When we use a traditional ring flash, we can try to cover a part of the flash tube (usually the lower left or lower right quarter) to create a layer.
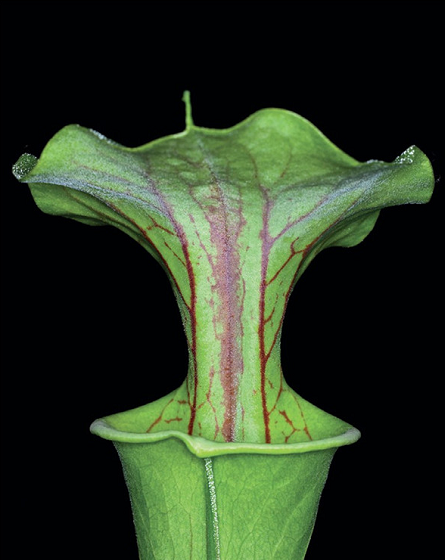
The ring flash did not show the depth or texture of this pitcher plant. 1/125s, f/8, Nikon D300, Nikkor 55mm macro lens.

Special flash for macro

Some manufacturers produce components that can mount one or more flashes in front of the lens. Such as the Nikon RC1 remote flash system, which is a ring device that can be installed in front of the lens, on which 8 small flashes can be placed, and the position and angle can be adjusted at will.

When you change from a horizontal composition to a vertical composition, this device can be changed flexibly. Its ring can be rotated, so it can ensure that the light effect of the vertical composition is the same as that of the horizontal composition.

There is also a separate flash that can be used for background or backlighting. This system is wireless and can be controlled by remote control or through the “control mode” of the camera.

The power of each flash head can be adjusted individually to obtain different light ratios. Each flash has a modeling light to precisely adjust the position of the flash, but the modeling light is not very useful in strong sunlight.

Customized flash bracket

When shooting a small subject in the field, there may be occasions where it is impractical to support the camera with any tripod, and you need to hold the camera at this time.

Some macro lenses are already equipped with image stabilizers, but we may also need to use flash, especially when shooting small insects. Many photographers use their self-made brackets that can fix one or more flashes when shooting insect-like subjects in the wild.

Like them, you also need a flexible bracket so that the flash can be arranged within a certain range of the lens. For example, it can be placed on the top, side or other positions of the lens. A bracket can be made by assembling metal belts, rigid or flexible poles, and spherical heads. When the flash is placed off-camera, you need an extension cord to trigger the flash.

If necessary, use a lower power flash to fill in the shadows caused by the main light. It should be located as close as possible to the camera, it is meaningless to fill in the shadows outside the lens range.

You can also add a small reflector on the other side of the flash to fill up the shadows. Put the diffuser on the flash or stuck on the lens, you can get softer light.

The main purpose of the stand is to provide a small and flexible component for outdoor photography, so it needs to be portable, lighter, and easy to assemble and operate. Many manufacturers manufacture flash brackets, such as Kirk, Really Right Stuff, Wimberley, Novoflex and Manfrotto.
Categories
Studio Lights Education

Exposure Compensation Tips

Brief Introduction

As the team of photography enthusiasts continues to expand, many people use their own digital cameras.

Photography is no longer an advanced art, and it has become a part of people’s daily life with continuous popularity. The feeling of being superior in the past no longer exists. Instead, the relaxing experience photography in the streets and alleys in the park and historic sites brings us happy people.

With the love of photography, a digital camera with manual functions has become a must. In actual use, I believe everyone uses shutter priority as the most important shooting control method. With the support of the fast autofocus system, it is very convenient to be able to capture many wonderful moments around you that are just a little bit lost.

While easily obtaining the photos we need, we also found some problems. Because the advantages of digital cameras no longer need the support of film, shooting is much more casual. In a more complicated environment, the metering may be inaccurate, resulting in a lot of waste films. Although it can be deleted at any time, the wonderful moments will also be gone.

So, how can we minimize the chance of this phenomenon happening? The answer is this, we can control the output of the photo by adjusting the amount of different exposure compensation, so as to solve the problem of underexposure or overexposure simply and effectively.

Of course, the method is easy to say, but the actual application requires a lot of empirical judgment. Let’s talk about how to manage this easy-to-operate and powerful exposure compensation function.

What is exposure compensation

Speaking of exposure compensation, we must first mention a term-exposure. The so-called exposure is EV (Expose Value), and the exposure compensation adjustment is actually this EV.

The adjustment range of exposure compensation is generally around ±2 EV. When adjusting, you can jump in steps of 1/3 EV or 1/2 EV, which can be roughly divided into -2.0, -1.7, -1, -1.0, -0.7, -0.3 and +0.3, +0.7, +1.0, +1.3, +1.7, +2.0 and other 12 levels.

During the shooting process of the digital camera, when the shutter is pressed halfway, the effect picture displayed on the LCD screen is basically the same as the actual output picture. If the displayed effect is obviously brighter or darker, it means that the automatic metering test result of the camera is quite different from the actual one. At this time exposure compensation comes in handy.

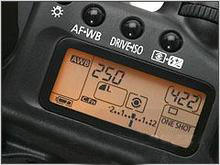
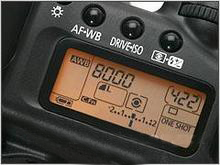
20D exposure compensation adjustment display window

When the exposure compensation is actually adjusted, the shutter speed will change. Simply put, the exposure compensation adjusts the EV, and the final way of adjustment is achieved by increasing or decreasing the shutter speed.

As mentioned above, the adjustment range of exposure compensation is generally around ±2 EV, so when we adjust EV step by step, the shutter speed will also change. Taking 20D as an example, we fixed the aperture of the lens to F4. When shooting objects with fixed light sources, assuming that the shutter speed is 1/20 S under normal Ev, it is 1/30 S when EV-0.5, and when EV+ At 0.5, it is 1/15 S.

Based on this principle, we can appropriately reduce the EV in some environments that require a high shutter speed, thereby increasing a certain shutter speed, making the picture clear and effectively avoiding the blurring of the picture caused by the shaking of the hand.

In addition, because we are using a digital camera, we have to pay attention to the relationship between exposure compensation and ISO. This is also some experience summarized by many photographers in actual use. Judging from the actual photos taken, when the EV is lower than the standard value, the picture looks purer due to insufficient exposure. When the EV ratio reaches the standard value, the exposure will increase and the relative purity of the output photos will decrease.

In actual use, we can lower the EV by one gear in advance, and then adjust it to a normal level in post-processing. In this way, you can effectively reduce the problem of noise affecting image quality.

Application of exposure compensation in actual shooting

Exposure compensation feels simple to say, but when it comes to the practical application stage, it is often at a loss.

What effect do you want for a scene to be shot? What style? These factors often determine the rigor of EV operation. When should it increase and when should it decrease, it is crucial to master this degree.

As the scene changes, the effect of EV adjustment changes is also very obvious. In general, there are the following general frameworks, mastering these can well reflect the creative intentions.

Firstly, Manually adjust the exposure

First of all, with the advent of winter, many friends like to shoot snow scenes. Especially after the snow has just fallen, the entire city is covered by white snowflakes. This is when the exposure level needs to be adjusted manually.

We know that today’s cameras are basically using TTL metering, with 18% mid-gray as the metering standard. And because the surface of snow is more reflective, after normal metering, the shutter speed will be higher than usual, so that the photos taken will be somewhat darker.

At this time, by increasing a certain EV value, the whole picture can look much more beautiful, and it can make your shooting process full of imagination.

So how much EV should I increase? We said that under normal daylight conditions, after adding 1EV, we can basically get the effect under normal standard EV.

In addition, some friends may consider using CPL (polarizer) to reduce the reflection of the snow surface, which is also a very effective method.

Secondly, how to shoot black and white background

When taking photos with black and white as the theme, we should lower the EV to make the black and white tones of the photo more pure. Because in most cases, we don’t want to see the originally black objects become dark gray.

When shooting with white as the main color, since the camera we mentioned above uses 18% mid-gray as the metering reference, we need to continue EV, so that white looks more “white”. This “white plus black minus” theory is particularly obvious when shooting product photos for some products. Through “white addition”, the background can be made white and clean, and the product itself can be more prominent.

Thirdly, the effect of contrast on exposure

In high-contrast conditions, in many cases the background is too bright, but the subject is very dark. At this time, whether to add EV or subtract EV, we say that we need to create according to the actual shooting needs.

If you need a silhouette effect, then there is no need to increase the EV. Conversely, if you want the subject to be shot clearly and accurately exposed, then you have to increase the EV at the expense of the background, that is to say, in order to make the subject accurately exposed, the background is overexposed.

To extend it, let’s talk about many people shooting at dusk, sunset and other landscapes, because the brightness close to the sun is very high, and the exposure is based on this, so it is difficult to imagine how many classic light and shadow effects come out. The correct way is to reduce at least 1EV to make the whole picture under-exposed, so that the sunset has a more layered feeling and can better reflect the artistic conception.

Fourthly, use face metering correctly

When shooting people, in order to make the people’s faces more fair, the method of directly metering the face and increasing the EV is often used. Using this method will make the face look more transparent under normal circumstances. If combined with the use of auxiliary equipment such as reflectors, the effect will be more obvious.

When we are shooting flowers and plants, although it feels similar to the feeling of shooting people, we have to lower the EV to shoot. Why? Because the flowers and plants are more beautiful, if you follow the standard EV exposure, the details of the flowers and plants may be lost. In order to retain more details and increase the texture of the flowers and plants, appropriately reducing the EV will have a good effect.

In short, the control of exposure compensation is not only a digital knowledge, but also an understanding of photography. Whether you increase or decrease the exposure, it is all about taking great photos. The above experience is only the most basic common sense, and does not mean that it is completely accurate. Because, more experience still depends on the fun that everyone brings through photography creation.

Categories
Studio Lights Education

Selection of Composition Direction and Height of Portrait Photography

Composition is derived from painting and refers to the layout and composition of the picture. Photography also involves composition, which refers to the whole process from framing the shooting to the tailoring of the photo. The composition of character photography mainly expresses the form of the character in the photographic picture, and uses all the styling factors to shape the image of the character to form a perfect picture as much as possible.

There are many similarities between photography and painting. Both are graphic art, so they must talk about composition. However, the composition of photography is very different from the composition of painting. The composition of painting is based on subjective design, while photography is based on objective selection. You can choose the material arbitrarily in the painting, and compose the picture according to your own ideas. Photography is to select materials on the spot, directly use the viewfinder to choose between, and compose the picture on the spot. Photographic composition is to transform the real life image into a plane image with frame restrictions.

Choice of direction and height

The choice of direction

“Looking horizontally as a ridge and a peak on the side, the distance is different.” From different angles, the scenery has different shapes. It’s the same when shooting scenery, and it’s the same when shooting people. Characters from different angles will have different looks. To determine the shooting angle, the first is to choose a different direction.

1. Frontal shooting

The camera is facing the subject and photographs the person from the front. The characters have complete features, distinct features, natural expressions, and solemn expressions. A frontal image generally requires that the person’s ears can be seen. If the photographer can only see one ear of the subject, even if most faces can be seen, this is not a frontal image. The frontal image is symmetrical to the facial features, making people feel more real, so photographers often use this as a standard image.

2. Half side

The camera and the subject form an angle of 25°-50°, and the face of the person faces the lens from the oblique side, which breaks the lack of symmetry and stability of the frontal image, making it more lively. The angle of the half side can be adjusted flexibly, and the face can be exposed a little more or less, which is a commonly used angle in portrait photography.

3. Side shot

The camera and the subject are at a 90° angle. When a person is facing the camera, the photographer can only see half of the face, half hidden and half exposed, which is more subtle.
Viewed from the side, the characters’ faces are well-defined, leaving a deep impression.
However, the lack of perspective changes on the side is not as lively as the half, so photographers generally don’t use this angle often.

4. Back shot

The camera is facing the back of the subject, at a 180° angle to the person’s line of sight. Since the photographer cannot see the faces of the characters, nor can they express the expressions of the characters, the photographers can only indirectly express the thoughts and feelings of the characters mainly through the form and movement.

Photographing the characters from the back can leave a rich imagination space for the readers to realize the theme of the work through the relationship between the main character and the environment, or through the plot formed by the front and back characters in the picture.

Height choice

Choose the shooting angle, in addition to the choice of aspects, but also the choice of height. Changes in height will also have a great impact on the composition of the photography.

1. Head up

Head-up refers to the height of the camera and the subject’s head, and the optical axis of the lens is parallel to the person’s line of sight. The photos taken by head-ups conform to people’s usual visual habits, and give people a sense of psychological intimacy and equality.

Head-up shooting, the character’s face is not easily deformed, the composition is stable, and it is conducive to the performance of the foreground. However, in scenes with a large number of people, people in the front and rear rows are prone to overlap and obscuration.

2. Top view shooting

Elevating the position of the camera and shooting from top to bottom can form a larger spatial layout, and the front and back figures do not block each other, which is conducive to shooting scenes with a large number of people. Photographing children by the government is like an adult watching a child, and it is more in line with people’s visual habits. However, shooting a person from above can easily cause a certain degree of distortion. If you use a wide-angle lens to shoot at close range, the person will appear big and small.

3. Elevation shooting

Lower the position of the camera and shoot from bottom to top, the figures appear tall and majestic. If you use a wide-angle lens to take a close up shot, the figures are big and small, standing tall and straight, which will produce an exaggerated visual impact.

Looking up can lower the horizon and let the sky become the background, which can make the picture more concise. However, looking up at a scene with a large number of people, the people on both sides of the screen look like they are leaning toward the middle, and the people behind will also be blocked by the front row.

Categories
Studio Lights Education

Practical Shooting Methods for Half-length Portraits

Use perspective in the background to extend the vision

Half-length portraits and full-length portraits pay more attention to the selection of the screen background. The background of the plane is not only monotonous, but also lacks change. Choosing tree-lined paths and corridors with a strong sense of depth can create a picture background with a sense of three-dimensionality and depth.

A background with visual extension characteristics, its effect comes from the depth elements in the background, and the perspective distortion effect of the lens near and far. When composing the picture, on the side of the character’s body in the picture, the elements with a sense of order are arranged in the depth along the distance, forming a background with a sense of linear form in the picture.

The model can choose to rely on the way of standing, using the model as the foreground and visual center of the picture.

Clever use of cross-shaped composition

Half-length portraits can collect and organize more screen elements. When the background is relatively messy, find their sense of order.

In the grasp and control of the model’s posture, try to avoid rigid symmetry of the limbs. Using the model’s body and various intertwined lines in the background, a Tic Tac Toe composition can be formed. In this example, the photographer chooses a low-angle upside-down shot. The model is located at the intersection of the horizontal and vertical lines of the picture, using the visual guidance of the lines to highlight the characters from the picture.

Use diagonal lines to compose pictures skillfully

Whether it is a banner composition or a vertical composition, the body posture of the model is roughly in a straight line in the picture. When the limbs do not have too many movements and changes, the straight and vertical body posture will appear monotonous and rigid.

At this point, the photographer can slightly rotate the camera’s holding angle, so that the person is in a diagonal position in the frame, and the diagonal composition is full of dynamic effect. It can make people like photos that are not rigid, and for portraits, it can express the youthful vigor of girls.

Avoid improper cutting of limbs

Close-up photos mainly show people’s faces. When framing a half-length portrait, it faces the problem of cutting the limbs of the portrait.

Usually, the half-length portrait is cut from the waist or thigh of the model. In the handling of the upper limbs, many film friends make the mistake of cutting the model’s arm when shooting.

Although it cannot be generalized, the cutting of the arm often destroys the overall effect of the picture, making the picture appear abrupt. Incomplete arms cannot be remedied in post-processing. Therefore, the photographer should pay special attention to the movement and position of the model’s arm when composing the image. Through communication and guidance, adjust the shape and posture of the model’s arm to avoid incomplete arms or unsightly arm movements from appearing in the screen.

Showing the graceful body curves of the model

The adjustment and control of the pose of the model is the key and difficult point of portrait photography. When shooting a half-length portrait, the photographer can communicate with the model to guide the model’s body posture in the screen to adjust, and use the S-shaped composition to express the model’s graceful body curve.

Half-length portraits can well express the model’s body curve. Whether it is from the front or side of the model’s body, it can well express the model’s elegant posture.

One of the main points of the filming is clothing. In order to obtain the desired effect, the model’s clothing should not be too loose. The photographer should guide the model into a state of confidence and relaxation, while at the same time adapting to the environment. For example, wearing a swimsuit to show the model’s body curve in the sun is an ideal shooting scene.

Use exposure techniques to interpret backlit silhouettes

Using backlighting for portrait creation, you can use silhouette shooting techniques to create works with a strong sense of form and appeal.

In photos taken under strong backlighting and using the limited dynamic range of a digital camera, if the sky is properly exposed, the person in the shadow will appear completely black or nearly completely black due to the extreme contrast of the light in the picture. The effect is that the details of the characters are filtered out, and the outlines of the characters are highlighted.

In order to make the sky properly exposed, the person is underexposed at this time, the photographer can use spot metering, and use the sky as the light metering basis to meter the sky. At the same time, you can appropriately adjust the exposure compensation according to the shooting effect, and then recompose the shot.

Modification of sitting posture and changes in limbs

In portrait photography, the basic posture of a model is divided into standing, sitting and lying postures, among which the sitting posture is the most commonly used and common character posture besides the standing posture.

The sitting position is divided into two types: front sitting and side sitting. In order to obtain the desired effect of the photo, the photographer should ask the model to sit on the outer part of the chair and maintain a good posture. Don’t sit down in the chair, otherwise the waist and shoulders of the model will be relaxed and lazy. At the same time, when composing the picture, pay attention to the treatment of the legs in the front sitting posture to prevent the direction of the legs and arms from being parallel to the shooting direction. The limbs of the model can appropriately use various movements such as crosses to obtain natural effects.

Place a vivid foreground for the picture

Whether it is close-ups, half-length portraits or full-length portraits, photographers often use large apertures to blur the background to create images. In fact, in portrait photography, the introduction of the foreground can often have a very good effect.

The foreground can help the photographer express a certain meaning in portrait photography. For example, a prospect with a blocking effect can express the lively and playful characteristics of the model. The props with auxiliary functions as the foreground can highlight the theme of the picture and the identity of the characters.

In addition, the foreground processing can also be similar to the background blur processing, so that they will not overwhelm the host.

Control the model’s sight to create an artistic conception

In close-up photos, models generally choose to look directly at the camera. In the shooting of bust portraits, the model has more room for free play. It is completely possible to create the atmosphere of the picture through the change of sight and express the inner world of the model.

The eyes of a model can express many different emotions. Such as joy, surprise, waiting, melancholy and loss, etc. The relationship between the model’s line of sight and the lens direction, as well as the model’s own characteristics and expressiveness, are the main factors that influence this effect.

When the model “into the scene”, the photographer must quickly capture the timing of the shooting, so as not to change the status of the model. In this example, the model’s gaze is towards the upper left of the photo, which is thoughtful and reverie.

Choose special perspectives cleverly

In addition to changes in composition, the creativity of portrait photography often comes from novel shooting angles. After mastering the general half-length portrait shooting techniques, you should try and innovate more in the shooting angle. Combine lenses of various focal lengths to create a brand-new image perspective.

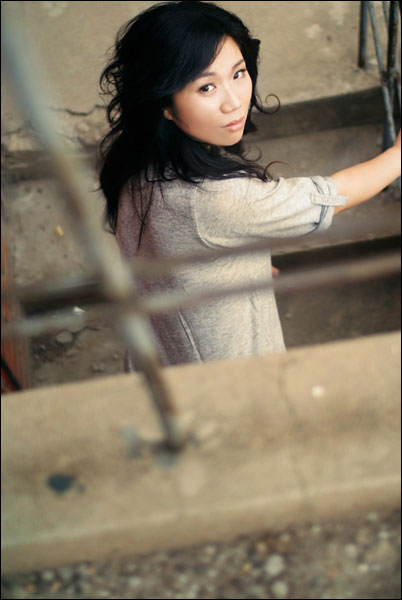
In this example, the photographer used a high-angle shot, and the model walked out of the underground passage, turned and looked up at the photographer. The model in the picture looks very weak in an industrial scene full of concrete atmosphere. The foreground of the picture not only plays the role of occlusion, but also creates the effect of frame composition. This enhances the expressiveness of the photo’s contrast between rigid and soft.

In many scenes, using low-angle shooting can also get creative portrait photos. The key to success is to keep trying.

Grasp the lively and natural casual moments

The casual beauty of a model is always fleeting, but it is often the most vivid and true. Photographers may wish to use more flexible expression techniques when creating portraits. For example, continuous shooting and snapping during sports can obtain more real and natural moments.

When the model is in motion, it is necessary to turn on the tracking and focusing function of the digital SLR camera. In actual shooting, the photographer can pre-design a sports route or activity method for the model, and then send a signal to start capturing.

In order to make the shooting effect more realistic, but also to overcome the shutter time lag of the digital SLR camera, it is often better to press the shutter in advance to predict the success rate.

Categories
Studio Lights Education

How to Take Good Photos of Flowers with Dark Background

Why Do Everyone Like Black Background?

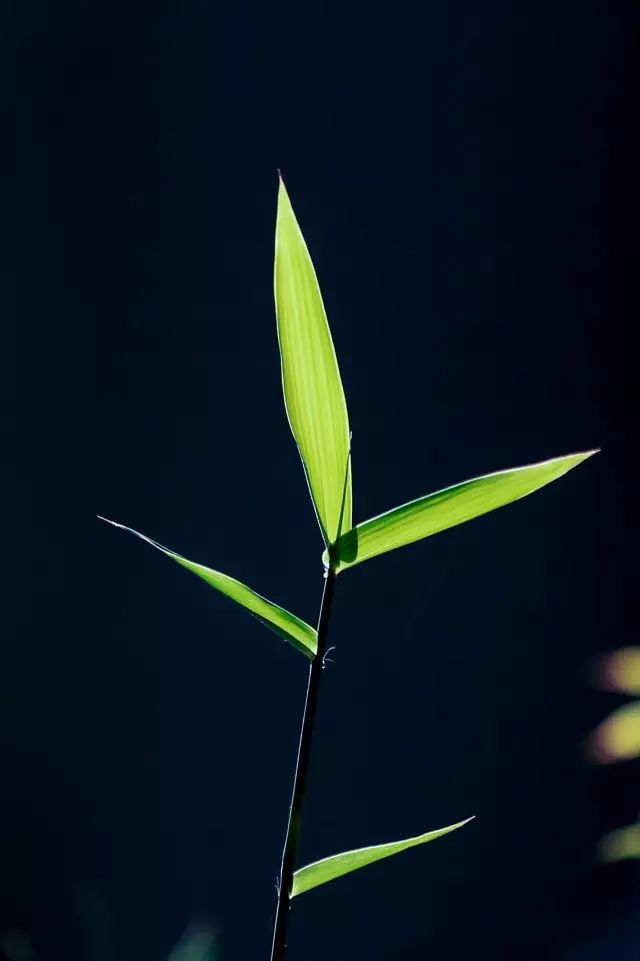
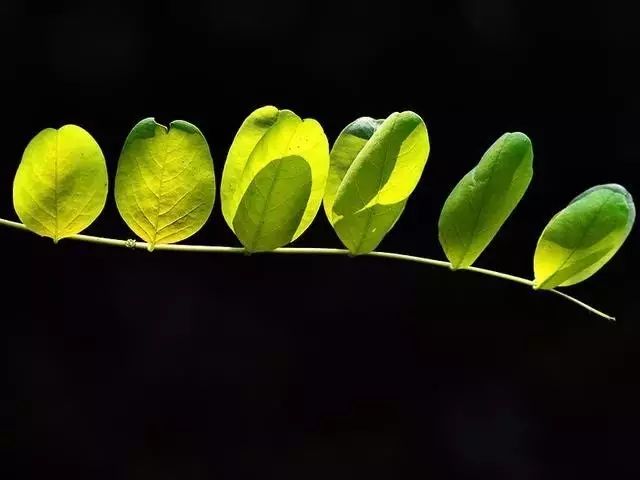
Photography requires subtraction, and photography is the art of subtraction. Before a unified background, all the extra elements except the main body are removed, and simplicity is beauty. Even the very ordinary leaves can be beautiful and quiet.

Make the picture more textured

The black background can highlight the veins and textures of the petals of the branches and leaves. Coupled with the strong color contrast, it can show many delicate details. No matter how ordinary an object is, once it is photographed into a single background,

The texture of the picture will also be greatly improved.

Comprehensive test of photography technology

Shooting a black background may seem simple, but first, the environment must be considered, secondly, metering, and lastly, the background and creativity must be considered. It’s not as simple as pressing the shutter as you might imagine.

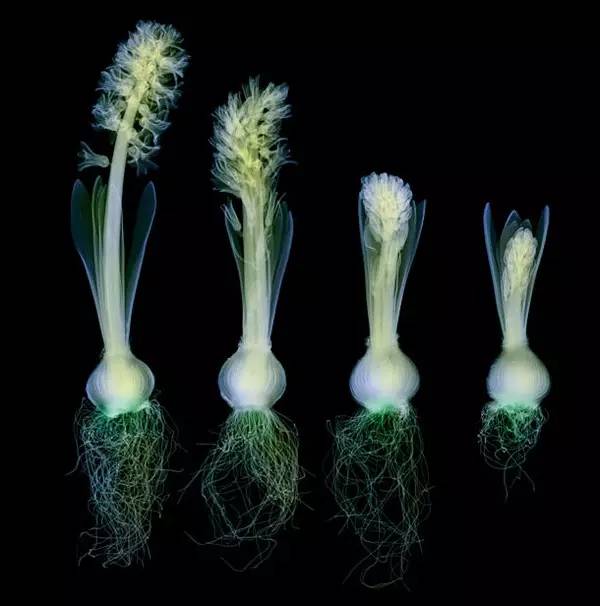
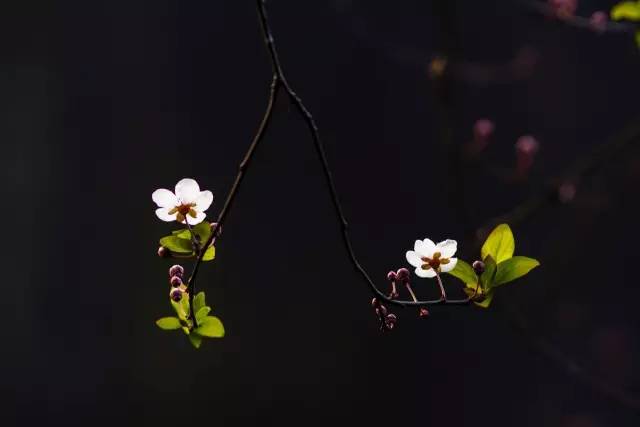
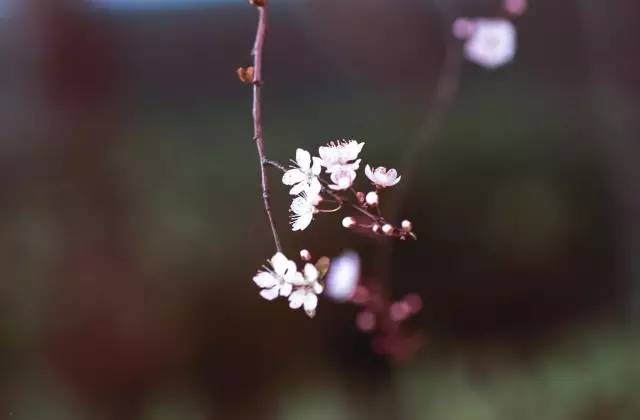
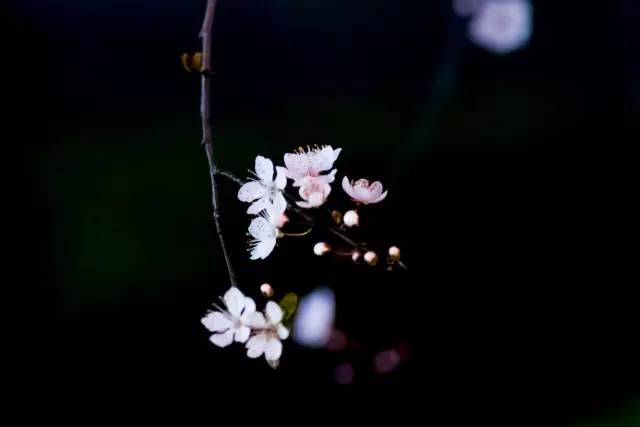
▲The flowers were photographed with X-rays under a dark background.

Take a good black background photo, you can not only take photos of flowers, but also still life, people and so on. Nowadays, artistic photos with dark backgrounds are also very popular.

How to take a good picture of a flower with a dark background?

  1. Choose a dark background

Flowers on a black background do not have to be a pure black background, just try to choose a dark, dark background. Generally, the color of the flower is relatively light. Try more angles when shooting, it is easy to find a dark background with contrast.

  1. Use spot metering

After choosing a dark background, use the spot metering mode. That is, the brightest area of the subject is selected for metering.

The purpose is simple. It is to use spot metering to increase the light ratio, so that the bright exposure is normal, and the place darker than the metering position will naturally go black. It’s the same thing with shooting silhouettes.

In the case of relatively strong light, it is easy to use this trick to make the background black.

Using the evaluative metering mode, the effect of shooting ▼

  1. Reduce exposure compensation

Through the first two steps, you can basically shoot a dark background in many scenes.

If the picture still looks a little gray, you can reduce the exposure appropriately. When adjusting the exposure compensation, it depends on the area of the dark background. The larger the area, the larger the value of exposure compensation should be. For the same flower in front, in the aperture priority or shutter priority mode, reduce the exposure of -1EV ~ -2EV, and the background of the screen can basically become black.

  1. Take advantage of backlighting

In light conditions, if the background color is brighter, it is difficult to take a black background effect. But under backlight conditions, even if the back is not dark, the effect is easy to produce because of the large contrast of light.

Shooting effect under forward light conditions▼

A slight adjustment of the angle under side backlighting can produce a darker background effect.

If it is forward and backlit, pay attention to the light source should be higher or lower than the camera.

The shooting effect under side backlighting ▼

  1. Use flash

The biggest advantage of using flash is: brighten the foreground and darken the background, even if the background is not dark,

It can also shoot a black background.

It should be noted that when using the flash, the farther the background is from the subject, the better. If there is no external flash, the use of internal flash can also be achieved.

The effect of shooting without flash ▼

The effect of shooting with flash ▼

  1. Borrow dark props

When the shooting conditions are unfavorable, or when you don’t want to be so troublesome, you may wish to use some black or dark props, such as background cloth, umbrellas or clothes, and place them at a certain distance behind the flowers.

When shooting with this method, either use macro or telephoto shooting, and don’t let things into the picture, so as not to affect the subject. Of course, the techniques mentioned above still apply.

Take a photo with a black background, and the subject must be concise. The choice of flower composition and branches is very important.

Categories
Studio Lights Education

Accurate Metering–a Must-have Technique for Portrait Photography

Metering

Reflected light meter:

For portrait photography, the requirements for correct exposure are so critical, and accurate metering is very necessary for this situation. Relying on the built-in metering of the camera can not always get accurate measurement results, even the internal reflection metering of complex multifunction machines is no exception. Bright objects can affect the vital skin tone. Usually, such metering is center-focused metering, because most people are accustomed to placing the subject in the middle of the picture.

The reason for the inaccurate metering is that the built-in light meter is designed to determine the amount of exposure based on the total average value of the light in the viewfinder screen. To ensure the accuracy of the built-in metering, it is recommended that the area confirmed to be mid-tone be measured as 18% gray. Even with this, for people with tanned skin or dark skin, the standard of 18% gray is somewhat darker.

Therefore, if you want to use in-camera metering, remember to place an 18% gray color card in front of the subject, and try to fill the viewfinder screen with this card for measurement. If you use a reflected light meter, you should also use the same method to meter light.

Incident light meter:

Another type of metering method (hand-held incident light meter) is ideal for taking portrait photos. It is measured by measuring the amount of light shining on the object, not by measuring the amount of light reflected from the object.

When measuring, just place the small semicircle ball of the light meter at the location of the object you want to shoot, let the small ball face the lens to measure, and then read the reading.

What needs to be confirmed is that your light meter is indeed placed where the subject is under the same light. The result obtained by this measurement method is accurate and unchanged, because it measures the amount of light that a person hits on the object, not the amount of light reflected by the object. This means that it will not be affected by materials such as strong reflections or surface absorption of light-reflecting materials.

In this portrait of a child, you can see a square gaze from the reflection of the child’s eyes. The photographer used a very unusual shooting angle-looking directly down to shoot, turning the floor and seamless background cloth into a part of the portrait.

Incident light flash light meter: It is necessary to equip an incident light flash light meter, whether it is indoor or outdoor shooting, especially in the mixed light of daylight and flash will be very useful. It can also be used to measure the light ratio. When you need to determine the distribution ratio of all light in a large space, the flash meter is very useful. The flash light meter is also incident light metering, which measures the light shining on the subject, instead of metering based on reflected light like in-camera metering.
Lighting and lighting modification device

Continuous light illumination and strobe:

The lighting equipment has a wide range of options. The topic of lighting will be an endless debate. Even so, there are three basic types of lighting, portable flash, continuous light and studio strobe light.

In professional portrait photography, the portable flash is only used as a supplementary light source. Should avoid using flash lighting directly mounted on the camera body, because it will produce strong and flat light, so that you can not get the perfect level of light on the face of the person.

In addition, this kind of lighting is not equipped with modeling light to predict the light effect, making the shooting effect difficult to predict, even if it is not completely impossible to predict, it is almost impossible.

Use continuous light source lighting, or studio strobe with built-in modeling light, you can predict the light effect. The light in these two lighting methods is easier for the camera to focus than a portable flash.

Whether to use continuous light source lighting or studio strobe lighting, the choice is yours. Either of these two can achieve excellent results.

Compared with the instantaneous lighting source, continuous lighting has one main advantage: because the light you use for shooting is the same light as the modeling light, the lighting effect you see is the effect you shoot.

Getting the correct white balance has also become a breeze. You can adjust the shooting color temperature, or set a custom white balance in order to get a more accurate effect.

All continuous light is cold light. There is a new type of LED tube lighting that is fixed in the bracket slot and it is becoming more and more popular. It can be applied to both location shooting and studio shooting. This LED tube can also be mixed with tungsten bulbs to change the color of light.

There is little or no hot light from the studio strobe light. Therefore, even if several lights are used at the same time, the subject will still feel comfortable, which is the main reason.

In stroboscopic lighting, modeling light (a continuous light source) only plays a role in indicating lighting, it is not the lighting source used for shooting. Nevertheless, in most cases, the modeling light still accurately reflects the actual effect.

Lighting modification device:

So far, the most popular lighting modifiers for portrait photography are reflector umbrellas and soft boxes, which soften the light and make the subject look more pleasing.

Put them on top of the camera to get the effect of fashion style, and put them on the side of the camera to get the effect of traditional portrait style.

Although the light obtained by these lighting modification devices is already very soft, it is usually necessary to use auxiliary light to illuminate the shadows of the face so that there will be no “dead” black areas.

Reflective umbrella: Reflective umbrella can be used on flashlights or on continuous lighting equipment. If you want to use it on a tungsten lamp or quartz lamp, be careful not to get too close, otherwise it will easily catch fire.

Reflective umbrellas for photography have two linings, white and silver. In contrast, reflective umbrellas with silver lining reflect more light and are more directional. Under the same light intensity, the light source with the reflective umbrella with silver lining can be used as the main light, because it can produce stronger light and more directivity. It can also produce wonderful reflection highlights in the highlight areas of the face.

The light source with the reflective umbrella with rough white lining can be used as auxiliary light or supplement light (some reflective umbrellas are called “zebra”). A lining with alternating white and silver patterns can produce the same soft light as the white lining, but there will still be a little directional strong light interspersed in it.

You can also make some attempts to adjust the distance between the light source and the axis of the reflector to obtain different softness of light effects.

Most photographers prefer to place the light source above the axis away from the curved surface of the reflector, so that all light beams can be projected within the curved surface of the reflector. When the light source is aimed at the center of the reflector, the resulting illumination light is the smoothest and softest. This point is called the “focus” of the reflector, and it can produce the most effective lighting effect.

Some photographers use the light source and reflector in reverse. Turn the umbrella and the light source around, and let the light pass through the reflective umbrella to illuminate the subject (excess light is reflected by the umbrella and then projected on the subject). The light obtained in this way is more directional than the light obtained by reflecting the light through an umbrella through the light source facing away from the subject.

Of course, the reflector with silver lining cannot be used in reverse, because the silver material is opaque, and almost no light can pass through the umbrella surface.

Softbox:

The soft box is a box made of dark black fabric, and its front is covered with a layer of white diffusing material. Some soft boxes have “double-diffusion”, which has a gauze cover covering the surface of the illuminated surface to form the second layer.

The purpose of the soft box is to place a separate light source in the box, and the light it emits is directly emitted through the diffuser material on the surface of the box.
Since manufacturers usually place lighting devices in soft boxes, the same is true for strobe lights. (As mentioned earlier, the heat generated by strobe lights is much lower than continuous light sources). Part of the softbox can also work with the multi-function flash lamp holder to obtain additional lighting intensity and brightness.

Illuminate the background

Because the reflector and softbox can produce a wide range of lighting and are diffuse lighting, there is often no need to use background lighting. Of course, this also depends on how far the background is from the light source and the hue of the background. The farther the background is from the light source, the darker the background of the photo.

Good digital processing technology

exposure

Recording images with digital files is very different from recording with film. In terms of exposure tolerance, especially when overexposure, there are basically no details. This seemingly flawed problem has the benefit of being more careful to get accurate exposures, which makes you a better photographer. Compared with those color negative films with an exposure latitude of plus or minus two levels, digital files completely follow a different game rule.

The correct exposure essentially determines the dynamic range of the tone, the overall quality of the image, and is also a key factor in determining the quality of the final output of the digital file. Underexposure will produce a lot of noise for digital images, while overexposure will make highlights and details missing.

Claude Jodoin, a portrait photographer and digital expert, said: “It’s time to end your days of exposure, and kiss goodbye to the situation of overexposure! You must achieve accurate exposure. If you make a mistake, you can only slightly underexpose. This situation can be remedied, otherwise you will only have to compensate the customer. No matter what degree of overexposure, it is a dead end for digital imaging!”

However, taking digital photos must ensure that the dynamic range of the material used to display the image matches the dynamic range of the image processing. (Such as photo paper for magnification, ink for printing or photo paper for printing)

Determine the exposure index of the camera (Exposure Index)

Even if it is the same digital camera, it is not always the same when the factory or manufacturer initially produced it. Like all man-made objects, cameras also have manufacturing deviations, which makes the complex electronic systems of each camera slightly different. Therefore, it is very important to understand the metering system of the camera that you rely heavily on, whether its index is higher than or lower than the film speed of the film equivalent to the same speed.

The following is a method of Don Emmercih’s test with 18% gray card.

First, align the viewing frame with the gray card, use the in-camera light meter to measure light, and perform exposure according to the in-camera light metering value, and check its histogram. If the exposure is correct, a single wave peak falls in the middle of the histogram, which indicates that the film speed value calibrated by the camera is correct.

If the crest moves to the right or left, please adjust 1/3 or 1/2 block and try shooting again. For example, if you are used to setting the iso to 400 for the initial test, the peak on the histogram is slightly to the left, which means that the exposure is slightly underexposure. Adjust the film speed, set the exposure index to 320 or 250, take another shot, and check the histogram again.

So how do you use what you have learned? If you repeat the above test for different film speeds under different lighting conditions, you will get a reliable factor. Or you will find that the metering of your camera is quite accurate. However, if you find that your camera’s metering is always underexposure by 1/3 stop, you can increase the camera’s exposure compensation by 1/3 stop to perform exposure compensation. Conversely, if your camera’s metering always overexposes by 1/3 stop, reduce the exposure compensation by 1/3 stop or adjust the corresponding ISO setting accordingly.

Use this series of tests to calibrate your handheld incident light meter to ensure that all your metering equipment is accurate.

Categories
Studio Lights Education

How to Take a Good White Background

How to take a good white background

Antonioni’s L’eclisse has a very different feel.

The highlight of this movie is that Monica Vitti’s clothes have a natural elegance.

Of course, clothing is not the focus of the plot, but many details and exquisiteness can be seen in it.

It can be found from Rome in the 1960s that Italians are very well-dressed even in daily life. It’s not overly showy, it’s elegant and soft, a very casual chic.

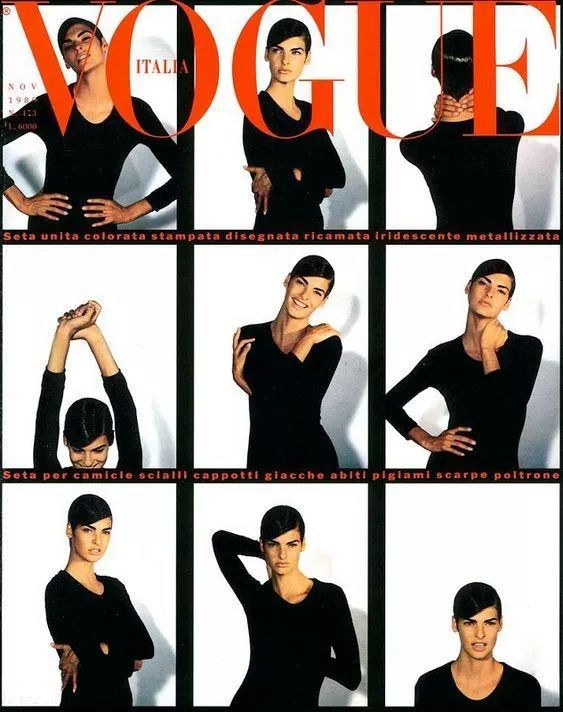
Therefore, the Italian version of VOGUE is almost the best.

When Italians talk about “fashion”, it is entirely from the perspective of art or art history. In addition to being very good at photography, they also cite a lot of art references to discuss style.

It also shows a sense of taste and culture inadvertently.

How to take a good white background?

Simply put, if you want the background to appear beautiful and pure white, you must meet several basic conditions—

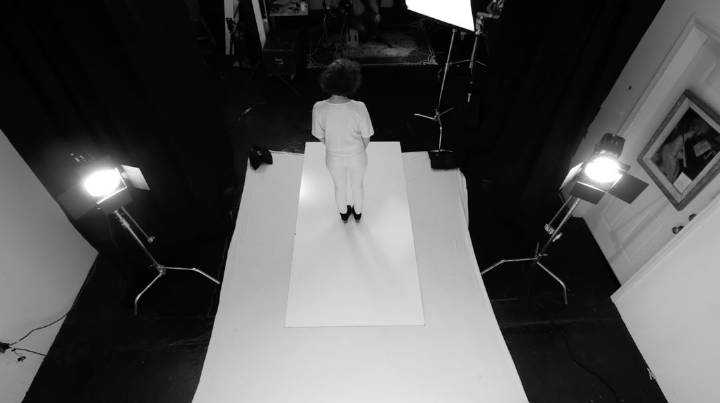
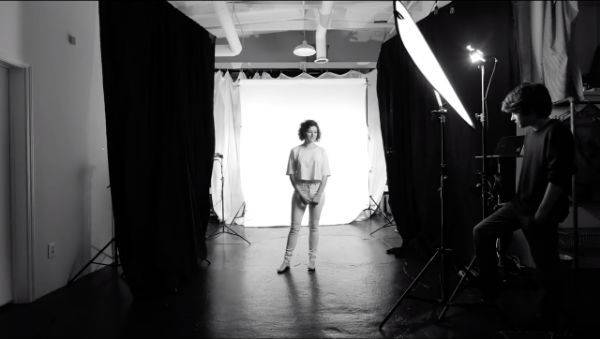
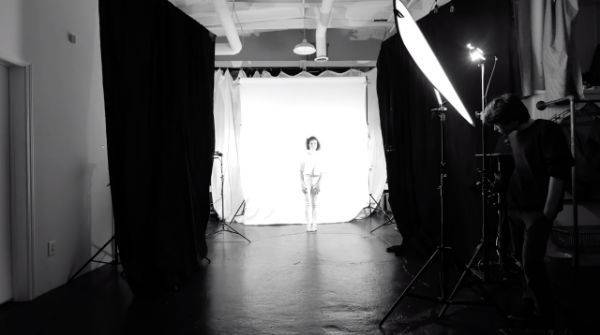
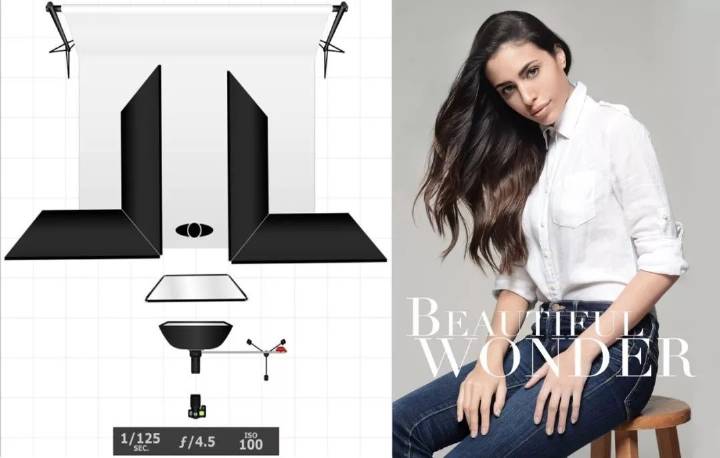
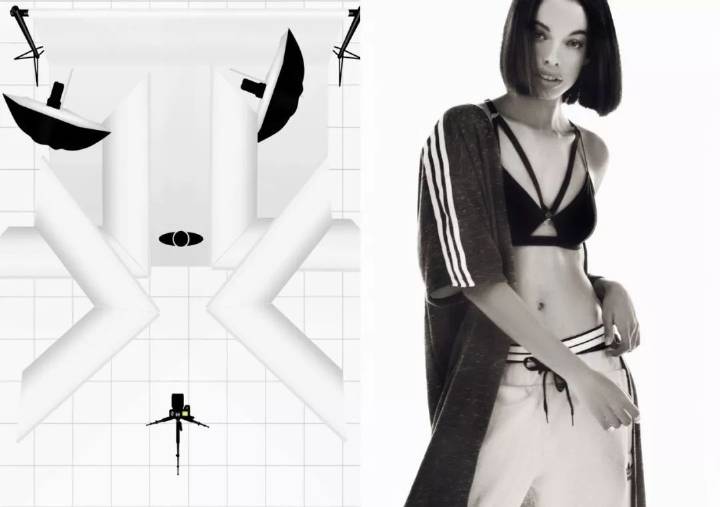
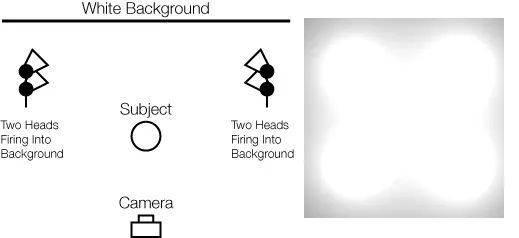
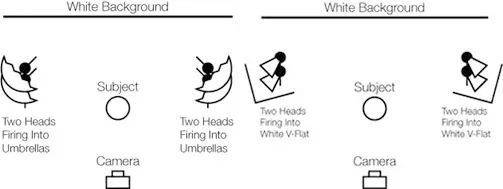
A seamless white background (wall, roll paper or other white fabric). Many times, the photographer will lay a white plate on the ground, which can provide a certain amount of reflection and avoid stepping on the dirty background. 2. At least two flashes, one on each side of the background. Because only one light is used to illuminate one side or the center, it usually causes the background to have a gradual change, showing the effect from white to gray.
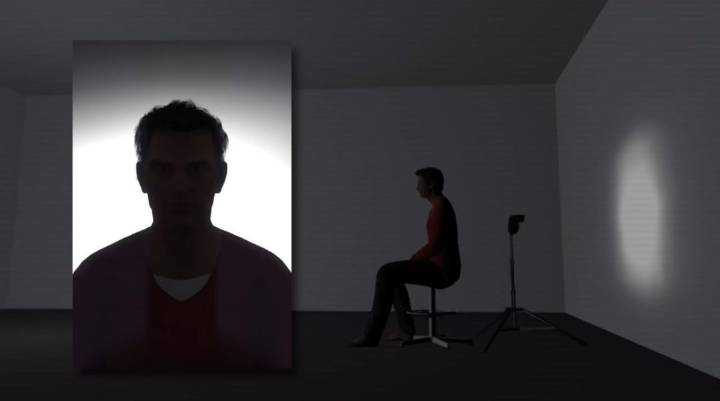
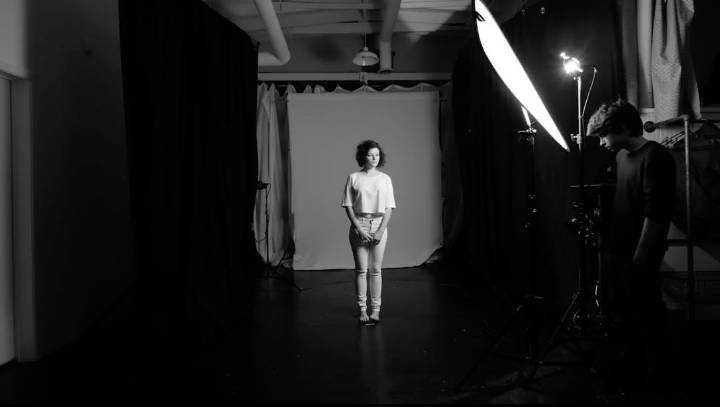
  1. The person being photographed should keep a certain distance from the background, so that the exposure can be controlled separately for both, while avoiding excessive reflections on the background and disturbing the person.

Let’s take a look at the two feelings first.

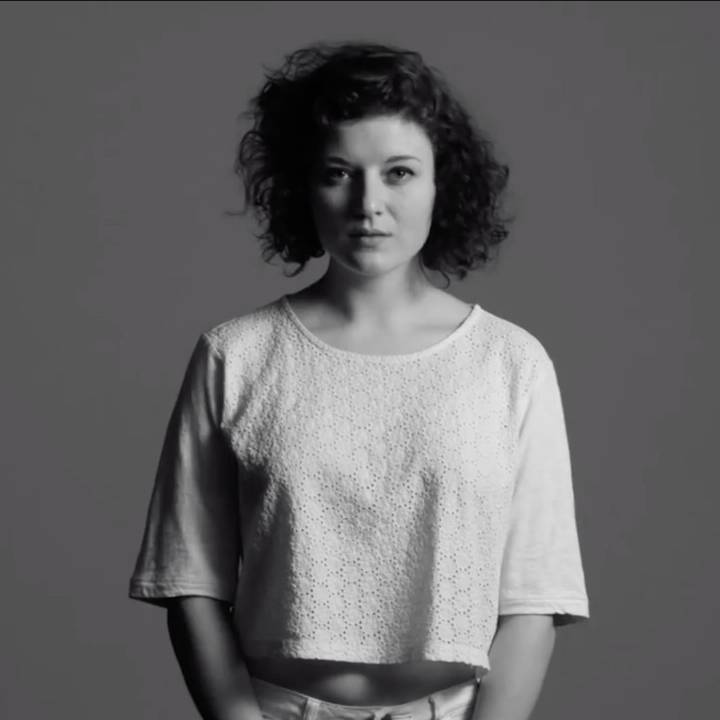
When the distance between the character and the background is appropriate (one main light and two background lights)

How to set the background light reasonably

The background light is usually used to illuminate the background, and should generally be set to the same intensity as the main light or a little higher.

Let’s compare the basic effects first

Don’t use backlight vs. use backlight

When the backlight is not used, we see that the background is gray

Take a look at the single-lamp lighting under no background light

Look at the double-lamp lighting under no background light

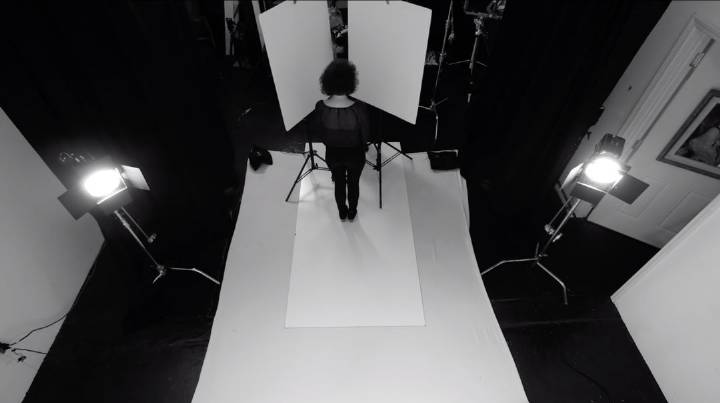
When using the background light, we see that the background is white, using 1 main light and 2 background lights, with white walls on both sides.

With the help of this example, we can compare the actual effect of background brightness changes.

What we need to know is that if the background light is too strong, the reflected light will surround the person and reduce the contrast, making the edges blurry.

If the background light is too weak, the background will appear gray or uneven, requiring more post-processing.

How to use reflector reasonably

For the following effect, try to add a reflector. It can effectively eliminate shadows and provide fully reflected soft light.

This is usually our usual idea of shooting commercial films.

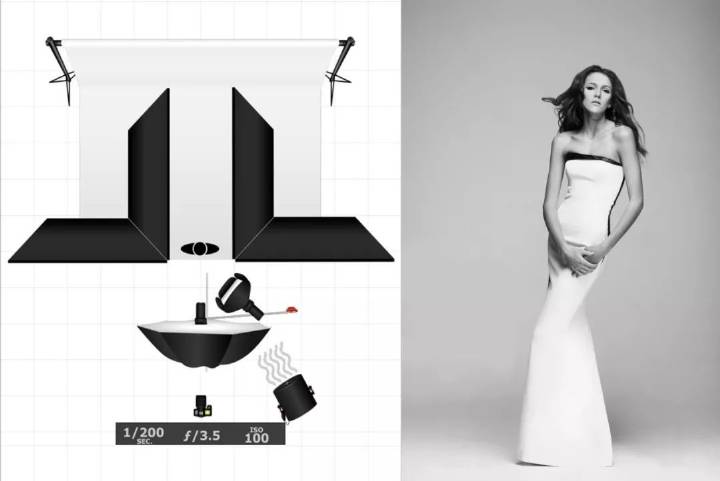
Let’s try a larger V-shaped reflector, 2 backlights and 4 V-shaped reflectors.

Next, try to add the character’s main light. With the aid of the V-shaped reflector and the background light, we will find that the whole picture is completely lit, and the characters are also shaped by vivid light and shadow.

For example, a front high-mounted main light, plus two large V-shaped reflectors “clamped” on both sides of the character, fully reflects the light to the main body.

Use two lights to illuminate the background, showing an almost all-white effect.

If the backlight is not used, what effect can be taken?

As we mentioned earlier, in order to obtain a pure white background with neither hot spots nor shadows, two lights are generally required to illuminate the background evenly from the left and right sides.

However, nothing is absolute.

If the conditions are limited, it is ok to need two lights to take into account the characters and the background. For example, it is ok to narrow the distance between the characters and the background, and at the same time use a reflector to fully reflect the light.

In the picture below, we only use two lights, and the characters are close to the background, so unsightly shadows will appear on the background.

Improve methods

    1. Try to put the reflector between the light and the character, it can effectively reduce the shadows and balance the background, but sometimes it still can’t fully eliminate the shadows.
    2. If we place the reflector directlyon the lamp, we will find that almost all the light is confined between the background and the reflector, so that it can be fully reflected and uniformly illuminated.

Seeing this, some friends will ask: “If it’s not studio shooting, how to build a white background in a normal environment?

1) white walls

Use existing white walls indoors or outside the building. Of course, if you are shooting the whole body, the line of intersection between the wall and the ground will appear in the screen, and shooting a half-length or portrait is completely sufficient.

2) white light-transmitting material

Hang a transparent curtain on the background frame, and place a flashlight behind it. The light shines on the window, causing it to reflect back to the curtain, thus transforming a small lamp into a beautiful large light source.

3) V-shaped reflector

The portable reflector is a good off-the-shelf product. Many photographers use it directly as a white background.

4) Softbox or reflective umbrella

In order to prevent glare interference, put the two reflectors close, leaving an opening in the middle for the camera to take pictures. A warm-tone constant light illuminates the V-shaped reflector on the opposite side, coating the body with a slightly warm glow.

Two major difficulties in shooting white background

How to create high-profile lighting to effectively eliminate bad shadows?

How to manage and avoid the negative effects that accompany high-profile lighting?

If the exposure ratio of the background to the characters is too large or too small, it will have an adverse effect.

For example, glare appears in the camera, edge contrast is reduced, background exposure is uneven and faded (low saturation). If we want to achieve accurate exposure in front of a white background, we must strictly control our settings.

There are many ways to evenly illuminate the white background.

Generally speaking, two lights are enough. But for more (large) subjects, or more precise background effects, most photographers prefer four background lights usually. This avoids possible hot spots and shadows.

For example, use four plus small standard flashes to evenly illuminate the background.

Or use four reflector or V-shaped reflector flashes to evenly illuminate the background.

What should we pay attention to when using four backlights?

  1. Consider the two lights on the same side as a whole. The left and right sets of lights should be balanced, that is, the distance and angle from the background are the same. The power of the two sets of lamps should be the same. And use a light meter for accurate measurement.
  2. The background covered by the frame varies greatly. Photographers often adjust the position of the light accordingly so as for best shooting effect. For example, multi-person shooting obviously requires more light width than single-person portraits. The height of the subject determines the height of the light.
Categories
Studio Lights Education

How to Take High-quality Flower Photos

In this “photographing season”, have you ever photographed works that are particularly impressive and visually stunning? You need some techniques that can significantly enhance the charm of your work.

Today, we will share with you 4 tips for taking better photos of flowers with macro. Guys who are interested in making a good picture, don’t miss it!

1. Consider the light

When shooting flowers, it is often necessary to emphasize the texture and color of the flowers while minimizing shadows.

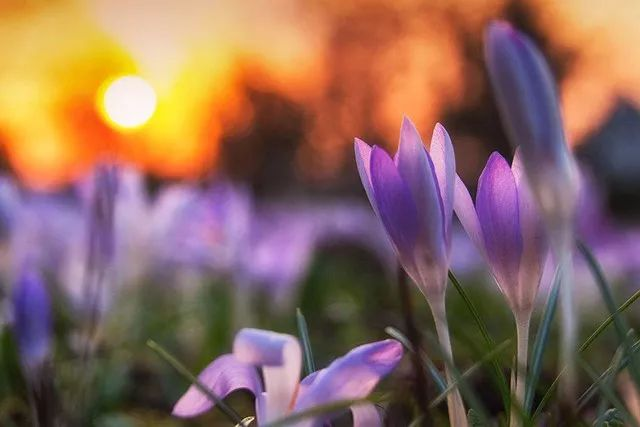
Based on this principle, you’d better avoid the violent noon sun as much as possible, and shoot at sunrise and sunset. Use soft light conditions to reduce shadows and highlight texture. At the same time, the pictures often have bright and warm colors, which look very beautiful:

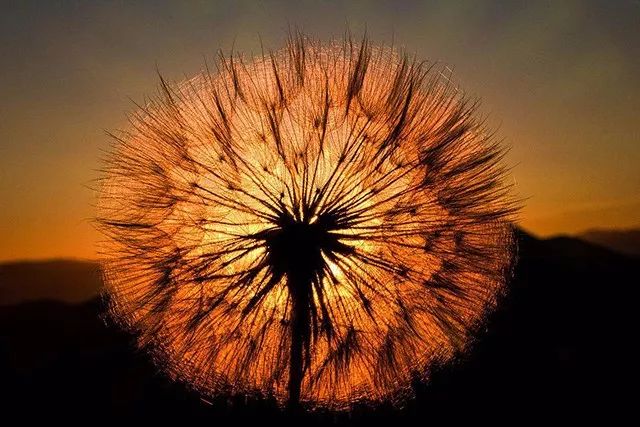
If you are shooting thin and stretched petals or “pompons”-shaped flowers, you can also adjust the shooting angle to allow sunlight to “transmit” through the flower body, highlighting its texture. At the same time, the colorful sky can be used as a background:

If you can’t wait for the sunrise or sunset, you can also look for the shadows of buildings and trees, or block the direct sunlight with your tools to create shadows that cover the entire screen.

This is similar to the feeling of shooting on a cloudy day, you just need to take the exposure based on the flower body. You can try to lower the exposure compensation manually, and the colors may become more saturated.

2. Focus on details

Tired of shooting full flowers? Try to step back and include more environment, but this can easily make the picture appear cluttered.  Also you could move closer and focus on interesting details.

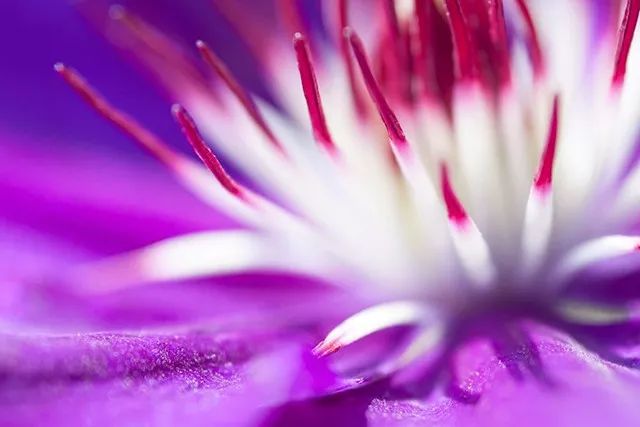
You can focus on some interesting structures, such as petals and stamens:

Changing your way of thinking is another thing you can do. Instead of expressing “a certain part of the flower”, you can abstract them and focus on repetitive structures, textures and lines.

You can try shooting perpendicular to the flower surface, which can effectively emphasize the repetitive structure.

You can also try flat shooting, with a large aperture, to show the lines of the stamen or petals.

3. Creative background

A good background is very important for any subject that needs to be highlighted, and flower photography is no exception. You can use natural factors to create a black/white background close to a pure color by controlling the exposure, or you can use some small props to create a pure color background.

Use some simple props, such as black cardboard, blue denim (preferably old, white-washed denim, to make the background more gradual), etc., adjust the focal plane with the large aperture, and you can Get a beautiful solid color background:

Sky blue background made of blue denim

Not satisfied with solid colors, want a more beautiful background effect?

The beautiful bokeh like the picture below can meet your requirements:

To achieve such an effect, you only need to prepare some gift wrapping paper (or tin foil or aluminum foil) with a metal coating.

The first step is to crumple it up, twist it into a ball, and unfold the wrapping paper, there will be many wrinkles on the surface. Next, you need to find the forward light position and make the wrapping paper plane and the direction of the light source be approximately 45°.

In this way, the wrinkled metal film will reflect light into the lens, and it will appear as a gorgeous out-of-focus bokeh at a large aperture, the bokeh color is the same as the color of the wrapping paper.

Reflected by the crumpled wrapping paper, the light source will become scattered dots

If your camera has a live view function, turn it on so that you can check the depth of field and adjust the bokeh effect on the LCD screen.

4. Artificial dew

Get up early to take photos of flowers. Not only can you take advantage of the soft ambient light, but you can also take photos of the dew on the flowers. Dew is a powerful tool to enhance the quality of flower photography.

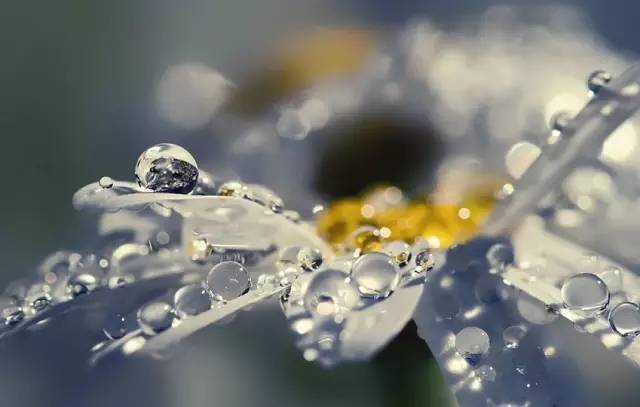
The translucent crystal dew condensed on the petals can set off the color of the flower more vividly. Undropped dew drops on the edges of the petals, which give the static flowers a sense of movement, making the whole picture lively and full of vitality.

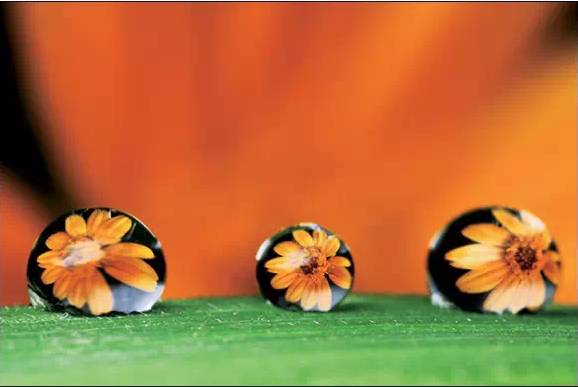
You can also use dew as a special “mirror” by adjusting the shooting angle. By constantly adjusting the shooting angle, so that the reflection of the flower body appears in the dewdrops, such a photo is also very interesting:

However, not everyone can get up and shoot in the early morning. Moreover, the naturally formed dewdrops have problems such as insufficient quantity, incorrect location, and insufficient shape, so it is better to “customize” ourselves.

In order to make dewdrops fuller and more stable, we can use glycerin-containing solutions to make dewdrops. Bring a small syringe with a needle, and you can put any size droplets anywhere you want.

Almost forgot a very important point. Remember to keep out the wind when shooting, lest you work hard to find a good angle and tighten the focus ring. Suddenly a breeze and dewdrops disappear, then it will be embarrassing~

 Composition skills when shooting flowers

Speaking of the beauty of flowers. Someone asked: “Does the flower have temperament?” Of course there is! If you don’t understand the beauty of form and temperament, how can you shoot well? Try the vertical composition and shoot the flowers to make sure they look good.

Vertical composition + hanging flowers = perfect

When shooting a part of a flower, you should take the angle more carefully. Have you ever thought about shooting down flowers like this? What are the things worth learning in this way:

Novel angles and subtle moments are a beautiful picture

There are also these composition methods you can try:

  1. Shading method:

Usually when using the foreground, a large area of occlusion is rarely used, so as not to overwhelm the audience, but when the subject’s foreground is relatively single, a large area of occlusion is conducive to highlighting the quietness of the subject.

  1. Top composition:

The hanging flowers are mainly left blank at the bottom, and the upper part of the screen is cropped above the main body in order to achieve a visual balance.

  1. Wide angle and small aperture:

Find a high camera position and use a wide-angle small aperture to show a top-down perspective effect.

In the past, the composition used to pay attention to the diagonal, the rule of thirds, the golden section, etc., but now more use of more conventional composition forms. The occlusion method and the top composition are more commonly used to shoot the hanging flowers. The shooting techniques used for different subjects are also different. Breaking through the conventional composition method is more popular nowadays.

What are the details to pay attention to when you take a good picture of the flower?

1. For the chaotic flower branches, we recommend to use the background to set off the top and bottom composition.

2. When there are more leaves, we can adopt a top-down echoing composition method, using elements other than the main body to add interest to the picture.

3. When shooting with telephoto, it is best to set the aperture value above 2.8, so that the picture will not be easily blurred.

4. Light-colored petals are not suitable for a white background. When shooting, reduce the exposure of the picture appropriately, and then save it in the later stage.

5. With a wide-angle overhead shot from top to bottom, the nearby scenery looks tall and tall, but the fishing boats in the distance seem to be shrunk, and the main body of the picture is a bit messy.

6. Choose different sceneries as the background, doors, windows, rubble, etc., and you can take pictures with retro charm.

7. Light and color can make the picture show more changes.

Categories
Studio Lights Education

The Projection Direction of Light During Portrait Shooting

1. forward light

The illuminating light projected from the back of the camera to the subject and forming an angle of about 0°~15° with the optical axis of the camera lens is called forward light. The feature of forward light is that most of the subject’s face and body are directly exposed to light, the shadow area is small, and the tone of the picture is clearer.

With this lighting method, the three-dimensional sense of the subject’s face and body is not mainly formed by the contrast of lighting light, but is expressed by the subject’s own ups and downs. The following figure shows the effect of forward light lighting.

It can be seen from the photos that the three-dimensional effect of the subject’s face and arms mainly depends on the changes in tone caused by their own undulations. Compared with other lighting rays, when using forward lighting, the three-dimensional effect is weaker because of the smaller shadow area of the subject.

2. Front side light

The illuminating light projected on the subject from the direction behind the camera (left or right) approximately at an angle of 30° to 60° with the optical axis of the lens is called the front side light.

It is characterized by the fact that most of the subject’s face and body are exposed to light, and the resulting bright surface is large, forming a brighter tone. Part of the subject is not exposed to light and produces shadows, showing the subject’s light and dark distribution and three-dimensional shape .

The characteristic of this lighting method is that the three-dimensional shape of the subject is better than forward light, and the tone is clearer. Therefore, it is a kind of light commonly used for shooting portraits (indoor and outdoor). As shown in the figure below, it can be seen that about 2/3 of the face of the subject is directly exposed to light, forming a bright surface, while the shadow surface only occupies a small part.

3. Side light

The illuminating light from one side of the camera (left or right) and the optical axis of the lens forms an angle of approximately 90° called side light.

Its lighting feature is that half of the subject’s face and body are exposed to light, while the other half is in shadow. The face and body parts have the strongest three-dimensional effect, which is conducive to showing the ups and downs of the subject’s face and body.

Although the side-light illumination increases the shadow area of the subject’s face and body, the tone of the entire picture is not as bright as the forward light and front side light, but the tone is not heavy. The light is projected on the subject from a position of about 90° from the side of the camera, half of the person receives the light and half is in the shadow. The three-dimensional form performs well, and the shadow adjustment is moderate.

At this time, since the shadow surface of the subject is gradually increasing, the tone of the shadow surface should be strictly controlled. If the intensity of the light and the tone of the shadow are more appropriate, you do not need to adjust the brightness of the shadow, and you can shoot directly. If the light is too strong and the shadow is too heavy, you need to use a reflector or other light-filling methods to slightly increase the brightness of the shadow to achieve the desired tone effect.

4. Side backlight

The illuminating light from the oblique front of the camera (front left or front right), forming an angle of approximately 120° to 150° with the optical axis of the lens, is called side backlight.

With side backlighting, the light-receiving surface of the subject’s face and body occupies only a small part, and the shadow area is large, so the tone is relatively deep.

With this lighting method, the subject’s three-dimensional sense is better than forward light lighting, but the shadow coverage in the image is weaker.

To shoot portraits in this situation, the control and adjustment of the shades of the dark parts of the characters are particularly important. Generally speaking, the shadow surface should not be exposed too little, so as to avoid too deep and heavy shades. Auxiliary lighting tools such as reflectors and electronic flashes are usually used to properly fill light, increase the brightness of the shadow surface, and modify the level of the shadow surface.

5. Backlight

Backlight is light coming from the opposite side of the camera and forming an angle of about 170°~180° with the optical axis of the lens. Its lighting characteristics are that most of the subjects are in the shadows, the tones appear heavy, and the three-dimensional sense of the shadow surface is also weak.

In most cases, the use of backlighting to shoot portraits requires the use of auxiliary lighting to modify the shadow of the subject, or increase the amount of exposure to preserve the level of the shadow of the subject.

With backlighting, sometimes bright spots and contours can be formed on the person’s hair and shoulders (sometimes also on the face), while the subject’s face is in shadow. When shooting with this kind of light, it is best to choose a dark environment as the background of the character to bring out the bright outline of the subject and to set off the character from the environment.


For the choice of light projection direction, there are different processing methods for portraits in photo studios, portraits in specific indoor environments, and portraits outdoors.

For portraits in the photo studio, the position of the lighting light can be selected by the photographer to achieve the change of the lighting direction, and the face of the subject generally does not need to be changed to adapt to the direction of the projected light. This is not true for portraits in certain indoor environments.

Since the direction of the indoor window is fixed, if the lighting direction is required to change, it can only be solved by changing the face direction of the subject (it is another matter if lighting is used in a specific indoor environment). As for outdoor portraits, the lighting direction can be changed by choosing the direction of sunlight projection, and by turning the face of the subject to form the desired light effect.

Natural lighting method for portrait photography

When photographers use indoor lighting, they usually want a natural feel. The lighting technology used in this example will simulate natural light. But when shooting portraits in the studio, there are many opportunities to use real natural light. The most typical natural light is the light coming in from the window. When using this technique, the object must be close to the window to produce a real Rembrandt lighting effect.

Since the camera cannot be placed in a wall, the direction of the light will be more restricted. Sometimes it is necessary to deflect the object slightly in the direction of the light, as shown in the picture. If you move the fill light board closer to the object, you can brighten the tone of the photo.

If the subject’s face can be evenly illuminated by light from the sky, a natural and beautiful lighting effect can be produced. In this photo, the woman is standing in the doorway, facing the backyard. The sun is on the opposite side of the house, and all the light comes from the clear sky. In fact, she has a light pad tied around her waist. The lighting effect is soft and uniform.

One problem with this natural lighting is that its light tends to be too strong, making the subject uncomfortable. The subject tends to squint into bright light, especially when using a fill light. To solve this problem, the subject can close his eyes and only win the eye at the moment of exposure.

Another thorny issue is the reflection in the eyes. The vast sky constitutes a huge soft light source, so the highlights or reflective areas in the eyes are divergent, which gives people a monotonous feeling of lifelessness. Please note that to make the eyes vivid, an easy way is to add some bright reflective areas.

Categories
Studio Lights Education

Ten Commonly Used Techniques for Borrowing Light in Photography

Techniques of Borrowing Light in Photography

The closer the light source, the softer the light. Conversely, the farther the light source is, the harder the light. This is because when the light source is closer to the subject, the relative larger, that is, the wider. And when the light source is farther away from the subject, the relative smaller, that is, narrower.

  1. The wider the light source, the softer the light

Conversely, the narrower the light source, the harder the light. A wide light source can weaken shadows, reduce contrast, and suppress texture, while a narrower light source has the opposite effect. This is because the wider the light source, the more the direction of the light on the object, which will increase the lighting in the scene and reduce the shadows.

Tips: When the main body of the portrait is arranged by a large and bright window that is not exposed to direct sunlight, the window can act as a soft box and no special equipment for the studio is needed.

  1. The closer the light source, the softer the light

Conversely, the farther the light source is, the harder the light. This is because when the light source is closer to the subject, the relative larger, that is, the wider. And when the light source is farther away from the subject, the relative smaller, that is, narrower.

Take the sun as an example. The diameter of the sun is 109 times that of the earth. It is a very wide light source! But the sun is 93 million miles (about 150 million kilometers) away from the earth, which is only a very small part of the earth’s sky, so the light is hard when the sun shines directly on the object.

Tips: When shooting portraits with existing lights indoors, you can change the distance between the light source and the subject to make the light more moving.

  1. Diffuse scattering can disperse light, widen the light source and soften the light

The essence of using diffuse scattering to disperse light is to widen the light source, so as to achieve the purpose of softening the light. When the clouds block the sunlight, the shadows on the object will be significantly reduced. If there is fog, the shadow will disappear. Clouds, gloomy sky, and heavy fog will diffuse light, and diffusion will spread light in all directions. On cloudy and foggy days, the entire sky will become a very wide light source, a natural soft box.

Tips: Materials such as translucent plastic or white fabric can be used to diffuse strong light. You can add a diffuser in front of an artificial light source, such as a studio flash; if it is in bright sunlight, you can also use a soft light awning or soft box to soften the light.

  1. Diffuse light in reflection

Shoot a narrow beam of light on a larger frosted surface, such as a wall, roof or frosted reflector, and the light will be diffused to a wider area during the reflection process.

But if you use a glossy reflector, the light will still be narrow after being reflected. A mirror is an extreme glossy reflector, the light it reflects is almost as narrow as the incident light.

Tips: Knead a large piece of aluminum foil into a ball, unfold the bright side outwards, and wrap it on a piece of cardboard, and a soft light reflector is ready. Although the diffusion effect of this homemade reflector is not as good as the white frosted reflector, it can add sparkling light spots in the photo.

5. The farther the light source, the faster the attenuation of the light and the darker the subject

This rule states that the illuminance of the subject is inversely proportional to the square of the distance. This sounds complicated, but it’s actually very simple. For example: if you double the distance from the light source to the subject, then the light falling on the subject will only be a quarter of the distance before the increase.

In other words, the light will rapidly attenuate as the light source moves away. We should keep this rule in mind. If you are going to move the light source or subject, you must change the quality of the light.
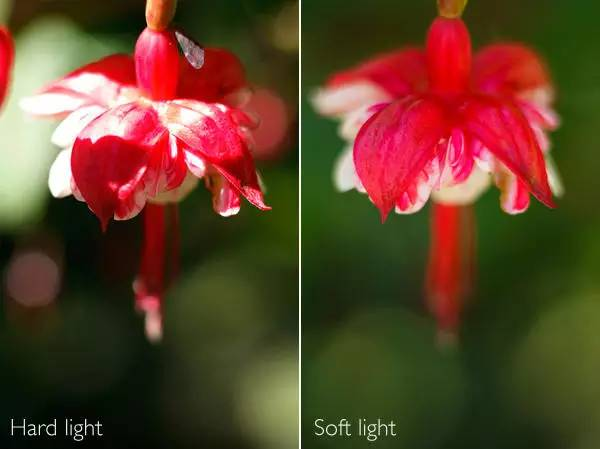
Also note that the distance traveled by the reflected light will increase, even if a glossy reflector is used.

Tips: Flash should be used when shooting portraits outdoors in bad weather conditions (hot shoe or pop-up type is acceptable). In this way, the shadow on the human face can be eliminated, and the exposure of the background will not be affected, because the light from the flash reaches the background and is already weak enough to be negligible.

  1. Light attenuation can be used to change the relationship between the photographic subject and the background

If the light is close to the subject, the difference in illuminance between the subject and the background will be more obvious. If the light is far from the subject, the background will brighten accordingly.

The same principle applies to side light: when the side light source is close to the subject, the light attenuation of the whole picture will be more obvious than when the light source is far away from the subject.

Tips: If the front light of the subject is the light coming in from the window, then bringing the subject close to the window can darken the indoor background. If you want to make the indoor background brighter, you should keep the subject away from the window and close to the background.

  1. The front light will weaken the texture of the subject, while the side light, top light and bottom light can strengthen the texture of the subject

Portrait photographers usually keep the light source near the axis of the lens to reduce wrinkles on the subject’s face. Landscape photographers prefer to use side light to emphasize the texture of rocks, sand and leaves. Generally speaking, the greater the light direction and the angle of the subject, the more obvious the texture of the subject.

Tip: When you want to highlight the fluffy hair of your pet, it is best to place the light source on the side instead of using a front light source.

  1. Shadows create three-dimensionality

Shadows are a way for photographers to describe the three-dimensionality of objects. It can make the object present a sense of space in the photo, not just the projection of the object on the plane.

Similarly, the side light, top light and bottom light can cast deep and long shadows on the object to create a three-dimensional effect. Therefore, still life, commercial products, and landscape photographers like to use angled light.

Tip: You can try to use the “Hollywood Lighting Method” to shoot dramatic portraits. Place the top light at a position slightly above the subject and adjust the light angle so that the shadow of the character’s nose falls on the position slightly above the lips.

  1. The backlight can be used as a highly diffuse light source

There are very few objects that are only illuminated by backlighting, that is to say, there are almost no pure silhouettes without any frontal illumination. If a person stands in front of a bright window, the opposite wall will reflect part of the light falling on the person. If a person is outdoors, even if the background is bright sunlight, there will be light from the sky on the front. In either case, if you want to record the light falling on the subject, you must increase the exposure, and these lights will reduce the details of the face and weaken the three-dimensional sense of the subject.

Tips: When shooting backlit portraits or silhouettes, try to incorporate the light source into the composition, but this will cause inaccurate light meter readings, so you can try to use bracketing.

  1. Light is colorful

Although sometimes the light looks like “colorless”, it is actually colored, and we call it color temperature. It’s just that the “computer” composed of our eyes and brain can adjust perception and adapt to changes, so it’s hard for us to notice it. But digital sensors and film will record colors that we can’t see.

The sun in the morning and evening has warm tones, and the shadows cast by the sun at noon turn blue. The tungsten filament light is obviously yellowish, and the surface reflecting this light will also show the corresponding color.

For digital cameras, you can use the white balance function to eliminate or emphasize the color of light. For example, you can add warm colors in landscape or portrait photos. For film movie shooting, you must select the appropriate film according to the shooting environment, or use filter compensation.

Tips: Scenery shots on sunny days, especially the shadows, will be very blue. At this time, setting the white balance of the camera to cloudy can add golden yellow to the photo, which is equivalent to adding a warm color filter in front of the lens.

The Use of Lighting in Photography

Light is the most important constituent element of photography, and the treatment of light is often more important and difficult than other elements. Light not only makes the target image on the camera’s CCD, but a good photographer can also express different moods by using light of different nature.

Intensity of Light

Intensity describes the intensity of light, and the light emitted by various light sources has a certain intensity.

the cabin can retain details under soft light

Strong light is usually caused by direct light from a strong light source. Of course, the weaker light source can also form a strong beam by concentrating. Strong and direct light will cause obvious shadows and clearly show the outline of the object, so it is often used to outline the outline of the object. Strong light can also increase the contrast between light and dark of the subject to emphasize the texture of the surface of the object, the contrast between different colors or tones. Weak and scattered light can reduce the contrast of light and dark of the subject, making the surface of the object look smooth and detailed.

For photography lighting, strong light sources are often used as the main light, which is the main source of photography lighting. The weak light source should be used as an auxiliary light, it can weaken the strong shadow caused by the main light, and at the same time will not cast unnecessary shadows.

However, if the light is too strong, very good results are often not received, because the shadows formed under strong light will be too exaggerated and the light and shadow effects are unnatural. When shooting, if the light is too strong, you can reduce the intensity of the light by installing a diffuser or reflector.

Compared with strong light, the light and shadow effect of astigmatism is softer and more natural. The light-receiving surface of the main body can be uniform, the contrast is moderate, and the directivity of the light source is limited, making it an ideal light source. In the shooting of feature films, astigmatism is used the most.

Illumination

The illuminance, which is commonly referred to as lux, represents the luminous flux per unit area on the surface of the subject. 1 lux is equivalent to 1 lumens per square meter, that is, the luminous flux that is vertically irradiated by a light source with a distance of one meter and a luminous intensity of 1 candela per square meter of the subject. Illumination is an important indicator to measure the shooting environment.

When the sun is strongest at noon in summer, the outdoor illuminance can reach more than 100,000 lux, and it is easy to form obvious shadows. This is not necessarily an ideal shooting environment. Most indoor illuminance is below 300 lux, and ordinary cameras can shoot under this illuminance.

However, the lower the illuminance, the more likely it is to take a gray or grainy image, so it is better to increase the lighting. The ideal shooting condition is that the illumination is about 10000 1ux. Shooting in such an environment, it is easy to get clear and bright images.

The illuminance is not only related to the luminous intensity of the light source, but also related to the distance from the light source to the subject. In general, when the distance from the subject to the light source does not change, the illuminance of the subject is proportional to the luminous intensity of the light source.

On the contrary, when the luminous intensity of the light source does not change, but the distance from the subject changes, the illuminance on the subject is roughly inversely proportional to the square of the distance.

When a light source illuminates the front and back two subjects, the closer the light source is, the greater the difference in illuminance between the two subjects. The farther the light source is, the closer the illuminance the two subjects receive.