Categories
Studio Lights Education

Photography Skills – Take Great Pictures on Cloudy and Rainy Days

How to Shoot on Rainy Days

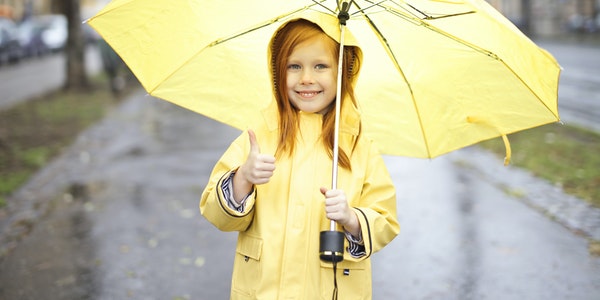
Traveling, especially long-distance travel, will inevitably encounter cloudy and rainy days. When it rains on a cloudy day, the whole light becomes very dim, but the light is very uniform. But taking pictures at this time, everyone will always find that the whole picture is very dark, so most people don’t like to take pictures when it is cloudy and rainy. In fact, even if it rains on a cloudy day, you can get a very good picture, but everyone hasn’t mastered the method yet.
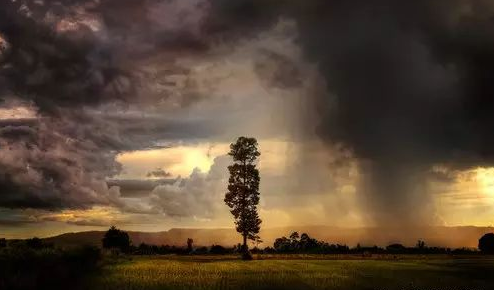
In fact, rain on a cloudy day is not terrible. Because the light is very uniform on rainy days, the camera’s metering will be more accurate than when the sun is strong. When the sun is strong, because the sun has a direction, we usually encounter when the light and the shadow are together when taking pictures. At this time, the metering of the camera will mess itself up. However, when it is rainy or cloudy, the lighting of the environment is very uniform, and there is no coexistence of light and shadow, so it is actually very suitable to take pictures at this time.
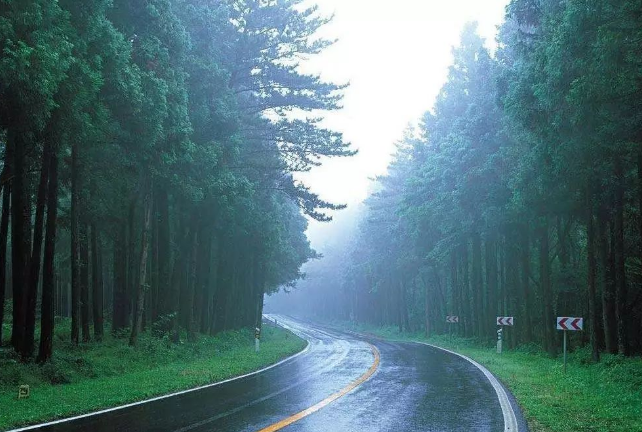
Shooting around rain

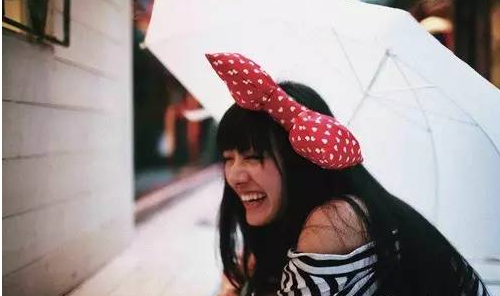
Since it is rainy, there will be rain falling. We can actually take some wonderful photos around the rain. In addition, in the case of uniform lighting in rainy days, shooting some close-up scenes and objects couldn’t be more suitable. If you are still at a loss for taking photos on a rainy day, and still don’t know what photos to take, don’t worry, then I will bring you a detailed collection of rainy days photography to answer your doubts in detail.

Since it is raining on a cloudy day, there will be countless rain drops. At this time, a very serious problem will be involved, which is the protection of the camera. Digital cameras are very sophisticated photographic equipment. In addition to the current rugged and waterproof cameras, other cameras, lenses, flashlights and other equipment need to be kept away from water, otherwise they will break down or cause serious malfunctions. Since the rugged cameras and waterproof cameras are not affected at all in rainy days, we don’t need to introduce their protection information here.
Waterproof of the camera

If it is drizzle–it is very light rain–we don’t need special equipment protection measures. Wipe the surface of the camera with clothes or paper towels every other time. Although the camera is a very sophisticated device, it is not so fragile. A little rain will not affect the camera. However, you still need to wipe the water droplets on the body and lens in time.

If it is heavy rain, pay special attention. If it is raining moderately or heavily, or even heavy rain, then we need to prepare special equipment protection measures. Because this type of rain is very urgent, if the camera is exposed to rain, it is equivalent to immersing the camera in the water. Water will immediately flow into the gaps in the camera housing and into the camera body, causing permanent damage to circuits and precision instruments.
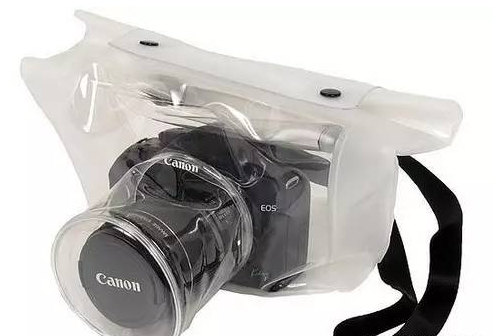
If you want to protect your camera from the rainy weather mentioned above, you might consider buying a camera waterproof cover to bring with you. In fact, no matter whether it will rain or not, when you travel, I suggest you bring a waterproof cover for your camera. In this way, you can protect your photographic equipment when it is raining or on the beach. Of course, if you don’t buy a waterproof cover and you catch up with the rain, I also recommend that you find a plastic bag to cover the camera. As long as it can be waterproof, there is no need to entangle whether the cover is professional or not, after all, the purpose is to protect the equipment.

The grasp of light when shooting in rainy days

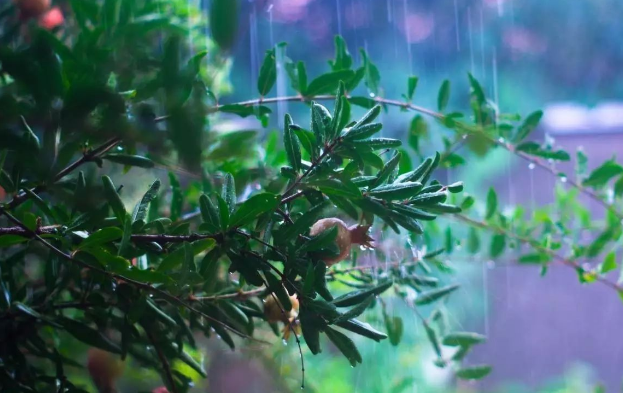
On cloudy and rainy days, because the light is very uniform, it is very powerful to take some close-up pictures. If it is sunny and sunny, it is easy for us to shoot some close-ups because the light is too strong to cause the close-up picture to be overexposed, but the light in rainy days is very soft and uniform, so close-up pictures are also very good.
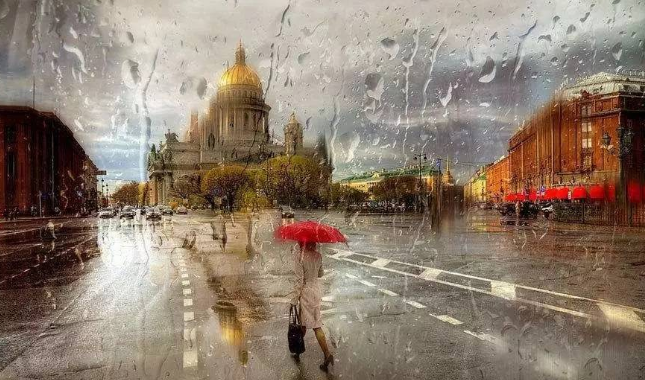
Close-up photography on a rainy day is not limited to a flower or a small object. Shooting close-ups of small scenes is also very powerful. Because of the soft and even light on rainy days, close-ups of these small scenes can also clearly show the details in the picture. As we can see from the above picture, in fact, when taking close-ups on rainy days, because there is water attached to the object, the picture will be more fresh and the colors are also very bright. Therefore, on rainy days, we recommend that you take more close-up photos of objects and small scenes.

It is suitable for taking close-up photos on rainy days, so how to take photos of large scenes? In fact, the main reason why it is not appropriate to shoot large scenes on a cloudy day is that the light is very dark, so the picture of the large scene will become very dim. Especially when the sky occupies a large area of the picture, it will become brighter after the light is diffusely reflected by the clouds, so the picture of other ground parts in the photo will become darker, and the loss of detail will be more serious.

At this time, we should try to reduce the proportion of the sky in the picture and increase the proportion of other parts in the picture.
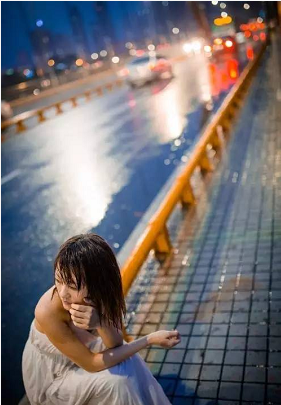
Outdoor shooting on a rainy day

By reducing the proportion of the sky, we can see that whether it is shooting in the city or shooting in the wild natural environment, the brightness of the picture can be maintained, and most of the details can be presented relatively clearly.

If the brightness of the picture is not enough, you can appropriately increase the exposure compensation for shooting. However, sometimes, the proportion of the sky in the picture can be increased on rainy days, and most of the details of the objects in the photo can be preserved, but this situation is a special case.
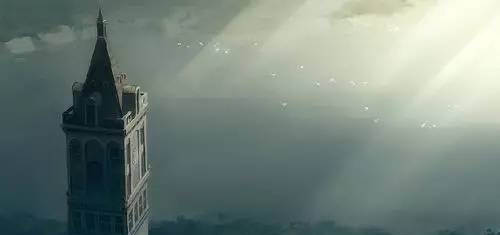
Generally, the sky part of the picture is more reserved, that is, when the proportion is large, most of the details of the picture can be clearly preserved and presented. This situation is generally a special case.

It shows that even if the dark clouds block the sunlight at this time, the light of the whole environment is still relatively bright, so it is possible to shoot a picture with preserved details and a large proportion of the sky.

Whether this kind of photo can be taken successfully depends mainly on the light conditions of the environment at the time, so in general, when you take photos of large scenes on cloudy and rainy days, you have to reduce the proportion of the sky.

How to shoot after raining and clearing

There will always be times when it will rain and the sky will clear up. In an environment where it has just rained and it is sunny, it is actually more suitable to take pictures. At this time, most objects still retain a certain amount of water, and all the environments are very clear and bright. And the photos taken are fresher and more likable.

After raining and clearing, the light recovery is actually very good. Therefore, there are many scene effects that we can shoot, such as shooting the brilliance of the sun, shooting rainbows, shooting reflections of water beaches, shooting close-ups of many objects, and so on. The picture at this time is actually more beautiful than the picture under the scorching sun, and it can also show more shooting techniques.
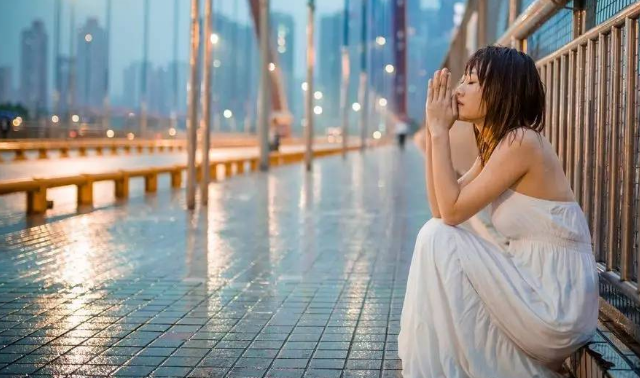
Many travelers don’t like rainy days. On the one hand, it increases the obstacles in the journey and makes some things in the journey very inconvenient. On the other hand, taking pictures will be greatly affected. In fact, good photos can be taken on rainy days. The main shooting methods are proper, the camera settings are accurate, and you have a concept of what kind of work you should shoot on rainy days, so that you can take good photos on rainy days.
Categories
Studio Lights Education

The Main Points of Photography in Different Places

Stage Photography

Concept:

An art form that vividly and perfectly expresses the artistic modeling on the stage through photography.

Subject:

Drama, dance, music, quyi and acrobatics performed on stage

condition:

  1. The particularity of the lighting is shown as weak light, large changes in light intensity, and strong contrast between stage areas.
  2. The shooting point is relatively fixed,
  3. Small changes in shooting distance,
  4. The plot of the stage performance.

Situation

  1. Take a snapshot at the performance site
  2. Take pictures during the rehearsal
  3. Specially organize photos.

Regardless of the situation, we must:

Be familiar with the plot before shooting.

Understand the performer’s style and performance characteristics.

When shooting, capture important moments or moments of performance or relatively static moments.

Only in this way can we get real and vivid artistic photos.

Stage Shooting Requirements

  1. To understand the laws and characteristics of different types of art performances,
  2. To understand the representative scenes constituted by the main “people in the play” in a certain position, make a corresponding shooting plan,
  3. Prepare necessary photographic equipment, such as small cameras, cross-focus lenses and various additional lenses, high-speed films, etc.,
  4. Adapt to the plot, choose the shooting position and angle, and master the “moment” of shooting.


Aesthetic characteristics:

Dynamic beauty: is the most important aesthetic feature of stage photography.

Excellent stage photography works reflect the sense of movement of the subject, forming a dynamic beauty.

The best object for stage photography to express dynamic beauty is dance, and the processing of virtual and real images is the key to creating a dynamic photo. It is generally required that the character’s face is clear, in order to fully express their expressions and emotions. The rapid movements of the body of the character must be blurred, so that the picture combines the virtual and the reality, and the movement and the static are contrasted, highlighting the character in the plot and artistic conception.

Indoor Photography

concept

As the name suggests, photography taken indoors

Light

  1. Indoor shooting because there are a lot of light sources, it will test the photographer’s light technique. There can be many changes in light and shadow as well as color and angle.

Indoor photography equipment requires at least three 400-watt tripod photography lights, preferably with diffusers, condenser plates, etc. One serves as the main light and two sub-lights. One of the auxiliary lights is responsible for filling light on the weak side of the main light, and the other auxiliary light is responsible for lighting the hair behind the character or lighting the background. The changes of these three light sources can be used to shoot people in high-key or environmental photography styles.

  1. Reflector

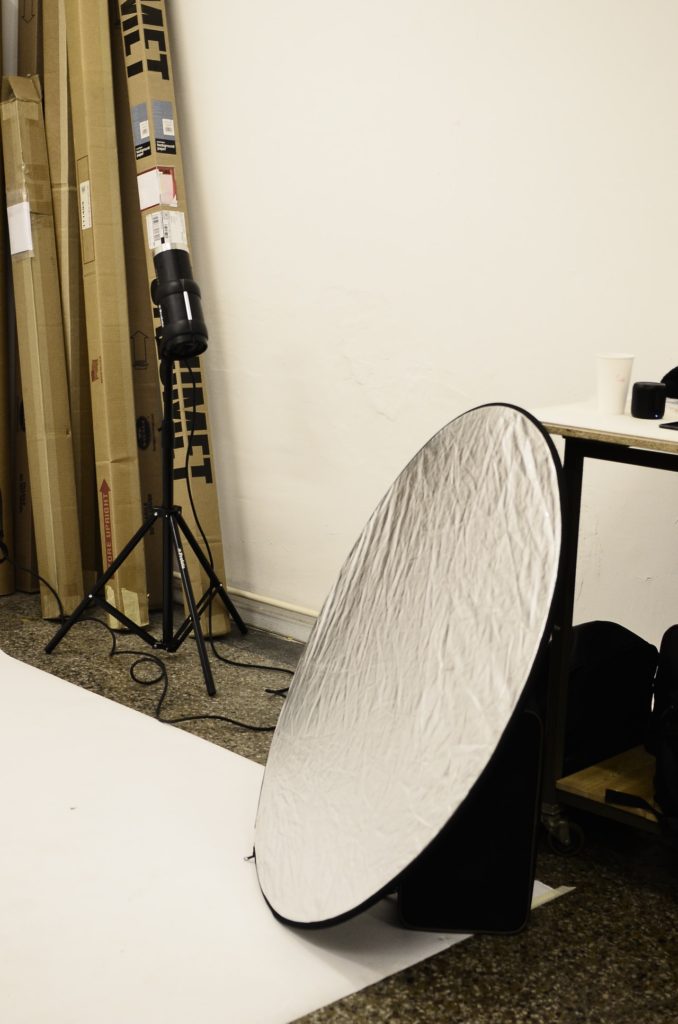
The reflector is one of the necessary photographic accessories whether indoors or outdoors.

A general reflector has two surfaces: one is a silver surface that reflects normal incoming light, and the other is a golden surface that reflects normal incoming light as warm light.

There are also many skills required for the application of reflectors. But what is always changing is that we need to compensate for the parts of the subject that are difficult to be involved in the external light source to achieve an overall light balance.

In indoor photography, the main light changes include forward light, backlight and side backlight. We have to make different fill light according to different light changes, so as to achieve the most satisfactory effect.

Flash Trigger

In indoor photography, the flash trigger is an absolutely indispensab

Categories
Studio Lights Education

Backlight Photography-How to Solve the Problem of Black Faces in Portraits

Photography is a dialogue between light and shadow. With light, the world has colors, contrasts between light and dark, and so-called “shadows”.

Backlight shooting is a kind of shooting method that many movie friends like, because it will produce charming contour light, the hair will look very beautiful, and the person will be surrounded by a circle of gold, and the whole person will become more three-dimensional.

However, due to the backlight environment, “big black faces” are prone to appear when shooting, which is a problem that we need to focus on.

Fill light

You can bring a reflector to fill up the light, but it is impossible for many people to bring such items when going out, so you can also use the surrounding environment and items to fill up the light. If there is a white wall on the opposite side of the character, light can also be properly supplemented by the principle of reflection. Or use white objects, such as white clothes. Of course, these operations need to be tested in reality.

Metering

The reason for the black face is that the light behind the character is relatively strong. If the metering method is unreasonable, after the automatic calculation, the camera will think that the front side of the portrait is normal, and a big black face will be formed.

At this time, center-weighted metering or spot metering can be used in the metering mode. Remember a very important formula “white plus black minus”. It is recommended to measure the light on the face of the person, and add 1 to 2 stops of exposure compensation on the basis, and you can get a picture with basic details of the face.


Many film friends like to use the second method, which can preserve the overall atmosphere of the picture and allow the characters to blend into the environment more naturally. I hope I can help film friends shoot more and better works.

How to solve the black face in portrait? ​

​Yes, when photographing against the light, we sometimes shoot people’s faces black, so what should we do?

My usual method is the “deception method.” Taking SLR shooting as an example, this deception is that the photographer “cheats” the camera to get a bright face exposure. There are three factors: metering method, focal length, and exposure lock.

  • Metering method

Since the metering is on the face and the range is small, it is better to use spot metering.

  • focal length

If it is a zoom lens, the lens should be extended to the maximum, that is, the light metering at the telephoto end can perform more detailed exposure detection on the face of the person, and the effect will be more accurate. If it is a fixed-focus lens, you need to measure the light close to the person’s face.

  • Exposure lock

The role of exposure lock is self-evident, that is, to lock the exposure value obtained by the above two methods, so that no matter how you move the camera, you will always maintain the face exposure value just now (note that this hold time is limited , Usually only for a short period of time to maintain, after this time it will return to the original state, need to pay attention).

 Shooting method

Set the camera to M gear, and the metering method is “spot metering”. Pull the lens to the telephoto end, aim at the face of the person and measure the light. Align the exposure indicator bar on the exposure 0 scale through the viewfinder, indicating the exposure standard. Press the exposure lock button on the camera in time (usually in the upper right corner of the camera) to lock the exposure value. Then you can adjust the focus to compose the picture, and then focus the shot. The faces of the characters captured in this way will certainly not be black.

It’s worth noting that sometimes you may think that the character’s face is too bright. So at this time, as long as you manually lower the exposure value by one or two stops, you can find the picture with the best exposure effect. This is why the M gear is selected, which can be adjusted at any time to get the best results faster.

Black faces in backlit photography portraits are a sign of serious underexposure. Especially when the background is too bright, the light is automatically metered, and the average of the characters and the large area of the sky is too bright, and the brightness of the sky shall prevail. Naturally, the characters are seriously underexposed.

Two solutions

This problem can be completely solved in the process of taking pictures. There are several ways:

The first is that the background should be darker for backlight photography, and even brighter it should be a mid-gray tone. This way the metering is easier, and the backlit contour light is also clearer.

The second is that when the contrast between the person and the background is large, and the darker background cannot be changed due to the limitations of the photographing conditions, the flash can be used to ensure proper exposure of the person. According to the weather and the camera’s flash synchronization speed, try to use a higher shutter speed to ensure that the background can be somewhat exposed. Of course, if you want a white background, you can also use a slower speed.

Pay special attention to the fact that when there is a big contrast between the person and the background, the exposure effect is not ideal even if the person is the subject, and the portrait may be vague and ungraded.

Another is that if you take multiple shots under the same background, you can take a good one first, and then change the manual mode with its parameters, so that you don’t need to repeat metering and calibration.

The most natural effect: reflector

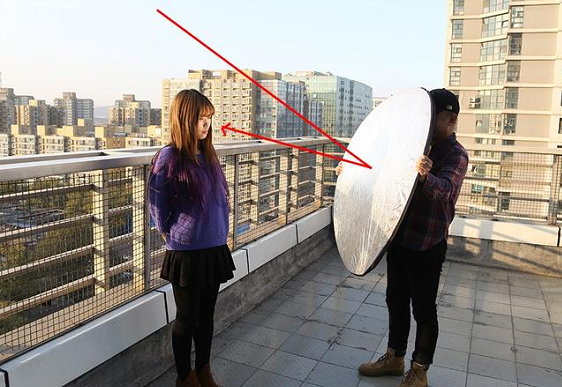
An inconspicuous reflector is an artifact of backlight shooting. It can effectively balance the light ratio of the ambient light and the facial light of the character without adding artificial light sources, so as to solve the problem of backlit and dark faces:

The most obvious effect: artificial light source

The artificial light source here can be internal flash, external flash, light box, or an independent small light source:

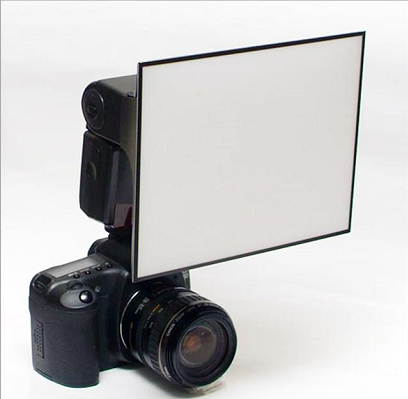
Compared with reflectors, flashing lights usually have high intensity and harder light, which tends to produce sharp shadows. A diffuser can be installed on the internal flash or external flash to effectively soften the light and obtain a softer light supplement effect:

Other emergency measures:

  1. White paper or cardboard

Don’t worry if you don’t have a reflector, a piece of cardboard or even a piece of white paper can play a role in reflection.

  1. Change the shooting angle appropriately

This is also a simple and effective method, but it is more restrictive to the viewfinder.

  1. Increase exposure compensation or spot measurement on people’s faces.
Categories
Studio Lights Education

Some Misunderstandings in Photography

Misunderstanding 3: Professional Film is Better Than Amateur Film

Some photographers often have the illusion that the image quality of professional film must be better than that of amateur film. But I often find that the facts are not so obvious, and I blame the camera, lens, light meter, etc. that are not good enough, even myself, which seems a bit pitiful.

Professional film does have some advantages over amateur film, but it does not mean that amateur film must be worse. In fact, we just want to say that professional film is designed for professional photographers. The way to use it well is very simple, just learn how to be a professional photographer.

What is needed is not necessarily professional equipment, but skills, especially skills in handling film. You might as well try to buy some professional slides to try. You will find that there will be a display cabinet wherever it is displayed. Pay attention to the instructions on the film. In addition to the use limit, there is also a recommended storage temperature, which is generally about 12 or 3 degrees.

The advantage of professional film is that it is fresh enough. If you can follow the recommended environment during storage, the film will get the expected results. But the film is handled at will, once in shop A and then in shop B for drying, it is weird to guarantee that there is no different color performance every time.

Of course, there are many ways to deal with film, such as exposure factors, reciprocity, etc., or you can refer to the instructions in the manual. Amateur film is different. Apart from the expire date, there are no other instructions. Generally, it has a longer and more stable storage period and high tolerance, which seems to be more reliable to general users.

Misunderstanding 4: Flash Shooting Must Use X sync Shutter

Many photography books have also mentioned the X sync shutter, and even the term fastest flash sync shutter.

However, many friends who are beginners in photography misunderstand that a certain shutter speed must be used when shooting with a flash. In fact, the so-called flash sync shutter or the fastest flash sync shutter generally refers to the shutter that can be used for flash photography. The fastest means that the shutter speed above the shutter speed can not be used for flash synchronization, otherwise it will not be able to capture clear images of the whole film.

This problem exists in cameras with rear-lens shutters, and each camera has its own design, so the highest synchronized shutters are not all the same.

When using the flash, as long as it is under the highest synchronized shutter speed, you can take photos with flashing effects, but the slower the shutter, the longer the exposure time of the live light.

For example, when shooting indoors, if you shoot with the highest synchronized shutter flash, the background may not be sufficiently exposed, which makes the foreground of the subject white and bright, while the background is dark and dark. If you shoot with a slow shutter (even the so-called Slow Sync or night portrait mode in the camera) synchronized flash shooting, you can get a more lively picture.

In addition, when using a slower shutter, you can even choose front or rear curtain sync flash. You can adjust the flash when the shutter is opened, and you can flash before the shutter is closed, which can create special shooting effects.

Misunderstanding 5: The Macro Lens Can Only be Used for Close-up Photography?

The macro lens is designed for shooting very close-ups, but some people say that it will have a quality degradation during normal shooting or it is superstitious that it can only be used for remakes or macro shooting purposes.

In fact, according to some optical tests, the resolution of the macro lens has excellent performance at most apertures when shooting at a ratio of 1:1 or 1:2 and 1:50. In the test at 1:49 or 1:50, the resolution is much higher than other non-macro lenses of the same focal length.

However, the biggest problem with macro lenses is that the focus design is designed for close-ups. Therefore, at a distance of tens of centimeters to infinity, you may only need to rotate the focus ring less than 45°, which may greatly reduce the accuracy. But today’s AF lenses are already very accurate, or can make up for this problem.

Therefore, using a macro lens to shoot scenes at normal distances, and even portraits, is absolutely no problem. The f/2.5 or f/2.8 aperture may not be used to the full, because the four corners often lose light, which is inevitable, but it can be solved by closing the aperture. On the contrary, when shooting macro, a thin aperture is likely to cause diffraction, so f/8 to f/11 will be more suitable.led-hard-&-soft-2-in-1-lights

Misunderstanding 6: The Incident Light Meter is More Accurate than the Reflective Light Meter

This statement is not comprehensive enough. Objectively speaking, both are equally accurate, but for people who only use a single metering method, it is understandable to believe that one is more reliable, because both have their own operation methods and measurement methods.

But for the reflective light meter, it is slightly more troublesome than the incident light meter, because the 18% gray scale limit is often considered. The incident type can directly measure the luminosity cast on the subject, and directly obtain the aperture value.

However, the built-in light meters on our cameras are all reflective light meters. The advantage is that it is more convenient because you don’t need to walk in front of the subject to measure, and most of them are TTL (Throagh the lens).

Exposure factors such as loss of light of the lens and filters are also directly included, which reduces the occurrence of errors and is easier and more reliable than the incident type. But the color of the subject and background (such as black or white) will cause measurement errors. The only way is to make exposure compensation. It’s not that difficult to get the right exposure as long as you practice more.

The incident type itself has advantages over the reflective type, but it is more troublesome to use. If you don’t mind bringing an extra light meter, that’s fine. But remember to take into account factors such as filters in front of the lens. Also, for example, Nikon F5 has been equipped with a 3D RGB reflective light meter, which means that reflective metering can still jump out of the cabinet frame. As long as the 18% gray scale limit is resolved, there is no need to doubt its accuracy.ledsfilm-2-in-1-studio-lights

Misunderstanding 7: The Most Reliable Seal Against Moisture

When it comes to the rainy season, the photographers feel the most sad, because the beloved equipment is reimbursed at any time due to the damp. Some people go crazy buying all kinds of moisture-proof products, such as moisture absorbers, dehumidifiers and so on. Once it rains, I would rather hide the camera lens and become a humidity allergic. In this way, the entire summer may not even be able to shoot a tube of film, which is very sad.

To be honest, the weather here in NY has very few days when the RH is lower than 60%, not to mention the rainy season. However, closing all equipment may not be completely moisture-proof.

Many people will have experience, and the old lens in the sealed box will also have mold for some reason. In fact, to prevent the lens from getting moldy, it is not humidity, but bacteria.

To stop the lens from getting moldy, the first thing is to understand why it gets moldy. Moisture and darkness are the favorites of mold, but the bacteria are scattered in the air and it is impossible to prevent them. If there is mold in a sealed moisture-proof box, if moisture-proof beads are added (silica gel is usually used), it can have a certain dehumidification effect (but not permanent, and the effect will be lost when saturated).

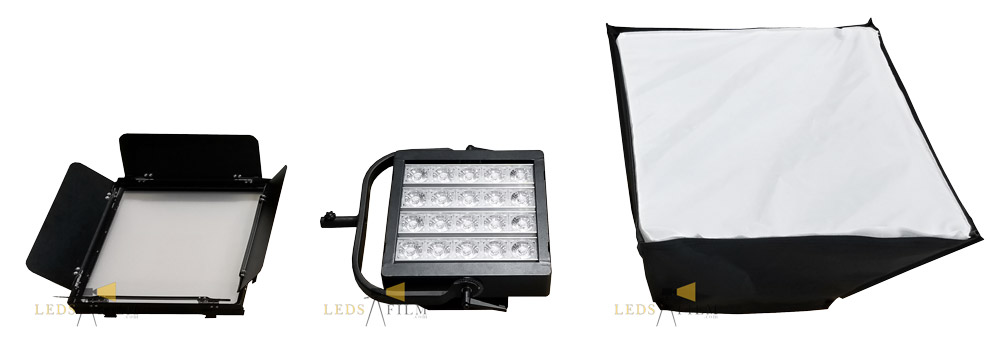
There are some moisture-proof devices on the market that can suck water into the box. Although the water absorption effect is good and obvious, I suggest that you be careful and check whether it is full or leaking. It is also necessary to avoid placing it in an excessively high temperature place, because the water may also be evaporated.LED soft light can have different color temperature

Therefore, many people would rather have time to take out the lens to play or use, seeing the light can greatly reduce the chance of mold. Generally, if it is placed in an open air-conditioned room, as long as the air is ventilated and the humidity is low, the chance of the lens getting moldy is very low.

If you really want to hide the equipment for a long time, it is best to put an appropriate amount of moisture-proof material in an environment with low humidity. Store it in a sealed box, and remember to clean the lens to prevent bacteria from growing. It is said that some electronic moisture-proof devices also have a certain effect, but the price is very expensive.

Misunderstanding 8: Always Wipe the Lens

There are many instruments for cleaning lenses and even wiping lotions on the market. Should the lens always need to be wiped? Generally, photographers love their equipment, and they are panicked when they see a dust on the lens, and are eager to buy something to clean the lens.

Some people use an air pump to sweep away or blow away the dust particles, or even wipe with lens paper and liquid medicine, but this is not good. Unless the stains on the mirror surface are difficult to clean, such as finger molds, do not wipe the surface of the lens rashly, as this may distort the mirror surface and may cause part of the coating film to peel off. But today’s coating film is quite stable, but this is always too dangerous.

It is recommended to add a UV or IB skylight filter to the lens for protection.

If you really need it, be careful when buying lens paper or lens cleaner, and avoid using alcohol-based cleaners, as this will damage the lens. Do not drop the cleaner on the lens surface when using it. If it flows into the lens or the edge of the lens, it will also damage the lens.

Therefore, the best way is to avoid contaminating the mirrors at both ends as much as possible. If there is dust, use an air pump to blow it away lightly. If it is stained with finger molds or oil stains, use high-density cloth or polished leather to wipe it off. If there is mold inside or condensation (such as entering and leaving air-conditioned places), it is best to return it to the original maintenance center for treatment.

Categories
Studio Lights Education

Photography Skills for Different Weather Conditions

Shooting Skills in Snow

Snow, like a beach, can deceive the light meter. The bright white color leads to underexposure, because, don’t forget that the light meter is reading from 18% gray.

The easiest way to compensate is to read from the gray card or the scene you know is the middle tones. Make sure it is in the same light as your subject and that the light meter is not reading from a bright background. If it is an important shot, use bracketing.

If you take many photos of the same scene, and you have determined how much your light meter is underexposed, you can set the exposure compensation dial to automatic compensation.

If your camera does not have such a dial, you can change the ISO value to “cheat” the light meter. For example, if you use an ISO 200 film light meter to read F/16 at 1/250 second, you will get F/11 at 1/250 second from the gray card. You only need to change the ISO value to 100 to compensate. (Remember, halving the ISO value doubles the amount of light required to reach the film.) Don’t forget to switch back to the original setting after shooting.

If it is sunny, it is best to come out in the early morning or dusk. The low-angle sunlight makes the snow show more details and texture than during the day. Avoid shooting when the sun shines directly behind you. The light reflected directly into your lens from the snow will usually give you the effect of a vast expanse of whiteness.

If you are shooting sports, such as skiers or sleigh riders, check the details of the sports chapter to learn how to freeze sports or capture them.

In very cold conditions, try to keep the temperature of the camera battery to work effectively. I usually put the camera in my jacket, take it out when shooting, and then put it back when I move to the next place. Also remember that the skin will stick to extremely cold metal, so tape any contact surfaces in advance.

Don’t forget the condensation phenomenon when you return indoors on a very cold day. Seal the camera in a plastic bag when you are still in a cold environment, and then warm up the camera when you return to a room with heating before opening the plastic bag.

Look for the details that really explain the “coldness”: a bird curled up in its feathers, just a child with eyes exposed from a bright down coat, the breath of two people talking in the air, and the ice on the beard.

Shooting skills in haze weather

The ship hanging in the fog, the haze floating on the lily pond-water vapor can produce a very resonant picture.

Like snow, fog can trick your light meter and flash. Some fog may be a perfect mid-gray tone or its thinness is irrelevant, while others may be almost white.

To ensure correct exposure, take exposure readings from the subject. Or, if you can get close, get it from a gray card. In a dense fog environment, your flash light may be reflected by water particles and cannot reach your subject, just like the situation when car headlights sometimes only illuminate the fog and cannot illuminate the road.

If the fog is too thick, simply wrap your camera in a clean plastic bag. Pay attention to the fog that condenses on the lens.

Don’t be scared away by the dim light when it is foggy outside. Diffuse light is ideal for certain mood types.

Shooting skills in stormy weather conditions

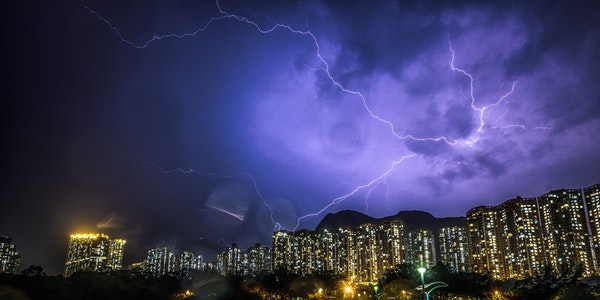
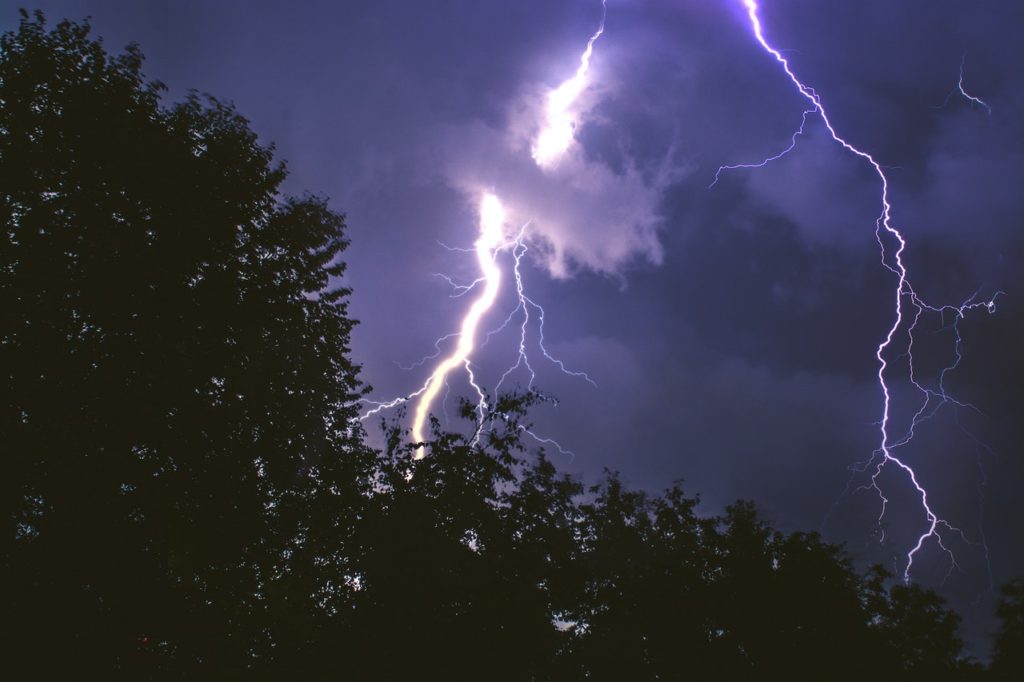
When I saw a dramatic stormy sky, I ran around trying to spot some points of interest in its foreground. The dramatic sky creates feelings that you cannot get from other scenes, as classical painters have shown.

If you are shooting a few sunlight penetrating clouds, be careful not to get the light meter reading from the beam of light, because you want it to be bright. The same applies to the white spray foam that bursts when hitting the reef. Remember, if the sky is too dark, the light meter will be overexposed.

What are the misunderstandings of photography?

The beauty of photography is that it contains many elements. You can think of it as an art, but also as a science. To create with a camera is to a certain extent the same as a painter’s creation with paint brushes, but photographers who attach great importance to equipment must understand the characteristics of cameras and lenses.

However, because photography is so broad and profound and involves so many elements, many people will have a lot of misunderstandings and fallacies about it, and many friends who are beginners in photography are even more misled unknowingly. Therefore, we specially share with you some photography issues that are often misunderstood.

Misunderstanding 1: The higher the lens contrast, the higher the resolution

Some photographers, when shooting with a certain lens, will find that the shot images have a high contrast, which is generally called hard. Once you look at a photo with weak contrast (which is often referred to as a softer time), the lens is considered to have poor resolution. This statement seems a bit arbitrary.

In fact, resolution and contrast are two different things and should not be generalized. Of course there are some related things. What is the resolution? Resolution is actually data obtained through some standard tests. It uses a black and white line chart to shoot with the lens at different apertures. However, the most standard data should be read by a machine, but some magazines or experiments use film imaging for human judgment.

This seems to have some objective factors, such as the processing of the film or the limitations of the human eye, but it is generally acceptable. Because at least the resolution performance of the same lens under different conditions (different apertures or focal lengths) can be found, no need to compare with other lenses. Generally speaking, the more the number of lines can be analyzed in the same range, the more resolving it is, that is, a sharper lens.

What is contrast? Contrast (Contrast) does not represent the resolution, but it is also related. But it cannot be said that high contrast means high resolution. Contrast actually refers to the ability of the lens to express the dark levels. An image must have two contrasts of light and darkness. High contrast means that there is a clear separation between light and darkness, and there may not be too much gradation in the middle. The low contrast means that the light and dark are not obvious enough or not sharp enough, but there are more levels, which may seem to make people feel more rigid.

For color or black and white images, the definition of contrast is the same. Most people misunderstand that high contrast is good. That’s right, high contrast is more vivid and brisk, but there are no rich layers. The high resolution just now loses its meaning and hinders the overall careful performance.

However, contrast is indeed a very subjective thing, and there may not necessarily be a standard. But specifically, a more comprehensive lens will be more popular. What’s more, today’s film also has a good contrast and hierarchy, and there are also different choices. For example, there are films specially designed for portrait shooting, and there are films specially designed for restoring accurate colors. Photographers do not need to pursue too blindly.

Misunderstanding 2: Adding 1B skylight lens is better than UV filter

Whenever you buy a new lens, you will consider buying a filter to protect the lens. Generally, 1B SKYLIGHT and UV are two kinds, the former is more expensive than the latter. Some people say that UV is just a piece of glass, and 1B will be more beautiful when shooting portraits or the colors will be more accurate, so they will choose 1B, but this statement does not seem appropriate.

1B skylight filter is officially a colored color filter. It is one of the standardized color correction filters, which can cut off light waves of 360nm or below (belonging to the bluer light to UV), and at the same time can be mild Absorb light waves of about 550nm (ie green light).

All in all, it is used to reduce the blueish phenomenon and the green reflection of leaves when shooting in the mountains or the sea. It may be useful for shooting portraits on the green grass. However, when shooting in direct sunlight, this 1B filter is completely wasteful, in other words, it is just a piece of glass.

The UV filter is used to cut off the ultraviolet light that is invisible to the naked eye, so it has no effect on the color (generally color film emulsion can not show the color of UV at all). But according to the factory’s suggestion, its biggest role is to improve the blurring of shooting infinity.

But to be honest, the weather is the final deciding factor. If there are many dust particles or high humidity in the air, it is useless to add more UV. In this case, is it best not to add any filters? Yes, it is absolutely good optically, because adding a piece of glass may be self-defeating, but it may not be detectable by the naked eye.

After careful measurement, buying a piece of glass to protect the front lens seems to be more important than the slightest optical loss. But 1B is still UV, so just do whatever you want. But it is enough to spend money to buy a multi-layered UV, which can protect the lens and reduce optical loss, which is more worthwhile.

Categories
Studio Lights Education

How to Deal with Harsh Light Conditions in Portrait Photography

There is no specific formula for portrait shooting. But the clever application of light does give the picture a deeper mood. However, some specific situations can also cause unnecessary shadows and reflections to have obvious negative effects.

In this article, we will gain insights into common light-using problems for beginners in portrait photography, understand the nature of light, and realize the ability to deal with “harsh” light conditions freely during shooting.

Understand the Quality of Light: Hard Light and Soft Light

The quality of light describes how soft its shadows are and how it behaves. There are many ways to control the interaction of light with the subject. In the most basic sense, it boils down to two points: hard light and soft light.

We can control the softness (quality) by adjusting the size of the light relative to the subject.

Hard light produces sharp shadows and tends to come from a light source, usually either very small or far away. Conversely, soft light either produces soft shadows or no shadows at all. It can be produced by a variety of light sources, by using a barrier (for example, a diffuser, or even just a piece of paper) to diffuse light, or by reflecting light from different surfaces so that objects are illuminated from different angles.

Under natural light conditions, when there are almost no clouds on a sunny day, hard light (strong light) will be produced, which should be avoided under normal circumstances.

Especially for beginners, you can try to shoot in other types of weather, such as cloudy or foggy, because the sun’s rays will be reflected or diffused by particles in the air (moisture, pollution, etc.) and produce soft light .

The Principle of Light Attenuation:

The intensity of light is inversely proportional to the square of the distance. You don’t need to be a great mathematician to understand this, it just means that if you move a lamp twice as far away from your subject, you will end up with a quarter of the light before. This is something to keep in mind, because closer light sources produce softer light, while farther light sources produce harder light.

Usually the size of the light source is inversely proportional to the hardness of the light, which means that a smaller light source produces harder light, and a larger light source produces softer light. According to the characteristics of light, we usually use two ways to process hard light.

Method #1: Reflected light

The function of reflected light is essentially to turn the reflected light into a secondary light source. Many things can be used as reflections, which are very effective whether they are shot indoors or outdoors. Compared with using the flash directly when shooting, the reflected light looks more flattering. If you use a single flash indoors, you can reflect strong light by aiming it at a surface such as a wall or ceiling.

Method #2: Diffuse Light

In natural light conditions, clouds are a good diffuser. Under artificial lighting conditions, any translucent material that can diffuse or soften light can be used. For example, a diffuser is a good example of light diffusion.

Both types of light have their own advantages and disadvantages. Hard light can be used to create images with strong contrast and highlights, emphasizing structure and texture. It can be used to enhance the three-dimensional effect of an image and create dramatic effects. However, hard light is difficult to use, and it is generally considered not suitable for shooting portraits.

In contrast, soft light creates a more uniform light, which can better describe the color and shape of the object. Which type of light to choose depends on the type of photography, the subject and the desired effect, but soft light is usually the first choice, and for beginners, it is of course the safest choice.


Understand the nature of light sources: natural light and artificial light

The biggest difference between natural light and artificial light is that natural light can be found in nature instead of electronic light sources.

The controllability of natural light is poor, and its controllability largely depends on many conditions, such as the time of day and the weather.

It does not require any equipment, except for your choice of diffuser and reflector. In the choice of using natural light or artificial light, portrait photography and still life photography are obviously more relevant than landscape photography or wildlife photography (in landscape photography or wildlife photography, your choice is usually limited to natural light).

Natural light and different weather

As mentioned earlier, cloudy days produce soft light and are usually the first choice for portrait photography. In contrast, the light conditions under the sun will produce stronger light. Bright light is the most difficult factor in portrait photography, but sometimes you have to deal with it. Here, a folding five-in-one reflector can basically help you solve this problem. The following is a brief description of the five-in-one reflector.

Silver part:

The silver side is probably the side I use the most. If there is plenty of sunlight outside, you can use it as the main light source and let a strong beam of light illuminate your subject. If it is cloudy, you will reflect less light from the reflector, so it can act as more fill light.

Golden part:

Sometimes we have some specific ideas in our minds, but they cannot be realized under the existing ambient light. For example, you want to get the effect of sunset at noon. Using golden reflectors can give you a warm light, similar to a sunset.

You can even reflect a golden lamp on the back of the subject, producing golden hair. The gold and silver sides are very similar, both can produce a strong concentrated light, so pay attention to the intensity of your light source and the distance from the reflector to your subject.

White part:

For a bright light source, silver is too strong, and white will slightly lower the tone without adding any color. Since it is not as strong as silver, white can be used at closer distances, making it appear softer on the subject. White can also be used to reflect the main light source, making the light source larger.

Black part:

Black is mainly used for shading. If you have bright sunlight shining on your subjects, you can shade them with the black side. If your fill light is too strong and you need some shadows, you can block some of the light. If the color of the environment affects the color of your subject, for example, if the subject is standing in a room painted red, you can use the black side to prevent the color from reflecting on the subject.

Translucent part:

This side is used for diffusion to produce a soft light, which you can use to diffuse sunlight or your main light.

Natural light and different time

We can usually get softer light conditions early or later in the day. This kind of light is usually warmer and produces an image with lower contrast than the sun is high in the sky.

Sunrise and sunset are generally considered the ideal time for portrait photography.

Prime time photography obtains its characteristic appearance from the lower position of the sun in the sky. During this time of day, lighting conditions change rapidly, both in intensity and color. This time of day is called golden time, and there are three main characteristics that together constitute the magic of golden time.

Soft: The transition from light to dark is gradual, creating soft light, which is a common expectation, especially for portrait shots.

Warmth: The low-angle sun creates an orange glow, creating an atmosphere of calm and happiness.

Directionality: When the sun is at a low angle, it is easy to create back light, side light or front light.

It is also a good choice to choose to shoot in the blue hour. The blue hour occurs before sunrise and after sunset, and the sun has dropped to a certain extent below the horizon. The sky showed a refreshing and quiet blue before it became a little darker or what we call night.

If the weather is clear, it is not uncommon to see some pink or red near the horizon. However, although it is called the “Blue Hour”, it does not actually last for an hour. It lasts an average of 20 to 40 minutes, or even shorter, depending on the season and where you are.

The challenge of artificial light

The challenges of using artificial light are very similar to those faced when shooting under natural light. We must understand how various light sources act on an object and how to produce the desired effect. But in this case, the photographer can directly control factors such as hardness, distance, strength, and angle.

In addition, artificial light from different sources produces heat signals of different color temperatures. For example, a halogen lamp has a lower temperature and emits blue light, while a tungsten lamp has a higher temperature and emits red light.

When using different artificial light sources, these light sources need to keep the same color heat signal as much as possible, the only exception is if you are taking a black and white photo.

When it comes to controlling and manipulating light, whether it is dealing with artificial, natural, soft or hard light, there are many options in photography. It boils down to understanding how the image is affected by different lighting conditions and setting the required lighting environment.

Front lighting

Front lighting minimizes shadows: we have been looking for a shadow-free lighting before. Front lighting is produced by directly focusing the light source on the surface of the object, which minimizes shadows and textures. But the disadvantage is that the light produced by the front lighting looks very flat, which will cause the portrait to have no three-dimensional effect, which also explains why the shadows are also important.

Side lighting

Side lighting makes the picture more dramatic: when light enters the scene from the side, it creates interesting long shadows. In this sense, the side light has something “dramatic” that the front light lacks, as well as its charm and artistic appeal. Sidelight is a very popular lighting method, which can help you create images with bold visual impact.

Backlight

Backlight means fewer details: Backlight is another common lighting method that minimizes the details of the subject by transforming it into outlines.

Depending on the nature of the backlight, the silhouette can be any effect between very dark (you can only see the outline) and medium light (the model’s facial features can still be recognized). Similar to the side light, photographers often use the backlight in more artistic shots.

Facing harsh light: the low light challenge of portrait photography

Most people think that the best time to shoot portraits is during the day, with plenty of light, contrast, and shadows. However, as a photographer, there is no reason to limit yourself. If we only focus on shooting during the day, we will miss some amazing opportunities for night portraits. In fact, as long as a few “little tricks” cameras and lenses can show what we can’t imagine.

Correct exposure in low light conditions

First, we should understand how exposure works. There are three factors that affect exposure, namely shutter speed, aperture and ISO. The first thing we need to do is to set the camera from automatic mode to manual mode. This gives you complete control over all these exposure settings. Low light conditions mean that we need to change the settings to compensate for the correct exposure. We may need to expand the aperture, slow down the shutter speed or increase the ISO.

Pay attention to the use of safety shutter:

Photographers often want to use the slowest possible shutter speed while still achieving the sharpest shooting possible. When shooting with a handheld camera, the answer to the question “how slow is the shutter speed you can use” is very important.

The easiest way to know how slow the shutter speed is while still taking clear pictures is to use the 1/focal length rule, also known as the safety shutter. What 1/focal length means is that you only need to take the focal length of your shot (for example, 50mm), and then use it as the denominator of your shutter speed. So, if you shoot with a 50mm lens, the shutter speed cannot be lower than 1/50.

Take the 1/focal length rule as the final conclusion. One thing to note is that if you are using a crop sensor camera, you need to multiply the focal length by the crop factor. But the safest way is to use a stable tripod.

Note the available ISO of the camera:

It seems to make sense to use a high ISO when shooting in low light, but doing so will also increase the noise in the image. Today some high-end cameras can shoot at higher available ISOs. However, for most consumer cameras with a limited light sensitivity range, sticking to a low ISO is the most practical method.

Understand the limits of the camera’s ISO level. To do this, take some low-light test photos with different ISO settings. Check the photo to find out at which ISO level it becomes rougher. If it does not seem to be available in ISO1600, then stick to the setting below this value. Basically all cameras can set a maximum ISO limit, which is also very helpful for us.

Categories
Studio Lights Education

Elementary Photography Skills

1. Keep the Camera Stable

Friends who are just learning to shoot often encounter blurry pictures. This is caused by camera shake, so avoid camera shake during shooting.

Generally, hold the phone with your left hand, and put your elbow against your chest, or let your body lean against a stable object. When using a telephoto lens, be sure to use a tripod.

The method of pressing the shutter should be steady and gentle, and the whole person should be relaxed. After adjusting your breathing, hold your breath and take the shot.

Hold the camera in a sitting or kneeling position for low-eye-point shooting to enhance stability.

2. Turn Your Back to the Sun When Shooting

Photography is the perfect combination of light and shadow, and enough light is needed to illuminate the subject when shooting. The easiest way is to make the sun behind you, and have a certain offset.

Light can illuminate the subject and brighten its colors and shadows. A slight offset can produce some shadows to show the texture and three-dimensionality of the object. But it should be noted that generally do not let your shadow enter the screen when framing.

3. Selection of shooting style

Different ways of holding and holding the camera (vertical or horizontal shooting) will produce different image effects. Vertical shots can emphasize the height of the subject (such as shooting a forest), while horizontal shots can emphasize the width of the subject (such as shooting continuous mountains).

4. Change shooting

style

You should constantly try new shooting methods or moods during shooting, otherwise it will give people a sense of immutability.

Personal shooting is very random, and you can shoot wh

erever you go. As long as you think the picture is interesting or meaningful, you can play it at will. For example, you can take some close-up shots of people, panoramic images, the same scene in different climates, and so on.

5. Reduce the shooting distance

Sometimes, it is not necessary to photograph the whole person or thing. Emphasizing a characteristic place in the scene will have a stronger visual impact instead. You only need to get closer to the subject to get better results than shooting at a distance.

6. Enhance the visual effect of depth of field

Depth of field is very important for shooting. Every photographer doesn’t want the photos he takes without three-dimensionality, it looks like a flat surface.

Therefore, it is necessary to appropriately add some objects used to display relativity to increase the depth of field during shooting. For example, if you want to take pictures of mountains in the distance, you can add people or a tree in the foreground of the picture. The wide-angle lens can exaggerate the perspective relationship between the normal space of the subject and the sense of depth.

7. Correct composition

The easiest way to highlight the subject in a photographic composition is to place the subject in the center of the picture.

Because the subject is in the center of the picture, the entire photo has a special stability. But always putting the subject in the middle can be annoying. A good photo is usually well-composed.

The most common in photography is the golden section composition, that is, the picture is divided into three parts (horizontal and vertical), and then the subject is placed on the bisecting line or the intersection. So you might as well use the golden section to compose the picture to make the picture more diverse.

8. Capture the details

Using a wide-angle lens can shoot larger scenes, but such shooting will make you lose a lot of details, especially meaningful details. So sometimes you should use a zoom lens to make the picture smaller and capture interesting small pictures.

9. Pre-focus shooting people

When shooting people, you can stand still. After determining the shooting position and angle, adjust the exposure and focus in advance. Strive to complete the shooting in a short time, reduce the tension of the subject, and get a natural-looking photo.

In the changeable weather, the light changes, so it is necessary to take more shots so that there are enough images for the final selection.

Use light correctly and talk to light

Light is the soul of photography, so we must pay attention to changes in light. Not only the intensity of the light, but also the direction of the light are important, so we must talk to the light with our heart.

For example, the sunset dyes the sunset glow red, symbolizing romance. The gloomy sky presents a cool gray tone, symbolizing melancholy. A ray of sunlight was removed from the shade of the trees, which reflected joyful emotions.

Distinguish the intensity of light

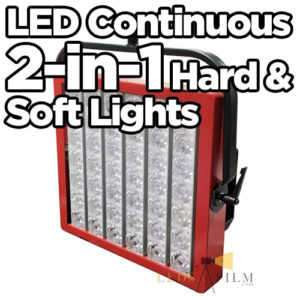
Hard dimming is usually emitted by a single light source, such as the sun, spotlight, flash or single bulb. Under this kind of lighting, the contrast of the subject is large, and the details and texture are highlighted. You can use this light to get a documentary effect.led-hard-&-soft-2-in-1-lights

In contrast, the light quality produced by diffused light is softer. This is the case for indoor indirect lighting, outdoor shade of trees and cloudy days. It is ideal to shoot portraits and quiet outdoor scenery in this light condition.
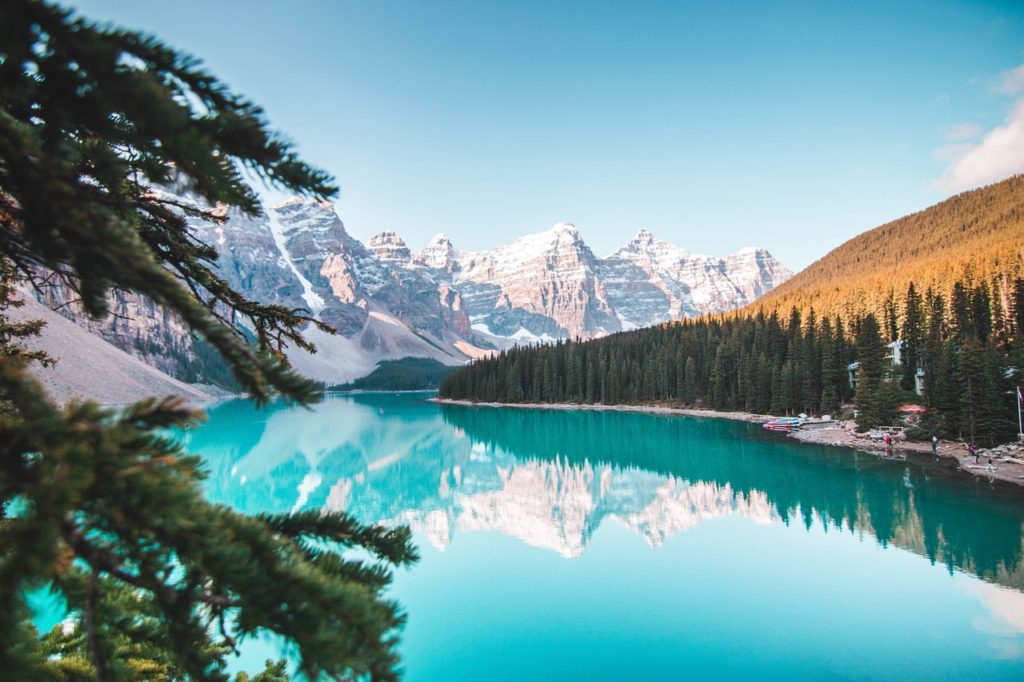
Pay attention to the light angle

When the angle of light is used, the texture of the subject will be strengthened or weakened accordingly, and the shape of the subject will be highlighted or weakened.

Whether the tone of the photo is pleasant or melancholic will also vary depending on the angle of light. The light projected from above or behind the camera (usually referred to as frontal light) will reduce the sense of gradation of the subject, because the frontal light is not conducive to creating highlights and shadows.
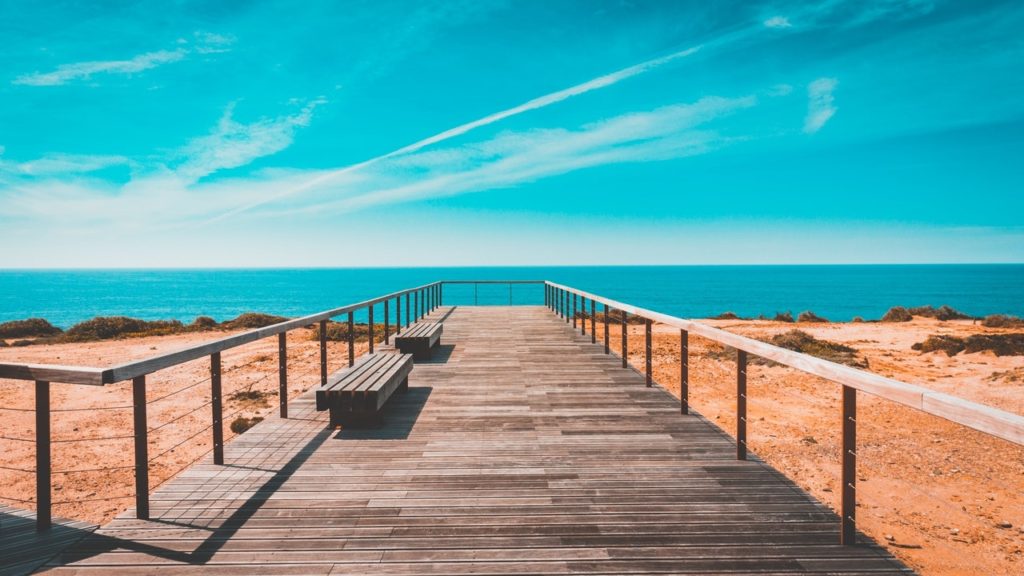
The better choice is to place the light source on one side, and the side light at an angle of about 45° with the subject can well express the shape and details of the subject.
When the light comes from behind the subject, it will produce backlight when it is facing the camera. The subject will appear dramatic in the backlight. When shooting portraits, the backlight creates a beautiful contour light on the edges of the hair of the person. Contrasting backlighting can produce a silhouette effect.

Categories
Studio Lights Education

Make a Shallow Depth of Field Photo with a Large Aperture

Everyone has heard that a large aperture is good. The shallow depth of field that is too blurry is often called the novice to put it down, just want to really have a large aperture lens.

But when you really have it, do you know how to shoot portraits with shallow depth of field? How to match the aperture and the background? This is the most common problem faced by many photographers when they are exposed to large-aperture portrait photography.

This time we will take these issues as the starting point and cooperate with actual shooting examples to give you an in-depth understanding of the changes produced by large aperture and its application to portrait photography.

The Combination of Bokeh and Scenery

When using a large-aperture lens, the photographer must be familiar with the meaning of bokeh in the picture, rather than simply opening the aperture.

Why do you say this? Because the depth of field represents not just a requirement for bokeh, but sometimes it is a manifestation of emotional evolution.

Generally speaking, we do not recommend opening the aperture to the maximum when shooting. In addition to the erroneous concept of being attached to shallow depth of field, the image will also fall into a state of no emotion, just like a seemingly beautiful painting, but there is no need for nostalgia, and it can be replaced at any time.

Therefore, when shooting, we should first observe the available elements in the scene, and simulate the situation shown by the depth of field in our brains, and preview the results of the image shooting.

From the following scene environment, we can see that all the trees are arranged in an orderly manner by the roadside. At this time, if the aperture is fully opened, the depth of field of the image will turn into layers of color blocks, which cannot express the layers that it should have. On the contrary, the screen will lose its meaning and become an ordinary image.

So how to control the collocation of the depth of field and the scene is the part that photographers need to pay special attention to before operating a large-aperture lens.

When shooting portraits, the depth of field can appropriately blur the background, soften the lines in the field of view, and enhance the perspective of the environment in which the image appears.

In addition to carefully observing and balancing the elements and images constructed between the scene and the depth of field, there are also other executable photography methods. It is a good composition technique to use large colors to replace the meaning of depth of field, or to use the light yellow halo produced under the backlight of the setting sun to frame the entire image. What is tested is not only my own view of the vision of the image, but also an opportunity to challenge the compositional ability.

The bokeh blurred by the large aperture can be properly used to integrate background lines or frames into the composition.

Observe the elements and colors in the environment at the right time, and add the beauty of the sequence and the expression of the Model to the image, forming a beautiful landscape photo.

The Relationship Between Depth of Field and Focus Distance

In addition to the large aperture, the depth of field is related to the focusing distance. We all know that the depth of field of a macro lens is quite shallow, and the reason is that the focusing distance is very close. The greater the resulting magnification (the ratio of the physical size to the photosensitive element), the more blurred the part farther from the focus point.

Used in portrait photography, when using a telephoto lens, in addition to zooming in to blur the background, we can also get closer to the Model within the acceptable range of the composition. It can be seen that with only two small steps, the proportion of Model on the screen is slightly larger, and the effect of shallow depth of field in the background will be more dreamy.

Another interesting issue of focusing distance and depth of field involves the angle change of the real three-dimensional space. When we fix the focus distance, within the same depth of field from the camera, the picture should be clear and in focus.

We can simulate the situation of shooting food. When we put the camera on the table and shoot food with a horizontal angle of view, you will find that only the plane in focus is clear, and the background shows a blurry out-of-focus phase. At this time, if we pick up the camera and shoot at a 45-degree angle, almost the entire plate of food will be in a clear state at this time. The reason is that the range of depth of field can change the range of depth of field in the picture because of the different shooting angles.

The same principle applies to portrait photography, we can see that one uses a flat angle of view, and the other uses a higher angle of view. In the photo, Miscanthus in the foreground is different in clarity. If you coordinate with the zoom adjustment of the aperture, you can freely control the most suitable depth of field effect.

The numerical difference between focal length and aperture:

When shooting, according to the numerical difference given by the focal length and the aperture, the effect of the image can be different. It is recommended that photographers try more and more apertures to experience the beautiful images displayed by different bokeh. In addition, the photographer can also look for some surrounding scenery and use the principle of large aperture and shallow depth of field to create a dreamy foreground effect and beautify the impression of the overall composition to the viewer.

Focusing method in low light environment

Many good low-light portraits, their sharp and deep eyes, or the dreamy bokeh displayed by artificial light, I believe they will all be wonderful works that players are attracted to after watching them, and people can’t help but want to shoot similar Image level.

But often after the actual shooting, I often feel a little confused, or I didn’t focus precisely on the position I wanted.

The main reason is that the focus system of low-level models cannot effectively distinguish the distribution of image levels in low-light conditions under low-light conditions, and thus cannot focus accurately.

There is another point, that is because the large aperture depth of field is extremely shallow. During the movement of the second composition after focusing, the resulting phase shift focus.

So, in the face of such a problem, how can we improve the focus accuracy? Do you spend a lot of money on top-of-the-line equipment, or do you take a few more shots and bet against it? Of course these are all options that can be considered, but in fact you have a better choice.

It is recommended that photographers use single-point focus, or use real-time shooting, to ensure that the focus is in the depth of field they want.

How ​​to grasp the focus accuracy

For situations where the focus accuracy is affected by insufficient light, there are generally two quick and easy methods that players can use. First of all, players can make good use of the focus assist lamp of the external flash to assist in the focusing situation. The second is to use real-time shooting to manually frame the image and then fine-tune the focus for details.

From the previous operating method, the photographer needs to adjust the external flash to turn off first to avoid the loss of the atmosphere caused by firing the flash. And use the infrared focus assist lamp to make up for the accuracy of the body due to the lack of light levels, and strengthen the body’s focus performance. In the application of real-time shooting, photographers can place the position where they want to focus, and manually adjust the sharpness of the image gradually until the area set by themselves is in focus. Although this processing method is relatively clumsy and has no speed at all, it is an extremely practical way of shooting.

Both the external flash and the original wireless trigger have quota infrared focus assist lights, which photographers can make good use of to help improve the chances of successful focusing in night portraits.

Although the above can allow photographers to slightly improve the shooting success rate of some large-aperture images when performing low-light photography. However, it is basically recommended that the photographer, if the ambient light source permits, control the aperture as far as possible to around F2.2~F2.8 when shooting. Lean against railings, wall corners, or other stabilizing equipment to help the image clarity to ensure that the image is accurate and sharp.

The new world of high-sensitivity applications

For many photographers who are using a large aperture to shoot portraits, night shooting is the best time to use a large aperture lens. Not only can it use the feature of large aperture and large amount of light to increase the shutter speed in a timely manner, and assist in image stabilization, it can also show the charming scene of the city with thousands of lights in the image.

Still remembering the contents of magazines in the past few years, we often advocate photographers to reduce the use of high-sensitivity as much as possible to reduce the impact of noise on the picture. We even hope that players use flashing lights to fill up the light, so that the image effect can be more intense in the style of the night.

However, with the improvement of photosensitive element technology and the improvement of processor performance, the available ISO has long surpassed the past and has come to a higher level.

So it is no wonder that in the past year, the photographer’s idea of ​​night portrait photography has been constantly changing. Not only gradually reduced the use of flashing lights, but also began to focus on the unique atmosphere led by the weak light, trying to use the mood generated by the light and atmosphere.

For photographers who want to try this kind of subject matter, it is recommended to prepare at least one lens with a large aperture of F1.8 (F1.4 is recommended). Whether it is 24mm, 35mm, or even the most basic 50mm F1.8, it can be operated with high sensitivity above 1600 and with the Av aperture priority mode.

When shooting, the photographer can first look around the artificial light source to find a more ideal light direction, and first use forward light, back light, side light and other methods to perform basic capture first. After the environment is more familiar, you can freely use the direction of light and change it. For example, using super bright street lights to create silky shine is also a good way of performance.

Application of environmental props: If you can properly configure the composition, even street lights can be used as props, showing the colorfulness of night light.

Color adjustment of night portrait

In terms of color presentation at night, since most of the street lights in LA use yellow lights, after shooting with a large aperture and high sensitivity, the image will inevitably be too warm. It is recommended to fine-tune the white balance before shooting, or use the RAW file to modify it afterwards to find out the tone and style suitable for night shooting.

Backlight Tips: When shooting at night, players should carefully observe the surrounding lights, let the Model stand in an appropriate position, use the ambient light source to illuminate the face of the Model, and try to use the strong light of the background to set off the outline of the Model.

Appropriate adjustment of the white balance can not only correct the high warm tone brought by night shooting, but also convey the calm mood of the night in light blue.

Categories
Studio Lights Education

Photography Skills – the Beauty of Portrait Photography

Grasp the mood of the model

To this question, I believe that most photographers will answer: “The meaning and value of photography is to record the most real scenes and the most moving moments.” It is both hypocritical and easy to use, just like the wishes of beauty pageants. The world is the same as peace. The standard answer forever is never wrong.

But I don’t know how many photographers pressed the shutter with the most moving mood. Perhaps documentary photography is the closest approach to the ideal “truth-seeking” shooting method, but many scenes can be encountered but not desired. If this is the case, the “truth” and “moving” of photography will become farther and farther away from us, and it will become less and less necessary.

The meaning and value of photography is to record the most real scenes and the most moving moments. Only this kind of subject matter will be the most worthy of our memory after many years, and it will become a meaningful image for ourselves.

Someone asked me, if I took a group of portrait photos, I can only choose the one I like the most. How would you choose? I said, I will choose the photo that most resembles this person, that is, the photo that best suits the personality of the subject. Even if it is not the most beautiful, it is not the photo that best expresses the photographer’s style.

I think that we must always know who we are shooting, and highlighting the value of the subject is the most important key, rather than just repeating the ideas and situations that the photographer wants to express through a character.

Subject & Environment

For example, if you set up a scene environment, story, or costume, you have to set it on the subject. This is not only easy to become a formality, but the result is the same regardless of who the subject is.

Of course, every form of photography has its own value, but I appreciate simpler shooting subjects.

Because it is true, so beautiful. Beauty must be built on a sincere foundation, so that it can be solid and meaningful. Truth is the first element that photographers must pursue.

Photography can of course have a personal style. Style is personality, and it can’t be separated from one’s own preferences, including composition, tone, selection and color application.

But we also need to guide the true emotions and personality traits that belong to the subject, and put these links in the most important position, and then use our accustomed shooting methods to present them.

I think that experienced professional portrait photographers will not deny that the best photos are often made in the final shot. Because the closer to the end, the more relaxed and natural the subject is, it is a good time to press the shutter.

The shutter is the art of condensing the moments of time and space. Everyone has a pleasing angle, expression and movement. Of course, there are also negatives. If the shutter is improperly pressed, the beauty may be disillusioned by a millisecond difference. In portrait photography, the pros and cons of the model itself depends entirely on the photographer’s skill.

In short, the beauty of a picture must be as beautiful as possible in the heart. Even if it is a simple portrait outside shooting, people must feel the real emotions. People have emotions, and the job of the photographer is to capture the charm of the subject, not just the appearance.

Emotional communication

The conveyance of emotions in portrait photography, especially the emotions revealed by facial expressions, is the most direct way of presentation. In addition to facial expressions, body movements and even the atmosphere of the scene can convey the mood of the entire work. How can I shoot a natural smile? The photographer must create some opportunities and possibilities, not necessarily to make the other party happy, but can design some actions that are not easy for the other party to do. During the process, the other party will feel embarrassed and will naturally laugh, even when facing the male subject. At the same time, the best time to shoot is the laugh.

Emotions are not only positive, it is easier to guide negative emotions to express deeper moods. And also need to cooperate with the appropriate scene to make the photos tend to be decadent, gloomy, and even ethereal.

Before shooting, the photographer and the model must communicate fully in advance. I think you can let the other party understand your ideas through some images or videos, and also have in-depth discussions to give the other party time to figure out and prepare.

Finally, it depends on the talent of the model, as well as the guide and shooting technique of the photographer.

Categories
Studio Lights Education

Photography Composition Skills–Light and Shadow Space in a Low-key Atmosphere

Shadow is imaged by light, and using light to describe is the original meaning of photography. In fact, the image itself conveys a strong sense of light and shadow in the photographic picture. Obviously, photographic composition is inseparable from tone, or in other words, photographic composition is a way of expression of light.

Reasonable control of the tone

Reasonable lighting is the key to tone control. In order to achieve the desired effect of the tone layout of the picture, it is necessary to effectively control various factors such as the direction and nature of the main light, the light ratio of the main and auxiliary light, the irradiation range and intensity of the background light and so on.

1. The direction of the main light

The direction of the light is the light level. Different light positions can produce different light-dark relationships, thus creating a different tone atmosphere. The light level can be summarized into seven types: front light, front side light, side light, side backlight, back light, top light and bottom light.

2. The nature of light

The nature of light refers to the convergence, dispersion, softness, and hardness of light. Different properties have different composition characteristics. The characteristics of spotlight are clear direction of light, narrow beam, and clear shadows. The characteristic of astigmatism is that the light comes from different directions and the shadows produced are softer. Soft light means that the light is softened and dispersed by light controlled equipment (such as soft light umbrella), the light is soft, and the contrast is small. The directionality of hard light is very strong, which can produce a large area of ​​contrast between light and dark in the picture, which helps to express texture and emotion.

3. Light ratio of main and auxiliary light

The light ratio refers to the difference in the amount of light received by the bright and dark parts of the person being photographed. The greater the light ratio, the greater the contrast between light and dark. When the light ratio is small, the contrast between light and dark is small. The light ratio can be adjusted by adjusting the intensity of the main and auxiliary lights or the distance between the lights and the characters.

4. The intensity and range of the background light

Background light refers to the light that illuminates the background, which is used to highlight the subject or beautify the picture, and has a great influence on the tone of the picture. To take high-profile photos, strong light will be selected to illuminate the background, and sometimes multiple background lights will be arranged to ensure that the background has sufficient brightness. Low-key photos will choose a weaker light intensity, sometimes even without the background light.

The influence of tone on composition

Tone composition is an important part of the composition. A large area of the same or similar tones can form the basic tone of the picture, and the balance and unity of the tones must be found in the same picture.

Shooting in the studio can achieve the unification of the tone of the picture by choosing the background. You can also use the background light to obtain different effects.

The composition of low-key portraits is dominated by dark colors. The background and costumes of the characters are all dark colors, and the lighting is relatively simple, generally only illuminating the subject.

Hard light is often used to take such photos to emphasize the contrast between light and dark and highlight the texture of the subject. This tonal processing method is often used to express the distinct personality of the subject, or to express the beauty of the simple and bright form of the picture.

The post-processing can be creatively cropped, and the contrast created by light and dark is used to cleverly compose the picture to help express the character’s personality and the atmosphere of the picture.

Dramatic spotlight effect

Once you have decided on the tone you want to express, you need to formulate a corresponding lighting plan. In terms of lighting, I always insist that the fewer lights, the better, but I have to look for a change. The subject is a girl who is experienced on stage, so I want to show this group of photos in a dramatic way.

I use the studio as a stage. I just want to illuminate the characters in the dark, similar to chasing lights on stage. The gray background wall is used as the background, the characters are very close to the wall, and a sun lamp (CCT is 9000K) is arranged at a position of 45° to the right of the character. I arranged two reflectors in front of the lamp to block the light. The light forms a beam of light accurately projected on the face of the character, and the darker background makes the character stand out.

In post-cutting, the characters are placed on the left side of the picture, and the large area of white space on the right enhances the sense of space in the picture. The light divides the picture into two areas, light and dark, and this contrast is full of dramatic color and tension.

Aperture: F/3.2, shutter speed: 1/250s, focal length: 70mm, ISO: 640

The photo below is based on a portrait of the comedian Chaplin taken by the portrait master Halsman. Use blocked light to highlight the characters and create a dramatic effect of the stage. I blocked two light-shielding panels in front of a naked lamp, letting light project from a long narrow light path onto the child’s face, and a stage-like photo was produced.

Aperture: F/3.2, shutter speed: 1/200s, focal length: 43mm, ISO: 640

The influence of light and shadow on composition

Light and shadow are the compositional elements in portrait photography. The use of light and shadow composition can enhance the visual effect of the picture.

  1. Light and shadow can render the atmosphere and highlight the emotions of the characters.
  2. Light and shadow can balance the picture and increase the aesthetics of the form of the picture. When composing a picture, shadows are often used to balance the picture and adjust the center of gravity to produce rich and interesting changes in the picture.
  3. Light and shadow help express the sense of space and three-dimensionality of the picture.Aperture: F/3.5, shutter speed: 1/200s, focal length: 35mm, ISO: 640▲ The projection adds the details of the picture, and the picture is stable and full of changes.
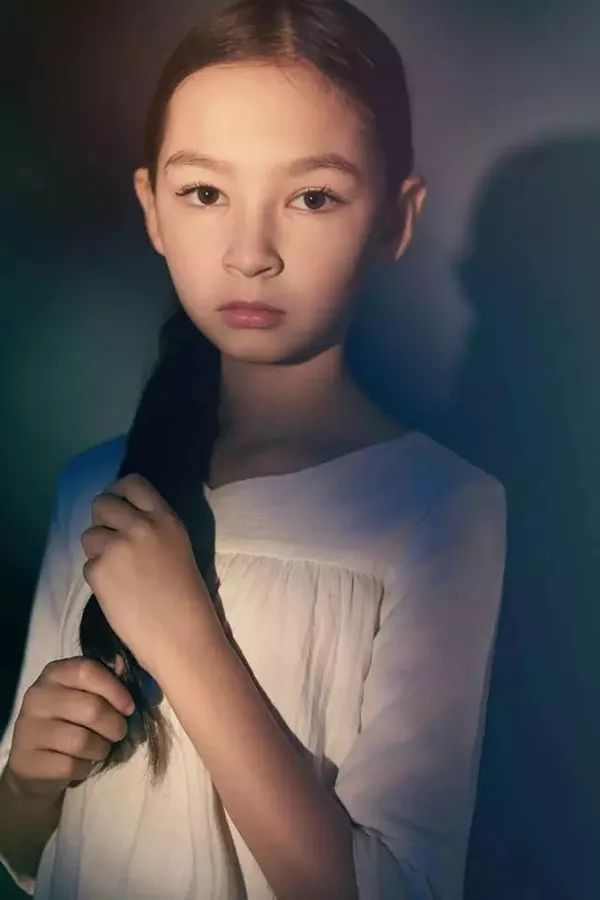
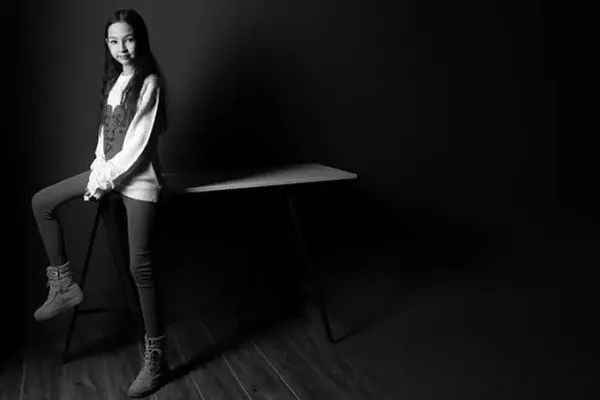
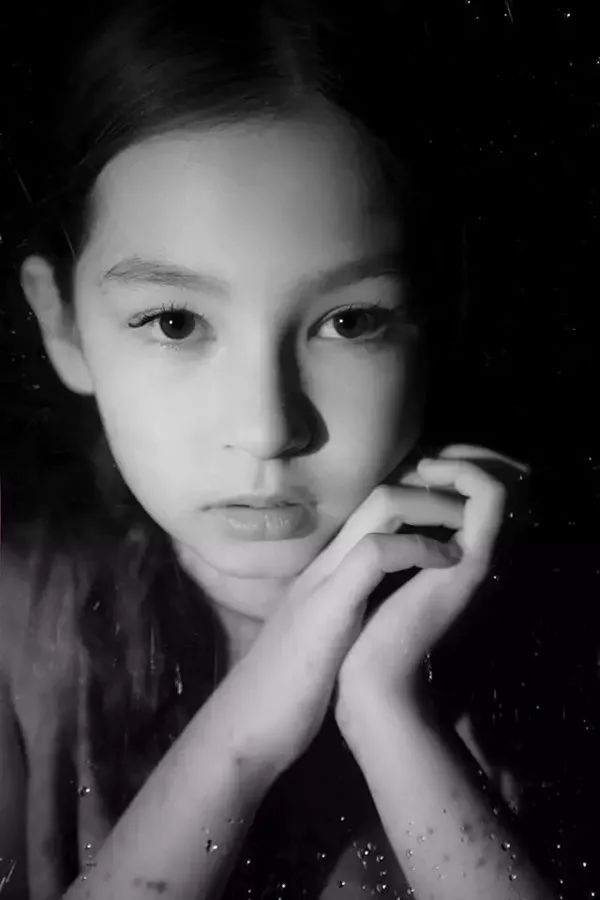
    Aperture: F/3.2 Shutter speed: 1/200s Focal length: 70mm ISO: 640

    ▲ The color temperature of the sun lamp is 9000k. The higher blue light constitutes a cool tone, which makes people feel calm and rational.

    The sense of space hinted by tonal perspective

    In the composition, the contrast of light and dark is often used to create a sense of space in the picture. Different light uses have different light effects, and the effects of light and shadow are also different. Lights such as side light and back light can form a strong contrast between light and dark in the picture, and the resulting space is also strong. The forward light is relatively weak for the sense of space.

    As shown in this example, the photographer used asymmetric composition. Leave the background on the right side of the girl with a large area of ​​white space, and use light to illuminate the girl through obscuration. The space behind it has a light-dark transition, which can create a sense of space and three-dimensionality. At the same time, the light and dark arrangement of the background allows the viewer to have an imaginative space for the space in which the subject is located.

    Photography is in fact expressing three-dimensional space on a two-dimensional plane. The spatial expression in the photographic picture must rely on the unique way of expression of photography itself, so that it can be restored to the true feeling of the original space when the viewer interprets it.

    Aperture: F/14, Shutter speed: 1/60s, Focal length: 40mm, ISO: 160

    ▲ The strip soft box is used as the main light, which can provide the characters with uniform light from head to toe without illuminating the environment.

    Focus: F/2.8, focus speed: 1/320s, focal length: 70mm, ISO: 640.

    ▲A transparent acrylic board was placed in front of the figure, sprayed with water drops, like in front of a window.

    In this light map, 1 is the main character, 2 is the acrylic transparent plate, 3 is the camera, and 4 is the sun lamp.