Categories
Studio Lights Education

Tips for Choosing Focus

1. Plant shooting:

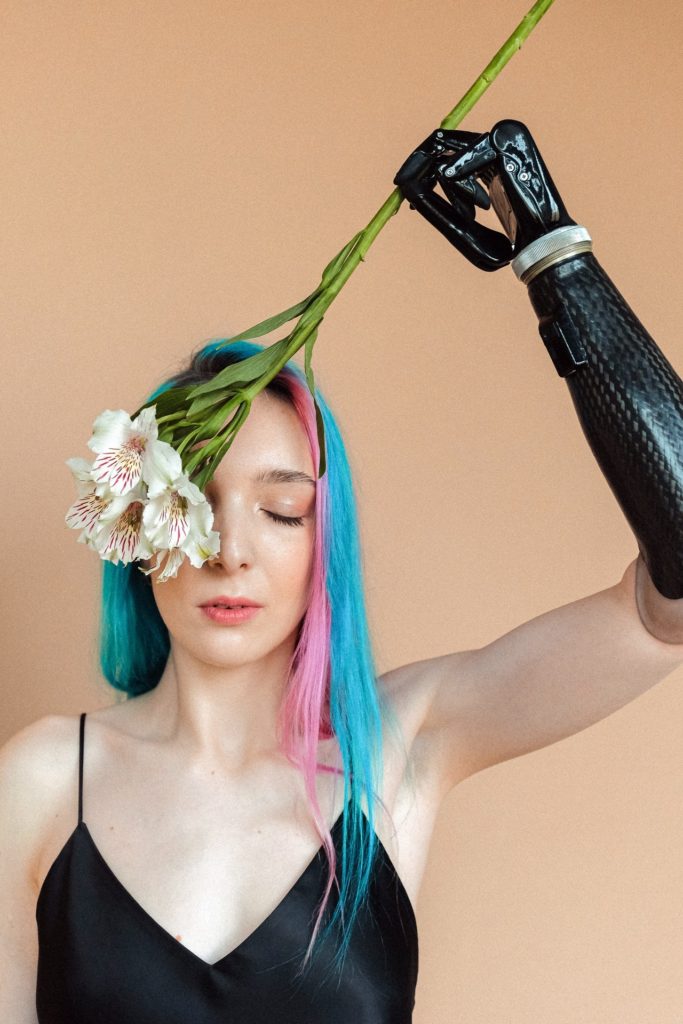
Select flowers as the shooting focus.

Flowers are undoubtedly the most attractive and beautiful part of planting beads. Therefore, it is not difficult to understand that flowers are the most common focus choice in plant photography. But when we face a cluster of flowers, which one should we choose as the focus?
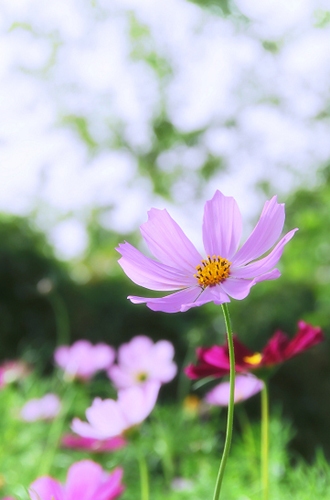
Focus on the biggest flower

First of all, we should consider the most characteristic one, such as the most beautiful one, or one whose color is different from other flowers. Then, through observation, we can choose a flower slightly higher than other flowers, or a flower closer to the camera. Through these methods, we can highlight this flower and make it the interest center of the picture.

2. Close up Shooting of Flowers:

The focus should be on the stamen.

For close-up shots of flowers, the focus should clearly fall on the flower core.

At this time, in the enlarged close-up photos of flowers, the original brightly colored petals become a foil in most cases, while the delicate stamens in the flower core are arranged in an extremely regular manner, which becomes an attractive place.
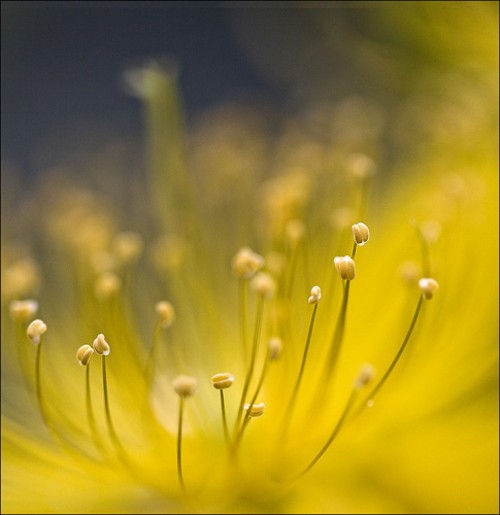
Close up shooting

It should be noted that in the pictures taken with macro, there will be different degrees of virtualization except that the focus is clear. Even after the focus is completed, a slight movement of the flower or camera will cause the loss of focus, resulting in no clarity in the picture. Therefore, it is very important to cooperate with the shooting tripod and windless environment.

3. Close up of People

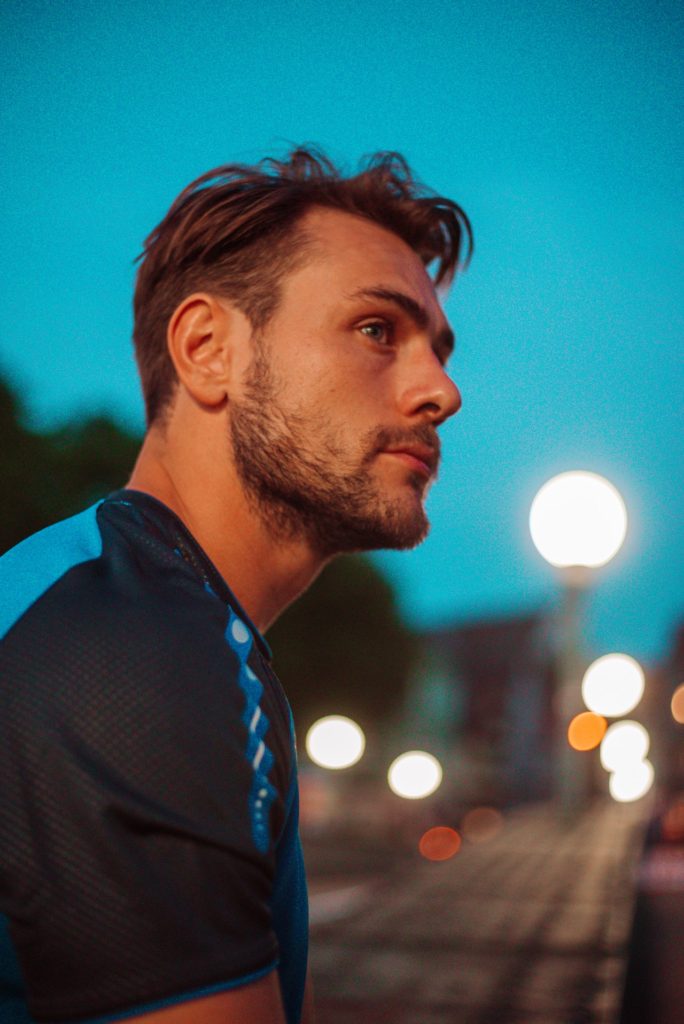
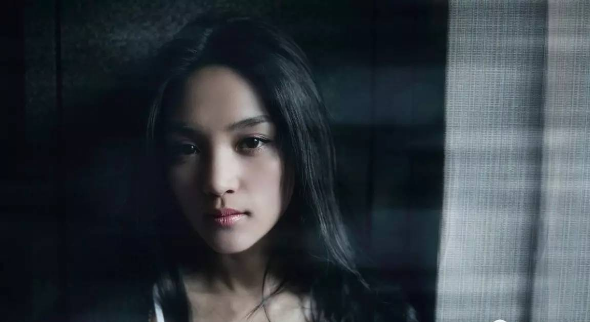
Eyes are the key focus when shooting close-up of characters. Close up photos of characters are generally half body photos focusing on the face of characters. Such photos need to depict the character’s characteristics and even the heart through expression. Eyes are the first choice of focus when shooting close-up of characters.
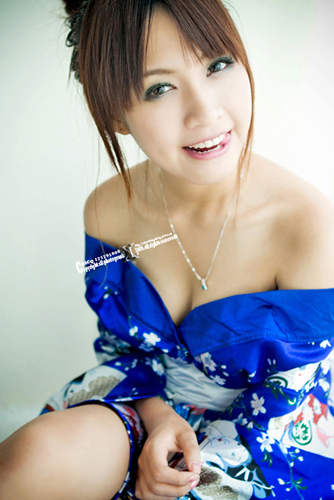
When the person is facing the camera, both eyes are on the same plane, so any eye can be the focus. However, such a view will be too flat and ordinary, so most photographers will take the half side of the character for view shooting. At this time, people’s eyes will be in the front and back position. At this time, it is necessary to focus on the eyes close to the camera. Because its position is obviously more important than the back eyes

4. Shooting Full Body Portraits

The head is an important focus when shooting a person’s full body.

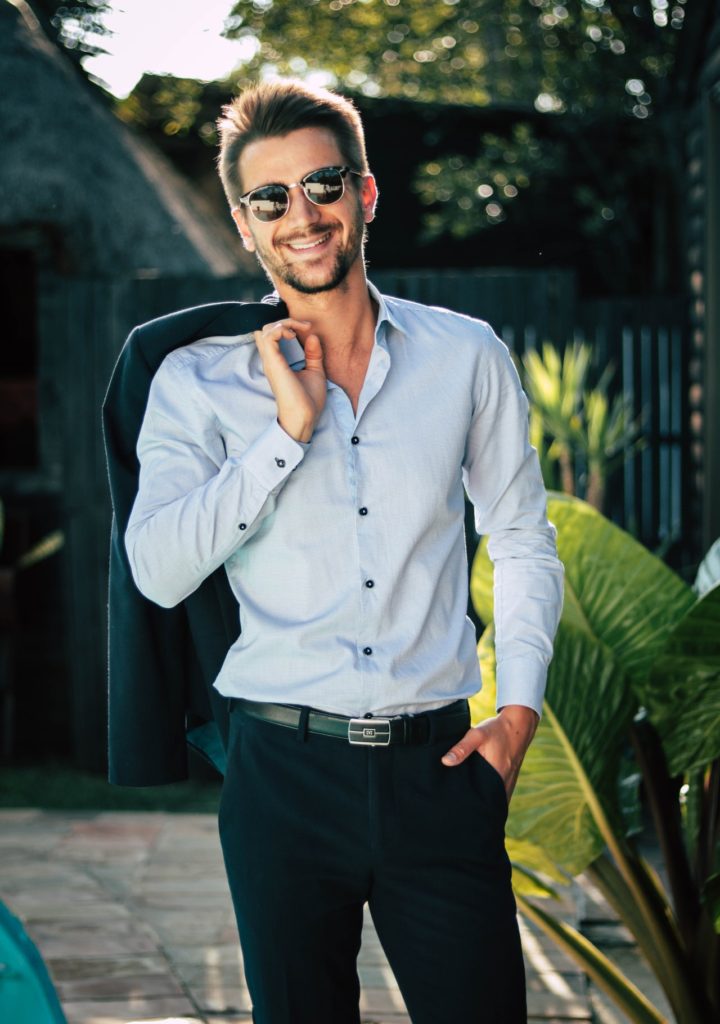
When shooting portraits including the whole body of characters and environmental portraits, we can’t clearly aim at the human eye and focus accurately. Then, the key to quickly and conveniently selecting the focus is to take the person’s head as the focus.
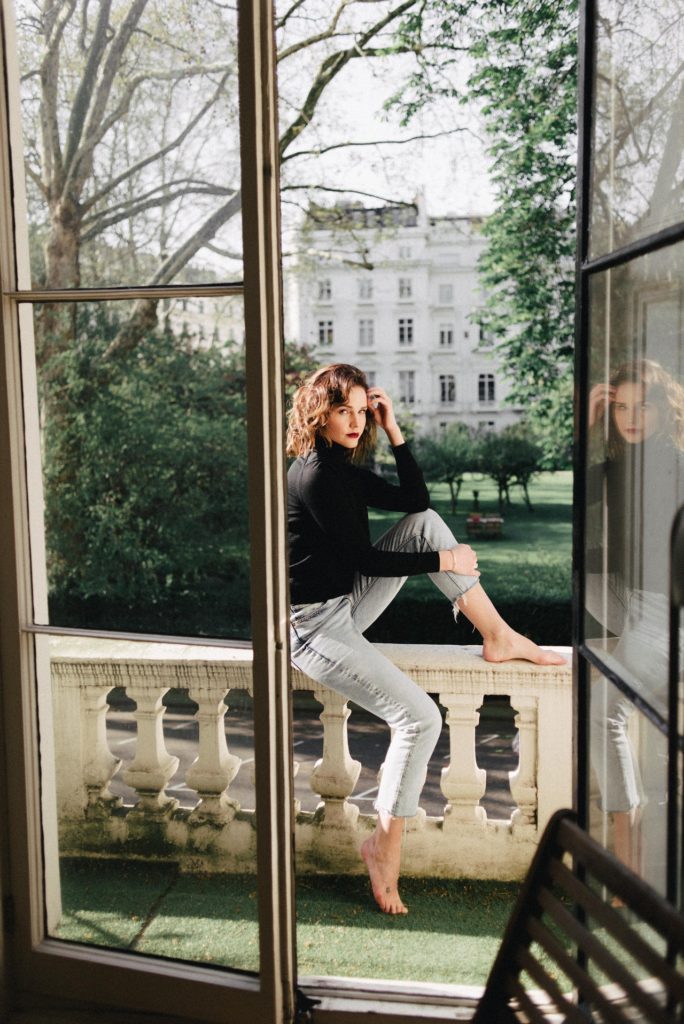
Whether it is to express the character’s action or posture, the character’s facial features are the key in the picture. People’s every move is controlled by the mind, so the head will become the center affecting the whole body. When shooting, we can focus on the person’s face or head in advance, and then quickly re compose and shoot when the person’s whole body posture reaches the ideal state.

5. Shooting People and Environment

When taking photos of people and environment, it is best to focus on people.

This category of photos includes simple travel commemorative photos, documentary photography and commercial advertising photography. The combination of characters and environment is the most vivid and difficult to shoot. However, whether people are the main body or foil of the picture elements, most of these photos are taken with the people as the focus. Because compared with those mountains and rivers that do not move (or move slowly), people are the most active and emotional.
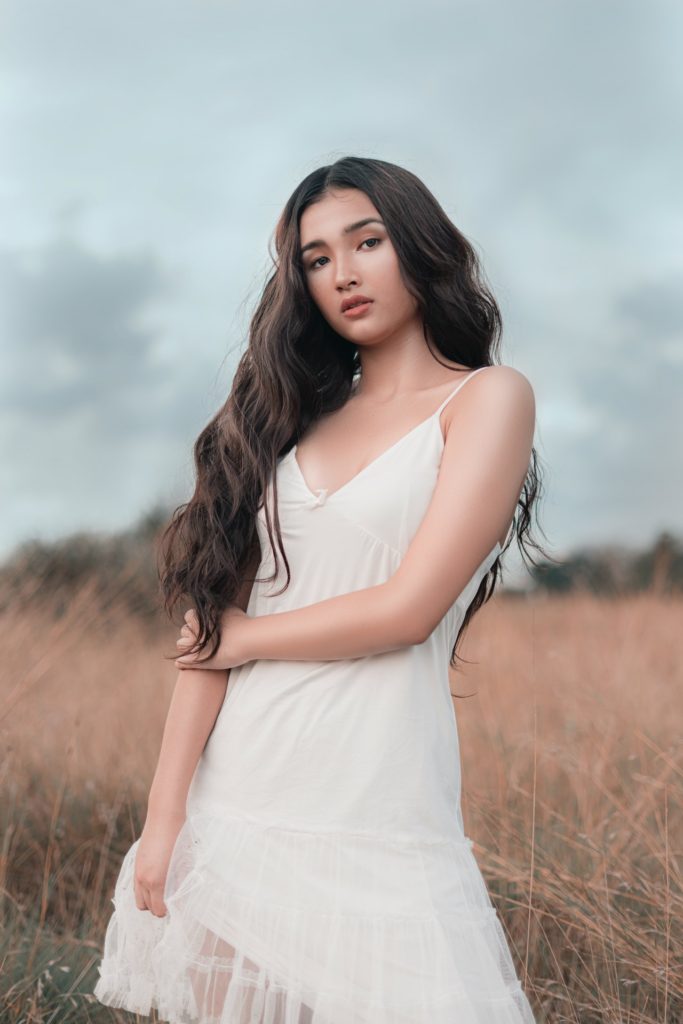
Of course, when shooting with people as the focus, we should also pay attention to the depth of field to control the virtual and real changes of the environment. If you simply need people and scenery to be clear, you can use a small aperture to obtain a large depth of field.

6. Shooting Crowd

When shooting a crowd, look for key people to determine the focus.

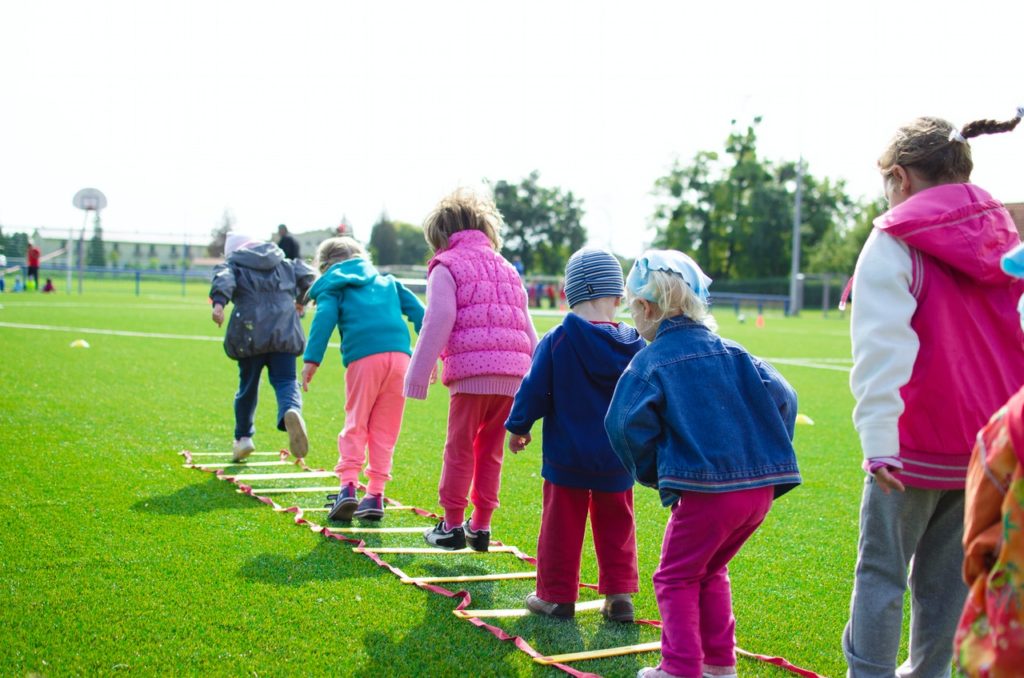
When shooting in front of a group of people, we are often disturbed by the changing people, do not know where to focus, and miss a lot of wonderful group photos.
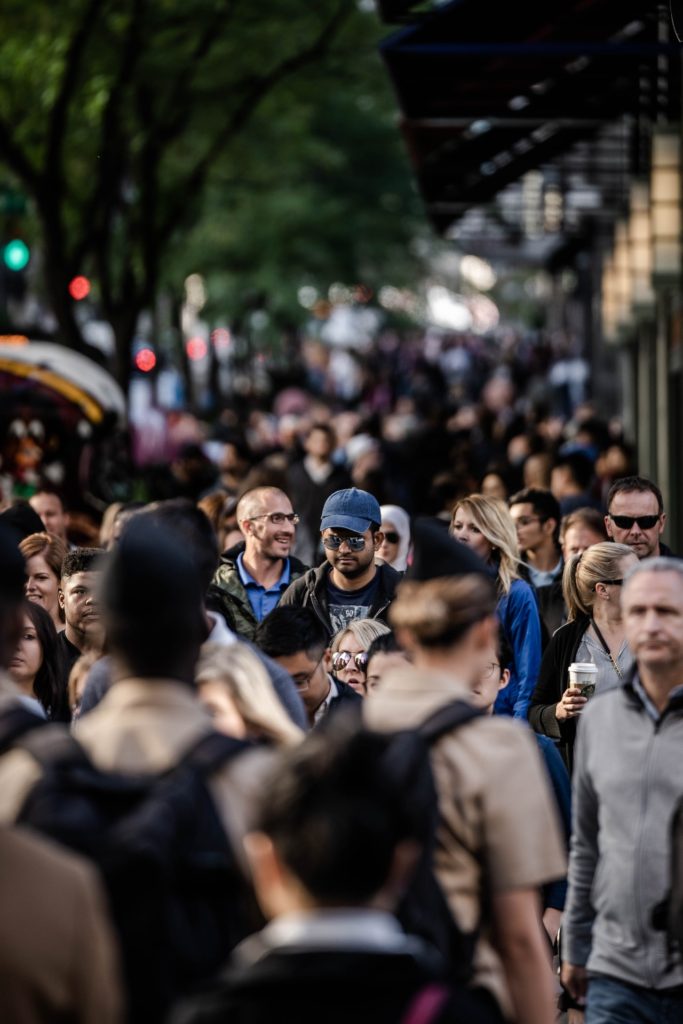
few key persons as the focus

In fact, the simplest way is to find a key person as the focus and track and focus. At the same time, pay attention to the dynamics of other characters with the rest of your eyes. When the positional relationship between other characters and key characters reaches harmony and unity, press the shutter to shoot.

7. Shoot a Part of the Mountain

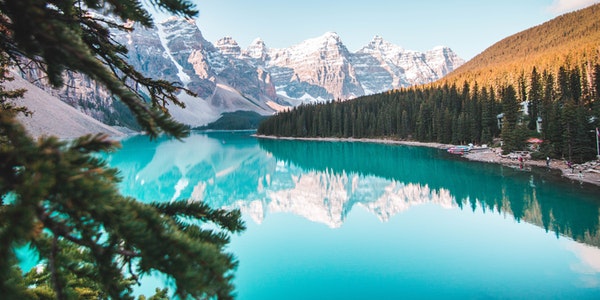
When shooting parts of the mountain, you can choose prominent trees or rocks as the focus.

When we use a long focal length lens to shoot a part of a mountain, it is usually because of the characteristics of a mountain that attract us. For example, a golden birch on the grass slope in autumn, or a raised rock. Choosing these obvious features as the focus can not only quickly complete the focusing, but also help us think about the composition.
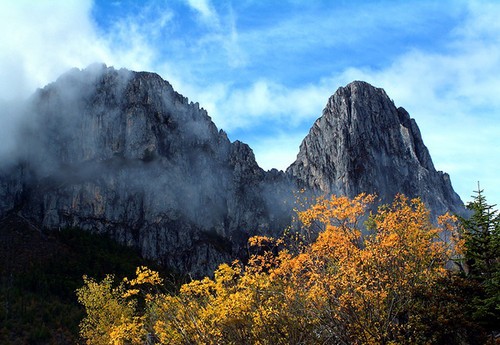
It should be noted that if the part we shoot is located on the shadow side of the mountain, due to the weak contrast of the scene, it will often lead to the error of automatic focusing of the camera. At this time, you should focus where the contrast is high to help the camera focus.


8. Take a Panoramic View of the Mountains

When: focus on the highest peak.

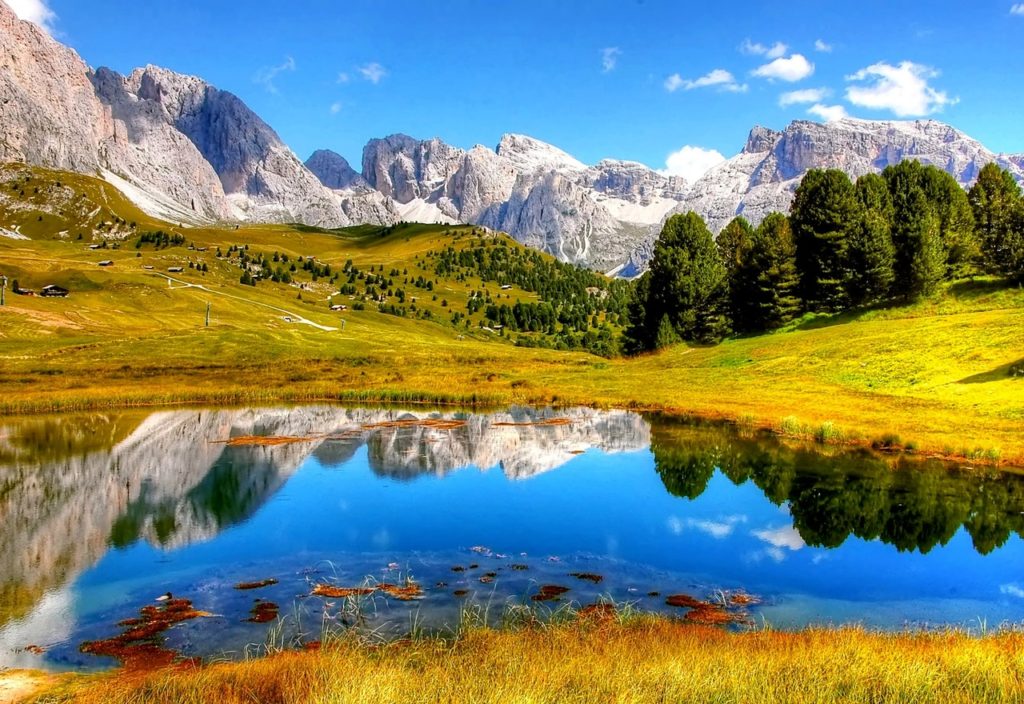
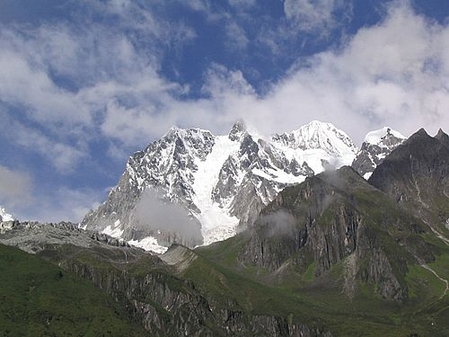
When taking panoramic photos of a majestic mountain, we’d better focus on the highest peak of the mountain, such as the main peak of the mountain. Because it is the farthest place from the camera, the camera needs to focus at infinity, also known as infinity focusing.
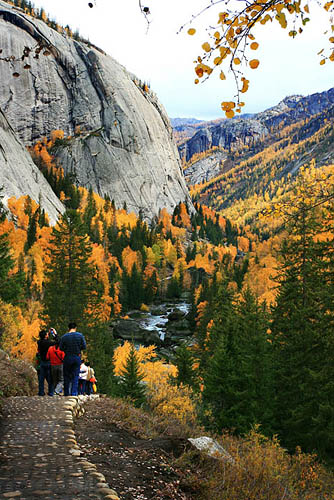
Through this focus selection, the photos taken can most clearly depict the main peak and other peaks of the continuous mountains, showing their grandeur. Without clear focus selection, the camera often mistakenly focuses on the branches or something in the foreground, resulting in a blur of mountains.

9. Shoot the Wide Grassland

When shooting a wide grassland, you can choose houses, cattle [herds], trees or the corners of the river as the focus.

Photographing grassland is perhaps the simplest and most complex thing. Simple auto focus shooting, looking at the small photos, it seems that all the scenic relics are very clear. But when you enlarge the photo, you will find that the key points in the photo are blurred. This is the most annoying thing.
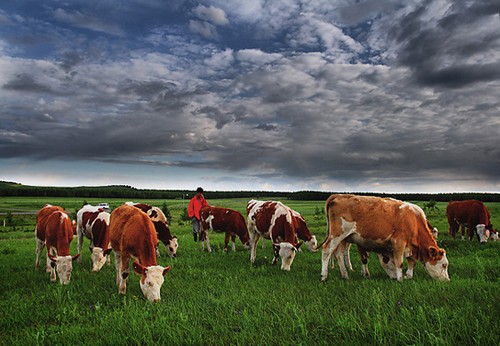
Therefore, when shooting, we must form a good habit of clearly choosing the focus. On the endless grassland, a lonely tree or a group of cattle are good focus and the key point of the picture. The clear description of them is far more important than the infinite grassland. If the focus falls on the winding river on the grassland, we should choose the most changeable or the nearest corner.


10. Shooting Buildings

When shooting a building, you can select a door or window as the focus.

As a photography lover, there are few opportunities to shoot buildings without distortion and full focus like professional architectural photographers. Therefore, when shooting buildings, the focus selection should be particularly detailed and accurate. Generally speaking, when shooting the front of a building, the focus should be on the front door, so that the front of a multi plane building can all fall within the clear range of the picture.
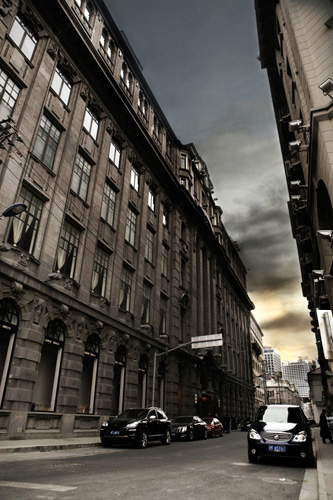
Of course, sometimes the front door will be in the shadow, so it is not easy to focus. At this time, you can also use the window near the light as the focus of shooting. If the front of the building falls completely in the shadow, you can also choose the edge of the house at the top as the focus.
Categories
Studio Lights Education

How to Use Existing Light for Night Dhooting

Precautions for Night Shooting (I)

The Subject at Night

For many photographers (including professional photographers), they mainly shoot during the day. After the sun goes down, they will put away their cameras and wait for the start of the next day. But if you only shoot during the day, you will miss many excellent shooting opportunities and the fun of some shooting experiences.

From the hollow pumpkin lanterns in front of the neighbors, to the endless traffic on the streets, and the bright street lights on the wide highways, the night is full of interesting visual possibilities. What is needed to capture the color and light at night is a tripod, a lot of memory card space, and a willingness to experiment (of course, you need a few hours less sleep).

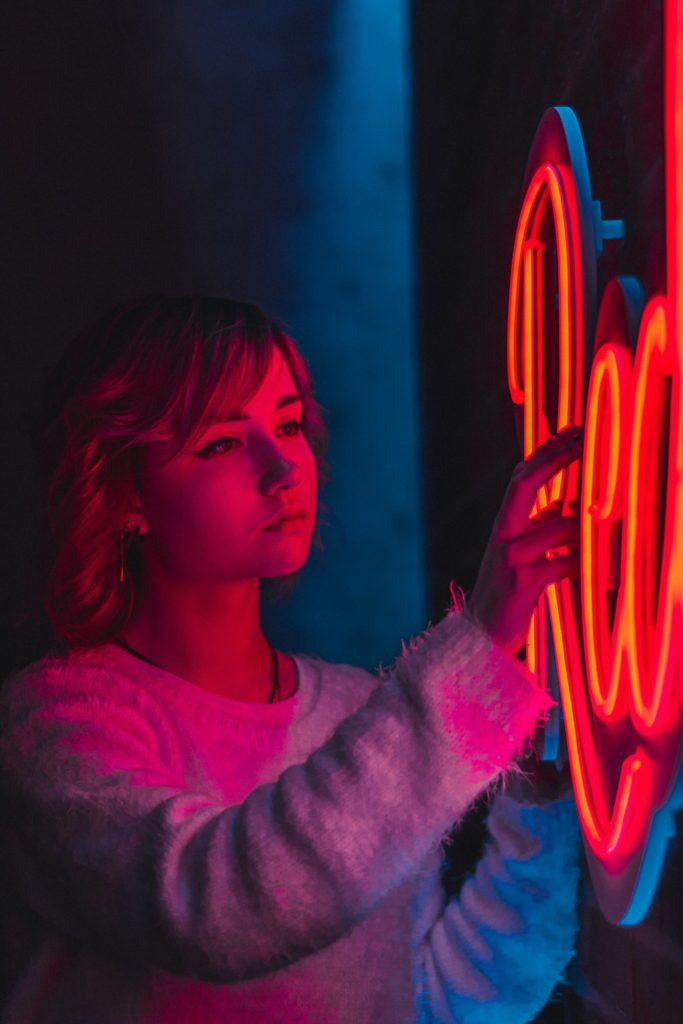
Shooting at night and shooting during the day, the light is too different, but the effect is almost as amazing. For example, if you have never photographed neon lights at close range, you will be surprised at how colorful they are in the photo and feel very excited, and you will also feel how easy it is to photograph them.

When shooting with existing light, night scenes are not the only place to find unusual and challenging shooting locations. Concerts, indoor sports and the interior of buildings (including your own home) will provide you with interesting technical and creative challenges.

Low-light Shooting Techniques at Night

It is easy to find night and low-light subjects, even ordinary subjects that disappear in the background during the day will become very interesting after dark. For example, the local McDonald’s restaurant may not look like the most glamorous subject during the day, but it looks like a lighthouse at night.

If you want to add some movement to the night scene, you can use a longer exposure time. Both the flight and the carnival team can turn into very extraordinary photos. In the summer, almost every city and town has an annual firework show, which provides an excellent opportunity for night shots.

There are many opportunities to practice your night and low-light shooting skills when traveling, and some places (such as Las Vegas) seem to invite photographers who like entertainment to shoot.

Precautions for night shooting (II)

Compared with shooting during the day, night shooting requires a lot of experimentation (at least at the beginning), and the effect is not very predictable. But in fact, there are not too many challenges compared to shooting during the day. Because night shooting usually involves a relatively long exposure time, and unknown or unpredictable color temperature, it is also necessary to keep the camera stable, minimize digital noise, and choose the best white balance.

Here are the main technical considerations you will encounter and some short suggestions to help you get great night photos from the start.

If you are out to shoot night scenes and do not have a tripod, you can also use other methods to stabilize the camera, such as rolling up a thick sweatshirt and placing it on the roof or trash can, using it as a kind of support like a “bean bag”. In fact, you can even make lightweight bean bags that you can use at will, by putting 1 pound or more of dried beans in a zipper bag, which is a great trick when traveling. I even filled a zipper bag with sand from the beach as a temporary camera support.

Longer exposure time and higher iso

Every time I shoot night or low-light scenes, I almost ask myself this question: Should I use a longer exposure time and thus use a lower ISO to get a higher photo quality, or should I increase the ISO so that you can Use a shorter exposure time?

In fact, higher ISO settings and longer exposures will cause increased image noise. I don’t care about noise in night photos, so I don’t want to think too much about this issue (if you find that noise affects the quality of your photos, there are many very good noise removal software that can help you solve this problem).


The main consideration should be the movement of the subject. Since a tripod is used most of the time, camera movement is not a problem. But the movement of the subject is always something to be aware of. If you want to take pictures that are as clear as possible, then using a higher ISO allows you to use a faster shutter speed. On the other hand, exaggerating the dynamic effects of night light (traffic, fireworks, carnival convoys) usually results in good photo effects. For this reason, using a slower ISO and a longer shutter speed is a good combination. For me, the bigger question remains the same: Is the subject moving and how to capture it?

Sometimes there is no tripod during shooting and the ISO must be increased. This can be done at this time. I had to increase the ISO to ISO 1600 to shoot the famous rose window in Notre Dame Cathedral, because I have used the fastest lens in my hand and cannot use a tripod, I have no other choice.

Fast lens and higher ISO

The issues discussed above are equally applicable here, with a faster lens usually obtaining one or two additional levels of light. But unless I really like night photography, I will never take a faster shot for extra speed.

The combination of a higher ISO and a good tripod is very effective, so you don’t have to have multiple faster lenses. One advantage of a faster lens is that it has a brighter viewfinder in a darker environment, which may be a real benefit (EVF in some cameras, the electronic viewfinder has a real advantage because it can improve the viewfinder image Brightness).

The sharpness of the photo is not as good as expected, but in situations like this, I always think that it is better to increase the ISO and get some digital noise than to stop shooting.

Tips for metering night scenes

Notes on color temperature

Modern artificial lighting can provide very complex and unpredictable color temperatures. If you don’t take a few trial shots, there is actually no way to know how a particular light source looks. We can set a custom white balance by placing a white card in the scene and then using the custom white balance feature to set the camera.

Even so, the light at night is usually formed by a mixture of multiple light sources. If you set the white balance to one of them, the light from other light sources may be recorded incorrectly. Many people like complex lighting at night and usually use automatic white balance settings unless they need to get very accurate colors.

Try to use camera Raw format

If the camera in hand supports the Raw format and has software that can open and edit such photos, then this is useful for night shooting, because you can adjust the color temperature and overall tone (including white balance) of the photo after shooting, or choose other White balance preset value.

I usually take photos in Raw and high-quality JPEG format during the day, but at night I almost always take photos in Raw format for this reason.

Another advantage of the Raw format is that you can adjust the multi-level exposure when shooting night scenes (actually changing the ISO speed). This is very useful because metering at night is the most difficult task of the day. In the AdobePhotoshop Raw interface, you can also adjust the shadow and brightness control items separately, which makes the control of contrast easier, and the night itself has high contrast characteristics.

Use flash boldly

If you are shooting a wide night scene like a city or Las Vegas area, then the flash may be useless. Since most built-in flash devices have a working distance of no more than 15 feet (the people who use pop-up flashes to shoot night baseball games are really pitiful), there is no point in using flashes in larger outdoor night scenes.

But sometimes the subjects we are photographing have poor ambient lighting, and the only available light source is a flash. I really wanted to shoot the sign of a bar in Texas, but I was very tired from shooting for a day, so I didn’t take a tripod, so I used a lazy method, that is, shooting with a flash. If the effect is good, you can use the flash.

Meter the night scene

Metering outdoor night scenes can be tricky, because there are usually large dark areas and small bright areas in front of you. For example, if you photograph Times Square, you will find that you have to face a lot of car lights, neon lights, illuminated buildings and large dark areas.

I usually do matrix metering first, including medium-brightness light, such as neon signs, but not any direct light, such as car headlights or exposed streetlight bulbs. Then take a few test shots to see if the meter reading is correct. Sometimes it is impossible to judge the effect obtained on the LCD, but in many night scenes, the picture displayed on the LCD is your best guide.

The histogram is very useful to show whether there are excessive highlights in the photo. But in the presence of car headlights and street lights, no matter how good the overall exposure of the photo is, you may get some whitish highlights.

For night traffic and brighter scenes, the biggest exposure hazard is to let too much light into the camera (this is very strange), because this will overexpose the brighter areas without revealing any details. It is in these bright areas that the most interesting colors can be found.

The good thing about metering and exposing these scenes is that you don’t actually have to use metering readings to take a shot with complete accuracy. The exposure we need is to be able to capture a variety of colors well without making the highlight areas whitish. Usually you don’t need to pay attention to the darker areas, you can remove these areas during shooting or later during editing.

Categories
Studio Lights Education

The Secret to Correct Exposure_Part III

Use the camera’s light meter

After the exposure of other photos, any price of SLR, can you make the correct exposure? Let us think about it. For any scene, this recommended value may be the correct exposure (do you remember it? “Correct exposure” refers to the exposure that can get the imaging results we want), or it may not. In order to be able to control the process of photography, we must consider what we are doing.

All cameras built-in light meters are “reflected light meters”. They can measure the amount of reflected light from the object pointed by the light meter and give recommended exposure parameters.

Most cameras now provide several metering modes to choose from. The more typical ones are: spot metering, center-weighted metering, multi-zone matrix metering or evaluative metering. The names of these metering methods basically indicate how much area in the viewfinder is actually measured by the TTL meter. There are some subtle differences between these metering modes.

“Spot metering”

As the name says, only a small part of the viewfinder frame is metered, and other parts of the lens are ignored. Spot metering is very useful when you only want to meter one area. Many high-end models allow you to select the location of the metering “point” on the viewfinder. Of course, if your camera does not have this function, you can also perform metering first, and then re-compose the view after getting the exposure reading. The framing during metering can of course be different from the actual framing.

“Central-weighted metering”

Focus on metering the central part of the viewfinder screen. For example, in this mode, the central area (the circular area marked in the center of the focusing screen) of the Nikon camera accounts for 60% of the metering, and the remaining 40% is determined by the edge.

“Matrix Evaluation Metering”

The viewfinder is subdivided into many small partitions, and the light metering results are calculated through software. For example, some Canon cameras have 45 divisions, while some Nikon cameras have 1,005 different divisions.

How ​​to choose the metering mode

It needs to be explained immediately that the choice of metering mode has nothing to do with whether you use auto exposure or auto focus under any circumstances. You can use spot metering when using manual exposure and autofocus. You can also use zone metering when using auto focus or manual focus.

You have three completely independent options:

  1. What kind of metering mode is used,
  2. Whether to use manual focus or auto focus body and lens,
  3. Whether to control the exposure manually or use the automatic exposure function.

You can mix and match them according to the subject matter you are shooting.


All TTL light meters give a recommended exposure value by measuring the amount of light reflected from the object being measured. The basis for this exposure value is to make the image of the object under test on the film a medium tone, which is consistent with the medium tone when calibrating the light meter.


In other words, if the light meter has been calibrated to a medium tone, then after exposure with the recommended exposure value given by this meter, the final image on the slide will be medium tone. It doesn’t matter if the object you meter is medium-toned or not. And it has nothing to do with whether you set the aperture and shutter yourself or set it automatically by the camera.

How ​​to evaluate the metering mode

Please check your camera manual to confirm whether the “matrix metering” or “multi-zone metering” mode of your camera is an evaluative metering method.

The matrix metering of some older cameras simply divides the viewing frame into several small areas, compares the metering readings of each area, and discards which abnormal readings.

The evaluative metering uses a program software to calculate the hue or color of the measured object. Then this program software gives the exposure results of the scene without “asking” you.


In addition, all reflected light meters only do one thing: they tell you the exposure value you should use when shooting. When a metering mode is selected and a specific area is metered, the camera’s light meter is designed to only do one thing: make the image of this specific area a medium tone.

If the area of ​​the subject being measured is originally medium-toned, and you also want the image on the negative to be medium-toned, then you have everything ready. Simply meter the light in the mid-tone area and shoot with the recommended exposure parameters. Of course, you can choose the shutter aperture combination you think is appropriate, and you will eventually get a properly exposed photo.

Metering of substitutes

However, if you are shooting something that is not in mid-tone, then there are some intermediate steps that need to be done before shooting. As an alternative, you can first meter some objects that you think are medium-toned. Note that the selected substitute should be under the same lighting conditions as the subject.

If the subject is front-lit, do not choose a side-lit substitute for metering. Similarly, if the subject is in the shade of a tree, do not choose a substitute under the sun for metering. Once you have finished metering the substitute, point the camera at the real subject, recompose the picture, and take the shot using the exposure reading from the substitute metering. Because the amount of light falling on the subject and the substitute is the same, this is an easy way to get the correct exposure.

18% gray card

What if there is no medium-toned object nearby for metering? To prevent this, you can bring a medium-toned alternative with you. Photographic equipment stores sell something called 18% gray card, which can reflect light of medium tones.

When you are shooting, you can measure the light by placing the gray card in front of the lens under the same illumination as the subject. However, it can be easily foreseen that this method will be problematic in some cases. When shooting, any substitute used for metering should have the same lighting conditions as the actual subject.

But what should you do when you are standing in the shadow of the foot of a mountain and want to shoot the scenery in the sun across the valley? It is best that we have a very long arm that can reach across the valley, otherwise the gray card for metering will be in the wrong lighting environment.

Have you considered how to take close-ups of rattlesnakes? Is it really necessary to stretch the hand holding the gray card to the rattlesnake to measure the light? And what about when we want to shoot the sunset? I had to give up using the gray card because there are too many situations where I cannot use it for metering. You might consider buying a gray card as a visual reference, but don’t use it for metering.

The best solution for metering

The best solution is to meter a part of the actual subject, and then adjust the reading of the light meter appropriately. You can meter anything, as long as it is medium-toned, or you see it as medium-toned, sometimes the latter is more important than the former.

For metering, this is a very important concept. Don’t forget at any time, you can make anything appear in any tone on the negative. The choice is always in your hands. The final photo is not just a simple record of the subject. It can be an accurate reproduction of what you see, or it can be a darker or lighter shade of different atmospheres. Your photos do not have to be a reproduction of reality, but to reflect your own visual experience.


Each color slide can tolerate a range of 5 shades of tones, from pure white to pure black. Current digital cameras cannot reach this range. Our eyes can distinguish more levels, about 12 or 13 stops. Therefore, learning to “see” things like a camera is definitely the basis for taking good pictures. No camera can record reality realistically, only human eyes can.

5 grades color method

If your camera can record a 5-stop tonal range (assumed), then the mid-tone is in the middle of this range, halfway from the two extremes.

There are 2.5 stops at each end of the medium tone. Therefore, you can meter any part of the frame when shooting, and increase the exposure to make the tone lighter than the midtones, or reduce the exposure to make the tone darker than the midtones.

Starting from the mid-tone metering reading, you can turn the color tone “light” by opening one block higher, and make the color tone “very light” by opening two blocks higher. Similarly, starting from the mid-tone reading, reducing one stop can make the object hue more “dark”, and reducing the reading by two stops can produce a “very dark” hue. The adjustment of half-stops can produce tones in between.

Of course, you can change the shutter speed or aperture size to achieve the actual increase or decrease of the tone scale. Or keep one of the shutter and aperture unchanged according to the environment, and change the other setting, so as to increase the light to lighten the hue of the measured object, or reduce the light to darken the hue.

Need to remember these 5 stops. For ease of use, just add the corresponding color name to the corresponding gear.

+2.5 stop: pure white

+2 stop: extremely shallow

+1.5 stop: very shallow

+1 stop: shallow

+1/2 stop: slightly shallow

0 stop: medium

-0.5 stop: slightly deep

-1 stop: deep

-1.5 stop: very deep

-2 stop: extremely deep

-2.5 stop: pure black

Categories
Studio Lights Education

The Secret to Correct Exposure_Part II

Depth of Field and Shutter Speed

All field photography will have some compromises. The aperture and shutter combination you use when shooting must be determined based on many practical conditions: Are you shooting a still landscape or a running animal? Is the subject shaking due to the wind? What is the focal length or magnification of the lens you are using? How sharp or soft do you want your photos to be in the end?

There is no suitable answer that can solve all the above problems at the same time. You must choose the appropriate steps to shoot according to your final expectations of the photo.

The first decision you should make is what shutter and aperture combination you should choose. Do you need to shoot moving moments (using a fast shutter and a large aperture) or do you need to use a large depth of field to shoot (through the use of a small aperture and slow door opening)? “Depth of field” refers to an area that is sharply imaged near the focal point in a photo.

In theory, there is only one plane of any subject that is in the best focus position: the plane where the lens focus is located. But in fact, clear and sharp imaging can still be obtained in a certain range on both sides of the focal plane. When it exceeds this relatively sharp range, no matter which side of the focal plane, the sharpness of the image will decrease.

The Factors That Determine the Depth of Field

The actual size of this sharp imaging area, that is, the “depth of field”, is determined by four factors:

*The actual aperture size when shooting

*The focal length of the lens used

*The size of the subject

*The distance between the camera and the subject

Let’s take a look at how these four factors affect the depth of field.

For all lenses, when the aperture is reduced, the depth of field increases. Conversely, when the aperture is opened, the depth of field will decrease. On the same lens, relative to f/2, f/2.8 and f/4, setting the aperture to f/16, f/22 and f/32 can achieve the maximum depth of field. The smaller the aperture of the aperture, the greater the depth of field. The larger the aperture, the smaller the depth of field.

If you repeatedly shoot the same object at the same place, no matter which f-number is given, when the focal length of the lens increases, the depth of field will decrease, and vice versa.

For example, if you change a 28mm wide-angle lens to a 200mm medium-focus lens, even if you use the same f-number on the medium-focus lens as the wide-angle lens, you will still get a much smaller depth of field than the wide-angle lens.

When changing the lens, the size of the subject in the photo will also change. Because the shooting position is not changed, the perspective effect of the photo has not changed, but because a longer focal length lens is used, a larger subject can be seen in the viewfinder.

Now through the viewfinder, you will see fewer scenes than when using a wide-angle lens, but at this time you lose the original depth of field. Simply put, in order to obtain magnification, the depth of field is lost.

Aperture Size and Depth of Field

For any certain lens and certain f-number of aperture, when the distance from the lens to the subject is shortened, the depth of field is also reduced at the same time.

When you get closer and closer to the subject, you will see a smaller scene through the lens. We assume that you are photographing trees and flowers on the hillside. You can use any lens to shoot. Suppose we shoot with a 35-70mm zoom lens at the 70mm end and f/16. At this time, the depth of field is about a few hundred yards.

Now we move the position closer, so that we still shoot a single tree at 70mm and f/16. Now the depth of field will be measured in feet (1 yard = 3 feet = 0.9144 meters). Let’s move closer so that we can use 70mm and f/16 to photograph a branch of that tree, and the depth of field should be calculated in inches.

Keep getting closer. When we shoot a flower under a tree with the same focal length and aperture, the depth of field at this time will be measured by a fraction of an inch. Once again, we have lost the depth of field in order to obtain a larger image.

The Focal Length and Depth of Field of the Lens

However, if the image size of the subject is kept unchanged, no matter what lens is used, as long as the aperture size is the same, the same depth of field will be obtained.

Perhaps you have heard a saying that a wide-angle lens has a larger depth of field, and a telescope lens has a smaller depth of field. This statement is not entirely accurate. When the shooting position remains the same, the wide-angle lens can shoot a wider angle of view than the telescope lens, and the telescope lens can only shoot part of it. This is what was said in the second point above.


But when the picture of the subject remains the same, all the lenses produce the same depth of field under the same f value. Take a photo with a 50mm lens, and then back 4 times the distance from the lens to the subject. At this time, you can use a 200mm lens to shoot the subject in the same frame (at this time, the focal length is 4 times that of 50mm).


If the aperture settings of the two lenses are the same, the depth of field of the two photos will be the same. If you step back twice the distance, use a 400mm lens and the same aperture value, you can also take pictures with the same depth of field. If you stand at the position where the photo was taken with a 50mm lens, walk forward half the distance, use a 25mm lens and the same aperture, the depth of field remains the same.

These photos will look very different, because the background format is different due to the different angle of view of the lens, and the perspective effect is also different, but the depth of field in all photos is the same.ledsfilm-2-in-1-studio-lights

Depth of Field and Shutter Speed

Now we return to the original question: do you need a large depth of field or a high shutter speed? In many cases, the setting of the exposure parameters must be a compromise between the imaging results you want and the impact of the shooting environment.

Maybe you like to use f/22 to shoot landscapes, but the result is that you have to use a slower shutter, which blurs the grass that is blown by the wind. Or, you like to use a shutter of at least 1/500 second to capture the bird’s momentary movement, but the result is that only the bird’s head is in focus due to the small depth of field.

Compromise, compromise again…but a decision must be made after careful consideration. Generally speaking, when shooting landscapes, you need to select the appropriate aperture to obtain the appropriate depth of field, and then determine the corresponding shutter speed. Therefore, landscape photography can be regarded as an aperture priority situation. For shooting animals, you need to select the required shutter speed first, and then determine the aperture size. Therefore, animal photography needs to use a shutter-first thinking method.

Shutter Speed and Aperture Size

No single shutter speed or aperture size can be suitable for all shooting situations. I have heard that some photographers advocate always using the smallest aperture of the lens to shoot landscapes because the maximum depth of field can be obtained. But I strongly disagree with this view. Choose the appropriate aperture f value according to the depth of field you want.led-hard-&-soft-2-in-1-lights

No matter when, there is no need to reduce the aperture to or even exceed your needs. If the depth of field produced by the exposure value of 1/60 second and f/11 can meet your needs, continuing to shrink the aperture to f/32 will increase the possibility of blurring the photo. Such as slight shaking of the camera or the subject, etc.

In fact, usually for any lens, as long as the aperture value is reduced by two stops than the maximum aperture of the lens, the sharpest image can be obtained. But if this aperture can’t produce the depth of field you need, then why do you need it? Using modern lenses and negatives, you can actually get the imaging results you want at any f-number. When discussing how to make photos clearer, using a stable tripod is more useful than shrinking the aperture.

Depth of Field Preview

Although the digital camera can quickly see the shooting results, due to the lack of accuracy of the LCD display, I still hope to “see” the effect of depth of field before shooting.

Under normal circumstances, when viewing through the viewfinder, no matter what the actual aperture you set, what we see is the depth of field effect at the maximum aperture (Note: This only applies to SLR cameras, rangefinder cameras are not To the depth of field effect).Portable Studio Lighting

This can be misleading. Therefore, for a serious photographer, I would not buy any camera without the “depth of field preview” function (you can see the depth of field effect after the aperture is contracted through the lens). This is very important to me because I want to be able to see what the final imaging result is. I also want to be able to see the depth of field effect to choose the right aperture, and I want to control the entire photography process.

(To Be Continued)

Categories
Studio Lights Education

The Secret to Correct Exposure_Part I

Exposure without Light Meter: “f/16 on a Sunny Day” Rule

The light meter built into the camera for metering through the lens (TTL: through-the-lens) makes our photography work a lot easier. In fact, we rely heavily on this light meter. Without it, when various things appear in front of our camera, we will feel a little disoriented or confused. I know that there are some photographers who can estimate the correct exposure parameters more accurately based on experience. They are also proud of their ability, but this is often not the case.

However, in one case, the correct exposure parameter is a constant constant, that is when you are shooting under bright sunlight.

In order to get the correct exposure value in this case, you should follow some rules that we call the “Sunny f/16” rule: under bright sunlight (no clouds at high altitude, no mist, no air pollution), Probably from a few hours after sunrise until a few hours before sunset, the correct exposure value for frontally illuminated subjects is approximately close to using the reciprocal of the ISO value of the sensitivity as the shutter speed. At the same time, set the aperture to the exposure at f/16, or any other equivalent exposure parameters.

Applicable Conditions of the “Sunny f/16” Rule

“Sunny f/16” is only suitable for bright, direct sunlight, not for early morning or dawn sunlight, nor for mist or cloudy light.

And this rule is not suitable for use in the deep winter in the north, because the sun is very close to the horizon and the light is very low. “F/16 on a sunny day” is also not suitable for macro shooting, because many lenses change the size of their effective aperture when focusing at close range.

In theory, the aperture f-number is only accurate at infinity. Under the same aperture, when the focus is moved closer, the light entering the lens at the focus will also decrease. But usually don’t worry about this problem, because your TTL meter has already calculated this change.

However, the “f/16 on a sunny day” rule is the exposure value when the light meter is not used, so when these conditions change, this rule will not work. And this rule is only suitable for subjects with frontal illumination (the sun shines directly on the subject from a height above your shoulder).

Therefore, at noon in the summer, when the sun is directly coming down from the top of your head, only when you want to shoot your feet from the top down, you can apply the “sunny f/16” rule. If you want to shoot as usual at this time, then you need to modify the parameters of the “Sunny f/16” rule to adapt to the exposure needs of the side light.

Shooting Tones Applicable to the “Sunny f/16” Rule

This rule is only valid for subjects with an average tone. Objects that are too bright or too dark can cause problems. In fact, the tones of most subjects are very uniform, in the words of the photographer, they are “middletoned”.

I personally don’t like the term “middle” very much. Because when we talk about tones, too many photographers use the term “middletone gray”, but we are not talking about black and white photography. So I use the word “medium” instead. In this way, you can say “medium green”, “medium red”, “medium blue” and so on.


Don’t forget that when using the “sunny f/16” rule, you don’t have to use the ISO value as the shutter speed and f/16, but you can also use other equivalent exposure parameters for exposure.

Moreover, the location of use is not mentioned in this law. I was once asked if the “Sunny f/16” rule can be used at the top of the mountain. The answer is yes, because the sun is 93,000,000 miles away from us. I don’t think that when we get closer to the sun at 10,000 and 12,000 feet, it will have much impact on the “F/16” rule.
Equivalent Value of “Sunny f/16” Rule

Now let us suppose that the sensitivity is set to ISO 100, using the “sunny f/16” rule, the exposure parameters under normal conditions are 1/125 sec and f/16 or other equivalent values.
In bright sunlight, there is no need to use only 1/125 sec and f/16. You can also use 1/250 sec f/11, 1/500 sec f/8, 1/1000 sec f/5.6 or 1/2000 sec. f/4. With a slow shutter speed, you can use 1/60 sec f/22 or 1/30 sec f/32 for shooting.
These exposure parameters can allow the same amount of light to reach the image sensor. If you use the ISO400 sensitivity, you have to start from 1/400 sec f/16, if you use the ISO 25 sensitivity, it will be 1/25 sec f16… and so on.

The same exposure means that the same amount of light hits the image sensor. Therefore, different exposure parameters can be used to achieve the same exposure according to the needs of the shooting environment.

Do you need to use a high-speed shutter to capture momentary action? Or need a small aperture to achieve a larger depth of field? If you are shooting a running deer with ISO 50 sensitivity, would you still use the 1/50 second f/16 parameter?

Before you say “no” without thinking, please think carefully. Is there really only one exposure combination correct in that situation? Don’t you like to use blurred pictures to reflect the feeling of movement? In any case, the correct combination of aperture and shutter depends on what kind of photo you want to take. Whether the exposure is correct is entirely up to you.

How ​​to Match Lens and Shutter Speed

In most cases, when you are shooting wild animals, you will use your longest lens, and more often, you will adjust the appropriate shutter speed to capture the momentary picture.

But starting from f/16, it is very time-consuming to calculate how many stops the aperture should be opened to match the shutter speed, but there is a simpler method.

It is equivalent to the “clear f/16” rule, and you can use what I call the “fast f/5.6” rule to achieve the same exposure as the “clear f/16”. Put a zero after the ISO value you use as the shutter speed, and use f/5.6 for the aperture. For example, using ISO100 sensitivity, “Sunny f/16” uses 1/125 sec f16, and “Fast f/5.6” uses 1/1000 sec f/5.6.

Are they the same? Through conversion, you will find that they have the same exposure. When shooting animals, this method is very convenient, because you can count a lot less, and usually the aperture you use at this time is around f/5.6.

By the way, I don’t know if you remember, this estimated exposure value is for the subject under frontal illumination.

For side-lit objects, the exposure value should be set one stop higher than the basic exposure value. For objects with back light (backlight), you should open up two stops. For objects with very light colors in the entire picture composition, you should reduce it by one stop. For very dark colors, you should open the big one. Keep in mind, however, that these estimated exposure values ​​are only used without a light meter, they are not applicable when using a TTL light meter.

Insufficiency of the “Sunny f/16” Rule

There is also a problem when using the “sunny f/16” rule, that is, you need to know how to set the aperture of the lens to f/16.

This seems to be a very simple question, but it is not easy for some lenses. Many zoom lenses today use a design called “variable aperture.” When the lens zooms, the actual aperture size also changes.

These lenses mark their maximum aperture with two f-numbers, such as Nikon 28-105mm f/3.5-4.5 or Canon 35-350mm f/3.5-5.6. If you want to achieve a constant aperture, when the focal length of the lens changes, the aperture must be changed accordingly. If the aperture remains the same physical size, then when the lens zooms, the aperture f-number will change.

For most variable aperture lenses, the aperture value marked on the lens is only correct at the short focal end. For old-fashioned cameras, either use only the short focal end of the lens and use the “f/16” rule, or guess the appropriate aperture value as the lens zooms.

The reason I call some cameras “old-fashioned” is because many new models of cameras can set the aperture value electronically, or have this optional feature. All Canon lenses work in this way. Some Nikon lenses can be set mechanically via the aperture ring on the lens, or set electronically using the command dial on the camera body.

When using electronic settings, the aperture value you set is the actual aperture size, except for the maximum and minimum apertures at the telephoto end.

Example

Let us illustrate the phenomenon described above using a Nikon 28-105mm lens. When the aperture is opened to the maximum, the focal length of the lens is zoomed from 28mm to 105mm, and the aperture size will also change from f/3.5 to f/4.5. There is a 2/3 stop change, which will also happen at the minimum aperture.

At the 28mm end, the minimum aperture is f/22. At the 105mm end, it is f/29. If you use an electronic method to set the aperture value between f/4.5 and f/22, the aperture will remain constant when the focal length of the lens changes.

Based on the above facts, if you use the “f/16” rule when using electronic cameras and zoom lenses, you should avoid using the maximum or minimum aperture. As long as we apply the middle aperture value , it will not have any effect on the application of the “Sunny f/16” rule.

By the way, if you never knew about the estimated exposure and the “f/16” rule before, then you really missed a very useful tool.

(To Be Continued)

Categories
Studio Lights Education

How to Take Good Portrait Photography

Control the Lights

To learn to control the lights and control the posture of the subject, the key is to use dramatic lighting. When I say dramatic lighting, I actually mean that there is no light. The less bright these non-model subjects are, the better the final photo.

In fact, consider silhouettes or long-distance night shots, that is, shooting at a distance of 100 to 200 yards from the subject-anyone at this distance looks very good (this is also the reason for the beauty of distance). In any case, we will tell you how to shoot people and provide a list of locations where people who wear jeans that are more expensive than Luxembourg’s GNP and have better expressions often play.

Innovative Composition Techniques

Most of the photos you see are taken either horizontally or vertically, so the shooting angle should be more innovative, yes, innovative! Nowadays, there is a very popular method for portrait photography: switch the camera angle, this angle will make the subject face a certain corner. This method can’t be simpler-just rotate the camera slightly to the right or left, and then shoot. You may need to try a few more times to get the subject in the frame position you want, but this effect (which has existed for many years) will be more popular.

Cut the Top of the Model’s Head

This is the next step in portrait photography, “Don’t leave too much space on the subject’s head”. In this composition technique, you need to trim off the top of the subject’s head. After reading this, you will definitely find it strange. It is a very popular professional technique to fill the frame of the subject’s head.

A compact composition like this has become a very eye-catching effect. As shown in the picture below, it now attracts your attention. You will find that this composition technique is ubiquitous and has become the mainstream method for many top fashion, beauty and portrait photography. (Note: Although it is good to cut the top of the subject’s head, or the edges of the arms, shoulders, hair, etc., you should not cut the chin. People are actually used to seeing the top being trimmed, which will look natural , But it’s visually uncomfortable to see photos of the chin being cropped.)

How to Take Group Photos Outdoors

It is undoubtedly a challenge to illuminate a group photo, and everyone has the same amount of light. This is also the reason why the subject is usually outdoors for better results when shooting a group.

It is easier to use outdoor lighting to illuminate the entire subject. Especially the subject is in the shade (not deep in the shade, just the edge of the shade. But no light spots are projected on the subject through the gaps between branches, windows or buildings). If you are lucky enough to take group photos in cloudy weather, then your job is very simple-just get the subject out of the outdoors. A cloudy sky will take care of the light problem for you, so you can focus on how they pose. (By the way, if you want to get a professional-looking group photo, the photographer would never say, “Now all tall people are standing in the last row.”)

Tips for Posing for Group Photos

The next time you take a group photo, don’t let everyone stand in a row (you know this effect doesn’t look good). Try to get them to gather around certain scenes-certain subjects will arrange their positions naturally. For example, try to make people pose on or around the bed, or on or around chairs, pillars, cars, tables, or anything that can gather them into a whole, so that they don’t stand in a straight line.

Tips for Group Photos of Life

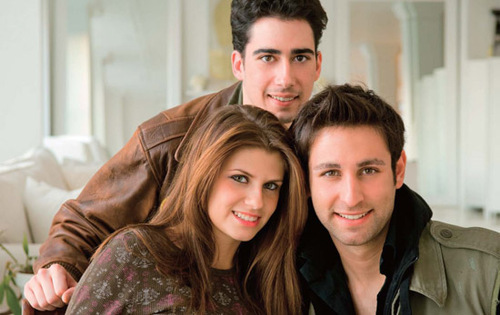
Want to take more attractive group photos of life? Then let the subject take a compact pyramid shape (triangle). But by close I mean that they are all in contact—arms leaning against each other, heads together. One person is at the top of the frame, each person is on the bottom side of the pyramid (as shown in the picture below), and the others are closely leaning in the middle.

In this way, you will find that their bodies are not in a straight line-their positions are staggered. But they are all leaning against each other, which makes the photos look more dynamic and interesting. I haven’t tried this method with a large group of people, but if you have already obtained an interesting group photo of life, this is the most powerful illustration of this method.

Do not illuminate the entire subject evenly

When people look at a photo, they are first attracted by the brightest scene in the photo, so you only want the brightest light to be projected where you want, right? Completely correct!

So, if you take portraits of people, do you want people to pay attention to the subject’s face or crossed arms? Of course so. But most people use the same light to illuminate the entire person, causing the hands on both sides of the subject to have almost the same light as the face. If you want to guide the viewer’s gaze to the position you want, the brightest light should be on the subject’s face, and then gradually go down the body and become darker.

This increases the interest and vividness, and you will find that the visual focus is usually at the high end of the character. By the way, this is also another example of feathering light. This way the edge of the light is the subject’s face, and the light outside the face is perfectly and quickly dimmed (but don’t let it become too dark-it should still be bright, with details, but not as bright as the face).

How to get better portraits

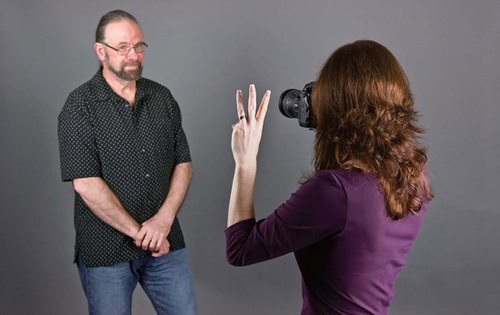
If you want the person’s shooting posture to look good, you would count 1, 2, and 3 before pressing the shutter button. This almost directly leads to the fact that your portraits cannot have natural expressions. As a photographer, it is your job to discover the natural expression moment of a character and capture this moment in time.

Anyone can stand there, count 1, 2, 3, and press the shutter button at the fourth beep. If you do this, any other person can also take the photos you took.

If you want some special effects, more natural expressions-sincere smiles or expressions, then abandon the old-fashioned practices of 1, 2, and 3, and talk to your subject instead. Inspire them, let them start talking and laughing, or even let them pass the time, and then the time is right-to capture this moment. In this way, their photos are not only well-lit and natural posture, you will make their expressions natural.

Where should the subject be?

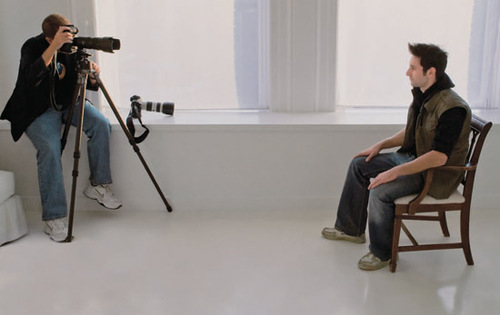
Window light, especially the north window light source anywhere, is one of the most beautiful light in portraits. In fact, some professional photographers insist on using only natural window light to shoot all portraits of people.

The windows disperse the incoming light, and the larger the window, the softer and more diffuse the light. So, if you have got some good window light, where should the subject be where the light will be the most beautiful?

You want the subject and its shoulders to face the window (so that the light passes through the subject and there will be soft shadows on one side of the face). Then, let the subject be 6ft (about 1.8 meters) from the window, so that the light is very soft and linger around the subject (if the distance between them is closer, the soft light will change quickly). Also, keep the subject slightly behind the window so that they can touch the edge of the window light instead of direct sunlight. This edge light is very soft and will give you the perfect, magical light that many professional photographers dream of.

6 ways to deal with facial challenges

By posing and lighting the subject, you can hide or reduce many typical facial problems (such as big nose, round face, wrinkles, big ears, etc.).

Here are 6 quick ways to help you make your subject’s facial expressions look best.

(1) Bold Subject

If the subject is bald, shoot from a lower angle. Never use things like hair lights.

(2) Wrinkles

If the subject is full of wrinkles, try to illuminate them directly. Because the side light will emphasize the shadow and make the wrinkles more obvious.

(3) Subject with Large Ears

If the subject’s ears are larger, let them turn sideways 3/4 so that only one ear is shown, and then light up. This way one ear will appear on the shadow side of the face (so basically, only one ear appears and the other is hidden in the shadow).

(4) Subject with big nose

If the subject has a big nose, let him turn his head and face the camera directly, with their chin slightly raised, and then shoot from a lower angle, which will not emphasize the nose.

(5) Double Chin

If the subject has a double chin, let him look directly at the camera, and then extend their heads slightly toward the front of the camera. This stretches and tightens the skin of the chin. Also, illuminate them directly (place the light directly above the location of the photographer), which adds a shadow under the chin and hides the double chin.

(6) Round Faces

If the subject has a round face or a fat face, you can laugh at them and let them lose a few pounds. Then when their eyes are full of tears, you will find their most natural expression in the day. Of course, you can also make their faces face left or right and only shoot 3/4 of their faces, so that their faces will not look so round, even though they are of course round.

Categories
Studio Lights Education

Studio Lighting Method

Photographic Studio Lighting Method

Lighting in the studio is often regarded as a very complicated problem, which requires specialized knowledge and rich experience to solve. In fact, if you follow some rules, lighting techniques are still easy to master.


Here only take the samples taken with the lighting of the Swiss “Prolinca” photography lamps as an example to introduce some basic lighting methods. These lighting methods are of universal significance and are also applicable to photographic lamps of other brands. I believe that after mastering these basic methods and improving lighting techniques, you can take ideal studio photos. I hope this can help you, and remember: “Playing creative performance makes you fun!”


In the studio, the photographer can completely control the light by himself, arrange the position of the strong light and shadow to create a beautiful photo, instead of waiting for the proper light from nature as in outdoor shooting. In fact, we think there is only one rule to follow, and that is “shoot if it looks appropriate!”

Male Portrait Photography Lighting

A. High Contrast Photos

A good photo of a male portrait should show the characteristics of the subject. Therefore, taking high-contrast photos is usually the most appropriate.

  1. Use a light source with a small beam. Its light is more concentrated and strong, which can show the texture of the skin. This kind of light source portrays male personality characteristics better than a light source with a larger amount of light. The light with a small beam is strong, but very soft. A light source with a larger amount of light is also desirable when shooting female portraits, because it diffuses the light and illuminates a large area.
  2. Using a simple lighting device, install a “Prolinca” 250 flash head with a standard reflector, and install a diffuser in front of the lamp cover.
  3. If a very hard light source is used, it should be carefully placed in an appropriate location. The use of suitable modeling light can make the shadow of the nose fall within the range of the cheeks and upper lip. This technique of using light is also very suitable for shooting men wearing glasses, it can avoid reflected light.
  4. Place a reflector on the side of the subject, so that the light on the first floor can illuminate the man’s ear.

 B. Prolinca Flash Lighting Method

The “Prolinca” flash lighting method provided in the following photo is suitable for taking ID photos or photos of people for publicity purposes.

  • The “critical” step is to use the “Prolinca” illuminator against a reflective umbrella and shoot with reflected light.
  • Another “Prolinca” 125 lamp holder with a condenser is placed on the right back side of the subject, facing the illuminating lamp and in line with it.
  • This light technique is particularly useful when shooting office environments, as it can express a space with a sense of depth. The back light condensed by the condenser separates the subject from the background.

    Female Portrait Photography Lighting

    A. Standard Lighting

    This is a simple lighting method for portrait shooting, using standard lighting principles:

  • 1) The main light is the “Prolinca” 250 lamp holder, equipped with an ultra-white reflective umbrella, placed at a 45-degree angle to the subject, and appropriately elevated.
  • 2) The auxiliary light is the “Prolinca” 125 lamp holder, which is placed on the right side of the camera. When shooting, scattered light is transmitted through a translucent umbrella.
  • 3) The auxiliary light illuminates the subject through one filter layer, while the main light passes through two filter layers, and then reflects the strong light to the subject through the ultra-white reflector. The lighting ratio of the main light and auxiliary light should be 3:1.
  • 4) Use the flash meter to obtain the comprehensive exposure index, so that the face is moderately sensitive without causing excessive contrast.

    B. Fill the Background with Light

    When shooting this portrait of a lady, we added a flash head to fill in the background light to separate the model from the background. This lighting method plays a good role in improving image quality.

  • 1 ) On the “Prolinca” 125 lamp holder, install a reflective umbrella and a 32-degree honeycomb structure net cover, and place it on the low shelf behind the model.
  • 2) This light source device uses a halo circle of light to shoot toward the background, and the halo circle’s light is reflected behind the model’s head.

    C. Head Glow

    Another way to illuminate the background is to use the light of the third light source device to project it on the subject’s hair, which is called “head glow”. This lighting method was used when shooting this portrait.

    1. 1) In this case, install a condenser on a “Polygia” lamp head, and place it on the upper right back of the second model, and the light is directed to the model’s hair.
    2. 2) The other light source that illuminates the hair should be placed on the same side of the main light to obtain the effect of natural light.
    3. 3) The principle of making the model’s hair obtain uniform auxiliary light by reflected light is that the amount of auxiliary light must be lower than that of the main light (“head light” is the main light), such as the flux of the main light is f/5.6, and that of the auxiliary light The amount of light passing is f/8-f/11.

    D. Reasonable Use of Head Glow and Background Light

    To take a three-dimensional portrait photo, you must be good at using headlight and background light.

  • 1) Use the “Polygia” 250 lamp holder, install a reflective umbrella and a 32-degree honeycomb net cover to create the background light, which can express the color well and help to set off the subject on the background.
  • 2) Another “Polygia” 250 lamp holder equipped with a condenser should be placed at an angle that can highlight the subject’s hat and its texture with strong light.
  • 3) The two light source devices that illuminate the face are “Polygia” 250. The main light is equipped with a white umbrella with a diameter of 85 cm, and the auxiliary light is reflected by a translucent umbrella with a diameter of 85 cm.
  • 4) This lighting method is also used to shoot various other portraits.

    High-gloss Portrait Photography Lighting

  • 1) Two “Polygia” 400 lamp heads are used for the background light to make the background white. They are placed on both sides of the model’s head, the height is equal to the sides of the model’s head, and the height is equal to the model’s head.
  • 2) Adjust the light power so that the background exposure exceeds the normal value by one to two apertures. Shooting is to ensure that unnecessary details in the background do not appear on the film. Be careful not to let the background light scatter onto the model’s head.
  • 3) A “Polygia” 250 lamp head as the main light is directly placed on the top of the camera, and its light is reflected by a 6×6 cm lamp head directly placed in the portable soft box.
  • 4) Place a large white mirror under the chin of the subject. The reflected light from the mirror can eliminate shadows.

Halo Photography Lighting

This lighting method makes portraits lively and lively, so it is especially suitable for female portrait photography.

  1. 1) When shooting, place the halo light source behind the model, slightly lower than her, with the light source facing the camera. This kind of light can isolate the model from the background.
  2. 2) Install a reflective umbrella and a 32-degree honeycomb net cover on the “Polygia” 250 lamp holder.
  3. 3) Pay attention to the placement of the light source device, you should not see them in the viewfinder. The only visible light is reflected through the hair.
  4. 4) Place the light meter on the model’s hair and read the exposure data at the light source. Keep in mind that the exposure of dark-haired portraits requires more exposure than the exposure of golden portraits.

Children’s photography lighting

Because the child is very active, the best way to illuminate the child is to illuminate from the left and right sides instead of using the main light and auxiliary light.

  • 1) This photo was taken with two “Polygia” 250 lamp holders and a translucent umbrella for lighting.
  • 2) This two-place lighting method is to illuminate the children’s lively area with a large range of light. In this way, the amount of exposure does not need to be adjusted with the movement of the child. By using a translucent umbrella to diffuse light to the background, there is no need to use additional background light sources.
  • 3) The advantage of translucent umbrella projection light is the soft contrast, suitable for taking pictures of children.

Double Portrait Photography Lighting

When taking photos of more than two people, place the light source farther away from the subject, and use a light source with a larger amount of light and a softer light.

  1. 1. Install the 100×100 cm softbox on the “Polygia” 400 lamp head, and place it at a slightly higher position near the camera to illuminate the light on the center of the subject to ensure that the light is even.
  2. 2. A translucent umbrella is installed on the second “Polygia” 250 lamp holder, and the light it casts can eliminate shadows.
  3. 3. The third light source is the “Polygia” 125 lamp holder, equipped with a reflector and a 32-degree honeycomb net cover, placed on the top of the back of the subject.
  • 4. The fourth light source is the “Polygia” 125 lamp holder with a condenser for the background light.

Perfect portrait photography-soft box

Layered arrangement of light

The light in this photo is arranged in layers. The first layer is shot from the side to the background, illuminating the background while making it clear. It is also used to make the hair shine to distinguish the characters from the background. The main light source is placed close to the front of the subject, so that the light can shine around the person. This maintains a three-dimensional effect. The translucent reflector umbrella acts as a filling light source, and the silver reflector illuminates the shadows. The main light source and the filling light source also have a 1 f-stop gap. The setting of the background light is the same as the main light source.

The magic of the soft box

This time we used two softboxes again. But this time they are combined to act as the main light source. The smaller 70cm softbox is placed on the ground, and the larger 100cm softbox is above him. This ensures that the light is evenly shining on the model closer to the lens. Look, there is no shadow under her chin.

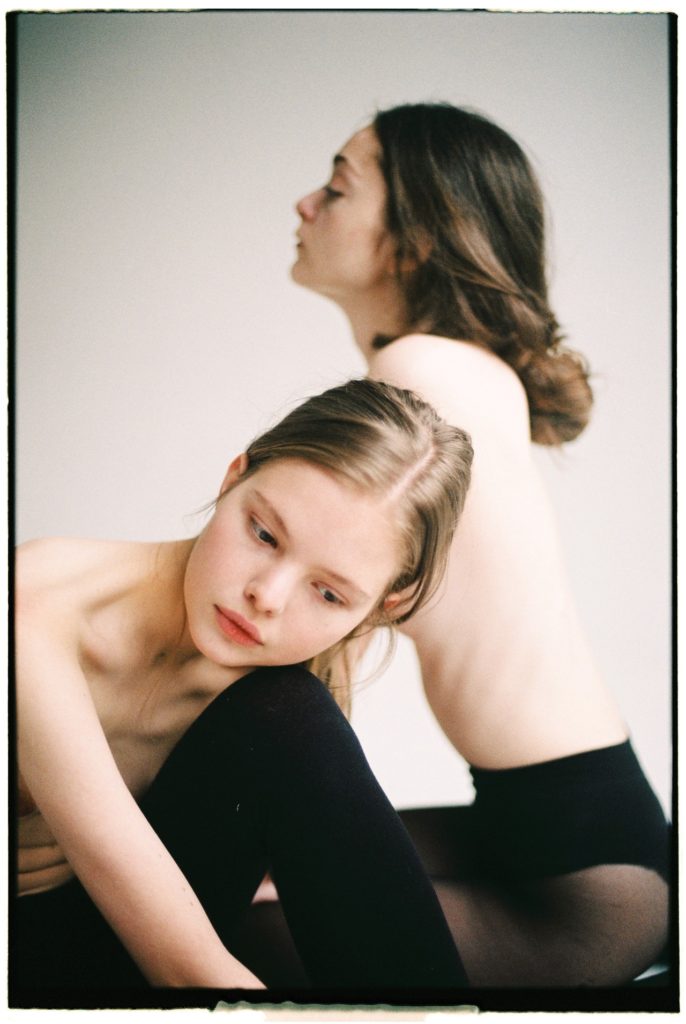
Because the model behind is not in focus, she is only illuminated by the light of the honeycomb cover, creating a stronger contrast. Adjust the flash to make the light falling on the two models the same. The wall on the left side of the studio has a lighter tone, which reduces the contrast of lighting on the clothes.

Walked out of the studio and came to the house of an average family. Here, we use a 100cm softbox to make some changes to the light from the window, and take a more natural-looking photo. The other two light sources are also used. A filled light source equipped with a translucent reflector is used to illuminate the shadows.

The third lamp is equipped with a 16° honeycomb cover, placed behind the figure. This light not only makes the characters stand out from the background, but also illuminates the objects on the piano, otherwise they will be submerged in darkness.

Categories
Studio Lights Education

The Main Elements in Photographic Composition_Part II

In photography, if you want to make a beautiful composition of the picture, then the picture must have some elements, and the correct distinction, primary and secondary positioning and performance of these elements must be carried out. Here, the elements of the scene in the picture are mainly divided into four parts:

  1. Subject
  2. Companion
  3. Environment
  4. Leave blank

Focus on the Subject

The subject is the main part used to express the main idea when shooting. It is the center of the picture structure and the interesting point of the picture. The subject should occupy a prominent position. It can be an object or a group of objects. We can say that a picture without a subject cannot be called a complete photographic work.

Generally speaking, there are two ways to highlight the subject:

1. Directly highlight the main body. Fill the frame with the subject, and match the appropriate lighting and shooting techniques to make it more eye-catching.

The subject occupies most of the screen space

2. Indirect performance of the main body. It is through rendering the environment to set off the main body. At this time, the main body does not necessarily occupy most of the area of the screen, but it will occupy a more prominent position.

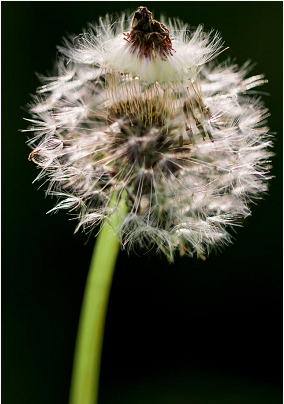
Use the contrast of dandelion and background to highlight the subject

There are 8 specific methods for focusing on the subject:

1). Express and highlight the subject in close-ups,

2). Place the subject in the foreground, so that not only can the subject stand out, but also more elements can be captured for the picture.

3). Use a background that contrasts sharply with the subject to set off the subject in shades or tones,

4). Use bright light to emphasize the subject,

5). Blur the background to further highlight the subject,

6). Utilize converging lines and other objects with directional meaning to converge to the subject to achieve a certain visual directionality.

7). Set the main body at the center of the screen or slightly to the left or right,

8). Use a certain shooting angle to highlight the subject.

Companion-Construct the Plot of the Picture Together with the Subject

Companion refers to the object that forms a certain plot with the subject on the screen and helps express the characteristics and connotation of the subject.

In layman’s terms, the main role of the companion is to provide a foil for the subject. If the subject is a red flower, then the green leaf may be the companion. Because of the accompaniment, the visual language of the whole picture will be more vivid and lively.

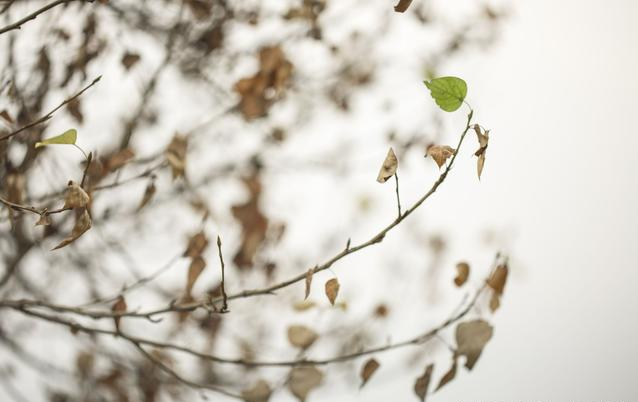
In the picture, the dead leaves act as companions to the green leaves

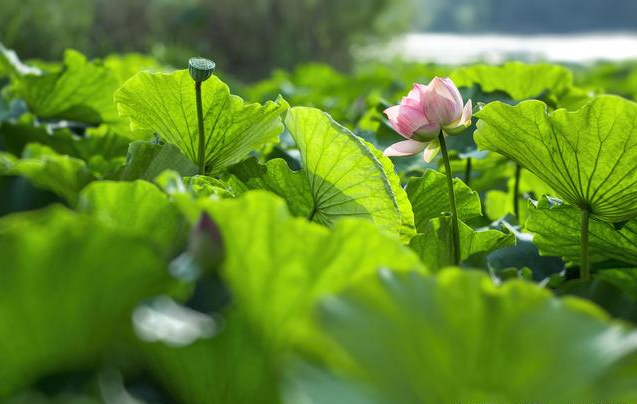
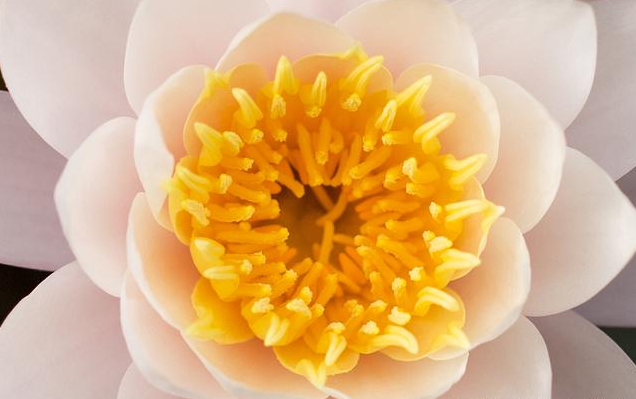
We can see in the picture above, the lotus leaf serves as the companion of the lotus

During the process of using the companion to modify the subject, pay attention to:

  1. The companion is mainly used to deepen the connotation of the subject. In the process of performance, don’t overwhelm you, do not distinguish between primary and secondary,
  2. To deal with the accompaniment, in essence, is to deal with the plot. Therefore, in the choice of companion, the photographer should pay attention to whether it has a positive effect on the subject. Don’t copy it mechanically and move away from the subject, so that the picture loses its original meaning.
  3. Companion also has two kinds of direct expression and indirect expression. Sometimes, the companion does not have to be shown in the picture, and the plot can also be constructed with the subject outside the picture.

Environment-Setting Off the Main Body With the Environment

In the photographic picture, in addition to the subject and the companion body, some elements can also be seen as part of the environment. It plays a certain role in supporting the main body and plot to strengthen the expressive power of the theme. The object that is in front of the subject and is part of the environment is called the foreground. What is behind the subject is called the background.

(1) Prospects

The foreground is the position in front of the subject and close to the camera. Its characteristic is that the image is larger in the picture, generally located around the picture. The objects using the foreground are generally flowers, trees, or people.

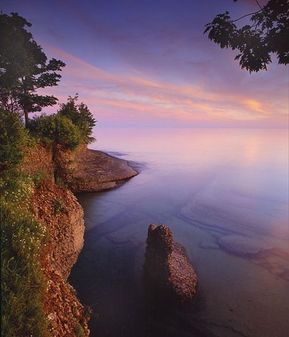
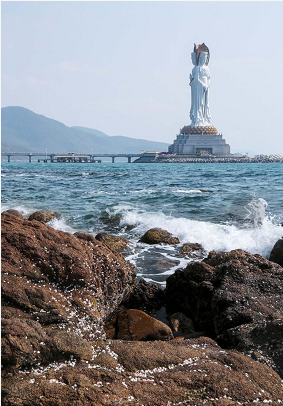
The reef is used as the foreground to enhance the sense of space in the picture

The application of different prospects plays a different role in the picture.

  1. Using some seasonal and local characteristics of flowers and trees as the foreground can further render the seasonal atmosphere and local colors, so that the picture has a strong atmosphere of life.
  2. The foreground can enhance the sense of space and perspective of the picture,
  3. The foreground can highlight the generality of the screen content. When expressing some things with rich content, placing the most characteristic part of the things to be expressed in the foreground position can further strengthen the content of the picture.
  4. Use foreground and background scenery to compare to deepen the theme,
  5. The prospects give people a subjective sense of status. For example, using distinctive features such as doors, windows, and buildings as the foreground, allowing them to occupy a larger position on the screen, can give the viewer an immersive sense of intimacy.
  6. The application of the foreground can enhance the balance of the picture,
  7. A certain blurring of the foreground can give people a hazy beauty.

(2) Background

The background refers to the scene behind the subject that is used to set off the subject. It plays an important role in highlighting the subject’s image and enriching the subject’s connotation.

Shoot upside down, avoid ground debris

In the process of photography, three aspects should be paid attention to for the selection of the background of the picture: one is to grasp the characteristics, the other is to strive for simplicity, and the third is to have tonal contrast.

First of all, we must be good at capturing some sceneries with local characteristics, time and place as background, and clearly explain the premise of the incident, so as to facilitate the viewers to understand the work.

Second, the handling of the background strives to be concise. Photography itself is “subtraction”. In the process of photography, the dispensable and obstructive things in the background are subtracted to achieve the simplicity and refinement of the picture.

Some Useful Photography Techniques

We can use a variety of photography techniques to achieve this effect:

  1. You can avoid the messy scenery on the ground by shooting upside down, and use a clean sky as the background.
  2. Using the road, water surface, and grassland as the background by overhead shooting, the outline of the subject can be clear, and a concise background can be obtained at the same time.
  3. Use backlighting to hide the messy lines of the background in the shadows,
  4. Use a telephoto lens to blur the messy background, and the subject will be more prominent.

These methods can all get a concise background effect. Furthermore, the background should strive to form a hue or tonal contrast with the subject, so that the subject has a sense of three-dimensionality, a sense of space, and a clear contour line, thereby enhancing the visual impact.

The processing of the background is an important link in the structure of the photographic picture. Only by carefully choosing during shooting can the content of the picture be refined and accurate, and the visual image can be perfectly expressed.

Leave Blank — Create Artistic Conception

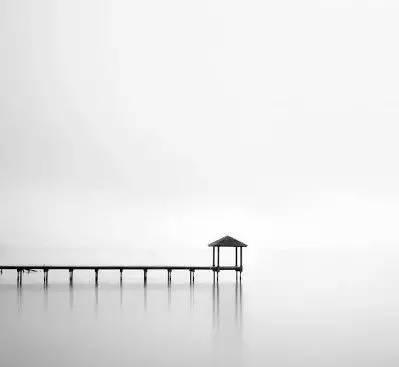
In addition to the visible physical objects, there are some blank parts on the photographic screen. They are composed of a single-tone background, forming gaps between solid objects. A single-tone background can be the sky, water, grassland, land, or other scenery. Due to the use of various photographic methods, these scenes have lost their original physical images, and a single tone is formed on the screen to set off other physical objects.

Although the blank part is not a physical object, it has played an immeasurable role in the picture.

Importance of Leaving Blank

First of all, leaving a certain amount of blank space on the screen is the need to highlight the subject. To make the subject more visually impactful, it is necessary to leave a certain amount of blank space around it. If the subject is placed in a mess of objects, it is difficult to appreciate its beauty. Only if there is a certain amount of space around the subject, the whole picture will be attractive.

Secondly, the blank space on the picture helps to create the artistic conception of the picture. If a picture is filled with physical objects without any blank space, it will give people a feeling of depression. Only when the blanks of the screen are left properly can one’s vision have room for maneuver, and the thinking may also change.

Of course, the photographer should pay attention to the ratio of the blank area to the area of ​​the physical object. It is best not to make the ratio of the two in the picture equal, otherwise the picture will appear dull.

Furthermore, leaving blank space can give the object a certain amount of movement space. Especially when shooting people or objects with forward momentum, there is a certain amount of blank space in front of the subject, so that the objects in motion have room to stretch, and it also conforms to the viewer’s visual habits.

Categories
Studio Lights Education

The Importance of Light for Shooting Portraits

Basic Knowledge of Light

Light can be divided into natural light and artificial light. Natural light is also called a constant light source, which means that it can remain unchanged for a long time. Artificial light can also be divided into constant and instantaneous light sources. For example, a light bulb is constant, and a flashlight is instantaneous. Natural light needs to be coordinated, and artificial light can be controlled freely.

The Important Role of Light

Light Is the Soul of Photography

Without light, there is no shadow, and no pictures can be taken. This is not just for portraits, it is for all photography. Light is the soul of photography and the root of photography. In most of the time, a good light environment can give a lot of points to the photo.

Light Can Create Atmosphere

The atmosphere is the air in the picture, which determines how you breathe. Shaping the atmosphere of the picture requires light to be laid out. For example, the forward-light picture is more natural and real, and the back-light picture has a sense of distance and layering. For example, warm light makes people feel warm and harmonious, while cold light makes people feel cool and quiet.

Light Can Reshape the Face

With good use of light, people can be thinned. Different light angles will also have an important impact on the shape of the characters. The forward-light will make people fatter, the front side light is three-dimensional and thinner, the side light shows the mysterious characters, and the ground light makes the characters insidious. To say that the most skinny thing is the side backlight. For example, the effect of the picture above. The warm side backlights shaped Evelyn’s face particularly stylish and small.

Light Can Modify the Skin

Just like girls using PS to retouch photos after taking selfies, light can also “dermabrasion” the skin. Different light quality has different modification effects on the skin. The light quality has soft light and hard light. Soft light can make the skin softer and smoother, and hard light can make the skin more three-dimensional. It is best to use soft light when photographing children, because the skin is inherently smooth. You can also use soft light to shoot cute, gentle, sunny and natural style photos. For shooting mysterious and cool style portraits, such as men, you can use hard light.

Light Can Cut Space

Photography is to convert a three-dimensional space into a two-dimensional picture. In this process, in order to highlight the level and space of the picture, two of the most important skills are: composition and light. Light can be divided into bright and dark. From the perspective of visual language, there is a principle of “bright advances and dark retreats”. This means that the bright position will feel forward, and the dark position will feel backward. All choices or creation of a light environment with contrast between light and dark can play the role of cutting the picture and make the photo more layered and spatial.

Backlight Portrait Photography Tips in Autumn

Backlit portraits can create romantic, beautiful, and dreamy visual effects, which is a common method for many professional photographers to take portraits. The photos taken in this way will not only make the character appear beautiful outline light, but also the character’s hair will appear beautiful golden hair.

When shooting a portrait of a beautiful woman against the light, very beautiful blond hair appears on the head of the person, and the photo feels very romantic and beautiful.

Real Shot Steps:

Step 1: Choose a sunny day with direct sunlight to shoot. In a sunny day, the directional sunlight can easily produce golden hair.

Step 2: Arrange the beauty in a backlit position and frame the shot. That is, let the character face the sun and face the photographer. At this time, you can observe the effect of golden hair under the character’s hair.

Step 3: Use reflectors to fill up the beauty’s face. When shooting under backlight, the brightness of the face of the person is much darker than the background, and better results can be obtained after filling in the light.

4th Step: Use aperture priority (Av) mode.

5th Step: Set the metering mode of the camera to spot metering, metering for beautiful faces, adding 2/3 stops of exposure to the correct exposure.

6th Step: Adjust the composition and take the picture.

Choose Backlight Shooting

The shooting effect of blonde hair must appear under backlight. If it is a front and back light that is 180° with the camera direction, the effect of golden hair will be formed on both sides of the character’s hair. If it is shot with side backlighting, the hair on the light-receiving surface of the person will appear as golden hair. When shooting under backlighting, the light is easy to directly shine into the camera lens, causing the quality of the photo to be impaired. So you should add a hood to the lens, or block the direct light with your hands.

Use the Reflector to Fill up the Face of the Character

When shooting portraits under backlight conditions, because the faces of the people are not illuminated by light in the shadows, it is easy to appear darker with no details. Therefore, you should use a reflector to fill up the character’s face, so that the character’s skin appears more delicate and smooth. In addition, the use of reflectors can also bring very beautiful eyes to the characters.When shooting with normal backlighting, people’s faces appear darker

When shooting with normal backlighting, people’s faces appear darker

Use reflectors to fill light when shooting against the light, and the skin color of the characters has been better expressed

The Effect of Choosing a Dark Background Is More Obvious

When shooting blond hair, the edges of the hair are exposed to strong light, showing very bright colors. Using a dark background as a foil can make the picture form a clear contrast between light and dark, which is conducive to the creation of the overall atmosphere of the picture.

Under the backlight, the character will have beautiful golden hair, but the background is too bright and the golden hair is not obvious

When shooting against the light, photographers often use the dark background as the background of the model’s hair, and highlight the hair effect of the blonde hair.

Categories
Studio Lights Education

Color Performance and Processing When Taking Color Photos

To take color photos, in addition to mastering the basic knowledge and skills of color formation and restoration, you should also master the ability to express ideas with color expressions and the ability to process colors on the screen.

1. The Three Eements of Color

①Separate

Also called color and hue. Refers to the appearance characteristics of various colors and the difference between each other. For example, the seven standard colors of the spectrum-red, orange, yellow, green, blue, blue and purple, each have its own appearance. Another example is red, which is divided into red, magenta, rose, pink, and crimson. Each has its own appearance.

②Brightness

Refers to the intensity of the color, that is, the brightness. The brightness of each color is different, with yellow being the highest, red-green second, and blue-violet the lowest. In each color, the brightness will also change due to different lighting conditions. The light is strong, the brightness is high. The brightness is low when the light is weak. The light-receiving part is light in color and high in brightness. The backlight is dark in color and low in brightness.

③Purity

Also called color saturation. Refers to the vividness of the color and the number of color components contained in the color. Black and white are panchromatic, also called achromatic. The purity is low if there are many decolorizing ingredients in each color. Colors with less decolorizing components have more color components, that is, high purity.

Smooth and clean surface, high color purity. Objects with rough surface and dust, low color purity. The seven standard colors in the spectrum have the highest purity. Adjacent mixed colors have the second highest purity. Complementary color mixing, the lowest purity.

2. Basic Tone of Color Picture

Taking color photos does not mean that the picture is colorful. Too many colors are too complicated, and the picture becomes messy and sometimes very tacky.

Learn to master the method of taking pictures with basic tones to make the picture look uniform and beautiful.

The basic tone of a color photo is that the screen takes a certain color as the main tendency, and appropriately includes the basic tone formed by other colors.

The main keynotes are:

Warm tone-mainly red and orange

Cool tone-mainly blue and cyan

Midtones-mainly yellow and green

Some Points to Note When Taking Color Photos

When shooting color photos with various tone tendencies, pay attention to the following aspects.

1). Choose an object with consistent color as the subject, occupying the entire frame or most of the frame to form the basic tendency of colors. Such as red pepper, yellow rice, corn on the cob, on the drying yard, storage yard, can all be photographed. Another example is the blue sky, the green water surface, and the large gardens, grasslands, woods, etc. of the same color, all of which can form a different tone of the picture.

2) Use the color change of the light source. In the morning and evening, the sunlight has low color temperature and contains many red light components, so you can get warm-toned scenery photos of the sky. For the night scenery, use the “daylight” block to take photos with various lighting embellishments in warm tones. You can also add red in post-processing. The method of using flash and indoor lighting to add color film can also make the subject have a strong color tendency.

3) Pay attention to choosing a more uniform color background. Such as the background of blue sky and white clouds or sunset. Or use red, yellow, and blue background paper as a background in the studio.

3. Contrast and Coordination Between Colors

Generally speaking, certain color pairs are stronger, such as red and cyan, yellow and blue, green and magenta. The colors appear closer between red and orange, orange and yellow, yellow and green, green and blue, blue and cyan, and cyan and purple.

When the contrasting colors are put together, the difference in the size of each area should be used to achieve harmony. Photographing a girl wearing a red jacket and green pants will look homesick and tacky. Two basic opposing colors appear equally in the picture, it will appear inconsistent. But if you adjust the ratio of red and green to the size of the area, it will look much better. For example, if a girl in a green dress wears a little red lipstick or puts a red flower on her chest, she will look very fresh and lively, and a little red will be very eye-catching. “A little red in the ten thousand green clusters” is the use of changes in area to make them coordinated.

Color contrasting picture

How to Deal with Two Contrasting Colors

When two contrasting colors get together, you can also use the transition of light and shade to make them more coordinated. If the subject of golden yellow is placed in front of the blue background, the contrast is very strong. But if the brightness of the background gradually darkens up or down from the middle, and the color gradually becomes darker and darker, it will appear coordinated and not very dazzling. It can not only highlight the subject, but also prevent the color of the picture from jumping too much.

When the two color blocks have a strong contrast and little difference in size, the intermediate colors can also be used to coordinate them. For example, add a piece of green between yellow and blue, and add a piece of purple between red and blue. Of course, you can also improve their brightness, and seek harmony in the light and soft tones.

When the color blocks are more complicated and objects with more colors get along and it is difficult to coordinate, if conditions permit, you can choose a white or black background to set off to make them coordinated and unified.

Bright contrast is elegant and harmonious

4. Color Echo and Layout

The color blocks of the same color and other colors in the picture do not necessarily have to be grouped together. Sometimes the same color blocks are scattered in different parts of the picture, echoing each other, the form is more lively, and the visual effect will be better. The color blocks that play an echoing role should be distinguished between large and small. Sometimes several colors are intertwined and distributed regularly, which can produce a certain rhythm and rhythm. As a result, we can obtain a unified and varied picture effect.

The light on the top and the color of the floor form a good echo

In the general color processing layout, in addition to forming echoes, rhythms, and rhythms, attention should be paid to the basic principles of cold top and warm bottom, light top and dark bottom, near warm and far cold in order to conform to the law of balance and perspective.