Categories
Soft Lights

The Charm of Backlight Photography

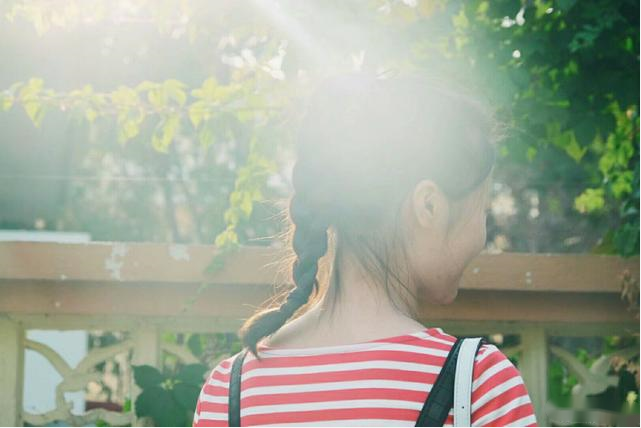
In photography lighting, backlighting is a kind of lighting with artistic charm and strong expressiveness, and many photographers like to create under backlighting. The artistic expression of backlighting mainly has the following seven aspects.

1. Backlight Can Enhance the Texture of the Subject

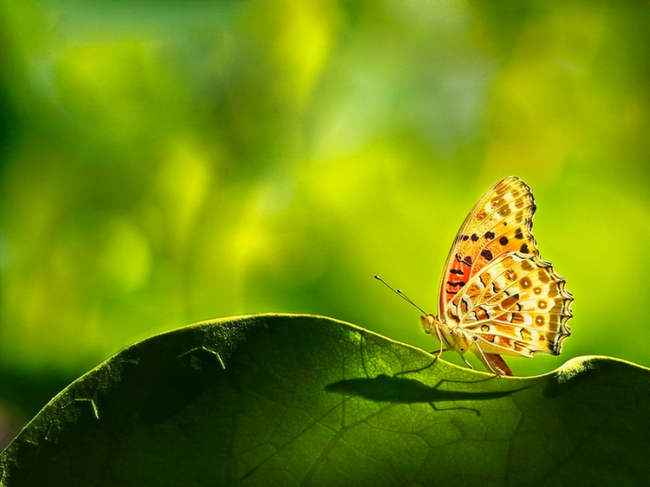
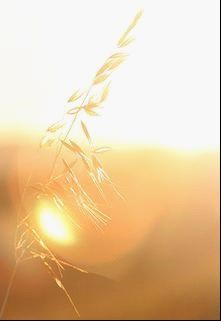
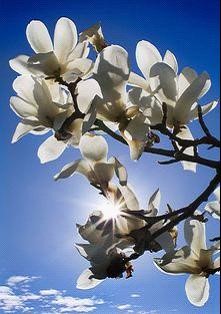
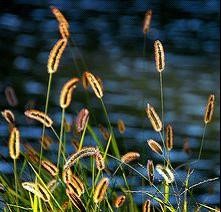
Especially transparent or translucent objects, such as flowers, plant branches and leaves, etc., the backlight effect is very beautiful. Because backlight illumination can improve the brightness and saturation of light-transmitting objects, so that plain and tasteless transparent or translucent objects under forward light illumination present a beautiful luster and a better sense of transparency.

2. Backlight can enhance the rendering of the atmosphere

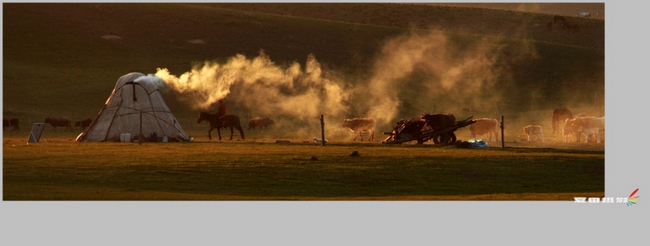
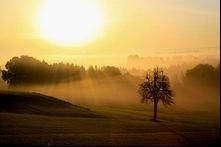
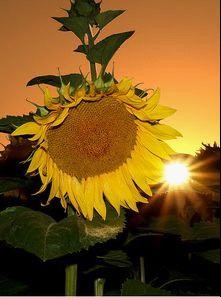
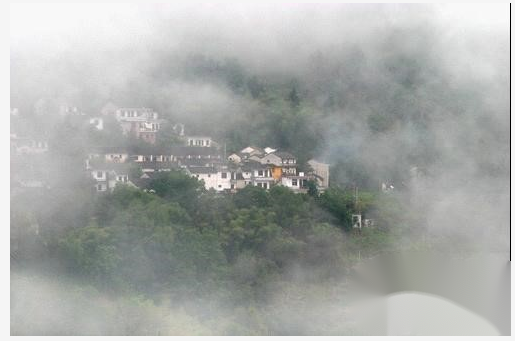
Especially in the morning and evening in landscape photography, low-angle, large backlighting means of light and shadow modeling are used, and the retroreflected light will outline the red clouds like dyeing, the sea of clouds transpiring, mountains, villages, and forests like ink. If mist, light boat, and flying birds are added to set off each other, it will cause a deep resonance in vision and soul, making the work deeper in connotation, higher in artistic conception, and full of charm.

3. Can Enhance the Modeling Effect

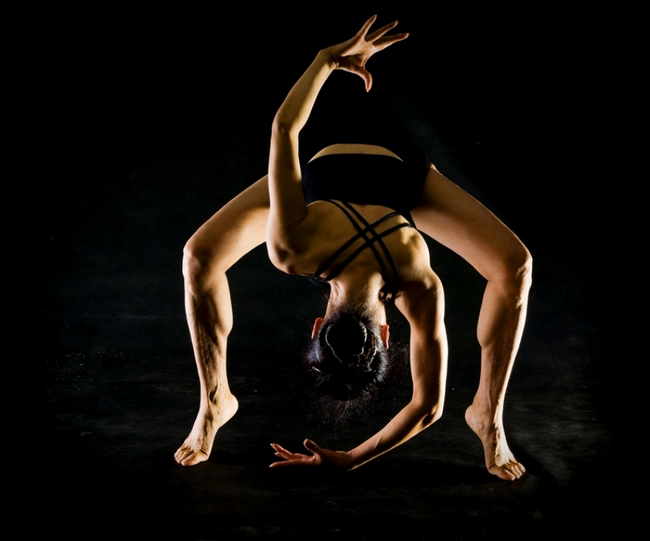
In backlight shooting, due to the increased proportion of dark parts, a considerable part of the details are covered by shadows, and the subject stands out in the picture with simple lines or a small light-receiving area. This large light ratio and high contrast give people a strong visual impact, resulting in a strong artistic modeling effect.

4. Backlight Can Highlight the Subject

First, it makes the background under-exposed and cleansed up by putting it in backlight. Secondly, it can vividly outline the clear outline of the subject, separate the subject from the background, highlight the undulations and lines of the subject, and enhance the subject’s sense of subjectivity.

5. Backlighting Can Deeply Portray Characters

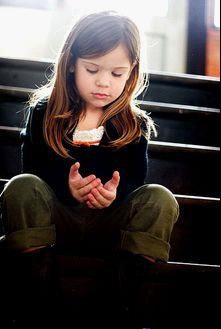
Due to the small light-receiving area of the entire picture, most of the face and body are in shadow, forming a heavy and low-key picture dominated by dark colors. This helps to express the character’s deep, reserved, solemn or melancholy character.

6. Hide Details

At the same time, due to the large contrast and contrast of shades and the strong layout of light and dark light, some deficiencies on the faces of the characters can be diluted by strong light, and the shadows of the backlight can be used to hide them, so as to achieve the effect of promoting strengths and avoiding weaknesses.

7. Backlight Can Enhance the Sense of Space of the Picture

Especially in the morning or evening shooting under the backlight, due to the different conditions of the medium in the air, the color composition has undergone different changes in the distance. The foreground is dark and the background is bright. The foreground color saturation is high, and the background color saturation is low. As a result, the whole picture moves from far to near, and the colors change from light to dark, from light to dark, forming a subtle sense of spatial depth.

Several Artistic Effects of Backlight Photography

1. Backlight can enhance visual impact

Specifically, first of all, it can make the background under backlight and underexposure. So that the background is purified, so as to obtain the effect of highlighting the subject.

Secondly, it can vividly outline the clear outline of the subject, separate the subject from the background. It can highlight the undulations and lines of the subject. And it can enhance the subject’s sense of subjectivity.

Third, it can deeply portray the character of the character. Due to the small light-receiving area of the entire picture, most of the face and body are in shadow, forming a heavy and low-key picture dominated by dark colors. This helps to express the character’s deep, reserved, solemn or melancholy character.

At the same time, due to the large contrast and contrast of shades and the strong layout of light and dark light, some deficiencies on the faces of the characters can be diluted by strong light. And we can use the shadows of the backlight to hide them, so as to achieve the effect of promoting strengths and avoiding weaknesses.

Categories
Soft Lights

Various Photography Backlighting Techniques_Part III

Virtual and Real Together to Shoot streams and Waterfalls

Waterfalls and streams are the most poetic landscapes in natural landscapes.

Choosing the right season and looking for a unique stream and waterfall is the premise of taking a good photo. In the choice of the frame, in order to express the broad and rushing momentum of the waterfall, photographers mostly use the horizontal frame. In order to express the high and deep streams and waterfalls with large drop, photographers mostly use vertical frames. To show a gentle stretch, a medium-sized square format is used.

Most of the stream waterfalls are in the valleys, and there is often no room for manoeuvre when shooting. To get a full panorama, a medium-wide-angle lens should be used. Taking its part and close-up, it is inseparable from the telephoto lens.

Regarding the shooting height, the flat shot is close to the usual line of sight, which makes people feel immersive and intimate. When looking down, the picture of the stream waterfall changes greatly in perspective, which is conducive to the expression of layers. When shot upwards, the height of the stream waterfall in the perspective of the picture is more majestic and taller than the actual feeling. The shooting direction is mostly on the side, and it should not be too positive, so as to avoid the picture being dull.

Correctly Handle Virtual and Real

In addition to the above points, the most important thing in shooting the waterfall is the virtual and real processing of the picture. The use of real and virtual are two aspects that complement each other. If the screen is full of real scenes, it will give people a feeling of suffocation. On the contrary, the picture is full of emptiness, and there is no real place at all, which will make people feel empty. Therefore, only by properly grasping the complementation, foiling, and growth of the virtual and the real can we achieve the endless wit of the picture.

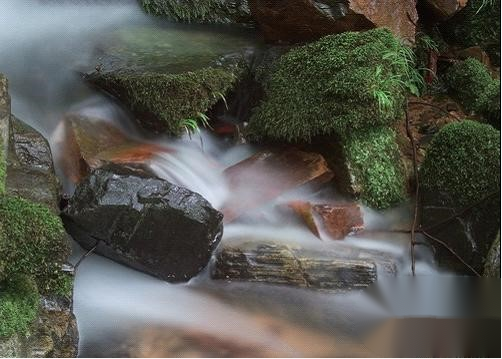
This is mainly reflected in the choice of camera shutter speed. If you shoot a splash of water, in order to display the water droplets, you can use a high-speed shutter. But in most cases it can’t be done. In order to show the momentum of the stream and look soft and elegant, you must find ways to slow down the shutter speed and shoot at a slower shutter speed.

Ways to achieve slow shutter speed

And the slower the shutter speed, the more fluid the stream, and the more exaggerated and expressive it is. Common shutter speeds are 1/2 second to 1 second or even up to several seconds. There are usually 4 ways to achieve a slow shutter:

  1. Narrow down the aperture to extend the exposure time relatively.
  2. Choose to shoot on a rainy day with dim light or in the morning and evening.
  3. Select a lower sensitivity by setting.
  4. Add a neutral gray mirror (one is not enough, two are superimposed).

In order to avoid the jitter that is easy to occur when using slow shutter speeds, be sure to fix the camera on a tripod and open the shutter with a cable release. If there is no cable release, you can enable automatic shooting.

Look for the Golden Divider

Start by choosing a panorama you want to shoot, and then start searching for a worthy subject. You want to visualize the landscape as a grid with multiple quads in your mind, which helps you better focus on each element in the landscape.

Professional photographers use a frosted glass with horizontal and vertical lines in the viewfinder. Some digital cameras have projected these guide lines electronically onto the LCD screen. If your camera doesn’t have this feature, you can also help out with an erasable soft pen. Use this pen to mark the lines on the LCD screen. In this way, it is not only convenient to divide the subject matter into several parts, but also helps to find the “golden separation point”.

To find the subject of your shot, you can also “look in your fingers”. Form a rectangle with the index fingers and thumbs of both hands. It may look funny, but it’s a quick way to find the subject. Of course, cardboard folded at an angle or an empty slide border can also be used for the same purpose.

Summary and Panorama

In one photo, “condescending” plays an important role. However, this bird’s-eye view of the overhead method requires a certain amount of preparation. The photographer can shoot directly from the window when flying in the daytime, which can realistically record the actual geographical structure.

If you do not have this condition, you can also try to find a high point. For example, in the picture above, you can get a good view of the valley or bay from the top of a mountain. If in a city, a tall building can serve the same purpose.

To get a panoramic photo, you can shoot continuously in the same direction. However, many digital cameras now have the ability to shoot such panoramic photos. If your camera doesn’t have this capability, you can simply take 4 to 6 photos with overlapping edges and then combine the photos together in Photoshop or other image editing software.

It is important that you manually set fixed aperture and shutter values. Because if auto exposure is used with each shot, there will inevitably be brightness jumps at the transitions between shots.

Show Movement Through Lines

An important compositional element is “dynamic lines”. You want to delineate a small area of the landscape with your chosen photo subject, so you can get more vivid elements into the structure of the photo. For example, elements such as a stream can be placed in a meadow. These lines should not simply be placed in the center of the photo, preferably at an angle.

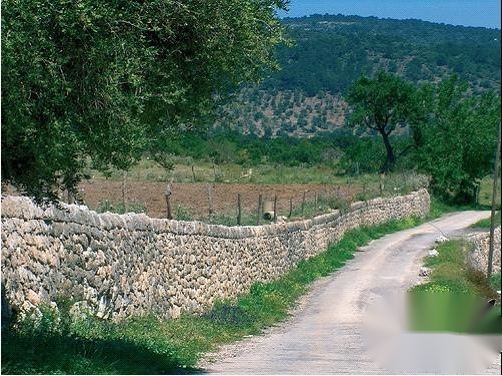
In addition, streets and walls are also suitable as dynamic lines. As shown above, you can position your camera so that the wall in the framing field stretches toward the viewer. This way, there is a soothing change in the photo.

This line should end within the frame, but not simply start on the other end of the photo. Also, don’t let the lines simply go straight through the photo, slightly curved lines or other shapes will be more interesting.

Observe the Subject Matter in Grayscale

Ansel Adams is a great master of landscape photography. He used the zone system method in the late 1930s to achieve the perfect black and white photo shoot. For color photos, the guideline of “all areas in the photo need tones” is equally valid, where the tones are the grayscale values.

If you want to learn more about the ideal distribution of brightness in a photo, you should first put the camera aside and mentally convert the subject matter into grayscale values.

Now, you have to look at this picture from a purely mathematical point of view. Each brightness area has a percentage value. 100% represents deep black, and 0% represents pure white. In a well-exposed photo, there won’t be any overexposed or underexposed areas. You can work hard to find the correct exposure in every light condition. The thing to note is that every area in the photo has a gradation.

Detailed Shot

It is not common practice to take a lot of photos in all scenic areas. Most of the time, photographers will choose a specific location or a very specific area to describe the journey.

Detail shots are important if you want to express the inner consistency of a series of photos. And these details are not found in ordinary landscape photography. You can photograph locals at work, a classic dish or local plants and animals.

Try to photograph local objects or details as simply as possible, and choose a typical composition method. That way, it’s a good comparison with a painstakingly shot landscape photo. Viewers can not only get information about the place from it, but also feel the story told in the photos.

In order to remember clearly which river you are focusing on when you get home, it is best to carry a notebook with you. This way, you can immediately jot down some information about the place and the subject matter of the shoot.

Night Shot: Underexposure is Necessary

In order to capture the typical night scene atmosphere, it was necessary to be flexible. You don’t have to wait until your eyes sense it’s getting dark before you’re ready to take a photo. Usually, it’s too late.

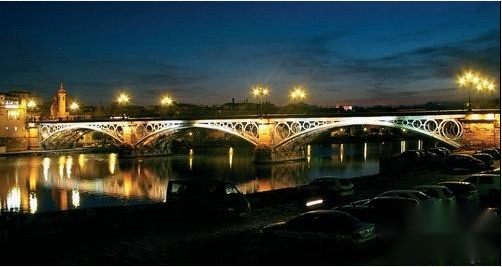
What you have to wait for is the moment when the street lights come on. The sun had set by this time, and the artificial light from the street lamps was cast on the buildings. In order to get a deep blue tint to the sky, one should consciously underexpose in manual mode.

To do this, you look for an area with only low light and record the metering data at that time. Next, with this reference value, you can complete a series of photos. Taking this measured exposure data as a reference, you can shoot at 3 different aperture data, brighter and darker. There will always be one of these photos that is properly exposed. However, the deep blue sky can only be photographed on a cloudless evening.

Categories
Soft Lights

Various Photography Backlighting Techniques_Part II

Backlight Photography Tips:

  1. Metering the bright background and not filling the foreground at all can get a strong contrast silhouette effect, which is a good rendering of the atmosphere.
  2. Use a reflector or flash to properly fill in the foreground to get more details.
  3. When shooting with backlight, a dazzling contour light can be generated around the object, which strongly outlines the appearance of the object.
  4. While shooting flowers, trees and other subjects that are easy to transmit light, you can take the light position of the backlight, and the illuminated subject will show a stronger texture.
  5. When there is serious halo in the lens, you must pay attention to the composition and adjust the position of the lens slightly to avoid the flare covering the subject.
  6. While shooting against the light, the accuracy of the auto focus will be affected. You can use manual mode to adjust the focus accurately.
  7. Avoid looking directly at the sun through the viewfinder for a long time to cause vision damage.

    Scenery Photography Shooting Skills Under Backlight

    In landscape photography, backlight shooting is a photography technique that has certain difficulty in shooting and can produce unique artistic effects.

    Backlight comes from behind the scene, and the subjects we shoot are often dark parts that are not illuminated by direct light. Therefore, it is not easy to show the light and dark levels and lines of the scene, and the contrast is large and there are many changes. If there is no richer shooting skills and experience, the exposure of the subject will be inaccurate, and the unique charm of backlight photography will not be displayed. Therefore, photographers should be proficient in using and mastering the following skills when shooting backlight photography works:

     1. Exposure

    Exposure should be based on the exposure of the subject, and the rest are ignored. For example, when shooting sunrise or sunset, the exposure value of the sky or the sun should be the main basis.

    2. Contrast

    When shooting backlit scenes with clear outlines and transparent textures such as flowers, plants, people, animals, etc., you should choose a darker background to contrast. When exposing, the highlight part is used as the metering basis to create a strong light ratio contrast, strengthen the backlight effect, achieve a clear outline, and highlight the artistic effect of the subject.

    3. Silhouette effect

    When shooting a silhouette effect, the exposure should be based on a bright background brightness.

    4. Control glare

    Since the camera is facing a strong light source when shooting in backlight, pay attention to the effect of glare. Try to use a hood or cover in front of the lens with your hands, hat, cardboard, etc., or adjust the shooting angle to prevent glare.

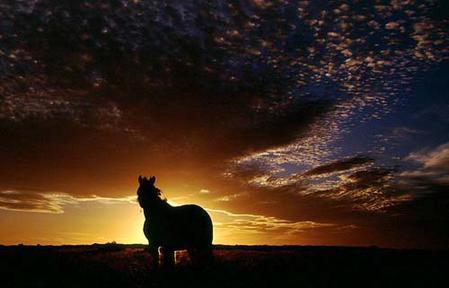
    There are two most commonly used backlight shooting effects: one is the silhouette effect. And the other is the “contour light” effect. The following are backlit photos that use different shooting methods at the same time, place, and subject matter to produce different effects.

    The “Rim Light” Effect in Backlight

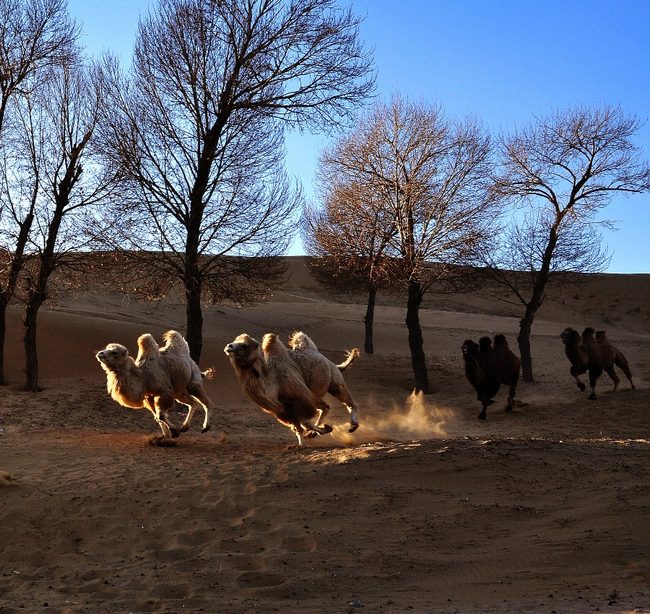
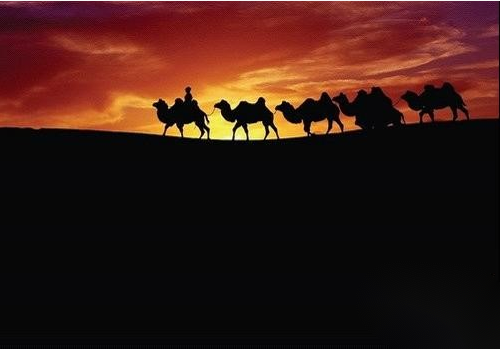
    As shown above, this is a camel caravan taken in the desert in October 2005. Although it was backlit at the time, due to the relatively high position of the sun, the top of the camel caravan and the dune that was hit by the light outlined a bright outline, which contrasted with the large area of ​​the dark black background to form a unique “outline” in the backlight. light” effect.

    When shooting, take the light metering as the basis, and reduce the exposure by 2 to 3 stops during the average metering to avoid overexposure.

    silhouette effect

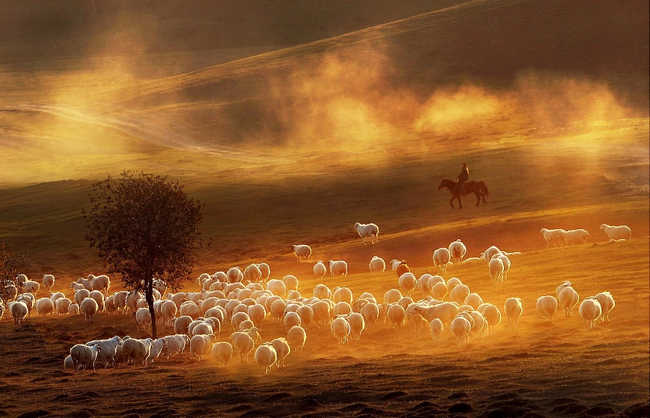
    The shooting of the silhouette effect is relatively simple, and the exposure of the bright part shall prevail when shooting. It is mainly a shooting method used to reflect the unique tones and atmosphere of the environment, as shown in the above picture.

    Concise Background Has a Way

    Landscape photography not only emphasizes the selection and arrangement of the subject, but also cannot ignore the processing of the background. Background refers to the scenery behind the subject to set off the subject to emphasize the environment the subject is in.

    The background plays an important role in highlighting the image of the subject and enriching the connotation of the subject. The processing of the background is an important link in the structure of the photographic picture. Only by careful selection during shooting, can the content of the picture be refined and accurate. And the visual image be perfectly expressed.

    The ideal background should strive for simplicity and purity, with refined visual elements and harmonious tones. Experienced photographers are good at mobilizing various techniques to achieve the simplicity of the background. Any elements that are optional in the background and prevent the subject from standing out should be subtracted. To sum up, there are several ways to improve the background.

    1. Virtualization

    That is, use a larger lens aperture (such as F2 or F2.8) to narrow the depth of field as much as possible. Focus on the subject, so that the background behind the clear subject is blurred. So as to receive a good effect of contrasting the real with the virtual.

    2. Occlusion method

    That is to use the rising clouds, misty white fog, tree branches and leaves, or the back side of mountains, walls and other objects to hide the background, so as to highlight the subject.

    3. Avoidance

    That is, adjust the shooting height, or look up to avoid the cluttered scene on the horizon. And set off the main subject cleanly against the sky background. Or lean toward the background of the road, water, and grass. So that the outline of the subject is clear and a concise background is obtained. Sometimes a telephoto lens is used to shrink the background, and clutter is excluded from the frame.

    High Profile Scenery Shot

    High key, also known as bright key. Photos with light tones are often referred to as high-key photos.

    Most of the tones in high-key photos are light colors. They are composed of a few levels from light gray to white to form the tones of the entire picture. It is generally more concise and clear, and is suitable for expressing themes with white as the keynote.

    Although high-key photos are dominated by light tones with high levels, they still require rich layers. And the existence of small dark tones is not excluded. Due to the large area of ​​light tones, the small dark shades appear more prominent.

    Here are 5 things to keep in mind when taking high-key landscape photos:

    1. Select a light-toned scene, and the color of the main body and the accompanying body should be as close as possible.
    2. Choose a light background, and use a white or light gray background to bring out the dark subject. These light backgrounds can be rain, fog, clouds, or rolling mountains and vast water.
    3. Use frontal or diffuse lighting to achieve a soft, flat-contrast image. On a sunny day, you can obtain a shadowless image by using a flat, straight frontal light. On cloudy and rainy days, you can achieve soft-contrast images by using well-proportioned, peaceful diffused or reflected light.
    4. Increase exposure.

    On the basis of the normal metering value, the exposure should be increased by 0.5 to 1.5 stops depending on the specific situation. That can brighten the background.

    1. To control the light ratio.

    It is advisable to control the light ratio within 1:2. If the light ratio is too large, the level of the highlight part will be lost. Or the gray tone part will be darkened, thus losing the characteristics of high-key photos.

    The role of high-profile shooting techniques

    In natural scenery photography, high-profile techniques are often used to show the beautiful, ethereal, vast and vast beauty. There are many natural backgrounds that can be used. For example, when shooting landscapes, it is often based on the concept of blank, with a simple composition and a general approach to highlight the main scene. The rest of it gradually changed into hazy distant trees, fresh water, fog, rain and mist. There are also snow scenes, almost pure white snow is an excellent background for high-profile pictures.

    In architectural landscape photography, the method of selecting a corner and a half of the scene, or focusing the scene on one side, is often used to direct the viewer’s attention to the empty space. It gives people room for contemplation and reverie. Also, with the sky as the background, shooting at an elevation angle, the exposure is based on the subject metering value. The sky is pure white due to overexposure. And the high-key effect of the whole picture can be well expressed.

    Low-key shooting Scenery

    Low key, also known as dark tone. We usually refer to photos with heavy tones as low-key photos. The tones in the low-key photos are mostly black and dark gray. And the tones of the whole picture are relatively thick and deep.

    Generally, it is suitable to express the theme with dark black as the keynote. It reflects the vicissitudes of life and the characteristics of calmness. Although low-key photos are mostly dark and dark, they do not exclude small areas of white light. Due to the large area of ​​dark tones, the small pieces of white are particularly obvious, forming the visual center and making the whole picture lively.

    There are 6 things to keep in mind when taking low key landscape photos.

    1. Choose a scene with a dark tone, and the tone of the accompanying person should be darker and coordinated with the low-key of the subject.
    1. Choose a dark background, pure black or dark background can bring out the light subject.
    2. Use side light or side backlight. These light positions are viewed from the direction of the lens, the subject’s light-receiving area is small. And it is contour light, so it is easy to obtain deep and dark images.
    3. To reduce the exposure, the exposure should be appropriately reduced by 0.5 to 1.5 stops on the basis of the normal metering value according to the specific situation. This can darken the background.
    4. The light ratio is large, and the light ratio can be greater than 1:4 or even 1:8.
    5. The use of the shaded side of the sun as a foil is to use the shadows of mountains and walls that cannot be illuminated by the sun as the background to hide the messy lines in the shadows.

    Time to get low-key photos

    In natural scenery shooting, the photos with low-key effect are mostly in special weather or time period. For example, a scene covered with dark clouds and rolling under the dark clouds presents an atmospheric, heavy and low-key artistic conception.

    In the morning or evening, sunlight from a low angle is noticeably directional. The projection of light is long and the shadow area is large. That can separate the projection plane of each scene and highlight some important aspects in the picture. Thereby presenting a three-dimensional, deep-toned scene photo. These periods can be put to good use for low-key photos.

    Also, shoot with night lights. Different from the daytime, except for the faint moonlight, lights, fireworks, etc. at night, a large area of the ground appears dark. With the help of a tripod and a cable release, long exposures can be used to capture low-key night scene photos.

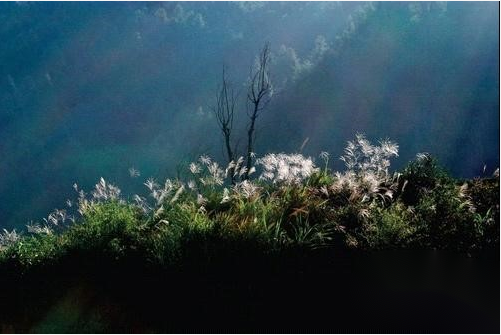
    As shown in the picture below, the morning sun shines on the white autumn reed thatch. And the dark background is very eye-catching to set off the subject that you want to express.

Categories
Soft Lights

Various Photography Backlighting Techniques_Part I

Basic Features of Backlit Portrait Photography

We all know that the essence of photography is light. Light is the lifeblood and soul of photography.

Backlight photography is a means of photographing light. Backlighting in a broad sense should include full backlighting and side backlighting. Its basic characteristics are: from the perspective of light position, full backlight is the light that is facing the camera and illuminated from the back of the subject.

Side backlighting is the light that strikes the subject from the rear side at a 135° angle to the left and right of the camera. The light-receiving surface of the subject accounts for 1/3, and the backlight surface accounts for 2/3. From the perspective of light ratio, the subject and the background are in a dark place, or 2/3 of the area is in a dark place. Therefore, the ratio of bright and dark light is large, and the contrast is strong.

From the perspective of lighting effects, backlighting produces rim light on opaque objects. Transmits light to transparent or translucent objects. Creates a scintillating light on liquids or water surfaces.

If we can use the means of backlight photography properly, it will undoubtedly be of great value to enhance the artistic effect of photography creation.

The Main Artistic Effect of Backlit Portrait Photography

Backlight is a kind of lighting with artistic charm and strong expressiveness, which can make the picture produce an artistic effect that is completely different from the actual light we see on the scene with the naked eye. Its artistic expression mainly has the following aspects:

1. Can enhance the texture of the subject

Especially when shooting transparent or translucent objects, such as flowers, plant branches and leaves, backlighting is the best light. Because, on the one hand, backlight illumination can improve the color brightness and saturation of light-transmitting objects, so that plain and tasteless transparent or translucent objects under forward light illumination present a beautiful luster and a better sense of transparency. This adds to the effect of transmission enhancement. On the other hand, the brightness difference between the light-transmitting objects and the opaque objects in the same picture is obviously enlarged. The contrast between light and dark greatly enhances the artistic effect of the picture.

2. Can enhance the rendering of the atmosphere

Especially in the morning and evening in landscape photography, low-angle, large backlighting means of light and shadow modeling are used, and the retroreflected light will outline the red clouds like dyeing, the sea of ​​clouds transpiring, mountains, villages, and forests like ink. If mist, light boat, and flying birds are added to set off each other, it will trigger a deep resonance in vision and soul, making the work deeper in connotation, higher in artistic conception, and stronger in charm.

3. Can enhance the visual impact.

In backlight shooting, due to the increased proportion of dark parts, a considerable part of the details are covered by shadows, and the subject stands out in the picture with simple lines or a small light-receiving area. This large light ratio and high contrast give people a strong visual impact, resulting in a strong artistic modeling effect.

Specifically, first of all, it can make the background under the backlight, underexposure, and poor color reproduction, so that the background is purified, so as to obtain the effect of highlighting the subject.

Secondly, it can vividly outline the clear outline of the subject and separate the subject from the background. Emphasizes the undulations and lines of the subject’s shape and enhances the subject’s sense of subjectivity.

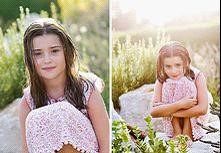
Thirdly, it can deeply portray characters. Due to the small light-receiving area of ​​the whole picture, most of the face and body are in shadow, forming a heavy and low-key picture dominated by dark colors, which is helpful to express the character’s deep, subtle, solemn or melancholy character.

At the same time, due to the large contrast and contrast of the shades and the strong layout of light and dark light, some defects on the face of the characters can be diluted by strong light, and the dark shadow of the backlight can be used to hide them, so as to achieve the effect of promoting strengths and avoiding weaknesses.

4. Can enhance the depth of the picture

Especially in the morning or evening shooting under the backlight, due to the different conditions of the medium in the air, the color composition has undergone different changes in the distance, the foreground is dark, and the background is bright. The foreground color saturation is high, and the background color saturation is low. As a result, the whole picture moves from far to near, and the colors change from light to dark, from light to dark, forming a subtle sense of spatial depth.

Backlight Portrait Photography Shooting Skills

1. Use light and fill light

Safer is the front side light. If the shadow is more obvious, you need to use a reflector to fill in the light on the side with the shadow. Pay attention to adjusting the distance and direction of the reflector to minimize the shadow caused by the main light. But also be careful not to overwhelm the guest, remember this is just a fill light. If you want no shadow at all, you might as well just shoot on a cloudy day.

Backlighting or side lighting is easier light to get good photos with, but it is also harder to master. Backlighting can illuminate the edges of the hair and hook it into shape. Because of the backlight, it is impossible for the light to directly hit the beautiful face, so the reflector comes in handy again. Another important role of the reflector is to “create” the catch light. In this way, the whole picture comes alive, with the finishing touch.

2. Shooting angle

The most common shooting angle should be head-up. Generally, a wide angle should be used to shoot upside down, which has a similar effect of peeping. This method of shooting is relatively easy to achieve with an LCD screen or a camera with a rotatable lens. A down shot is also a common angle. In the same scene, several shooting angles can be changed to determine the best shooting angle. A variety of different styles of photos are also available.

3. Composition

Portrait photos can usually be divided into full body, half body and close-up. As long as this mode is set, it is generally not a problem. As for the specific composition, the placement of the subject is not only in the middle, but also in the golden section. Some people like the vertical style of the main body that looks formal, and some people like the slanted or even diagonal composition, highlighting the dynamic, and so on. As long as you feel good, you might as well give it a try, anyway, don’t waste film.

4. Exposure Modes and Combinations

Choose Aperture Priority, and set the aperture to maximum. This is the more commonly used exposure mode. In addition, the “spot metering” function is also used more. If the digital camera in hand does not have a spot metering function, it is not a problem. Because the digital camera is ready to shoot, the exposure inaccuracy can be found immediately, and there is still time to make up. If you are not sure, there is also exposure bracketing that can be used.

5. Model’s body movement design

Professional models are generally subject to professional physical training. Even if no one is instructing, they can pose in a variety of poses, take the initiative to express their beauty, and change their expressions and postures at certain intervals.

This makes it easier to shoot, and a little pointing is good. But for an amateur model, you need to pay more attention to pointing her. When she doesn’t understand your intentions, you even have to pose and let her follow along. If the model has no concept of poses, then buy a few fashion magazines, “practice” behind closed doors, or watch more print ads at ordinary times, it will also benefit a lot.

Several Issues That Should be Paid Attention to When Shooting with Backlight

How ​​to avoid the contrast caused by backlight

Backlight shooting has a strong artistic effect. However, it is difficult to photograph the scene under the backlight. The main reason is that it has large contrast and many changes, and most of the main parts are located in thousands of shadows. Therefore, you should pay attention to:

  1. Don’t be fooled by the light from a large dark background in the frame when exposing, but base your exposure on the subject’s brightness reading. The rest are not counted. If shooting the sunrise or sunset, the brightness of the sun should be used as the main basis for metering. When shooting low-key portraits, you should use the highlights of the person as the basis for metering.
    1. While shooting against the light, close-up shots, especially when shooting portraits, you should choose an appropriate auxiliary light (fill light with flash or reflector).
    2. When shooting silhouettes, a bright background should be used as the basis for exposure.
    3. If shooting flowers in backlight, you should choose a darker background to contrast, so as to create a strong light ratio contrast, strengthen the backlight effect, achieve clear outlines, and highlight the artistic effect of the subject.
    4. Since the camera is still facing a strong light source, pay attention to the disturbance of glare. There should be shielding measures (use a suitable hood as long as possible, or cover the shield in front of the lens with hands, hats, cardboard, etc.), or slightly shift to the side, adjust the shooting angle, etc., to prevent the sun or light from directly hitting the lens. . Press the shutter again after the glare disappears.

    Understand the properties of light

    Photography is the art of light. The characteristics of light are divided into many aspects such as luminosity, light quality, light position, and light type. For the average amateur, natural light may be the most encountered in daily shooting.

    There are pros and cons to shooting with daylight. Strong illumination can ensure sufficient color performance. But if you need a specific light color and light position, you need to choose the correct time to shoot. In particular, friends who like to shoot landscapes will definitely understand that the waiting time is often more than the shooting time.

     Suitable shooting time

    When shooting portraits, try to avoid direct sunlight at noon. And it is best to use the golden hour to shoot night scenes. These are my experiences after countless shoots. If you miss the best shooting time, the color temperature and angle of sunlight will be very different. And the probability of getting wonderful photos will be relatively difficult. But nothing is absolute. Sometimes just when you feel that the sun is quite unsuitable for shooting and you are about to put away the camera, you can get some unexpected effects.

    Light ratio

    Backlighting, especially low-angle backlighting at sunset, tends to bring about strong shadow contrast on the subject. That will result in a large difference in light ratio. There are always a lot of details that cannot be taken into account in the light-receiving and backlighting parts, not to mention the backlight shooting.

    Even those high-end lenses worth tens of thousands of dollars have good anti-backlight performance. And it is inevitable that glare and autofocus obstacles will occur in the case of complete backlighting. For ordinary lenses, it will be more serious.

    However, nothing is absolute, as long as it is used properly and combined with a good composition, you can also get beautiful results in backlight shooting. When shooting wide-angle landscapes, macros and even portraits, you can use the light position of the backlight to get different effects.

    (To Be Continued)

Categories
Soft Lights

Photography Skills_Part XII

How ​​to Properly Grasp the Light Ratio

The effect of light ratio

The ratio of brightness between the bright side and the dark side of the photographed person, object, and scene due to the different degrees of light reception is called the light ratio. Assuming that the light ratio is 2:1 or 3:1, that is, the brightness ratio of the bright side to the dark side is equivalent to the different illumination levels of 200W:100w, or 300W:100w lights.

In terms of exposure, the difference between the former’s light and shade is 1 stop (1 stop), and the latter is 1.5 stops (1.5 stop). The contrast effect of light, dark and light between the two is obviously different, and the contrast of black and white contrast (or shade contrast) is also different.

The part of the subject that receives light directly or receives more light is the bright side, and the part that receives indirect light or receives less light or does not receive light is the dark side. The amount of light received by the bright side and the dark side is similar, the brightness is similar, the light ratio is small, and the contrast of the tone performance is also small. It seems to feel soft (if not used properly, it will feel flat). The difference between the brightness of the light and dark sides is large, the light ratio is large, and the contrast of shades is also large, which makes it appear strong (if  use it improperly, it will feel stiff).

The light ratio is large, the tone is dominated by black and white, and the grayscale in the middle is very small, which is a high contrast effect. The light ratio is very small, the tone is mainly gray, and the necessary black and white contrast is lacking, so it is a bad tone with serious gray cast.

How ​​to correctly grasp the light ratio

The mastery of light ratio is an important means of light modeling for photography. The good tone contrast effect produced by the appropriate light ratio will help greatly enhance the artistic expression of the picture. Therefore, the light ratio should be properly mastered in photography practice.

For example, when shooting portraits under direct sunlight, the dark side of the face will appear darker even though it receives a certain amount of illumination from the sky scattered light. The face light ratio can be moderately improved by adding a reflector or flash for auxiliary lighting. In addition, for lighting photography, in addition to relying on the main light for lighting, a sub-light is also used.

Measures such as multiple flashes or bounce flashes implemented in flash photography all have the effect of forming an appropriate light ratio.

What is the proper use of the light ratio?

  1. In order to express the softness of the skin of children and girls, or to take high-key photos with white and light gray as the keynote, the light ratio should be 2:3 to 3:1.
  2. For photos with a slightly soft tone, or normal color photography, the light ratio should be 2:1~3:1.
  3. For general photography of people, objects and scenery, the usual photos with moderate tonal contrast should have a light ratio of 3:1 to 4:1.
  4. Take a slightly hard photo, or take photos with backlight or side backlight, and the light ratio should be 4:1~5:1.
  5. Express the rough image and resolute temperament of young adults, or take low-key photos with black and dark gray as the keynote, and the light ratio should be 5:1 ~ 6:1.
  6. For photography of backlit portraits or backlit still lifes with bright outlines, the light ratio can reach 6:1 to 7:1.

    How ​​to Use the Interior Lighting for Photography

    Indoor light source

    For indoor lighting photography, you can use the original chandeliers, table lamps, wall lamps and other conditions. In order to increase the brightness, you can remove the lampshade, replace the milky white bulbs, and use 150w-200W bulbs for lighting.

    When shooting larger scenes indoors, the lighting positions should be properly spaced. If it is equipped with scattered light from doors and windows, the brightness will be larger. If you use a light-type color roll to shoot, you should close the doors and windows, and only use the light as the light source to avoid mixed light sources that cause color casts in the color film.

    Indoor lighting photography, due to the small area and many subjects, if the light is moved too close to the subject, the subject will be bright, and the background will be dim, resulting in uneven light. Therefore, when shooting more objects in indoor lighting photography, pay attention to arranging the lights not too close to the human body, so that each subject can receive light evenly. It is best to choose a photosensitive film with a medium speed or above to ensure that the exposure time is not too long.

    Lighting method for indoor lighting photography

    The following is a brief introduction to the lighting method of indoor lighting photography.

    Key light:

    The key light is the main light that illuminates the scene, and plays a leading role in the shape, outline and texture of the object. As the main light of the photographic lamps, there must be enough brightness, so that the photosensitive film can have sufficient light sensitivity. The arrangement of the main light should be higher than the subject to ensure the realism of the photo and achieve the effect of light and dark contrast.

    In the absence of other light sources, a main light can also be used for photography. But the contrast is large. Adding a reflector to coordinate some shadowy parts with insufficient light, the effect will be better.

    Auxiliary light:

    The function of auxiliary light is to assist the main light to illuminate the dark side of the subject. So that the dark side also shows brightness and texture, ease the projection caused by the main light. And it obtain a soft and delicate effect.

    Lighting fixtures used as auxiliary light should have lower light intensity than the main light. If the brightness is too strong, another projection will be formed on the subject. The height of the auxiliary light can be the same as the main light. Or it can be slightly lower than the main light. The position of the auxiliary light should not be too close to the subject. It can shine directly at an object. Or it can shine on a white wall and reflect it back to soften the light.

    After the position of the main light is determined, move the auxiliary light. Observe the subject and wait until the projection of the key light is diluted and the contrast is coordinated.

    The main light and the auxiliary light, used at the same time, are conducive to photographic modeling and ease the contrast. The position of the auxiliary lights should change with the position of the main lights.

    Contour light:

    Contour light is the light used to outline the outline of the scene. It can form a bright edge on the object, resulting in a clear outline separated from the scene. It can increase the three-dimensional effect of the scene.

    Most of the rim lights are backlit and placed behind the subject. The brightness of the contour light is generally higher than that of the main light. Otherwise the contour will not be displayed.

    Background light:

    The main function of background light is to set off the subject and render the atmosphere of the environment. In portrait photography, in order to eliminate the projection on the background. Or make the portrait and the background not confused, often another astigmatic light is used to directly illuminate the background. In this way, the background and the portrait can form a strong contrast of light and dark. That enhances the sense of space in the photo.

    Foot light:

    Light shining upward from the lower part of the subject is called foot light. With foot light alone, the lower part of the object is bright and the upper part is dark. It gives people a strange and weird feeling. Foot light can be used as a light distribution in indoor photography.

    How ​​to Use Outdoor Natural Light Photography

    Direct light and scattered light

    Outdoor natural light photography, the lighting source used is mainly sunlight. There are two types of natural light: direct light and scattered light. Direct light is the light that the sun shines directly on an object. This kind of light is strong, the contrast between light and dark is large, and there is a strong projection. Scattered light is the light that the sun shines on objects through clouds and fog. Relatively soft, without significant shading and shadowing.

    Outdoor photography, the lighting of natural light is changeable. Changes in weather, different shooting directions, and the angle formed by the sun and the horizon directly affect the lighting effect of natural light.

    Generally, the natural light of a day is divided into four lighting times:

    Morning and evening:

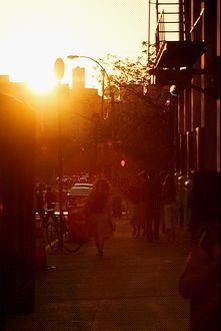
    When the sun is rising or the sun is about to set. That is, when the sun is below an angle of 15°, the light is softer and the light is pleasing to the eye. Moist air often forms morning fog or curtain haze, and the phenomenon of air perspective is obvious. The sun exposure angle is low, the scene can form a long shadow. This lighting condition is suitable for shooting content that expresses an emotional atmosphere. When shooting large scenes with backlight or side backlight, it is easy to obtain obvious air perspective effect. If there is morning glow and sunset glow, it will add more interest. You can also take the sun into the picture and process the ground scene into a silhouette or half-silhouette. That will make the atmosphere of the picture more intense and give people a feeling of vigor.

    Normal light photography time

    The period when the sun is at an angle of 15° to 60° with the ground is usually called the normal light photography time. At this time, the incident angle of the sun is moderate. The vertical and horizontal planes of the ground scene are illuminated. And the shadow part can also be supplemented by the reflected light from the ground. Therefore, the scene captured at this time is clear, bright and rich in layers. That is conducive to expressing the sense of three-dimensionality, space and texture. At this time, shooting portraits, the modeling effect is better. Such as shooting scenery and plot themes, you can get clear tones, rich layers, strong lines.

    (To Be Continued)

Categories
Soft Lights

Photography Skills_Part I

How ​​to Eliminate Reflections

The surface of many objects has a very strong reflectivity due to the high finish, and the shooting results often seriously affect the picture quality.

How to eliminate or avoid undesirable reflections in various photography practices? Examples of relevant measures are as follows:

1. Shooting objects with a larger glossy surface

Shooting glass cabinets, dark cars, refrigerators with plastic surfaces, etc., due to the large glossy surface of the subject, not only will there be a lot of messy reflections, but even the photographer himself and the camera will be reflected. Therefore, a polarized lens should be added to the camera lens to shoot.

After adding a polarizer to a single-lens reflex camera, you can observe through the viewfinder and rotate the polarizer until the reflection disappears or becomes inconspicuous, and you can shoot. If using a non-single-lens reflex camera, you can hold the polarized lens cover in front of your eyes to observe and rotate it. When the best situation to eliminate reflection occurs, keep the polarized lens at this degree of rotation and cover it on the camera lens to shoot.

2. Shoot on highly reflective glass surfaces

When photographing products in store windows, exhibits in exhibition cabinets, and goldfish in square glass fish tanks, the glass surface often has strong reflections, and it is difficult to completely eliminate it even with polarizers. In such a situation, you can use the flash to illuminate the subject at a close distance on one side or two 45° angles of the glass surface, so as to use the flash synchronous shutter and close the aperture as small as possible, so that the glass surface is underexposed or even exposed. Seriously insufficient. Thereby, the effect of natural disappearance of reflection is obtained.

3. Shooting near the window

There are no polarizers and no flash, and the glass surface of the window or cabinet is very reflective. When shooting the objects, you can simply put the camera lens close to the glass surface to shoot, so as to avoid the strong light fundamentally.

4. Use Polarizer

Polarizers can largely eliminate various reflections (polarized light) such as glass, porcelain, paint, plastic, leather, silk, jade, ice, snow, water, and even blue sky, but they can do little to eliminate the luster and reflection of metals . Therefore, when photographing shiny metal products, certain measures must be taken to soften the lighting light, so that bad reflections and flares can be eliminated.

5. Shooting of Uneven Objects

Some shiny objects, even if various measures to eliminate reflection are taken, the concave part of the object, the convex part

There may still be unsightly light spots and light spots in the parts or corners. A thin layer of soap can be applied to these parts, and the light spots and light spots will disappear. After shooting, scrub off the soap and restore the original glossy appearance of the object.

How ​​to Play the Role of Light Spot in Painting

A flare is also called a flare or bright spot. It is formed by the “directional reflection” after the light hits the surface of the object. On a smooth surface with a parabolic shape, the light produces a concentrated “diffuse reflection”, which can also form a light spot.

The light spot is characterized by small area, strong relative brightness, and generally obvious directionality. Therefore, it can only be seen in a certain azimuth when the incident angle of the projected light is small.

The flare is the brightest part of the entire frame, but it’s not necessarily very bright in absolute terms. Because the brightness difference from the surrounding environment is large, it appears very bright, so it can attract the attention of the audience.

From the whole picture, although the area occupied by the light spot is small, it can produce a certain interest and artistic effect. Catch light is a light spot formed by natural light or artificial light reflected on the eyeball of a character. Two tiny light spots make the eyes full of expression, and the spiritual outlook of the characters is refreshed. The flare can even out some objects at the edge of the frame. It can also play a positive role in connecting the various parts of the picture.

How ​​to Eliminate Flare

Spots help to express the surface structure of an object. The higher the degree of smoothness and smoothness of the object, the stronger the light spot, allowing people to perceive the surface structure and texture of different objects. Bright light spots can enrich the tone (tone) of the picture, making the picture vivid and lively.

However, if the photographer does not handle the light spot properly, it will also have adverse effects. If the spot area is too large or too bright, the picture will be out of balance, and the texture of the object will be difficult to express.

Unnecessary light spots can be eliminated by changing the shooting angle or adding polarizers and applying a transparent coating agent to the reflection of the object.

How ​​to Make the Sun Halo

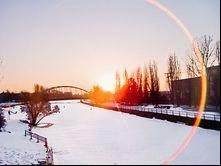
In some photographs, the sun is photographed with a beautiful halo, large or small. Through certain measures of photography, the sun can be artificially produced a halo, which appears on the photographic screen:

  1. Choose the framing angle appropriately, use tree branches, branches and leaves, or even the tips of the cornices of ancient buildings to block the middle of the sun; or shoot when a small cloud is in the middle of the sun, which can produce a halo of light.
  2. By adjusting the shooting position, look at the object with a hole in front of the lens. So that the object is smaller than the area of ​​the sun from perspective. And the hole is in the center of the sun. The result was a halo around the object that was larger than the sun.
  3. Use a medium focal length zoom lens to photograph a distant mountain in the backlight. When the mountain peak blocks the lower half of the sun, it will produce a large halo. And miraculously circumnavigates the mountain that blocks the sun – the sun is behind the mountain. But the halo surrounds the sun before the mountain.
  4. In order to effectively show the sun halo, you should choose a blue sky and clear sky and add a yellow filter to shoot. Expose according to the brightness of the sky near the sun, taking care not to overexpose.
  5. With a single-lens reflex camera, you can observe from the viewfinder and adjust the viewing angle to more effectively represent the sun’s halo. Because it is often inevitable that the angle of view of the camera lens changes slightly from left to right, and the viewfinder screen can correct the angle error that the sun halo forms and disappears suddenly.

    How ​​to Make a Light Halo

    When taking night photos of cities, airports, construction sites and even production workshops, there must be a variety of lighting on site. After photographic performance, the light can often produce a halo, which plays a wonderful embellishment role on the scene.

    The on-site conditions and shooting measures that make the light aura are:

    1. The condition for the formation of the halo is that there must be an appropriate amount of air medium on site. Such as mist, smoke, steam, moisture, dust, etc. When viewing the light directly, you can see a slight diffuse astigmatism around it.
    2. Lamps without lampshades, or even with lampshades, can directly see bright light bulbs and wicks. Because the light-emitting parts are exposed, the air medium around the light spot refracts the light from the center. So that a halo can be formed.
    3. Spotlights and searchlights with strong luminous intensity are properly blocked by certain objects. And the backlight enters the light source, which can produce a halo.
    4. The background of the light should be a dark space or a dark scene. And the faint brightness of the halo should be fully set off with the help of the darkness of the background. If there is a light-colored building behind the light, or if there is other strong light, the halo is difficult to show clearly.
    5. Since the brightness of the light halo is weak. In the case of a black background, the exposure may be sufficient to make the halo appear fully. Therefore, the exposure can be increased by 0.5 to 1 level on the basis of accurate exposure.

      How ​​to Shoot the Effect of Contour Light

      The role of contour light

      Photographic lighting serves two purposes: one is to illuminate the subject with correct exposure. Another is arranging lighting to beautify the subject. The former is the foundation of photography. For the latter, it can make a bland subject stand out and reveal the inner meaning of the subject. Although most photographers are so busy with composition, focusing and choosing colors that they ignore it.

      While using frontal lighting is the best way to ensure that your subject is evenly illuminated. It can make your subject appear less contoured. For a multi-dimensional subject, it is necessary to use the contrast between the bright part and the shadow part to express the shape and texture of the subject.

      To do this, you can move the light source as you shoot. As well as control the size and shape of the light. If you are shooting outdoors, you need to wait until the lighting is right. Or use some tricks to control the lighting in the scene.

      Emphasize the texture and shape of the subject, using strong directional lighting. Usually it’s a side light from the side, or close to a backlight. This “rim light” can cast heavy shadows. However, the angle at which the light hits depends on the actual shape of the subject. Therefore, studio light sources that can be controlled at will are very suitable for expressing such subjects.

      How ​​to Generate Contour Light

      Shooting subjects with finely patterned surfaces requires a fairly low lighting angle. For example, when photographing the lines on coins or wooden boards, the light forms a certain angle with the horizontal line. This way, the smallest parts will cast shadows. Mint patterns on coins and uneven surfaces on other objects are clearly reproduced.

      Outdoors, even difficult-to-photograph objects, such as a wrinkled piece of metal, or a pile of logs, can be effective with this lighting method. But shooting outdoors, when you have to take care of composition, how do you get the right directional light?

      If you can neither block the strong sunlight nor get the right lighting by changing the location, you have only three options:

      One is to wait for the sun to move to the right place,

      The second is to move the subject to suit the angle of the sun,

      Another is to control the scene light to achieve the effect you want.

      In the studio, it is not only the direction of the light, but also the intensity of the light that needs to be controlled. Whether the light comes from the top, bottom, side, or completely backlit, it all depends on your creative intent.

      Exposure is easy for rim-lit subjects. Expose the highlights to deepen the shadows. If you want the shadows to be richer, you can increase the exposure.

      (To Be Continued)

Categories
Soft Lights

Aperture and Speed_Part I

Aperture and Speed Are the Most Important Things in Photography

Aperture and speed actually play the same role, both control the amount of light. The wider the aperture, the more light comes in. The smaller the aperture, the less light comes in. The slower the speed, the more light will enter. The faster the speed is, the less light will enter. Aperture and speed are used together.

The maximum aperture of the general camera is 3.5 and the minimum is 22. Slow is a second, fast is a thousandth of a second. But we usually take pictures with the maximum aperture and minimum aperture. Common apertures are 5.6, 8, 11, 16. Commonly used speeds are 1/60 second, 1/125 second, and 1/250 second. What is a thousandth of a second used for? One-thousandth of a second can shoot fast-moving objects such as rocket launches, gun barrels, etc.

Large aperture and fast speed are only used in certain situations. Compared with the large aperture and the small aperture, the small aperture will produce clearer photos than the large aperture. To get a clear picture, try to use a small aperture. To highlight a person or object, use a wide aperture. Due to the large aperture, the objects in the focal length are clear, and the objects outside the focal length are blurred.

The above is a camera with a manual shutter, but a fully automatic camera cannot control the aperture speed.

How ​​to Reconcile Aperture and Shutter Speed

We often encounter such a problem in photography: the exposure of the film is correct and the composition is OK, but the recorded subject is not perfect. Its properties have not been fully revealed. Where is the source of the problem?

The main reason for this problem is often that you don’t have a good balance of aperture and shutter speed. Because for a certain exposure, there are many combinations, it can be F5.6 aperture, shutter speed 1/125 second, it can also be F8, 1/60 second or F11, 1/30 second. Only by finding the best combination among them can we obtain the ideal shooting effect.

Function of Aperture

To coordinate the relationship between aperture and shutter speed, we must first understand the respective effects of aperture and shutter speed. In addition to controlling the photosensitive effect of the film, the aperture also has three prominent functions:

  1. It has a direct effect on controlling the depth of field. Large aperture, short depth of field. Small aperture, long depth of field.
  2. It has a significant effect on expressing the texture and texture of the subject. For some subjects, the texture of the surface is often an important aspect that shows its characteristics. In order to obtain extremely clear texture texture, correct focus is a prerequisite. And a small aperture is also necessary, especially when the shooting distance is very close.
  3. Aperture plays a role in reconciling color. Using a large aperture can make some previously contrasting colors harmoniously and softly on the screen, and no longer eye-catching.

    Function of shutter speed

    The most important function of shutter speed is to control how long the light stays on the film. But beyond that, it has some benefits. For example, a faster speed can “freeze” a dynamic subject, while a slower shutter speed can show or emphasize the movement of the subject. It can also create different atmospheres on the screen according to the photographer’s creative intention.

    Highlight performance focus

    Consideration must be taken before taking a photo to determine what aspect of the subject the photo is trying to highlight. Do you want to fully reflect the movement of the subject, or do you want to reflect the appearance of the subject in detail? Or to emphasize the clarity of the background? Only when the answer is clear can you make a choice according to your needs.

    The photographer can first decide which side of the exposure combination according to the determined shooting target and method. Then based on this, according to the specific light conditions, determine the more suitable other party to form a correct exposure combination. If the subject of the shooting is boating, the photographer should set the shutter speed to 1/125 second to ensure that the image does not shake. Then choose the appropriate aperture number according to the lighting conditions of the scene.

    The Relationship Between Aperture and Shutter Speed

    Aperture and speed are both devices used to control the amount of light entering the camera, and they are related to each other and constrain each other.

    When the light is constant, the aperture is opened one step, the speed must be increased by one step, and the aperture is narrowed by one step, the speed must be slowed down by one step. For example, when using aperture 11, the speed is selected as 1/60 second. When the aperture is changed to 8, the speed should be changed to 1/125 of a second accordingly. If we change the speed to 1/30 of a second, the aperture should be best 16 accordingly.

    The mutual relationship between aperture and speed can be expressed by exposure combination:

    Aperture 8, speed 1/125 sec.

    Aperture 11, speed 1/60 sec.

    Aperture 16, speed 1/30 sec.

    Choose one of the exposure combinations, and for a given light, the camera will get the same amount of exposure. Choosing an exposure combination according to different shooting needs is one of the important basis for controlling accurate exposure. When shooting, is the shutter speed or the aperture factor determined first? We should determine this by the specific situation of the subject and the creative intention of the photographer.

    Generally speaking, accurate exposure is only one aspect of taking a good photo. If photographers want to give full play to their creative consciousness, they should flexibly master the exposure combination of aperture and shutter speed.

    The Respective Functions of Aperture and Speed

    Aperture and speed have the function of jointly controlling accurate exposure, each has its own “professional division of labor”.

    The aperture controls the depth of field, and the speed “freezes” moving objects on the film. According to the shooting requirements, in order to expose the film accurately, the photographer must learn to choose the appropriate exposure combination.

    If you are shooting moving objects, if you want to make the photos clear, you must first choose a shutter speed that can capture the moving objects, and then match the corresponding aperture. If you want to show a certain depth of field of the scene, you must first determine the size of the aperture, and then match the corresponding shutter speed.

    When choosing an exposure combination, we can use the following points as a reference:

    ①The object moves fast, the shutter speed is fast, and the aperture is correspondingly large.

    ②If you want to make the depth of field of the photo large, the aperture needs to be small, and the shutter speed can be slowed down accordingly.

    ③ The moving direction of the moving object is different, and the shutter speed is also different. For objects passing through in front of the camera, the shutter speed is generally faster. For objects moving towards the camera or away from the camera, the shutter speed can be slower.

    ④ Shooting moving objects, with the change of distance, the shutter speed should also change accordingly. The closer the distance, the faster the shutter speed.

    ⑤ The camera lens used has a long focal length and the shutter speed should be correspondingly fast.

    ⑥ Use additional lenses for photography, such as color filters, teleconverters, etc., to increase exposure appropriately. The use of different additional lenses, the increased exposure is also not the same.

    The Combination of Aperture, Shutter and Sunlight

    The brightness of sunlight varies with seasons, climates, and the latitude of the earth.

    In tropical regions, the sunlight in summer is twice as strong as in spring and autumn, and 3 to 4 times stronger than in winter. On a sunny day in summer, at eight or nine in the morning and four or five in the afternoon, the brightness of the light is roughly the same. In winter, from 9 am to 3 pm, the brightness of the light does not change much during the period.

    Around sunrise in the morning and around sunset in the evening, the light intensity is 10 times weaker than at noon. During the day, there are also changes in sunny, cloudy, and rainy, and the intensity of light also changes.

    The effect of bright light on aperture

    Strong sunlight, thin cloudy sunny day, cloudy sunny day, and cloudy day, the strong change of light among them can be understood as follows: the light of a cloudy and sunny day is twice as strong as that of a cloudy day, and the light of a thin cloudy sunny day is twice as strong as that of a cloudy and sunny day.

    If you use a constant shutter speed, the aperture is 5.6 on cloudy days, 8 should be the best on cloudy and sunny days. And 11 should be the best on thin cloudy and sunny days. If you use a certain aperture, the shutter speed used on cloudy days is 1/30 of a second, on cloudy and sunny days, we can increase it to 1/60 of a second. And on a sunny day with thin clouds, it`s better to increase to 1/125 of a second.

    Weather changes are capricious and sometimes subtle. The above changes can work as a reference for the exposure of photos taken in outdoor natural light.

Categories
Soft Lights

Intensity and Properties of Light

Intensity of Light

The intensity of light refers to the degree of light reception on the surface of the subject, that is, the illuminance. Illuminance is an important basis for determining exposure, which is proportional to the luminous intensity of the light source and inversely proportional to the square of the distance. The illuminance on the inclined plane is also related to the cosine function of the incident angle of the light.

The intensity of light in photography is often expressed by the EV (Exposure Value) value of illuminance measurement. In the shooting of outdoor scenes, the light meter or the in-camera metering system can be used to analyze the intensity of the main light and control the light ratio. If the natural light is too strong, attenuate the key light or compensate on the dark side. If the natural light is too weak, moderately increase the brightness of the picture or replace the key light with a new light source.

Nature of Light

The properties of light are represented by hard (direct light) and soft (scattered light). If there are obvious shadows after the light hits the object, it is hard light. Soft light if there are no distinct shadow outlines. It should be pointed out that the hardness and softness of the light are not directly related to the intensity of the light. Soft light can also be more intense than hard light. The light intensity of the sun on a cloudy day can greatly exceed that of a low-power direct flash.

direct light

Scattered light

Natural and Dramatic Lighting

In portrait photography, it conforms to objective physical logic and has a lighting style that unifies the source of the light source, which we call natural light effect. The works shot with natural light effects are natural, fresh, and believable.

In addition to natural lighting, there is another style of lighting, dramatic lighting. For example, if two newlyweds are looking at each other, and one is in a side-facing position, the other will be in a side-backlighting position in real visual habits. This is in line with the actual characteristics of daylight lighting.

On the other hand, if the newlyweds look at each other, one of them is in the side-beaming position, and the other side is also in the side-beaming position through the fill light. Although it does not conform to the logic of light sources in natural situations, both faces are well-layered.

This way of focusing on lighting effects and weakening the logical relationship is called dramatic lighting. The two light effects have their own characteristics, and there is no difference between them.

When using a reflector, if only moderately compensate for the shadows of the dark parts produced by sunlight to make the layers better, it can be considered as a lighting style that conforms to natural lighting effects. If through compensation, the brightness of the backlight part is greatly improved when the two people are looking at each other, and both parties are uniformly illuminated, which is in line with the lighting style of dramatic lighting effects.

6 Elements of Photography Lighting

1. Light source

Light is divided into natural light and artificial light. Natural light refers to natural light such as sunlight and moonlight. Natural light will appear particularly realistic, and the shooting can be blocked by objects or by reflection (you can use A4 paper to reflect the light). Photographers typically choose mornings and a period of time before sunset, when the light is softer. Direct sunlight at noon is not very effective.

Artificial light is often referred to as lighting, which is artificial and can change direction, angle, and intensity at will. This light is commonly used in wedding photography, advertising photography, portraits and still lifes. Flash is artificial light, but try not to use flash when shooting. It is not allowed to be used in many places during travel, and it is easy to have red eyes when you use it yourself. Improper use of flash is not good.

Natural light

Artificial Light

2. Luminosity

Luminosity: The luminous intensity of the light source and the illumination distance affect the illuminance. The amount of illuminance and the color of the surface of the object will affect the brightness. Whether your photo is transparent or not has a lot to do with the way you use the light. So pay attention to the intensity of the light, the distance, the light-receiving area of the object itself, the color of the surface and so on. According to relevant information, the illuminance of a 2-kilowatt tungsten filament lamp at a distance of 1 meter from the light source is roughly equivalent to the solar illuminance in the spring and autumn seasons in the plain area under sunny conditions at noon.

3. Light quality

Light quality refers to the properties of light gathering, scattering, soft and hard. Spotlight is characterized by coming from an obvious direction, producing shadows that are clear and intense. Astigmatism is characterized by coming from several directions, producing shadows that are soft and not sharp. How soft or hard light is depends on several factors, with narrow beams generally harder than broad beams.

Hard light can make the subject produce a strong contrast between light and dark, which is helpful for the performance of texture. Soft light is good at revealing the shape, shape and color of objects, but not good at expressing texture and details. Photographers often use soft light for portraits.

​4. Light type

Light type refers to the effect of various light rays when shooting. Like what key light, fill light, trim light, contour light, etc.

(1) Key light: Also known as “shaping light”, it refers to the main lighting light used to display the scene, express the texture, and shape the image.

(2) Auxiliary light: Also known as “fill light”, it is used to improve the brightness of the shadow part generated by the main light, reveal the details of the shadow part, and reduce the image contrast.

(3) Modified light: refers to the enhanced shaping light added to the part of the subject, such as hair light, eye light, flare light of craft jewelry, etc.

(4) Contour light: refers to the light framing the outline of the subject. Backlighting and side backlighting are usually used as rim lights.

(5) Background light: The light is located behind the subject and illuminates the background. Used to highlight the subject or beautify the picture.

(6) Simulated light: also known as “effect light”, the auxiliary light added to simulate a certain scene light effect.

These lights are all a function, in order to highlight the subject.​

5. Light ratio

The light ratio refers to the difference in the amount of light received between the bright part and the dark part of the main part of the subject. The larger the light ratio, the larger the contrast, which is conducive to the performance of the “hard” effect. The light ratio is small, the contrast is small, which is conducive to the performance of “soft” effect. For example, a large light ratio is commonly used for photographing the elderly, and a small light ratio is commonly used for photographing children.

What many photographers call hard tone is high contrast, and soft tone means low contrast. In portrait photography, contrast can well express the character of the character. High contrast appears strong and powerful, and low contrast appears soft. In landscape photography and product photography, high-contrast texture is hard, while low-contrast is objectively dull.

6. Light Color​

Light color refers to the “color of light” or “color component”. When we say “Light color”, it usually refers to as “color temperature”. There are many data for color temperature, such as the color temperature of sunlight at noon is 5400k, and the color temperature of flash is 3800k.

The lower the color temperature, the more red components, called warm light. The higher the color temperature, the more blue components, called cold light. Warm and cool can help with color correction in post. Cool tones refer to cyan and blue, giving people a cool feeling, thinking of blue sky ~ ocean ~ moonlit night and so on. Summer will feel refreshing, and many young people like cooler colors. Warm colors refer to red, orange, etc., giving people a warm feeling. Can make people think of the sun, flames, etc., giving people warm and active. After sunrise, the light is warm before sunset.

Cool color

Warm Color

Categories
Soft Lights

Portrait Lighting Guide – The Most Critical Elements of Photography

Guide to Lighting for Portrait Photography – Discover the Right Light Outdoors

If a photographer consciously trains himself to “see the light,” he can see at a glance how light is being used in any picture.

Learning to “see the light,” understanding how light shines, and appreciating good lighting are the first steps to taking great photos. But simply appreciating good lighting is not enough. It is a long process of training and cultivation to truly master the skills of using light. At least several years of persistent observation and learning are required.

Like other comprehensive skills learning, the more you understand, the more you will find that there is a longer way to go, which is the so-called “learning without end”.

True photographers spend their entire lives studying the interplay of light and shadow, forming a lifelong research habit. Wherever he goes, on any form of object, indoors or out.

When he goes out and hangs out in the woods, he studies the different shades of light created by leaves. Looking at the leaves, we can notice the different effects of the light on the bright new leaves and on the dull old leaves, and then we can change the camera position according to the direction of the light to emphasize these differences. In fact, the photographer’s ability to control and exploit this infinite variation in light is even more important to the success or failure of the final image than the quality (or intensity) of the light.

In this image, the photographer used the canopy to block the overhead light, allowing the light to shine from the side, and used a warm reflector to reflect the fill light on the ballerina/model to create a beautiful effect.

Guide to Lighting for Portrait Photography – Discover the Right Light Outdoors

As the twilight light sweeps obliquely across the surface of the building, the light reveals and portrays the textures and textures hidden in the picture, as beautiful as textiles.

Sometimes natural light and artificial light can complement each other to the perfect effect. So the photographer’s shooting timing determines whether or not to capture the perfect moment. Here, the photographer captured multiple light sources at the same time with a 15s exposure just before dawn. The picture shows the view of the Alamo Square in San Francisco. The long exposure was to incorporate into the frame both the tungsten and mercury streetlights in the building, which illuminate the sky so beautifully.

Guide to Lighting for Portrait Photography – Discover the Right Light Outdoors

The light enters from a large window and penetrates the mesh on the bride’s veil, creating a soft and wonderful surrounding light, which just sets off the bride’s quiet state of mind.

Simplicity is Fundamental

The best lighting is minimalist. Most successful photographers recognize the fact that the way you use your light shouldn’t be a major consideration. Even if you use 5 lights to set the light in perfect harmony, the effect of the subject is always more important than the effect of the light.

A beautiful photo can often be taken with just a light and a reflector, nothing more. Ultimately, minimalist lighting techniques allow you to control the light however you want, allowing it to portray your subject and achieve unexpected results. This is much better than exaggerated, complex lighting.

It goes without saying that simplicity is a fundamental factor in successful lighting. In nature, at least on this planet, “there are no two suns” and life revolves around a single sun—so we have only one true source of light. But often, we are always subconsciously troubled by the differences we see. This difference stems from the multiple light and shadows generated by different light sources that interfere with each other.

On the other hand, if there was only a single direction of light, and therefore only a corresponding set of shadows, we would be content to accept such a minimalistic “normal state”.

Learning to see light sometimes means looking in special places. “The Wedding in Philadelphia”. Here the photographer captured the beautiful reflections in the puddles on the road.

Portrait photography in natural light

Natural light is always beautiful, especially when you know how to use them to take a great photo. What do we need to know about shooting portraits with natural light? Why do many photographers prefer to shoot portraits with natural light rather than artificial light?

First of all, it is real. Although artificial light can also create a realistic feeling, for most photographers without much experience, the most realistic feeling must come from natural light.

If the artificial light source is used too much, it will obviously give people a false feeling, making it difficult for the viewer to connect with the content in the picture. If the brain focuses on the strange light, it is likely to change the expected mood of the image.

Advantages of natural light

Of course, the most important thing is that natural light is the most economical way for us. We may not have the time to learn how to set lights, nor do we have so many professional lighting equipment to do it. And using the natural light that nature provides us is naturally the best lighting for most non-professional photographers like us. We just need to buy cameras and lenses, and leave the rest to the sun.

And using natural light will save us a lot of time, we don’t need extra time to prepare the lighting.

Of course, that’s not to say lighting isn’t important. In professional photography, planned lighting is still the most important part. But when we practice our hands, natural light is like a natural light training ground. As the earth moves, the angle of sunlight and the quality of the light are constantly changing over time. We need to be familiar with the characteristics of light in each time period to get the effect we want. Even cloudy weather and rainy weather have different lighting.

Issues that need attention

However, this is also the biggest disadvantage, or weakness, of shooting with natural light. We have to have a sense of time, and generally speaking, there are only a few hours of the day that are suitable for us to take pictures. At other times, the light is either too bright or too hard to help us get a good image. Therefore, we had to allow ourselves to complete the shooting within a limited time. It can cultivate our sense of time, and it can also urge us to be more efficient.

Compared with artificial lighting, which is a skill that can be learned by serious study, I think it is the biggest thing to be able to take advantage of the natural light under the existing conditions to take pictures and take the best pictures in the current environment at all times. talent.

What’s more, practicing taking photos with natural light can save us a lot of time with artificial lighting. We can spend a lot of our time on pre-preparation and post-processing. Some photographers used to prefer artificial light sources, and each shot required more than 10 hours (including pre-prep time and post-cleaning time). After switching to natural light, the entire shooting process took only three or four hours to complete.

Utilize natural light according to local conditions

Naturally, nothing is perfect, and the flaws of natural light are limitations. We are always passive when it comes to natural light, especially after the sun goes down. Unless you’re shooting city lights (which is not natural light, of course), there’s no way to do it. In the studio, we can use artificial light to simulate many effects of light that natural light cannot achieve.

It is good to use natural light for daily practice. But no matter what, it is still necessary to adapt to people, places and materials, so that we can take the most ideal photos in our minds.

Categories
Soft Lights

Light in Photography (5) – the Use and Control of Light_Part III

Bottom Light

Also called basic light or base light. Its function (artificial light photography) is to make the darkest parts have a layered expression, balance the light contrast and shape the light. Its light position can be in two places, one is the camera position left and right, and the other is perpendicular to the optical axis of the lens, that is, the top light position. Generally, it depends slightly on the camera position. Since there is an auxiliary light near the camera position, it is now mostly placed in the top light, and the light is soft and the best.

Above we discussed key light, fill light and backlight, which are the three main lights for photographic styling. Due to the particularity and common use of the bottom light, we will explain it separately.

In addition, there are background lights, decorative lights, effect lights, modeling lights, catch lights, glow lights, and low lights. We illustrate this in tabular form below.
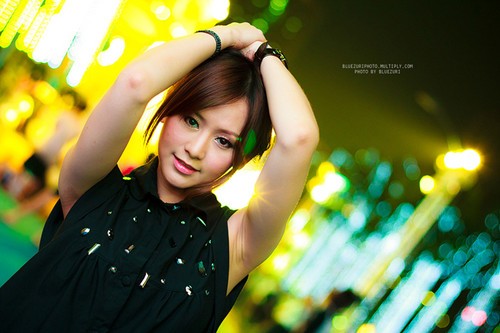
Balance of Light

The so-called light balance mainly refers to adjusting the relative brightness of each light when artificial light is used for photography, so that the light-dark relationship of each part of the model and the overall contrast of the picture are appropriate, so as to achieve a visually balanced effect of light and dark distribution.

It is generally based on the brightness of the key light. This job is easier said than done. Mastering the knowledge about light is only a preliminary step, and it can only be mastered by the organic combination of knowledge and practice and the accumulation of experience.

Under natural light conditions, it is also a light balance to fill in the light for people or block the bright spots of a small range of scenes.

Light Control

The control and selection of light are as follows:

The direction, angle, quality (color temperature), nature (soft and hard), intensity (light and dark), distribution and balance, shadow, contrast, etc. of light. Generally speaking, it involves all the light involved in photographic modeling, and its purpose is only one: to perfect the light modeling and organically combine it with other photographic modeling methods, so as to improve the artisticization of image modeling.

For the control of light, it mainly refers to the adjustment and control of all kinds of light in artificial light photography to make it meet the requirements of perfect modeling. In natural light conditions, photographers have limited means and ability to control light. The demand for light mainly depends on the choice of natural light conditions. Control can only be limited to local and small areas.
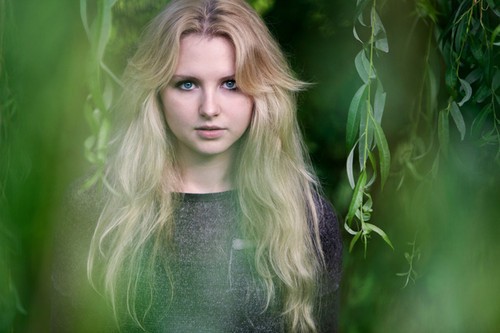
So, how to control light in photography using light? Below we briefly introduce several methods of artificial light control and natural light selection and control.

Note:

  1. Color temperature control and contrast control have been discussed in another article, and shadow control can be found above.
  2. The light used for artificial light photography is easy to understand in practical application. There is a great distance between what is written or written and what is actually used.

Artificial Light Control

With the use of artificial light in photography, the photographer has the initiative to control the light, and can adjust the light of all light sources at will. Adjustment is relatively easy, but control is not very easy. For example, in commodity photography, it takes a long time or even a few days to arrange, adjust and control the light to complete a photo when the performance requirements of the commodity are relatively high. There is also an iterative process of trial shooting, adjustment and control, re-trial shooting, re-adjustment and control.

1. Light intensity control.

Adjust the output light power of the lamp, adjust the distance between the lamp and the subject (pay attention to the irradiation range of the light).

2. Control of beam shape (ie, light irradiation range).

Use the four-in-one light blocking plate and light blocking tube (sleeve) configured by the lamp. Various light-blocking plates and black light-blocking paper (generally resistant to high temperature) can also be made to control or limit the light in a range or part.

3, the nature (ie soft and hard) control.

In order to soften the light, diffuser, soft yarn, metal gauze, sulfuric acid paper (high temperature-resistant frosted white paper), etc. can generally be used to block the light in different ranges and degrees. In addition, reflective methods can also be used, such as turning the lamp against a reflective umbrella, reflecting on a white plane, etc.
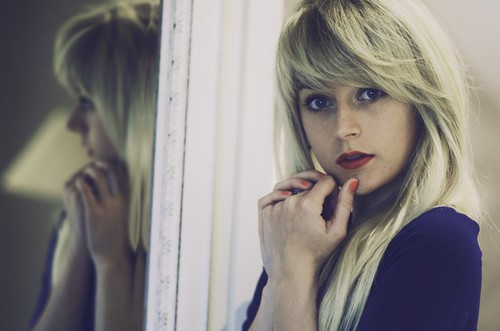
4. Local restrictions.

It refers to the above-mentioned uncontrollable local light. If you want to control the light in a certain part of the beam to cause the subject to be too bright, the light is too hard or the shadow, etc., a small and flexible light blocker should be used to block the light.

Generally, they are self-made light-blocking utensils similar to fly swatters. They come with different lengths, squares and circles, different sizes, and different light transmittances (black, milky white). The camera assistant needs to be hand-held when shooting, and the light is concentrate.

5. Template.

There are many shapes of the template, and the common ones are honeycomb, pane, annular water pattern and various patterns. Its control of light is mainly to obtain a certain pattern or light and shadow effect.

 Control of Natural Light

For photography in natural light, the main thing a photographer can do is choose. Photographers can choose appropriate lighting conditions according to their expression of the subject, the performance of the subject and the desired picture effect. Through the discussion of light above, we should know how to choose natural light conditions. However, the control of natural light is very difficult and can only be local or small-scale. In the case where the shooting point cannot be changed to determine the lighting conditions, there are the following methods to control the light:

1. Blocking method.

In photography, the bright spots and color spots that cannot be selected and cannot be avoided in small areas can be controlled by the occlusion method. For example, if the clothes of the characters or the foreground are too bright, use the branches and leaves to create artificial shadows or the foreground. And reduce the area of ​​excessive brightness.

2. Concealment.

For example, the background of the subject has objects, lines or colors that are not in harmony with the subject. If it get blur, we usually use artificial foreground to hide them.

3. Local fill light.

Local fill light is to coordinate the contrast of the scene or to emphasize the color and characteristics of a specific scene. And to fill in the local dark scene nearby to reduce the contrast of the scene. For example, when the backlight or side light makes the contrast of the character’s face too large, you can use the reflector and flash to fill in the dark part.

4. Medium gray mirror.

Use a gradient gray filter to control some of the natural light. Such as controlling the contrast between the sky and the ground scene. There are also neutral gray mirrors with different gray levels for overall control of natural light. For example, when shooting buildings in prosperous urban areas, because there are too many people and cars on the ground, the pictures get cluttered. This will affect the performance of the subject. Use a gray mirror with a higher gray level to control the light intensity and prolong the time for the camera’s photosensitive medium to obtain the corresponding exposure. The moving body on the ground is blurred, the main body is highlighted, and the artistic effect is strengthened. We also use this method in film photography to shoot night scenes with backlight during the day.

The Concise Effects of Various Lights

Key Light – The main light that hits the model, casts the main shadow, and is the most attractive highlight.

Fill Light – A soft light that illuminates the shadows cast by the key light.

Backlighting – Light from behind the model, generally illuminating the outer edges of the model’s silhouette.
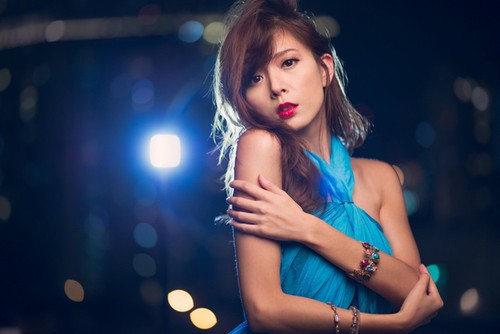
Shaping Light (Accent Light) – Broadly refers to any hard light that reveals the surface structure and morphology of the subject.

Effect Lights (Basic Lights) – Lights that emphasize a particular bright spot.

Bottom light – diffuse light that evenly illuminates the entire scene to prevent partial underexposure.

Backlight – Dedicated light that illuminates the background.
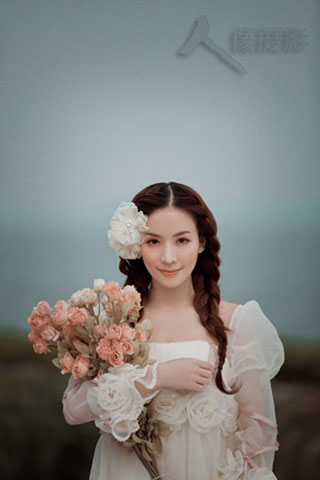
Catch light.

The reflection of the light source by the glasses (a small spot is formed on the eyeball), usually a low-power light.

Hair Lighting – Local light that expresses small parts of hair and accessories.

Apparel Light – Light used to express the style, silhouette and texture of clothing.

Low Light – Light below camera height for special effects or to blend shadows and sculpts.

Contrast Control Light.

A soft light close to the camera. It illuminats the dark side seen from the camera angle to balance the light contrast of the model.