Categories
Soft Lights

Eight Tips for Photographing Interiors

1. What is an Iterior Scene?

(1) Interior scene

Interior scenes have two meanings. In a broad sense, interior scenes refer to the sets set up in the studio (including the “exterior scenes” set up in the studio), which generally refer to film shooting.

In a narrow sense, there are two kinds of interior scenes. One refers to the indoor scenes built in the studio, such as courtyards, houses, indoor buildings, and spaces. Usually built according to the design drawings.

The other refers to the indoor shooting of real scenes, such as actual scenes such as offices, classrooms, and living rooms.

(2) Favorable conditions of interior scenery

  1. Not affected by natural conditions such as seasons and weather.

General wedding photo studios will be equipped with air conditioners, and the indoor temperature can be adjusted freely. Brides take wedding photos indoors without being affected by the temperature, even if they wear a wedding dress in winter, it is not a problem.

  1. The layout of the scene has a certain degree of freedom and flexibility.

During the shooting process, the scene style can be determined according to the subject of the shooting. For example, if you focus on cute pet series, you can prepare small animals such as cats and dogs. If you focus on retro series, you can also use old European elements in the nineteenth century to reflect the sense of age.

(3) Disadvantages of interior scenery

The layout cost is high and the cost is high. For example, for large-scale buildings used for film and television construction, ancient architectural arrangements cost more.

Secondly, the collocation of some scenes is mostly fake and not fresh. For example, some indoor decorations, such as flowers and bamboo, have heavy traces of artificial processing and are not fresh.

2. Indoor Space Photography Skills

Our subjects are mainly indoor places, such as companies, hotels, libraries, homes, etc. These are interior scenes that are closely related to our lives.

The following also officially enters our theme: How to take satisfactory photos in indoor space?

(1) Equipment preparation

The first is the arrangement of photographic equipment.

Generally speaking, the light in indoor spaces is mostly dark, and it is impossible to have bright light outside. Choose a camera with a high sensitivity to flexibly grasp the light source.

In addition to the fuselage, a tripod and a prime lens are also required. A tripod can give the camera a stable shooting environment. For fixed-focus lenses, you can refer to 20mm, 24mm, and 35mm.

(2) Shooting method

i. Partial close-up

The interior shooting is not completely required to pay attention to the complete image or the square composition. No matter where the space is small or the details are outstanding, you can capture a unique beauty.

The premise of taking these kinds of photos is to be careful. Observing through different perspectives, inspiration will always burst out inadvertently, capturing unexpected surprises. Such as corners, balconies, windowsills, potted plants, etc. are all elements that you can consider.

The easiest way to shoot a part is to focus the lens on the subject, highlight the focus of the photography, and at the same time pay attention to the overall composition.

ii. Light flow

Light and shadow are the soul of photography. Relying on the changes of light and shadow in the same interior space, the visual differences presented in the early, middle and late time periods of the day are also very obvious. Therefore, exploring the use of indoor light and shadow is also an important topic for many photography enthusiasts.

For example, on a sunny day, the light is bright and strong, and it is easy to create a strong contrast of light and shadow, and the space has a strong three-dimensional sense. On cloudy days, the light is soft and delicate, the transition between light and dark is soft, and the overall balance is relatively balanced.

If the light contrast is too large, in order to adjust the light and dark contrast, white cloth and reflectors can also be used to balance the light.

iii. Human factors

Indoor shooting subjects are generally still objects, and most of the photos rendered are a visual sense of the environment. According to the difference of interior layout, it shows different styles, or simple and stylish, or spacious and bright.

If people are included in the shooting elements, the atmosphere they create is also very different. The characters become the main body, the background environment becomes a contrast, and the photos will exude different emotional colors due to the performance of the characters. Therefore, when pursuing the diversification of shooting, you might as well include people in the lens, and the content of the expression will be richer and more diverse.

iv. Diagonal composition

Diagonal composition is a common method for photographing architecture. It is also very practical in interior spaces. Find the diagonal position in the frame and place the subject on the diagonal. The proportions of the pictures are coordinated, which not only highlights the protagonist, but also makes the layers more distinct.

Therefore, you can use more diagonal lines when shooting indoors. Finding lines can complete the picture composition faster, and these lines can be selected according to the actual situation, such as stairs, light, corner lines, etc.

(3) 8 precautions for indoor shooting

1. Be sure to use a tripod to shoot still life steadily.

2. The indoor light is dark, and the ISO should be adjusted reasonably.

3. Keep the exposure compensation negative to get more picture details.

4. The shutter speed can be a little slower, a tripod comes in handy.

5. The composition of the living room and conference hall is generally centered, symmetrical and wide-angle.

6. The bathroom and bedroom can adopt diagonal composition.

7. The general indoor space shooting pays attention to horizontal and vertical.

8. Occasionally change the angle of view, and shooting through windows and cave doors can add more interest.

Categories
Soft Lights

Several Useful Tips for Digital Camera Photography

You must have heard this saying before: Digital cameras (DC in the following) are omnipotent. You just press the button and a great photo will magically appear in front of you. The better the camera, the better the photos it takes. Is that true? Of course not!

The truth is that you can take a great photo with a simple consumer-grade goofball DC, and you can take a rubbish photo with the most expensive DC. Beautiful photos are not created by cameras, but by photographers. With a little knowledge of photography, and a desire to keep improving, you can use your little DC to take big shots that could make it to Time magazine.

To help you fast-track your journey to becoming a great photographer, here are 10 tips that will allow you to take pictures like a pro without spending a fortune on expensive equipment.

1. Warm up Your Photos

Have you ever noticed that sometimes the photos you take have a cold feeling? If the answer is yes, then you are not alone. The DC’s default white balance setting is “auto”, and while that’s fine in most cases, it can sometimes make the scene too “cold”.

When you’re shooting outdoor scenes, especially when the sun is shining, try setting your white balance to the “cloudy” setting. Yes, it is the “cloudy” gear. This change is the same as adding a warm filter in front of your lens. It warms up the image by making the reds and yellows in the photo fuller.

If you don’t believe me, try it. Take two sets of photos outdoors with auto white balance and cloudy white balance, then compare them on your computer, and I guess you’ll like the warm-looking set.

2. Use Sunglasses As Polarizers

If you really want your photos to punch, keep a polarizer handy. Polarizers are a must-have filter for every photographer. It filters out glare and those unexpected reflections, making your photos more saturated, especially for the sky.

What did you say? Your DC cannot add filters. Don’t be disappointed, I have a trick that I’ve used on my fool DC for years. If you have a decent pair of sunglasses, just take it off and put it in front of your lens. This is your polarizer. Of course keep them as close as possible to your DC’s shots, don’t block one part but not that part.

For best results, point either of your shoulders at the sun. The polarizing effect is best when the light source is at a 90-degree angle to the subject.

3. The shining style of outdoor portraits

One of the undiscovered features of digital cameras is fill flash or flash on. By manually controlling the flash, rather than letting DC decide when it should and shouldn’t, you’re taking a critical step forward in creating great outdoor portrait shots.

In forced-flash mode, the camera first exposes the background and then illuminates the subject just right (this is a bit awkward). The result is a professional looking photo where everything looks so comfortable. In fact, wedding photographers use this technique all the time. I used to wonder why they used flashlights in broad daylight.

When you use this technique, you can have your model stand in different light paths, such as side lighting, or even backlighting. You’ll get that kind of photo with sparkling edges of hair, and that way your model doesn’t have to squint for the sun to shine. Of course they also look more natural.

Remember, most cameras have built-in flashes that are only 10 feet (3.05 meters) or less, so you should never stand too far from your model.

4. Crazy Macro Mode

Remember when you discovered a whole new world in the grass beneath your feet as a child? As you get closer to the ground, you see a vast world of creatures that you’ve never seen before.

These days, you probably don’t want to stick your rotten belly to your backyard turf like that anymore. But if you close up and start exploring that microscopic world in more detail, you’ll be rewarded enormously. That’s brand new content that you’ve never shot.

Even the simplest objects take on a fascinating new look in macro mode. The best part is that DC is the best at doing this.

Find the button for macro mode, which is often a small flower, press it to turn on macro mode, and get as close to what you want to photograph as the camera will allow. Once you’ve composed your image, half-press the shutter to let the camera focus, and when it’s focused, press the shutter to take the photo.

Remember that in macro mode, you’ll get a very shallow depth of field (that kind of bokeh effect). So it’s important to get the focus right to the subject you’re shooting.

There are requirements for the focal length in macro mode. Generally, the macro mode of the large zoom camera fails at the telephoto end.

5. The horizontal line that always hurts

For some mysterious reason, the vast majority of humans can’t hold the camera flat when shooting with their DCs with LCDs. The result is a skewed sunset, a sideways horizon and the ubiquitous Leaning Tower of Pisa.

Part of the reason is that the camera’s lens is distorted when it is imaged on the LCD. A tree that looks upright and straight will appear curved inward in the lens.

What should you do? First remember that there is no one-size-fits-all or one-size-fits-all approach. But you can improve by remembering a few tricks.

First of all, it’s important to realize that it’s important to shoot as level as possible. If you’re having trouble composing your shot, try keeping your camera level, then gently rotate it horizontally a slight angle to take another shot. Of course you can take a few more pictures and compare them, maybe there will be one that feels right to you.

If you practice the technique of taking horizontal photos regularly, it will slowly become a habit, and you will find your landscapes take a class.

6. MMC card

Buy a memory card large enough so you don’t miss out on good photos just because the card is full.

Today’s memory cards are so cheap…this is no longer a problem.

7. Always use the highest resolution

Another great reason to buy a mass memory card is that it allows you to use the maximum resolution of your camera.

Be sure to set it to the highest resolution. Because if you accidentally take a great photo, you don’t want to just share it with people on your computer.

I always set the photo quality to the highest, very fine level. Although the size of the photos has increased dramatically, as the author said, you will definitely not regret doing so.

8. Mini tripod

I have occasionally heard someone say, “He must be a professional because he uses a tripod.” Of course, whether you use a tripod or not has nothing to do with your photography skills. But, this three-legged guy is really useful.

The problem is that tripods are cumbersome to carry around.

Good news for DC owners, the UltraPod II, a mini tripod that stows away in your pocket. It can be used alone or tied to something (like a railing).

9. The fun of selfie mode

Now that you have a mini tripod in hand, you can try another feature that hasn’t been developed yet – selfie mode (self timer is that timed shot). This feature allows you to take a photo after a period of time (up to 10 seconds) after pressing the shutter, and it solves another problem that has plagued people for many years – no photographer’s family photo.

Hey, don’t think you’re ugly and don’t want to be in the group photo, you can give the camera to a stranger and ask him to help. Of course, you run the risk of them being unreliable.

Selfie mode is the alternative. Fix the camera with a tripod, adjust the settings, press the shutter, and then quickly stand at your preset position, wait for a while and it will be OK.

Selfie mode is even more powerful! When you are shooting night scenes with long exposures (such as those spooky photos of car lights on the road), in order to avoid camera shake when you press the shutter with your hand and blur the photo, you can use the selfie mode to perfectly overcome this problem .

10. Running water under long exposure

The pictures I take, no matter how wonderful, are hard for my family to see. But there is one exception. Recently my sister commented on a set of my water-themed photos that they were like paintings. You know, that’s a great compliment to me.

She was talking about one of my favorite photos: shooting water in slow motion. It is to use a slow shutter speed and shoot that kind of flowing water to create a soft and dynamic feeling.

Put your camera on a tripod, force a slow exposure (like 1 second or more), and you’ll get this painting-like flowing water curtain. Aperture priority mode, f8, shutter speed 1 second, polarizer, mini tripod.

Because of the long exposure time, you will need a tripod for stability. Of course, you have to use the selfie mode. Use aperture priority mode and set your aperture to f8 or even smaller, which will give you a great depth of field while slowing down the shutter. Shooting water in the shade, water in the sun will not allow you to use such a long exposure time.

Another tip is to keep your sunglasses in front of the camera. In addition to the role of the polarizer, it also blocks some sunlight and makes it possible for you to get longer exposure times.

Categories
Soft Lights

The Use of Light in Digital Photography

The Use of Lighting in Digital Photography

Light is the most important component of photography, and the processing of light is often more important and more difficult than other elements. Light is not only the key factor to make the target image on the CCD of the camera, a good photographer can also express different moods by using light of different properties.

There are three elements to any kind of light, namely intensity, direction and hue.

Light Intensity

Intensity describes the intensity of light, and the light emitted by various light sources has a certain intensity.

Glare is usually caused by direct light from a strong light source. Of course, the weak light source can also form a strong beam by concentrating. Strong and direct light will cause obvious shadows and clearly show the outline of the object, so it is often used to outline the outline of the object. Bright light can also increase the contrast of light and dark on the subject, to emphasize the texture of the surface of the object, the contrast between different colors or tones. The weak and scattered light can reduce the contrast between light and dark of the subject, making the surface of the object look smooth and detailed.

For photography lighting, strong light sources are often used as the main light, which is the main source of shooting lighting. The weak light source should be used as an auxiliary light, which can reduce the strong shadow caused by the main light without casting excess shadow.

However, if the light is too strong, you will not get a good effect, because the shadow formed under the strong light will be too exaggerated, and the light and shadow effect will be unnatural. When shooting, if the light is too strong, you can reduce the intensity of the light by installing a diffuser screen or a reflector.

Compared with strong light, the light and shadow effect of astigmatism is softer and more natural. It can make the light-receiving surface of the main body uniform and the contrast is moderate. It is an ideal light source because it is limited by the directionality of the light source. In the filming of feature films, astigmatism is used the most.

Illumination

Illuminance (lux), represents the luminous flux received per unit area on the surface of the subject. 1 lux is equivalent to 1 lumens per square meter, that is, the luminous flux irradiated vertically by a light source with a distance of one meter and a luminous intensity of 1 candle per square meter of the subject. Illuminance is an important indicator to measure the shooting environment.

When the sun is the strongest at noon in summer, the outdoor illumination can reach more than 100,000 lux, and it is easy to form obvious shadows. This is not necessarily an ideal shooting environment. Most of the indoor illumination is below 300 lux, and general cameras can take pictures under this illumination.

However, the lower the light level, the more likely it is to produce gray or grainy images. So it’s best to increase the lighting. The ideal shooting conditions are around 10,000 1ux. And it is easy to get clear and bright images when shooting in such an environment.

Illuminance is not only related to the luminous intensity of the light source. But also to the distance from the light source to the subject. In general, when the distance between the subject and the light source is constant, the illuminance of the subject is proportional to the luminous intensity of the light source.

Conversely, when the luminous intensity of the light source does not change, but the distance from the subject changes, the illuminance on the subject is roughly inversely proportional to the square of the distance. When a light source illuminates the front and rear two subjects, the closer the light source is, the greater the difference in illuminance obtained by the two subjects. The farther away the light source is, the closer the two subjects receive the illumination.

Direction of Light

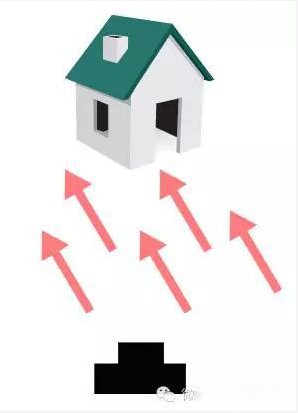
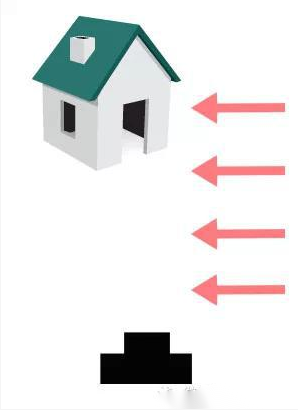
All light is directional, a concept that is easy to understand. According to the relative position of the light source, the subject and the horizontal direction of the camera, light can be divided into three basic types: front light, back light and side light. According to the relative position of the three in the longitudinal direction, it can be divided into four types of light: top light, overhead light, flat light and ascending light.

1. Forward light

The camera and the light source are in the same direction, facing the subject. So that the side facing the camera lens can easily get enough light, which can make the subject clearer. According to the different angles of the light, forward light can be divided into two types: positive light and side light.

Positive light is the light that hits the subject directly in the direction of the camera lens. If the light source is at the same height as the camera, all parts facing the camera lens will receive the light so that there is no shadow at all.

In images shot with such light, the contrast of the subject will be reduced. And the three-dimensional effect will be lacking like a plan view. Shooting under such light, the effect is often unsatisfactory, and the subject will lose the original light and shade level.

The side light is the light from the left or right side of the camera to the subject. When shooting, the side light is the ideal light for shooting with a single light source. In most cases, we generally use 25°~45° side light for lighting. That is, the angle formed by the connection between the camera and the subject and the connection between the light source and the subject is 25°~45°.  At this time, the subject facing the camera is partially illuminated, and a partial projection occurs. This can better represent the facial expressions and skin texture of the characters. It not only ensures the brightness of the subject, but also makes the contrast of light and dark properly, and has a three-dimensional sense.

2. Backlight

Backlighting is light produced by a light source from behind the subject. In the image shot under the backlight, the subject is easy to form a silhouette. The subject is bright, and the outline of the subject is particularly prominent.

Backlight photography has always been a major taboo in photography. Shooting against the light tends to make the faces of people too dark, or the shadows cannot be seen clearly. Improper use will also result in incorrect subject color, underexposure and other phenomena. If you are not shooting an alternative film, then try to avoid shooting in backlight. If you have to shoot under such conditions, you should use a reflector to increase the auxiliary light.

3. Side light

The light source of the side light is the light that irradiates the subject from the side on the direct side formed by the camera and the subject. At this time, half of the front of the subject is illuminated by light. The shadow is slender, the projection is obvious, and the three-dimensional sense is very strong. That is very expressive for the majestic and tall buildings. However, due to the strong contrast between light and dark, it is not suitable for expressing the delicate texture of the subject.

4. Top light, overhead light, flat light and elevation light

Top light is usually to outline the upper part of the person or object, isolated from the background. However, the light shining on the top of the subject from above will make the scene flat, lacking in layers. And the color reproduction effect is also poor. This light is rarely used.

The overhead light is the most used of these four kinds of light. When dealing with the main light in general photography, the light source is usually arranged at a position slightly higher than the subject and at an angle of 30°~45° to the ground. This kind of light can not only make the front of the subject get enough light. But also have a three-dimensional sense, and the shadows formed will not be too obvious. The effect will be better if you use the side-smoothing position.

The flat light is the same as the straight light, which is not very ideal light. Even in the position of the side light, the shadow formed is a bit rigid, not as natural as the overhead light. Upshot light is also a rare lighting method. Putting a light source under the subject and shining upwards creates a spooky effect.

Light Shades

Like all things, light also has color, and different lights have different hues. Usually we use color temperature to describe the hue of light. The higher the color temperature, the more components of blue light. The lower the color temperature, the more orange-yellow components. Under the illumination of light with different color temperatures, the color of the subject will change. In this regard, white objects are most noticeable: under a 60W bulb, white objects will appear with an orange tinge. But under a blue sky, they will have a bluish tinge. The camera restores the original color of the subject by adjusting the white balance.

Categories
Soft Lights

How to Take Beautiful and Clear Portraits in Backlight Conditions

The Meaning of Backlight

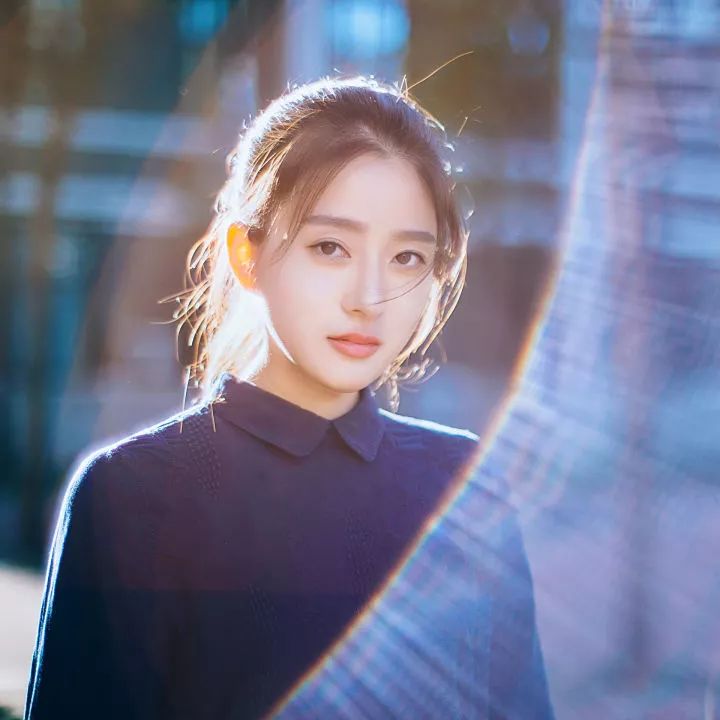
If the backlight is used well when shooting portraits, the picture will be very beautiful. The hair and body outline the contour line, and the whole person will be more three-dimensional, just like this. ▼

When it is not used properly, the face will turn black. Maybe this beauty has a grudge against you? ▼

Some people ask, where is the problem? How to avoid this embarrassment? In fact, you can try to shoot like this!


1. Choose the Right Scene and Time

After choosing the right venue and time, you will be successful for the most part. There are two important time points for shooting backlit portraits.

One is half an hour before the sun comes out in the morning, and the other is half an hour before the sun sets in the afternoon. The slanted light can give people a very beautiful contour light.

As the light fades, the rim light also slowly disappears. Of course, if there is a jungle block, as long as it is not in direct sunlight at noon, it is also the best time to shoot backlit portraits.

2. Use Spot Metering

In backlight, to ensure that the face is not black, the easiest way is to use spot metering. Spot metering only guarantees about 5% of the metered area, when the environment is too bright or too dark, in order to correctly expose the subject.

Therefore, use spot metering for the face of the portrait, focusing on ensuring accurate exposure of the face. But often the picture will be overexposed, so what should I do?

3. Exposure Compensation

If you experience overexposure, you need to use exposure compensation. There is a very easy to remember formula, namely “white plus black minus”.

The overall environment is too bright, and exposure compensation needs to be reduced.

The overall environment is too dark, increase the exposure compensation

4. Portrait Position

If the light ratio is too large and the background is too bright, the backlight shooting must be a silhouette effect. You can choose a relatively dark background, such as under a big tree, so that it is easier to shoot light spots.

If the backlight doesn’t work, try a side backlight and change the direction of your face.

5. Learn to Fill Light

Under the backlight, if you don’t want to shoot silhouettes, the above methods can’t satisfy you, then you need to fill in the light!

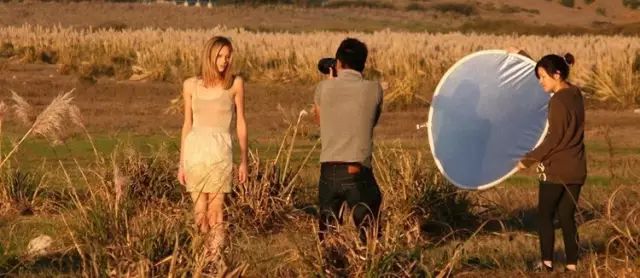
If there is an assistant, it is very easy to use the reflector to fill in the light for portrait shooting.

Using the flash is also handy if you don’t have an assistant. If you consider the later stage, in fact, as long as the dark parts are not turned into dead black, it is also very easy to retouch the picture.

If you don’t want to take so many things out, it’s also necessary to make the most of them!

Photography is an art of using light. Use the backlight and add some light spots to the background, I believe the portrait will be more beautiful. Give it a try!

6. How to Ensure Accurate Exposure of People’s Faces?

In portrait photography, if the light ratio between the subject and the background is not too large, the exposure can be basically accurate. The key is that in the case of a large light ratio, the faces of the characters are easily overexposed or underexposed.

Many people may ask everyone to use exposure compensation to make the subject exposure accurate. In fact, exposure compensation can compensate for the contrast between the character’s face and the background, but the value of exposure compensation is not so easy to determine, and sometimes it may only be done a few times. So what is a good way to make the face exposure of the characters accurate and easy to operate?

There is only one answer: spot metering.

The Role of Spot Metering

When the light ratio between the background or foreground and the subject’s face is not too large, using actual metering methods, such as average metering or center-weighted metering, may cause the exposure of the face to be inaccurate. It’s just a matter of how much the difference is. And only spot metering can accurately get the exposure value of people’s faces.

Especially when the light is relatively large, whether it is the background or the foreground, the faces of the characters are very prone to inaccurate exposure. The reason is that the proportion of the character’s face in the whole picture is too small, which cannot accurately reflect the exposure value of the character’s face. Using spot metering and metering directly on the face of the person is a relatively safe method.

Using spot metering, if it is a semi-automatic mode with aperture priority or shutter priority, you may need a metering tip to adjust the exposure compensation to meet the exposure needs. But if you use the fully automatic exposure mode, it will be more convenient. According to the metering prompt, it is easier or more convenient to directly change the aperture or shutter to achieve accurate facial exposure.

Categories
Soft Lights

How to Make Photos Transparent

1. How to Take Clear and Sharp Photos at the Telephoto End?

For photography beginners, the first thing to learn photography is to shoot clear and sharp films, followed by accurate exposure, and finally other aspects such as composition and style. So how can you take clear and sharp photos?

1) Hold your camera steady.

Of course, it is best to use a tripod. You can use squatting and kneeling positions, with the elbows close to the body, and it is better to use the things around you as a support. Reason: The field of view at the telephoto end is very narrow, and a slight shake will bring about a large displacement. It’s the same thing as a telescope, and anyone who’s played with it knows it, or it’s the same thing as a lever. Practice controlling your breathing and shutter release fingers and arms to minimize shaking. This process takes about several months of practice.

2) Try to shorten the distance from the lens to the object.

Get closer, get closer. Just outside the closest focusing distance is fine. The closer it is, the clearer it is, simple. Don’t be afraid to waste your extraordinary focal length.

3) Good lighting conditions

Try to shoot in good light conditions, you can increase the shutter speed and reduce the displacement. At the 200-300mm end, the shutter is clear at more than 1/250th of a second.

4) Proper aperture

The aperture is not the bigger the better. Unless you’re going for a very blurred background, it’s sharper to stop down a bit. The vast majority of lenses are not very good at the widest aperture, and will be fine after 2-3 stops down. If you don’t consider the background blur, you can zoom out a little more, increase the depth of field, and make it clearer.

Take a few more pictures. There are several pictures horizontally and vertically, on the one hand, the composition needs, on the other hand, there is always a clear picture. The continuous shooting function can be used when necessary.

Using the depth-of-field preview function is still useful.

Manual focus is possible. At least what you want to shoot will be clearer. Provided that your viewfinder is bright enough and you don’t wear glasses.

2. To Ensure Sharpness:

1) The focus is accurate,

2) The camera is stable (safety shutter, tripod, mirror pre-lift, remote control or timed shooting),

3) The best aperture of the lens (usually f/8) and the best focal length. The optimal aperture also takes into account the depth of field. The optimal imaging focal length of each lens is also different, and telephoto lenses are generally sharper than wide-angle lenses.

4) Sufficient sharpening settings for JPEG.

5) In addition, proper lighting and exposure can enhance contrast and make sharpness easier to express. IS slightly affects sharpness. High ISO also affects sharpness.

3. Other Points:

1) F16 is not used. Generally F16 is not the best aperture, F8 or F11 will do. The shutter machine is customized.

2) With spot measurement, whether the exposure compensation is + or – depends on the scene you spot. Measure the sky or the trees, then lock the exposure value and adjust the exposure compensation.

3) If you need to look sharper when shooting landscapes, use a tripod, cable release, mirror pre-rise, and aperture above F16.

4) Try with a small aperture, the effect of taking the depth of field should be better than it is now.

Categories
Soft Lights

Key Takeaways for Successful People Photography_Part II

What Photographic Equipment and Accessories Should I Bring When Traveling to Photograph People?

1. Photographic equipment

The photographic equipment to be carried when photographing people in travel is generally light. Usually, to take a commemorative photo of the tour, holding an ordinary small 135 camera or a “point-and-shoot” camera can be used.

If you plan to further engage in character photography, such as shooting some local customs, etc., it is best to carry a 135 single-lens reflex camera with an interchangeable lens and a 28-80mm zoom lens. This is easy to adapt to photographic needs, while reducing the size of the equipment.

Alternatively, while using the original standard lens of the camera, one 24-28mm wide-angle lens and one 85-105mm mid-focus lens can be configured for selection. If you need to take color and black and white portrait photography at the same time, it is best to have two bodies, respectively, loaded with color and black and white film, used alternately. If you are carrying a 120mm single-lens reflex camera with an adjustable back, you only need one.

2. Accessories

No matter what camera you are carrying, a lens hood and No. 2 yellow filter should be included. If conditions permit, it is best to bring various main filters (including UV mirrors, skylights, polarizers, etc.) commonly used in color and black and white photography, as well as yellow, red, and green filters for black and white photography. You can also carry a small electronic flash or a self-made reflector for auxiliary lighting.
To keep the camera and lens clean at all times, bring lens paper and lens brushes. It would be ideal if you could bring a blower. When traveling to photograph people, since the angle can be freely selected for handheld photography, the tripod is not used many times and does not need to be carried. But if you can bring it with you in case of emergency, of course it is better.

In addition, it is advisable to prepare a pocket notebook to briefly record the shooting situation, including date, weather, time, occasion, person, aperture and shutter speed used, etc., so as to accumulate relevant data and refer to it at any time, so as to continuously improve the level of photography.

What Additional Lenses Are Commonly Used for Black and White Portrait Photography?

In black and white portrait photography, the commonly used additional mirrors in front of the camera lens include two series of changing the properties of color and light and changing the imaging result. For example, the former are various colored filters, sky filters, UV mirrors and sky light filters. The latter such as diffuser, blooming mirror and close-up mirror and so on. It is described as follows:

1. Additional mirrors are commonly used to change the properties of color and light

1) Various color filters

This type of filter is made of colored and optical glass, and there are yellow, green, red, orange, blue, etc., which are named after each color. Its function is to prevent or reduce the unwanted color light, and relatively increase the amount of light passing of the desired color light, so as to change the color sensitivity of the photosensitive film.
In black and white portrait photography, the yellow filter is the most commonly used. For example, in the case of blue sky and white clouds, once it is used when shooting outdoor people, it can absorb part of the blue light, so that the blue sky on the film is less sensitive, so that the sky is slightly darker on the photo, and the white clouds are clearly prominent. . Otherwise, the blue sky and white clouds will be mixed into one color, and it will become a white sky, which is tasteless.

The yellow filter can also enhance the texture level of characters and express delicate and realistic skin tones. It also has the characteristics of large light transmission range and low light blocking rate. Therefore, when adding a light yellow filter, you only need to open the aperture by half a stop, and when adding a medium yellow filter, you only need to open the aperture by one stop.

2) Sky Filter

This is a half-yellow or light-grey, half-transparent colorless add-on mirror. The edge of its colored part is dark to light, and gradually transitions to colorless and transparent, so it is also called a gradient filter. Its role is to adjust the contrast between the sky and the ground. Specifically, the colored parts can absorb the sky’s violet blue light or reduce the intensity of the sky light, limiting the exposure of the sky part on the film, and making the ground part more exposed on the film. When using, the colored part should be facing up, no need to increase the exposure. When shooting people in backlight, adding a sky filter will give a better effect.
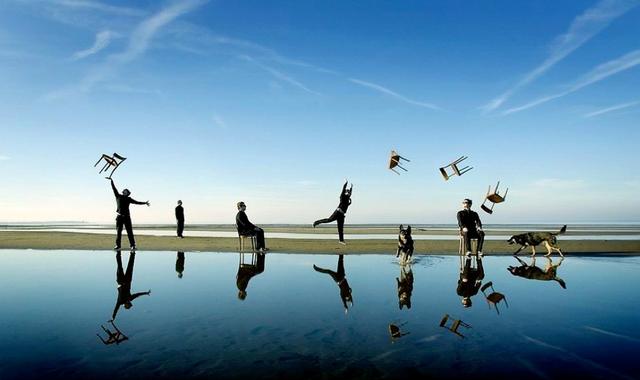
3) UV mirror and sky light mirror

Most UV mirrors are colorless, and some are slightly yellowish. Skylight mirrors are nearly colorless or slightly reddish. Their role is mainly to absorb ultraviolet rays in the atmosphere. Ultraviolet rays have a serious impact on photography in alpine areas, often hindering the clarity of images. After adding a UV mirror or a skylight mirror, the influence of ultraviolet rays on the photosensitive film can be eliminated, and the image clarity can be improved, especially for distant scenes.

Since the UV mirror and skylight mirror are colorless or nearly colorless, there is no need to increase the exposure, and there is no side effect for photography in any situation. Therefore, it is often worn on the lens to protect the lens.

2. Change the commonly used additional mirror for imaging concretions

1) Diffuser

The diffuser partially refracts the light passing through the lens, so that the photographed image can maintain a certain clarity, and the contrast of the tone can be softer and more natural. The diffuser has various structures. Generally, circular corrugations of different density are made on transparent glass, or a mesh woven from nylon wire or other fibers is used to achieve the purpose of dividing and refracting incident light. After adding a diffuser, take close-up photos of women and children, which can make the image soft and pleasing to the eye.

2) Halo Mirror

The shape and structure of the halo mirror is that a circular hole is opened in the middle of the glass lens, and the surrounding is sand-like. Because of the hollow in the middle, wearing it in front of the lens will not affect the focus of the main image. When shooting a person, arranging the face at the position of the round hole can get normal sharpness, while the image around the face is hazy and hazy due to the influence of the sand on the lens. It is advisable to use a single-lens reflex camera to photograph people with vignetting lenses. Because the photographer can directly observe the blurring of the image through the camera’s viewfinder.
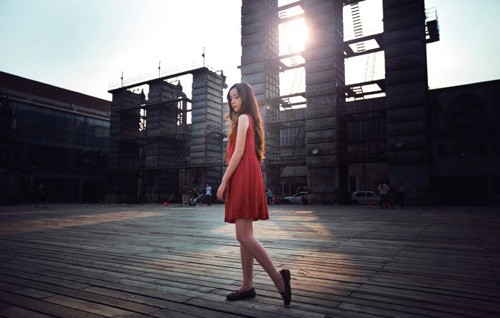
3) Close-up lens

A close-up mirror, also known as a half-length mirror, is a convex positive lens. After wearing it, the focal length of the lens can be shortened, thereby shortening the closest shooting distance, expanding the image of the person, and making full use of the area of ​​the photosensitive film. When shooting, it is generally not necessary to increase the exposure, but use a small aperture to increase the darkness and prevent the four corners of the negative from being blurred.

In photography practice, close-up lenses are not suitable for taking close-up shots of people, because the shooting distance is relatively close, which is prone to deformation defects.

In addition to the above commonly used add-on mirrors, there are also many special effect add-on mirrors such as multi-shadow mirrors, starlight mirrors, and neutral gray mirrors. After being added, the former two can obtain the effect of multiple images and different radial rays respectively, and the latter can reduce the amount of light passing through.


  What Additional Lenses Are Commonly Used for Color Portrait Photography?

Color portrait photography, in order to correctly reproduce the original color of the characters, generally only use colorless, neutral gray or very light color additional mirrors under the correct color temperature lighting. It is not advisable to wear colored filters for black and white portrait photography in front of the lens.

Because UV mirrors, skylight mirrors, diffuser mirrors, halo mirrors, close-up mirrors, and various other special effect additional mirrors are colorless, light-colored or nearly colorless, they are not only used for black and white portrait photography, but also Suitable for color portrait photography.
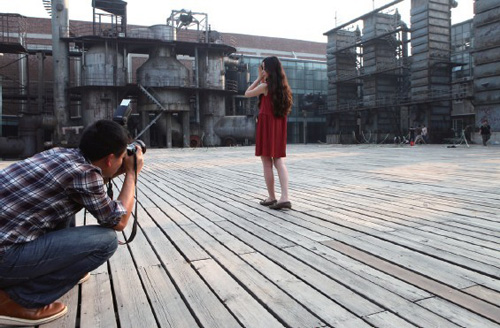
Secondly, in color portrait photography, when the color temperature of the lighting source and the color temperature balanced by the color film do not match, in order to obtain correct color reproduction, a color temperature conversion filter should be added in front of the lens.

Color film is generally divided into two types: daylight type and light type, and most of the color negative films sold on the market are daylight type. Daylight-type color film should be shot under daylight or electronic flash lighting with a color temperature of 5,400-5,600K. If you shoot under tungsten lighting, you need to add a blue filter in the color temperature conversion filter series to increase the color temperature, and you need to increase the exposure by about two steps.

Likewise, light-type color film should be shot under tungsten lighting with a color temperature of 3,200K. If shooting under daylight or electronic flash lighting, add the orange filter in the color temperature conversion filter series to lower the color temperature, and increase the exposure by about two-thirds.

How ​​to Arrange the Portrait Photography?

The layout of portrait photography should simplify and exclude everything unrelated to the theme according to the requirements of the theme, and arrange the main characters in the dominant position.

Golden Section

This dominant position should not be in the center of the picture, because it seems to divide the picture into two halves, which is rigid, rigid, and lacks artistic expression. Usually, the main characters can be arranged on the aesthetic point of the golden ratio. The so-called golden section is one of the rules of composition in plastic arts, that is, a line segment is divided into two parts, so that the ratio of the larger part to the whole is equal to the ratio of the smaller part to the larger part, and the ratio is 1:1.618. This rule is applied to photographic composition, which is to use this ratio to draw two straight lines horizontally and vertically, so that the picture is roughly divided into nine grids, and the four intersections formed by these four straight lines in the picture are taken as the golden section.
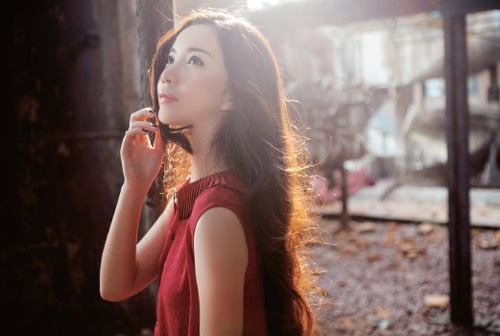
Generally speaking, these four intersections are recognized as having aesthetic value. No matter which one of them is, it is an ideal position for arranging the main characters, because this position not only changes, but also has a stable and comfortable feeling, which is in line with people’s aesthetic requirements.

Primary and secondary collocation of scenery

In addition, it must be noted that the arrangement of figures and other scenery should be clear and dense, and should not be piled up. Sometimes, in addition to making appropriate arrangements for the position of the main character, it is often necessary to use another character and scene to play a role of lining or balancing.

For photos of dynamic figures, such as toddlers, bicycle races, etc., more blank areas should be left in front of the dynamic figures, so that there is room to stretch forward, which is in line with the usual habit of observing things.

How ​​to Master the Balance of the Picture in Portrait Photography?

Balance, applied to the composition of portrait photography, means that the subject in the picture is in a relatively balanced state, so that the portrait of the portrait can be visually stable and comfortable. In order to master the balance of portrait photography, generally pay attention to the following aspects:

1. The face of the character

The head and face of people photography, in terms of vision, the proportion of the face is larger, and the proportion of the back of the head is smaller. Therefore, when taking side portraits, the image needs to be shifted to the back, and there is no space left behind the back of the head, so that the space in front of the face is larger than the back of the head.

In this way, the line of sight of the face can be stretched, and the light and heavy balance of the picture can be maintained. But there are also some themes that show the plot of “impulse”, the space in front of the character’s face is smaller than the back of the head, so that the picture has a sense of weightlessness. This is a special placement based on the subject’s needs.
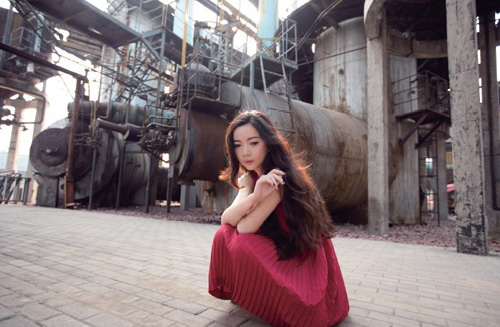
2. Subject matter

In the image structure form of the inequality of portrait photography, the posture of the subject, such as tilting, tilting or tilting, often leads to a feeling of weightlessness and instability. To this end, the body’s own shoulders, its own hands, and other objects related to the theme, such as books, flowers, teacups, fans, etc., can be used as “pads”, so that the weightless body can be stabilized.

3. The subject and the foil

In the subject of portrait photography with scenery as a foil, visually, the characters are the most important and the scenery is lighter. To this end, the area of ​​the space occupied by the characters can be arranged to be smaller, and the space occupied by the scenery can be arranged to be larger to achieve a balanced picture.

For example, shooting a half-length scene of characters writing, in which the characters with a larger area can be arranged to one side. Correspondingly, objects such as ink bottles or inkstones can be placed on the other side of the table to keep the picture balanced.

4. Bright, dark, deep and light aspects

In the composition of people photography, the visual importance of light, dark, deep and light is also different. Generally, dark colors are heavier, and light colors are lighter. Typically, a small area of ​​dark patches can be balanced with large areas of gray or light patches. If a certain part is too deep or too shallow, and the weight is not coordinated enough, you can choose a light-colored scene as a “pad” in the too deep part. You can also choose a dark scene as a “liner” in a too light area. However, it should be strictly noted that dark backgrounds or light-colored scenes must have a certain contrast in order to increase or decrease the weight and balance the picture.

5. Color

Different colors have different visual components. Generally, warm colors and bright colors are heavier, and cool colors and light colors are lighter. The law of its balance should also use the warm or bright color of the small surface to correspond to the cool or dark color of the large surface. For example, around the warm color of a small face of a character, a cool color with a larger face can be arranged. When taking pictures of people with warm tones, the skin color of the face should be as bright as possible, and the surrounding warm colors should be made darker, which not only facilitates the highlighting of the subject, but also makes the color balance of the picture.
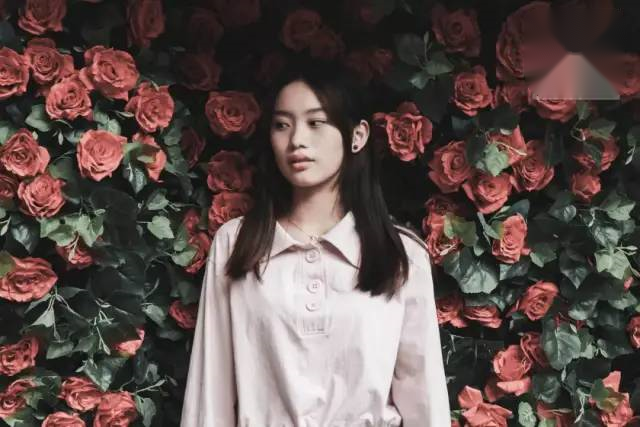
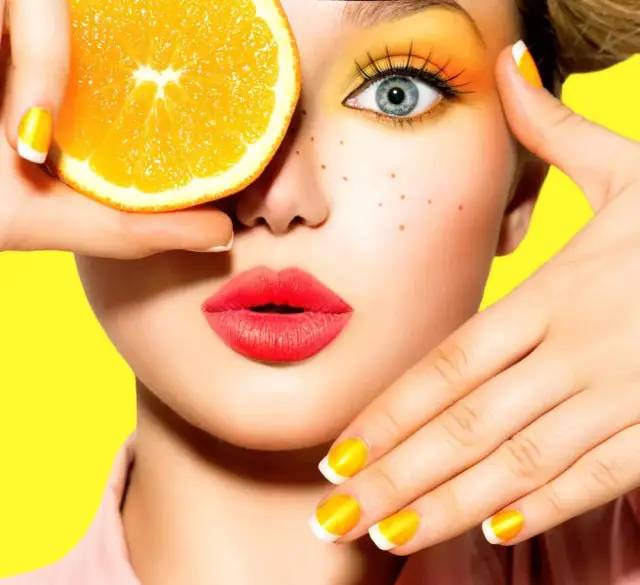
Categories
Soft Lights

Key Takeaways for Successful People Photography_Part I

1. What is the Key to Success in People Photography?

Range of people photography

People photography is a kind of photography that directly expresses people by taking static or dynamic people as subjects, focusing on depicting their appearance and spiritual outlook. All kinds of subjects that involve characters and take characters as the main body belong to the category of character photography. Such as: portraits, family life, reunion with relatives and friends, happy couples, weddings, childhood facts, campus dynamics, evening scenes of the elderly, travel range rover, fashion wear, stage performances, sports activities, work sites, festivals, customs, social news, human body art etc. Wide variety, available everywhere.

In general, in the field of photographic art, there are specific categories corresponding to this. In addition to portrait photography, there are also family, children, travel, wedding, sports, stage, social documentary and even human body photography. Distinctive and interrelated. It is often included in the portrait photography series, collectively referred to as portrait photography.

The key to people photography

Since the birth of photography in 1839, people have always been the main subject of photography, and the key to the success of photography of people is “both form and spirit”.

In real life, everyone’s appearance and personality characteristics are different, and their mental outlook and even more change in the intellectual world are ever-changing. If a photograph of a person captures the demeanor and emotion of the subject, but the appearance is not well presented, it cannot stand close inspection, and it lacks due artistic expression,

On the contrary, if the appearance is similar, but the demeanor and emotion are not delineated, the character performance is bound to be rigid and without charm. Therefore, people photography should not be limited to taking pictures, but should be based on the theme, the appearance of the characters should be promoted and avoided, and the beauty should be highlighted, so as to better convey and describe the spiritual outlook of the characters through the appearance. As a result, the people in the photo look more beautiful, more vivid and more spiritual than the real subject. Only when you achieve the “shape is similar” first, can the spirit be expressed.

In order to make portrait photography meet the requirements of “both form and spirit”, photographers should not only master the correct use of camera technology, but also on the basis of observing excellent photographic works and learning relevant photography knowledge, often carefully observe various people in life, Think seriously, develop agile thinking and judgment ability, so that you can be discerning in the practice of portrait photography, deliberately seek novelty, and choose the subject matter without wasting time. And capture the typical and vivid moments of the subject, and take a picture of lifelike characters.

2. What Kinds of Shooting Methods Are There for People Photography?

There are three types of shooting methods for people photography: pose shot, snap shot, and pose/grab combination. Each has its own characteristics and requirements. And they are related to each other and cooperate with each other, respectively constituting an indispensable way of portrait photography.

1) Posing

That is to say, during the whole photography process, always let the model know that someone is taking pictures for him. So that the photographer can have more time to complete the shooting after preparing for the shooting and instructing the model.

Therefore, we also call this method of shooting as manipulation, or we can call it the shooting method of subject omniscience.  We often use  it for portrait photos, group photos, commemorative photos, advertising photos, etc. But at the mercy of the situation, the photographer should do everything possible to make the subject relax so as to cooperate with the shooting.

2) Capture

That is, during the entire photographer process, the subject does not know that someone is taking pictures for her. The photographer directly captures the typical and vivid moments in the activities of the characters on the spot. Therefore, we can also call it a shooting method that the subject does not know.

Shooting in this way, the composition and lighting may be unsatisfactory. But the subject is in a state of unrestrained activity, and the expressions and behaviors are more natural. However, photographers need richer life experience and keen eyesight. They are good at capturing the most typical, perfect and attractive moments of the subject in the fleeting activities of various characters, and pressing the shutter in time.

3) Combination of pose and capture

That is to say, during the whole photography process, although you told the subject that someone is taking pictures for her,  but not inform the exact shooting time. So that the model is still focusing her attention on what she is doing. The photographer has a certain time to choose the best angle and light. And after a small range of adjustments and manipulations, press the shutter at the right time. This shooting method combines the advantages of both pose and capture. Therefore, we also call it the shooting method where the subject is half-aware.

3. Which Camera Should I Buy for Portrait Photography?

Although you can use ordinary cameras for portrait photography. However, due to different models and structures, performance and characteristics are different. How to choose a camera for portrait photography? Usually, we can consider it from three aspects: photographic use, personal hobbies and economic conditions.

1) Photographic use

This refers to the range of use of the camera. If beginners only take family photos, full-body and half-body photos for personal souvenirs, etc., they can easily handle it by purchasing an ordinary small 135 camera. These cameras generally come with standard lenses and can take both black and white portraits as well as color portraits.

Alternatively, a “point-and-shoot” camera can be purchased. It is small in size, simple in construction, and comes with a flash unit. Not only is it convenient to use, but you can take pictures when you pick it up, and you don’t need to purchase a separate flash.

If you plan to use the camera for artistic creation of human subjects, consider purchasing a single-lens reflex camera. This type of camera can generally replace lenses with different focal lengths, and the degree of automation is relatively high. You can use it to take photos of people in a variety of genres, including full body, half body, and avatar specific.

2) Personal hobbies

Every photographer has different hobbies, some like 135 cameras, some like 120 cameras. These two cameras have their own strengths and characteristics. It is difficult to say which is better and which is bad.

Generally speaking, the 135 camera is small and compact and easy to carry. It is more convenient to use, and the cost of each negative is relatively cheap. 120 cameras, some with interchangeable cassettes, and can shoot a variety of formats. At the same time, due to the large format of the negative film, the particles of the photo are relatively delicate and soft. That is easy to make the faces of the characters show the effect of rich layers and real texture.

3) Economic conditions

On the market, there are many models of cameras with different functions and structures. Although the basic performance is generally similar, the price of each is very different. When purchasing a camera, you must consider whether its price is suitable for your economic conditions.

Under normal circumstances, buying a mid-range camera can be suitable for all kinds of portrait photography. We must recognize one point. Thatis, there is no necessary relationship between the quality of the camera and the quality of the pictures of people. With a high-end camera, there is no guarantee that every photo will be of good quality. Using a normal camera, you can also take high-quality pictures of people. The important issue is that one must be familiar with the structure and performance of the camera and be proficient in operating techniques.

4. Which Lens Should I Choose for Portrait Photography?

Although you can use various lenses of the camera  for portrait photography. Strictly speaking, the lenses for portrait photography should have the following options.

1) Imaging

The image quality of the lens for portrait photography should be clear and soft. Because portrait photography generally focuses on expressing the face, the quality of the lens image should be able to meet the requirements of rich layers, real texture, full details and moisturizing skin.

2) Focal length

Generally, cameras all come with standard lenses. That is, the focal length is approximately the diagonal length of the film frame you took. You should only use this lens for full body or half-length portraits. If you use it to shoot a close-up of a half-length person or a head portrait, the perspective distortion of the image of the person would probaly happen because the distance is too close.

And if you shoot at a distance closer to the specified minimum shooting distance, some lenses cannot be brought into sharp focus. Therefore, to shoot portraits or close-up people, it is necessary to use a medium or telephoto lens. The focal length generally needs to exceed the standard lens 1-2 times. Taking the 135 camera as an example, the focal length of the lens needs to be above 105mm. So that the distance between the camera and the person can be kept above 1.5 meters. It can not only make the focus clear, but also avoid deformation such as big nose and small ears.

Taking small group photos indoors, if there is a lack of retrogression, you need to use a short focal length lens (ie, a wide-angle lens). But it is prone to the defect that the characters on both sides are slightly deformed.

3) Caliber

When shooting close-ups of half-length figures and avatars, the effective aperture of the lens should be large. So that the subject is clear, the background is slightly blurred. And the sense of perspective in far and near space is enhanced to highlight the subject. In addition, if the effective aperture of the lens is large, in the case of slightly dim light and no flash, you can still use a faster shutter speed for shooting dynamic people.

(To Be Continued)

Categories
Soft Lights

Exposure compensation EV value_Part I

Exposure Compensation EV Value Theoretical Knowledge

Photography-loving friends all know that if a scene is to be photographed, there will always be a suitable amount of exposure. If the exposure is not enough, there will be a problem of underexposure, and the picture will be black. On the contrary, it is overexposed and the picture is white.

So, what is exposure? The so-called exposure is the exposure value, do you feel familiar? In fact, EV is the abbreviation of expose value. So the so-called ev adjustment is the exposure adjustment.

How can I get the right exposure of the image? The key is to choose the correct aperture and shutter. When shooting the same scene, if the exposure is the same, the shape of the picture they get must be exactly the same! The above theory is the so-called reciprocity rate.

But do keep in mind that this theory will fail if the shutter time is too short (less than 1/1000th of a second) or too long (more than 1 second).

To get the same amount of exposure, the aperture goes from f2.0 to 2.8, 4.0, 5.6, 8.0, and the shutter speed doubles for each stop down. The aperture is like the diameter of a water dragon, and the exposure time is equivalent to the time it takes for the water to enter. The diameter of the water dragon is smaller, in order to obtain the same water intake, it is necessary to have a longer water intake time.

Exposure Compensation for Digital Cameras

Features

In order to take a good photo, the camera needs to ensure that the exposure is accurate. However, the natural weather, the unpredictable changes of light, and the wide variety of subjects, make light metering a very complicated task.

In some cases, the camera’s own metering may be biased, which requires a certain degree of exposure compensation. For the traditional automatic cameras in the past, the light metering is completely dependent on the camera itself when it is working, and the user is basically unable to intervene too much. Only a camera with a manual mode can partially intervene in exposure. Therefore, in some mid-to-high-end cameras, the exposure compensation function will be a part to allow users to adjust.

In digital cameras, 100% of them have the function of exposure compensation. Even the simplest fully automatic type of point-and-shoot digital camera is capable of exposure compensation. For digital cameras, according to their different grades, there may be no manual modes such as aperture priority, shutter priority, etc., and there may be no flash slow sync mode. But in the menu of the digital camera, you can definitely find a parameter called “EV” value, which is exposure compensation. It can improve to some extent underexposure or overexposure caused by inaccurate camera metering. It is also possible to create works of special artistic effects according to the photographer’s intention.

Exposure compensation range for digital cameras

Almost all digital cameras have the same exposure compensation range, which can be added or subtracted within plus or minus 2EV. But the addition and subtraction are not continuous, but jumping at 1/2EV or 1/3EV intervals. The early old-fashioned digital cameras were separated by 1/2EV, so there were 8 grades of -2.0, -1.5, -1, -0.5 and +0.5, +1, +1.5, +2. The current mainstream digital cameras are more finely divided, with 1/3EV intervals, so there are -2.0, -1.7, -1.3, -1.0, -0.7, -0.3 and +0.3, +0.7, + 1.0, +1.3, +1.7, +2.0, etc., a total of 12 levels of compensation value.

How ​​to use exposure compensation for digital cameras

For detailed operation, of course, you must read the manual carefully. There are generally two ways to call up the exposure compensation function: one is to call it up from the camera’s menu. Generally we call this option  “Exposure Compensation” or with the word “EV”. Another way is the shortcut keys, different camera operations are very different. Since the modification of the EV value may be frequent, you may wish to familiarize yourself with its shortcut operations, so as not to delay time and miss valuable shots due to temporary adjustments.

Why Exposure Compensation is Necessary

Since we call it “exposure compensation”, as the name implies, it is to compensate for the deviation of exposure. And the exposure deviation is obviously caused by the camera’s metering ability. We might as well analyze the factors that affect the accuracy of camera metering.

Metering Mode

First of all, the metering mode of the camera has a great influence on the accuracy of metering. We know that the camera’s automatic metering functions include average metering, center-weighted metering, spot metering, multi-area metering and so on. The reason why there are so many patterns is nothing more than the unpredictable nature of the light. For different times, different places, different subjects, and different photographers’ different performance maps, a single metering mode is really stretched. Therefore, there are many useful metering methods in different environments to improve the accuracy of exposure.

However, even so, it still cannot meet many special occasions and situations. After all, a camera is a machine and cannot think like a human being. It is impossible to understand your shooting intentions. And it can only do rough processing according to the situation preset by the manufacturer. One of the important factors in the level and price of the camera is the level of light metering capability. High-end cameras can’t guarantee 100% accuracy, and for low-end cameras, the metering mode is more likely to be single. That cannot guarantee accurate metering and exposure in complex environments.

The principle of camera metering

Secondly, from the perspective of the principle of camera metering, most of the low-end automatic cameras use to obtain the brightness of the entire screen. Then calculate the average value or select several areas with emphasis. And obtain the brightness information according to their brightness values. .

Such an algorithm is obviously relatively crude. In some special situations, such as the strong contrast between the light and dark of the scene, the subject is not in the center, the subject is bright and the background is dark, etc., it is often easy to mislead the camera, causing the metering to deviate.

For high-end cameras, photographers mostly use TTL (meaning through the lens) metering , and the accuracy is within 0.5EV. The metering accuracy of mid-range cameras is within 1EV. While many low-end cameras use internal and external metering, and the deviation may reach 2EV.

Generally speaking, the smaller the brightness contrast of the scene, the more accurate the exposure, otherwise the deviation will increase. The grades of the cameras are high and low. The higher the grade, the more accurate the metering, and the lower the deviation will increase. If it is a traditional camera, the latitude of the film is relatively large. The deviation of exposure will not be a big problem within a certain range. But the latitude of the CCD of a digital camera is relatively small. And a slight exposure deviation may affect the overall effect.

Correct Use of Exposure Compensation – Change Passive to Active

For those of you who own a digital camera, exposure compensation is very useful whether you are using high-end or low-end equipment. Especially for low-end fully automatic digital cameras, exposure compensation may be the only part you can participate in and control the photo shooting process. In models that lack a powerful manual mode, exposure compensation is the magic weapon for you to turn passive into active and greatly improve the quality of your shots.

When to use exposure compensation? How to make compensation? How much compensation is appropriate?

(to Be Continued)

Categories
Soft Lights

Application of Natural Light

The Importance of Light for Photography

Light is to photography what oxygen is to life. From framing, framing, adjusting the camera to pressing the capture button, there is not a single step without the involvement of light. Like oxygen, it is the basic condition for all the activities of life.

A successful photograph must have wonderful light. A failed photographic work is mostly caused by the lack of light. Therefore, to learn photography well, you must learn light, so that it can become our good companion in any occasion.

Classification of Light

According to the different light sources, we can divide light into several types. Among them are the most familiar ones and the lesser known ones. As the saying goes, the building near the water comes first, and today, I will start with the natural light that we are most familiar with.

Natural light refers to the light that shines on the earth with the sun as the light source. It not only refers to the sunlight on sunny days, but also includes the light reflected by cloudy, rainy, snowy and foggy weather. There is also moonlight at night and the light seen indoors without artificial lighting. These are all within the natural light range.

Light is a tool. Whether you can use it with ease depends on how well-trained you are. But more important is imagination. Photographers must learn to observe light and its effects. You try to transform the effect as much as possible, no matter what the lighting conditions are. As long as the footsteps move, the light changes differently.

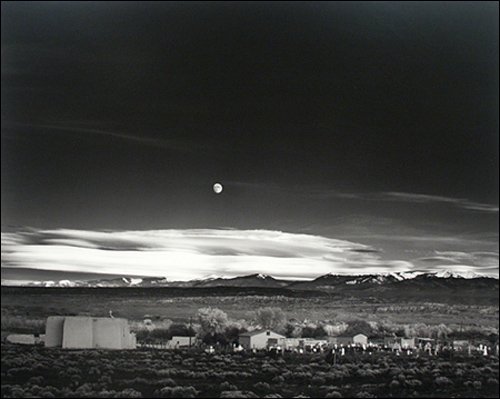
The natural scenery photos taken by American photography master Adams, those rocks, trees, bright moon, and white snow, can be called a masterpiece of magical light and shadow. In fact, he used light and shadow to write poetry.

Light itself appears in many different forms, and photographers should be good at choosing the most suitable form to achieve a particular purpose.

Light Intensity

Natural light is the change of bright, dark, strong and weak with the change of season and time. The bright light of spring and summer gives a dazzling, bright and vibrant feeling.

The dim light of autumn and winter is suitable to express melancholy, tranquility and subtle mood. Photographers can use this difference in light intensity to better highlight the characteristics of the subject to reflect the shooting intent.

Light Quality

Light quality has nothing to do with the intensity of light. The light can be direct light from a hot source, or reflected light from the surface of the object being illuminated. Direct light is natural light that is not blocked by clouds and fog. Diffuse light is sunlight that is obscured by clouds, soft light that bounces off walls, ceilings, or other surfaces.

Direct light is strong and dazzling, with high contrast, creating clear and prominent shadows. The reflected light formed by reflection is softer and has less contrast. Can result in a blurry shade of gray or no shade at all. It can express the shape of the subject and reproduce its original appearance delicately and naturally.

Direction of Light

It refers to where the light comes from. The photographer should study the different poses and special effects of the scene he wants to photograph under different lighting conditions. When the photographer is facing the sun, the subject is exposed to the frontal light, which is flat and weak and lacks layers.

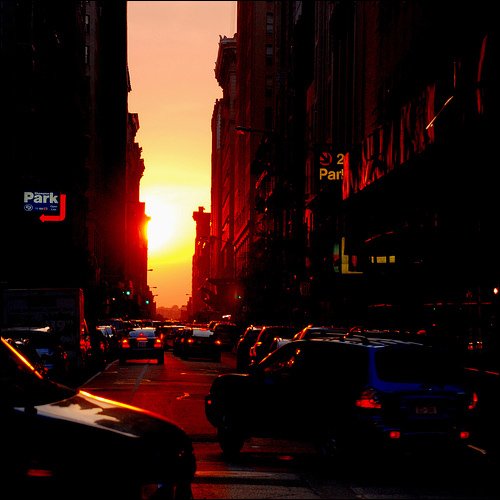
It can be quite noticeable when viewed in side light or in backlight. If you use the backlight to shoot the traffic flow after get off work, how attractive the picture is. These are all artistic effects that come from different light sources.

We can see from this how inseparable the relationship between light and photography is. Only skilled use can improve the artistry and appeal of photos.

Mastery of Natural Light

Shooting with natural light is the easiest way. Usually photographers mostly use aperture priority and leave the metering work to the camera. If the lighting is wrong, adjusting the exposure compensation can improve the picture. Directly use natural light as the main light source, and customarily add a reflector to reflect sunlight to complement the dark side of the Model’s face. In addition to reducing contrast, it can also have multiple catchlights in the model’s eyes. In this photo,  photographer added a reflector to the front left of the Model to evenly fill the light on the dark surface.
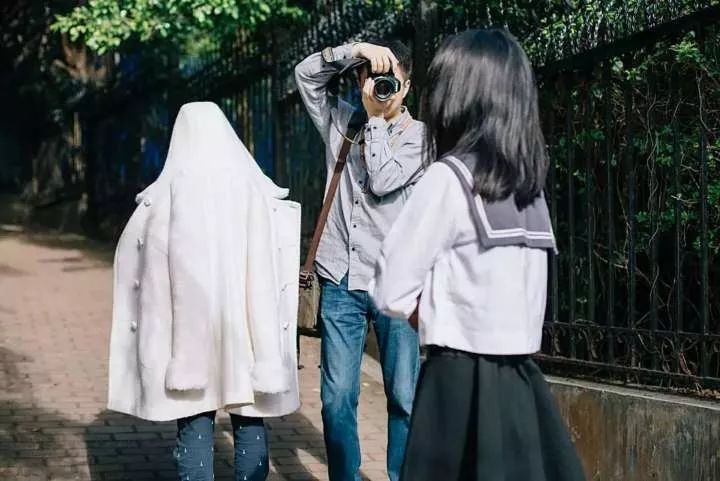
Shooting in natural light only with reflector fill light

Flash or External Light Fill Light

If the natural light is weak, the effect of filling light with the reflector is not good, or the contrast of the picture is too large, you can use the flash to fill in the light. When using the flash, it is recommended to connect the off-camera cable, and it is better to use the off-camera flash to fill in the light. The advantage is that it is more beautiful than the flash mounted directly on the camera, because the direction and range of the fill light can be adjusted to avoid the face light being too stiff and enhance the three-dimensional effect.

If the contrast is large, you can try to control the direction of the light. In the dark part of the Model, the light output of the manual flash can be 1/32~1/16, supplemented by some weak light sources. You can also hit the flash on the reflector to reflect the fill light to diffuse the fill light range.

This is a photo thte photographer has shot with external lighting

Choose your Background Carefully

After selecting the shooting location, it is best to go to the scenic spot to investigate first. However, if time does not allow, the photographer should train the ability to observe the scene. He can quickly complete the idea of the feeling, scenic spot and picture to be photographed, arrange the style, color and accessories of the clothing, and complete the preliminary communication with the model.

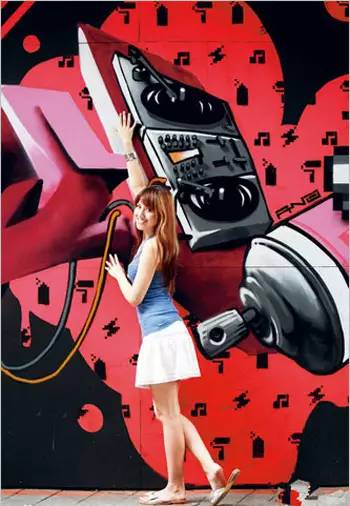
1. You can also use Murals  as backgrounds

Whether the Model is standing in front of the wall or leaning against the wall, you can present her in different poses and expressions. Make good use of the background, and you can easily take a unique photo.

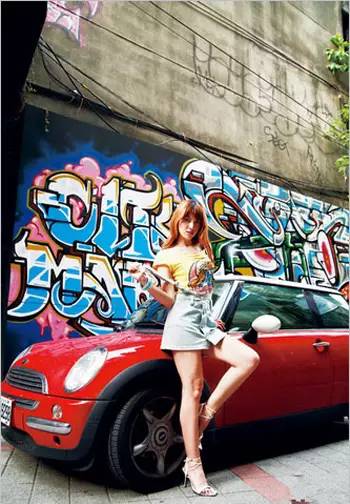
2. Borrowing cars on the roadside as props

If you park a famous car with bright colors, you can also ask Model to make a fuss about this car. Photographers themselves can make good use of different lens characteristics and take a variety of perspectives, and then ask the Model to interact with the car a little to shoot works with bright colors and sufficient contrast.

In fact, it’s not just the cars on the roadside. If you happen to encounter some fresh scenery, or eye-catching architectural decorations, they are all elements that are very good to borrow from the theme.

3. Downtown streets

Take pictures on the streets in the downtown area, because there will be more interference factors in the background, such as pedestrians, cars, and store signs. Therefore, you can use a medium and long focal length lens with a large aperture to create portrait works with compressed backgrounds and blurred bokeh.

In addition, the use of light is also a science. Although the light was smooth when shooting on the day, the average light source on the face was not enough, so it was necessary to use the reflector to evenly fill the light on the shadow of the face, and also use the eye light to add brilliance to the work.

No reflector for fill light

Full body composition with reflector for fill light.

4. Glass window reflection

For location shooting, glass window is a very useful auxiliary prop. By virtue of the reflection of glass, it can express the interest of composition fully . In the whole picture, the real and illusory portraits can be expressed through the photographer’s ideas. Of course, we can also just use it as a background when creating.

How to express the charm of this medium depends on everyone’s ideas and creativity when shooting. But be careful, when facing the glass that will produce reflections, try to find an appropriate angle to prevent your own shadow from entering the mirror.

In addition, if you want to use the flash, shooting straight from the front will also expose the point light source in the image. If you deliberately create it, it can also make a good work. If you accidentally let the lights pass through, the work will be greatly deducted.


Categories
Soft Lights

Master the Soul of Photography – Light

Front Light

The front light is the so-called forward light (the photographer’s shooting direction is the same as the direction of the light). Because the light source of forward light covers a large area and the metering difficulty is not high, it is one of the easiest light environments for beginners to master. However, the disadvantage is that the contrast of the light source is small, which is easy to cause the color of the subject to be flat and lack of transition layers. Therefore, when shooting, it is recommended that players adjust the viewing angle in time to keep the subject in a half-side light state. This can effectively improve the above problems.

Front Side Light

We also call front side light oblique light. Since the direction of light irradiation is just at a 45-degree angle to the subject and the camera, there is a clear difference between light and shade on the subject. However, because the light contrast is moderate, the shadow area is small, and the three-dimensional effect of the picture is strong, it is one of the best lighting methods to express the material sense of the subject. It is generally used for shooting subjects such as landscapes and buildings.

As for the timing of the front side light? If you look at the average of the day, it will mostly appear between 9-10 am and 3-4 pm, which can be used as a reference for photographers when using light to frame the scene.

Due to its small contrast and strong three-dimensional effect, the front side light is one of the light methods that photographers generally like to use at present.

Side Light

Side light, as the name suggests, is the light from the left or right side of the subject. Since the light is at a 90-degree horizontal angle to the subject and the camera, the light will produce a strong contrast.

Generally speaking, many photographers will use this light feature to create, such as using side light to express the specific mood of the character or highlight a part or detail of the subject, it can immediately achieve obvious effects. However, due to the strong contrast of the side light, we recommend to meter the light according to the bright area first. And then reduce the exposure by 1~2 levels.

The strong contrast characteristics of the side light are very suitable for expressing the specific expressions or emotions of characters, and can immediately achieve an immediate highlighting effect.

Full Backlight and Side Backlight

Broadly speaking, we can divide backlighting into “full backlighting” and “side backlighting”. In the former case, since the light source is shining directly from the back of the subject, the subject will form a dark silhouette in front of a bright background. Although the picture is simple, it has excellent expressive power, but it is best to actively use the hood when shooting, in order to effectively avoid the problem of glare.

As for the latter, it refers to the light source emitted from the rear side of the subject. That is about 45 degrees deviated from the backlight angle. Since the light source has both side light and backlight characteristics, it can fully express the outline and texture of the subject.

Generally speaking, in addition to natural light sources, the photographer can also correct the side backlight through the reflector or flash to make the side backlight picture more perfect.

In the field of portrait photography, photographers often use side backlighting to express the outline and silky light of the Model to create a dreamlike effect on the picture.
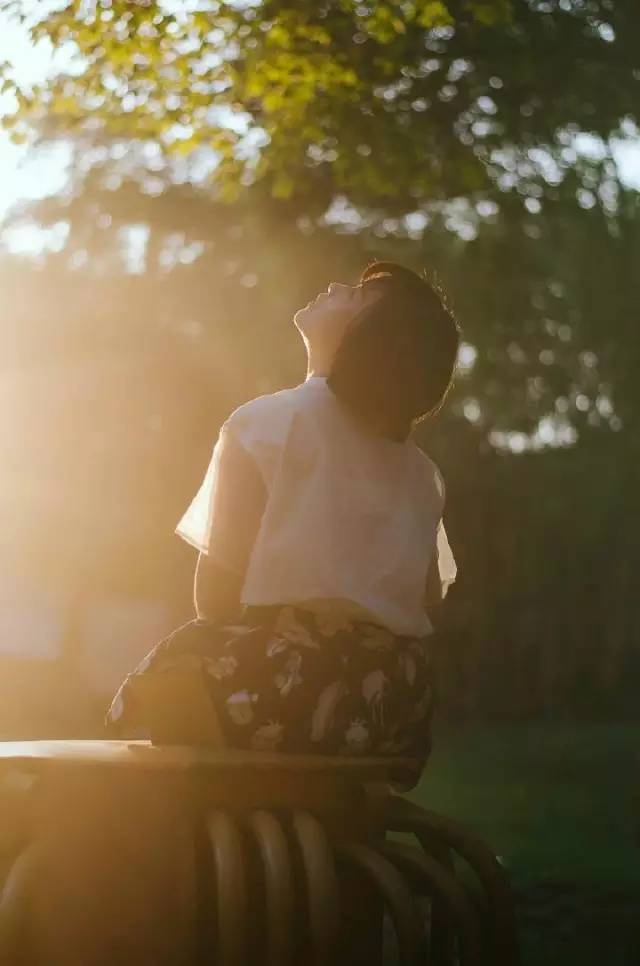
Top Light

Top light is the light from the top, which forms a vertical angle of 90 degrees with the subject and the camera. Since the light falls from top to bottom, it will leave a noticeable shadow on the subject. Among them, portrait photography has the most serious impact. Not only will it brighten the crown of the head, forehead and tip of the nose, but it will also leave a noticeable shadow on the cheeks, lower eye socket and under the tip of the nose.

Therefore, in general, you should avoid using this light to shoot portraits. If you have to shoot in a top-light environment, we  recommend you to adjust the camera exposure compensation value by about 1-2 levels when shooting. So that the picture can obtain a softer light performance.

When creating portraits, you should try to avoid using top light for shooting to avoid leaving obvious shadows on the Model’s face.

If you have to shoot in a top light environment, you can adjust the exposure compensation value by 1-2 stops to obtain a picture with accurate exposure.