Categories
Soft Lights

Five Essentials for Shooting in Natural Environments

1. Cloud

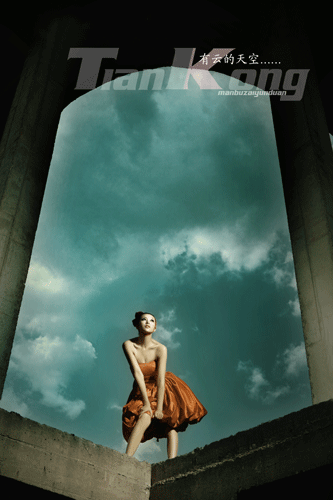
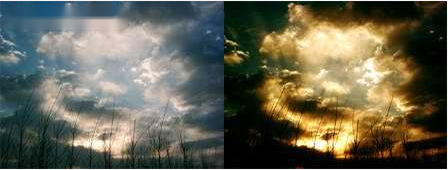
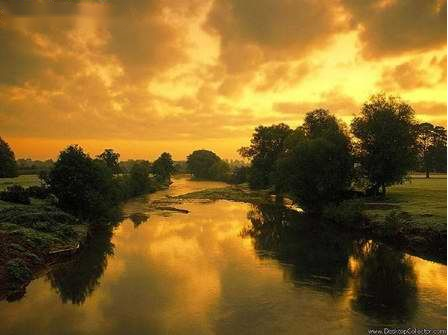
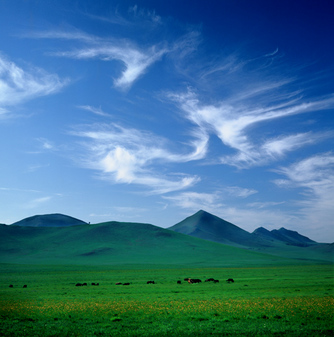
Clouds are condensations of water vapor in the sky that condense, move and dissipate in the sky as the weather changes. Clouds are indeed beautiful and come in many different shapes. Commonly seen are floating clouds, fish scale clouds, sheet clouds, striped clouds, stratus clouds, fire clouds and so on.

People who like to photograph landscapes are particularly fond of clouds. A landscape photo will be more beautiful because of the clouds. Many good scenes often lack clouds in the sky, which makes the sky part of the picture too empty and a fly in the ointment, and even affects the structure and tone balance of the picture.

The meaning of cloud to shooting

Clouds can not only increase the beauty of the scene and balance the picture, but also use different images of clouds to express the season and climate of the scene. For example, light and thin floating clouds in the morning in spring, stratus clouds that condense in summer, beautiful fish scale clouds in autumn, sparse clouds in early winter, sea of ​​clouds in the morning and colorful clouds in the evening, clouds in a sunny day, fiery clouds on the eve of typhoons, Storm clouds and so on. It is all about the different seasons, climates and times.

Even if the scene itself has no obvious feature of time, but because there are clouds in the scene, you can know what season and climate it is from the image of the cloud. Clouds are diverse and have different shapes. We use the white clouds to set off the scenery, and we should also pay attention to whether the image of the white clouds is suitable for the scenery.

For example, for a scene with prominent horizontal stripes, the cloud with horizontal stripes should not be used as a foil, otherwise it will cause more horizontal lines in the picture, resulting in a rigid picture with no changes in the lines.

For another example, the use of a white cloud of the same size as the subject of the scene as a companion will also result in no distinction between the host and the host of the picture. Therefore, when taking the white clouds as a foil, we must pay attention to its image and have a significantly different proportion from the main object, so that the picture can be vivid and touching.

The right time to shoot the clouds

White clouds with no depth or depth are not suitable as a foil for any scenery, let alone as the main body. Generally, white clouds with more layers are mostly produced in the morning or afternoon when the sun is slanting. Therefore, it is most suitable to use the white clouds in the sky to accompany the scenery in the oblique sunlight. The image of the cloud is ever-changing with the wind. We must grasp the timing and be patient to get a good cloud scene. But pay attention to the use of color filters when shooting, add polarizers for color, and use yellow and orange filters for black and white photography.
2. Fog and mist

The significance of fog and mist to photography

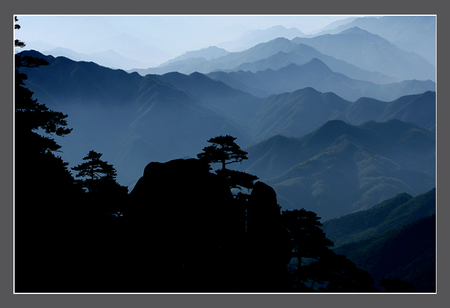
The use of various fog layers or haze layers to shoot scenery can make the perspective of the scenery change from near to far. It can also make the color tone of the scene change deep or shallow, giving the scene rich layers. When the morning fog has not been evaporated and dissipated by the heat of the sun, and the peaks of each mountain are protruding above the morning fog, the backlit mountain scenery is photographed. Because the mountains near and far have different thicknesses of morning fog, the fog layer illuminated by the backlight It is also very bright. As long as you use the main mountain layer as the exposure basis, it will naturally show bright and bright photos with rich tones from deep to shallow.

Grasp the timing of shooting clouds and fog

Clouds and fog often move in the direction of the wind on the mountain, but sometimes they stay on the mountainside or only show the peaks. When the layer of fog exists in the forest, the sun shines from the space with sparse branches and leaves into the forest to produce strips of oblique sunlight. This different light, with the direction and angle of the sun changing its projection direction, shows light and dark beams. All these changes in natural scenery have created excellent conditions for us to photograph mountain scenery. As long as we are in the scene and grasp the natural changes of the scene in time, we can take artistic and high-quality landscape photos.

Timing to shoot the sunset

The sunset glow occurs in the evening, and because there is less moisture in the space in the evening, the sunset glow is often thinner than the morning fog. Using the sunset to shoot the scene, only the distant scene has the atmosphere of the sunset, and the closer scene is as if there is no sunset. If you use the backlight to shoot the sunset scene, the place with the sunset can be like the morning fog scene, showing the light level of the scene.

However, when the backlight illuminates the sunset scene, the close part of the scene is underexposed due to the lack of the atmosphere and is easily affected by the light of the distant scene. Therefore, when shooting a sunset scene, if the subject is close to the scene, you should use the close distance as the metering standard. Sometimes to shoot the distant sunset scenery, we have to use a long focal length lens to zoom in and shoot, so that the scene occupies a larger area on the screen.
3. Shooting of rain scenes

Rainy days are the least favorite weather for photographers. Whether it is raining heavily or lightly, few people take a camera to take pictures outside. Some people even think that it is impossible to photograph landscapes on rainy days.

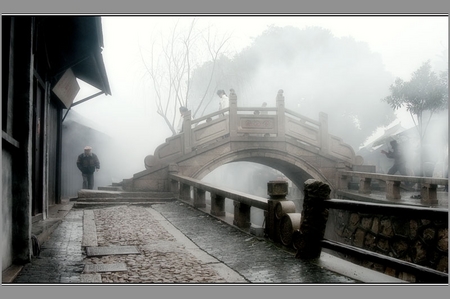
Everyone knows that photography is possible with light. We can shoot night scenes at night, and of course we can shoot rain scenes during the day, and we can shoot dynamic rain scenes. It is a rainy night, and it is also right to shoot the rainy night scene. The scenery in rainy days also has its unique sentiment, not to mention the rainy days are also a must-have in people’s lives. In order to reflect more life situations and enrich the content of scenery, rain scenery is also an indispensable subject for our shooting.

Selection of rain and scenery

When shooting a rain scene, in order to express the rain stripes in the rain scene on the photo, in addition to choosing heavy rain, a darker background must be used as a foil. If the background of the rain scene is the sky, then the rainy sky must be white dense clouds. Even if it rains very heavily, it cannot be seen because the background and the rain strips are white. The closer the background is, the easier it is for the rain stripes to appear. The farther the background is, the bigger the scene is, and the rain strips are not easy to show clearly. Therefore, the range of the scene taken in the rain scene should not be too large, and it is necessary to avoid the white sky occupying most of the picture, which will affect the performance of the rain stripes in the scene.

Aperture and shutter selection

When it rains, the brightness of the scenery is generally weak. Therefore, it is generally necessary to use a larger aperture and a slower shutter speed when shooting rain scenes, so that the rain scenes have sufficient light sensitivity. In order to show the rain strips that have not yet landed in the scene space and to be able to grasp the dynamics in the rain, you should stand at a higher position to shoot. Generally, shooting rain scenes with a shutter speed of 1/60 second can show the rain strips that have not yet landed in the space. If you shoot a rain scene with a fast shutter speed, the rain strips in the space will be shorter. Use a slower shutter speed to get longer rain scenes, and the motion in the scene may not be clear enough.

Viewfinder

Shooting the scene in light rain weather, because the light rain is not visible enough in the scene, it cannot show the rain stripes. However, when using drizzle to shoot dark forests or mountains, since there is no sunlight in the scene, the drizzle will be like a fog layer between dark objects, showing the tones of far and near.

If the framing range is not very large, and you use the brightness of the nearby object as the exposure key, it can also show the misty and rainy scene in the scene. Whenever it is summer, there is often a sudden heavy rain under the sun, which is the best time to shoot rainy scenes. When shooting scenes in heavy rain, the camera lens is easy to get wet by the rain. Before shooting, you should consider this in advance and prepare tools for rain protection.
4. Shooting the snow scene

The choice of snow subject

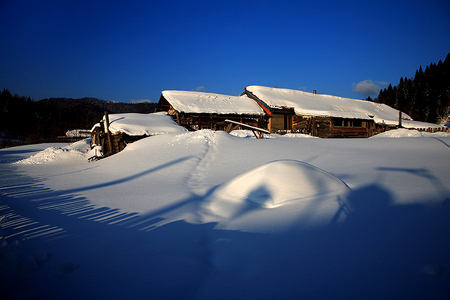
When snow scatters or accumulates on a scene, objects of varying shades of color in the scene are obscured and become white objects. Therefore, a snow scene is a scene with more white parts, which can give people a white and lovely feeling.

Because the white part of the snow scene occupies a larger area and is brighter than other scenes, it is even brighter when there is sunlight. It is also more sensitive than normal scenery on film. Snow is a transparent crystal, and its texture can only be clearly expressed at a distance. Therefore, in order to show the light and dark layers of the snow scene and the transparent texture of the snow particles in the nearer place, it is most suitable to use the backlight or the back light to shoot the snow scene.

In this way, even distant views create a profound atmosphere due to backlighting or side backlighting. If the snow scene is photographed with frontal light or top light, due to the relationship of flat or vertical light, not only can the snow-white fine crystal objects not be able to produce light and dark layers and textures, but also the object will lose its three-dimensional sense. However, when backlight or side light illuminates a snow scene with a large white area, objects of other tones that are not covered by snow will inevitably become black objects. In order to make snow and other tonal objects in the snow scene appear layered, it is necessary to use soft sunlight when shooting snow scenes.

Snow shooting background selection

Shooting snow scenes when it is snowing, just like shooting when it is raining, must have a dark background as a foil to easily show the snowflakes flying in the sky. If you are shooting a wide area of ​​the sky, snowflakes will only be visible in the space in front of some dark objects, and other parts of the snowflakes will not be visible.

When shooting snow scenes in the sun, in order to keep the blue sky from being too white, you can use color filters (polarizers) as needed.

In order to obtain a more concise snow scene picture and clearly express the layers and lines of objects in the snow, you can choose a partial scene with more beautiful lines and shoot with soft backlight and side backlight. In this way, the layered lines of the objects in the snow can be fully displayed, so as to obtain a more beautiful snow scene.
5. Capture the sunrise or sunset

The choice of shooting time

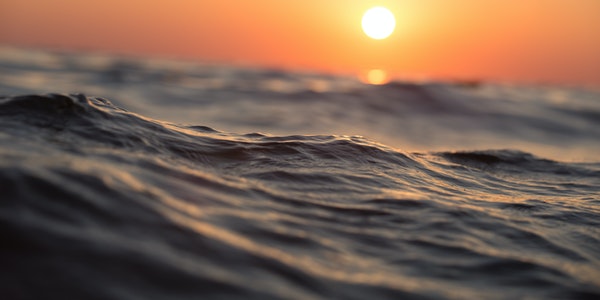
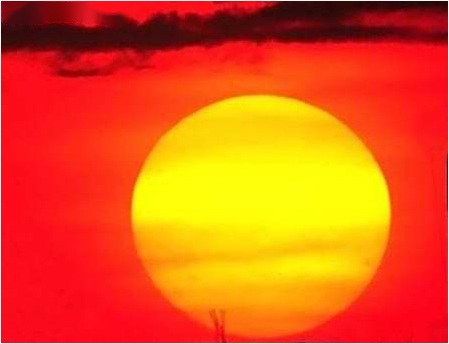
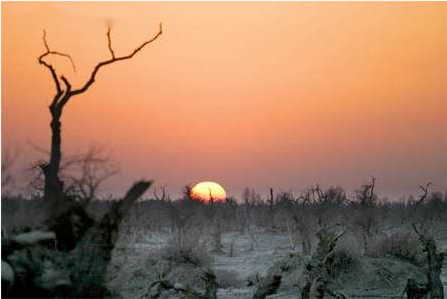
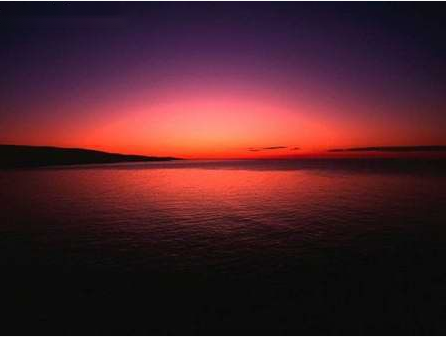
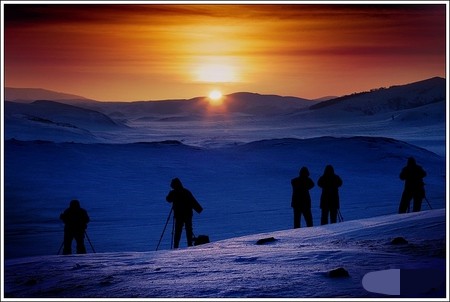
When the sun just rises from the horizon or when the sun is about to set in the west, there is a certain morning glow or sunset on the ground that covers the light scattered by the sun, and a round sun with no light scattering appears. That’s when it’s time to photograph the sunrise or sunset.

When the sun is just rising or setting, the sky on the horizon often has some backlit colored clouds. We can wait until the sun is cloudy and there is no scattering of light to shoot a sunrise or sunset. In this way, not only can the sun be scattered and the halo produced on the negative film, but also the sky part of the scene will not have a lonely sun.

When the sun just rises or is about to set against the mountains, because there is no reflection of water between the mountains, it completely contrasts with the dark sky with the sun. Therefore, when shooting a sunrise or sunset scene on a mountain, only when the clouds cover part of the sun or increase the exposure of the sky when zooming in can make the tones of the sky and the mountains more balanced.
Scene selection

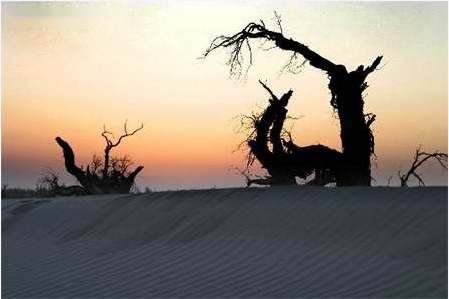
When the sun just rises or is about to set, it is also a common phenomenon that there are no clouds in the sky. In order to avoid the sky being too monotonous, using some sparse leaves and branches as the foreground of the empty sky can help to balance the structure of the scene. But too many or too heavy branches and leaves will cover most of the sky and affect the balance of the picture.

The image and hue of the sun are not much different in the morning and evening. If you want to distinguish a sunrise or a sunset from a photo, you should distinguish it by the scenery and the tone. Because the sky on the horizon in the morning is generally clearer, the sun will spread the light quickly when the sun rises. The sky is generally cloudy on the horizon at dusk, and when the sun is still far from the horizon, there is no scattered light. In terms of hue, the sky is reddish-yellow in the morning and magenta in the evening.

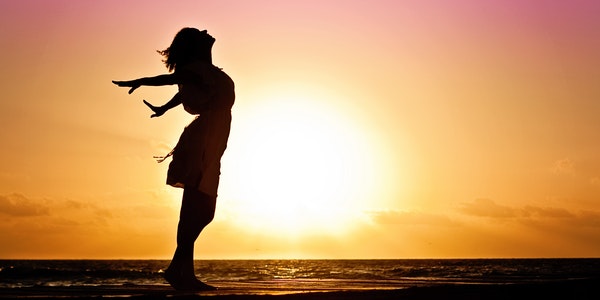
Therefore, when photographing the sunrise, we should take it as soon as the sun rises above the horizon, and do not miss it. Shooting sunsets can start when there is no light scattering, until the time when it is about to enter the horizon, and you can shoot in a leisurely manner.
Categories
Soft Lights

Shooting Techniques for All Kinds of Backlit Portraits

Spot Type Backlight

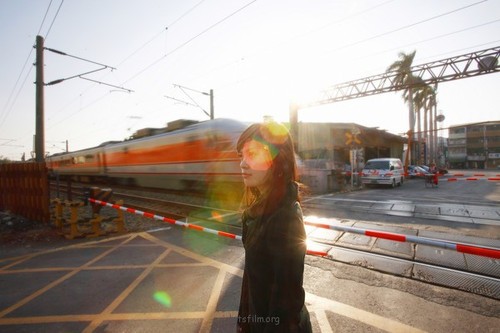
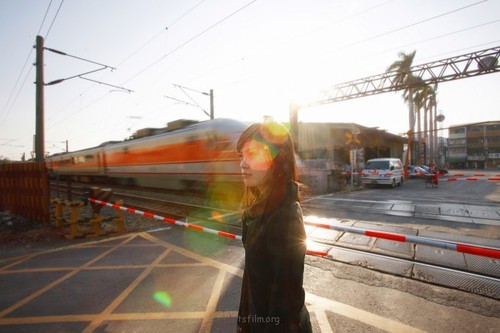
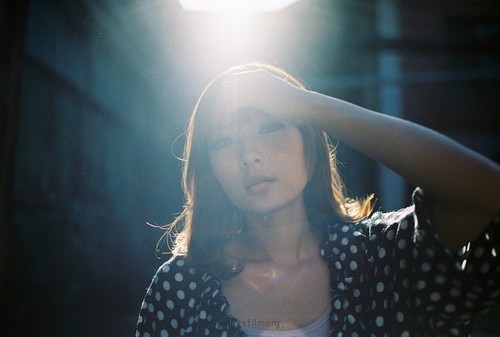
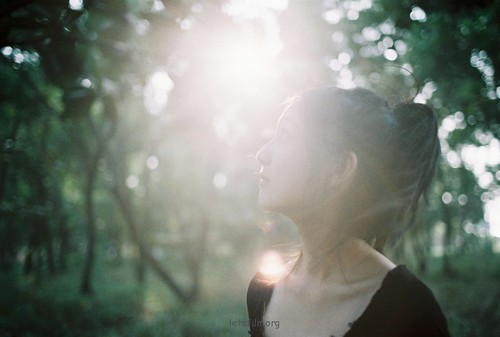
The light spots under the backlight have various appearances such as round, rhombus, dotted and atomized, very beautiful!

Shooting Timing

To produce the effect of the spot, a relatively strong point light source is required. At this time, it will be beneficial to have a light source with a relatively hard light quality and a strong amount of light. Such as when the sun is in a relatively high position, or the light from the light directly on the lens belongs to this. Sometimes the low-angle sun also has the opportunity to form light spots. But the amount of sunlight close to sunset will be weaker, and it is easy to weaken the light spots into white fog.

Shooting method

The flare effect produced by the backlight can be roughly divided into two types. Like a circle of bubbles, I call it “bubble type”. The light spots that look like a grid, I call it “rhombic pattern”. Whether it is “bubble type” or “rhombus pattern”, the shape of the light spot has nothing to do with photography skills. But is absolutely related to the equipment.

The fixed-focus lens has a relatively strong ability to suppress the flare effect. So no matter how you shoot, you can’t get the flare. The zoom lens is easier to produce. This will vary depending on the lens coating and material of each lens.

The “bubble” and “rhombus” light spot shapes are formed by the mechanical blades in the lens that control the aperture. The difference between the two lies in the size of the aperture. If we open a large aperture, a “bubble-shaped” light spot will be produced. And when the aperture is narrowed, a “diamond-patterned” light spot will appear.

But it does not mean that there will be a “bubble type” when the aperture is fully open, depending on whether your lens aperture is large enough. Only when the mechanical blades are opened to a nearly circular shape has the opportunity to form a bubble. Otherwise, it will be a “diamond pattern” or a slight bubble spot in the corner. And the “rhombus pattern” also has so-called octagonal and hexagonal shapes. That depends on the number of mechanical blades of your lens.

General Type Backlight

Generally, there are two types of backlighting, one is “front backlighting” and the other is “side backlighting”. In any case, when the sun is directly behind the model, I classify it as general backlighting. If the sun is shot directly into the picture, it is called “front backlight” And if the sun is not shot into the picture, it is called “side backlight”.

Shooting method

The general type of shooting method is relatively simple, as long as you shoot against the light. At most, the “shading method” is used for metering, which is almost not difficult. And this type of backlighting effect will easily produce contour light and silky light. The more difficult part is that the position of the sun in the day is high and low. It will affect the effect of shooting. And how we should judge and choose the picture we want is the main point of consideration for general backlighting.

Shooting Timing

When the sun is still high, if you want to be backlit, you must kneel lower. But sometimes the low-angle picture is not so ideal, and the atmosphere is not easy to control. If you wait until the time for the oblique light to appear, it will be much simpler and easier.

Side backlight shooting method

Although it is called “side backlight”, it is not necessary to put the sun on the side. But no matter which side the light is on, as long as the sun is not taken into the photo. The application of “frontal backlight” and “side backlight” is that if the contrast between the front and backlight is too large, the subject will be too dark. If you insist on shooting the subject very bright, it will cause the background to be completely overexposed and dead white. At this time, you can use the “side backlight” to control the contrast to avoid overexposure of the picture. In addition, the side backlight does not need to be too obsessed with avoiding the sun in the picture, but simply hopes to reduce the excessive contrast between light and dark caused by direct sunlight.

When the sun is too strong, although the “light reduction method” is used to control the amount of light, the contrast between the front and back light is still very large.

At this time, you can consider using “side backlight” to control the contrast.

White Fog Backlight

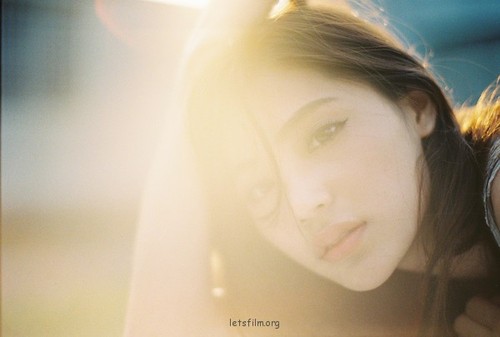
The white fog phenomenon under backlight is also divided into two different presentation conditions. One is under strong light and the other is under weak light. The effect of the fogged light spot taken out is slightly different.

Shooting method

when under bright light

The strong light white fog is also related to the equipment. But it is not the lens itself, but the difference in focal length. Because this type of backlight is the result of diffraction in the lens when the light source enters the camera, the longer your focal length, the more chances and times the light is diffracted in the lens, the easier it will be.

At this time, the greater the degree of opening of the aperture blades, and the best effect of letting the light source directly into the lens. As a result of using 35mm, 50mm, and 85mm prime lenses, the 35mm lens is not easy to shoot, the 85mm lens is prone to fog. And the 50mm lens is easier to produce under direct strong light.

When shooting in low light

When the light source is too weak, or the indoor window light is used to create a large contrast, the result will also be fogged. However, the effect is different from that under strong light. The fogging under weak light is generated when the light penetrates into a black object with excessive contrast, so there is only a faint white fog, which is different from the situation where the strong light completely fogs the picture. too the same.

The white fog under strong light actually requires a black object as the substrate to be more obvious. Therefore, you can choose a background with high contrast, or use the model’s body as the substrate, which are all techniques for using white fog backlighting.

Shooting Timing

Low light or weak indoor window light also often has edge fogging

Strong light or weak light fogging requires a black substrate to be more obvious

This type of backlighting has nothing to do with the time of shooting, nor with the quality of the light. But the color of the light will have different fogging effects. For example, white light will produce white fog, and yellow light will produce yellow fog.

Sunset Type Backlight

 Shooting Timing

Since it is said to be sunset, it must be taken at sunset. Sunset backlighting is actually a type of general backlighting. But why is it necessary to separate it out? This is because sunset backlighting focuses more on shooting timing, and sunset backlighting is probably the most beautiful of all backlighting types, and it is also the type of backlighting that photographers love to shoot.

Before the sun has completely set, there will be a period of time when the light is softer and has a slightly golden color temperature. At this time, the contrast will become smaller, so the shooting process is also easier to control. This golden hour lasts for about an hour, and the time point and duration of it will vary depending on the season. It’s around 5pm in summer and around 4pm in winter. There is also a soft light quality in the morning, but this golden hour occurs earlier, around 5 or 6 in the morning in summer, and around 7 or 8 in winter.

Shooting method

Sunset-type backlighting is the same as the general backlighting method, and it is not too difficult. Especially when the prime time comes, the situation will be better controlled. Just want to shoot a good-looking sunset-type backlight, scene selection and scouting become very important. But if you’re the go-anywhere type, that’s another story.

It’s just that sometimes if we want to shoot a subject, the content is to use the sunset backlight to create some kind of comfort, then we must pay special attention to the issue of time. On the day of the shooting, we waited at the shooting location before the prime time, so that we did enough preparation and homework, and the result will be the picture that we imagined in our hearts.

TIP:

As the sun gets closer to the horizon, the color temperature will become more and more yellow, and the skin tone will gradually darken. And this complexion is difficult to handle with any powerful software. If you don’t want to stop shooting at this point, you don’t need to be too deliberate about how bright the person is, and it’s also great to change to a beautiful silhouette.

Categories
Soft Lights

Shooting Tips with Digital Cameras_Part II

(2) Animal Photography Skills

B. Use fill light to reflect your pet’s demeanor

It is not advisable to shoot in the light of pets. Shooting with side light or side backlight can enhance the texture of the fur, making the fur look rooted and detailed. Control the depth of field with a wide aperture to blur the cluttered background.

When photographing pets, you must first understand their living habits. Grab their special demeanor and shoot with appropriate props, arrange a more elegant and clean environment, and wait patiently. Induce his demeanor and let nature take its course, in order to take vivid and interesting pictures.

C. Snapshot skills of moving characters and animals

The movement mentioned here refers to the rapid movement. Therefore, in order to freeze a fast-moving picture horizontally, in addition to using AI Servo AF for follow-focus shooting, a high shutter speed must be guaranteed. Shutter priority exposure mode should be used.

As the shutter speed increases, the aperture will automatically open accordingly to ensure exposure. However, the shallow depth of field brought by an excessively large aperture is not good for photographing moving objects, especially those that move vertically. Properly reducing the aperture to increase the depth of field can prevent the subject from blurring due to the shallow depth of field.

If you cannot narrow down the aperture, you can reduce the shutter speed appropriately when shooting people moving in front of you, or you can make up for it by increasing the ISO sensitivity.

For complex backgrounds, use a large aperture to blur the background. When it is not possible to reduce the aperture to increase the depth of field, you can use manual focus and preset focus. Take a close-up photo with the wide-angle end to meet the needs of blurring the background. Although this is more difficult, it can be selected after taking more shots, such as when shooting pigeons.

Macro and Subject Photography Tips

(1) Macro photography of flowers

The most characteristic shooting in digital camera shooting is the macro. The key to success in macro photography is high definition of the subject. To achieve this, the accuracy of focusing is very important, because the depth of field of macro photography is very shallow, and the camera will be out of focus with a little movement. If possible, use manual focusing as much as possible. The accuracy of manual focusing is often higher than that of automatic focusing. At the same time, be careful not to exceed the shortest focusing distance of the lens, otherwise the focus will not be achieved.

In addition, since the objects of macro photography are very small, in order to be beautiful in the environment, spot metering should be used. For stationary subjects, use aperture priority mode. For moving subjects, shutter-priority exposure mode can be used.

Depth of field

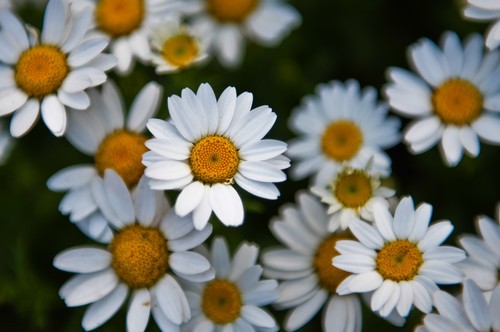
Macro photography has a shallow depth of field. For larger flowers, the focus should be on the stamens, but the rest of the flowers are a little hollow. If the background color of the flower is relatively simple, you can increase the depth of field by narrowing the aperture, so that other parts of the flower will be clear.

For a single flower, try to make the optical axis of the lens perpendicular to the plane formed by the flower. This will try to make more parts of the flower equidistant from the lens, and will also form a larger area of ​​the real image. When shooting a single flower, you need to pay attention to the composition, the full composition has a stronger visual impact.

Background

When shooting flowers, you can place a black background behind the flowers, so that the flowers you shoot will appear more prominent due to the strong contrast with the background, and the charm will be greatly enhanced. When taking photos with side light, the petals have texture. It is not advisable to take pictures with forward light, as it will lose detail.

All kinds of flowers have all kinds of flower qualities. Familiarity with various flowers will help when creating ideas, such as lotus, which should be photographed to express its purity, not showy. Therefore, choosing a light-colored lotus is more conducive to expressing this theme.

(2) Macro Capture of Flying insects

Early in the morning or after rain, because the wings of insects are relatively wet, their movement is not large, and this is the best time to photograph insects. The difficulty of photographing flying insects lies in how not to disturb the insects. You should try to use the telephoto end of the lens to shoot, and you should move lightly when shooting. Also do not wear brightly colored clothes, preferably green clothes.

Familiar with the habits of insects is good for photographing insects. Many people think that flying bees are difficult to capture. In fact, when bees find a desired flower and are ready to land, they will “stop” in the air for a few seconds in front of the stamen. This is a great time to capture bees in flight. Sometimes even using autofocus is enough.

In order to increase the luster of insects in macro photography, you can use flash to fill in light. Due to the short distance, in order to control the output power, you can put a napkin on the flash, because the light intensity required for fill light is not large.

Butterfly is a difficult insect to photograph, because it is constantly flying, rarely staying, and even if it stays, it will fly away quickly. If you encounter a butterfly parked on a flower, you should quickly “catch” it with continuous shooting.

(3) Several Subject Shooting Techniques

A. Lower the shutter to capture waterfalls and rain

If the motion trajectory of the water flow is photographed with an extremely slow shutter speed, countless motion trajectories are intertwined, creating a dreamlike effect like gauze, fog and silk. At the same time, due to the long exposure time, the water flow track recorded on the screen is the result of superposition. Even a small flow of water can create a powerful effect.

The flow rate of the water determines the selection range of the slow shutter. Use a tripod to ensure that everything except water is very clear.

When you lower the shutter, the aperture narrows accordingly. When shooting flowing water in sunny weather, it is often the case that due to the strong light, even if the aperture is narrowed down, the speed cannot be lowered any lower. If you want to use a slower shutter speed at this time, you can add an ND filter in front of the lens. The ND filter can block without affecting the color reproduction or other functions of the photoreceptor. An ND8 filter can reduce tertiary exposure. If you don’t have an ND mirror on hand, you can use a polarizer to reduce the exposure from 1.5 to 2.2.

Do not use a shutter that is too fast to shoot rain. Because the high speed will condense the rainwater, forming a small raindrop, and there is no feeling of being pulled into silk. You should note that when shooting a rain scene, do not use the sky as the background, but choose a dark scene with a larger tone related to the rain as the background (such as a dark green forest). In this way, the bright rain threads can stand out, and the transparent texture of the rain water can also turn extraordinary.

B. Common water drop shot

Shutter speed

Digital cameras have certain manual functions. Such as shutter priority, this is very useful for shooting water droplets. Because you can set the shutter speed to a minimum of 1/300 of a second, so that the moving water droplets can be “frozen” on the photo. Indoor light is often not able to achieve such a high shutter speed, you can use the flash to increase the shutter speed.

If you have a glass basin or a glass fish tank at home, it is better. Use it to shoot water droplets, and the incidence of light will be very even. Put a color drawing board under the glass basin or transparent fish tank, the color will come through, as long as the shooting angle is tilted, the color of the background will be colorful, and the feeling will be different.

speed of dripping

The dripping speed of the faucet should not be too fast, otherwise it will easily cause the ripples on the water surface to end with disorder and lose its beauty. In principle, the ripples formed by the first drop of water should disappear after the second drop of water falls, which is a suitable speed. In addition, the water droplets should not be too large, otherwise the splashed water droplets will be scattered. To control the size of the water droplets, insert a toothpick in the faucet and let the water drip down the toothpick.

Usually, when shooting water droplets, the faster the shutter speed, the better. If it can be controlled at about 1/500 of a second, then the effect is the best. Aperture control is closely related to the depth of field and image quality of the photo – the larger the aperture, the faster the shutter speed, the shallower the depth of field, and the better the effect (especially for SLR cameras).

However, a large aperture will also degrade the image quality, so you can’t blindly pursue the maximum aperture. Usually we will control the aperture between F5.6~F8, which not only guarantees the shutter speed, but also makes the best picture quality.

C. food texture shot

First of all, food photography should not only choose food with local characteristics, but also pay attention to whether its color is beautiful. Some foods are dark in color and don’t look good when photographed, while some colors are paired with tempting appetites. The point of photographing food is gloss and texture. To highlight the luster of the food, spray a layer of oil on the surface, and then use a lamp to light the side.

When shooting food, in order to highlight the details, the composition can fill the entire frame to maximize the prominence of the subject. If it is a consumer-grade camera, it can be placed in the macro file for close-up shots. If it is a SLR camera, pay attention to shooting outside the closest focusing distance of the lens, otherwise the lens will not be able to focus.

In still life photography, the focus is on using light to enhance the texture of the object, and the light that can best highlight the texture is the side light.

Shooting food is generally indoors, and white balance control under indoor lighting is more critical. Sometimes it is difficult to use automatic white balance to be accurate, so try to use several white balance schemes. If it is still not accurate, you can correct it in post-processing. In short, you can’t make something that was originally white gray or yellow.

Categories
Soft Lights

Night Scene Special Effects Shooting

In the past, when I used a film camera, I was always obsessed with using various special means to take some pictures, but film shooting is not something everyone can do. Well now, we have a digital camera.

Basic Tools

The camera and lens must be able to zoom in the process of exposure, generally DSLR or high-end DC (such as F828) can meet the needs.

A tripod is a must. Otherwise, you have to look for fixtures everywhere, or you will become a “trash can photographer” (referring to the expert who specializes in finding garbage cans to place cameras).

Remote control or shutter release to prevent shaking when pressing the shutter. Of course you can use a selfie instead.

1. focal length

Focal length is an important factor for a lens. First, understand what a focal length is. The lens of a digital camera can be thought of as a set of lenses. When parallel light rays pass through the lenses, they will converge to a point called the focal point. The distance from the focal point to the center of the lens is called the focal length. A lens with a fixed focal length is a fixed focal length lens. A lens whose focal length can be adjusted is a zoom lens.

In the field of photography, the focal length mainly reflects the size of the angle of view of the lens. For traditional 135 cameras, the angle of view of the lens around 50mm is close to that of the human eye, and it is not deformed when shooting, which is called a standard lens.

The division of this range is just people’s habit, and there is no strict definition. The CCD of a digital camera is generally much smaller than that of 135 film. Therefore, the same angle of view, the focal length of the lens is much shorter. For example, a digital camera with a 0.33″ CCD uses a lens of about 13 mm, and its angle of view is approximately equivalent to a standard lens of 50 mm for a 135 camera. Due to the different CCD specifications and models used by various digital camera manufacturers, everyone adopts the “equivalent” lens. In the 35mm camera (ie 135 camera) focal length” statement.

Usually, there will be F and f in the technical parameters of digital cameras. Where F represents the maximum aperture value, and f represents the focal length. For example, it is marked with f=8-24, which is equivalent to 38mm-115mm for a 35mm camera.

2. zoom

Zoom capability is also a design focus of digital camera lenses. The zoom of a digital camera is generally divided into two types: optical zoom and digital zoom. The optical zoom is the same as the traditional optical imaging camera, which realizes the zoom through the telescopic combination of the lens. This is also true zoom.

But optical zoom lenses are expensive and complex. Complex zoom lenses are generally too bulky. This is not applicable to digital cameras whose volume tends to be miniaturized. Therefore, most of the optical zooms of mainstream digital cameras on the market are about 3 times.

Digital zoom can be said to be exclusive to digital cameras and is a brand new concept. Its basic principle is to interpolate the captured scene data through the calculator in the digital camera, so as to enlarge the subject and achieve the effect of zooming.

This zoom method seems to bring out more detail. In fact, simply zooming in on the originally shot image will not increase the clarity of the image. Because the number of extra pixels is not actually taken by the lens, but calculated by software interpolation. The digital zoom of digital cameras is now more common in the market is 2 times, 3 times or 4 times.

You can easily find the words “This digital camera has 3x optical zoom and 2x digital zoom function” in the performance index column of the digital camera. It can be seen that they are an important indicator of the performance of the digital camera lens. It seems that in order to attract more attention, the current digital camera manufacturers often emphasize that the zoom capability of their products can reach 6 times, and some even claim that it can reach 12 times.

Slow Shutter Zoom

Slow Shutter Zoom: As the name suggests, it uses a zoom lens to zoom when shooting at a slow shutter speed.

There are two ways of zooming commonly used on DSLR lenses, one is a rotary type and the other is a push-pull type. Both of these lenses are basically the same when shooting with a slow-gate zoom. Relatively speaking, the push-pull type is easier to operate.

Shutter speed:

The shutter is a device used to adjust and control the time when the light passes through the lens and reaches the photosensitive surface. In layman’s terms, the shutter determines when the image is captured. It is blocked in front of the photosensitive element and is normally closed. It only opens when the shutter button is pressed, and the opening time is determined according to the set shutter speed. Usually the camera shutter speed range is: 4 seconds, 2 seconds, 1 second, 1/2 second, 1/4 second, 1/8 second, 1/15 second, 1/30 second, 1/60 second, 1/125 second seconds, 1/500 of a second and 1/1000 of a second.

If the camera shakes due to instability while the shutter is open, the resulting image will be blurred. That’s why it’s important to keep the camera steady when shooting, and it’s why a slow shutter speed is more likely to cause camera shake. Therefore, there is a concept of a safe shutter in terms of shutter speed. Generally speaking, the shutter speed should not be slower than the safety shutter: safety shutter = 1 / focal length of the lens.

For example, the focal length of the lens is 50 mm, and the safety shutter is 1/50 of a second, that is, a shutter speed of more than 1/60 of a second can be selected to avoid blurred images caused by hand shake. Of course, the safety shutter is just a reference parameter. The shutter speed range is also as large as possible, so that the camera can adapt to more shooting ranges.

Just follow the normal metering exposure when shooting. However, if you want to zoom when shooting, you should naturally leave enough time for the zooming action. So try to use a small aperture to get a longer exposure time.

Controls for zoom:

The longer you stay at a focal point when zooming, the sharper the image will be at that point. And those point light sources (such as street lights) will form a light trail when zooming. Various radial light tracks form another scene in the picture.

TIPS 1:

Try to be as steady as possible when shooting, so that the zoom lines are smooth and the picture is clear.

Select some points of light to form zoom lines.

Staying at different focal points for a while, you can get several clear pictures with different focal lengths.

Before shooting, check the composition at the telephoto end and the wide-angle end to ensure that the picture is complete.

Multiple exposures:

The function of multiple exposures is currently only available on a few DCs, but we can use shutter B or a slower shutter to achieve a similar effect.

The method is very simple, open the shutter B or when using the slow shutter to shoot, cover the lens cap or cover the lens with an object, and then take the second shot after adjusting the position. And so on you can make multiple exposures.

This photo took eight exposures using shutter B, with a total of 115 seconds of aperture B, with each exposure taking about 8 seconds.

Aperture

Aperture is a mechanical device that controls the amount of light that passes through the lens and enters the photosensitive surface of the fuselage. It is usually inside the lens and does this by controlling the size of the lens aperture. When the outside light is weak, open the aperture wider. Otherwise, close the aperture down. Expressing aperture size is usually expressed in F-numbers. The formula is: aperture F value – = focal length of the lens / diameter of the lens aperture.

The complete aperture value is in descending order: F1. F1.4, F2.8, F4, F5.6, F8, F11, F16, F22, F32, F44 and F64.

The smaller the aperture F value, the wider the aperture is, and the more light enters in the same unit of time. Moreover, the amount of light entering the upper stage is just twice that of the next stage. For example, if the aperture is adjusted from F8 to F5.6, the amount of light entering is doubled. It can also be said that the aperture is opened one stage larger. For popular digital cameras, the aperture F value is often between F2.8~F16. In addition, many digital cameras can do 1/3-stop adjustment when adjusting the aperture.

TIPS 2:

Make a good idea before shooting, observe each exposure of the picture, and be aware of it.

If you use a slow shutter, the adjustment speed is a little faster, because time is limited. With shutter B, you can do whatever you want.

Master brings in the door, and the practice is personal. We can try to use various other means to make the DC in your hand dance in the dark night. We can break the tradition that the camera stand is fixed on a tripod, it can be rotated, raised and lowered, and even halfway through, the camera can be removed and the camera can be taken in another place. There is nothing impossible, as long as you dare to think, you can shoot.

Rotate shot

Categories
Soft Lights

The Meaning and Application of Depth of Field

1. What is the Depth of Field?

Depth of field refers to the area of acceptable clarity in front of and behind a well-focused focal point. When the depth of field is shallow, the focal point is a very thin plane that falls on the object, which is parallel to the plane where the sensor in the digital camera is located.

When conditions affecting depth of field change, such as when the lens aperture is narrowed, this apparent range of sharpness extends in front of and behind the lens’ focal plane. By controlling the depth of field, the photographer can control the clarity of the subject and the background environment.

Among the basic methods of composition, it is very common to use depth-of-field blur to deal with the background. Using a long focal length or a large aperture, or shortening the shooting distance, can create a shallow depth of field effect. A shallow depth of field can blur complex backgrounds and make the subject stand out.

The picture above shows the cute scene of the cat lying on the seat. The photographer used a relatively shallow depth of field, and the subject stood out, creating a beautiful background blur and soft picture effect.

2. Factors That Affect the Depth of Field

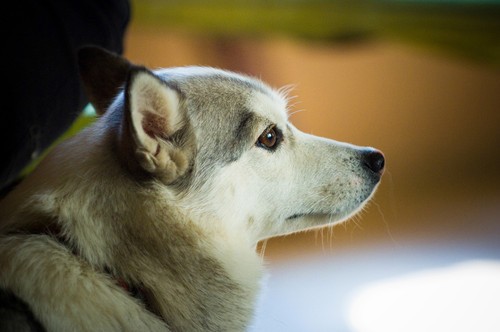
How deep the depth of field should be used in the photo depends on the message the photographer wants to convey. The image below shows a close-up of a pet dog, shot at f/3.2. Shallow depth of field, focus on the dog’s eyes, the dog’s eyes are perfectly displayed.

In photography creation, the three main factors that affect the depth of field are as follows, we can adjust these items to change the depth of field effect.

  1. The size of the aperture when shooting,
  2. The focal length of the lens,
  3. The distance between the camera and the subject.

The specific relationship between the depth of field and the above three elements is as follows.

Aperture size: The larger the aperture, the smaller the aperture value, and the shallower the depth of field. The smaller the aperture, the larger the aperture value, and the deeper the depth of field.

The focal length of the lens: The longer the focal length, the shallower the depth of field. The shorter the focal length, the deeper the depth of field.

Shooting distance: The closer the camera is to the subject, the shallower the depth of field. The farther the camera is from the subject, the deeper the depth of field.

3. Depth of Field and Foreground and Background

(1) Shooting with a focus on the foreground

We all know that when framing, the picture in the viewfinder will be divided into two parts: foreground and background. The foreground is the part closest to the camera. Focusing on the foreground shot will highlight the foreground as the main body of the frame. Generally, when the background of the picture is very cluttered, you can focus on the foreground to make the background blur, thereby reducing the adverse effect of the background.

(2) Focus on the background shot

The background is the person or thing in the shot that is behind or close to the subject. The background corresponds to the foreground in the scene of the lens, and is sometimes used as the subject or companion of the performance.

Focusing on the background shooting will show the background as the subject, and the parts other than the background will be blurred. This kind of photos with strong contrast between reality and reality often leaves a very deep impression on people.

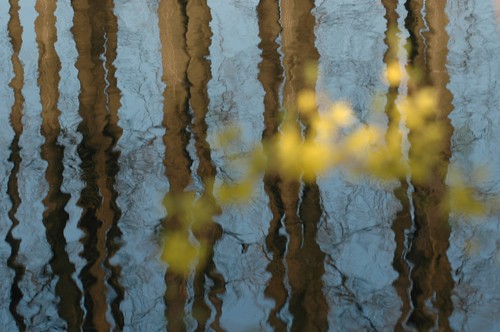
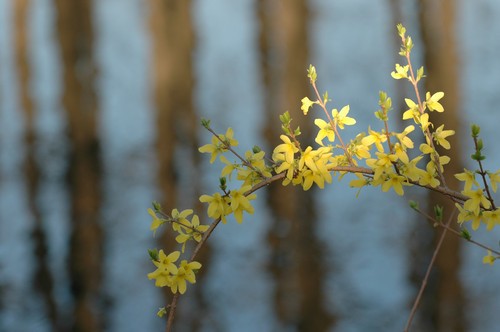
Normal shooting generally requires a clear focus, so that the subject is clearly presented. But sometimes, purposefully blurring part of the scene in the picture is also one of the techniques of photographic expression. For example, in the picture, by selectively placing the foreground branches and leaves out of focus, the photographer deliberately crossed the foreground and only focused on the reflection of the trees in the water surface behind, so that the branches and leaves became the foil foreground. The contrast between reality and reality is impressive.

(3) Control method of depth of field

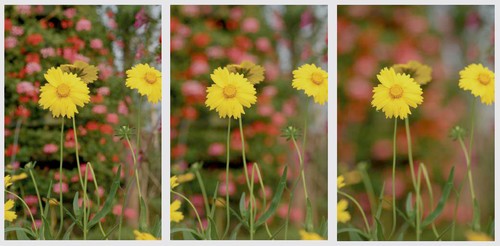
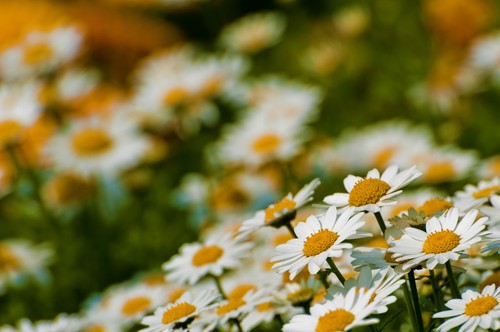
Shooting flowers in a bush, different apertures create different depth-of-field effects. It can be seen from the figure that with the change of aperture, the depth of field of the picture also changes.

(4) How to get the maximum and minimum depth of field

Control over depth of field is one of the fundamental techniques of photography. We can expand the depth of field so that all subjects are clearly visible on the frame. We can also narrow down the depth of field, so that only the main objects are clearly represented, and the secondary objects are blurred and hidden. The depth of field effect has a very noticeable effect on the composition of a photo.

How to get the deepest depth of field? We can get the deepest depth of field by the following 3 measures:

i Try to use the wide-angle end of the lens or a short focal length lens.

ii When shooting, try to extend the shooting distance.

iii Close the aperture as much as possible.

 Sometimes, photographers want to have both reality and reality in the photo, such as blurring the environment and making the subject clear. This requires the use of a shallow depth of field technique known as “selective focus”.

How to get the smallest depth of field? There are also 3 measures:

i Try to use the maximum focal length of the lens or shoot with a telephoto lens.

ii Try to get as close as possible to the subject.

iii Use the widest aperture as much as possible.

(5) Control the depth of field through the aperture

Although these three elements can control the depth of field effect, the most operable aspect in photographic creation is adjusting the aperture. Because changing the focal length or shooting distance will change the overall composition and perspective of a photo. If the composition and perspective of a photo have been determined, the only way to control the depth of field is by changing the aperture. The two images below are two photos taken at the same focal length. The difference in depth of field is achieved by the adjustment of the lens aperture: the larger the aperture, the shallower the depth of field. The smaller the aperture, the deeper the depth of field.

4. Control the Degree of Blur by Adjusting the Background

Among the 3 factors that affect the depth of field, the shooting distance (the distance between the lens and the subject) plays an important role. There are two ways to change the shooting distance: one is to move the camera to change the distance between the camera and the subject, and the other is to change the distance between the subject and the background.

When changing the distance between the subject and the background, other shooting factors are kept constant. At this time, the depth of field of the picture will not change, but because the background is further away from the clear depth of field range, the blurring effect of the background in the photo will be stronger. That is to say, by changing the shooting distance, we can control the degree of blurring of the picture.

The photographer took the first of the two photos above  using an overhead shot. The distance between the flowers and the ground is relatively close, and the ground is relatively dim, and the degree of blurring is not particularly obvious. When the photographer took the second photo from the side, the background in the picture was farther and farther from the subject, and the blurring effect of the background was more obvious.

5. Control the Depth of Field by Adjusting the Focal Length

We can also control the depth of field by adjusting the focal length of the lens. The shorter the focal length, the deeper the depth of field of the picture. The longer the focal length, the shallower the depth of field of the picture.

However, in actual shooting, the adjustment of the focal length is often subject to many restrictions, because the change of the focal length will simultaneously change the viewing angle and framing range of the picture. The perspective is often the most important factor in determining the composition of a photo. Therefore, changing the focal length is often not a photographer’s first choice for controlling depth of field.

In the picture, the photographer used the wide-angle lens to shoot close to the sculpture. And the background is not blurred enough. And we can still see the elements in the background. At this point, the photographer stepped back and switched to a telephoto lens to shoot. And the depth of field of the picture immediately became much shallower. In the picture on the left, using a wide-angle lens to shoot a large indoor scene, it is impossible to simply adjust the focal length to control the depth of field.

6. Correct Understanding of the Degree of Blurring

Depth of field and accurate focus are very important to the sharpness of the picture. Some beginners may think that a certain part of the photo is either clear or blurred. In fact, this understanding is too absolute. The degree of blurring out of focus in the image is also different, And can show a linear change. That is, from a little blur to a complete blur. From in-focus to out-of-focus, there is a trend from clear to gradually blurred. That is, the degree of blurring gradually changes.


The subject in the photo is only really sharp when it is in the focal plane, all points that are not on the focal plane are more or less blurred in the photo. But the weak blur effect we can’t distinguish with the naked eye.

The further from the focal plane, the blurrier the image. In fact, in many photos, because the depth of field is not shallow enough, the out-of-focus scene can still be clearly identified. Thereby, it reduces the viewer’s attention to the subject. At this point, you need to control the depth of field to be shallower.

On the contrary, if you need to explain the environmental information of the picture, such as the picture on the left, you need to explain the environment where the subject is in the stadium stand. At this time, we can control the depth of field deeper, and the picture gradually changes from clear to blurred. But some background elements are still clearly identifiable, allowing viewers to learn about the shooting scene. As a background element, even if the out-of-focus area is not very clear, it can give people a sense of the background and other information of the photo.

Categories
Soft Lights

Change the Aperture to Shoot

The Structure and Function of the Aperture

Aperture is the hole that controls how light enters the camera body. The larger the hole, the more light may enter the camera at one time. In addition, the aperture has another function, which is to adjust the depth of field. The wider the aperture, the narrower the focus range and the more pronounced the bokeh effect. On the contrary, the smaller the aperture, the more in focus from near to far, the sharper the photo.

Using the aperture function flexibly, you can improve your composition skills. For example, it can not only achieve the effect of foreground bokeh and background bokeh, but also make the whole photo in focus.

The unit of aperture is the F(f) value. The smaller the F(f) value, the richer the bokeh effect. The F(f) number must be increased to take sharp pictures.

The Relationship Between Depth of Field and Aperture F Value

To see the effect of the aperture, an indispensable element is the depth of field. Depth of field refers to the range of focus. Specifically, a lot of bokeh and a small in-focus range are called “shallow depth of field”. Less bokeh and more in-focus range is called “deep depth of field”. That is, the smaller the aperture F(f) value, the shallower the depth of field.

Different lenses have different F(f) values that can be used. For example, fixed-focus lenses, because the minimum F(f) value that can be used is very small, so it is easy to take relatively blurred photos. This minimum F(f) number that can be used is also called the open number (open F(f) number, open aperture). If you want to take photos with better blur effect, it is recommended to use a lens with a smaller open value. The following will focus on the various characteristics of different apertures when composing pictures.

Flexible Use of Background Bokeh in Composition

Reducing the F(f) value of the aperture to blur the background of the subject is called background bokeh. Because the object to be photographed in front of you is very clear in focus, its presence is enhanced. Using this method, the subject of the shot can be clearly defined, and the photographer’s intention can be easily conveyed through the composition of the picture.

Flexible Use of Foreground Bokeh in Composition

Bokeh the scene in front of the protagonist, known as foreground bokeh. With this shooting method, the viewer’s eyes can be guided to extend deep into the picture. In addition to opening the aperture, the same effect can be achieved by moving the camera closer to the subject.

Flexible Use of Front and Rear Bokeh in Composition

Front and back bokeh is a method that blurs the front and back of a photo. Jiao Nei’s protagonist is easy to impress. The smaller the depth of field, the more striking the object in focus. This method is not recommended for flat composition, and is more suitable for horizontal composition with some angles. It can capture the beauty of layers inside and outside the focal length.

Flexible Use of Pan Focus When Composing Pictures

Pan focus is to make the scene from the front to the depth of the picture are all within the focal length. The pan-focus method can be used to narrow down the aperture in order to capture the layering of objects, or to take sharp photos in flat places that lack three-dimensionality. The charm of flexible use of pan focus is that it can show the viewers each element of the picture in detail. However, there are also shortcomings, that is, it is difficult to highlight the protagonist, and it is easy to mix redundant elements, so you need to pay special attention to the composition.

Categories
Soft Lights

How to Use White Balance to Control the Color of the Picture

The emergence and extensive use of digital photographic equipment has changed the method of controlling the color of the picture, improved the efficiency of using and controlling color, and made portrait photography develop in a diversified manner. Let’s explore how to use the white balance of a digital camera to control the color of the picture.
 

1. The Concept and Characteristics of Digital Camera White Balance

The color reflected from an object depends on the color of the light source. White balance is one of the important guarantees to ensure the accurate color reproduction of digital cameras.

So, to understand what white balance is, you need to first explain what red is. The human eye sees some objects as red because the human brain can detect and correct color changes like this. Therefore, no matter in sunlight, cloudy weather, indoors or under fluorescent light, people see red objects as the same color.

The human eye can adapt itself, but digital cameras do not have such intelligent functions. This is because the photosensitive element of the digital camera itself does not have this adaptive function. In order to be close to the human visual standard, the digital camera must imitate the human brain and adjust the color according to the light, that is, the white balance needs to be adjusted automatically or manually to achieve a satisfactory color.

Master the adjustment of white balance, you can shoot a real color picture. All digital cameras currently on the market have the function of automatically or manually adjusting the white balance, which can be adjusted according to the usage environment, which is relatively more convenient and faster. Because this adjustment is often based on red, it is called white balance.
2. The Relationship Between White Balance and Color Temperature

It is to quantitatively express color in Kelvin temperature (K). The higher the K value, the more the displayed color tends to be white and blue, and the lower the K value, the more the displayed color tends to be yellow and red. Suppose a black body material can absorb all the heat falling on it without loss. At the same time, if all the energy generated by heat can be released in the form of “light”, it will turn into different colors due to the level of heat.

For example, when a black body is subjected to heat equivalent to 500-550 degrees Celsius, it will turn dark red. When it reaches 1050~1150 degrees Celsius, it turns yellow. As the temperature continues to rise, it will appear blue. The color component of the light source corresponds to the thermal temperature of the black body. The color temperature of any light is equivalent to the temperature at which the black body described above would emit the same color. This temperature is used to represent the characteristics of a certain color light to distinguish others, which is the color temperature. Figure 2.
Different street lights also emit different colors of light. The light emitted by tungsten lamps is expressed as a yellow tint due to its lower color temperature. Natural gas flames are blue because of the higher color temperature. The color temperature of a cloudless blue sky is about 10,000K. Cloudy days are about 7000~9000K. The color temperature under direct sunlight on a sunny day is about 6000K. The color temperature at sunrise or sunset is about 2000K. At this time, it is not difficult for me to find a rule: the higher the color temperature, the bluer the light color, and the lower the color temperature, the redder.

The change of target color

Under various light conditions, the color of the target will change. In order to minimize the influence of external light on the color of the target, the original color of the subject can be restored under different color temperature conditions, which requires the digital camera to perform color correction to achieve the correct color balance.

Red objects reflect the entire visible spectrum, so digital cameras use it as the norm for setting. When performing manual white balance adjustment, the white balance attempts to modulate a certain range of tones other than pure white into pure white. If this part is yellow, the blue will be strengthened to reduce the yellow color in the picture to obtain a more natural color.

As long as the digital camera correctly restores the red color of the object when shooting a red object, it can correctly restore other colors of the object under the same lighting conditions. So called white balance adjustment, divided into automatic and manual adjustment. Manual is more accurate and has a wider range of adjustment. The traditional camera relies on the use of different films (daylight type, light type) or different color filters to achieve the correct color balance to ensure accurate color reproduction of objects under different light sources. Therefore, digital cameras set different white balance values ​​for the color temperature of different light sources to correspond to different light sources.

3. Use White Valance to Restore the Color of the Picture

(1). Use automatic white balance to restore the color of the picture

There is a complex histogram in the camera, and auto white balance is usually the default setting for digital cameras. The white balance reference point in the picture can be determined to achieve automatic white balance adjustment.

The accuracy of this automatic white balance is relatively accurate. And it is suitable for use in situations where the on-site light is more complex. Or it needs to be used in short-term shooting situations. However, the effects of many automatic white balance systems tend to have a slight color cast. That can be adjusted using a computer in the later stage. Figure 5 is a picture taken with automatic white balance.

(2) Use incandescent white balance to restore the color of the picture

This is to ensure that the color of my picture is reproduced correctly. Incandescent white balance is the mode used when shooting with light with a color temperature of about 3000k. Figure 6 is a picture taken with incandescent white balance.

(3) Use the white balance of fluorescent lamps to restore the color of the picture

In order to ensure the correct color reproduction of the picture, we can use the fluorescent light white balance mode to shoot. And use the fluorescent light with a color temperature of about 4200k to shoot. Figure 7 is a picture taken with fluorescent white balance.

( 4) Use direct sunlight to restore the color of the picture

In order to ensure the correct color reproduction of the picture, we can use the direct sunlight white balance mode to shoot. And use the color temperature of about 5200k to shoot in direct sunlight. Figure 8 is a picture taken with direct sunlight white balance.

(5) Use the flash white balance to restore the color of the picture

In order to ensure the correct color reproduction of the picture, we can also use the flash white balance mode to shoot. And use the color temperature of about 5400k studio flash to shoot. Figure 9 is a picture taken with flash white balance.

(6) Use the preset white balance to restore the color of the picture

The preset white balance is relatively accurate among the white balance types of digital cameras, and is tested and set according to different light. Simply put, it is the process of telling the digital camera to manually preset the white balance.

At the current color temperature, what kind of white looks like and how to preset it, different brands of cameras have different methods. When you preset the white balance, you are actually telling the digital camera what the color temperature is under the current lighting conditions. Use this color temperature as the standard to set the white balance. This setting is generally more accurate. In the actual test operation, you can use white paper or medium gray board (18% as shown in Figure 10 is the picture taken with the preset white balance.

4. How to Dislocate the Use of White Balance to Obtain the Special Color of the Picture

Use different light sources to shoot portraits, and choose the corresponding white balance. But sometimes I also use white balance out of place depending on the needs of the subject. That is to say, shooting under a certain light does not use the corresponding white balance. But uses the white balance opposite to the light source to make the picture achieve a special color effect.

5. Problems That Should be Paid Attention to When Using White Balance to Control the Color of the Picture

(1) Accurately analyze the color temperature characteristics of light and be familiar with the performance of the digital camera used. So pay attention to fine-tuning and proper compensation of white balance.

(2) The aging of the digital camera will also cause color cast in the white balance mode.

But often due to a variety of factors, there are still unsatisfactory places.

(3) Although I accurately selected the white balance in the early shooting, using the computer to adjust in the later stage is also an important method for secondary processing of the color of the picture. As shown in Figure 11, on the basis of the previous shooting, the computer was used to adjust the color of the picture according to the theme.

The above only introduces some typical and commonly used white balance control methods of digital cameras. Since the performance of each type of digital camera is different, there are other types of white balance that have not been introduced, as well as some methods of fine-tuning and supplementing the white balance. In practical application, you can refer to the manual of the digital camera and the actual experience to choose and use.

Categories
Soft Lights

Tips for Photographing Sunrises and Sunsets_Part III

Specific Shooting Articles:

6. give a close-up to the lovely sun

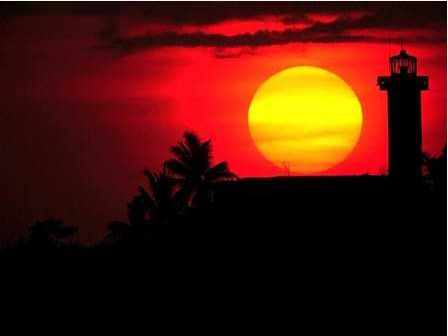
No one stipulates that when shooting sunrise/sunset, there must be clouds involved, nor does it have to be the foreground. A simple and pure sunset or rising sun is just as lovely enough to get into our shots. If your camera has a telephoto lens, lengthen it and let a simple and pure sunset or rising sun become the absolute subject of the picture!

In fact, this picture is also very colorful. A setting sun or rising sun shows a color transition from red to yellow when it is close to the ground, and the surrounding sky also shows a transition from yellow to red, from bright to dark. How can you miss a picture like this? Therefore, when shooting, do not stick to the shooting experience of predecessors. Develop your own personal creativity, maybe there will be unexpected harvests!

7. move, the picture is more exciting!

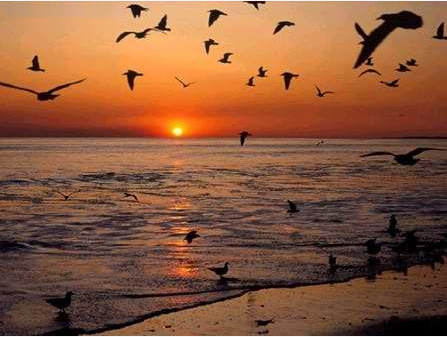
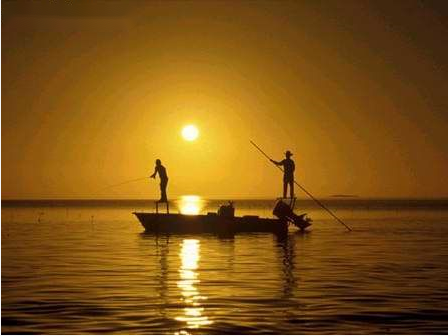
Distant mountains, sunset, colorful clouds… We have seen a lot of sunrise/sunset works that contain these compositional factors. But pay attention, aren’t many photography works with sunrise/sunset themes based on static scenes? Why not add some dynamic scenery to the picture? For example, fishermen casting nets by the water, children playing in the water, and flocks of birds returning late, these dynamic scenes can be added to the picture to make the picture more vivid and exciting.

However, in addition to the objective conditions to capture such a lens, the photographer’s keen observation is also a very important factor. So, we had to use our brains when shooting and capture some creative shots. Many times, a good photographic work is not produced by equipment, but by the photographer’s head behind the camera.

8. The sun is setting in the west, can you call it a day?

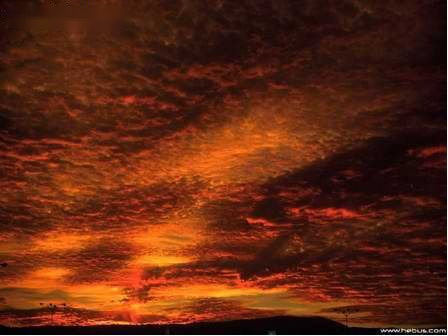
The shooting is almost done, and the sun has already sunk behind the distant mountains. Should we also put the lens cap on at this point? Don’t worry, just because the sun can’t appear in the picture doesn’t mean our shooting is over. Sometimes when the sun goes down in the west, that’s when the beautiful fiery clouds start to appear. This is because clouds reflect the sun’s rays more clearly when the sun is below the horizon. At this time, the light is often dim, and the shutter of the camera is often lowered to the point where it cannot be hand-held.

That’s when the tripod we’ve worked so hard to carry can come in handy. The metering selection is aimed at the burning cloud for spot metering. Or when shooting large scenes, use a wide-angle lens (or pull the camera’s focal length to the widest angle), and use average metering to shoot, and you will get good results.

Of course, using manual exposure will get more results, at this time test several combinations of aperture and shutter. Generally speaking, when shooting landscapes, using a small aperture can make the picture more transparent. So, isn’t it a waste to put on the lens cap when the gorgeous fiery clouds fill the sky with a variety of colors?

Post-processing Articles:

1.    Photo composition and cropping

The general photos are taken in 4:3 format, or 3:2 film ratio. These ratios are probably the most commonly used ratios. But for sunrise/sunset landscapes, there may be unexpected surprises in the strip or square ratio.

Of course, cropping loses screen area, and it also makes the photo quality rough. However, it is an effective way to attract the audience’s attention by effectively removing the obstructions of the picture, such as the excessive white sky or the dark earth, and focusing the picture on the places with layers and colors. At the same time, breaking the proportion of traditional composition can also get the effect of “a little red in the green bush”.

Square photos are the most difficult to frame. But they effectively break the rule that the subject cannot be in the center line. I have also seen the framing and placement of the quadrilateral phases in a diamond shape. And the effect is also very attractive. The cutting of the strips effectively makes the audience feel that the captured picture is spacious, and with proper magnification and fine-grained pictures, the audience gets a shocking power of being in the scene. That is difficult to achieve in general square proportions. The commonly used strip ratios range from 1:2 to 1:4, depending on the sky and foreground ratios of the scenic spots.

2. Processing of picture color tone

As mentioned earlier, the reason why digital cameras do not need too many color filters is because the post-processing space of digital photos is very large. The effect obtained by computer processing is often stronger than that of color filters. For example, the processing of the picture below:

As May is approaching, it is the turn of spring and summer and the perfect time to photograph the sunrise/sunset. Friends who are interested in this article, quickly pick up your own camera to capture this splendid moment!

Categories
Soft Lights

Tips for Photographing Sunrises and Sunsets_Part II

Specific Shooting Articles:

2. Clouds are sometimes the protagonists

The clouds are natural reflective objects in shooting. It can reflect or refract the sun’s rays, thus constantly changing the moving image. Clouds are an indispensable factor in many excellent sunrise and sunset works, so clouds can also be used as the main subject for shooting.

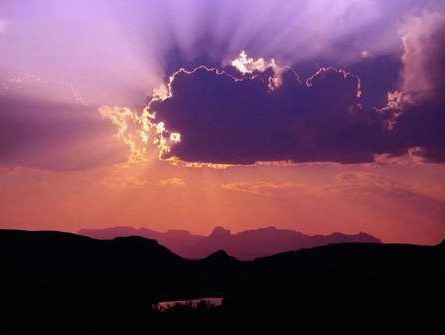
When shooting, pay particular attention to what happens when clouds cover the setting sun. At this time, the sun’s light will shoot out from behind the cloud, forming a large scene of radioactive light, which will add a very moving effect to the photo.

Sometimes when the sun hides behind the clouds, there will be a bright edge around the clouds, which is also very suitable for shooting. However, due to the fickleness of the clouds, the photographer is required to pay attention to observation when shooting, and pay attention to seize the opportunity to press the shutter. When taking pictures of clouds as the main body, generally, the metering point should be aimed at the clouds to measure the light. But at the same time be careful not to overexpose the sun.

3. Don’t ignore the use of foreground

When photographing sunrise/sunset, it is also a common phenomenon that the sky does not have some clouds. In order to avoid the sky being too monotonous, using some surrounding foreground as a foil, such as sparse leaves and branches as the foreground of the empty sky part, can help to balance the structure of the scene. However, if the foreground is too large or too heavy, it will cover most of the sky and affect the balance of the picture. However, you can also use the foreground as the main subject of the shooting, and the sunset/morning sun scene behind it as the background of the shooting is also a very good method.

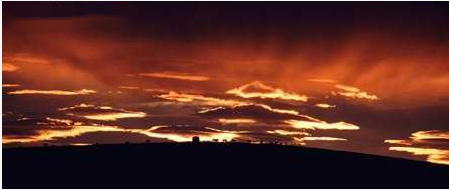
If you want to use the foreground to show the sunset or rising sun in the sky, the foreground is often processed into a silhouette effect. The silhouette effect photo is obtained by taking full advantage of the difference in light between the subject and the background. Generally speaking, the backlight at sunrise/sunset is easy to show the effect of silhouette, because the light at this time is the softest. Choose the position and angle in advance, wait for the sun to rise from the horizon, or set the horizon, from red to orange-yellow, or from orange-yellow to red, when it does not look dazzling, it is the best time to shoot.

Control exposure

Exposure should follow the principle of underexposure rather than overexposure. Exposure metering against the background is the only way to severely underexpose the subject and create a strong silhouette.

First, select the camera’s metering mode as “spot metering”. And then select the metering point on a brighter sky for metering. If your camera has an exposure lock (AE Lock) function, press the camera’s AE Lock button to lock the exposure value. For cameras without AE exposure lock function, you can hold down the shutter button halfway to lock. Finally, re-adjust the composition and shoot with the exposure combination just now. This results in a perfect silhouette effect.

4. Are you near the water? Show beautiful reflections!

A lot of good sunrise/sunset photography is done near the water. Because at sunrise or sunset, the shimmering water surface reflects the beautiful colorful clouds. And the sail shadows of ships on the water add a bit of vividness to the picture. This is a really good subject for photography.

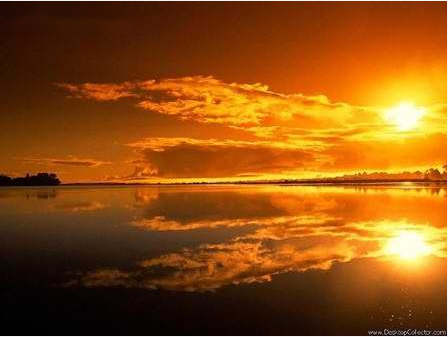
Shooting water reflections can enhance photos of sunrises and sunsets, and a calm sea or lake can reflect the sky. In this way it gives us a mirror-like image. A breeze blowing over the water always disturbs this reflection, leaving a more dazzling ray of light on the water and delineating a light path from the horizon to the foreground of the picture.

As the sun gradually goes down, this light path stretches out in front of your eyes. Therefore, when shooting by the water, the first thing to pay attention to is the composition factor. Did you position the horizon line before you pressed the shutter? Is the scene I need already included? These are all issues worth noting. When metering, the average metering mode is generally selected. So that the light distribution of the entire screen can be uniform, and it will not be overexposed or underexposed.

5. Do not randomly select the white balance of the camera

As mentioned earlier, you can use some color filters when shooting, but digital cameras can not use them. Because the rich white balance effect of digital cameras can replace some simple color filters. General digital camera white balance includes the following modes: sunlight, cloudy, tube and incandescent mode.

Among them, when you select daylight white balance , the picture is most yellowish. And when incandescent white balance is selected, the picture is most blue. When shooting sunrise/sunset, photographers recommend choosing auto white balance or daylight white balance. Because this yellowish tone can best express the atmosphere of sunset or sunrise. If you choose a bluish incandescent white balance, the yellowish tone of the picture will be lost. Thus affecting the atmosphere of the entire picture.

(To Be Continued)

Categories
Soft Lights

Tips for Photographing Sunrises and Sunsets_Part I

Introduction

Beautiful sunset or sunrise scenery only appears in less than 20 minutes before and after sunset and sunrise. The excellent color temperature at this time, combined with the appropriate clouds and terrain, not only photographers, but also ordinary people can not help but be moved by this beautiful scenery.

Photography, in many cases, shows the effect of light and shadow. At sunrise and sunset, the angle of the sun’s rays is low, and the light quality is soft and warm. The whole picture is full of seductive charm. Presumably any photography enthusiast will not easily miss this opportunity, right? However, it is not an easy thing to record the beautiful sunrise and sunset perfectly in just a few minutes.

Preliminary Preparations:

1.    Where should I go?

I came up with the idea of ​​shooting sunrises and sunsets, and the first question I thought about was: Where should I go to shoot? Of course, you must choose a place where you can see the sunrise or sunset. If conditions permit, it is better to choose to shoot in the wild. After all, the air in the wild is much clearer than in the city.

But whether in the wild or in the city, the chosen location should be relatively open, and the terrain should be high. Choose a place with relatively high terrain, such as a mountain, and choose a high-down angle for the shooting angle. In this way, there will be no redundant objects near and on the ground to block the sun when framing, which is beneficial to the performance of the main content. When the sun rises, the overlapping mountains and peaks are in great backlight, which will produce a rich layered effect. If shooting in the city, you can choose a higher building, which has the same effect and richer layers.

In addition, a high shooting viewpoint is also beneficial for improving the contrast and composition of the picture. Of course, it does not mean that high terrain must be selected when shooting this type of subject matter. If your location has a wide enough field of vision, such as a large lake, such a location is also an excellent location for shooting sunrises and sunsets.

So choose a location to shoot without having a fixed mindset. As long as you can express your own photography ideas, it is a wonderful shooting location. The choice of location is very important in photographing this type of landscape subject matter. Choosing the right location for shooting sunrises and sunsets is half the battle!

2. When should I shoot?

The timing of sunrise and sunset is very strong, and the performance is different in different seasons and different time periods. This requires us to pay great attention to the choice of shooting time between shooting. In terms of seasons, the best seasons to shoot sunrises and sunsets are spring and autumn. These two seasons have a later sunrise and an earlier sunset than summer, which is favorable for shooting. In spring and autumn, there are more clouds, which can increase the effect of shooting.

The specific time is determined according to the author’s intention, the choice of location, as well as the local sunrise and sunset timetable and the season at that time. Before shooting, you can pay attention to the time when the sun is setting. If possible, ask the local meteorological department for a sunrise and sunset timetable. If it’s convenient, go to the place you choose and click several times, so that you can know the time of shooting. In addition, before you set off, pay more attention to the weather forecast for the day! If it’s cloudy or rainy…

Specific Shooting Articles:

On a morning when the dew wets jeans, or in the evening when the sky is full of clouds, you come to an open lake, or stand on a certain peak of the city, set up your beloved camera, and aim at the sunken or not yet rising of the sun. What a photography trip that must have been.

1. When should I press the shutter?

The time of sunrise or sunset is very short, and every minute of this short period of time may have a great change in the scenery. Take sunset as an example, sunset also has several processes, which can be divided into four. That is, the sun turns yellow, enters the shape of a long egg that turns red, and then disappears on the horizontal line, until the sky turns from red to purple and then to dark blue.

The light in it varies greatly, from blazing sunlight to deep blue. And the foreground (such as the city light) also lights up. It may seem like a long time, but the sun disappears on a mountain or horizon so quickly that it may take less than two minutes for the sun to set. If you are not careful, you will not be able to grasp it.

And after the sun goes down, the wonderful colors are just beginning. Or nothing for ten minutes after the sun goes down, a faint patch. The sky was getting darker and darker, and at this time, I saw my colleagues start to pack up their equipment and go home. But in fact, for most of the half hour after sunset, the sky is very good. If shooting in the city, the lights in the city become the best subject. Many perfect sunset photos were completed at that time, because the light difference was narrowed, and the foreground of buildings or countryside was still layered, so they were very beautiful.

2. Selection of shooting timing

When the sun just rises from the horizon, or when the sun is about to set in the west, there is a certain morning or sunset on the ground that covers the light scattered by the sun, and a round sun with no light scattering appears. That’s when it’s time to photograph the sunrise or sunset.

At the beginning of the shooting, the shooting should start when the sun has not yet risen and the sky begins to appear colorful. At sunset, you should start shooting when the sun begins to weaken and the surrounding sky or clouds begin to appear red or yellow.

When shooting sunset, if the timing is too early, the brightness of the sun is still strong, and aiming at the strong sunlight will make the photographer’s eyes feel uncomfortable. In addition, strong sunlight will burn the CCD of the digital camera.

When shooting the sunrise, you should stop shooting when the sun has risen enough to produce a relatively strong light.

The changing of the morning or sunset is impermanent and rapid, which requires the photographer to maintain concentration, find the appropriate composition and timing to press the shutter of the camera in hand.

(To Be Continued)