Categories
Soft Lights

10 Ways to Shoot With Great Visual Impact

1. The Layering of Composition Graphics

The sense of hierarchy between graphics and elements can highlight the theme you want to embody while interfering with the vision. This way of expression is often a more direct and effective way.

We’re talking about this kind of visual distraction, which distracts the viewer’s unwanted attention while making them more aware of the subject of the shot. The graphics produced for this type of interference are auxiliary graphics for this theme.

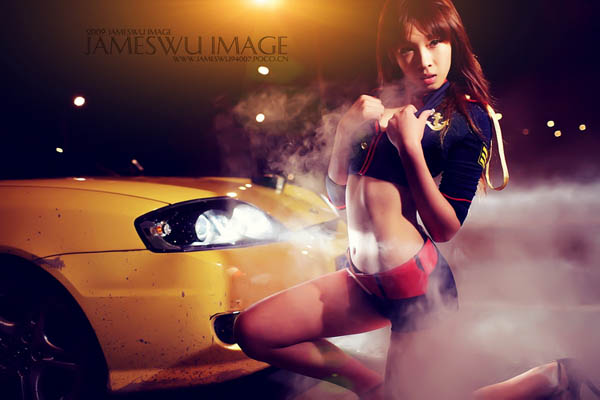
The layering of composition graphics


Just like the above piece, the irregular elements, light, light spots, smoke and the sports car that occupies half of the composition in the work, although there are many things in the picture, they constitute a certain sense of depth and hierarchy. These elements distract the eye while bringing the viewer’s eye to the center. This method is now a more common way of shooting. Maybe most people think it’s more cool.


2. The Visual line Traction of the Composition

Use colors or elements to draw the viewer’s vision, allowing the viewer to think and watch the works with the photographer’s thinking. Most of the works that exist now are guided by points, lines and surfaces, and works in the form of graphics and elements are rare.

The visual line traction of the composition


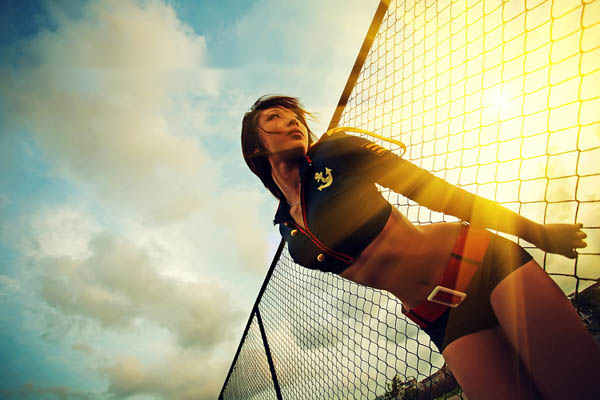
Just like the above work, the visual impact is not on the characters, but the brightest light. However, the author uses a ball net to divide the picture as a traction line, and the appearance of characters at the junction of the upper and lower parts is to pull the viewer’s vision to move to the characters, making them more impactful.


3. Color Induction

In fact, the principles of photography and painting are the same. The color matching and position, even if it is just a hint of embellishment, can make the picture have a super impact.

Therefore, the use of this expression method will mostly appear in the lens of artists or photography enthusiasts who have learned the use of color.

color induced


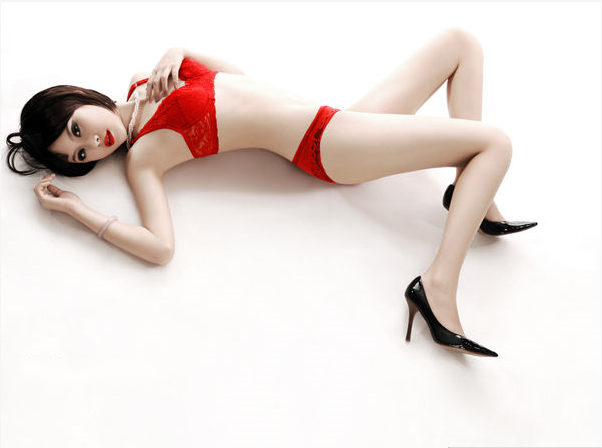
The main color block in the image above uses red and black. In the picture, the white block in the background and the red line form a strong contrast. While balancing the strong contrast of colors, the black shoes also play a certain contrasting role with red. The crystal color of the bracelet has also become an embellishment, so that the whole picture will not be weightless. However, it must be noted that the proportion of each color block must be adjusted well, otherwise the whole picture will be very scattered.


4. Light and Dark Induction

Use some commonalities of light perception refraction, light perception capture, dynamic light perception and difference between light and shade to set off the theme.

light and dark induction


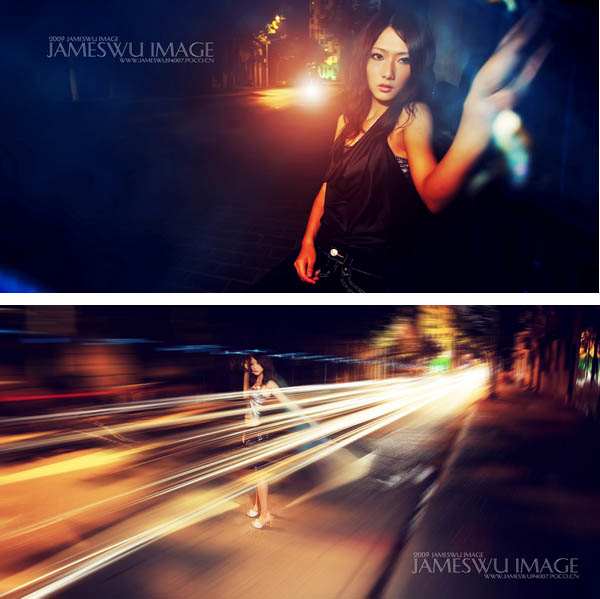
In Figure 1, the author uses a lamp as the background, but reduces the exposure value to make the contrast between light and dark strong, and the refraction in the environment embellishes the subject (the small light spot on the right side of the figure), which strongly attracts the viewer’s attention.

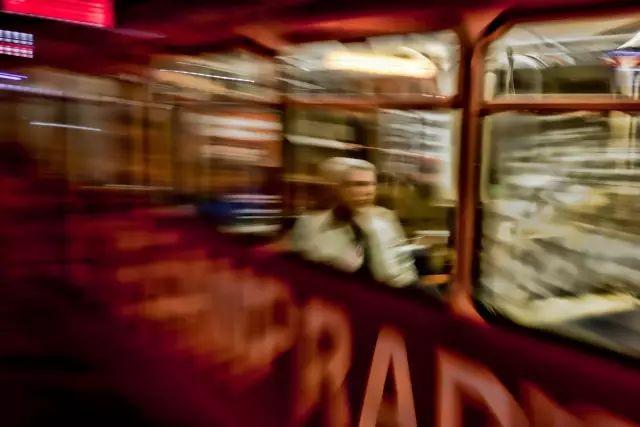
As shown in Figure 2, the slow shutter speed makes the dynamic light perception and the difference between near and far light and dark make the original inconspicuous shooting distance and inconspicuous characters become the focus.


5. Instant Capture

Use the momentary reception of the eyes senses to capture the visual point.

instant capture


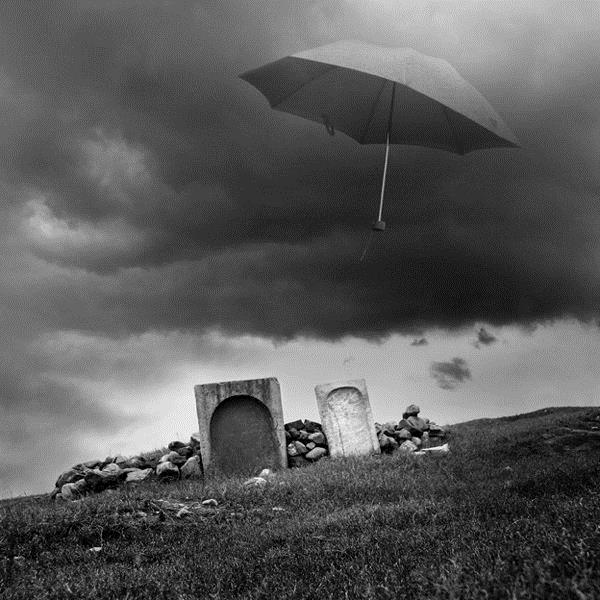
The moment when the umbrella floats in this work, it can instantly stimulate the sensory visual response. Although this is just a very ordinary scene, but it makes people have an inexplicable sense of shock!


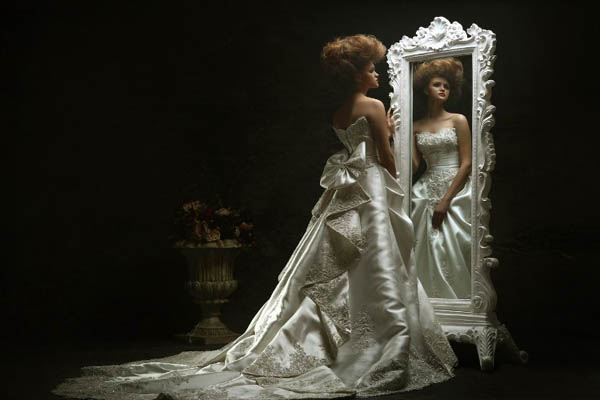
6. Grasp the Breakthrough Point

The visual requirements are achieved by breaking through the visual balance point of the image itself, and the main element itself is used to find the breakthrough point of shooting. According to the sense of space, light, and other prominent places generated by the subject itself, use them to highlight the subject of shooting.

Grasp the breakthrough point

As shown in the picture, the mirror in the picture creates a strong sense of space. The photo breaks the visual convention, allowing the focus of the vision to focus on the mirror, and instead transforms the original subject into an “ornament”.

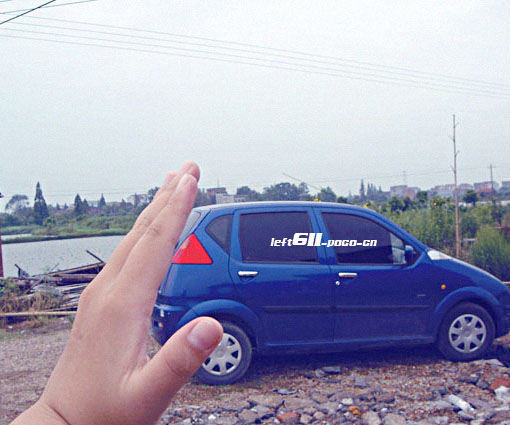
7. Proportional Size

According to the proportional relationship of the thing itself, it pursues the visual balance relationship in the proportional relationship, breaks through the proportional relationship of the thing itself, and then pushes out its own visual focus for breakthrough. Just like some exaggerated cartoons, a character with a big head and a small body, an exaggerated way of distorting the normal proportions, can often have miraculous effects inadvertently.

Proportional size

When taking this photo, the author just used the principle of a small visual error. That changed the proportion of the subject, lost the balance relationship, and made a visual breakthrough in the ordinary picture.


8. The Cognitive Abilities of the Appreciator

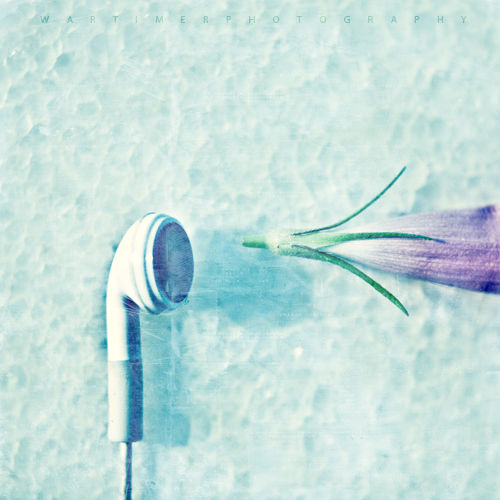
According to the appreciator’s receptive ability, that is, the feelings commonly referred to, use some elements of daily life. And fully consider the appreciator’s ability to recognize the film. Touch viewers’ emotions with natural beauty and brutal beauty that transcends ordinary acceptance to get people to have a clear memory of the photos you take.

Appreciator’s Receptive Ability and Feelings


9. Visual Illusions

Use the visual illusion of space to highlight the visual center of the overall shot.

visual illusion


The object in the work is actually just an ordinary fruit. But the author uses lighting and other effects to create a visual fantasy.


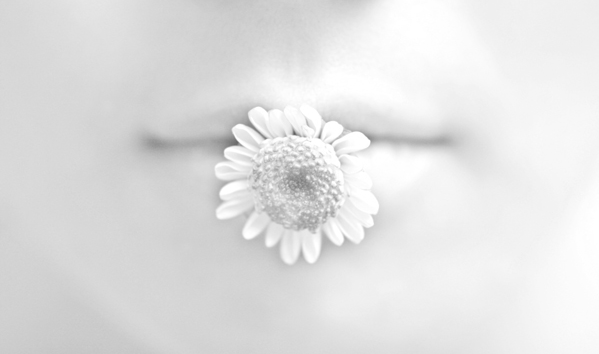
10. Abstract Representation

abstract representation

In the above work, the author abstracts the use of flowers to represent the water sprayed by the shower. And uses the contrast of colors to highlight the theme and at the same time play a certain entertainment. This kind of work is easy to make people feel good about, and it is less easy to forget.

Categories
Soft Lights

Macro Photography Tips

1. What is Macro Photography?

Macro, as the name suggests, is to take pictures of very small things. Because these tiny things are often things we don’t see very often with the human eye, many macro photos strike us as magical.

However, does taking small things all belong to macro? actually not.

For example, this photo, although it is a cookie, is not a macro.

For another example, in this photo, although the head of the butterfly can be seen clearly, it is not actually a macro in the strict sense.

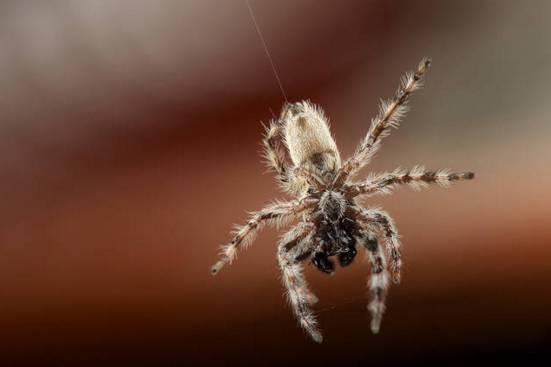
This spider, on the contrary, is a macro photography.

Macro photography does not have a clear definition, and can generally be divided into:

Close-up photography – the magnification ratio is 1:2 ~ 1:1,

Super close-up photography – 1:1 ~ 6:1.

So the question is, what is magnification?

First of all, the magnification is only related to the lens. It is the most important parameter of the macro lens, which expresses the ability of the macro lens to capture subtle things.

So what exactly is macro photography? To put it simply, the objects we see with the naked eye in daily life are about the size of a fingernail, and the pictures taken by macro photography can enlarge the subject to the size of a palm.

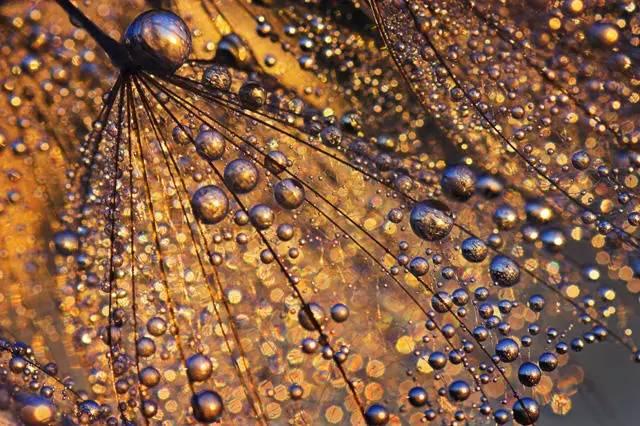
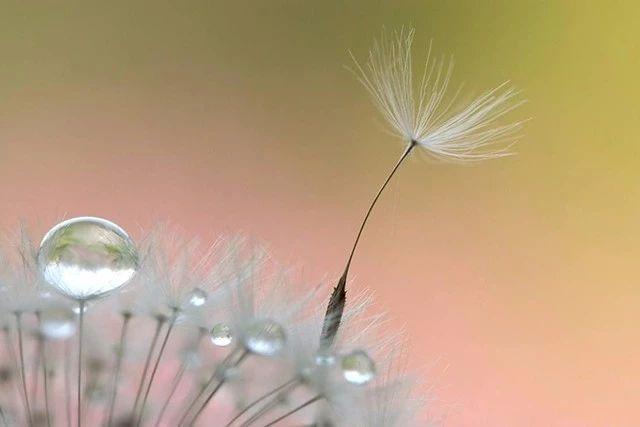
For example, the dandelion in the picture below:

2. Do You Need a Professional Lens for Macro Photography?

To be precise, it is needed. Friends who have some knowledge of photography know that if you are too close to the subject, you cannot focus. Therefore, for macro photography, ordinary lenses cannot meet the shooting needs.

If you want to take a close-up shot with a general photography lens, you need to add a close-up lens, a close-up ring or a close-up skin cavity and other close-up accessories to the lens before you can do it.

To shoot the perfect macro shot, it is best to have a professional macro lens. Macro photography lens is a photographic lens that is specially designed to shoot tiny subjects or remake small pictures. The resolution of this lens is quite high, the distortion aberration is very small, and the contrast is high, and the color reproduction is good.

Lens manufacturers on the market now attach great importance to macro lenses, so the quality of each lens is not bad. However, macro lenses are generally expensive, and you better do what you can. You don’t have to spend a fortune on a macro lens if you only shoot macro occasionally.

3. Precautions When Shooting Macro

A: Aperture:

It is best to use a large aperture. Under normal circumstances will not use an aperture smaller than F16.

B: Choice of focus

Different focus options can create different image effects. When moving the focus, the subject should be in the middle of the frame. Under normal circumstances, you should select the most attractive part of the screen, that is, the part you want to express the most, and keep the shutter half-pressed. After the focus is clear (wait for a while for the camera to focus), press the shutter calmly to avoid blurred photos.

C: Focus and Depth of Field

Depth of field is often the key to success or failure in macro photography. Because the lens is so close to the subject in macro shots, the depth of field is generally shallow and the background is barely visible. But sometimes in order to emphasize the effect of the picture, it is necessary to properly strengthen the depth of field. Therefore, special attention should be paid to the adjustment of focus and depth of field.

Depth of field generally depends on three factors:

Aperture size.

Under the same focal length, the larger the aperture, the shallower the depth of field, and the smaller the aperture, the deeper the depth of field. In order to show the details of flowers, birds, fish and insects in macro photography and increase the clarity of the subject vertically, it is generally appropriate to use a larger aperture value to deepen the depth of field.

The distance between the lens and the scene

The farther the distance, the deeper the depth of field, and the closer the distance, the shallower the depth of field. When shooting, it is best to put the subjects to be photographed in the same plane perpendicular to the lens axis, otherwise some subjects may not be sharp enough. If conditions permit, you can configure a wide-angle lens, which not only increases the depth of field, but also allows you to get closer to the scene.

focal length

The larger the focal length, the shallower the depth of field, and the smaller the focal length, the deeper the depth of field. Different combinations of apertures and focal lengths can produce different depths of field. We should learn to use the combination of aperture and focal length reasonably, which can not only blur the background, but also ensure that the subject is clear. If you use the telephoto zoom for macro shots, you’ll get less than ideal photos.

D. Exposure and Background

Macro photography exposure procedures are slightly different than normal photography. Because macro photography items are generally very small, occupying a small part of the space. The exposure procedure is likely to be fooled by the background, so it’s best to artificially add a background when shooting to make the subject stand out more.

Generally, a neutral gray paper can be chosen as the background. Using gray on the one hand can make the exposure more accurate, and on the other hand, using gray can make the background appear very light. This color can be matched with normal colors. White or black backgrounds can also be used, but special care must be taken when exposing them, as they can easily lead to inaccurate exposures, resulting in over or underexposure. Then you need to use exposure compensation to adjust. If the background is too dark, increase the exposure, if it is too bright, decrease the exposure.

E. Control of light

Light control in macro photography essentially adjusts the ratio of natural light to artificial light. The correct operation of light can create different atmospheres and moods. But generally do not use flash. Although the flash can shorten the exposure time, obtain a deeper depth of field, and reduce the impact of exposure shake or object movement, it is more difficult to use the flash in macro photography than in normal mode, and it is easy to cause overexposure.

Therefore, general photography enthusiasts should pay attention to the direction of light irradiation when taking macro shots. Make the most of natural light and make sure it hits the subject evenly. In most cases, light coming in from the side accentuates the texture of the object better. If the natural light is insufficient or the light exposure is inappropriate, you can use a flashlight or a white foam board (acting as a reflector) to fill in the light.

4. How to Take Excellent Macro Photography?

What’s the trick? Take macro shots without asking anyone. The most practical macro photography tips are here.

Leave the subject’s sight space

When photographing insects, animals and portraits, one principle should be followed: leave room for the subject’s sight. Because the line of sight itself is an invisible guiding line, the audience’s attention is easily led to the direction of the subject’s line of sight.

As shown in the figure below, the head of the insect is facing to the right, so leave some space on the right side of the screen, so that the audience’s line of sight can also be extended, making it more comfortable to watch:

On the contrary, if there is not enough space in front of the head, does it feel awkward to look at?

A more conservative composition is to follow the rule of thirds. But sometimes it can be more extreme, increase the ratio of the main body to the reserved space, create an edge composition, and use white space to deepen the visual impression:

However, when reserving space, you also have to consider whether there is an interesting scene or special light and shadow in front of the line of sight, will it be too monotonous?

As shown in the picture below, there is no other scene in the space in front of the butterfly. Fortunately, there is a special light and shadow, you can take which as out-of-focus bokeh. Otherwise I really dare not leave so much space.

Is the subject complete

Some people will be confused when they see this title. But if you look at the example in the picture below, you will understand immediately.

In addition to letting the subject be in full shadow, there is another way of expressing it. Often, in order to better highlight the key points, the key points are enlarged for visual effects. And the rest are omitted. Anyway, everyone on earth knows what a dragonfly looks like.

Use lines to make the picture more lively

When shooting macros, controlling exposure or using black card stock to create a pure black background are common techniques.

When shooting the insects on the leaves from above, the edges of the leaves against the black background will form a graceful curve. That makes the picture more lively. Consider leaving more space for the leaf edge curve when composing the picture.

When shooting the “side face” of insects, you can use the edges of branches and leaves to express the shape of similar lines to enrich the layering of the picture:

In addition to leaf edge curves, leaf veins are also natural lines that are worthy of our good use.

In particular, the leaf/grass surface with a long strip shape as a whole, numerous and obvious leaf veins, and parallel arrangement is a very strong visual guide line. That can effectively strengthen the directionality of the picture.

Don’t be greedy

When there are multiple animals in the picture at the same time, most photographers will choose to have them in the same focal plane and share a clear composition.

In this way, although more individual creatures can be photographed, it is better to keep them apart to form a contrast between the virtual and the real, the detailed and the subtle, and enhance the layering of the picture.

In short, it must be remembered that the essence of composition is the rearrangement and combination of various elements of the picture, in order to make the overall picture look more comfortable or eye-catching.

Categories
Soft Lights

Basic Knowledge of External Flash

The Role of Flash

First of all, it can be clear that external flash, whether it is on-camera flash, external shooting light or studio flash system, is much better than in-camera flash. The built-in flash is just an emergency configuration, not very useful, and the effect is not very good. To really shoot portraits with lighting effects, an external flash is indispensable.

Normally, the position of the flash and the orientation of the head cannot be adjusted in a DSLR or mirrorless camera. The output power is also very small, and devices such as front beam light and soft light cannot be added. Single effect, low flash intensity and small flash range. The light is relatively hard and not suitable for portrait photography. So why bother with an in-camera flash? In fact, many flagship full-frame cameras have already removed the built-in flash. For more professional photography work, this small internal flash effect is really not big.

The built-in flash is mostly used on entry-level and mid-range cameras. The main functions are as follows: one is to temporarily fill in the light for portraits in the case of backlighting, for example, in the case of informal photography such as travel photos. Second, it can be used as a light trigger to trigger other external flashes. Apart from these two effects, it really doesn’t work much. Especially when the internal flash is turned on in low light, the effect is very poor, and it is generally not used.

When shooting portraits, generally use an external flash. Photographers usually use on-camera flash off-camera flash, or use studio flash to set up multiple lights.

The Reasons Why It Is More Appropriate to Use External Flash Are as Follows:

  1. The flash power is much higher than that of the in-camera flash, which has a greater advantage in brightness, and it is more convenient to manually adjust the flash intensity.
  2. Through wireless triggering, the effect of multi-light lighting can be achieved. Different flash powers can be set for each individual lamp to achieve the desired lighting effects.
    1. Different devices can be installed in front of the lamp head, which can adjust the divergence range of the light and the hardness and softness of the light quality. Various artificial flash effects can be achieved to assist in the completion of photographic creation.
    2. Even if the more complicated multi-lamp lighting is not used, the adjustment of the lamp head can be realized by the external flashing of the single unit. Photographers can use bounce flash and other methods to shoot more uniform and soft flash effects to avoid harsh light quality. 5. Irradiation distance is longer

    The external flash is larger than the built-in flash in terms of output, volume or power consumption, and the illumination distance is farther. Even if the subject to be photographed is far away, it can still have sufficient illumination.

    Benefits of External Flash

    Adjustable irradiation direction and angle

    Because the front part of the external flash can be rotated, users can adjust the irradiation direction and angle according to their needs. One of the most important applications is bounce flash. The details will be introduced later.

    Convenient additional accessories

    The external flash can be combined with different accessories such as diffuser, color filter, reflector, etc. to achieve different lighting effects, making the shooting effect better and more interesting.

    Flash Power – GN Value

    The firepower calculation unit of the external flash is the GN value, the larger the GN value. The higher the maximum output of the flash, the longer the effective distance it can illuminate.

    Recycle speed

    The flash also needs to use a lot of energy each time it fires, so it takes some time to prepare for another flash after firing once. This time is the “recycling speed”. The recycling speed depends on the output of the last flash, the quality of the battery and the remaining power (voltage). Some advanced external flashes have additional battery boxes to speed up recycling.

    Wide Angle Flash Diffuser

    When using the flash at the wide-angle end, we need to use a wide-angle flash diffuser to diffuse the light more so that the light is not too concentrated. Now many entry-level flashes also have this function built in. When you need to use it, you can pull out the diffuser from the top of the flash. Note that some flashes will automatically set the focal length of the flash at the widest end (eg 14mm) after pulling out the diffuser.

    The Usefulness of the Diffuser

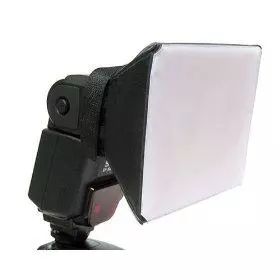
    The light of the flash is a kind of “hard”. If you shoot directly on the subject, it is easy to make a shadow or make the contrast between the subject and the background too large, so that the subject is like “pasted” on it. The diffuser can soften the light and make the effect appear more natural. There are various types of soft light products on the market.

    What is Bounce Flash?

    Bounce flash refers to pointing the flash at the surface of a large enough, relatively flat light-white object (usually a white wall or a white ceiling) to diffuse the reflected light, so that the subject obtains relatively soft natural light. To reduce the light ratio, eliminate harsh black shadows and halos caused by direct light. This is also one of the most commonly used techniques for external flash.

    What is a remote control flash (flying light)?

    Remote control flash (flying light) refers to removing the external flash from the top of the camera through wireless remote control or extension cable, so as to control the direction of light and make more creative light. This is also one of the benefits of an external flash.

    Use the remote control flash to take special effects

    What is TTL?

    TTL is short for “Through the Lens”. The flash will send out a pre-flash before the actual shooting, allowing the camera to use the lens to predict the amount of flash that the subject will emit, thereby controlling very accurate flash output. Now most of the original external flashes also have this system. The output level of the flash is automatically adjusted so that the subject and background are well balanced. However, we still recommend photographers to use manual flash compensation to fine-tune the flash output.


    What is Auto High Speed ​​Sync Shutter (FP)?

    When using a flash, the fastest shutter speed that the camera can synchronize with the flash is about 1/200s (different cameras have different settings). If the shutter speed exceeds the camera’s synchronous shutter, the resulting photo will be half black and half normally exposed.

    Most of the new flashes now also have built-in “Auto High Speed ​​Sync Shutter (FP)” mode. This can solve the problem that the shutter speed cannot be synchronized with the flash. This mode is useful when shooting with a wide aperture to obtain a shallow depth of field. But pay attention to whether your camera supports this mode.

    What is Observation Preflash?

    Observational pre-flashes are flashes that fire a series of observational pre-flashes that are imperceptible to the naked eye just before the normal flash. So that the camera can obtain enough subject information. Usually observation pre-flashes will only fire when the flash head is level/frontal.

    How to Make Sure the Subject Has the Correct Flash Lighting?

    We can use flash value lock (FV lock) to fix the flash at an output value. You just need to put the focus point of the lens (depending on your metering mode) on the subject, then press the FV button (you may need to set this function on the camera). And the flash will emit an observation preflash to lock the flash value. Now whether you zoom the lens back or forth, change the aperture, or compose the flash value will also lock.

    Flash output compensation

    Just like exposure compensation, the flash can also adjust the output level. One of the most commonly used examples is the angle type where the flash only acts as a fill light when shooting portraits. So the flash output is usually reduced by 1 to 2 stops. And you can increase the flash output to compensate when you “bounce” on a surface with insufficient reflection.

    Flash as fill light

    Which flasher should a beginner choose?

    An external flash does do more and has practical uses too. So newcomers to DSLRs should also be equipped with an external flash. However, if you don’t often take big group photos in dark environments, you can actually buy an original entry-level flash for beginners. The price is relatively cheap, and it is enough for beginners to use and learn.

Categories
Soft Lights

12 Tips to Improve Your Photography

During the shooting process, do you sometimes feel a lack of creativity, always repeating the same shooting mode and shooting method? If you’re tired of cookie-cutter shooting, here are 12 tips to help you break through the bottleneck of photography.


1. Find the Reflection

As the name suggests, try creatively capturing mirrors or reflections of your subjects through mirrors, water, etc. You can find these images on the street where it just rained, on the surface of the lake, in the rearview mirror, in the shop window, etc.

But creating the right shooting timing is very important at this time. Please imagine a story you wish to express.

2. Use the Foreground to Make the Frame

Adding some foreground to the shot can give the photo a little more interest and depth. When shooting, you can give the frame a natural visual guide by adding small elements (such as leaves, branches, fabric, and glass) in the right places.

3. Seek a Breakthrough in Color

In your creation, there is no rule about what color the world is. You can choose to fully reproduce the colors that the eye sees, or you can use various color filters, or infrared photography to create a completely different look.

But the training of color sense starts from trivial matters. Look at various types of designs and learn the basics of color. Read more books and use other people’s stories to enrich your inspiration.

4. Try Taking Monochrome Photos

This is the exact opposite of the previous one, you need to go and shoot black and white images. You can also convert the image to black and white in post. You must know that not all scenes and pictures are suitable for monochrome processing. At this time, you need to keep trying to find your own style in black and white photography. Creation is never really right or wrong.

5. Use Repetition

Take a moment to look around and see if you can find any natural repeating structures around you. They can be man-made or natural. Buildings, windows, parking lots, facades…all offer many opportunities to discover this structural pattern. Interesting effects are obtained when you capture them from a unique perspective.

6. Make Good Use of Shadows

When there is sun, there tends to be a lot of shadows in natural light, and more light effects indoors. You learn to use the contrast between shadows and lighting, and try to shoot some creative angles.

7. Try Double Exposure

Double exposure is an ultra-simple form of taking your photos from boring to interesting. Actually it’s superimposing two images onto a single frame. It is now possible to create double exposure photos with some DSLR cameras or mobile phones. Go try it out, you’ll love it.

8. Add Emotion to Images

Both the photographer and the audience should be able to feel the emotion in the picture when they see the following photos. When you’re shooting portraits, most people aren’t professional models. Generally speaking, they are shy. The photographer needs to be responsible for guiding them so that they have a natural interaction in front of the camera, infusing the photos with real emotion.

If you’re shooting landscapes, then you need to create emotion in your images, making viewers feel the urge to travel when they see your travel photos, or insane hunger when they see your food images.

9. Try the Motion Blur Effect

There are many different ways to achieve motion blur during shooting. For example, you can photograph moving subjects, or move the camera (e.g. pan, dodge, etc.). For me, the easiest way to achieve motion blur is slow gate.

Motion blur can add some interesting artistic elements to your photos. However, when taking this type of photo, you will get better results with a tripod.

10. Try New Uses for Macro

In everyone’s mind, macro photography is always associated with flowers and animals. But it really isn’t just rushing into the garden, looking for the smallest ants. The microscopic expression of the human body, the use of macro to create a small miniature world… Pay attention to observe the surroundings of life, you will find that macro can complete many interesting photography at home.

11. Shoot in Different Ways

When you find yourself shooting the same subject in the same way, stop and rethink your shooting mode.

When you always shoot vertically, force yourself to use a horizontal frame. If you like to capture details when shooting, then use a wide-angle lens to force yourself to capture a wide range of images. If you always like to shoot with a wide aperture, then please try to narrow the aperture.

12. Use Multi-image Typesetting

A diptych is the placement of two images side by side in order to add context to each other and tell a complete story. When choosing images to form a twin, pay attention to the harmony of light, tone and exposure. Usually, I make a diptych with a large picture and a photo of the details of that picture.

A triptych is the concept of placing three images side by side so that the photos collectively tell a story. It is important to note, however, that when composing the triptych, special attention is paid to the order and orientation of the images.

Categories
Soft Lights

Diagonal Composition

Brief Introduction

Diagonal composition refers to the line connecting the two diagonal corners of the object in the frame, which is a highly oriented composition form. We can adjust the subject’s body lines to form a dynamic diagonal line in the frame and slant to the opposite corner of the frame. You can also make the background or accompanying lines in the picture form a diagonal form, and arrange the subject on the diagonal. The longest line in the rectangular picture is the diagonal line, which allows us to maximize the use of the space of the picture and make the viewer’s eyes clearly lead to the subject.

The advantage of diagonal composition is that it is dynamic and lively, and it is easy to produce a convergence trend of lines. Has a sense of depth, catches the eye and accentuates the subject.

1. Form a Diagonal composition with Beautiful Oblique Lines

The slashes are varied and dynamic. When expressing static, through vertical or horizontal lines, a serious or tranquil atmosphere can be expressed. When expressing the dynamic of the subject, it is often expressed through curved lines and oblique lines. In commercial shooting, most of the photos are vivid and lively. This requires us to mobilize the body language of the subject to form a dynamic picture.

In a frontal photo, if the head is also upright, the photo looks lacking in variation. So we need to increase the richness and variety of the photo by tilting the head and turning the face when shooting

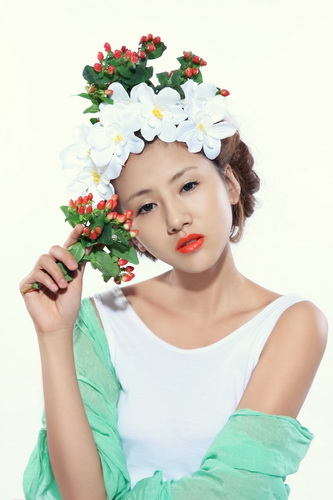
In the frontal photo of (Fig. 1), we use the model’s head tilted to one side to form the diagonal line of the frame. To make the sloping head look more natural, we can use the beauty of the hands and the echo of the head as support.

figure 1

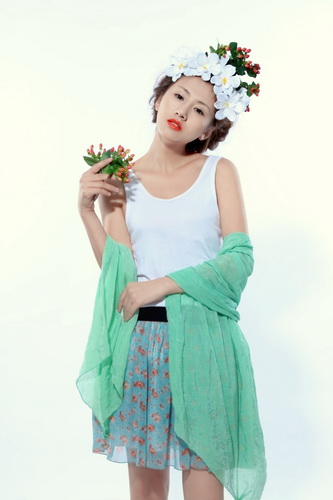
(Image 2) In the photo, we form a diagonal line by tilting the head to the upper right corner of the picture, because the head and the lower left corner of the picture are echoed to form a diagonal composition.

figure 2

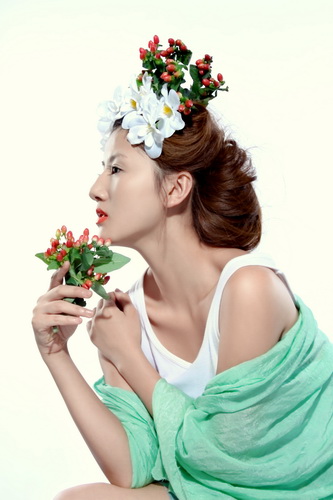
In the profile photo (Figure 3), the model’s body is leaned forward towards the legs. So that the head and waist form a diagonal line. The magnitude of the tilt depends on our composition. We can see in the viewfinder that the head is close to the upper left corner of the frame. Until it forms a diagonal line with the lower right part of the composition. When cropping, we often put the face in the center of the picture. So that another diagonal diagonal line is formed by the echo of the face and the hand.

Figure 3

2. Form a Diagonal Composition Through the Echo of Beauty and Background, Props and Space

In the diagonal composition, we not only compose through beautiful lines, but also form a diagonal relationship through the echoes of beauty and other parts of the picture.

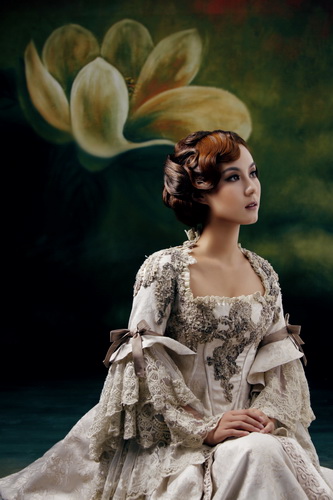
In the pictorial photo of (Fig. 4), the main pattern on the background is a large flower. We can deliberately arrange the beauty to be diagonally below the flower to form a diagonal relationship with the pattern. When adjusting, pull the skirt at the same time so that the head of the skirt forms a diagonal corner on the other side. This arrangement can make the picture more static and stable. In commercial shooting, there are many patterns on the background that are not evenly distributed. But we can adjust the position and height of the characters to echo the pattern of the background.

When shooting, we can often use various props and the beauty of the subject to form a diagonal line. For example, tall people and low props will form a diagonal line, or vice versa. You can also use the props in the hands of the subject to form a diagonal line with the main lines of the body. And use various camera positions flexibly.

Figure 4

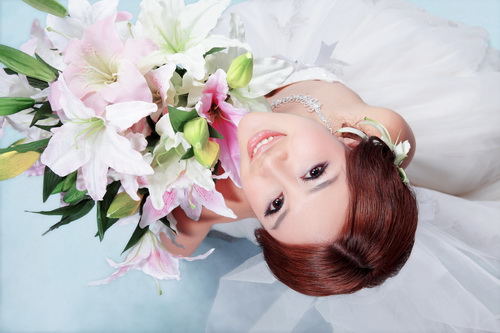
(Figure 5), I used a high camera to shoot overhead. In order to make the composition of the picture more full, I asked the model to put the flower in the corner of the picture. And adjusted the model’s face to turn diagonal lines and the flower together to form the diagonal line of the picture.

Figure 5

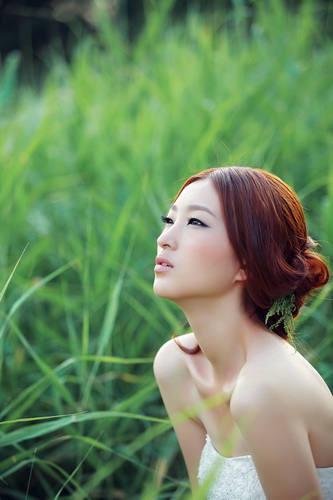
(Picture 6), the shoulders that the model is pulling forward are in the lower right corner of the picture. So it corresponds to the space in the upper left corner. The diagonal line formed by the raised face, we deal with the diagonal line formed by the upper right and lower left corners of the picture. The diagonal composition formed in this way is more natural and attractive.

3. Form a Diagonal Composition by Reversing the Camera Position

Figure 6

What I mentioned above are all diagonal compositions formed through the adjustment of beauty. In actual shooting, beauty and composition affect each other. We also deliberately adjust the angle of the camera to change the viewing angle.

The inverted position is a special technique in photography composition skills. There are two situations we generally use. One is to deliberately turn some unchangeable inclined lines upside down by rotating the camera during shooting. The other is to rotate the camera so that the subject is on the diagonal line of the picture in order to pursue the movement of the picture or maximize the use of the length of the picture.

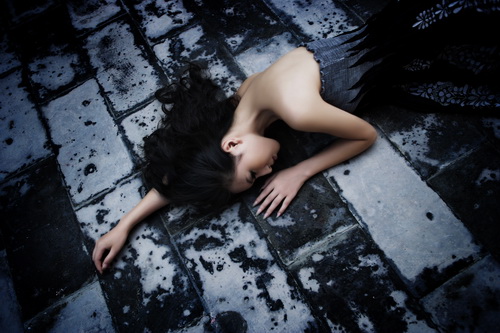
In Figure (7), we rotate the camera so that the model’s hands, head, and body are on the diagonal line from the lower left corner to the upper right corner of the frame. In order to make the static beauty more stable, the model’s face is also on the diagonal line formed by the upper left and lower right corners of the picture when composing the picture.

Figure 7

Diagonal composition is the most used composition form, and it is also a composition that is easier to master. I hope that when you practice, you don’t compose pictures for the sake of composition. A bluntly arranged diagonal relationship or in a deliberately inverted position makes the subject look oddly tilted.  And it makes the picture unstable.

Categories
Soft Lights

Photography Common Sense_Part II

2. Why the Larger the Aperture of the Camera, the Smaller the Number?

Aperture f-number = the focal length of the lens / the diameter of the lens aperture, F2.8 is larger than the F4 aperture. Numbers such as 2.8 and 4 are a ratio, which is the ratio of the focal length F of the lens to the diameter D of the aperture.

A simple analogy:

For example, the focal length is 100mm, the aperture diameter is 25mm, and the aperture is 4. 4 is called the aperture value, also known as the aperture coefficient.

For another example, the focal length is 100mm, the diameter of the aperture is 50mm, and the aperture is 2.

The aperture diameter of 50mm (which can be understood as aperture) is of course larger than that of 25mm, but it is calculated as 2 (aperture value).

Therefore, the larger the aperture, the smaller the number.

3. Why the Larger the Aperture, the Smaller the Depth of Field?

 This is a question involving optics.

The aperture mentioned here refers to the coefficient of the aperture, which refers to the exposure value of the camera. It should be pointed out that the larger the value, the smaller the aperture. Conversely, the smaller the value, the larger the aperture.

“The larger the aperture, the smaller the depth of field” is a professional colloquialism. The larger the aperture, the stronger the sensitivity, and vice versa.

How ​​the camera works

You know how the camera works and how it works. When the camera is shooting, it mainly depends on the shutter and aperture to adjust the sensitivity. When you increase the aperture, the hexagon in the camera will open a larger light entrance, so it is called a large aperture. The shutter is to control their opening speed. If you use the same shutter speed, you must think that the larger the light inlet will sense the stronger light.

So why does the larger the aperture, the smaller the depth of field?

The main reason for this is that the focal length in the lens is made using the principle of a magnifying glass. When the magnifying glass works, the close range is clearer, and the far distance is more blurred. Likewise, when the light inlet (small aperture) is set smaller (small aperture) in the lens, the resulting focal length is farther. When the light inlet is set relatively large (large aperture), the focal length is relatively close.

The blurry backgrounds we usually shoot are shot at wide apertures. That is, the object being photographed is clear, and the thing behind it is blurred. Especially when shooting leaves in the sun, you will find that the leaves in the distance are blurred and sparkling, and the effect is obvious.

In addition, it should be added that when using a large aperture, the shutter speed should be increased accordingly. Otherwise, the photo will be black (that is, darker). At the same time, the focus must be precise, otherwise, the object to be photographed may not be clear.

Effect of flash on aperture

Under normal circumstances, try not to use flash at large apertures, so as not to destroy the effect. Shooting with backlighting works well, but when shooting backlit subjects, placing a reflector in front of the subject works really well. Some of the wedding photos you see were taken this way.

Aperture and focal length are two factors that directly affect depth of field. The larger the aperture and the longer the focal length, the result is a small image depth of field. Otherwise, the depth of field will increase.

On the premise of ensuring focus, the lens is infinitely close to the subject, and the maximum aperture is opened to obtain the shallowest depth of field.

Traditional cameras have this feature. Digital cameras currently only have this function above US$1500. Which brand to use depends on your preference.

4. Does Camera B Need a Large Aperture?

The so-called B door also refers to Buble setting, also called manual shutter. Generally engraved on the shutter adjustment button or ring, commonly known as the B door. When the shutter button is pressed, the shutter opens and exposure begins. When the shutter button is released, the shutter closes and the exposure stops. That is to say, the B shutter is determined by the length of the shutter pressing time to determine the time of each exposure, and the exposure time can be controlled more freely.

The size of the aperture depends on the amount of exposure you need.

The wider the aperture, the more exposure the camera can get. You need to set the aperture size according to the lighting conditions of the shooting environment and what kind of film you want to come up with.

Hope it helps you.

5. What Are Aperture, Shutter and ISO Used to Adjust?

Aperture is the appropriate aperture size depending on what kind of light the subject you are photographing should use so that you can take a sharp image. Shutter and aperture are used together. For example, when you are shooting a scene, you can open the aperture to the maximum. The shutter is set to 250 or even 500, so that you can take a picture with a very blurred background and a very clear subject. If the environment is very dark, adjust the ISO by increasing the sensitivity, which allows you to take clear images in very dark conditions.

Categories
Soft Lights

Photography Common Sense_Part I

1. How to Adjust the Aperture and Shutter Value in different Environments?

 Combination of aperture and shutter

Aperture and speed are both devices used to control the amount of light entering the camera, and they are related to each other and constrain each other. When the light is constant, the aperture is opened by one step, and the speed must be increased by one step. When the aperture is reduced by one step, the speed will be slowed down by one step. For example, using aperture 11, the speed is 1/60 second, when the aperture is changed to 8, the speed should be changed to 1/125 second accordingly.

If the speed is changed to 1/30 of a second, then the aperture should be changed to 16 accordingly.

The mutual relationship between aperture and speed can be expressed by exposure combination: aperture 8, speed 1/125 sec; aperture 11, speed 1/60 sec; aperture 16, speed 1/30 sec. Choose one of the exposure combinations, and for a given light, the camera will get the same amount of exposure.

Choosing an exposure combination according to different shooting needs is one of the important basis for controlling accurate exposure. When shooting, is the shutter speed or the aperture factor determined first? This should be determined by the specific situation of the subject and the creative intention of the photographer.

Generally speaking, accurate exposure is only one aspect of taking a good photo. If a photographer wants to give full play to his creative consciousness, he should flexibly master the exposure combination of aperture and shutter speed.
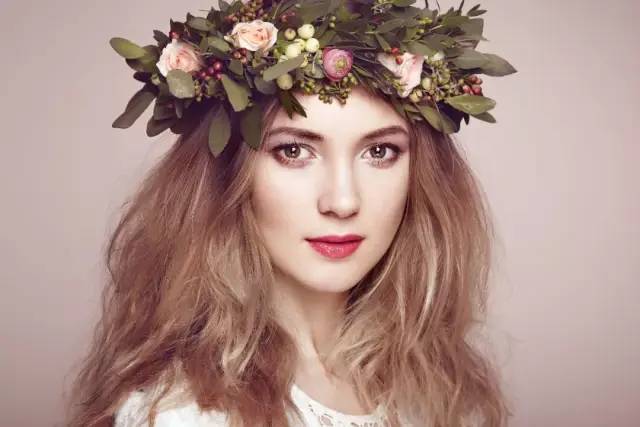
The respective functions of aperture and speed

Aperture and speed have the function of jointly controlling accurate exposure, and each has its own “professional division of labor”. The aperture controls the depth of field, and the speed “freezes” moving objects on the film. According to the shooting requirements, in order to expose the film accurately, the photographer must learn to choose the appropriate exposure combination.

If you are shooting moving objects, if you want to make the photos clear, you must first choose a shutter speed that can capture the moving objects, and then match the corresponding aperture.

If you want to show a certain depth of field of the scene, it is necessary to first determine the size of the aperture, and then match the corresponding shutter speed.

When choosing an exposure combination, the following points can be used as a reference:

① When the object moves fast, the shutter speed should be fast, and the aperture should be correspondingly large.

②If you want to make the depth of field of the photo large, the aperture needs to be small, and the shutter speed can be slowed down accordingly.

③ The moving direction of the moving object is different, and the shutter speed is also different. Objects passing across the front of the camera generally require a faster shutter speed. For objects moving towards the camera or away from the camera, the shutter speed can be slower.

④ Shooting moving objects, with the change of distance, the shutter speed should also change accordingly. The closer the distance, the faster the shutter speed.

⑤ The camera lens used has a long focal length and the shutter speed should be correspondingly fast.

⑥ Use additional lenses for photography, such as color filters, teleconverters, etc., to increase exposure appropriately.

Use of natural light

The brightness of sunlight varies with seasons, climates, and the latitude of the earth.

In warm tropical regions, the sunlight in summer is twice as strong as in spring and autumn, and 3 to 4 times stronger than in winter. On a sunny day in summer, at eight or nine in the morning and four or five in the afternoon, the brightness of the light is roughly the same. In winter, from 9 am to 3 pm, the brightness of the light does not change much during the period. Before and after sunrise in the morning and before and after sunset in the evening, the light intensity is only 1/10 of that at noon.

The intensity of light varies throughout the day. Strong sunlight, thin cloudy sunny day, cloudy sunny day, and cloudy day, the strong change of light between them can be understood as follows: the light of a cloudy and sunny day is twice as strong as that of a cloudy day, and the light of a thin cloudy sunny day is twice as strong as that of a cloudy and sunny day. If you use a constant shutter speed, the aperture is 5.6 on cloudy days, 8 should be used on cloudy and sunny days. And 11 should be used on thin cloudy and sunny days.

If you use a constant aperture, the shutter speed used on cloudy days is 1/30 of a second, on cloudy and sunny days, it can be increased to 1/60 of a second. And on a sunny day with thin clouds, it can be increased to 1/125 of a second.

Weather changes are capricious and sometimes subtle. The above changes can be used as a reference for the exposure of photos taken in outdoor natural light.
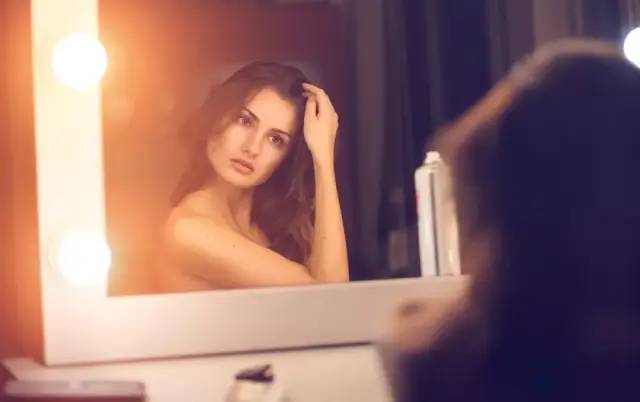
Subject reflections

Different subjects have different intensity of reflected light. Bright scenes and dark scenes cannot be exposed the same under certain lighting conditions. Generally, bright scenes are more exposed than bright scenes, and dark scenes are more exposed than ordinary bright scenes.

What is a bright scene? Such as the seashore, snow, milky white buildings, people wearing light-colored clothing, etc., can be viewed as bright scenes. A gray scene can be viewed as a generally bright scene. Scenes under the shade of trees, dark buildings, and people wearing dark or dark red and dark green clothing can be viewed as dark scenes.

This kind of bright and dark performance is often not very obvious. When the photographer controls the exposure, he must learn to grasp the subtle changes in the light and dark of the actual scene and treat them differently.

The photos taken in the backlight should increase the exposure by 1-2 levels compared with the side-light photography. And the side-light photography should increase the exposure by 1-2 levels compared with the front-light photography. For example: use 1/125 sec and 8 apertures to take photos with the light. For side-light photography, if the light conditions remain unchanged, you should switch to 1/60 second, 8 aperture, or 1/125 second, 5.6 aperture. Use a slower shutter speed or a larger aperture for backlit photos.

There are many factors to be considered in order to master accurate exposure. So when you hold a camera and choose an exposure combination, you should calmly compare the above factors and choose a set of exposure combinations. Don’t face the subject, get excited for some reason, choose the exposure combination and lose sight of the other, causing the exposure mistake and regret it.
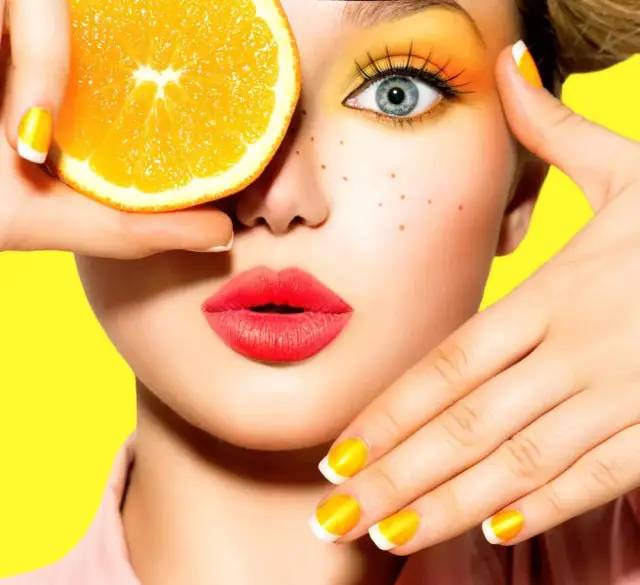
Exposure for indoor natural light photography

In indoor natural light photography, it is difficult to master accurate exposure. Indoor natural light includes the light that is directly injected into the room through doors and windows, the light that is reflected into the room, and the original light in the room. How to get accurate exposure when taking pictures in indoor natural light? In this section, we will discuss the various factors that affect indoor natural light photography and the basic methods of indoor natural light photography.

We’ve covered the various factors that affect accurate exposure outdoors, and the same applies to indoor natural light photography. However, there are some unique factors that affect indoor natural light photography, such as: the influence of sunlight on indoor direct sunlight and reflection, the influence of the number of doors and windows, size and opening direction of the house, etc. Taking pictures in such an environment, if you want to succeed, it mainly depends on the photographer to take more pictures, experiment more, and accumulate more experience. If you can use the side light meter as a staff, you will have a better grasp of accurate exposure.

Shooting indoors often requires artificial lighting due to limited light. In this case, mixing light sources with different color temperatures should be avoided. Indoors with low natural light, the aperture used is generally larger and the shutter speed is slower. Therefore, the photographic equipment used can choose a camera with a larger aperture. And the photosensitive film can be ISO200/24° or ISO400/27° fast film. Also a tripod and shutter release can be provided as much as possible.
Exposure for artificial light photography

Artificial light photography refers to the use of artificial light sources for indoor photography, such as iodine tungsten lamps, spotlights, ordinary lights, etc. Using artificial light source to take pictures, to be able to accurately control exposure, the factor to be considered is the brightness of the artificial light source. This is determined by the number of lights, the level of illumination, and the distance of the subject from the lights.

There are also factors such as the ability of the subject to reflect light, the influence of the surrounding environment, etc. If it is a certain light distance and aperture, 100 watts of light illumination, the exposure takes 1/30 of a second, then switch to 200 watts of light, and the exposure only takes 1/60 of a second. This shows how many times the lumen of the lighting light is increased. And how many times the exposure time can be reduced accordingly.

The distance of the subject from the light determines the amount of exposure. To estimate accurately, apply the inverse square law calculation. If the distance between the subject and the light is changed from 5 meters to 1 meter, the light received by the subject is increased by 25 times. And the exposure should be reduced to 1/25 of the original.

Using artificial light photography, mastering accurate exposure is only one aspect. It also has a problem of how to set the light. In color photography, there is also the issue of the color of artificial light. In general, artificial light can impart color casts to daylight-type color films.

How to master accurate exposure in artificial light photography, the above are just tips, but also experience in practice. When there is a certain amount of experience accumulated, it is not difficult to accurately grasp the exposure.
Flash

Flash is an artificial light source commonly used by photographers. It is easy to carry and use, and is not limited by day and night and space.

(1) The general performance of the flash and its light characteristics

It has been 100 years since 1887, when burning magnesia powder was first invented for photographic lighting. With the development of modern technology, flashlights are becoming more and more perfect. And there are more and more types of flashlights. No matter what kind of flash it is, from its appearance, it generally has two parts: power supply and flash. The power supply part consists of

Batteries, transformers, capacitors. The flash part includes flash tube and fixed reflector, light handle, switch and other components.

At present, the flash tube of the flash can flash multiple times, so it is also called a thousand-time flash. Some can automatically control the light output of the flash, and adjust the output light output arbitrarily. Some flashes can adjust the beam angle it emits to adapt to the different lighting needs of wide-angle lenses, standard lenses and medium-telephoto lenses.

Generally, the flash is taken with a standard lens, and the light needs to be designed. It emits a beam angle of 50 degrees. The duration of the flash varies from light to light, some on and off time can be as short as 1/5000 second. And some can be as long as 1/120 second. That can basically meet the needs of all levels of shutter speeds in the mirror.

(2) Photosensitive control circuit flash

The photosensitive control circuit flash composed of integrated circuits and blue silicon transistors can control the amount of light emitted by the flash according to the change of shooting distance and the strength of the subject’s reflective ability. The distance is short, the reflection ability is strong, and the flash time is short. The longer the distance, the weaker the reflection ability, and the longer the flash time on and off. In short, the 10,000-time flash has the characteristics of brightness, strong adaptability, wide application, high speed, economical convenience. And is widely used by many photographers.

The light characteristics of the flash are:

①High brightness,

②The direction is controlled by the photographer,

③ The color of the light is similar to that of sunlight.

(To Be Continued)
Categories
Soft Lights

Use of Flash and Eflector

Direct Light and Diffuse Light

In terms of light quality, scattered light is much softer than direct light.

So how do you use a flash to create a larger area of ​​scattered light outdoors?

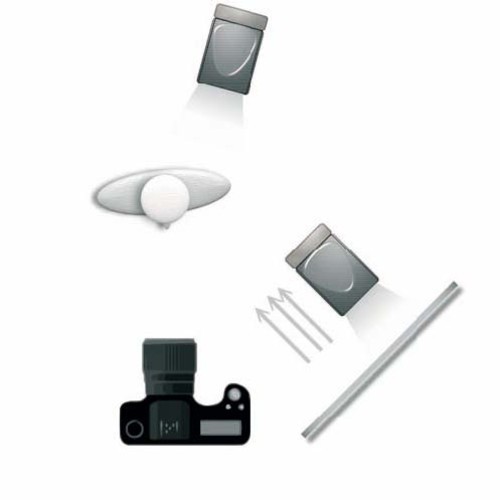
The easiest way is to use the flash to hit the light on the reflector, which then hits the light on the subject.

This method is very similar to lighting with a reflector outdoors, except that the light source is changed from sunlight to flash. Indoors, this is very similar to the bounce flash, except that the reflective surface of the bounce flash is changed from a ceiling or wall to a reflector.

Combination of Flash + Reflector, Consideration of Application Surface

From the perspective of real shooting, if the outdoor light is very strong, the combination of flash + reflector may not be ideal at this time. When the sun is strong, it may be necessary to switch to the way of hitting directly from the side, or directly use the reflector to fill in the light.

If the outdoor light is weak, such as cloudy or indoor scenes, because the ambient light itself is weak, the scattered light reflected by the flash & reflector will be better.

Angle and Position of Reflector

When filling light, we must think that not only the head of the flash is free, but also the angle of the reflector on the light stand is free.

Therefore, we can raise the reflector to simulate a ceiling. You can also mount the reflector on the side to simulate it as a wall.

This way, even outdoors on a cloudy day, you can shoot as if you were indoors. When there is no sun, the flash in hand is a small sun. Anytime, anywhere, we can master the light source.

On a cloudy day, there is no sunlight indoors, and it seems that the reflectors are useless. However, the flash is the sun in the room, and the combination of the reflector has an unexpected effect.

Due to the weak indoor light, the effect of the flash will be more obvious. So pay attention to adjusting the output of the flash. Full manual exposure mode, aperture f/2.2, shutter 1/80s, ISO 200.

Another important effect of using a flash with a reflector is that the catch light it creates will be much larger than a direct flash. This is also an important example of turning a point light source into an area light source.

Can you observe the catch light in the photo, is it bigger than the direct flash?

Folding Reflector Application

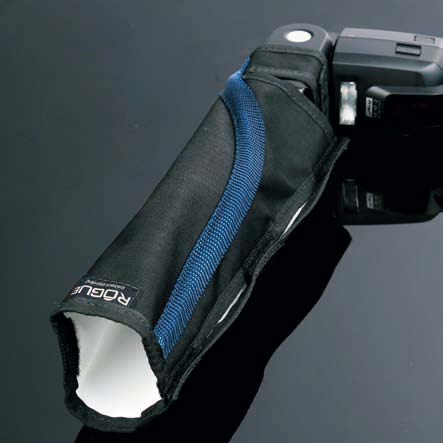
·Folding reflector

Among the many accessories that flash out, photographers prefer the foldable reflector, because it does not occupy the space of the camera bag compared to the diffuser. The angle is changeable, and the application methods are also more.

The diffuser is not discussed here because it is bulky. And it may fall off due to its heavy weight when firing from the side of the flash. We can think of a diffuser as a bulky hard diffuser box.

The foldable reflector can be said to be an extension of the reflector of the lamp head.

Advantages of Folding Reflectors

Folding reflectors are at least a few things better than reflectors built into flash heads.

  1. The reflection area is large. It is at least 4 to 6 times that of the reflector of the lamp head, so a larger catch light can be obtained.
  2. It can be rolled into a cylindrical shape as a light-collecting device.
  3. Supports multi-angle changes, which can reflect more light to the front. Relatively speaking, the internal reflector (diffuser) is difficult to control the amount of reflected light because of the angle.
  4. Lightweight and compact, easy to carry.

Overall, the foldable reflector is a very interesting mini device, and I suggest you give it a try.

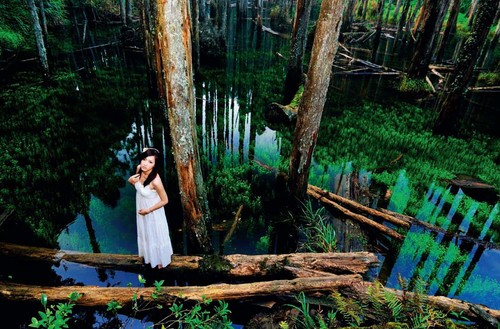
This photo was taken with a foldable reflector. Since the journey to the forest is a more difficult journey, it is important to keep the equipment compact and light.

Settings: Shooting in full manual mode, f/4.5, 1/40s, ISO 400.

Folding reflectors can be rolled into a tube to concentrate light. You can use this method when you need to emphasize the model’s hair.

Categories
Soft Lights

How to Choose the Most Appropriate Focus Mode

Brief Introduction

Whether the focus is accurate or not determines whether your photo can be clear in the clear place, and the blurred place is blurred, which determines whether the photo can meet your shooting needs, which is the foundation of the foundation.

To achieve accurate focus, you must have sufficient knowledge of the camera’s focus mode. What are the characteristics of each of them, and which subjects are applicable/inapplicable? How many operating tips and precautions we should know?

What I want to explain to you today are the characteristics of several main focusing modes, their applicable subjects and precautions for use, let’s take a look!

1. One-Shot AF

This is the most basic focus mode. Half-press the shutter, and the autofocus system will start working, and after successfully focusing, you can press the shutter to take a photo.

If you are not satisfied with the autofocus results and need to refocus, or you need to change the focus, you just need to release the shutter, then half-press the shutter again, and start the autofocus again.

As autofocus technology becomes more and more mature, the process of focusing is getting faster and faster. Some cameras can almost complete the framing, half-pressing the shutter, and focusing in an instant, which is very convenient and fast.

It is because of this superior convenience that One-Shot AF is suitable for most static subjects. But it also has a problem, that is, it is not suitable for shooting high-speed moving objects.

You must know that there is a time difference between when you start half-pressing the shutter to focus and when you press the shutter to shoot.

When you are shooting static or low-speed dynamic subjects, this time difference may not affect the shooting. But when shooting dynamic subjects (especially when the direction of movement is perpendicular to the lens), this may cause the subject to be out of focus when you press the shutter.

So, what focus mode is suitable for shooting dynamic objects? Try continuous autofocus.

2. Continuous AF

Continuous autofocus is also known as continuous servo focus. After pressing the shutter halfway, the camera locks on the subject or locks the focus area. Once the focus distance between the target and the camera changes, the camera will automatically focus.

As long as the first focus is achieved and the focus is on the subject, it is equivalent to specifying a target for the camera. “You shoot me chasing it”, you can keep the focus on the subject.

It is precisely because of this special working mode that continuous AF is most suitable for shooting sports subjects, which can ensure that the focus is always on the subject and keep the subject clear.

Use this mode for high-speed continuous shooting, and the camera will refocus before each shot. If the autofocus speed is not fast enough, it is likely to lead to the phenomenon of being lost.

Therefore, the faster the subject is, the higher the requirements for the camera’s focusing ability (in fact, the computing power of the autofocus system). And it depends on the performance and grade of the camera.

Generally speaking, professional cameras are definitely more capable of focusing than entry-level cameras. And models that specialize in sports themes will enhance the focus tracking function to the extreme by sacrificing some other capabilities.

3. Face Recognition Focus

The enhanced capability of the autofocus system is reflected in two aspects.

The first is speed, the focus calculation speed is getting faster and faster. The second is intelligence, and some focusing functions for specific needs have been developed. Among them, the most typical is face recognition.

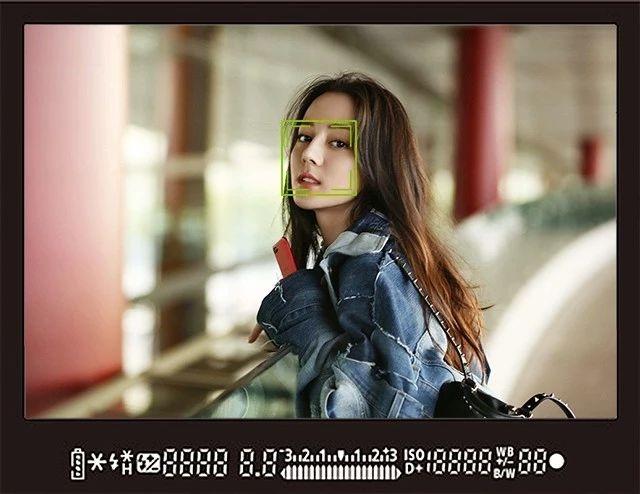
After the face recognition function is turned on, the camera will give priority to the face that appears in the viewfinder when performing one-shot/continuous AF.

This function is specially designed for shooting portraits. Whether shooting still or dynamic portraits is quite powerful, but its use also has some limitations.

limitations

First of all, it is the aspect ratio of the face. The face needs to maintain a certain proportion, and the face that is too small will not be able to guarantee normal recognition.

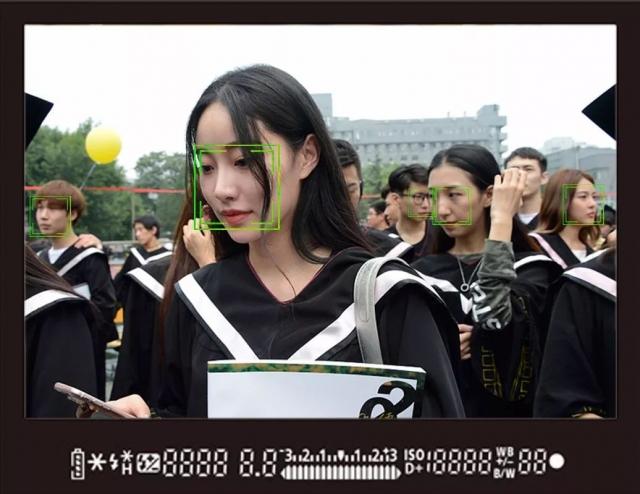
Secondly, if there are multiple complete faces with a large screen ratio and different distances from the lens at the same time, the face recognition focusing results may be biased.

The focus is likely to fall on the closest and largest face, but it does not rule out the possibility that it will run to other faces, and the result is more uncontrollable.

And if you want to ignore the face that is close and let the focus fall on the face that is farther away, it is even more difficult.

In response to this problem, the recent face recognition system continues to develop towards intelligence, and has developed targeted functions such as “priority recognition of adults/children”, “priority recognition of smiling faces”.

These functions provide targeted weighting for the faces in the picture, effectively improving the problem of the camera being confused when faced with multiple faces.

Most cameras now have facial recognition capabilities. However, this relatively advanced “smile face recognition” intelligent system is estimated to be less popular.

In addition, no matter how smart the intelligent system is, it still cannot fully meet our shooting needs. At this time, we may need to manually do some small operations to help it.

4. Manual Focus Assist

The several focusing modes mentioned above can be called “full automatic focusing” to a certain extent, and the system can help you choose the focusing point through its own calculation.

The biggest advantage of the fully automatic focus mode is convenience. When you need to take a snapshot and have no time to adjust the focus point, or when you need to take a lot of photos and have no time to focus one by one, the automatic focus comes in handy.

However, the automatic focus also has a disadvantage, that is, when the camera automatically selects the focus point, it tends to choose the object close to the center of the frame, because the center focus point is the most powerful.

That is to say, when you want to place the subject on the edge for shooting needs, and there are other very present scenes in the center of the frame, the focus may not be on the subject.

In this case where autofocus cannot meet the shooting needs, we should use manual focus assist.

The so-called “manual assisted focus” is not a built-in focus mode of the camera. But a series of methods that combine the camera’s autofocus capabilities and our subjective choices to meet specific shooting needs.

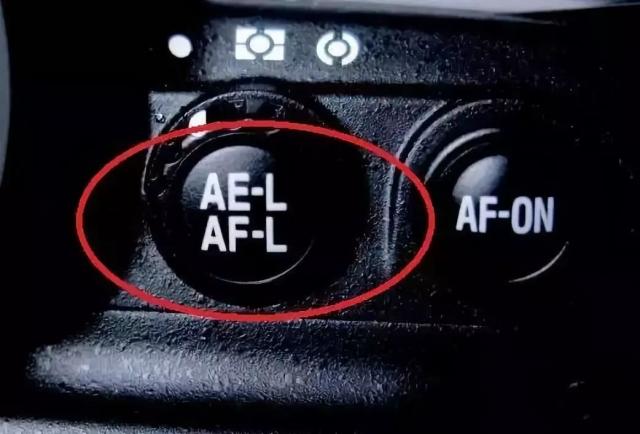
One of the most typical is “focus first and then compose”. That is, first put the subject in the center of the frame, then use the center focus point to complete the autofocus. Then press AF-L to lock the focus, and then recompose the shot.

How to assist focus

During the process of moving the camera and reframing, your camera-subject distance may change slightly. But this change will not cause the subject to fall out of the focal plane, so don’t worry too much.

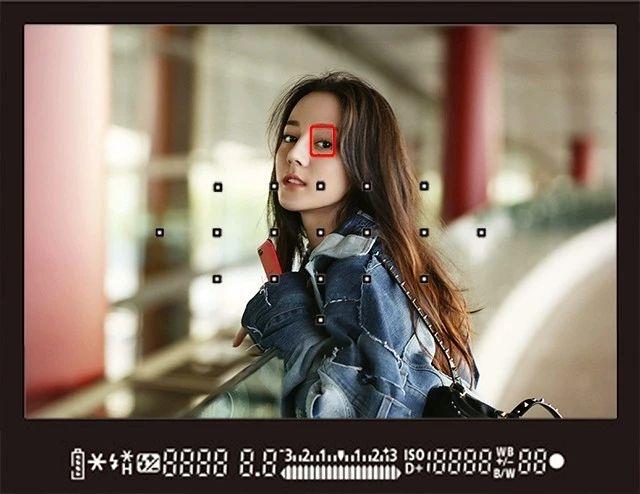
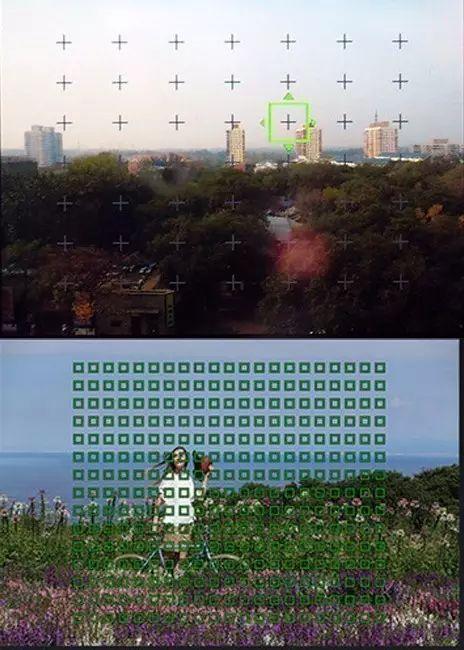
In addition to the above ” old-fashioned way “, most cameras now have optional focus points covering almost the entire viewfinder. And you can manually select the position where you want to focus. The number and coverage of selectable focus points varies from brand to brand.

By touching and clicking or turning the wheel, you can select the focus point at a specific position. And the camera will focus on that position.

Of course, the optional focus point may not completely cover the entire screen. And the position you want to focus on may just not have the optional focus point.

In that case, you’re stuck with the old-fashioned way of focusing first, then composing the shot.

After introducing several focusing methods that combine automatic, automatic and manual, the next thing to introduce is pure manual focusing.

5. Manual Focus

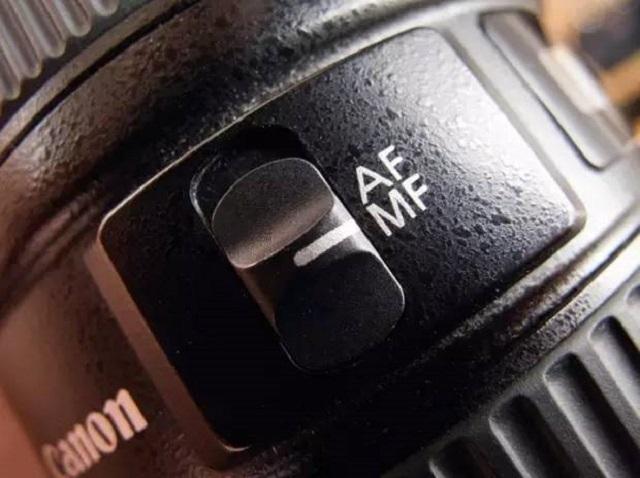
Manual focus is to precisely select the distance from the focal plane to the lens by rotating the focus ring. To activate this mode, you need to adjust the AF/MF gear to MF, which is the manual focus gear.

The manual mode can most accurately reflect the photographer’s will. The disadvantage is that it is too troublesome. And you have to slowly turn the ring to focus slowly every time. With a slightly larger volume, manual focusing can be very laborious.

With the gradual upgrade of the autofocus system, the autofocus function has become stronger and stronger. And has gradually become the mainstream of shooting. But in some shooting situations, manual focus is still the only option.

For example, in low-contrast scenes, especially shooting in low-light environments, the autofocus system that calculates based on light and contrast may not work properly.

When shooting night scenes, sometimes the lens will have the phenomenon of “pulling the bellows”. This is actually an error in the calculation of the focusing system. And the performance of the focus cannot be achieved. And you need to focus manually.

Another subject that requires the most manual focus is macro photography.

This is because the depth of field of macro photography is extremely shallow. And the accuracy of the focus point is extremely high. If you shift it a little bit, the entire photo may be destroyed.

In addition to the low-light environment and macro subjects that require manual focus, there is a special focus method that also needs to be completed in manual focus mode. That is, hyperfocal distance.

“Hyperfocal distance? I know, it’s focusing at infinity. In manual focus mode, turn the focus ring and aim at infinity, and the whole picture can be in the clear range.”

Categories
Soft Lights

What We Do With Long Exposures

“Long exposures” have become easier since digital photography. This technique is different from normal shooting because it opens another door – a world invisible to the naked eye! Today, in this article, I will share with you the different shooting methods and techniques of long exposure. I hope it can help friends who are engaged in photography!

Why Use Long Exposure?

Long exposure is to open the shutter for a long period of time, which can be from tens of seconds to several hours. So what kind of photos can you take with long exposure? Roughly these uses:

When shooting night scenes, it can reduce the need to increase the ISO due to insufficient light, and reduce the generation of noise. You can also close the aperture to make the depth of field deeper and prevent the scene from blurring due to the depth of field.

Absorbs more light that the human eye can’t see, making photos more interesting.

Smoothes flowing water.

Create dynamic photos, such as moving clouds and people.

Shoot light trails, such as light and shadow graffiti, car tracks, star trails, etc.

Long exposure makes water flow like mist

Let the light leave a trail

Camera Dettings for Long Exposure

Shooting Mode

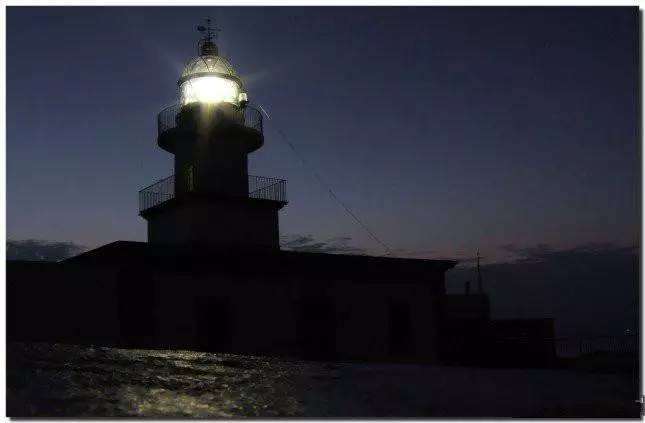
Long exposure Because we want to control the shutter speed, we usually use shutter priority (S-mode/Tv-mode) or manual mode (M-mode). The former is convenient, but it is highly recommended to use manual mode to take pictures. This is because night camera metering is often wrong, and aperture, ISO, etc. need to be adjusted accordingly. For beginners, you can use the aperture f/8-11, ISO100/200 to experiment, and then adjust the brightness of the photos taken.
example:

Of course, if you find that the photo is too dark, you can slow down the shutter, but it will extend the exposure time.

Increasing the aperture will make the depth of field shallow, and the subject will easily become blurred.

Raising the ISO will increase the noise.

So, how should we choose? It depends on which element is important – if you’re shooting a night scene, most of the scene needs to be clear, so we want to make sure the aperture is small enough. Therefore, I will choose to slow down the shutter and consider increasing the ISO if it is not enough. If you are shooting moving things, the shutter should not be too slow, otherwise the subject will be blurred. At this time, we will choose to keep the shutter speed and increase the aperture and ISO. Other situations are similar.

Long exposure adds motion

Long exposure records the trajectory, making the picture “interesting”

Take more photos — turn off noise reduction

Generally speaking, for long exposures, our camera’s Noise Reduction will take the same amount of time to work. For example, after taking a long exposure photo for 1 minute, the camera will use an extra minute for noise reduction, which will take a lot of time. We recommend turning off the built-in Noise Reduction, and then reducing the noise on the computer if necessary, the effect will be better.

 Failed to focus at night

In dark ring mirrors, the camera’s focusing system usually fails. At this time, we can use the lighting to illuminate the subject, and then shoot after focusing. Or use manual focus directly, especially when shooting very far scenes, just set the focus to infinity!

Autofocus may fail in the dark, switch to manual focus

How to Prevent Blurry Photos

To keep the camera steady, we pay attention to the following points:

Stable tripod and head

One of the very important equipment for long exposure photos is a tripod. A sturdy tripod and gimbal will keep your photos sharp even in strong winds. If you like to shoot in the mountains or at the beach, a tripod is even more important! Of course, it would be better to add weights to the center of the tripod.

Use the shutter release

The cable release not only allows you to avoid moving the camera when pressing the shutter, but also allows you to use the Bulb shutter to expose the camera for more than 30 seconds.

Use Mirror-up function

Some cameras have a mirror-up function, which can further reduce the vibration caused by the movement of the mirror.

Turn off anti-shake function

Some cameras with anti-shake function turned on may cause blurred photos due to lens assembly movement even when placed on a tripod. Try turning off the anti-shake function!