Categories
Soft Lights

How to Photograph Mountains

Mountain photography is a very important subject in landscape photography. What are the things you need to pay attention to in mountain photography? How to take beautiful mountain photos? How can I make my photos unique and distinctive? These top tips below will introduce you to the dos and don’ts of mountain photography. Learn with me!

1. Weather

For the best mountain photography, you need to travel in good weather. First consider what season it is, and then determine the shooting plan in advance according to different seasons. In the cold winter, the mountain area will be covered with snow and icy and the roads will be slippery. At this time, you must pay attention to personal safety, make preparations to keep warm and anti-skid, and prevent frostbite from falling. If you’re going out in the warmer months, having sunscreen, insecticide, and a hat on hand will greatly benefit your photography. To be sure, whatever the weather conditions, you will need to have the appropriate clothing and protective gear for the season.
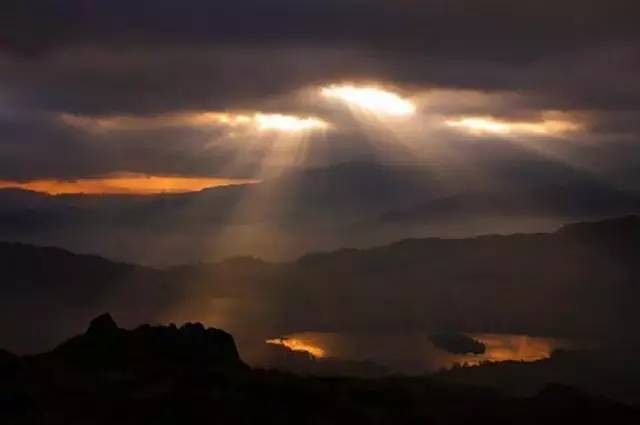
A good weather makes for a good mountain photo
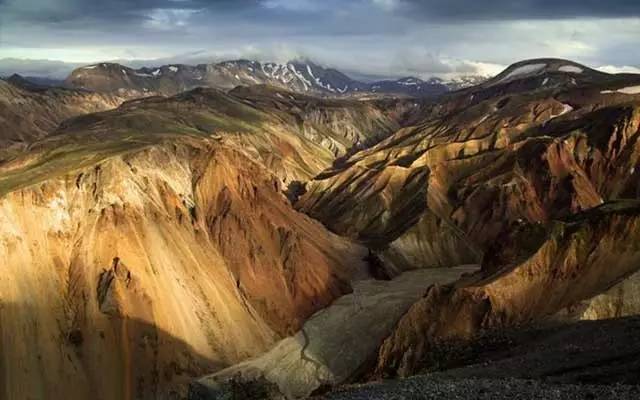
The sun shines directly through the thick clouds

2. Time

Most photographers agree that the best time to capture beautiful mountain photos is in the early morning or early evening. Because during the two time periods of sunrise or sunset, the light creates a unique lighting environment. The typical mountain photos are made because the sun doesn’t produce harsh light during these two time periods, and it doesn’t cast shadows when you capture the best of the moment.

In addition, the temperature of the midday sun can create smoke in the air, making photos look polluted. This is not the case at dawn or dusk. Also, there won’t be too many tourists visiting during these times to get in the way of your shots.
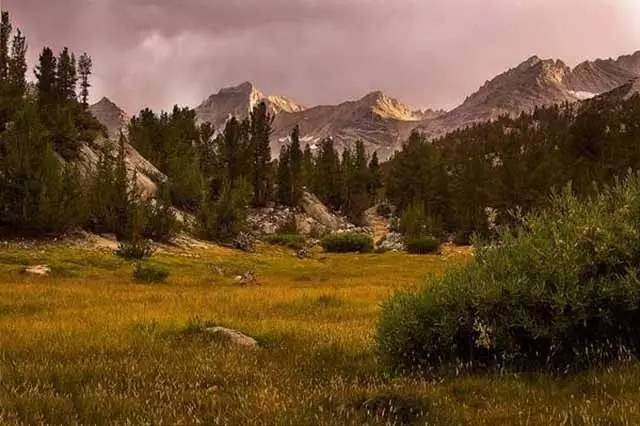
In the evening, the light is soft and not dazzling, which is more suitable for taking such mountain photos
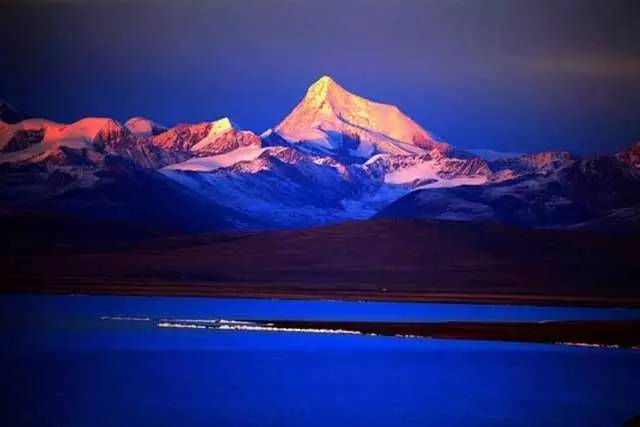
The setting sun shines over the snowy peaks, dyeing the white snow a warm orange

3. Lens

Generally, when photographing mountains, you need a lens that can take wide-angle shots. In order to ensure that the edge of the photo is not deformed, the appropriate focal length of the wide-angle lens is 24-28mm. On the other hand, in order to cope with shooting in different scenery environments, it is also recommended that players prepare a zoom wide-angle lens, such as 24-70mm. A wide-angle lens can help you capture the grand scale of the mountain, while also allowing you to zoom in to get some interesting details when viewing the photo.
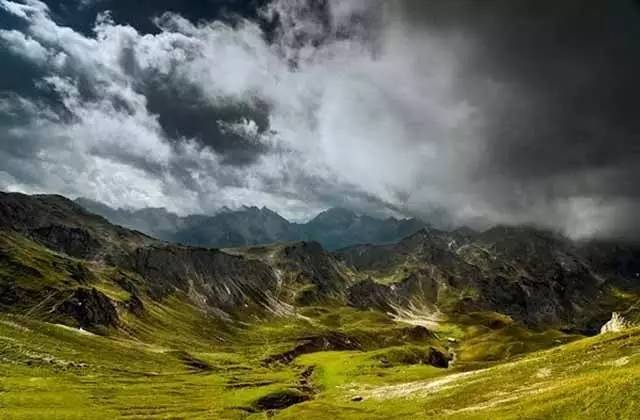
Wide-angle lens helps you capture the grand scale of the mountains
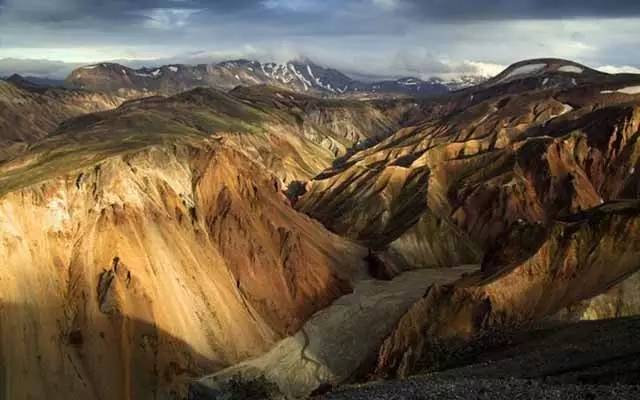
Rolling mountains in wide-angle lens
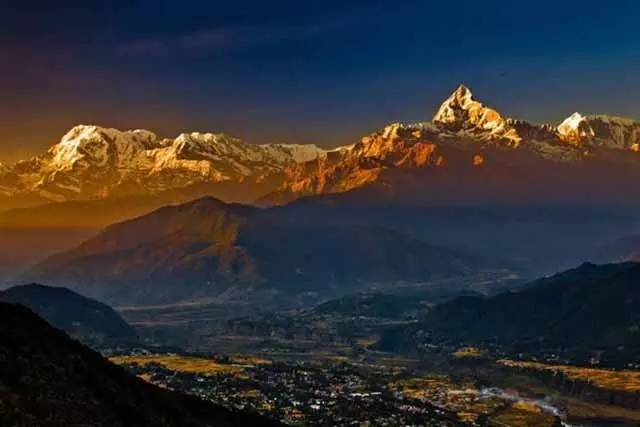
The nearby towns further set off the towering snow-capped peaks in the distance.


4. Color Filter

In mountain photography, there are three types of color filters that come in handy: color filters, UV filters, and polarizers. When shooting high-contrast landscape areas, color filters can help you solve problems such as a dark foreground and a bright sky. The job of a UV mirror is to filter sunlight while protecting your lens, especially in places with high levels of sunlight such as mountain tops. There are many benefits to using a polarizer, such as it helps your shot through misty skies, or when shooting in winter, a polarizer helps reduce glare and light reflected off of snow.
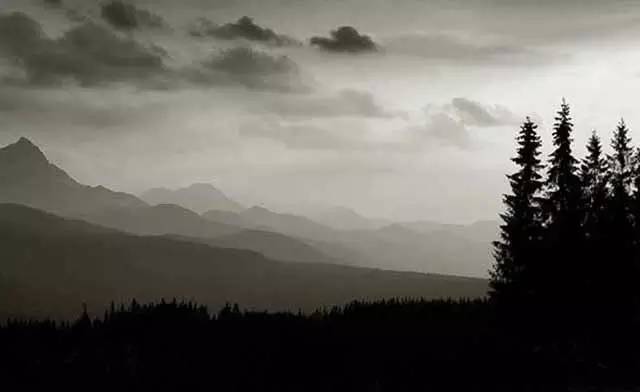
Using color filters according to different situations can make your pictures more layered
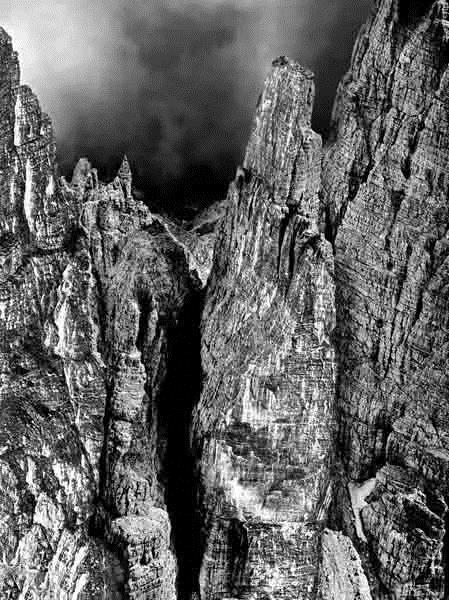
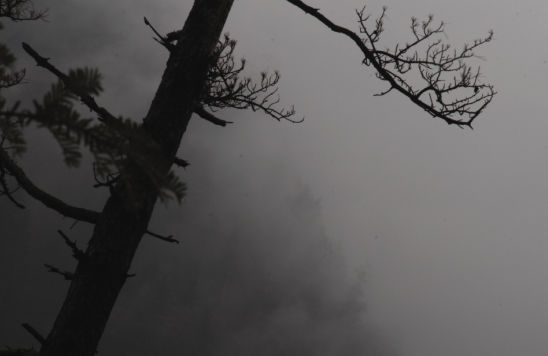
The black and white color adds a bit of danger to the mountain


5. Tripod

Tripods are very useful in mountain photography for two reasons: First, when taking long exposure photos at dusk or dawn, the tripod can provide a very stable support. The second reason is that a tripod can help you get more unusual shooting angles, allowing you to break out of the stereotype and form a new perspective. In addition, when shooting mountain scenery, it can help you share the heavy weight of the SLR camera and lens, reducing the burden of shooting.
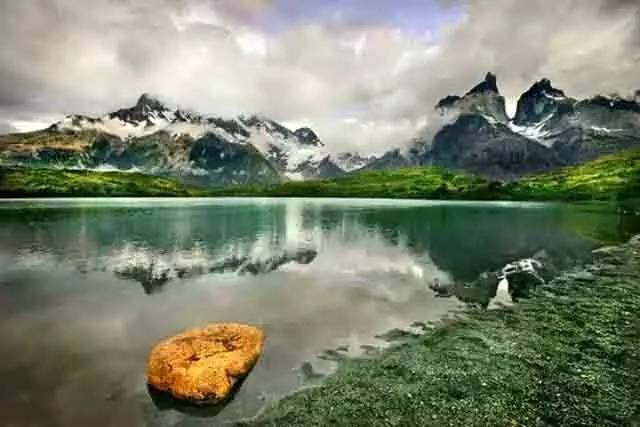
Tripods can help with new photography styles like HDR
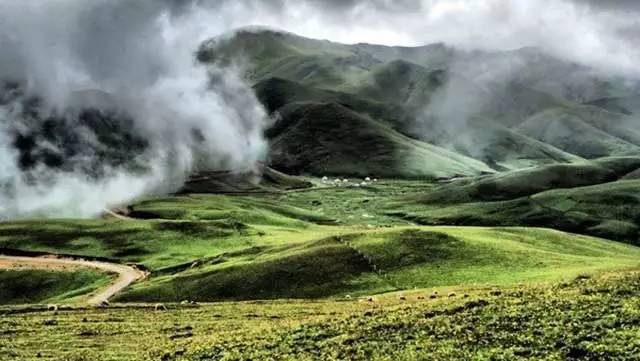
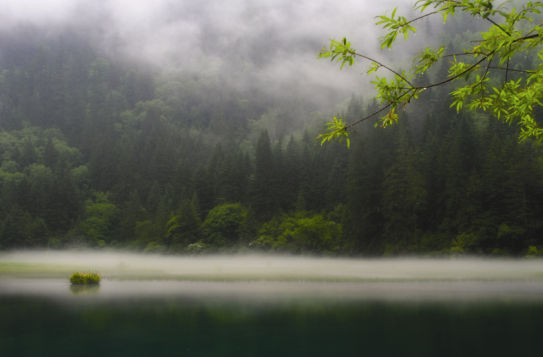
Take pictures of misty mountains with the steady support of a tripod
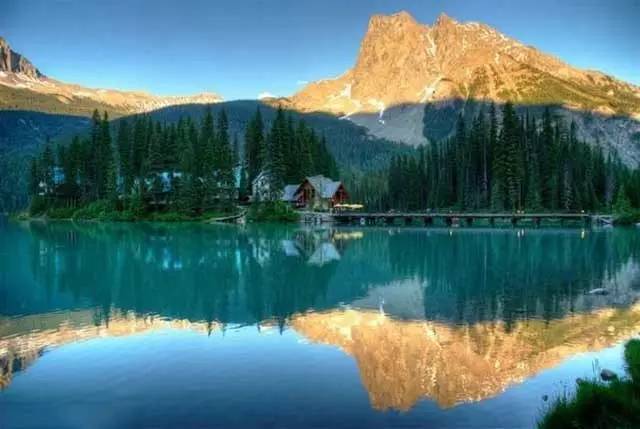
The reflection on the lake seems to lead people into another fairy tale world

6. Composition

After you’ve gotten over the lighting issues and understand what type of lens will work best for you in which situation, all you need is to adjust your composition when photographing. The first tip to improve your composition is to not put too many objects in your photo. That would take away the vibrancy of the mountains, and that kind of photos tend to look pretty unfocused. Another aspect to consider is making sure the foreground of your composition gives the viewer a sense of the scale of the mountains, creating a sense of layering.
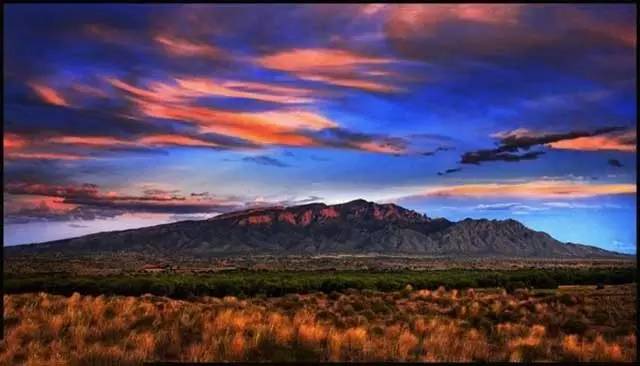
The simple composition can better show the vitality of the mountains
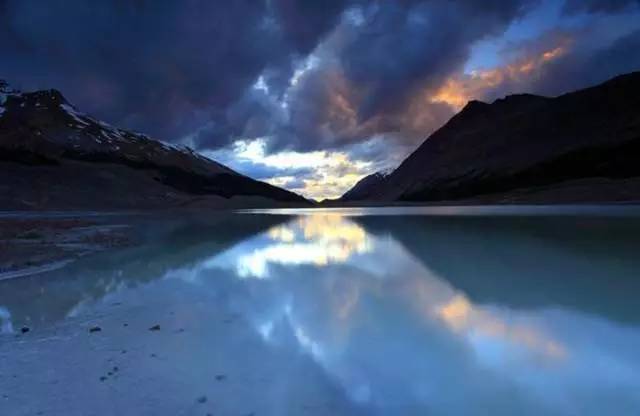
The flowing water and floating clouds set off the layering of the mountains

7. Aperture

Setting the aperture before shooting mountains is a very basic job, and there are fixed standards. In order to frame the background and foreground very clearly, the camera aperture should be set to a higher value (small aperture), between f/8 and f/22 depending on the situation. The exact value depends on your actual situation, but remember that it must not exceed f/8 at the maximum.
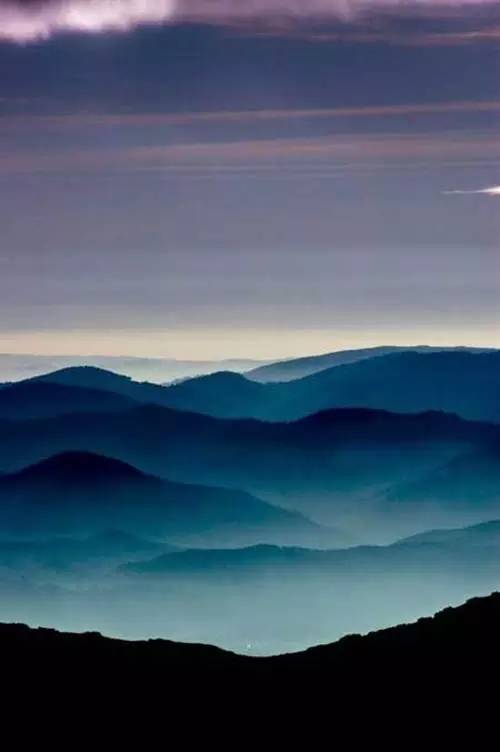
Setting a small aperture can make the background and foreground of your photo appear sharper
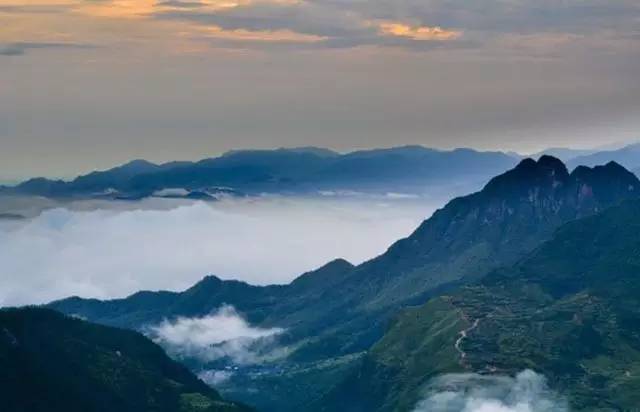
The mist shrouded the mountains with a mysterious veil
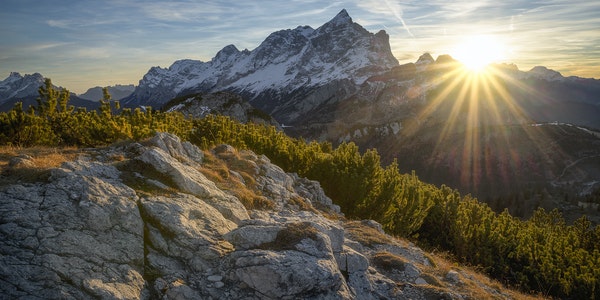
Categories
Soft Lights

Make Slanted Compositions More Stable

The “composition” of the traditional photography concept pays more attention to the normal perspective relationship. And generally pays attention to the horizontal and vertical lines, and the uniformity. However, to a certain extent, some seemingly unstable compositions still reflect the author’s grasp of the subject in a certain sense. Shooting photos with unstable composition, the framing is more flexible, but there are some rules to follow.

Using Depression Angle Framing

Especially when using a wide-angle lens, you may wish to pay more attention to the framing changes of the camera’s pitch and elevation angles when framing. Once the angle changes, the lines of the subject in the picture will give the photographer new inspiration for flexible composition. This is conducive to the creation of relatively novel compositions.

Change Left and Right Angles

Take the photographers usually shoot more buildings and human activities as an example. When framing and composing a picture, in addition to considering the front of the shot, you should also observe the front, left, and right sides of the subject. It can make better use of different line changes and express them in combination with the characteristics of the scene. Similarly, when photographing subjects such as roads, railways, bridges, and rivers, if you pay attention to the left and right angles, the main lines are likely to form more vivid changes. And the picture will not be dull.

Wide-angle Lens Exaggerates Foreground

When doing unstable composition, it is often necessary to combine the strengthening of the diagonal line. This exaggerates the foreground, etc. to obtain a strong visual effect. At present, the wide-angle end of many home digital camera lenses has reached 28mm. For film lovers with full-frame digital SLR cameras, many people use wide-angle lenses with focal lengths shorter than 20mm. Proper use of wide-angle lenses to exaggerate the perspective changes of the foreground can often compare the original Ordinary scenes are rendered visually stunning.

Utilize Slanted Lines

Most of the conventional composition is based on the pursuit of horizontal and vertical lines. The horizontal line is usually strictly horizontal, otherwise it is easy to give a sense of instability. But in unstable compositions, horizontal lines are often first treated as oblique elements. For example, in the current popular wedding photography techniques, many photographers like to treat the newlyweds as more dynamic movements such as sideways, oblique standing, pitching, and tilting. in order to obtain a vivid composition.

Organic Combination of Point, Line and Plane

Pay attention to the vivid changes in the composition. But still involve requirements such as the balance of the center of gravity. According to general visual habits, even when making full use of various exaggerated lines or oblique lines for composition. We should pay attention to the relative balance of up, down, left and right in the composition elements of the picture. When necessary, you may wish to arrange appropriate embellishments at the golden section of the inclined lines. This can not only correct the sense of instability, but also make the picture more lively.

Categories
Soft Lights

Six Tricks to Get the Expressive Power of Light and Shadow in Landscape Works

Light and shadow are the soul of landscape photography. How to quickly get the expressive power of light and shadow in landscape works and shoot a perfect landscape blockbuster?

1. Give People a Sense of Comfort

Twilight landscapes captured in soft diffused light give a soothing, restful feeling. When we appreciate digital photos, we should not only pay attention to parameters such as aperture, shutter speed, sensitivity, white balance, etc., but more importantly, understand the content and subject of the photos, and express opinions on the scenery.

Aperture: F2.8. Exposure time: 1/50s. Sensitivity: 100. Focal length: 28mm.

As the sun sets and twilight falls, the soft diffused light makes the photo look soothing and comfortable.

2. The Mosaic Effect of Light

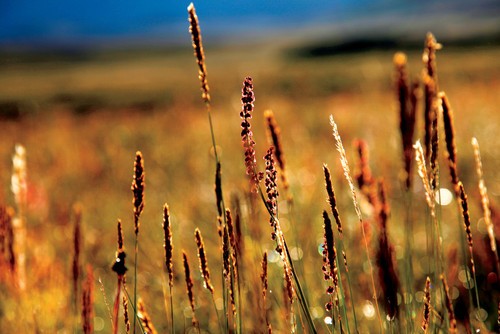
In the early morning and evening, the changing combination of light and shadow and the perfect contrast of light and shadow in nature provide many favorable conditions for photographic creation. It can be said that a landscape photographer should not only be a technical expert, but also an industrious explorer. This photo was taken in a highland meadow, with direct sunlight shining through the edges of the weeds shortly after sunrise, and at the same time, a lot of diffuse light fills the front of the grass so that we can see these colors in the photo.

Aperture: F5.6. Exposure time: 1/640s. Sensitivity: 100. Focal length: 105mm.

The picture above shows the plants that the photographer took with backlight in the early morning when the direct light was not too strong. The mosaic effect of edge light can be obtained by controlling the exposure.

3. Abstract Effect of Silhouette

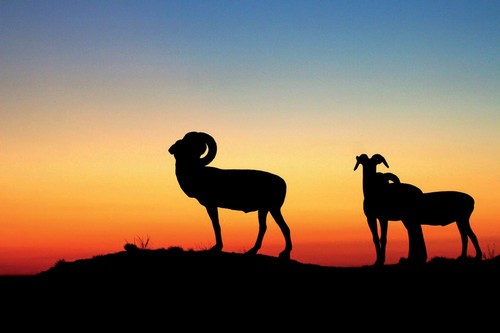
Black images with obvious shapes but no tonal details, known as silhouettes, generally appear in shooting scenes against a bright background. The expressiveness of the silhouette image depends on the sharpness of the outline of the image. In this photo, the photographer climbed a hill in the twilight and stumbled upon a few goats with their heads held high while shooting the sunset. So after metering the sky, lock the exposure value to focus on the goat and shoot.

Aperture: F4.5. Exposure time: 1/80s. Sensitivity: 400. Focal length: 100mm.

After shooting under the backlight to find a sharp-defined subject, expose for the sky in the background to take a silhouette photo.

4. Express the Reflection of the Water Surface

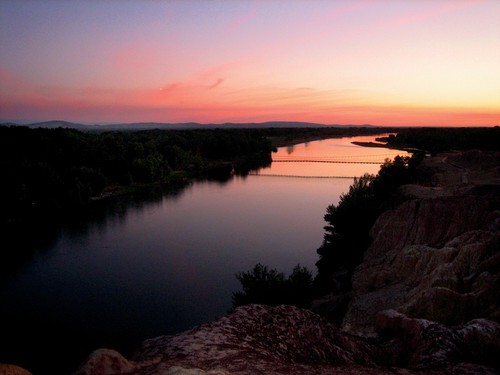
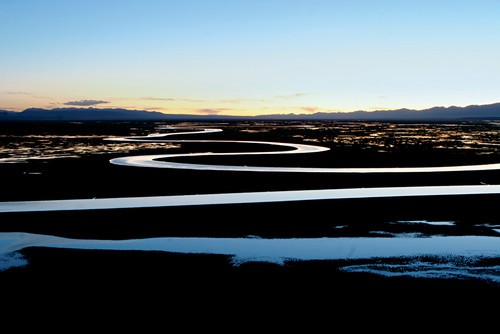
When shooting landscape subjects such as lakes and seas, photographers usually avoid reflections on the water by adjusting the shooting angle or using polarizers. However, not all shooting subjects need to prevent reflections on the water surface. The picture was taken by the photographer of the meandering river. At sunset, the backlight plunges most of the landscape into endless blackness, and the high-light water surface becomes the only high-profile subject in the frame, filling the entire photo with a sense of formal beauty.

Aperture: F6.3. Exposure time: 1/30s. Sensitivity: 100. Focal length: 12mm.

Using the reflection of the water surface, the river is abstracted as a ribbon in the photo.

5. Use the Flash to Calender the Light

When shooting in natural light, a lot depends on the preparation before shooting and the observation and patience when shooting. The most important thing in preparation is to know the weather in advance to configure the appropriate shooting accessories. And through observation when shooting, you can find subtle changes in light and shadow, and grasp the fleeting moment.

Sometimes, in order to improve the light ratio in the scene and highlight or weaken certain elements in the scene when taking photos in the daytime, you can use an external high-power flash to match the photo shooting. Many people will ask, isn’t the flash used to fill in the light when taking photos at night or indoors? Not really. Flash can also play a powerful role in outdoor photography.

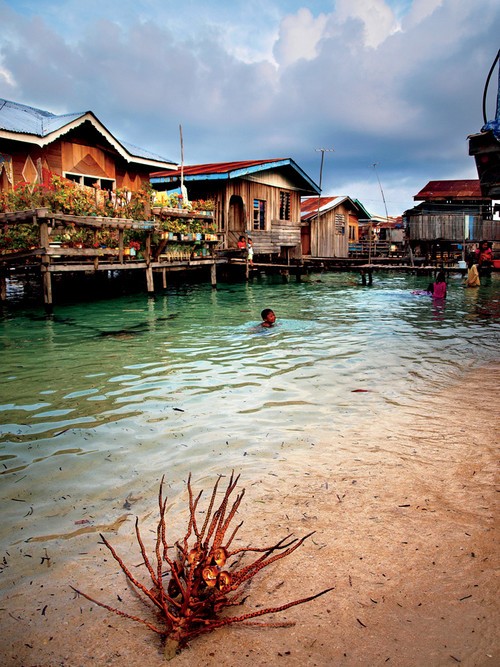
The picture below was taken in a seaside village in Malaysia. In order to highlight the coconut tree branches in the foreground, the photographer dimmed the brightness of the sky, and at the same time used the flash to fill in the light locally, and got this photo with excellent contrast.

Aperture: F3.5. Exposure time: 1/400s. Sensitivity: 100. Focal length: 28mm

The photographer uses the flash to increase the brightness of the parts in the picture, thereby reducing the overall exposure value, so that the details of the clouds in the sky are richer.

6. The Charm of Color Temperature and Tone

Taking advantage of color temperature for landscape photography is one of the great advantages of DSLRs. To create color contrast in a photo, in addition to using the color of the subject itself, the most common method is to use the color temperature contrast of the shadow and light-receiving parts. In the picture below, the sunset that is about to descend the mountain casts the last rays of warm light on the small house where Kanhe people live, while the shadows in the lower third of the picture are filled with cool blue, forming a strong contrast.

Aperture: F5.3. Exposure time: 1/320s. Sensitivity: 1000. Focal length: 240mm

Use the contrast of color temperature and light and shadow as the highlights of your photos.

Categories
Soft Lights

Several Methods to Ensure the Level of the Picture

Before people pick up the camera and shoot, people now frame the image in their minds. There are many methods and types of composition. In conventional shooting, the most basic requirement is to ensure that the picture is horizontal and vertical. In this way, the viewer can look very comfortable and conform to normal visual habits. Taking landscape photography as an example, there are several methods that can help us determine whether the picture is level or not.

With the Help of Horizontal Scenery

This is the most commonly used method in shooting, which is to use the lines of the scene itself to help us determine the level of the picture. For example, when shooting large areas of lake water, boats on the lake may interfere with our confirmation of the level of the picture. At this time, you can check whether the picture is level when framing the scene by the connection line between the water surface and the horizon, or the boundary line with the scenery on the opposite bank. As long as this line is parallel to the upper and lower sides of the viewfinder, the composition will basically be horizontal. Similarly, this method can also be applied to photographing grassland or desert scenery. Other features that can assist with level confirmation are buildings, straight streets, stairs, or tall trees.

Camera screen Gridlines

When there is no outside scene to refer to, the camera in our hands can play a big role. Most of today’s home digital cameras have a grid line-assisted shooting function. As long as the grid lines are displayed on the screen, the picture level problem can be easily solved. In general, there are two ways to set gridlines on the screen. One is to use the screen display information key to switch the screen switch, shooting parameter display, grid lines and other functions. The other is to select in the menu, there will be an option to enable screen gridlines in the settings directory. In some digital SLR products in the live view state, the auxiliary reference line on the screen is in the shape of “+”, and this “+” reference line can also be used as a reference for confirming the level of the picture.

Electronic Spirit Level

For example, in digital SLR cameras, EOS 7D, EOS 550D, D3x, D3s, D700 and D300s, E30, EP-1, EP-2, etc., among household digital cameras, some products of R10, GRD series and CX series are designed with electronic level.

The electronic level on the camera can be displayed in two ways. One is the more intuitive graphical electronic level on mid-to-high-end digital SLR cameras. This type of electronic level is displayed in an intuitive “+” coordinate mode. In some early products, only the horizontal condition in the left and right directions can be displayed. The latest product has added a gyroscope inside, which can display the horizontal status in four directions, front, back, left, and right.

Another electronic level is relatively simple in terms of display status. Displays horizontal status by displaying horizontal or horizontal and vertical bars on the display screen. The different colors of the display bar can inform the user of the current level of the screen. Or use a sound to alert the user when the screen is level. Most of these electronic levels can only display the horizontal condition in the left and right directions. When the lens is perpendicular to the ground, the level will not work.

Tripod and Gimbal Level

It doesn’t matter if the camera doesn’t have an electronic level. Using this type of tripod and gimbal with a spirit level can also obtain a more accurate level picture. The level on the tripod is generally designed at the connection of the three-legged tubes. Due to the limited space, it is mostly designed in a circular shape. The inside of the level is filled with liquid and has a certain amount of air, forming a circular bubble. When the bubble is centered on the top circle mark, the tripod is level.

Due to the large space on the gimbal, the level is mostly long and is designed on the quick release plate locking frame. The principle is the same as that of the circular spirit level. When the bubble is in the center of the two scale lines, the quick release plate is in a horizontal position. Some better gimbals will design multiple levels to facilitate users to determine the all-round level.

Horizontal Bubble

This is an external level mounted on the hot shoe of the camera. This little thing is only $2~3, and it is very convenient to use. It is designed with horizontal posts in two directions, and can be installed on the hot shoe in two states. When placed horizontally, two tick marks are used as horizontal identification marks. When placed vertically, it is identified by the circle mark at the top. This leveling bubble will work if we are using a tripod without a spirit level device. When holding the camera, if you use the optical viewfinder, it will be a little inconvenient to use it, and it is convenient only with live view.

Categories
Soft Lights

Grasp the Changes of Time and Light

Early Morning and Dusk

Professional landscape photographers pay the most attention to the grasp of early morning and dusk. The natural light during this period is mild, and the sun angle is low, so that the scene can not only show more details, but also the long shadow will create a three-dimensional effect. In addition, in the early morning and evening when the sun angle is low, the color temperature outside is low, and nature is cast in a warm tone, and we can also see the unusual side of nature in the viewfinder.

Early morning and evening hours are also the best times for direct expression of the sun. Things like sunrise and sunset are the subjects that landscape photographers pay the most attention to. The weather is also an important factor for landscape photography. In the early morning and dusk, the sky will appear blue in many cases, which is one of the important reasons for choosing to shoot at this time.

For digital SLR cameras, when shooting in the early morning and dusk, it is necessary to grasp the camera’s white balance function. If you want to record the color temperature of the scene light, it is best to set the white balance to daylight mode, otherwise the camera’s automatic white balance function will automatically change the color temperature, so that the photos taken in the early morning and dusk will lose their original color charm.

Noon

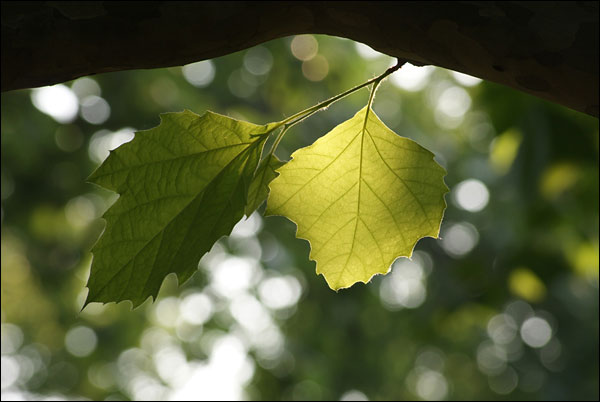
Under the strong light of noon, it is not a favorable time for landscape photography. However, through reasonable selection of materials, you can take excellent photography unexpectedly. If the top light at noon is used in the woods, it can show the transmission state of light, just like the leaves in the photo and the blurred leaf gap in the background. However, due to the strong light at noon, the leaves or water surfaces that are directly irradiated often produce reflections, so that the original rich colors of nature will be greatly reduced.

When choosing a scene to shoot, try to avoid this as much as possible. In well-lit situations, you can safely shoot with a telephoto lens and a small aperture. A sufficient amount of low light can ensure the clarity of the picture, and it is also a favorable time to capture scenes with motion such as water splashes.

Cloudy Day

Excellent landscape photography is not only born in fine weather, on the contrary, many experienced landscape photographers often choose to go out to shoot in bad weather. For example, on cloudy days, the sun’s rays pass through the clouds, which will produce soft and even scattered light, and the contrast in nature will become very low. This is more conducive to the performance of the sense of hierarchy.

At the same time, on cloudy days, the direct sunlight of the sun is missing. And the reflection of the ground scene will be weakened, so that the colors and details will be richer. The atmosphere of the cloudy day is also different from usual. And the photos taken at this time will have a hint of melancholy and low color. This will impress people from another aspect. When shooting a cloudy landscape subject, always pay attention to setting the camera’s exposure compensation to avoid the automatic exposure function causing the picture to be too bright, thus losing the unique atmosphere of the cloudy day.

Image of Fog

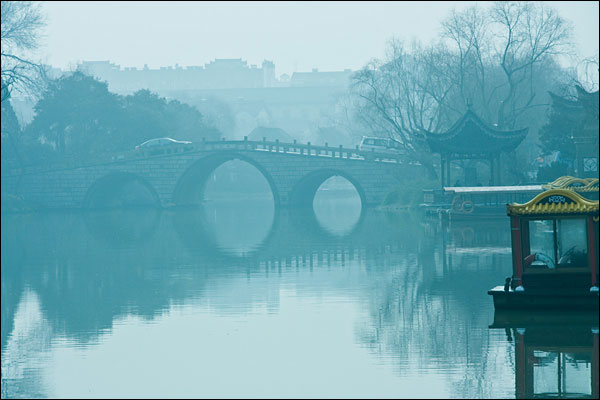
In landscape photography, the successful use of fog can lead to profound works. Clarity is a must for a photo. But a photo with all elements clearly presented is not necessarily a good landscape photography. Like this photo of the lake taken in the fog, the hazy vista creates a profound artistic conception, dilutes the figurative scene. And it makes the viewer seem to be in a dream. At the same time, the clear pavilion in the close-up view is used to pull the viewer back to reality again.

The shooting of foggy scenes is a test of the photographer’s ability, especially the selection and matching of foreground and background. And the echo of theme and object. Only by walking more, shooting more, and comparing more, can we grasp the shooting skills of fog scenes.

Wind and Rain

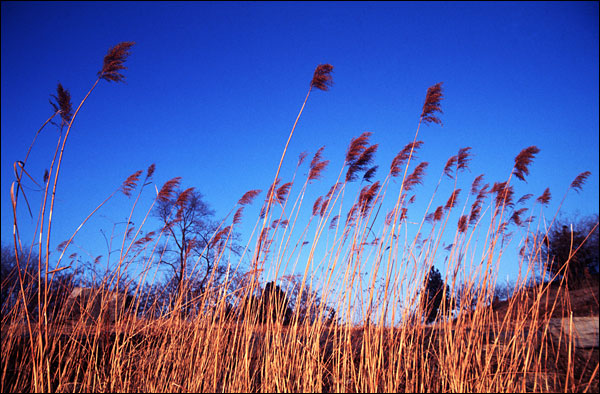
Using the power of wind, you can express the vitality and agility of nature. This is the so-called bells and whistles. In this photo of windswept reeds, a low-angle shot captures a calm blue sky and golden reeds swaying in the wind. There is a sharp contrast between the two, and the dynamic and the static complement each other.

In landscape photography, there are many ways to express the characteristics of rainy days. For example, choosing a darker background and a slightly longer exposure time can freeze the rain in the picture. In addition, you can also choose a place with standing water to photograph the ripples that the rain hits in the puddle.

Categories
Soft Lights

How to Use a Wide-angle Lens

Brief Introduction

When it comes to “wide-angle lens”, many people immediately think of “big scenery” and “panorama”. Well, that statement is not correct either.

Granted, the wide-angle lens has a wide field of view, making it ideal for capturing big, imposing scenes. But if you only shoot big scenes, you will inevitably get bored after watching it for a long time, and it will not help you improve your own level.

It is not wrong to say that “wide-angle lenses are suitable for shooting large scenes”. But if you say that “wide-angle lenses can only capture large scenes”, it is a big mistake.

In fact, you can try to use a wide-angle lens to shoot medium and small scenery, portraits, buildings and even still life, and the effect is also very good – as long as you understand the characteristics of the wide-angle lens, and correctly exploit its strengths and circumvent weaknesses, to maximize its role.

1. Watch out for vignetting

Filters will bring special visual effects to the picture and are important auxiliary equipment. For some themes, you can try to use multiple filters superimposed, and the effect will be more outstanding.

However, when using wide-angle and ultra-wide-angle lenses, the filter has an additional “side effect”, which is vignetting.

The so-called vignetting is actually a phenomenon in which the brightness and color saturation brightness are significantly reduced at the edge of the screen:

Vignetting phenomenon

Whether the vignetting phenomenon is obvious or not often depends on the focal length of the lens and the actual thickness of the lens. The shorter the focal length of the lens, the more pronounced the vignetting. The larger the actual thickness of the lens, the more obvious the vignetting.

After the filter is installed, the “actual thickness” of the lens will increase in disguise, which may cause vignetting. If multiple filters are used in combination, the vignetting may be more obvious.

Loading polarizer, vignetting is more obvious

Before using a filter with a wide-angle lens, first weigh the benefits of using the filter and the side effects of vignetting, and then make a decision whether to use a filter or not.

In fact, vignetting is not necessarily a bad thing. It can provide a sense of gradient from all sides to the center, and the picture has a psychological feeling of focusing on the center, but it also has a different flavor.

LOMO style often enhances vignetting in the later stage

2. Control deformation

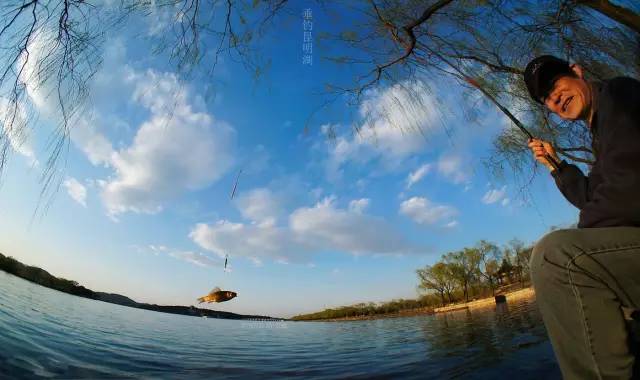
In addition to a large viewing angle and a wide field of view, another feature of wide-angle lenses is edge distortion, that is, the closer to the edge of the screen, the stronger the deformation and stretching effect of objects.

Let’s look at an example:

As shown in the image above, the horizontal plane near the edge of the picture has a pronounced arc. The head and legs of the figure on the right side of the screen are also significantly larger.

Another law of wide-angle lens distortion is that objects closer to the lens are more distorted. As shown in the picture below, the barrel of the nearby cannon has become extremely huge. And the distant cannon, although it is located at the edge of the picture, the deformation effect is not obvious.

You can reduce these unnatural distortions by changing the angle, adjusting the composition, or moving away from the subject.

3. Take advantage of deformation

The edge distortion of the wide-angle lens is not entirely negative. In fact, making good use of the deformation effect of the wide-angle head can add a lot of points to your picture.

You can enhance the depth of the picture through reasonable composition and spatial layout.

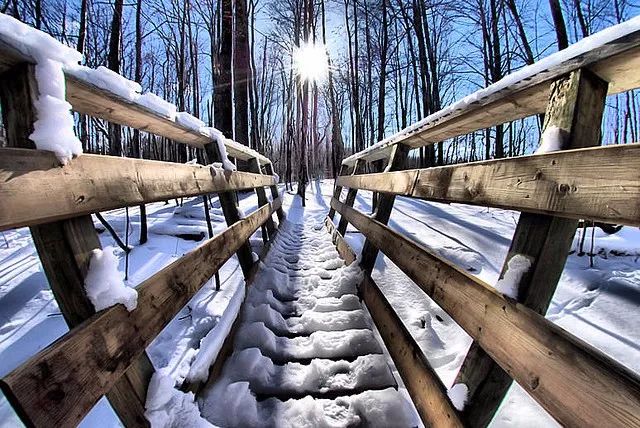
When the same scene exists in the current, middle, and distant scenes, place the foreground scene at the edge of the screen, use deformation to make it larger, and enhance the size contrast between the foreground and the medium and distant scenes, and the sense of depth is naturally stronger:

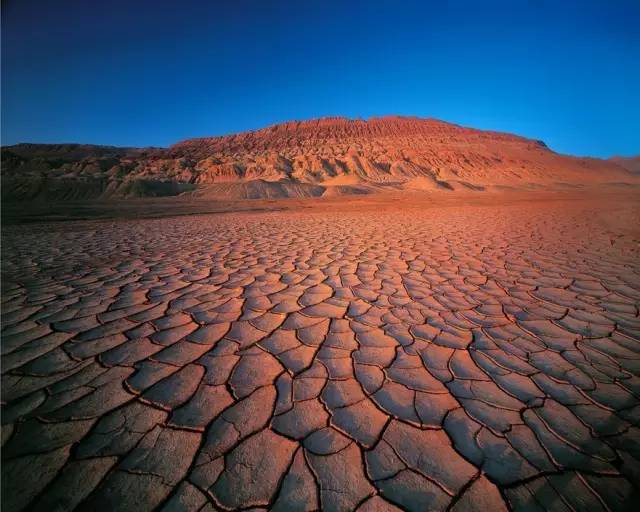
The tortoise crack decreases sharply from near to far, and the picture has a strong sense of depth

Choose a strip-shaped, linearly extending object as the foreground scene, and the picture effect will be better.

In addition to enlarging the foreground scene and enhancing the size contrast, the edges of such objects are themselves a set of convergence lines, which have a very strong “eye-catching” effect:

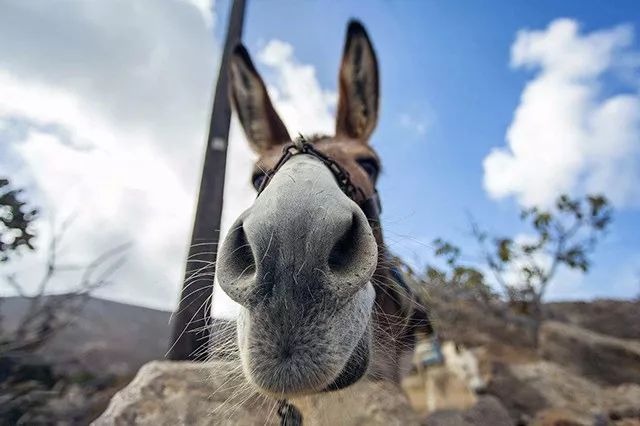
In addition to enhancing the sense of depth, the edge deformation of the wide-angle head can also create many interesting creative effects, such as the classic “big head animal”:

Briefly speaking, please actively develop your brain holes. Just keep in mind that the object that needs to be enlarged should be closer to the lens and placed on the edge of the screen, and that’s OK.

4. Add highlights

Due to the large angle of view of the wide-angle lens, many scenes will be included in the picture, and the further the distance is, the proportion of the scene will become very small.

A large piece of small-scale scenery is crowded into the picture, and the picture is likely to lack the main body and have no bright spots:

When shooting such a large panorama, you need to add some distinctive and super-existent scenes to the picture as “highlights”, so that the audience has a clear focus.

For example, when taking a panorama of a city, choose to have magnificent clouds in the sky, or shoot at sunset:

You can also choose some scenes that are more distinguishable from the surrounding environment as the subject when framing.

As shown in the figure below, in the gray-yellow tone environment, the green building is particularly conspicuous:

Selecting some foreground objects and shooting at a low angle is also a good way to add highlights to the picture.

Low-angle shooting, the foreground scene is very close to the lens, coupled with the “zoom-in” effect of the wide-angle lens, it will become extremely present, and the texture and texture are even more outstanding:

5. Try vertical shots

In addition to the advantages of the angle of view, the wide-angle lens is also very suitable for shooting vertical landscapes, allowing the camera to shoot from an angle higher than the foreground, bringing a large amount of ground into the foreground of the picture.

Ordinary lens to shoot like this, the whole photo may be all the ground. The large field of view of the wide-angle lens allows the picture to incorporate more medium and long shots.

The proportion of the ground scene is controlled to about two-thirds, and the magnification effect of the wide-angle lens on the close-up scene makes the audience feel more immersive and presence, which is in line with the theme of the vertical composition.

6. Do a lot of upside down shots

If you ask me what shooting angle is best for a wide-angle lens, I’ll tell you: upside down. Why do you say that?

Because of the edge distortion of the wide-angle lens, not only will it not look unnatural in the upside-down shooting, but it will maximize the charm of the work.

You can photograph buildings taller and more majestic:

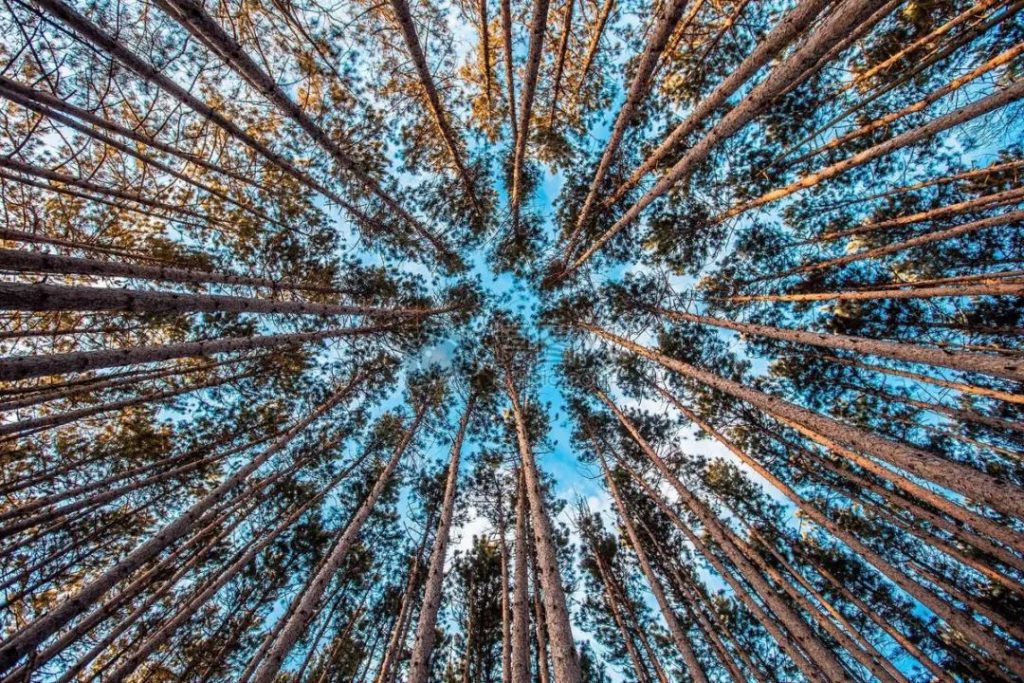
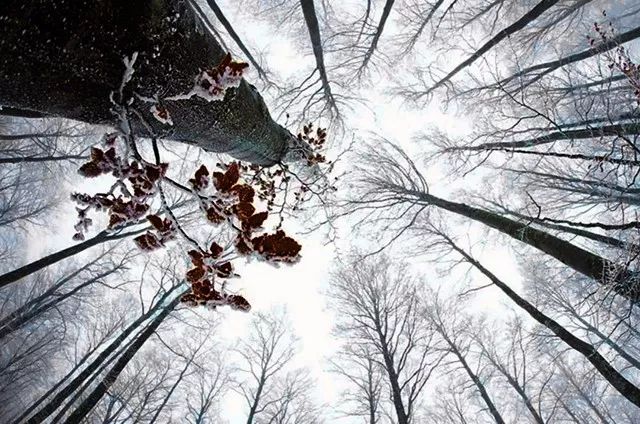
Shooting trees upside down can not only make the trees taller and more majestic, but the dense and slender trees will converge in the center of the picture, which has a great visual impact:

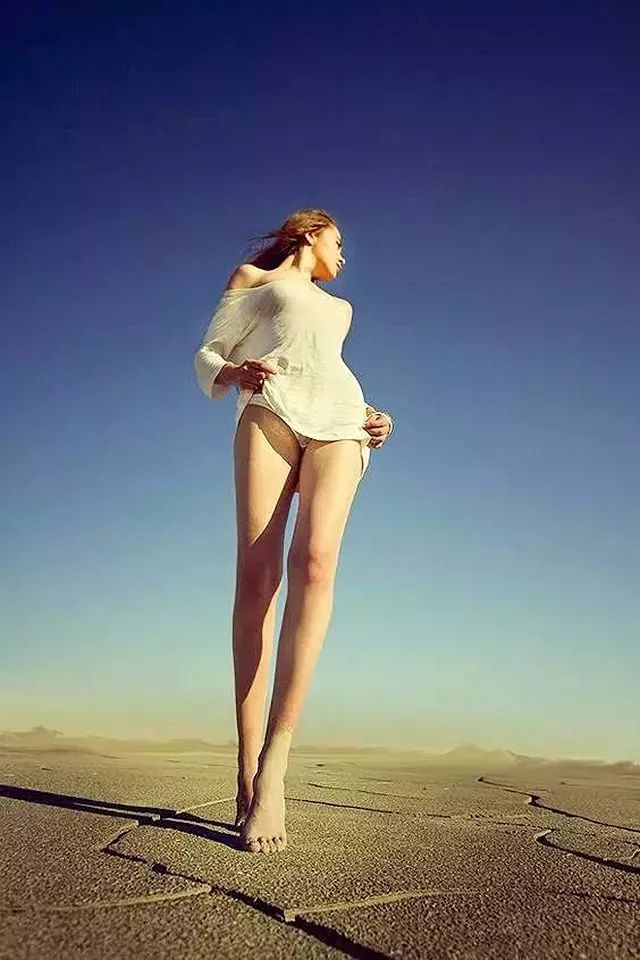
When shooting people, shooting upside down from a small angle can make people’s legs look longer.

It should be noted that wide-angle distortion may make the calves and feet larger and thicker, and it is necessary to coordinate the posture and control the elevation angle to mitigate this negative effect:

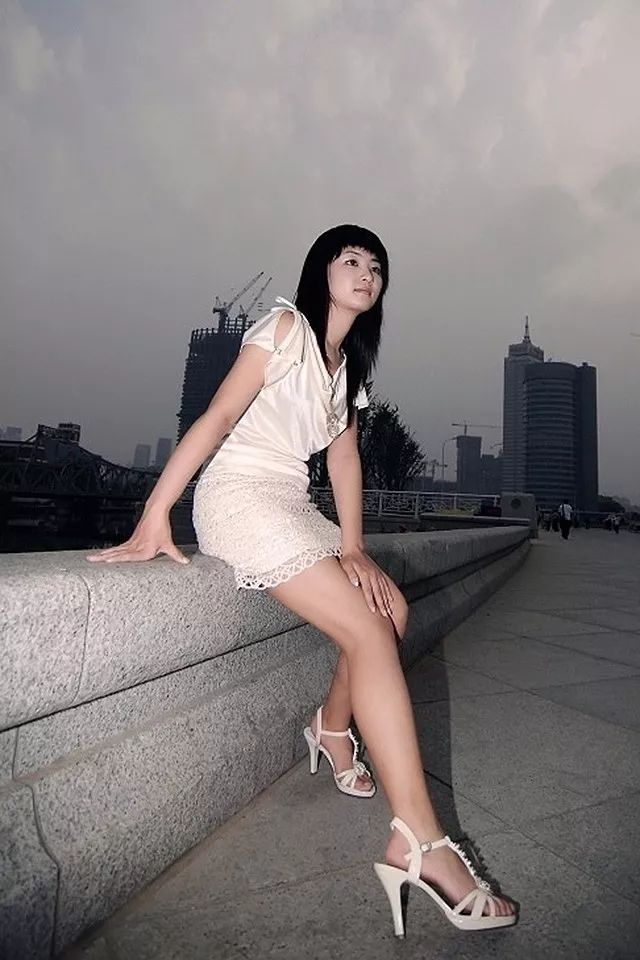
When shooting profile portraits, if both legs are relatively complete in the picture, you need to pay special attention to the placement of the legs, otherwise it is easy to shoot a funny effect of “two long legs and one short”.

Categories
Soft Lights

Let the Prospect Broaden Your Horizons

1. Find a Suitable Prospect

To express the sense of three-dimensionality and depth on the screen, the foreground is very important. Pay attention to those terrain elements in front of you, find suitable foreground, and use them to increase the depth of field of the picture.

(1) Use striking foreground elements

When you have chosen a scene to shoot and look around for elements that are suitable for the foreground, you can arrange some foreground elements that lead the line of sight, such as a bunch of grass or a patchwork of rocks. Use them to add depth to your photos, creating a three-dimensional feel. The use of a strong foreground can bring out the size of the scene, let the viewer know about the relative dimensions of the various parts of the scene, see the detailed details of the scene, and can better show the middle ground and the expansive background in the distance.

(2) Reasonable use of some guiding lines

In shooting, if you can find the hidden guide lines of the scene in the viewfinder, you can make the picture more exciting. Before shooting, ask yourself “What elements of this image interest me the most?” Consider how to create the most perfect image. Common scenery such as paths, bridges, fences, etc. can also be used as the foreground of the picture. At this time, the viewer’s line of sight will extend along this vein in the picture to the distant view.

Foreground Composition Rules

Look carefully at the foreground, find points of interest and use compositional rules to lay out the picture, such as the rule of thirds, symmetrical composition, or the golden ratio.

(1) The foreground occupies one third of the screen

It is crucial to grasp the area that the foreground occupies in the picture. If you want the foreground to be the main body of the frame, you need to think more carefully about its placement. We are accustomed to arranging the foreground in the lower third of the frame, and this kind of photo has a strong visual impact. Don’t choose a foreground that is too complicated, though, as it will distract the audience from the subject.

(2) Symmetrical composition

Symmetrical composition is also a commonly used composition rule. The role of placing the foreground is to fill the gap at the bottom of the picture and make the picture feel more layered. For example, if you arrange the distant view at the top of the screen, then place the foreground at the bottom of the screen.

Foreground components work more effectively if they intersect or protrude into more distant objects (including the sky), making the composition appear tighter. Just because you’re taking landscape photos doesn’t mean you’re limited to the narrow scope of landscapes. Remember to try more!

Tips for photographers:

When shooting landscapes, we use a very small aperture, which reduces the shutter speed to 1/15th of a second or slower. In order to ensure a clear picture, be sure to use a tripod, a cable release or the camera’s time-lapse function.

(1). Stable tripod

Hang a rock bag (or a backpack) on the center of the tripod to prevent sudden winds from affecting stability. If you have a level on your tripod, use it to make sure the composition is level. Remember to secure the camera as tightly as possible.

(2). Exposure bracketing

Usually you should choose the center-weighted metering method, and then take the exposure bracketing, each time ± 1/2 stop or less, at most overexposure or underexposure by one stop.

Proper Use of Lenses and Depth of Field

You can use a wide-angle lens, choose a small aperture, and then set a reasonable focal length to obtain the maximum depth of field, so that the foreground and distant scenery in front of the lens are clearly captured.

(1) Control the depth of field

With aperture priority mode, there is an opportunity to create different depth-of-field effects. To get a wider in-focus imaging range, choose a small aperture of F11~F22. And then use the manual focus mode to set the focus between the middle and foreground. If the foreground is 1 meter away from the camera, setting the focus at about 2 meters will make both the foreground and the distant view clear. Sometimes you can also try to take creative pictures with a shallow depth of field, and you will have a different harvest.

Shooting Tips:

(i) When using a wide-angle lens, be careful not to include the tripod and your own shadow into the picture. This problem can be avoided by choosing side lighting and a suitable shooting position.

(ii) If you like creativity, why not try a shallow depth of field? Open a large aperture to clearly image the foreground, and after the complex environmental background is blurred, the picture is much simpler. Use playback to check your images after shooting to ensure sharp details and vivid colors. Shooting in RAW format is recommended if the camera allows and the memory card capacity is sufficient.

(2) Use the wide-angle lens skillfully

Using a wide-angle lens can highlight the depth and depth between the foreground and the background. It allows the photo to gain a greater depth of field. Another benefit of a wide-angle lens is that it can exaggerate the perspective of the photo and make the foreground more exaggerated. Of course, shooting is not set in stone. In actual shooting, according to different needs, choose different focal lengths of lenses and shooting distances.

Light and Angle

When photographing a scene, the angle of the shot is also important to understand the source of the light and the effect of the intensity of the light. Choose a low angle and make good use of the effect of light on the foreground. That can create a good sense of depth in the picture.

(1) low-angle shooting

Shooting the foreground from a high angle will make the picture less effective. Try a low angle when shooting. Keep the angle of view level with the foreground and adjust the tripod height to find the best angle for the shot. If the tripod is too low, the scene will look flat. If the tripod is too high, the foreground may appear skewed.

It should be noted that many photographers use wide-angle lenses with the foreground very close to the lens. At this time, it is necessary to adjust the angle and distance appropriately. And do not let the exaggerated foreground interfere with the beauty of the whole picture.

(2) The effect of light on the scene

If it is morning, evening or cloudy, the foreground is darker. If the sunlight is strong and the object in the foreground is light in color, a picture effect with a dark background and a light foreground will be formed. So that the foreground is more eye-catching.

Shooting a scene with frontal light can make the scene clear and have a bright and vivid atmosphere. But the frontal light will make the scene lack three-dimensional effect. Using side light to shoot the scene, due to the oblique light, the scene will naturally show light and dark lines, resulting in a three-dimensional effect. The scene has a three-dimensional sense, and the tones of the background are not easily confused with each other.

When shooting, the neutral gray part of the picture is used as the keynote for metering. So that the layers of the dark parts of the scene can be fully displayed, making the picture rich in layers. Side light can express levels and lines, which is more suitable for shooting.

Categories
Soft Lights

The Necessary and Unnecessary in Landscape Photography

There are many photographers who like landscape photography. Traveling all over the country, recording the beautiful scenery of nature, you can experience the culture of different places and expand your knowledge. However, for many beginners, landscape photography is difficult, and it is impossible to shoot satisfactory works. We bring you 10 do’s and don’ts when shooting landscapes, so that beginners can refer to them, and even get some inspiration from them to build their own set of shooting modes.

Five Necessary Behaviors

1. Always bring a tripod

A tripod is arguably one of the most important pieces of photographic equipment, and landscape photography is no exception. You must know that photography not only records a momentary image, but also records the changes and dynamics of things.

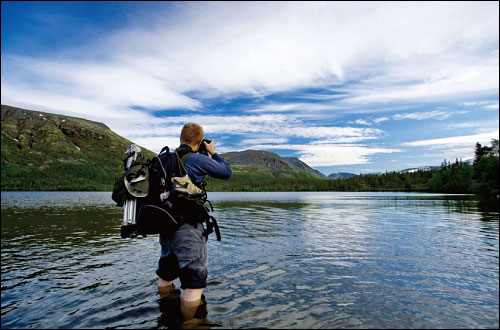
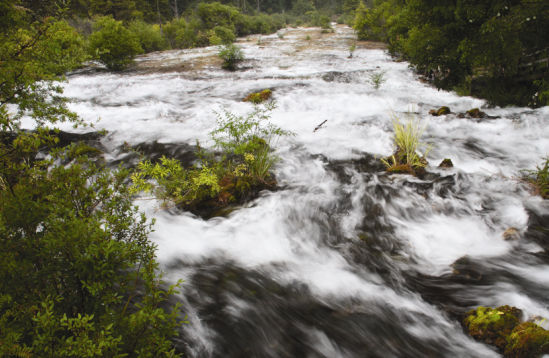
Sometimes I take pictures while walking, and I want to shoot with slow shutter speed when I see the flowing water on the side of the mountain and the plants dancing in the wind. If you don’t have a tripod by your side, you can only cry out a pity. In addition, a tripod can also help control the level, reduce camera shake, or maintain a specific viewing angle, which is very important.

Although the tripod is heavy and bulky, it is inconvenient to carry, but there are always situations in which it is necessary to use a tripod during shooting. In order to take more great photos, it’s always a good idea to bring something with you at all times.

A tripod is so versatile, it’s still worth taking with you even when shooting in the daytime


2. Try adding characters

Some photographers are always satisfied when there are no people or animals in the photos when shooting landscapes. In fact, they don’t need to be so persistent.

The characters in the photos can often inject life and vitality into the whole picture, or give the reader room to imagine and tell a wonderful story. The presence of animals can sometimes interact with the background, bringing out more information about the place.

In addition, adding characters can also be used as a standard for comparison, indicating the size of the objects in the picture. Sometimes it is difficult to avoid the appearance of characters, and we must find a way to use them. But at the same time, be careful not to be affected by the added characters or animals to affect the atmosphere and the balance of the composition.

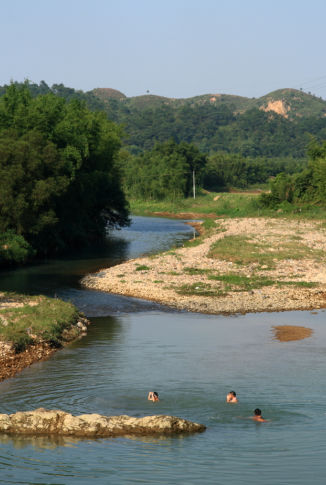
If there were no children playing in the water, the picture would be too quiet and lacking in life.

3. Use Zoom out to help with composition

Here’s a little tip we recommend when shooting to help beginners master composition. When framing, first adjust the zoom lens to the telephoto end, and then slowly zoom to the wide-angle end. In the process, carefully observe the scene in the viewfinder, find the balance point between the subject and the foil in the photographed image, and then press the shutter.
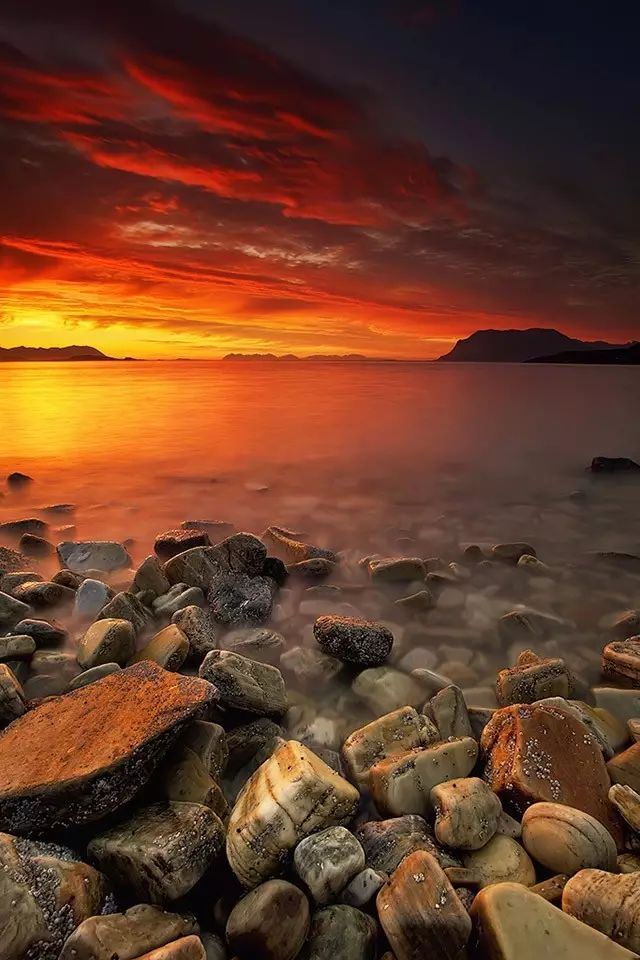
Because many beginners often want to include more elements in a photo, or are reluctant to give up the scene in the picture, only to find that the content of the photo is too much and too messy, and there is no clear theme. So we came up with this method, starting with the simplest, cleanest picture, and then slowly adding other foils to reduce the temptation to compose.

Focal length: 21mm – adjust the lens to the telephoto end, zoom out slowly, and then press the shutter after adding the city buildings to set off.
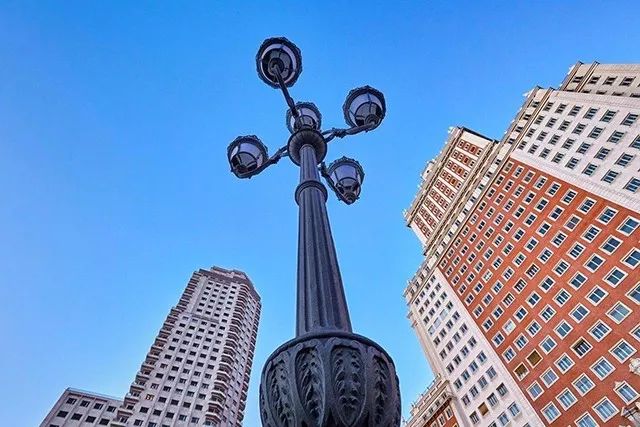
4. To go back

As the saying goes, “a good horse doesn’t eat grass”. We say, “Photography needs to go back.” This means that when you are shooting while walking, if your physical strength and time permit, you can turn back along the way. Good places are not afraid to go again and again, especially now that there is GPS positioning technology, which is very convenient.

When revisiting old places, find a different route. The purpose is to help everyone to see the scenery from another angle, so as not to miss any beautiful scenery. A mountain just photographed might look even more majestic from another angle. A tree that was inconspicuous just now may become mysterious and beautiful from another angle.

Don’t limit your vision, know that there are many beautiful things in nature that need to be discovered by yourself. The most beautiful side of things can be found only through observation in many aspects.

This photo was taken while passing by a rocky beach

Later, I turned back along the road and took this photo to better express the rocky beach and flowing water.


  1. Pay attention to details

Many beginners ignore a lot of details in landscape photography, and only focus on expressing the whole picture. The continuous mountain peaks are certainly worth admiring, but have you noticed that a grass at the foot of the mountain is also worth photographing?

Careful observation is a condition that all photographers and all subjects need. In landscape photography, it is also necessary to observe the weather changes, the expected changes in the scenery, etc., in order to find the best shooting time.

In addition, pay more attention to some subtle places, such as moss on the stone, insects on the leaves, etc., or the shape of things, the texture of the surface, the abstract light reflection, in fact, can be very good shooting theme.


Five Unwanted Behaviors

1. The angle is the same

Many beginners use eye-level framing when shooting landscapes. All of them use the golden section method to place the horizontal plane at the bottom 1/3 of the photo, and there is no change in the shooting, and I cannot get out of the frame I set. So we take the trouble to mention it.

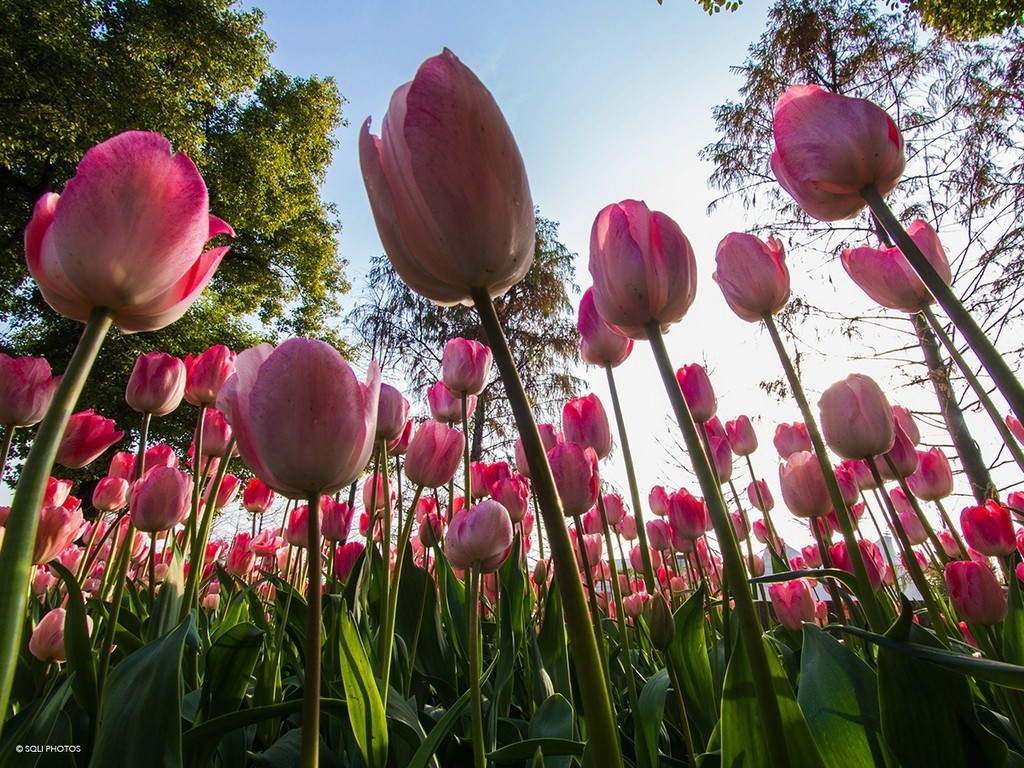
When photographing landscapes, don’t stick to the rules. You can try to frame the scene from different angles as much as possible, so that there are more changes between photos of the same subject, so as not to be dull and boring. For example, there are many framing angles when photographing flowers. Try looking at eye level, looking up from the ground, and looking down from directly above the flower. When photographing trees, you can take a picture of the tree from a distance, or take a picture of the shape of the tree from a close distance along the trunk. Shooting from a special viewing angle can often bring unexpected results.


2. Impatient

Some people raise their cameras to take pictures as soon as they see the beautiful scenery in front of them, while others have just finished taking pictures of one place and can’t wait to go to the next place to take pictures. In this way, it is easy to miss the opportunity to shoot.

Photography is an activity that requires patience. When you see a beautiful scenery, you should first think about the content of the photo, arrange the main body, the proportion of the foil, and how to use the photo to bring out the story behind it before pressing the shutter, otherwise, in most cases, it is just a waste of film or memory card. After shooting a place, you should also observe it for a while to see if it will fog up for a while to increase the mysterious atmosphere, and whether there are often birds passing by to enrich the content of the photo, etc. Leave only after you are sure that the opportunity is not big, so as not to regret it in the future.

When I walked to the lake, the thick fog slowly dissipated, so I waited for about 5 minutes before pressing the shutter.

3. Only trust the camera metering

There are many pitfalls in landscape photography that can make the camera’s metering system misjudge. Depending on the camera’s metering and recommended exposure, you may not get the desired effect every time. Metering traps in landscape photography are often encountered, such as white sky, backlit tree branches, dark green lake water, etc.. That makes it difficult for the camera to judge.

Besides, sometimes in order to enhance the story of the photo, you need to deliberately underexpose or overexpose to create an atmosphere, and it is definitely not the camera that can decide for you. Although the accuracy of camera metering in recent years has been very good, the metering system of many new cameras can even consider the target color, focusing distance and other information together, but how powerful the camera’s metering function is, it is always only auxiliary. How to take a good photo depends on your own judgment.

There are camera metering traps everywhere in landscape photography, and you must be careful

4. Multiplayer Travel

It seems like a good thing to meet five or six friends to go out and shoot together. On the one hand, we can talk and laugh along the way. And on the other hand, we can take care of each other. But it’s easy to be self-defeating when it comes to photography itself.

For beginners, shooting with multiple people will easily be influenced by others, and feel that the scenery selected by the other party is a good subject to shoot. And they lack their own observations and opinions. Second, it is difficult to accommodate each other when there are too many people. When several people wait for one person to shoot, they are often very impatient in the end. In order to avoid trouble to the other party and try to complete the shooting as quickly as possible, the concept of the photo is not comprehensive.

We believe that photography is always a creative art that belongs to the individual. We need to find out the goal of shooting and use our own brains. If you don’t go to some remote or dangerous places to shoot and need someone to take care of you, it is better to enjoy the fun of shooting by yourself. And then find friends to share the results afterward.

An inconspicuous flowing water, but I feel very peaceful


5. Ignore the telephoto lens

The choice of equipment when shooting is also very important. Many beginners ignore the importance of telephoto lenses and only bring wide-angle lenses when shooting landscapes. Yes, a wide-angle lens can create an exaggerated perspective, emphasize the momentum of the foreground, and express the vastness of the world. But sometimes just using a wide-angle lens is not enough.

The wide-angle lens has a large viewing angle and cannot easily obtain a concise picture. The photographer needs to move around a lot, the focal length is short. And even with the maximum aperture, a very shallow depth of field cannot be easily created. These are all very important for composition and highlighting the subject. The telephoto lens has many advantages in this regard. Wide-angle lenses and telephoto lenses have different optical characteristics. And they have different strengths and weaknesses in shooting, and can play their strengths in various places.

Telephoto lenses are also very important in landscape photography

Categories
Soft Lights

Five Do’s and Don’ts for Low-angle Shots

Camera Placement

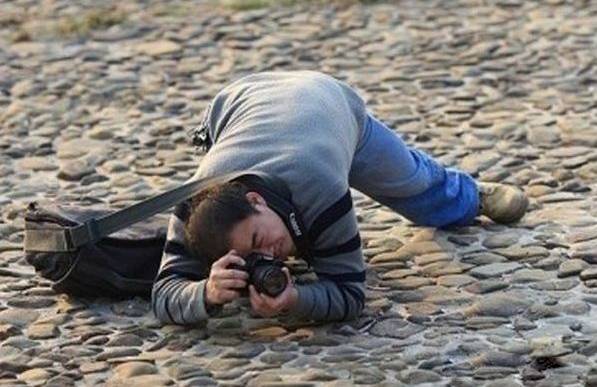
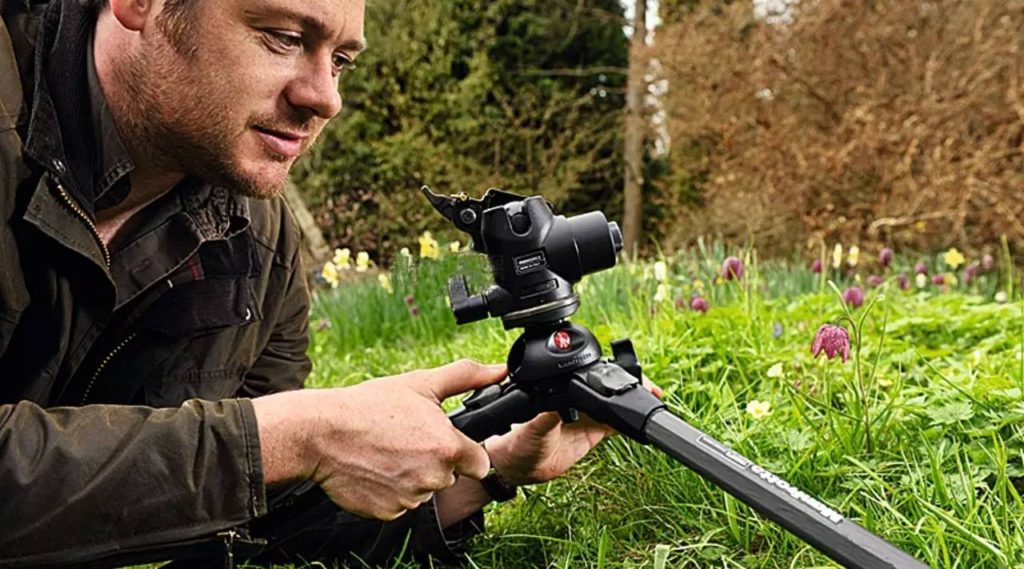
Crouching or lying down, handheld shooting can already meet the shooting needs in most situations.

Of course, you can also put on some smaller and fresher poses, like the picture below, which is very cool.

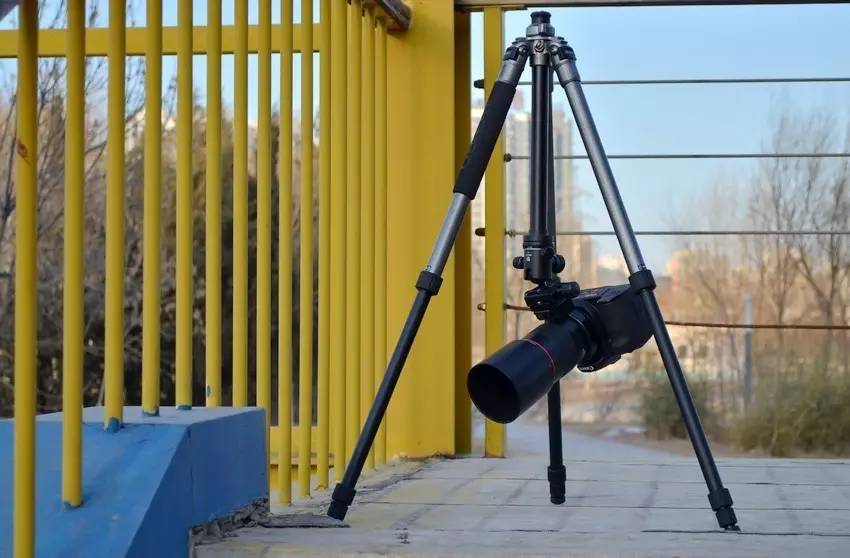
Need to go lower? You can put the camera directly on the ground. Need to shoot up? Adjust the elevation angle and put a small pad on it.

In some special cases, the above two methods may not be applicable.

For example, the ground is wet, muddy, rough, and there is no flat place to put the camera. Or if you need to shoot night scenes at a low angle, long exposure of vehicle tracks, etc. that cannot be done by hand, you cannot lie down and hold it.

In this case, you can try flipping the tripod head upside down.

Using this method requires that the tripod head has a high bearing capacity and locking force, otherwise your camera will “nod” or simply fall off.

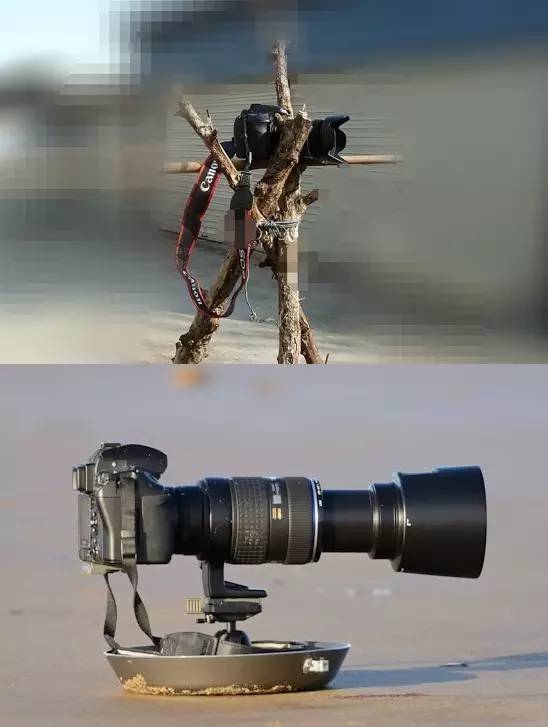
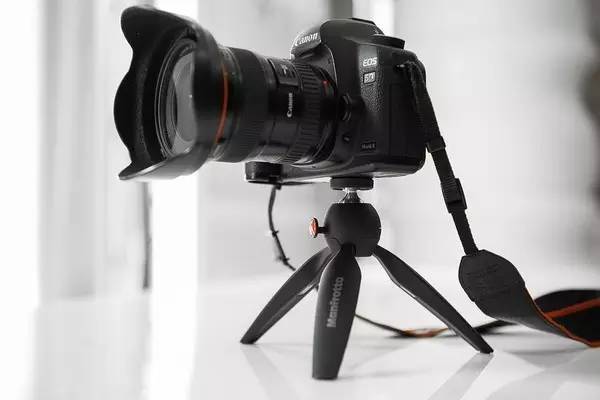
Alternatively, you can buy a tabletop tripod designed for low-angle shooting.

A tabletop tripod has the exact same construction as a regular tripod, but with very “short legs”. It is often used to shoot macros and scenes, and it is an artifact for low-angle shooting.

The one in the picture above is already a “giant” in the tabletop tripod. There are also smaller miniatures for tabletop tripods.

Mini Tabletop Tripod


There are “soft foot” versions for rough terrain.

Of course, this type of tripod can’t use a lens that is too large, and it probably won’t be able to hold a cannon.

If you don’t want to buy a desktop tripod, you can make do with it and DIY yourself with various tools, as shown in the picture below.

Framing Problem

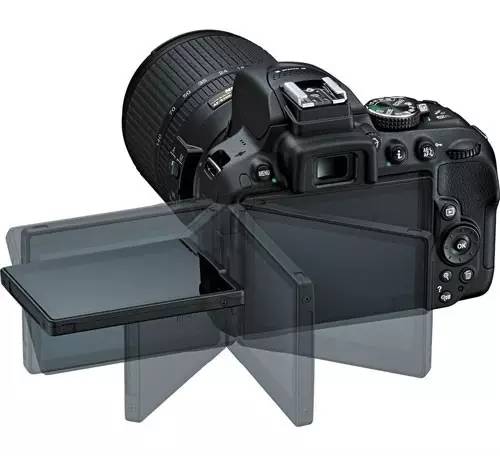
Some of the newer cameras will have a flip-up LCD screen. That can be flipped up when shooting.

Some camera models do not have a reversible LCD screen, but have developed a reversible viewfinder.

Some cameras do not have a reversible LCD screen or a reversible viewfinder, but have developed a supporting external device: an external viewfinder.

The external viewfinder is generally matched with the model or brand, and needs to be purchased separately, and the price is generally not low. We do not recommend buying it if it is not professionally needed, or if you often want to shoot at a low angle.

If your camera doesn’t have a flip-up LCD screen, doesn’t have a flip-up viewfinder, and isn’t worth buying an external viewfinder, then you’ll have to learn to “forget the viewfinder” and improve your blind shots.

Take a good picture first, pick up the camera, take a general look at the composition, think about how to adjust the shooting angle, then put it down and take a blind shot, pick it up and adjust it.

This is a great exercise for your blind shooting and screen control skills. Perhaps Sai Weng lost his horse, how can we know that it is not a blessing?

With Wide-angle Lens

Low-angle shots are generally used with wide-angle lenses.

The reason is very simple. Low-angle shooting itself has the problems of limited field of view and inconvenient angle adjustment. There are many problems in composition when using a medium and telephoto lens.

The wide-angle lens has a wider field of view and a larger picture. You can optimize the composition or adjust the level of the picture through post-cropping.

Wide-angle shooting, the picture can withstand post-cropping.

In addition, using the characteristics of the wide-angle lens, it can also magnify and highlight the foreground scene.

Manually focus on the foreground, use a large aperture to create a shallow depth of field, and a very impressive photo comes out.

Try to Keep It Level

If you have a horizon line in your frame, you still need to keep the frame as level as possible.

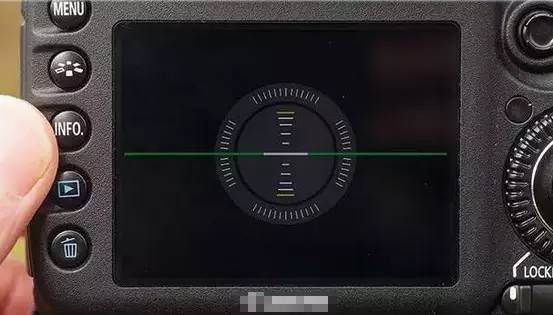
Some cameras come with an electronic level. After turning it on, adjust the body to be in a horizontal position, and a green line will appear as shown in the figure below. Otherwise, continue to adjust.

If there is no electronic level, and accurate level cannot be achieved, it can also be left to the later stage for processing.

It should be noted that even if there is processing in the later stage, the tilt angle of the picture should be minimized in the early stage of shooting. The larger the tilt angle, the more the loss of the picture.

Let’s take this photo as an example.

After the photo has been corrected for the horizon angle, a maximum crop is made to preserve as much of the image as possible.

As shown in the figure below, after rotating the horizon to the horizontal, the pictures that can be kept and used are the parts in the red box, and the pictures outside the red box are all wasted.

Obviously, the larger the tilt angle, the more wasted parts of the picture and the greater the loss of picture quality. Therefore, in the preliminary work, try to make the fuselage as close to the level as possible.

Another, more convenient solution is, instead of shooting the horizon, play upside down. Or a large aperture, blur the distant horizon, and reduce the unnaturalness of the picture caused by the tilt.

As shown in the figure below, although the horizon is slightly inclined, due to the extreme blur, the impact on the picture is not great.

Control Exposure

When shooting upside down at a low angle, with the sky as the background, you need to consider exposure.

While the light is very strong, you need to consider lowering the light ratio. When there is a lack of related equipment and equipment to reduce the light ratio, you must accept a large light ratio, make trade-offs and adjust the exposure according to the needs of the picture.

For example, if your photo wants to highlight beautiful blue skies and clouds, consider lowering the exposure compensation, even if the foreground is darker. If you want to highlight a beautiful foreground scene, overexposed the sky slightly.

To accentuate the flowers, it doesn’t matter that the sky is slightly overexposed.

Categories
Soft Lights

The Application of Light in Photography

1. Plain Forward Light

If most of the light illuminates the subject from the front, we call it forward light. Think of the two headlights in front of us when we take ID photos, which are typical forward lights. As you may have guessed, shooting with the flash on a digital camera is basically a forward light.

Many people like to put the subject under the lighting of the forward light when taking pictures, because at this time there is no shadow and the brightness is the highest when shooting people and scenes. The characteristic of forward light is that it can illuminate the subject evenly, which is the same as the ideal scene characteristics in our mind. This kind of light is not good at highlighting the texture and outline of the subject. For example, when we use forward light to shoot relief or rough rock walls, we can only get flat images.

We can use this feature of forward light to cover up the flaws on the character’s face. Under the forward light, if you put on a little makeup, the pimples on your face will not be so dazzling. You can use this method to make women appear more beautiful (but be aware that forward light will make the face more contoured). But in most photographic creations, forward light is less popular because its expressiveness is too general.

2. Sharp Side Light

If the light comes from the side of the subject, it is called side light. Contrary to the characteristics of forward light, side light emphasizes the outline and surface texture of the subject very much, because it will leave heavy shadows in the bumps.

Side light can be subdivided into side light and side backlight.

(1) Side smooth light (oblique side light):

Photographic lighting when the ray casts horizontally at an angle of about 45 degrees to the camera lens. In the creation of photographic art, it is often used as the main shaping light. This kind of light illumination can make the subject produce light and dark changes, which can well show the three-dimensional sense, surface texture and outline of the subject, and can enrich the dark layers of the picture, and play a good role in modeling.​​

(2) Side backlight

Also known as reverse side light, rear side light. Lighting when the raycast direction and the camera shooting direction are approximately 135 degrees horizontally. Side-lit scenes are mostly in shadow. The illuminated side of the scene often has a bright outline, which can better represent the outline form and three-dimensional sense of the scene.

In location photography, this kind of lighting can better express the atmospheric perspective effect. When using the side backlight for close-up and close-up of characters, auxiliary lighting is generally needed to prevent the face from being too dark. However, the brightness of the auxiliary lighting light should be controlled so that it does not affect the natural lighting effect of the side backlight.

If you shoot an old man with a vicissitudes of life in a side light environment, you will get a very vivid effect, and the wrinkles on the face are portrayed in ravines. So if you’re photographing young women, you need to think twice. Unless she has a very three-dimensional silhouette and smooth skin, she will encounter white eyes.

For landscape photography, side-lit environments are a treasure. For example, if we want to photograph the Great Wall, the warm side light of the setting sun can depict the outline of the crenel and the surface of the city bricks, showing a heavy sense of history.


3. Brilliant Backlight

If the light comes from behind the subject, it is backlit. Usually, backlighting is avoided as much as possible in shooting, because backlighting can make the background quite bright, but the subject is pitch black, with only outlines and no layers.

We often hear the term “backlight compensation” in photography, which is to use artificial fill light (flash or reflector) to illuminate the backlit subject and avoid photographing the face without details.

In this way, the backlight seems to be terrifying. But its characteristics are also very obvious: the backlight can clearly outline the outline of the subject, for example, when shooting people, the hair and face will be “trimmed with a layer of gold”. At the same time, the backlight can effectively express the perspective of the air. For example, the fog in the morning and the cooking smoke in a small village can be more beautiful under the backlight.

4. Use top Light and foot Light with Caution

In addition to the horizontal angle of light exposure, the angle change relative to the vertical direction of the subject will also significantly affect the imaging effect. The most important of these is top lighting, where the light falls from the top of the subject’s head, which often occurs in the midday sun.

Top light is almost devastating to portrait photography because it casts heavy shadows on the faces of the two eyes, under the nose, and under the cheekbones, and is aptly called “skull light”. Shooting people in this light is a good prank idea, and if you want to avoid being hunted, it’s best to fill in the same way you would with backlighting.

If the light comes from under the feet, it is called foot light. It has always been used to portray villains in classic movies. Chances of encountering this light in actual shooting are rare and best avoided.

In fact, it is more likely that the light is parallel to the subject or slightly higher. Therefore, what we usually consider more is the horizontal angle of the light.

5. Scattered Light

In daily shooting, what we often encounter is not just light in one direction, but mixed light sources from various angles. At this point, we should consider the direction of the strongest light source.

If it is cloudy or in the shadow of a sunny day, the light hitting the subject has no direction, we call it scattered light.

Compared with direct light, diffused light is very soft, without shadows, and can present rich details of the subject. However, the description of outlines and lines is relatively flat, and usually makes the contrast of the picture relatively low. Shooting portraits in the weather with thin clouds covering the sun is to use scattered light with a slight sense of direction. At this time, the lighting is uniform and can express the appropriate outline, and the people can open their eyes and not suffer from the sun, which is considered to be the most suitable natural light for shooting portraits.

6. Color Temperature of Light

In addition to the change of the illumination angle, the color of the light itself is also different. Take sunlight, for example, the morning sun is soft and warm. As the sun rises, the light becomes more and more “white” and stronger, becoming a dazzling light. At dusk, the sun returns to a warm state. Using the different colors of light, we can make targeted creations.

7. Warm Low Color Temperature

When the sun angle is relatively low in the early morning and evening, the color of the light will be significantly warmer, or the color temperature will be low. This light can paint a world unfamiliar to us, adding gold edging to sharply contoured objects and making people look healthier. Coupled with the low light angle in the morning and evening, it is easy to form a lighting environment with side light and backlight. This is the most favored by photographers.

For landscape photography, many photographers determine the angle of the sunrise in advance. Before dawn, they wait near the stepping point, adjust the equipment. And wait for the first rays of the sun to illuminate the subject. That kind of picture effect is completely invisible to us when the sun is shining.

At this time, we should pay attention to setting the camera’s metering and white balance. To accentuate the contours outlined by the sun, it is often necessary to reduce the exposure a bit. We can press the info button and open the brightness value square on the LCD screen to adjust the exposure compensation. So that the dark information occupies most of the space. In terms of white balance, in order to highlight the warm sunlight, it is best to manually set to daylight white balance mode. Otherwise, the camera may automatically recognize that the current color temperature is lower. And convert the warm-toned picture to normal color, then we will get up early in vain.

8. Cool High Color Temperature

Photos taken in normal sunlight match our usual observations. For example, in order to express the red walls and green tiles of the Forbidden City, you can choose after the sun rises. The palace is fully illuminated, and the colors are accurate and saturated. It should be noted that the color temperature will be higher around noon, cloudy days, and in the shadow of the sun. That may cause the picture to be bluish. At this time, you can use the manual white balance function to select cloudy mode, or to customize the white balance.

Knowing the angle and color temperature of light can help us choose better timing, better angles, and take creative photos. Or maximizing the subject’s strengths and masking its weaknesses.

Whether you want to specialize in portraits or landscapes, using light is a must. We recommend that when you shoot, you may wish to move around the subject, or let the subject move around. Take a few more shots in different lighting conditions, and gradually, you will find the light you like.

Finally, let me remind everyone that when the sun rises, it will emit the familiar white light. Under this kind of light, all objects will show their own color. This is the most accurate light environment for color expression.