Categories
Soft Lights

Four Pinciples of Digital Photography

Nowadays, most photographers use digital photography, and some people also use digital backs, such as us. Digital photography has different photography techniques.

Aperture and Shutter

aperture

For beginners, the aperture value is difficult to grasp. Therefore, almost all DCs have an automatic setting function. Objectively speaking, this advanced program auto exposure allows us to easily obtain photos with basically correct exposure. But sometimes program auto exposure cannot meet some of the shooting effects we want. For example, when we want to take a photo with a clear subject and a blurred background under strong light, the effect of program automatic exposure is often that the subject and background are very clear. At this time, it is very necessary to manually set the aperture.

Since the DC has a real-time LCD viewfinder, it is more convenient to manually set the aperture, as long as you directly observe the screen. However, everyone needs to understand that the size of the aperture has a crucial impact on the depth of field. Small apertures allow for a large depth of field that accentuates the background. A large aperture allows a small depth of field to highlight the foreground.

However, the aperture size not only determines the depth of field , the focal length is also very critical. In fact, there are no certain rules for the use of apertures, and everyone should learn more from practice.

It should be noted that “increasing the aperture” usually refers to reducing the aperture value and increasing the aperture when shooting. For example, from F5.6 one level higher to F4.0 or higher F2.8 and so on. Please don’t make a mistake, this is the most basic term.
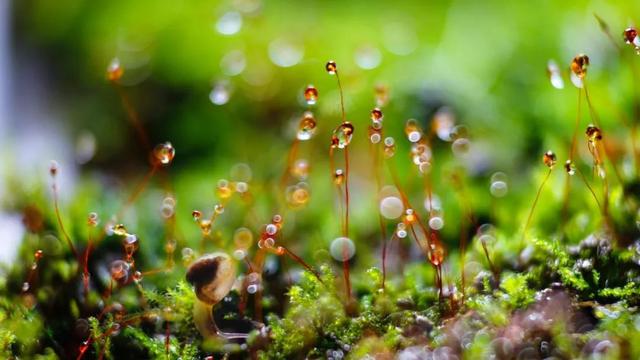
Shutter speed

When we mention it, shutter speed refers to controlling the time that light is projected onto the CCD photoreceptor. Shutter speed, like aperture F-number, can only express some parameters. In fact, shutter and aperture are inseparable. Only when these two work together can we create great photos. For example, when we need a large depth of field, we must use a small aperture, and in order to ensure enough light at this time, we must reduce the shutter speed or use a large aperture. Shutter and aperture go hand in hand.

The relationship between them is as follows:

Aperture open <–> narrow

Shutter Speed Fast <—-> Slow

depth of field shallow <—-> deep

Use the Flash at the Right Time

Most people think that you only need to turn on the flash when shooting in low light. In fact, there are many situations in which you need to use flash. For example, when shooting against the light, if the flash is not used, the surface of the photographed object will be underexposed and the background will be overexposed. At this time, the flash must be turned on and set to forced flash mode for flash fill light, so as to achieve the effect of accurate and uniform exposure. When shooting portraits indoors or at night, remember to set the flash to red-eye reduction mode to avoid the red-eye phenomenon of people in the photo.
If there are reflective objects such as glass or metal near the subject or the subject, avoid using the flash unless necessary. If the light is too dark and must be used, you can appropriately increase the exposure to compensate, so as to avoid reflections from affecting the accuracy of flash exposure.

The Mystery of Color–White Balance

Due to the special imaging principle of digital cameras, it has a natural weakness in color reproduction. Photos taken in a fluorescent room would appear greenish, while photos taken in the shade of sunlight were inexplicably bluish. Maybe everyone has encountered this situation, and the reason is the white balance setting.

If the ambient light is not very complicated, we can also use the automatic white balance function. But if one of the digital camera and the subject is in the bright place, the other is in the dark place, or the surrounding light is too low or too bright, we all need the help of the custom white balance function. Digital cameras that generally support custom white balance have a variety of preset environments that cover most applications.
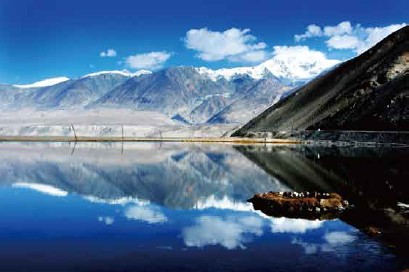
Learn to Think — Composition is Not Difficult

For users who have a certain understanding of photography, they all understand the importance of accurate composition. If you are not shooting close-ups, you should generally place the subject at 1/3 of the screen. At the same time, try to avoid the cluttered background and shoot from a special perspective. Try to capture the details and personality of the object, and use some diagonal or curved background composition to make the overall picture look more vivid.

In addition, we must be good at using two-dimensional eyes to observe. Because photography has only two-dimensional space, it expresses the sense of space through perspective relationship (that is, the modeling effect of light and shadow is the reference object), which is different from the three-dimensional human eye that observes things from two different angles.
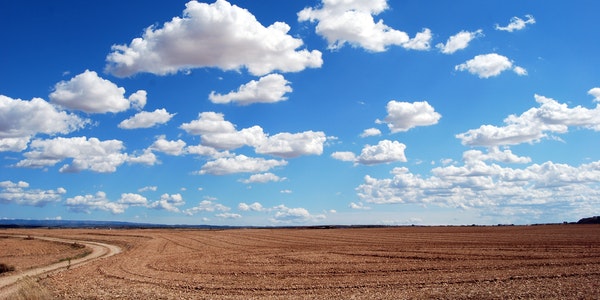
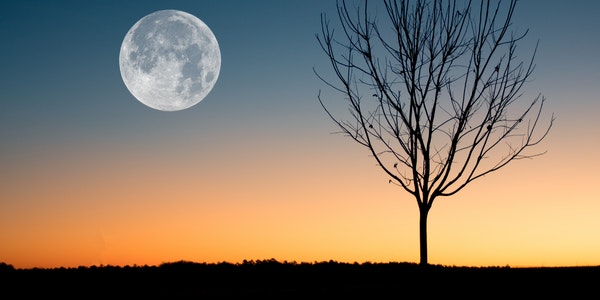
Categories
Soft Lights

Distinguish the Use of 3 Autofocus and Manual Focus Modes

Real-time Mode

The ability to move the focus frame freely makes it ideal for shooting scenes where composition is important.

Even if the position where you want to achieve focus is at one end of the screen, you can move the focus frame to focus reliably. Therefore, it is very effective for shooting scenes where composition is a priority. Suitable for taking portrait and landscape photos.

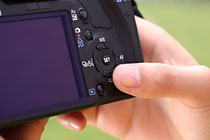
Use the cross keys or multi-selector to move the focus frame


The focus frame in live mode can be moved freely within the frame. The method of moving the focus frame varies depending on the model, but it is usually operated using the cross keys or the multi-function selector. When stopped at any position, that position becomes the AF point.

After determining the position of the focus frame, press the autofocus start button and the camera will start autofocusing. Depending on the model, the AF start button may be different, but generally there is a dedicated button, and there is no AE lock button. When the focus frame turns green to focus, you can press the shutter button to release the shutter to take the picture.

Position of focus

Since there is no limit to the position of the focus point, it is possible to focus on a specific desired position.

The focusing principle of the real-time mode is to measure the contrast of the object on the image sensor, and focus while scanning the contrast wavelength difference. This makes it possible to focus almost anywhere on the entire frame without the framing constraints imposed by the placement of the focus points as when shooting with the viewfinder.

And since the position of the focus frame can be freely set, there is no need to use AF lock. You can freely move the focusing frame to the position you want to focus on. At the same time, it also has the feature that the real-time display shooting screen can be continuously displayed without interruption of display.

In addition, any part can be enlarged and displayed to achieve more precise focus. Although the freedom of focus position has good versatility, depending on the scene, it may sometimes take slightly longer to complete focusing. Easier to use when people are basically stationary, such as portrait photography. Also be aware that focusing may also take slightly longer in poorly lit locations.

Face Detection Live Mode

It is suitable for taking group photos and people’s portraits. And it is equipped with an AF mode with facial recognition function.

When a face is detected, a white focus frame is automatically displayed on the LCD monitor screen. The focus frame is automatically tracked even if the person moves laterally. When the position of the focusing frame coincides with the face you want to focus on, press the AF start button to start the AF and shoot. While focusing is complete, the focus frame will turn from white to green.

When the face automatically selected by the camera does not fit the creative concept, you can use the “+” key or the multi-function selector to select the face you wish to focus on automatically. This is very effective when shooting people who are deep in the frame.

 Shooting angle

Automatically detect the faces of people in the screen, and the shooting angle is free.

The AF mode that uses “Face Recognition Technology” to focus can automatically detect the face of the person in the screen and automatically display the focus frame. Focus can be prioritized, and faces can be detected even when backgrounds and people are mixed. Therefore, there is less chance of focusing errors. In addition, when there are multiple faces in the screen, priority recognition will be performed according to the size of the faces in the screen. And the focus frame will be displayed on the face that has been recognized with priority. When you want to focus on another face, you can use the “+” key or the multi-function selector (varies by model) to select the face you want to focus on. It not only realizes automation, but also fully reflects the creative idea of the photographer.

Fast Mode

Used for high-angle and low-angle shooting, it is the fastest autofocus mode for Live View shooting.

Even at heights that cannot be visually observed when using the optical viewfinder, if you use the quick mode, you can easily change the shooting angle to shoot. Suitable for a variety of subjects including portrait photography. The range of applications is very wide, including portrait photography in a crowd and group photography of a large number of people.

low angle shot


Even at low angles where you could only shoot down on your back before, if you shoot with Live View, you can freely compose your shots. Shooting poses are easier than when using angle viewfinders, etc.. And you can shoot from a variety of bold shooting angles without worrying about getting your clothes dirty.


As with shooting with the optical viewfinder, you can choose to use all focus points.

Focusing is performed using the camera’s built-in phase-difference detection AF sensor, as when shooting with the optical viewfinder. Since the AF method is the same as when shooting with the optical viewfinder, the focusing speed is fast. This makes it an AF mode suitable for shooting moving subjects.

The available focus points are the same as when shooting with the optical viewfinder. Not only automatic selection but also manual selection of all focus points to use a specific focus point. Simply press the autofocus start button to start autofocusing quickly and easily. Focusing can be achieved quickly even at shooting angles that are difficult to shoot with the optical viewfinder. Not only for taking portraits, but also for snapping or photographing animals.

Manual Focus

Enlarged display + tripod can achieve high-precision focus.

Easily achieve precise focus

Manual Focus Live View Shooting


When performing Live View shooting, use manual focus to achieve highly accurate focus. Since it is less affected by the AF sensor or the brightness of the subject itself, it is suitable for shooting landscapes or night scenes. When magnified display, the display of the LCD monitor is very clear, and the details can be well grasped.

Manual focus method during Live View shooting

1. Fix the camera on a tripod

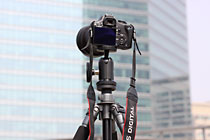
In Live View shooting, if you want to use manual focus to achieve high-precision focus, the premise is that you need to use a tripod. Although there are no restrictions on the tripod used, if the tripod is not strong enough, it may cause the Live View shooting screen to shake, making the image difficult to observe. So pay attention.

2. Switch to manual focus mode

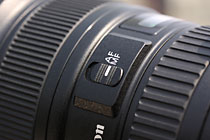
Slide the focus mode switch located on the side of the lens to the “MF” position. This operation is not required for lenses that do not have an autofocus mechanism, such as TS-E lenses. In addition, focus can be achieved in manual focus mode regardless of the autofocus mode setting on the camera side.

3. Determine the focus position

Start Live View shooting and display the image on the LCD monitor. Manual focus is used to roughly focus and adjust the overall image and composition. Determine the part you want to focus precisely. And use the “+” key or the multi-function selector to move the magnifying box.

4. Use 5 times magnification to display for approximate focus

Press the AF point selection/magnification button to first focus using the 5x magnification display. You can also directly use the magnified 10 times display to focus. But due to the dramatic changes in the field of view, it may sometimes be difficult to grasp the overall image effect. It is best to first use the magnified 5x display to grasp the focus situation and image atmosphere.

5. Using 10 times magnification to display, further precise focusing

When the focus position is finally determined, press the AF point selection/magnification button again to increase the display magnification. Use the maximum magnification 10x display for ultimate precision focusing. If it is difficult to get the best focus, you can operate the focus ring with slightly larger movements to find the sharpest position.

6. Release the shutter

When the focus position is determined and the focus is completed, you should check again whether the subject and its surroundings have changed. Especially when shooting scenes like cityscapes, it’s a good idea to keep in mind to check if the scene changes during focusing. Press the AF point selection/enlargement button again. And after confirming that there is no problem with the overall picture, gently release the shutter to complete the shot.

Categories
Soft Lights

Beginner Photography Tips

Use the Light Correctly and Talk to the Light

Light is the soul of photography, so we must pay attention to the changes in light. Not only the intensity of the light, but also the direction of the light, talk with the light attentively. Such as: the sunset dyes the sunset red, symbolizing romance. The gloomy sky takes on a cool gray tone, symbolizing melancholy. A ray of sunshine was removed from the shade of the tree, and a joyful and pleasant mood was transmitted…

 Resolving the intensity of light

Hard dimming is usually emitted by a single light source, such as the sun, a spotlight, a flash, or a single light bulb. In this lighting, subject contrast is high, and details and textures are highlighted. You can use this light for a documentary effect.

In contrast, diffused light produces softer light. This is the case for indoor indirect lighting, outdoor shade and cloudy days. It’s ideal for portraits and quiet outdoor landscapes in this light.

Pay attention to the light angle

Depending on the angle of light used, the texture of the subject will be enhanced or weakened accordingly. And the shape of the subject will be highlighted or faded. Whether the tone of a photo is cheerful or melancholy will also vary depending on the angle at which the light is used. Light cast from above or behind the camera (often referred to as frontal light) can reduce the depth of the subject because frontal light is not good for creating highlights and shadows. A better choice is to place the light source on one side. And the side light at an angle of about 45° with the subject can express the shape and details of the subject well.

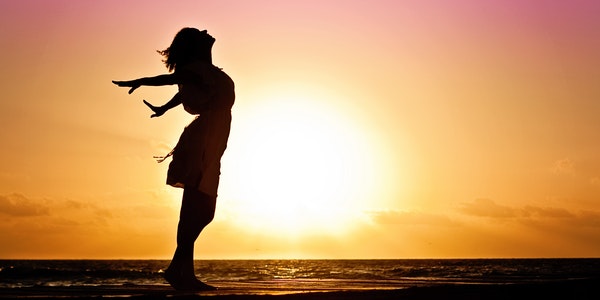
Backlight occurs when light comes from behind the subject and is facing the camera. The subject appears dramatic in the backlight. When shooting portraits, the backlighting produces a nice contour light on the edges of the subject’s hair. Contrasting backlight can produce a silhouette effect.

Focus and Metering Settings

Focusing is the most basic operation of photography, and it can be said that everyone can do it. But when we review the reasons why some photos are not taken well, sometimes the problem happens to be the focus.

If you are using the automatic photography method, please be sure to lock the focus at half distance. Otherwise the subject may be blurred due to out-of-focus. If you are using program control, the situation is different. programnormal, a semi-automatic photography method. It features that aperture and exposure time are automatically selected by the camera. While metering, focusing and white balance conditions can be manually selected. This digital photography-specific method and function, optical cameras do not have. If you are not good at using its characteristics and treat it like fully automatic photography, you may be self-defeating and be dragged down by it.

Try to Keep the Camera Steady When Exposing

For newbies and senior photographers, sometimes the blurred photos are not due to inaccurate focus, but because the camera is not stable.

Under normal circumstances, for beginners, when the exposure speed is lower than 1/60 second, it may affect the clarity of the image. For veterans, if the exposure time is longer than 1/30th of a second without relying on it, it is also possible to have problems.

To keep the camera stable, the first is to hold the camera correctly and the strength is correct. And the second is to press the shutter button with appropriate strength. To practice this basic skill seems to be very simple, but it is not achieved in a day.

then what should we do? I have several methods: One of the simplest is to find a support for the body or hands. Second, hang the camera strap around your neck and stretch the camera forward until the strap is taut, forming a 3-point support. This greatly improves the stability of holding the camera. The third method is the tripod to speed up the door line (wire-controlled shutter trigger). However, some cameras do not have a shutter release interface, and the shutter release is quite expensive. The corresponding effective alternative is to use the delay function. If your camera has a 2-second delay function, it would be best. “Tripod + 2-second delay” is the most stable and convenient method. It doesn’t matter if there is no 2-second delay function, just use a 10-second delay, just waste a little time, and the effect is just as good.

Make Good Use of Flash

Some articles say that photojournalists use flash at all times. It seems that flash is indispensable and an indispensable condition for taking good photos. But I’ve been frustrated over and over again. Thinking about it carefully, I may have swallowed it whole. Maybe people are using an external high-power auxiliary flash?

As far as the built-in flash is concerned, the power is so limited, and the lighting distance and range are so small, it is impossible to illuminate the scene in a wide range with balanced lighting. So it is only suitable for use when you need to highlight a specific theme. This is my first experience. Second, when taking pictures of people indoors with flash, the images are often flat, lacking in layers, or the contrast is stiff due to a single light source, and sometimes red-eye is also captured. For a friend who wears glasses, it’s even more difficult to do. I often shoot him with “silver glittering” and expressionless eyes, which makes him and I annoyed.

To Take a Good Photo, You Must First Compose the Picture

Regarding composition, there have been many articles teaching us how to apply the principles of the golden section, “#” grid focus, etc. I just want to emphasize one point, that is, there is a principle: pay attention to “white space”. That is to say, don’t fill the frame too much, which is just as useful for photography.

For composition, some friends like to take photos with strong symmetry. For me, unless I want to highlight the symmetry of the subject itself, I prefer to shoot at a slightly offset angle, because too much symmetry can easily give people a rigid feeling.

Lines that are too horizontal and vertical are easy to become stereotyped. You must learn to use another set of lines to break the control of the main line.

The use of color is very important, but I think the light and shade and their contrast are more important factors that affect the mood.

Shutter Speed

When you’re shooting still mountains and buildings, shutter speed doesn’t matter much. But when it comes to capturing the subtle movements of the subject, such as a picture of a flower swaying in the breeze, a poorly tuned shutter can be a mess.

The faster the object moves, the higher the shutter speed is required. In addition, the angle at which the object moves also affects the determination of the shutter speed. You should use a slower shutter speed for motions moving toward or away from the lens than for motions moving past the camera.

If you want to use a shutter speed of 1/1000th of a second or faster to capture the moment when the football is flying through the air, then the medium speed film, lens and light are all essential factors when shooting. This reveals an obvious rule: to freeze an action, there is a direct relationship between the speed of the action, the speed of the film, the size of the lens aperture, and the intensity of the light on the subject.

Categories
Soft Lights

Camera Settings for Landscape Photography

Camera Basic Configuration

Focus Mode and Focus Point:

Generally speaking, the subjects of landscape photography are mostly static objects, so it is best to set the focus mode to one-shot AF and the focus point to single-point AF.

Exposure Mode:

Among the four available modes of program exposure (P), shutter priority (S), aperture priority (A) and manual (M), it is best to choose aperture priority (A) as a novice. Because in this mode, when you choose your aperture, the camera will automatically choose the shutter speed that produces the best exposure. In general, we need to control the depth of field effect through the aperture size when taking landscape photos.

Best Aperture:

Aperture controls not only exposure, but more importantly, depth of field to achieve unique effects. When taking landscape photos, in theory, the aperture should be adjusted to the smallest possible to obtain a large depth of field, that is, the front, middle, and rear scenes are all clear. However, practice has proved that it is difficult for many lens apertures to achieve ideal clarity and sharpness after exceeding F18. Therefore, we recommend increasing the aperture setting from the minimum aperture value by 2 to 3 stops, that is, between F13 and F16.

Metering method:

In normal lighting conditions, it is best to choose center-weighted metering. If the on-site lighting situation is complex and it is necessary to take care of the tone level of the entire picture, the average metering method should be used. When metering, special attention should be paid to the selection of “point”: one is to select the correct metering subject, and the other is relative to the full screen. Metered subject brightness should be neither too high nor too low to prevent over or underexposure.

Sensitivity:

Because the lower the sensitivity, the higher the image quality, the less noise, the finer the image quality and the smoother the image transition. Therefore, when conditions permit, a sensitivity of 50 to 100 should be selected as much as possible. You only need to increase the sensitivity when the light is poor and you are not using a tripod, but try not to increase it too much, otherwise the noise in the dark parts of the picture will increase, and the highlights will even appear “dead white”.

Color Saturation:

Low saturation can obtain a wider color range, more color layers, and can record richer color and tone layers. So set the camera saturation to “low” or “soft”. If your camera doesn’t have a saturation setting, you can choose a mode such as Soft, Normal, or Standard.

Contrast:

Low contrast allows for maximum tonal gradation, which leaves room for adjustment in post-processing. If your camera does not have a “Contrast” setting, you can choose “Soft” or “Standard” in “Image Optimization” instead of “Landscape” or “Vivid”.

For beginners, it is necessary to understand some basic common sense and theory such as photography composition and lighting. But to really learn landscape photography well, you need a lot of practice in actual shooting scenes. In the actual shooting process, it is very important for beginners to master certain shooting techniques according to the environment. This often has a multiplier effect.

Use a Striking Foreground

a. Use the foreground to express the height of the object

When photographers take landscape photography, they often encounter some scene materials with obvious heights, such as high-rise buildings, tall stone monuments, cliffs, towering rocks and so on. At this time, photographers often want to express the tall scene in front of them through their own lenses. However, if the photographer only expresses the subject alone, the picture will be slightly monotonous, or the height of the subject will not be clearly expressed.

At this time, the photographer can observe whether there are available reference objects around the subject as the foreground. Such as trees and other objects with a certain height. Due to the height of the subject itself, it is generally necessary to use the upward shooting method and use the vertical form of the camera to express it. In this way, the height of the subject can be shown, and the overall picture will not appear monotonous. In addition, when photographers shoot tall objects, they generally need to use a wide-angle lens, because the wide-angle lens has a large range in both height and width. This is conducive to better representation of the subject.

b. Use the foreground to express the depth of space

In landscape photography of large scenes, the foreground is often used. In particular, it expresses scenes with a sense of space, such as the vast grasslands and the vast sea. Although the scenery of the big scene is very attractive, it is not easy to express. Because the bigger the scene, the more elements are taken into the picture. For beginners, the expression of the overall feeling is even more difficult to grasp.

Some beginners find that the effect of the picture is often very flat and lacks three-dimensional sense after shooting a relatively distant and expansive landscape. At this time, photographers need to consider certain objects, such as sand and stones, low plants, etc., as the foreground. The use of the foreground allows the viewer to see the detailed details of the scenery. And the broad scenery for the middle and distant planes. Inject more meaning. Most importantly, by juxtaposing the near and far components of the scene, not only does it add depth to the photo. But it also gives the whole picture a three-dimensional feel.

When expressing such a scene, the photographer also needs to use a wide-angle lens to shoot. In addition, you can achieve a large depth of field by choosing a smaller aperture. So that both foreground and distant components can be clearly reproduced. When using the foreground to express the sense of spatial depth, the photographer should pay attention that the foreground does not occupy too much area in the whole picture. Otherwise it will affect the overall feeling of the photo, because the scene in the middle and far and the spatial depth of the picture are the key points.


Use Reflections to Add Appeal

a. Choice of time and place

In landscape photography, reflections can add appeal and visual pleasure to the frame. Because the reflection of the scene can extend or repeat part of the pattern of the landscape, it can expand the expressiveness and range of the landscape image. Plus, the reflection itself can add a sense of tranquility to the scene.

The best times to capture reflections are around sunrise and sunset. The most dramatic reflections are often found on mirror-like water surfaces, such as small puddles, ponds, puddles, stagnant water formed by receding rivers, and small lakes. Before shooting, the photographer should observe the location of the framing. And you can also look for multiple locations with different shooting angles. So that different reflections can be captured in a very short period of time.

b. the use of light

For the shooting of reflection photos, the most ideal light is the front side light, with clear outlines and rich layers. Followed by forward light, clear water and blue sky, rich colors. Under normal circumstances, top light and backlight should not be used. Because the top light reflects strongly on the water surface, and the backlight tends to make the contrast between the subject and the background too large. This cause the image of the subject of the photo to be gray and hazy. Therefore, when taking a reflection photo, the photographer can choose the angle of the back to the sun or let the camera form an oblique angle of 45° with the sun.

Since the reflection is in the water, the water surface absorbs some of the light, making the reflection less bright than the actual scene. Generally, the exposure of the reflection and the ground truth differs by about one f-stop. Photographers can set the exposure compensation to +1 to +2 stops when shooting. When the exposure value is determined by metering, under normal circumstances, the photographer should perform metering and determine the exposure value based on the brightness of the subject on the ground.

A more practical method is to point the lens at the real scene. Then press the shutter halfway, write down the exposure value of the real scene. Or turn on the AE exposure lock button on the camera. And press and hold this button to lock the currently measured exposure data. And when the photographer moves the lens to change the composition, he can still make exposure according to the data just measured. In this way, the color of the reflection will be darker than the real scene, forming a beautiful image.

C. Correct composition

The photographer should also pay attention to the composition when shooting the reflection, especially the dividing position of the horizon. In general, if the photographer wants to express a certain sense of harmony and symmetry in the picture, he can consider placing the horizon in the middle of the picture. In this way, the reflection in the water will form a perfect echo with the actual scenery.

Categories
Soft Lights

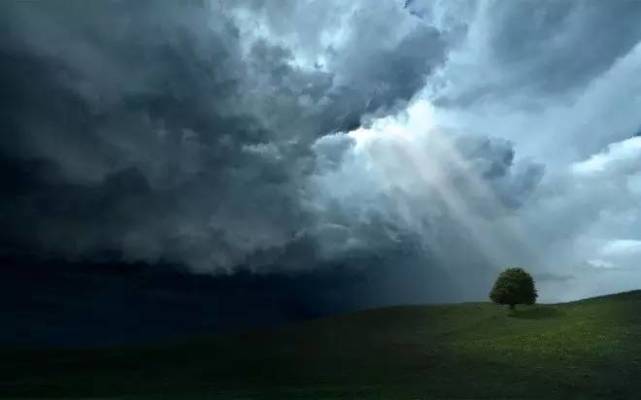
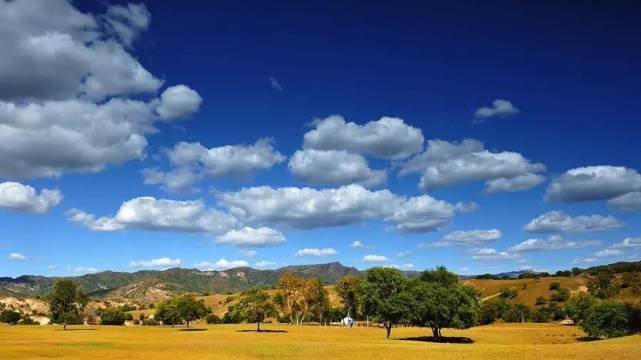
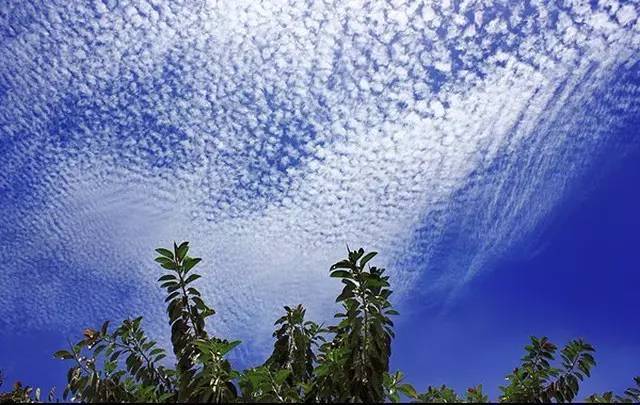
Four Key Points for Taking Good Pictures of Clouds

Brief Introduction

Clouds are flowers blooming in the sky and the most beautiful scenery in the sky. It is also a subject that landscape photography enthusiasts are happy to shoot.

There are many people who take pictures of clouds, and there are more cloud photography works. But the level is not uniform. One of the important reasons is that everyone lacks a unified understanding and clear norms about what is a good cloud photo and how to take a cloud.

Based on this question, this article is about to sort out a clear idea for you. From exposure to composition, from ground to sky, we have a clear answer: clouds should be shot like this!

1. Different Shapes and Beats

Clouds come in many shapes and shapes. It is important to adjust the way you shoot according to the shape of the cloud.

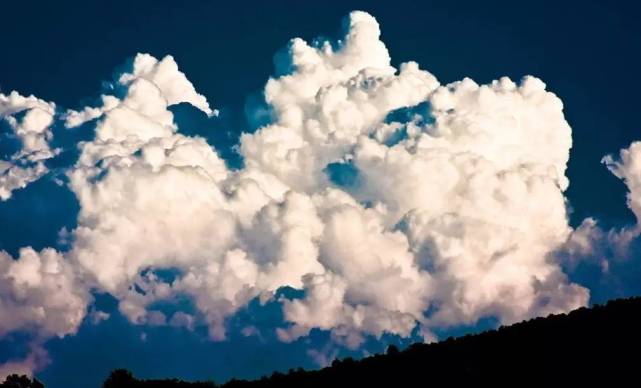
For large continuous clouds, you can consider using a wide-angle lens to shoot the big scene, reflecting its majestic momentum:

If the clouds in the sky are discrete and separate into blocks, you can use a telephoto lens to select the interesting and beautiful piece as the protagonist, and use the other clouds as a foil.

It is recommended to adopt a central composition and appropriately increase the proportion of the “protagonist” to better express its shape.

When framing, you also need to pay attention to keep the “body” of the “protagonist” as complete as possible, and don’t let the edge of the viewfinder frame cut it off:

The most taboo thing about cloud photography is that there are many incomplete clouds in the picture at the same time, which makes it difficult to distinguish which one is the main body.


Let’s look at a bad example:

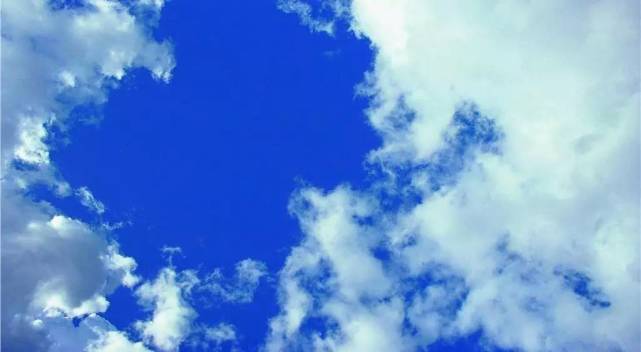
The center of the picture is relatively empty, and there are many clouds on the edge that have been cut off by the viewfinder. The picture lacks focus and appears cluttered.

Even if the sky is blue and beautiful, it can’t save this photo, so everyone should take this as a warning.


2. Correct Exposure

There is a certain light difference between the sky and the clouds. If the picture also contains a large number of ground scenes, the light difference will be even greater. How to correctly expose has become a problem that must be considered.

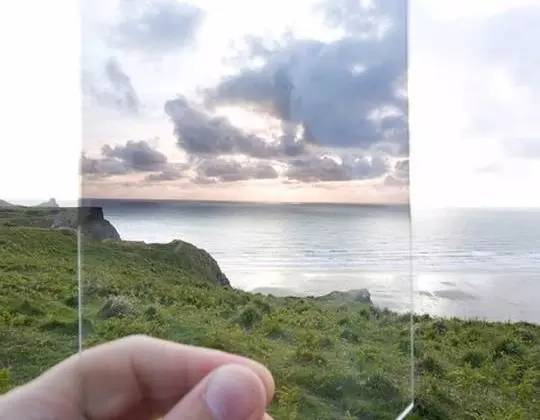
If you don’t want to shoot silhouettes, but need to preserve the details of the shadows, the first thing to consider is to balance the light difference. If possible, install a neutral gray gradient filter.

When using it, align the gradient of the neutral gray gradient mirror with the dividing line between light and dark on the screen, so that the sky can be darkened without affecting the ground scene:

The effect of using the neutral gray gradient filter

If you lack the relevant equipment, then shoot in HDR mode. Or try to choose to shoot in the early morning or dusk, avoid the fierce sunlight at noon, and avoid shooting in the backlight to reduce the light difference.


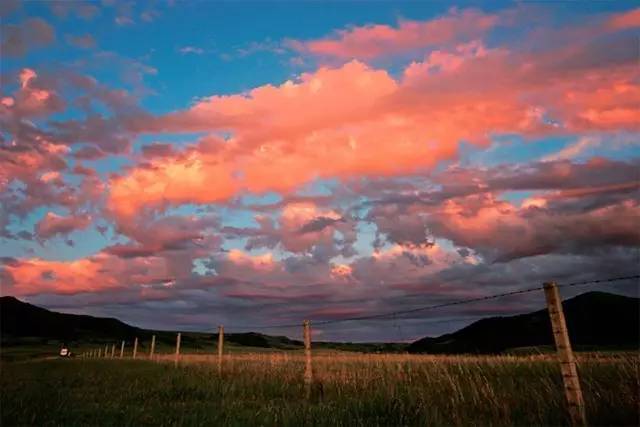
Sunset is perfect for taking pictures of clouds. Not only is the light soft, the light difference is small, and the exposure control is convenient, the bright warm sunlight often dyes the clouds with gorgeous colors, which is very beautiful:

In terms of specific operation, friends who are confident in their own technology or who need precise control of the picture effect can use the spot metering mode.

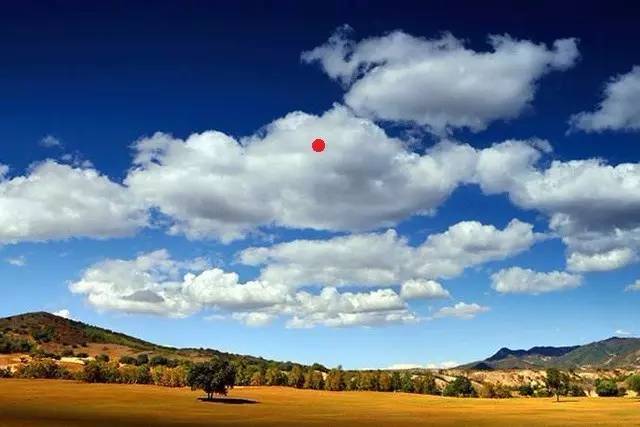
In the spot metering mode, the basic principle of selecting the metering point is to aim at the “midtone” of the screen, that is, the bright part is darker or the dark part is brighter. The darker part of the cloud layer is a good metering spot.

With the live view function, you can see the picture effect you will get under the current metering value on the LCD screen, and adjust the metering point based on this.


The red dot is the appropriate metering point

After selecting the metering point, press AE-L to lock the current exposure value. And then you can move the viewfinder to recompose the shot.

If you are not confident in the technique of choosing the metering point, you can try to take a picture with the average metering first. And then slowly adjust the exposure compensation. This is not accurate enough to control the screen, but it is more convenient.

In addition, you can also turn on the “Highlight Warning” function.


Highlight warning function

When the highlight warning function is turned on, the overexposed parts of the photo will turn into flashes of bright white. According to the amount of this part, reduce the EV appropriately and shoot again.


3. Ground Scenery and Composition

If you only shoot clouds, the picture will look boring. Appropriately adding some ground scenes can effectively enrich your picture.

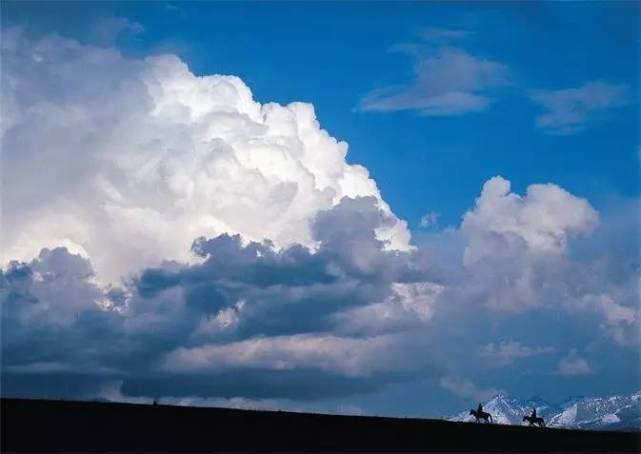
When shooting a panorama of large clouds, it is appropriate to add ground scenes such as mountains, seas, plains, and extended roads as a foil to make the picture more magnificent:

Try to avoid placing the horizon/sea level in half of the frame when taking this type of photo. This balanced composition can make the image look old and uninteresting.

Instead, place the horizon in the upper and lower thirds of the screen according to the rule of thirds. You can choose to highlight the sky clouds or ground scenes according to the actual situation.


Because the ground scene is very beautiful, let the ground scene occupy 2/3 of the picture.

Of course, you don’t have to apply the “rule of thirds” rigidly. If the ground scene is really boring and the clouds are beautiful, it’s okay to put it on the edge of the frame, or even not take it at all:

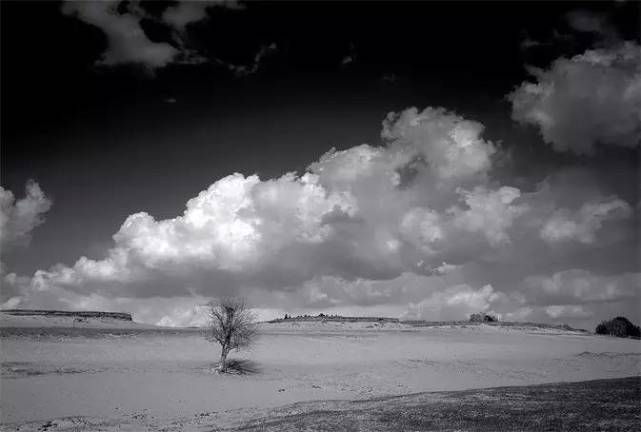
It is also a good choice to place isolated trees, houses and other sceneries with the significance of size identification in the front and middle scenes. And adopting a contrasting composition is also a good choice.

Individual trees and houses, large clouds form a sharp contrast between less and more, small and large. And the picture has more impact and connotation.


A solitary tree that contrasts beautifully with the thick clouds

If there are more trees, the contrast effect is weakened a lot.

It is also a good choice to try a framed composition by zooming in on the foreground scene.

Subject and foil

The branches and leaves of the trees are the best frame, with a naturally extended posture and rhythmic silhouette, and the contrast of green and blue sky and white clouds is quite high:

What needs to be paid attention to is the proportion of the framed scene in the picture.


The frame is too small to attract attention and does not “provide a sense of occlusion” as the frame should. In fact, some people complained that the frame in the picture above is not big enough, but I think it is enough.

If the frame is too large, it will attract too much attention of the audience. Which results in a cluttered picture, regardless of priority.

It’s nice, but the subject becomes a tree branch instead of a cloud.

4. Try Special Tricks

For photos with clouds as the main body, it is very important to capture the three-dimensional effect and texture of clouds. In addition to using polarizers, you should also try some special techniques, such as shooting in black and white.

Black and white photos remove the interference of colors, are more “sensitive” to light and dark levels, and have a miraculous effect on expressing the three-dimensional effect of clouds:

Another way to shoot is a long exposure. Fix the camera with a tripod and set a longer exposure time to make the clouds look flowing.

The exposure time is generally set to about 30 to 40 seconds. After all, clouds move very slowly (unless it is windy), so long exposures are generally used at dusk.

If you want to take a long exposure in the daytime, please add an ND lens to prevent overexposure. The higher the value of the ND filter, the better the light reduction effect. An ND 1000 will allow you to expose for a few minutes during the day!

There was a rumor in the photography industry that “long exposure cannot be used often and will burn the shutter”. I also heard people say it when I was new to photography.

Now I want to solemnly refute the rumor. Now the new camera, the shutter curtain is metal, no longer afraid of high temperature like earlier cameras. This rumour is out-of-date, so feel free to expose it as long as you like.

Categories
Soft Lights

12 Photography Fundamentals

What are the basic rules you need to follow when you shoot? What basics do you keep in mind while shooting? How many basic principles are the surefire way to get great photos? That’s the 12 basic photography rules below.

⒈ “Sunshine 16” Rule

This basic rule is suitable for shooting bright, evenly lit scenes during the day. That is, the aperture is F16, and the shutter speed is the reciprocal of the sensitivity index. For example, the aperture is f16, the sensitivity is ISO100, and the shutter speed can be selected as 1/100 second. On this basis, you can stop down to F22 if you are shooting on the beach. If you encounter cloudy weather, you can zoom in to F11, and so on.


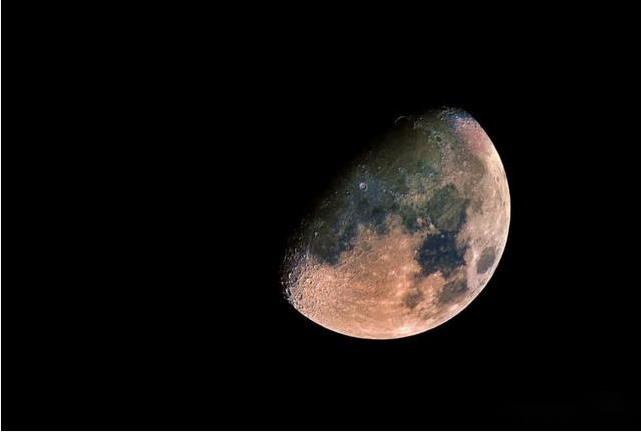
⒉ Moon 11, 8 and 5.6 Laws

This is a different rule, and it only works when photographing the moon. At full moon, the aperture is F11, and the shutter speed is higher than the reciprocal of the ISO index. The shutter speed remains the same when the moon is out, but the aperture is changed to F8. If there is only one crescent moon left, choose F5.6 aperture at the same shutter speed.

⒊ Camera Shake Law

When you shoot with a handheld camera, the shutter speed cannot be slower than the reciprocal of the focal length of the lens. The slower the shutter speed, the more likely you are to lose sharpness when shooting shaky. If you use a 50mm focal length, the shutter should be at least 1/50 of a second. Only when the environment is really dark, use a flash, a tripod. Or place the camera on a hard object to prevent shake.

However, many of today’s digital cameras have anti-shake function. For cameras represented by lens body stabilization technology, the advantages are mainly reflected in the telephoto capability. In the focal length above 135mm mm, the lens body is used for anti-shake, the effect is very obvious. And it can completely replace the 3-speed safety shutter. For example, the shutter speed for handheld shooting can reach 1/30 of a second after turning on anti-shake at the 200mm end.

The anti-shake advantage of the models with the in-body anti-shake function is mainly reflected in the middle focus of 50-100mm. At this focal length, it can replace the 4-speed safety shutter. That means that at a focal length of 100mm, the photos taken with a shutter speed of 1/8 second are not false.

⒋ Gray Card Rule

During shooting, metering with an 18% gray card is the best way to get an evenly exposed, accurate photo. Even if you forget to bring the gray card, it doesn’t matter. You can stretch out your hand, let it face the light source. Measure the light with a light meter or an in-camera meter. And increase the exposure by 1 stop based on the metered value. Different skin tones may cause a slight deviation in metering accuracy.

⒌ Depth of Field Law

When focusing on a distant subject, the depth of field area is usually twice as long in front of the subject as behind the subject. In other words, the subject is usually in the back third of the depth of field. This is the same at all apertures and focal lengths, except that the smaller the aperture, the shorter the focal length. And the greater the depth of field, the greater the length of sharpness you can capture.

6. Fast Flash Output Rule

For ordinary users, the dedicated hot shoe TTL flash is expensive. And many people use the hot shoe flash with a general interface that costs only more than $20. Taking Yinyan flash as an example, the price of BY28A is around US$26. But it is an automatic flash with automatic measuring flash of the lamp body.

When we need to take photos of backlit portraits outdoors, in order to ensure that the details of the sky and the light ratio of darker faces under backlight conditions are uniform, we need to use flash to fill the face with light.

Taking BY28A as an example, we set the sensitivity of the flash to twice the ISO of the camera (eg camera ISO100, flash ISO400). The camera uses aperture priority exposure. The aperture selected by the camera should be the same as the aperture set on the flash. And the exposure should be made according to the brightness of the sky. The brightness of the face in the shadow area of ​​the flash lighting is usually one stop lower than the brightness of the sky. And the overall light ratio of the photo is very suitable.

7. Capture Dynamic Laws

This rule is based on empirical formulas for angle and velocity. If the object is moving along the axis of the lens, you can capture it with a shutter speed of 1/125. Then its movement following the axis of the lens can be captured in 1/500 of a second. That is, if the object is moving 45 degrees along the axis of the lens, only a shutter speed of 1/250 is required.

⒏ Fast Flash Exposure Rule

When using an automatic flash that does not automatically reduce the flash output to achieve fill-in flash, you can increase the sensitivity setting on the flash to twice the sensitivity of the focal length you are using.

The most classic interpretation is: “exposure according to the highlights, and then develop according to the shadows”. This is just as accurate for conventional reversal film as for digital cameras. But with negative film—especially color negative film—it’s best to overexpose by a stop.

⒐ The Working Range of the Flash is the Fule

This rule is needed to understand the maximum working range of your flash. The rule is: “Double the distance, 4x the ISO speed”. For example, if the sensitivity is ISO100, the maximum effective distance of the flash is 6 meters. Then when changing the ISO400 film or increasing the sensitivity of the digital camera to ISO400, the maximum effective distance of the flash is 12 meters.


⒑ Megapixel Multiplier

Rule

In order to double the resolution of a digital camera, you have to multiply the effective pixel count of the digital camera by 4 to do this (not 2x!). Why is this? If the resolution is to be doubled, the effective pixels of the image sensor must be doubled in both the horizontal and vertical directions. So the number of pixels on the image sensor is naturally 2 times × 2 times = 4 times.

⒒ The Law of Solidification of Moving Bodies

To record objects moving perpendicular to the optical axis of the lens, you need to increase the shutter speed by 2 stops from the shutter speed required when the object is moving towards or away from the camera. When the object moves toward or away from the camera at a 45-degree angle to the optical axis of the lens, the required shutter speed is one step higher than the shutter speed required for the object to move toward or away from the camera. For example, if a person is running towards you at a medium speed, it takes 1/125th of a second to freeze the movement. A shutter speed of 1/500 of a second is required when he runs sideways through the viewfinder at the same speed. If he is running diagonally, it only takes a shutter speed of 1/250 of a second.


⒓ The Law of Sunset

For an accurate exposure when shooting at sunset, the metering area should be above the sun, but not the sun itself. If you want the whole scene to look like half an hour after sunset, stop down by 1 stop or reduce the exposure by 1 stop.`

Categories
Soft Lights

Learn To Take Backlit Silhouette Photos

A Compulsory Course for Photographers–Learn to Take Backlit Silhouette Photos

Digital cameras have become popular, and many people have their own digital cameras. But having a digital camera does not mean that you can use a digital camera, just like being able to take pictures is not the same as being able to take pictures.

In the face of a lot of dull photos taken every time I come back from a trip, it really makes people feel that there is nothing special about this digital camera in my hand. However, I often hear that many photographers use very common models to create, and I can’t help but feel the gap between myself and the masters. In fact, through some very simple tricks, you can make the photos you take more like a created work. Today we are going to talk about taking silhouette photos.

The silhouettes in your albums can boost your level


Silhouette photos express the outline of the subject. Whether photographing people, mountains or buildings, what will appear in the photo will be a dark outline. The details of the object’s performance are no longer our concern, and the sharp shape cut by scissors is what we seek.

This way you can also take silhouette photos

Principles of Shooting Silhouettes

Silhouette photos can describe the pose of the target well, and the background is well highlighted, so the photo has a strong sense of environment. Although the faces of the characters cannot be clearly seen in the silhouette photos, which does not meet the needs of taking souvenir photos in general, the appearance of silhouette photos in your albums will definitely make your photography skills more convincing. So how do you take a silhouette photo?

The silhouette photo is shot through the principle of backlighting, so that the target is between the photographer and the light source, and the front of the target cannot be directly illuminated, even close to complete darkness. The level of the background (usually the sky), the color performance is more adequate. Seeing this, friends who are familiar with the principle of camera photography already know that the silhouette photo is actually a photo based on background metering. Let’s take a look at the specific method of silhouette.

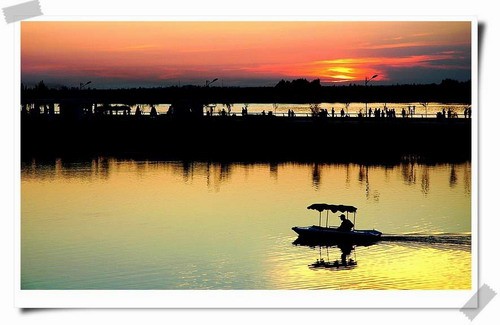
Metered by the water, the trees and boats will be underexposed, creating a silhouette

How to Take Silhouette Photos

First, it’s not always possible to take silhouette photos. Generally choose early morning or evening. When the light is soft, the texture is good, and the polarized light is less. It is easy to take good photos. At the same time, since the light is not as strong, the front of the subject is not illuminated by various reflections. As for the sky, colors and layers can also be better expressed in soft light, which is in line with the background requirements for silhouette photos.

Silhouette photos emphasize the shape of the subject and the color and detail of the background


Next is the camera settings. To take a silhouette photo, to make the subject almost completely black, the subject is underexposed. Most photographers will use manual exposure mode, close the aperture and speed up the shutter speed. Generally, the aperture of F8 ~ F11 is used, and the shutter speed is determined according to the needs. When the light is relatively strong, it is generally necessary to use a dimming filter.

Timing of Shooting Silhouettes Matters

When shooting, the first thing to do is to find the right scene so that the rising or setting sun is behind the building or person we want to shoot. Use the M file to adjust the aperture and shutter. Since the digital camera we use is very convenient, we can take a picture first to see the effect and check the exposure. In particular, the exposure of the sky is not appropriate. So what is the appropriate exposure for silhouette photos? What should I pay attention to when shooting?

Since you want to shoot silhouette photos, you must make the photos show the expressiveness of silhouette photos. First of all, fully display the physical characteristics of the silhouette subject, and vividly integrate the figure and the background. Since in silhouette photos, there is basically no color and detail display of the subject. So the requirements for the physical characteristics of the subject are very high. Therefore, when creating, it is best to carefully grasp the subject’s posture, choose the framing angle. And grasp the shooting opportunity.

Main body shape and background color are the focus of silhouette photos


Also, as I said before, the timing of the shooting is very important. The acquisition of silhouette photos takes full advantage of the difference in light between the subject and the background. Generally speaking, we can take advantage of the backlight at sunrise and sunset, because the light is the softest at this time. Choose the position and angle in advance and wait for the best light to appear. In addition, the red sky reflected in the morning and evening glow is also a great time to take silhouette photos.

The shape of the subject is very important for silhouette photos

Accurate Exposure

It can be said that in addition to the subject’s posture and outline. Accurate exposure is the most important detail in a silhouette photo. Here is a little trick. When taking silhouette photos, the exposure should follow the principle of underexposure rather than overexposure. And the exposure should be measured according to the background. Only in this way can the subject be severely underexposed, form a strong silhouette, and fully express the subject’s posture.

The main body in the silhouette photo is all black, it is best not to take up too much area

After you have a feeling for the lighting conditions for taking silhouette photos, you can use the spot metering and exposure lock functions to easily achieve a silhouette effect. The method is to switch the camera’s metering mode to “spot metering”. Then select the metering point on the bright part of the sunset on the right side of the building for metering. Press the camera’s AE Lock button to lock the exposure value. For cameras without AE exposure lock function, you can hold down the shutter button halfway to lock. Finally, re-adjust the composition and shoot with the exposure combination just now. This results in a perfect silhouette effect.

Categories
Soft Lights

What Are the Tips for Photographing the Moon

Preparation

To determine the position of the moon at a certain time, the easiest way is to use a mobile phone APP, which can easily check the exact position and time of the moon every day at any position. For example, on April 08, 2020, the moonrise in LA is At 19:27 in the evening, the altitude was -8.59°.

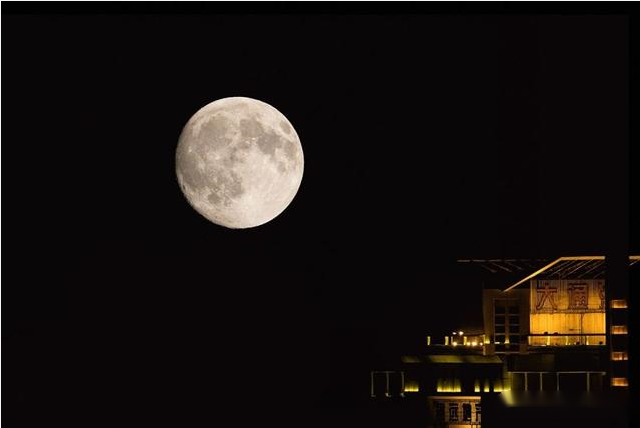
The camera position can be selected according to the following: there is a certain height, avoiding the occlusion of the buildings on the ground. Far from the foreground, it can reflect the relative size of the moon and compress the sense of perspective. The foreground lines have rhythm, ups and downs, and convergence points. Special reminder here, pay attention to your own safety!

▲Choose a certain height to avoid the blockage of buildings.


Camera Settings

1. Use full manual mode

When photographing moonlight, we are usually in a dark environment. Therefore, if you are shooting in semi-auto or preemptive mode, the camera may be misled by the surrounding darkness and mistakenly think that there is insufficient light to slow the shutter or open the aperture. In the end, the photo will be overexposed as a result. Therefore, when shooting moonlight, it is best to set the camera to full manual mode, take a few test shots and then fine-tune it according to the environment.

2. Spot metering mode

The moon is in a dark environment, so it’s perfect for spot metering. When shooting, aim the metering point at the brightest part of the moon, so that the exposure parameters obtained will not be affected by the dark environment.


3. Manual focus

Because autofocus is difficult to work in low light, manual focus is recommended for shooting. If you only shoot the moon, you can adjust the focus distance to infinity.

To shoot the foreground, such as a tree or building in the foreground, focus on the foreground and use the hyperfocal distance to ensure that the foreground and the moon are clear.

▲Focus on the foreground plant and use the hyperfocal distance to ensure that the foreground and the moon are clear.


In this way, the foreground may be a silhouette. If you want to take a clear picture of the foreground, you can consider using a light source such as a flash to fill in the light.

▲The lighting of the building itself fills in light independently.


4. Shutter speed

When shooting the moon, the shutter speed of the camera is not as slow as many people think. First of all, the brightness of the moon in the sky is actually very high, and the shutter speed is too slow to cause overexposure. Second, the moon, like the stars, is in motion in the sky, and a shutter speed that is too slow will make the moon appear ghostly in the photo.

Generally speaking, when the shutter speed is slower than 1/15s, there will be a more obvious ghost image when shooting the moon. When the shutter speed is faster than 1/30s, you can take clear photos of the moon.

▲ The shutter speed is 1/30s, and the moon shot is relatively clear.


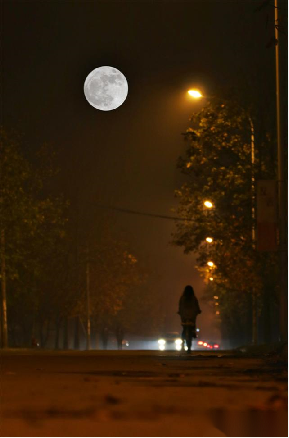
In addition, the shutter speed also needs to consider landscape elements, such as traffic flow, pedestrians, etc. For example, in the picture below, to ensure that the pedestrians on the road are not false, then a fast enough shutter speed is needed to freeze the moment, so the photographer took a shutter speed of 1/3000s.

▲f/2.8, 1/3000s, ISO500

5. Shoot with a tripod

Shooting the moon is the same as shooting the night scene, and shooting in the dark. Although it is said that the brightness of the moon allows the camera to obtain a higher shutter speed, don’t forget that the lens is a telephoto lens, which is itself heavyweight and needs to be very stable to take clear images. Also, the moon is so far away from us that even the slightest shake will blur the picture. Therefore, it is recommended to use a tripod to keep the camera steady when photographing the moon.

Creative Shooting

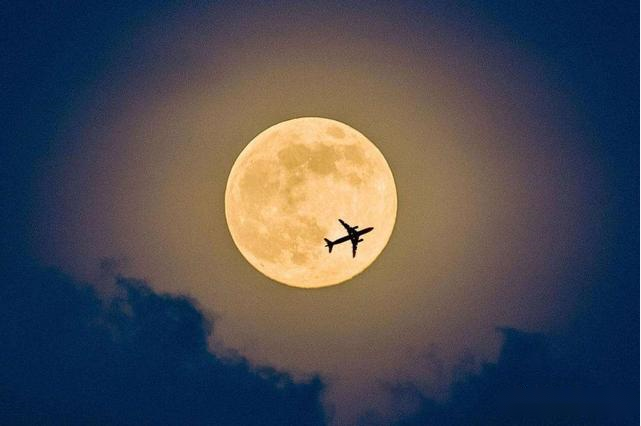
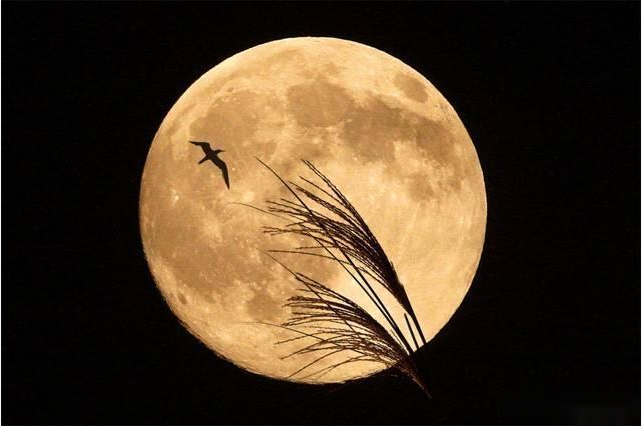
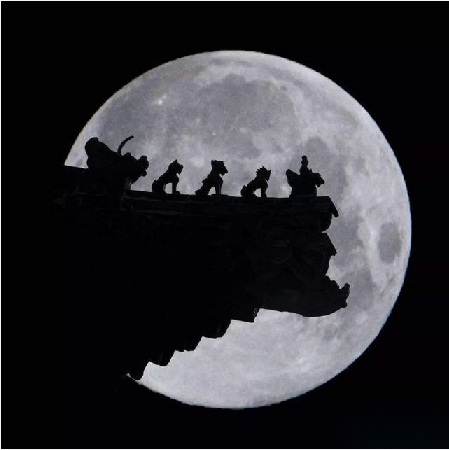
Use the foreground: Clever use of the foreground can often make a photo more artistic than a big, bare moon.

▲Use the foreground to make the picture more artistic and layered.


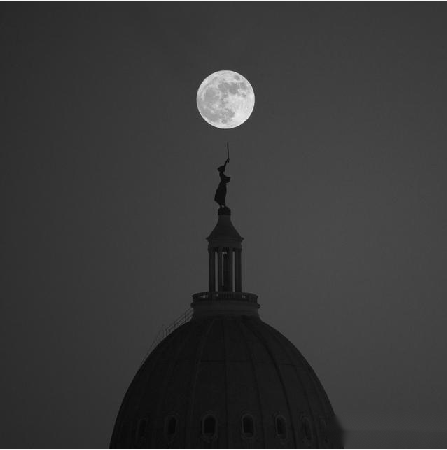
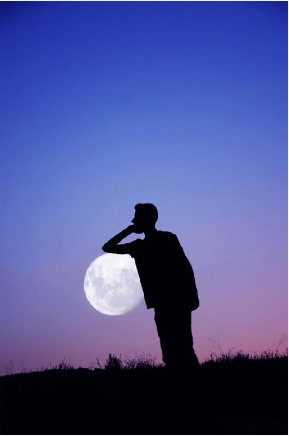
Visual misalignment:

You can use front and back, up and down, left and right to create illusions. To put it simply, according to the visual principle of “big in front and small in the back”, on a plane, two subjects of similar size are placed in tandem. Distant subjects will appear small in the photo, and close subjects will appear larger.

▲Using visual dislocation to increase the interest of the picture.


Multiple exposures:

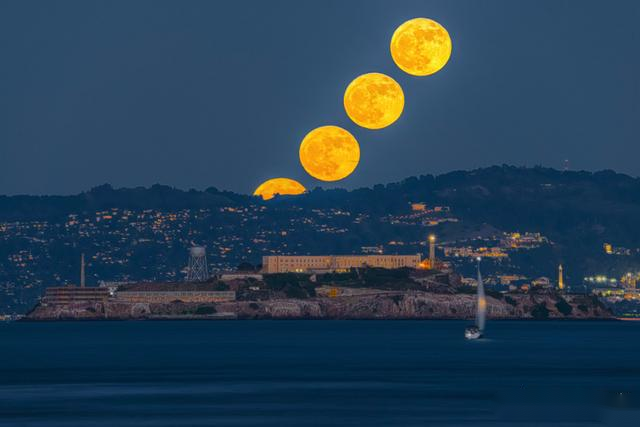
Using multiple exposures to photograph the big moon is the way most people use it today. Use the wide-angle lens to take a picture of the ground night scene first. The dark night sky needs to make room for the moon. Then change the telephoto lens and shoot the moon with the telephoto lens. The position of the moon should be similar to the position reserved for the moon in the first picture just now, so that the shooting can be completed.

▲ Multiple exposures record multiple positions of the moon

In addition, the parameters of the mobile phone to shoot the moon are presented. First of all, you need to use the professional mode of the mobile phone to shoot the moon. Adjust the ISO value to 50, S to about 1/200, and EV to -4.0.

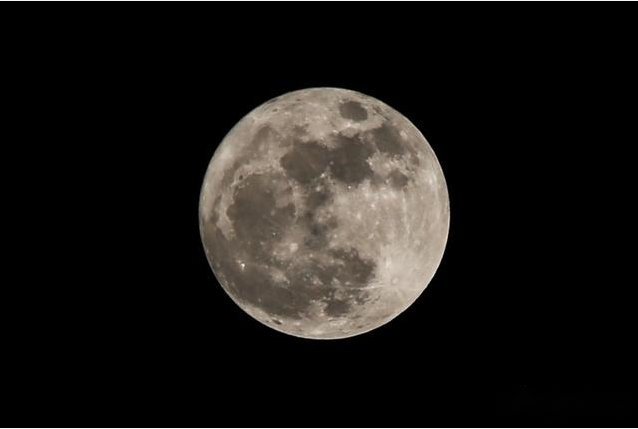
▲f/11.0, 1/125s, ISO100

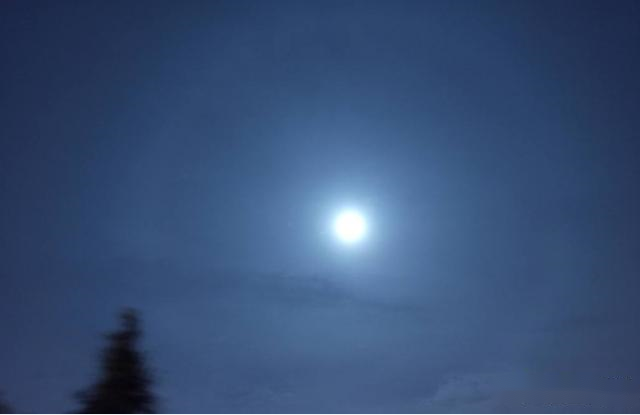
Finally, I remind everyone that when photographing the bright moon, you should choose sunny weather. When the weather is cloudy, the moonlight is refracted by the clouds, forming a halo around the moon called a halo.

▲ There is a halo around the moon, and the moon shot is not good.

Categories
Soft Lights

How to Use Polarizers Correctly

What is the most favorite filter for landscape photographers? Of course it is a polarizer~ The reason is also very simple, its effect is really great!

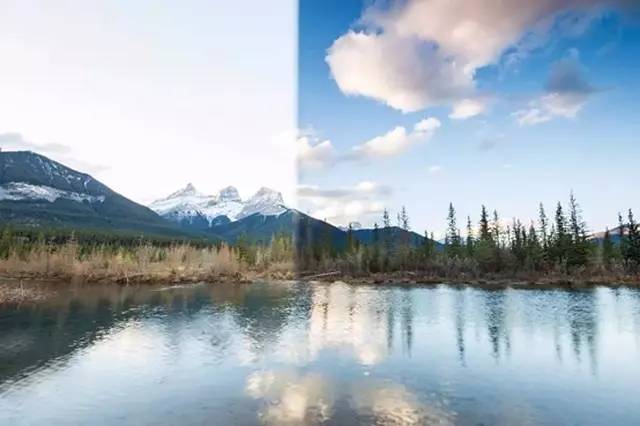
It can make the clouds more detailed, while also making the scenery more vivid:

(left) without polarizer, (right) with polarizer

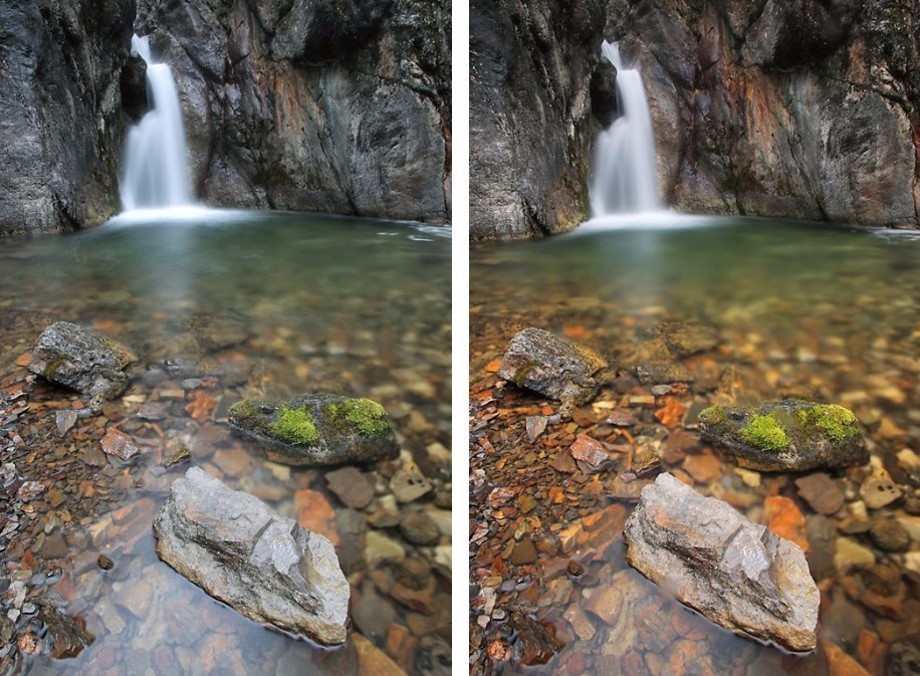
It can make the water crystal clear, while still making the scenery more vivid:

(left) without polarizer, (right) with polarizer

Why are polarizers so powerful? We have to start with how it basically works.


1. The Working Principle of Polarizer

Sunlight hits the scene, reflects and enters the lens at an angle. Too much cluttered white reflections is the equivalent of adding a lot of white to the picture. This naturally reduces color saturation.

If you remove these unwanted reflections, the photo will be clear and transparent, which is exactly what polarizers do.

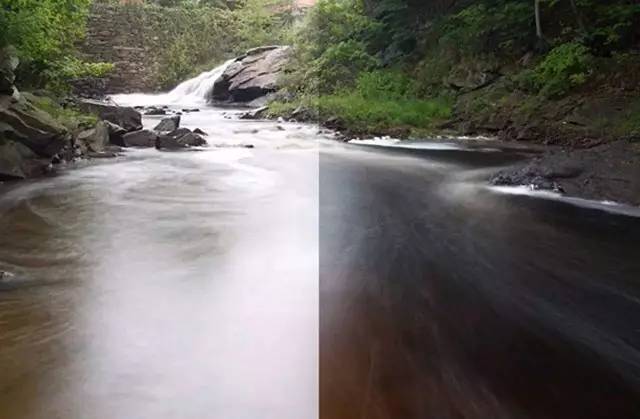
(left) without polarizer, (right) with polarizer

The polarizer consists of two rotatable lenses, which contain micro-grid gratings. That only allow the light parallel to the grid to pass through, thereby filtering the light.

Structurally, the polarizer is divided into two rotatable rings. The upper ring is a linear polarizer with a grid grating. And rotating the upper ring can effectively adjust the effect of filtering scattered light.

2. The Main Purpose of Polarizer

Polarizers have four main uses.

First, polarizers eliminate surface reflections from transparent objects such as water and glass.

When shooting through glass, when you need to shoot underwater scenes through the water, this feature is beyond the reach of any post-production software – they can’t recall scenes that were not captured in the previous period.

Shooting through glass is difficult to do without a polarizer


The polarizer can block part of the polarized light in the sky, darkening the tone of the blue sky.

When the picture contains a large area of sky, the polarizer reduces the contrast between the high-brightness sky during the day and the ground scene, making the contrast between the two more harmonious.

At the same time, the polarizer can also improve the tone of the blue sky, making the color of the sky more saturated, so that the white clouds are also more prominent.

The polarizer can eliminate the scattered stray light on the surface of non-metallic objects, so that the object can show its original clarity, texture and color saturation in bright light environment.

The flowers, trees, and wet rock surfaces in the picture below, if you do not use polarizers, will produce white reflections under sunlight, which will suppress the original color and texture of the object.

After the polarizer eliminates the dazzling reflections, the original saturated hue and rich level of detail of the object are revealed.

Polarizers can absorb stray light in various directions reflected by fog or dust in the atmosphere.


A large part of the occlusion of fog and haze on the field of view comes from the high-brightness stray light reflected by suspended particles. After filtering by a polarizer, the vision in fog and haze will be better:

It is precisely because the polarizer has so many irreplaceable functions that many landscape photographers regard it as a “on-camera mirror” and never take it off.


After talking about the function of the polarizer, it’s time to talk about some precautions for the use of the polarizer.

3. Pay Attention to Adjusting the Angle

As mentioned before, the essence of the polarizer is to selectively filter the light through the grating. The amount of light reflected and the part of the light reflected are different depending on the angle of rotation.

Among the several functions of the polarizer, it is very important to adjust the angle.

For example, when you shoot through glass and need to eliminate glass reflections, the rotation angle will make your picture “different”:

Comparison of effects at the same angle:

Above: No polarizer

Bottom: with polarizer


Adjusting the angle does not just refer to rotating the upper circle of the polarizer. Your shooting position and the orientation of the lens are also an important factor that affects the effect of the polarizer.

For example, when you’re photographing the sky, it’s best to have the lens at a 90° angle to the sun. This can eliminate the most scattered light, and the picture effect is also the best.

You can point your hand at the sun in a gun-shooting position, so just keep the lens parallel to your thumb and you’ll be able to find the best position for the polarizer.

You can slowly adjust the angle as you shoot, or you can take a few more shots at different angles. Go back to the computer and zoom in to see the comparison and filtering, and select the one with the best de-lighting effect.
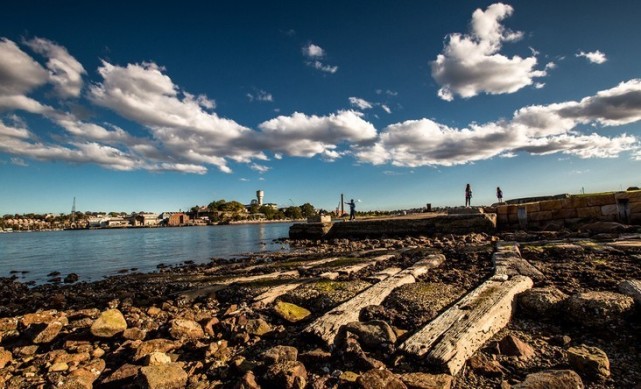
However, the elimination of reflections is not the more the better. Especially when shooting large green plants, excessive removal of reflections may result in unrealistic colors and loss of three-dimensionality.

As shown in the figure below, after excessively eliminating the reflection, the leaves of the trees are too saturated, false, and have no details. It looks very “flat”, but the effect is not very good.

4. Don’t Go with a Wide Angle

Polarizers are not suitable for wide-angle use, and the focal length should preferably be greater than 35mm, otherwise, just like applying a hood, it is very prone to vignetting.

Even if there is no vignetting, or you are not afraid of vignetting at all, the wide-angle panorama effect is very weird. Let’s look at an example:

As shown in the figure above, we can see that due to the large field of view, the extinction of the polarizer at different angles is different. And the blue sky becomes uneven in color, which is particularly awkward.


5. Other Notes

First, polarizers cannot eliminate reflections from metal surfaces. Because reflections from metal surfaces are polarized light rather than unpolarized scattered light from other surfaces.

Polarizers are suitable for shooting through glass, except for some special glasses, such as aviation glass for aircraft portholes. This type of glass has a special coating that looks like this when a polarizer is used:
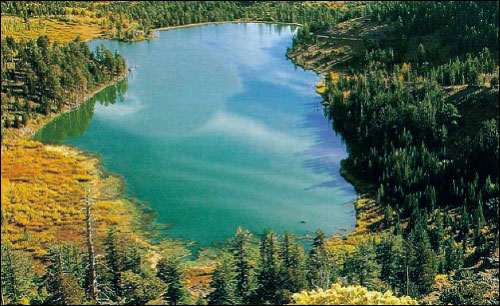
Another point to note is that the polarizer will filter out a lot of light after all. That will produce some kind of dimming effect, which will reduce the exposure by about two stops.

So, you need to adjust shooting parameters such as shutter speed and ISO accordingly. Or use exposure compensation to maintain the brightness of the picture and ensure normal exposure.

Categories
Soft Lights

How to Photograph the Starry Sky

Why do you choose to photograph the starry sky, I believe this is the dream of many people in childhood. The significance of photographing the stars lies in the enjoyment of the process. Escape from the city under the high-paced life, come to the wilderness, stretch your body, lie on your back and stare at the deep sky above your head, and your mind can be peaceful.

But looking at the romantic and beautiful starry sky, it is not so easy to shoot. This requires the photographer to have some basic astronomical knowledge, enough patience, and of course, a love for the sky and a persistent heart.

1. Explanation of the Starry Sky

You may ask, if you don’t have basic astronomical knowledge, how can you take good photos of Hoshino?

Yes, astronomical knowledge does need to be cultivated slowly, and it is necessary to have a general understanding of the starry sky in the sky and even become familiar with it slowly. It will take some time, but not difficult. The software called Stellarium is a very powerful real-time star simulation software. When shooting outdoors, it can help you find different constellations and bright stars in the sky very easily. You can also use this software to combine the actual stargazing outdoors, and slowly get familiar with the sky above your head.

In fact, some famous constellations are composed of several to several very bright star points, so you only need to remember these iconic star points, and you can slowly identify more constellations. There are also many story connections between constellations in Greek mythology, which is also a good way to help familiarize yourself with the stars.

2. Classification of Astrophotography

Astrophotography can be roughly divided into two categories:

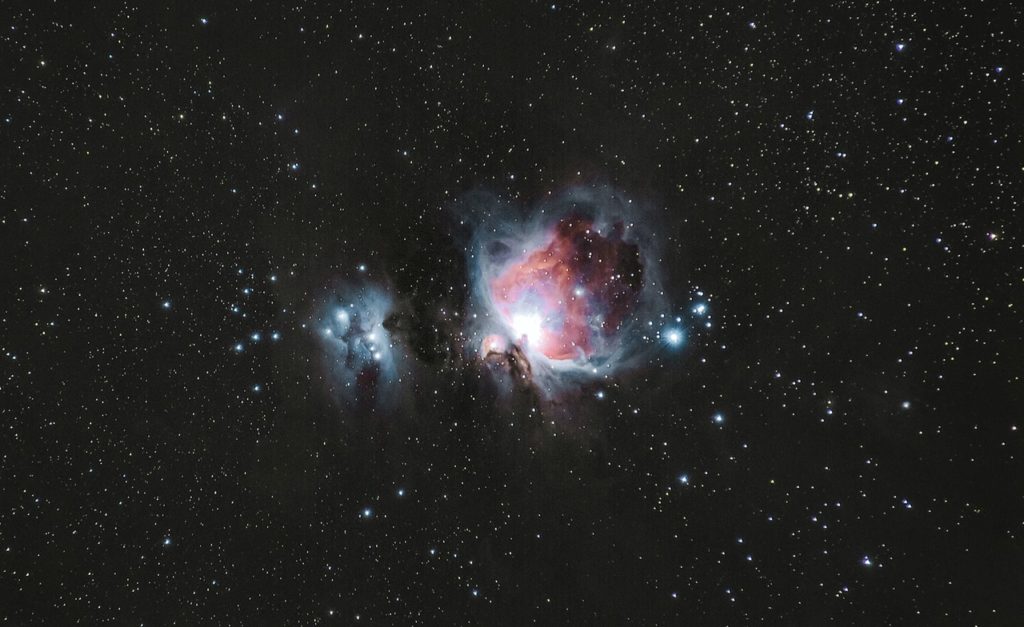
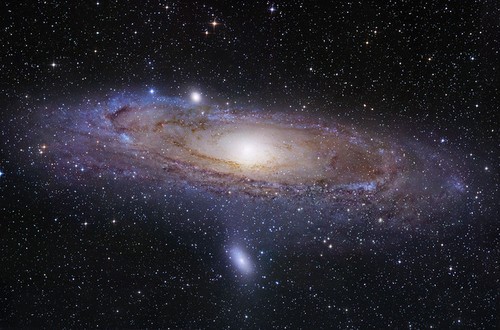
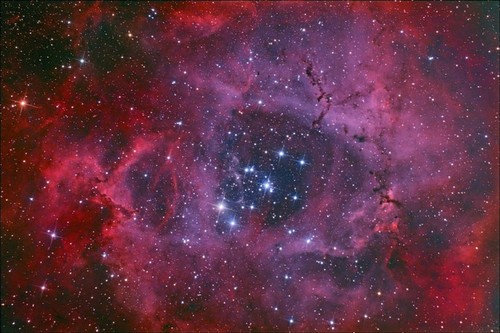
One is deep sky astrophotography. The main objects are galaxies, nebulae, star clusters, planets and other dim deep sky objects. So the requirements for shooting equipment are very high. An astronomical telescope suitable for photographing the target celestial body and an equatorial mount for accurate tracking are essential. It also requires the photographer to have a very high astronomical knowledge and expensive equipment guarantee. The requirements for the shooting environment and weather are also very demanding.

This is the nearest extragalactic galaxy to our Milky Way, also known as M31, the Andromeda Galaxy.

This one is NCG2237 Rose Nebula.


The other category is Hoshino photography, which we are going to talk about today. The shooting content is mainly based on the Milky Way, star scene. And various landscapes with various characteristics to achieve a wide and beautiful visual effect.

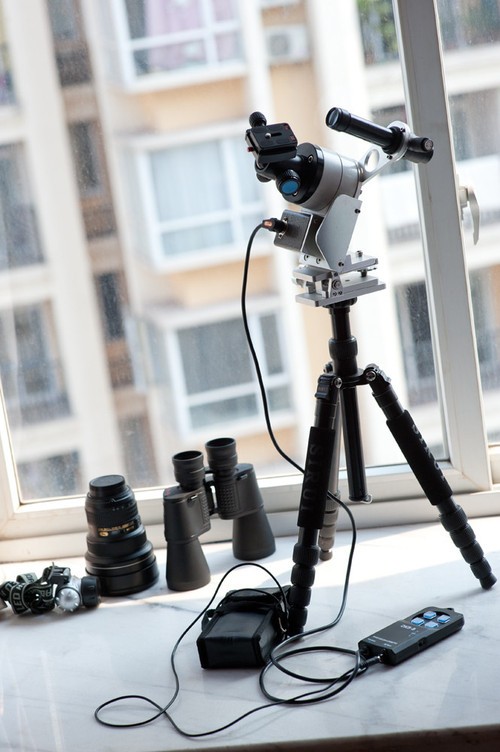
The equipment used in Hoshino photography is just an entry-level SLR digital camera, a shutter cable that can control the shutter speed, a sufficiently stable tripod, a light Hoshino equatorial mount (example), various focal lengths. SLR lens and the must-have wide-angle lens.

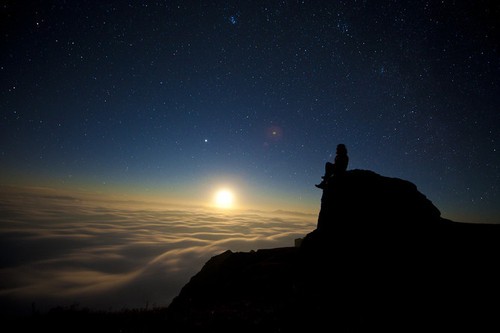
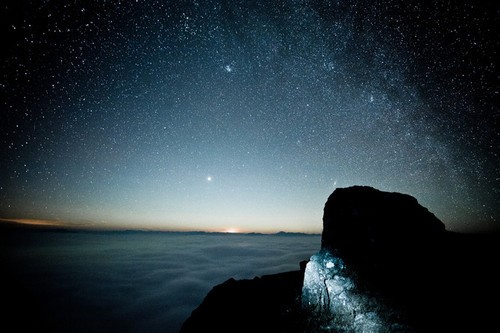
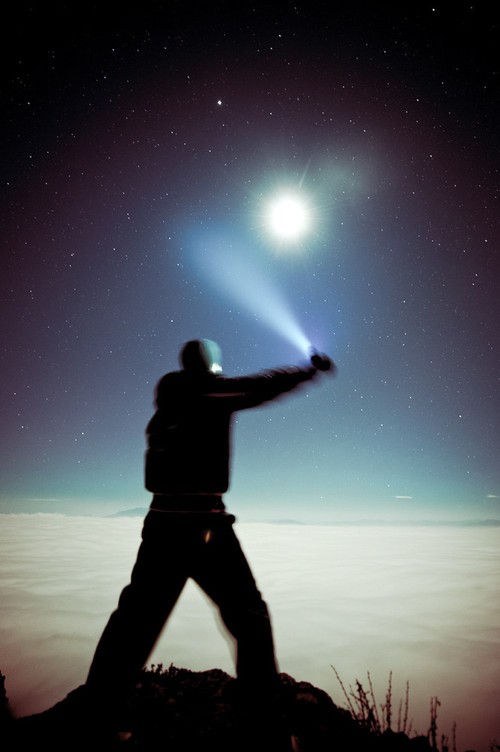
This photo was taken in Yunnan, around 1:00 in the morning. The starry sky, the falling moon, the sea of clouds, and the characters in the picture constitute a beautiful and illusory beauty.

3. Tools—-Equatorial Mount

The main purpose of the design of the equatorial mount is to overcome the influence of the earth’s rotation on stargazing and photography. The application of Hoshino photography is to eliminate the star drag line phenomenon that occurs in photos due to long exposure. The application in deep space photography is to ensure that the focus during long exposures is accurate and does not shift through accurate star tracking.

This is the lightweight Hoshino equatorial mount. Just connect the camera to the gimbal of the equatorial mount. And simply calibrate the polar axis, then you can track and shoot.

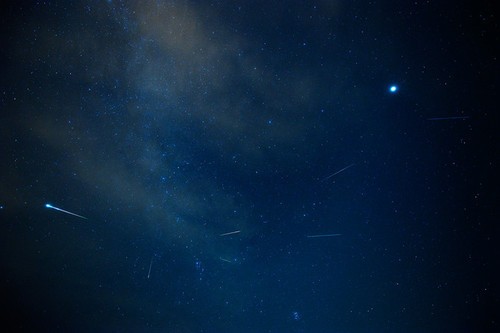
The photo of the Perseid meteor shower in the picture below is a picture obtained by aligning the radiant point of Perseus with the equatorial mount and exposing it for 5 minutes. If there is no equatorial mount, the Milky Way and star points on this picture will all be drag lines, not so clear.
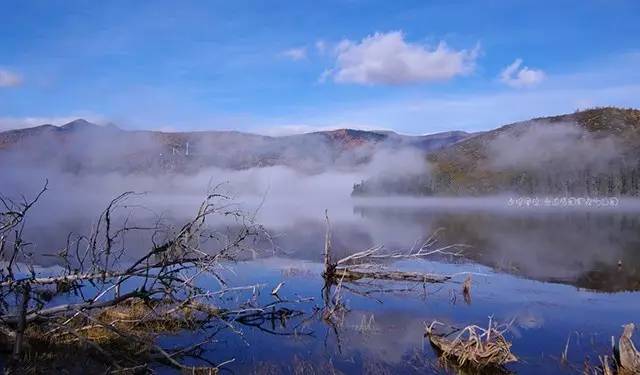
Perseid meteor shower

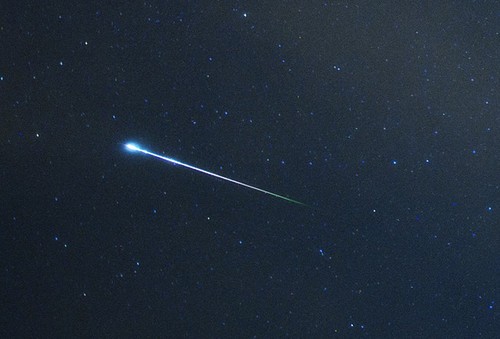
Meteors appear clearer and brighter in the background of non-star trails.
Meteor in the background of non-star trails

Equatorial mounts can be selectively used according to different shooting environments and landscapes. Most of the star field photos you will see in the following are not actually taken with an equatorial mount.
4. Matters Needing Attention

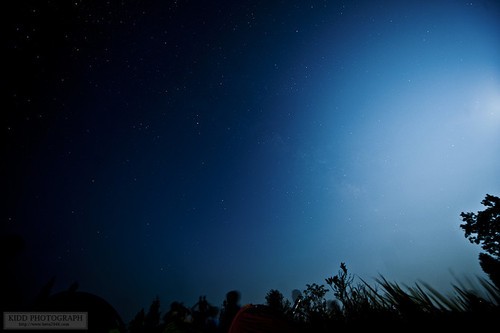
Next, we need to choose a better time period to shoot. Generally speaking, the beginning and end of the lunar calendar of each month are the time periods when the interference of the full moon can be avoided. Because the moonlight of the full moon will cover up many dark stars that are invisible to the naked eye, the resulting picture is sparse.

Another thing to note is that in a moonless environment, the landscape may require a longer exposure time to appear. In an environment that is invisible to the naked eye or invisible to the naked eye, the landscape cannot be properly exposed, no matter how long you expose it. Unless there is a faint light that illuminates the foreground, bright lights such as torches must not appear. To sum up, it is not difficult to see that the influence and role of moonlight on Hoshino shooting is a decisive factor.

The interference of moonlight on the starry sky is as follows:

In addition, sunny, transparent atmosphere, sufficient contrast, more stars can be seen with the naked eye, high visibility and avoiding the light pollution of the city are also necessary shooting conditions. Generally, in the open mountainous areas 20-80 kilometers away from the urban area, you can look up and see the Milky Way and stars clearly visible to the naked eye. Even if I am in the Great Basin, as long as I leave the city in good weather, I can see the Milky Way. So you don’t have to worry about not seeing the stars at all.

We should remind that photographers mostly carry out Hoshino photography  in the wild. So pay attention to safety and nighttime warmth. It’s best to go together in three to ensure safety, to prevent poisonous beasts. After entering the middle of the night, the temperature is extremely low. So you must bring enough clothing to keep out the cold.

5. Shoot the Starry Sky

The next key point is the specific shooting and exposure methods of Hoshino photography:

(1) Choose a suitable shooting location

You can try to step on the spot before it gets dark. Find a suitable composition position, set up a tripod and camera. And wait for the night. This is more conducive to saving time than turning around with your head covered at night. And it is also relatively safer.


(2) Adjust the composition

Adjust the composition in the viewfinder. If it is too dark to see it, please take a sample after composing the picture. And then gradually adjust it. Or scan the framing range with a red light bulb to determine the compositional boundaries.

(3) Lens settings

Set the lens to M-position manual focus mode. Turn the focus ring to ∞ infinity, and then turn it back about 2-5mm.

Why turn around? The focus here is on focus. Because the viewfinder is completely dark, the autofocus mode will definitely not work. And the manual focus will also not be able to accurately focus. In this case, only estimated focus. Usually Hoshino photography landscape is far and large, so set the focus at infinity. But the infinity of the camera is really farther than the star point. so it has to go back a little bit. The exact amount of rollback may vary depending on each lens. The best way is to focus on the moon when there is a moon near the horizon. When there is no moon, you can only gradually expose the proofs for fine-tuning before and after comparison, preferably with the smallest star point.

(4) Set the camera to M or B for manual exposure

  1. If you don’t have a shutter release, you can only use the M file. Your exposure time can be set up to 30 seconds. So please use the widest aperture, or reduce it by one stop. To minimize body shutter shake, mirror lockup mode can also be turned on. The ISO is first set to 400, and the sensitivity is gradually increased if the brightness is not enough after shooting, because the other two sets of parameters have reached their limits. 30 seconds is usually enough to expose normal starry sky and landscapes normally.
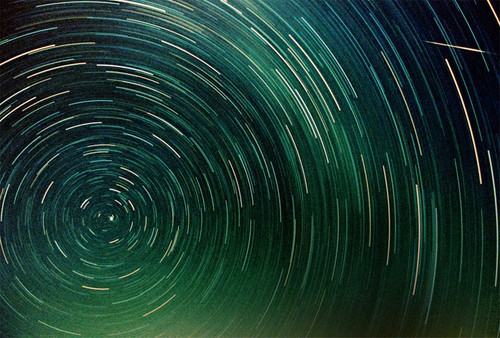
  2. If you have a shutter release, please set the B file, the aperture can use the maximum aperture (the purpose is to minimize the exposure time). And the sensitivity is 200 or higher. Then control the exposure time by manually locking and releasing the remote release button. Generally use the widest focal length no more than 42 seconds, because beyond 42 seconds, the trailing line of the star point will become obvious, unless you use a longer exposure star trail photography.Lens and exposure time: Because of the different shooting stars, photographers will use lenses with different focal lengths to shoot. But how to ensure that there will be no star drag lines when shooting with each lens? Here is the 600 rule, the formula is as follows:600 (quantitative) / the focal length of the currently used lens = safe exposure seconds (ie, no star drag line will appear)
    (5) About composition and framing

    Because Hoshino photography and traditional photography are the same, so the composition can also use #-shaped composition, golden section, diagonal line, extension, symmetry and other composition methods. It’s just that the subject of the composition becomes the landscape and the Milky Way. We should note that when composing the picture, you can consider the composition according to the direction of the Milky Way. And try to show the complete Milky Way.

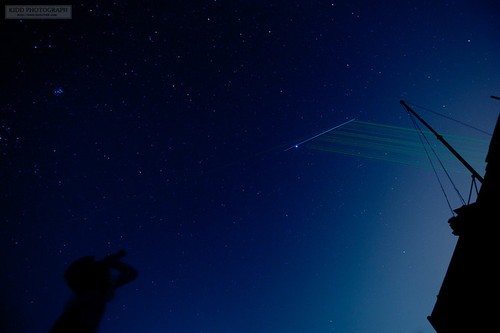
    This photo is the result of luck and calculation. It’s not a meteor that crosses the picture, but the brightest Jupiter in the night sky at the moment when the solar panels of the Hubble Space Telescope reflect sunlight. The thin green lines are the star pens of other astronomy enthusiasts. The lovers holding binoculars in the lower right corner of the picture have perfected the balance of the whole picture and played the role of a little sunshine.

    (6) About color temperature

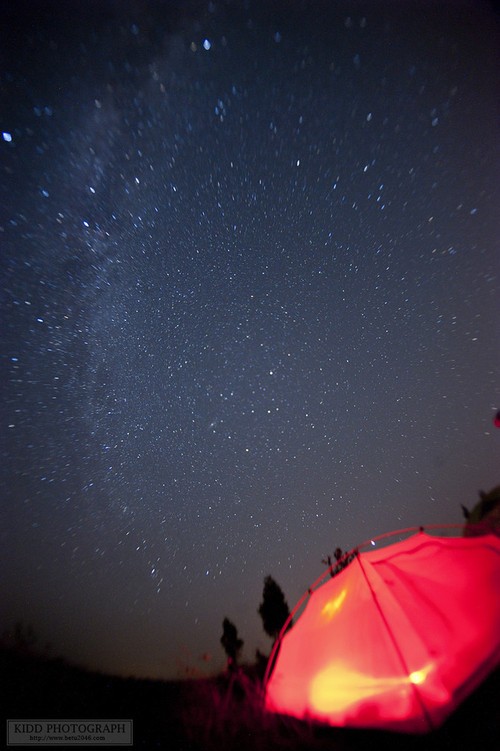
    This photo is cool toned

    There is no fixed value for this, it can be set according to different environments or your own preferences. The starry sky is infinite, and so are creativity and feelings.

    (7) About light pollution

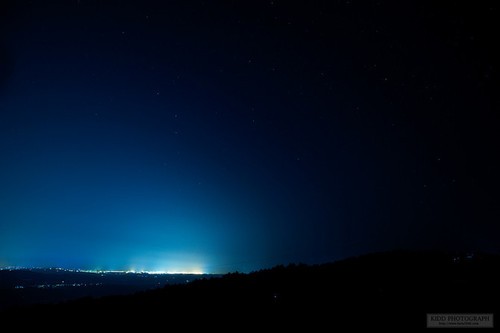
    Light pollution refers to the redness and whiteness of the sky caused by the reflection of city lights by low-level atmospheric dust or water vapor. In traditional astrophotography, we will try to choose a field with little or no light pollution for shooting.

    But in the photos I take, sometimes I deliberately use light pollution and shoot it into the picture to achieve the atmosphere of the picture. Everyone has different opinions on this.

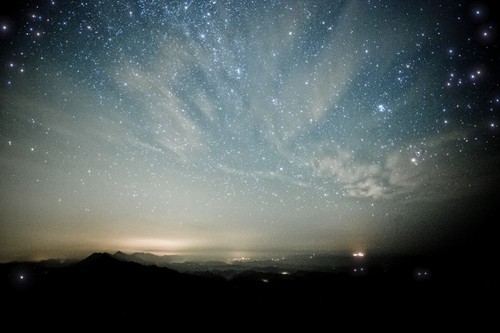
    This is a relatively strong light pollution effect.

    (8) Creative shooting method

    Shooting the starry sky is an enjoyable process. So you can completely improvise your own creativity and take some creative shots in combination with the environmental conditions at that time. Even if it doesn’t work out in the end, it’s still a good experience.

    Alternative use of the equatorial mount: During the rotation of the equatorial mount, manually rotate the focus ring. And the resulting galaxy has three visual effects of stretching, rotating and expanding.