Table of Contents
How to Eliminate Reflections
The surface of many objects has a very strong reflectivity due to the high finish, and the shooting results often seriously affect the picture quality.
How to eliminate or avoid undesirable reflections in various photography practices? Examples of relevant measures are as follows:
1. Shooting objects with a larger glossy surface
Shooting glass cabinets, dark cars, refrigerators with plastic surfaces, etc., due to the large glossy surface of the subject, not only will there be a lot of messy reflections, but even the photographer himself and the camera will be reflected. Therefore, a polarized lens should be added to the camera lens to shoot.
After adding a polarizer to a single-lens reflex camera, you can observe through the viewfinder and rotate the polarizer until the reflection disappears or becomes inconspicuous, and you can shoot. If using a non-single-lens reflex camera, you can hold the polarized lens cover in front of your eyes to observe and rotate it. When the best situation to eliminate reflection occurs, keep the polarized lens at this degree of rotation and cover it on the camera lens to shoot.
2. Shoot on highly reflective glass surfaces
When photographing products in store windows, exhibits in exhibition cabinets, and goldfish in square glass fish tanks, the glass surface often has strong reflections, and it is difficult to completely eliminate it even with polarizers. In such a situation, you can use the flash to illuminate the subject at a close distance on one side or two 45° angles of the glass surface, so as to use the flash synchronous shutter and close the aperture as small as possible, so that the glass surface is underexposed or even exposed. Seriously insufficient. Thereby, the effect of natural disappearance of reflection is obtained.
3. Shooting near the window
There are no polarizers and no flash, and the glass surface of the window or cabinet is very reflective. When shooting the objects, you can simply put the camera lens close to the glass surface to shoot, so as to avoid the strong light fundamentally.
4. Use Polarizer
Polarizers can largely eliminate various reflections (polarized light) such as glass, porcelain, paint, plastic, leather, silk, jade, ice, snow, water, and even blue sky, but they can do little to eliminate the luster and reflection of metals . Therefore, when photographing shiny metal products, certain measures must be taken to soften the lighting light, so that bad reflections and flares can be eliminated.
5. Shooting of Uneven Objects
Some shiny objects, even if various measures to eliminate reflection are taken, the concave part of the object, the convex part
There may still be unsightly light spots and light spots in the parts or corners. A thin layer of soap can be applied to these parts, and the light spots and light spots will disappear. After shooting, scrub off the soap and restore the original glossy appearance of the object.
How to Play the Role of Light Spot in Painting
A flare is also called a flare or bright spot. It is formed by the “directional reflection” after the light hits the surface of the object. On a smooth surface with a parabolic shape, the light produces a concentrated “diffuse reflection”, which can also form a light spot.
The light spot is characterized by small area, strong relative brightness, and generally obvious directionality. Therefore, it can only be seen in a certain azimuth when the incident angle of the projected light is small.
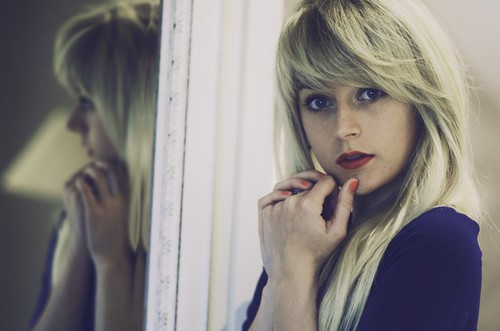
The flare is the brightest part of the entire frame, but it’s not necessarily very bright in absolute terms. Because the brightness difference from the surrounding environment is large, it appears very bright, so it can attract the attention of the audience.
From the whole picture, although the area occupied by the light spot is small, it can produce a certain interest and artistic effect. Catch light is a light spot formed by natural light or artificial light reflected on the eyeball of a character. Two tiny light spots make the eyes full of expression, and the spiritual outlook of the characters is refreshed. The flare can even out some objects at the edge of the frame. It can also play a positive role in connecting the various parts of the picture.
How to Eliminate Flare
Spots help to express the surface structure of an object. The higher the degree of smoothness and smoothness of the object, the stronger the light spot, allowing people to perceive the surface structure and texture of different objects. Bright light spots can enrich the tone (tone) of the picture, making the picture vivid and lively.
However, if the photographer does not handle the light spot properly, it will also have adverse effects. If the spot area is too large or too bright, the picture will be out of balance, and the texture of the object will be difficult to express.
Unnecessary light spots can be eliminated by changing the shooting angle or adding polarizers and applying a transparent coating agent to the reflection of the object.
How to Make the Sun Halo
In some photographs, the sun is photographed with a beautiful halo, large or small. Through certain measures of photography, the sun can be artificially produced a halo, which appears on the photographic screen:
- Choose the framing angle appropriately, use tree branches, branches and leaves, or even the tips of the cornices of ancient buildings to block the middle of the sun; or shoot when a small cloud is in the middle of the sun, which can produce a halo of light.
- By adjusting the shooting position, look at the object with a hole in front of the lens. So that the object is smaller than the area of the sun from perspective. And the hole is in the center of the sun. The result was a halo around the object that was larger than the sun.
- Use a medium focal length zoom lens to photograph a distant mountain in the backlight. When the mountain peak blocks the lower half of the sun, it will produce a large halo. And miraculously circumnavigates the mountain that blocks the sun – the sun is behind the mountain. But the halo surrounds the sun before the mountain.
- In order to effectively show the sun halo, you should choose a blue sky and clear sky and add a yellow filter to shoot. Expose according to the brightness of the sky near the sun, taking care not to overexpose.
- With a single-lens reflex camera, you can observe from the viewfinder and adjust the viewing angle to more effectively represent the sun’s halo. Because it is often inevitable that the angle of view of the camera lens changes slightly from left to right, and the viewfinder screen can correct the angle error that the sun halo forms and disappears suddenly.

How to Make a Light Halo
When taking night photos of cities, airports, construction sites and even production workshops, there must be a variety of lighting on site. After photographic performance, the light can often produce a halo, which plays a wonderful embellishment role on the scene.
The on-site conditions and shooting measures that make the light aura are:
- The condition for the formation of the halo is that there must be an appropriate amount of air medium on site. Such as mist, smoke, steam, moisture, dust, etc. When viewing the light directly, you can see a slight diffuse astigmatism around it.
- Lamps without lampshades, or even with lampshades, can directly see bright light bulbs and wicks. Because the light-emitting parts are exposed, the air medium around the light spot refracts the light from the center. So that a halo can be formed.
- Spotlights and searchlights with strong luminous intensity are properly blocked by certain objects. And the backlight enters the light source, which can produce a halo.
- The background of the light should be a dark space or a dark scene. And the faint brightness of the halo should be fully set off with the help of the darkness of the background. If there is a light-colored building behind the light, or if there is other strong light, the halo is difficult to show clearly.
- Since the brightness of the light halo is weak. In the case of a black background, the exposure may be sufficient to make the halo appear fully. Therefore, the exposure can be increased by 0.5 to 1 level on the basis of accurate exposure.
How to Shoot the Effect of Contour Light
The role of contour light
Photographic lighting serves two purposes: one is to illuminate the subject with correct exposure. Another is arranging lighting to beautify the subject. The former is the foundation of photography. For the latter, it can make a bland subject stand out and reveal the inner meaning of the subject. Although most photographers are so busy with composition, focusing and choosing colors that they ignore it.
While using frontal lighting is the best way to ensure that your subject is evenly illuminated. It can make your subject appear less contoured. For a multi-dimensional subject, it is necessary to use the contrast between the bright part and the shadow part to express the shape and texture of the subject.
To do this, you can move the light source as you shoot. As well as control the size and shape of the light. If you are shooting outdoors, you need to wait until the lighting is right. Or use some tricks to control the lighting in the scene.
Emphasize the texture and shape of the subject, using strong directional lighting. Usually it’s a side light from the side, or close to a backlight. This “rim light” can cast heavy shadows. However, the angle at which the light hits depends on the actual shape of the subject. Therefore, studio light sources that can be controlled at will are very suitable for expressing such subjects.
How to Generate Contour Light
Shooting subjects with finely patterned surfaces requires a fairly low lighting angle. For example, when photographing the lines on coins or wooden boards, the light forms a certain angle with the horizontal line. This way, the smallest parts will cast shadows. Mint patterns on coins and uneven surfaces on other objects are clearly reproduced.
Outdoors, even difficult-to-photograph objects, such as a wrinkled piece of metal, or a pile of logs, can be effective with this lighting method. But shooting outdoors, when you have to take care of composition, how do you get the right directional light?

If you can neither block the strong sunlight nor get the right lighting by changing the location, you have only three options:
One is to wait for the sun to move to the right place,
The second is to move the subject to suit the angle of the sun,
Another is to control the scene light to achieve the effect you want.
In the studio, it is not only the direction of the light, but also the intensity of the light that needs to be controlled. Whether the light comes from the top, bottom, side, or completely backlit, it all depends on your creative intent.
Exposure is easy for rim-lit subjects. Expose the highlights to deepen the shadows. If you want the shadows to be richer, you can increase the exposure.
(To Be Continued)
