Table of Contents
Brief Introduction
Lighting is also an art. The layman sees the excitement, the insider sees the way. Each light has a different function. We all know that reflectors and flashes are used to create catch light when shooting outside. From the small details, the visibility of the photos is enriched.
Of course, the same is true for using shed lights. In addition to paying attention to the light on the model’s face, it is also necessary to consider the combination of the Model’s actions and the light, as well as the brightness of the background light. When necessary, small accessories such as honeycomb covers, diffusers, transmission umbrellas, etc. should be dispatched to change the light and increase the level.
Next, we will share with you what other methods can make the light from the studio lights more diverse!
Make Good Use of Background Paper and Contrast to Create Ever-changing Tonality
In addition to soft light shooting, another mainstream of studio shooting is the use of light. The most common use of this type of contrast light is on the background paper.
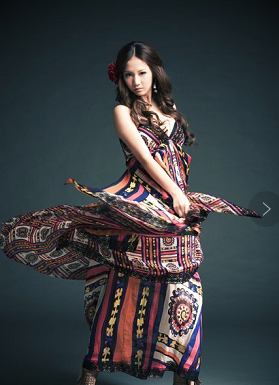
The photo below is a very standard work shot with the background paper in the studio.
Here, we used four lights. One is the main light on the model’s head, which casts the main shadow. One is on the front of the model with a front fill light with a transmissive umbrella. We also used another light to brighten the background so that it is not too dark and has more layers. Finally, we added a honeycomb lamp to the model’s feet to create light spots on the ground. This completes the photo.
In fact, it is not difficult to shoot the background paper. The focus is on the solidity of the model’s own movements and what is the focus of your lighting.
Details of Light Usage
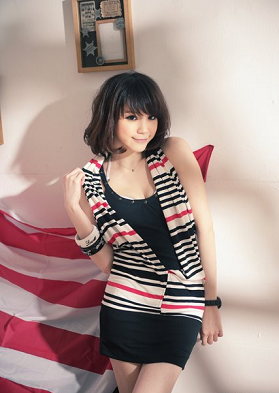
Taking this picture as an example, the photographer just wanted a single diffuser work with pure light and shadow changes to show the cool personality of the model. In order to keep the light from being too hard, the photographer used a 150 cm octagonal mask. It’s just that because of the large lighting range of such a large cover, and in order to enhance the contrast of people, the photographer chose a higher and oblique angle for lighting.
But here comes the problem: In this way, the front of the model and the bottom of the face will have too much contrast due to insufficient light. Simply put, these parts will be too dark. Therefore, the photographer will add another light on the front. Then why add a transmission umbrella? Mainly because of the need for soft front fill light.
After adding these lights, we found that the background was too dark. That’s why we will add a honeycomb light with very little light to give the background some layers, but it will not be too bright and spoil the feeling of the whole photo. Finally, the light spots (honeycomb lights) added to the feet are to enhance the dramatic effect.
When you are lighting, you must know why each light is made. Even when you are shooting, you have to understand how the tone of the entire photo feels. In this way, you can arrange the lighting and complete a photo in the general direction you have set.
Use Light and Shadow to Complete a Rich Sense of Hierarchy
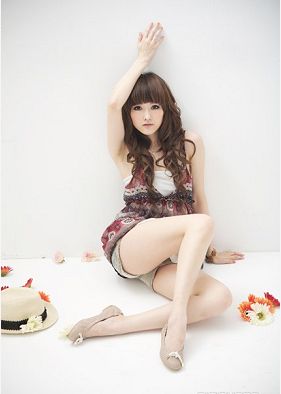
The same situation can also be applied to the photos below. When taking this photo, the photographer has probably understood that the light required by the model is light with layers and not too hard. So the photographer used naked lights to express from the beginning. Because some of the light of the bare lamp will be reflected by other media to get some soft light, and the direct light part has the characteristics of hard light, which just meets the needs of the model.
But after trying this lighting method for the first time, because the background is all white, it feels a little bit less layered. Therefore, the photographer added a fake frame between the lamp and the person, and used lighting to create a black shadow to increase the layering of the background.
In this example, the main light is also determined first, and then supplemented afterwards to meet our photo requirements. Therefore, the most important thing about lighting is not a technical problem, but to clarify one’s own purpose before arranging the light.
Make Good Use of Small Skills to Make the Light Feel More Natural
This is to create a natural light with a top light feel. In fact, in some studios, there are skylights on the roof, which is more convenient when shooting natural light. But because some studios do not have skylights, they had to use lighting simulation.
First, the photographer erected a wooden wall on the right side of the model, and then used the studio lights to jump off the lights to diffuse the light into the entire shooting space. Although the goal was achieved, I always felt that the light was a little too clean. So the photographer adjusted the direction of the lamp head to let part of the light into the lens. It creates some fogging phenomenon formed by obsidian light, and completed this work.
Conclusion
Behind these works, although some are some of the basics learned in the previous class, like the lighting of the background paper. But most of them are inspired by photographers’ observations in daily life. For example, when imitating natural light, the point is that you are indoors. Unless it is direct sunlight entering the window, in most cases we should get diffuse light instead of direct sunlight.
In addition, the use of false windows to express the sense of light and shadow is inspired by observing street lights while walking. And the last one, which imitates natural top light, is the idea that the photographer got in the auditorium one day when the photographer went to take a wedding record.
In fact, there are many light conditions in nature that we can learn from. And they can all be used in the basis of lighting. We may not have to learn too high-end lighting methods at the beginning. Because many light in daily life is our best learning object.
