Table of Contents
Lighting and Shooting of Tri-lamp Portrait
Let’s demonstrate step by step the lighting method of shooting indoor portraits with three small flashes. The flash used here is not a professional studio light, but a small electronic flash with a soft box. The focus of this article is not to teach you the specific lighting position, but to familiarize you with how to meter the light and how to check the effect of the light through an introduction to the lighting process, and give you some basic guidance on lighting according to your own creativity.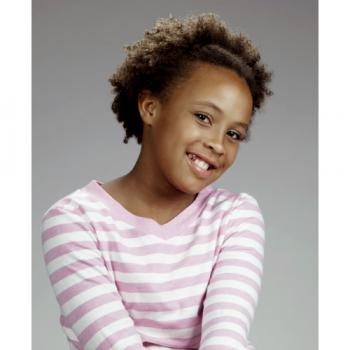
Key points:
The arrangement and metering of the main light
The way to use reflector
How to light up
How to turn on the background light
used equipment:
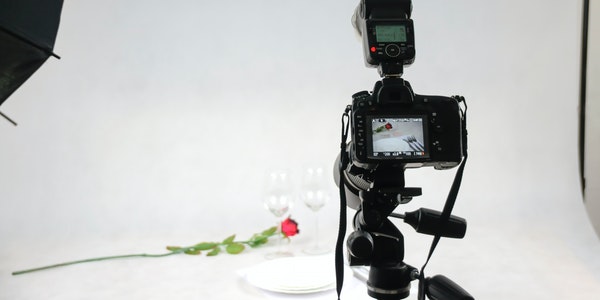
Camera and accessories
Lexar 1 GB 80x CF card
7-in-1 USB card reader
Manfrotto 3D PTZ
Manfrotto 458B NeoTec Pro Tripod
Olympus 14-54mm f/2.8-3.5 lens
Olympus E-1 SLR digital camera
Incident light meter (with flash metering function)
lighting
3 small electronic flashes
flash brackets x 3 sets
3 soft boxes
a reflector
reflector bracket set
Wireless flash sync device
background
9 feet white non-woven fabric background
Background frame
The Arrangement of the Main Light:
Install the background cloth first, and place a small stool on the left side of the center for the model to use. Put the flash into the diffuser, put it on the lamp holder and place it on the right front of the camera. After the approximate position of the lamp is set, ask the model to sit down. Before the formal shooting, communicate with the model to explain the effect we need to shoot. Communication with the model is very important, no matter how you plan to shoot, make the model feel comfortable and cooperate with your shooting.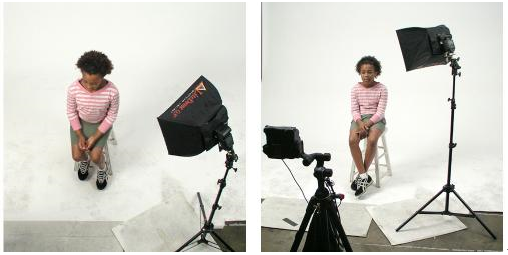
After the preparations are completed, the main light will be formally arranged. The main light is placed at a 45-degree angle in the front right of the camera, the height is basically flush with the model’s head, and the light is facing the model’s face.
When the main light is in position, it is ready for trial shooting. Since the color temperature of the flash is close to sunlight, we set the color temperature of the camera to 5500K, the sensitivity to ISO 100, and use manual focus. We first connect the flash synchronizer to the light meter, place the light meter on the face of the model, and measure the incident light in the direction of the lens. The measured exposure combination is 1/60 second, F8. Set the camera according to the metering results, and install the synchronizer to take a test shot.
Judging from the results of the test shooting, the results are basically in line with the expected results, and the main light intensity and angle are relatively ideal.
Reflector Fill Light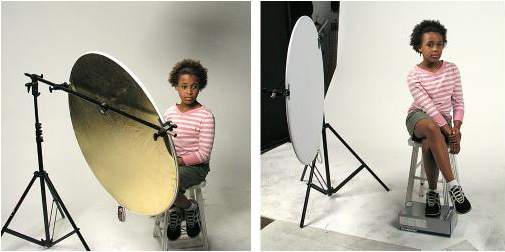
Now use the reflector to fill up the light on the model. Fix a 32-inch double-sided reflector on the shelf and place it as shown in the picture above. Use the silver side to fill up the shadow of the model. The center of the reflector is facing the shoulder of the model. After the reflector is set up, turn off the main light and use the spot light reflected by the reflector to take a test shot: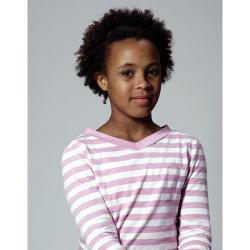
It can be seen that the original shaded part has details. Adjust the position and angle of the reflector to achieve the best fill light effect.
Arrange Hair Lights:
The next step is to arrange the headlights. Place a flashlight on the left, behind the model, the light hits the model’s hair from above: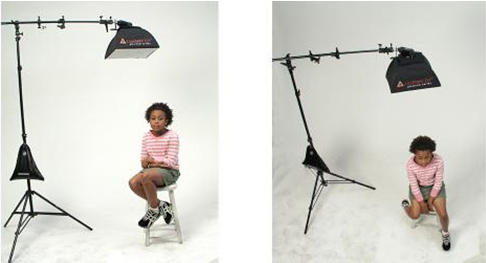
After arranging the headlights, turn off the main light, remove the reflector, and take a test shot with the headlight alone. Expose the highlight parts of the hair to see the effect of the headlight:
The lighting effect is as expected. Turn on the main light, put it back on the reflector and try again: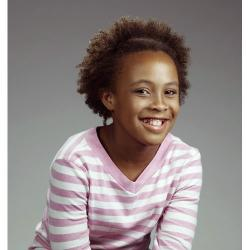
At this point, the three-dimensional portrait effect created by the main light source, fill light, and light has been presented. The only regret at present is that the background is dark, which needs to be solved with a background light.
Set the Background Light:
The last step of lighting is to install a background light. Put the last flash into the soft box, place it on the low light stand, behind the model, and shoot it flat on the background cloth: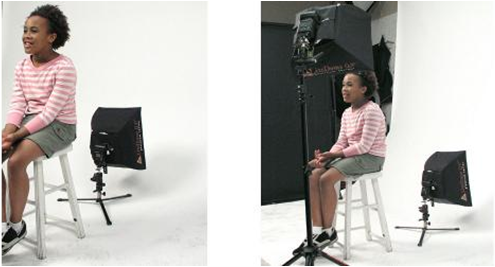
After determining the approximate position of the background light, you still have to take a test shot to see the lighting effect, and then make adjustments. Turn off the main light and the light, and shoot the illumination effect of the background light separately: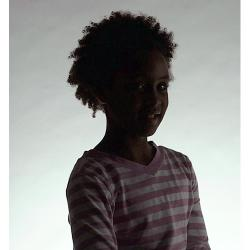
The brightness and light-dark transition of the background are exactly what we need, just adjust the angle a little.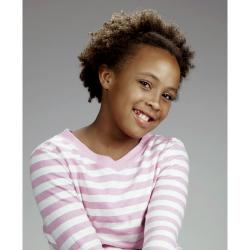
OK, so far three light sources and a lighting reflector are ready, turn on all the lights for test shooting, and a standard “oil painting effect” lighting portrait is presented in front of us. This lighting method is a more classic one. Because the light and shadow effects are very close to the works of the oil painting master Rembrandt, it is also called “Rembrandt lighting method”.