Table of Contents
How to Understand the Composition of Landscape Photography
The visual elements of beauty are all around us and occupy such a large part of our daily lives that most of us turn a blind eye to it. In landscape photography, whether bland or majestic, it contains an infinite amount of visual beauty. Sometimes it only exists for a moment, fleeting. Sometimes it hides under a very ordinary exterior, making it difficult to identify. In fact, it’s the hidden visual beauty that is truly magical and interesting.
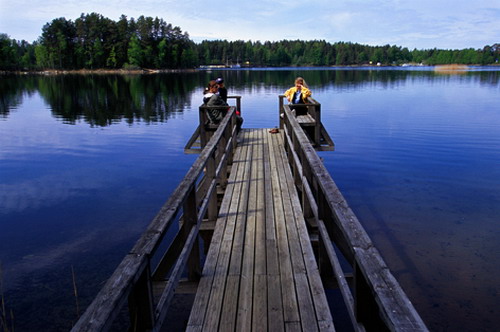
Aesthetically pleasing lines, tones, shapes, and textures are found in natural landscapes, brought into viewfinders, processed in the photographer’s own way, and then photographed so that the viewer can see them at a glance. That’s what composition is all about.
Composition is a thought process that seeks order from the chaos that exists in nature. It is an organizational process that brings together a large number of scattered compositional elements into an understandable whole. Composition is the process of reacting to these elements and finding ways to organize them. The aim is for these elements to convey to people the excitement, reverence, fear, wonder and empathy that the photographer has already experienced. The atmosphere expressed by the composition is sometimes calm, sometimes powerful or firm, and sometimes active. Nature itself will show the photographer the emotions to be expressed.
Some people compare the composition of painting with the composition of photography, and come to the conclusion that the composition of photography is a subtraction, and it is a refinement of the natural scenery of the world. There is some truth to this statement. Whether it is addition or subtraction, there is only one purpose, that is, to reproduce the feeling that nature gives us through composition, and to convey this feeling to the viewer with the camera.
The Spatial Division of Landscape Photography
In a square or rectangular viewfinder, the natural scenery is reasonably distributed among them, which is the spatial division of landscape photography. The natural spatial arrangement is nothing more than the proportional relationship between the landscape and the sky, and between the landscape and the landscape on the ground. For example, in terms of the layout of the screen, whether there are more sky and less land, or less sky and more land, should be decided according to the actual situation and personal subjective.
The general rule of space division is that which part is exciting, which part should occupy a larger area. But it is worth noting that the main body of landscape photography is the natural landscape on the earth, and the sky is more often used as a foil. Therefore, when the sky part does not have the creative elements we need, it should be completely cut out of the composition. If the sky is the main body of the picture, we should also keep some of the ground on the picture. Without the background of the earth, the expressiveness of the sky will be greatly reduced.
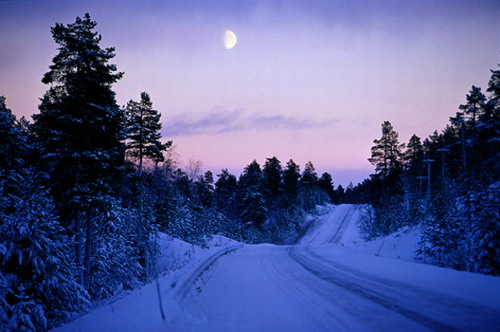
When shooting landscapes dominated by the ground, it is also necessary to consider the sense of spatial distance between the scene and the scene. Using the focal length of the lens, the air perspective relationship and the radioactive lines, the three-dimensional space effect of the natural landscape can be displayed to the maximum extent in the picture, so that the viewer has a sense of being there.
The Location of the Subject in Landscape Photography
No matter what the content or object of landscape photography creation, there are primary and secondary points. The subject is the focal point of the picture and the main expressor of the subject idea. The main body can be one, or two, three or several. The status of the main scene should also be superior to other scenes in the picture, and it should be in an obvious position.
But not all subjects must be arranged in the center of the picture, which would be rigid and not meet the aesthetic requirements. Regarding the position of the subject in the picture, the commonly used method is to draw the picture into a “#” shape, and place the subject at any cross point of the # shape. This method of handling the body is worth referring to. The specific placement location, we also have to vary depending on the scene, depending on the situation. It is necessary to pay attention to the laws of aesthetics and to dare to break through and innovate.
Accompanying Landscape Photography
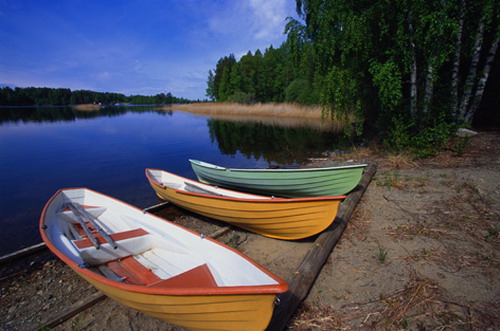
Accompanying body refers to other scenes after the subject is determined. It is second in the picture, but it is extremely important to highlight the main body in the picture. It mainly sets off the subject and assists the subject to complete the task of expressing the author’s emotions. In addition, if possible, decorate and beautify the picture, unify the tone, express the atmosphere and express the depth of space, and cover up some deficiencies. Therefore, the choice of companion should not be the same color, tone, and shape as the main body, but should be different. The relationship between the subject and the companion is both contradictory and interdependent.

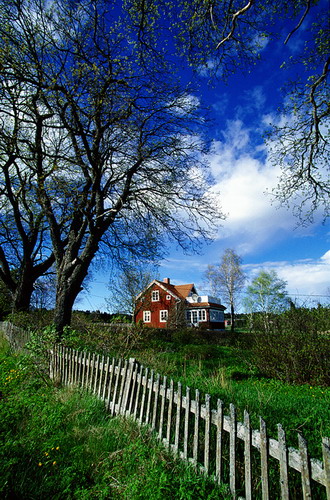
Depth of Field for Landscape Photography
The scene is formed into a relatively clear image on the photosensitive material. And the longitudinal depth of the scene with a clear image is called the depth of field. That is to say, when we take a landscape photo, the distance from the closest clear scene to the farthest clear scene is the range of the depth of field. Most landscape photography requires as much depth of field as possible, making every part of the frame sharp if possible.
There are several factors that affect the depth of field: the size of the aperture. That is, the length of the focal length, and the distance of the shot. The larger the aperture, the shorter the depth of field. The smaller the aperture, the longer the depth of field. The longer the focal length of the lens, the shorter the depth of field. The shorter the focal length, the longer the depth of field. The closer you shoot, the shorter the depth of field. The further away you shoot, the longer the depth of field.
To sum up, when shooting natural scenery, in order to maximize the panorama depth. That is, the maximum sharpness range of the photo, the most effective method is to use a lens with a short focal length (wide-angle lens) and a small aperture (F11, F16, F22 ), to capture the scene at a longer distance (about two meters away). Using the above three methods at the same time ensures the maximum sharpness of the photo.
Aerial Perspective for Landscape Photography
Aerial perspective is a phenomenon in which the details of distant objects are blurred. The greater the distance between the photographer and the scene, the thicker the layer of air the scene’s light needs to penetrate. The distant scene seems to be immersed in a hazy fog. And the aerial perspective will make the distant scene blurred.
But it is this visual phenomenon of near-clear and distant blur that gives our photos a sense of depth and space. Photographers also take advantage of this visual phenomenon to take landscape pictures with three-dimensional space effects.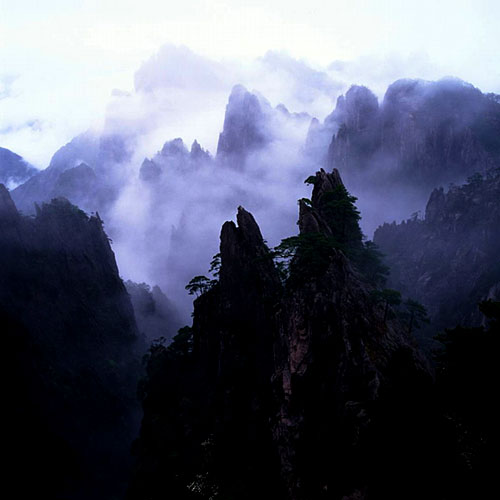
In nature, in addition to the influence of the distance of the shooting distance on the aerial perspective effect. The change of the weather plays a decisive role to a certain extent. When shooting in sunny and windy weather, the air perspective is good, and the landscape clarity is high. In foggy weather, the air perspective is poor, and the spatial clarity of the landscape is limited.
Therefore, after mastering the basic relationship between aerial perspective and shooting, we can freely choose the shooting scene in any weather conditions. That is, when the air perspective is good, you can take pictures of large scenes and distant scenes. When the air perspective is poor, take some small and close-up photos.
Metering is the Basis of Exposure
Standard grey reflectivity
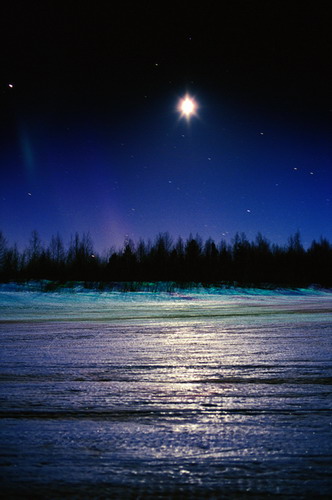
The design principle of modern cameras and professional light meters is based on the standard reflectivity of 18%. That is the reflectivity of a standard gray plate. But in the thousands of scenes in nature, different substances have different colors, light-sensing and light-receiving directions. Therefore, when we are faced with intricate and ever-changing scenes, how to measure the reflectivity of the subject becomes the key to correct exposure.
In the face of different scenes and different illumination directions of light, the metering methods used are also different. When we want to know the reflectivity value of the subject, we should use the reflective metering method. If we want to know the intensity of sunlight or sky light, we should use the incident light metering method. Whichever metering method is used, it is a relative basis for exposure values.
This value is not necessarily the most correct. The correct exposure value should be the data obtained after comprehensive analysis based on many factors such as weather, season, area of illumination, and the reference point of metering.
Reflective metering
Taking reflective metering as an example, the range of the metering point is sometimes the subject itself. And sometimes the sky overhead. For example, it is necessary to use the brightness of the sky light as the metering point. That is mostly used before sunrise and after sunset. During this period of time, the scenery on the ground is not directly illuminated by sunlight. And the intensity of the reflected light cannot be accurately grasped by the light meter. The sky part is within the range of the sun. It can effectively reflect the intensity of light. At this time, the direction we measure should be the sky, not the scenery.
Whether to use incident metering or reflective metering, there are certain rules to follow in actual creative activities. On cloudy days, the scattered light of the sky is softer and the illumination is average. So it is more convenient and accurate to use the incident light metering method. If the light is relatively strong, whether it is shooting in backlight, front light, side light or area light, it is better to use the reflective metering method. Reflective metering can accurately measure the light ratio contrast value of the bright part and the dark part of the object. It provides a reliable basis for us to accurately calculate the correct exposure data.
Exposure is the Key to Landscape Photography
Effects of exposure
Using the shutter speed and aperture size of the camera, a certain amount of light is refracted through the lens and onto the photosensitive material. This process is exposure.
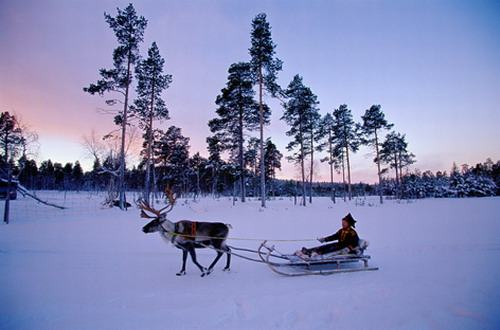
The exposure value determines the image effect of the shooting screen. Overexposure will result in a lighter image, and underexposure will result in a darker image. Only when the exposure is correct, the color of the scene can be truly restored. And the level and texture of the object can be fully expressed.
Exposure Compensation and Correction
In actual shooting, we not only have to learn the way of metering, but also understand the compensation and correction of exposure.
When shooting high-key and low-key photos, the exposure value needs to be corrected. The so-called high-key photo is a photo with bright tones, most of the screen is occupied by light white tones. And the image is only a light image composed of intermediate tones. If you want to get a high-key photo, you generally need to increase the exposure by one level on the basis of the measured exposure value.
A low-key photo is one where the majority of the image is dark, with only a few mid-tones and highlights. When taking low-key photos, it is generally necessary to reduce the exposure by one stop from the measured exposure value.
This is the actual application of the exposure principle of “white plus black minus” in shooting. In addition to the above-mentioned principle for the tone of the picture, the depth of the subject’s color also applies to this principle.
Not all works require accurate exposure. The amount of exposure depends entirely on our understanding of things and the effect we want to express.
Exposure increase and decrease
We must understand the following knowledge: within the allowable range of exposure latitude. When the exposure is less than half a stop or one level, the color of the highlight part of the scene is more saturated. On the contrary, the color of the highlights will be faded.
The mastery of exposure requires continuous accumulation of experience, and some ready-made rules should also be memorized. For example: To shoot a snow scene, increase the exposure by 1.5 stops. Shooting a landscape illuminated by area light, after metering according to the highlight area, reduce the exposure by half a stop. To shoot a darker scene, increase the exposure by one level after metering. Shooting a river in backlight, after metering the highlights in the river, reduce the exposure by one level.
When shooting the sun at sunrise and sunset, if you put the sun that is not dazzling like a duck egg yolk into the frame, the exposure data is F/16. And the speed is 1/15 second (100-degree reversal film). When shooting landscapes on cloudy and rainy days, shoot according to the data obtained by incident metering. Generally, there is no need to increase or decrease exposure. And the color reproduction of the scene is true and full, and so on.
(To Be Continued)
