Table of Contents
The Characteristics of Light
With the continuous improvement of the performance of software and hardware equipment, today, it is more and more meaningful to talk about how to take good natural light portraits. Natural light portrait is a big topic, this article only gives some valuable hints through a few excellent natural light portrait photography works.
The control of light has always been the core technology of portrait photography. Compared with the freely controllable lighting system in the studio, the characteristic of natural light lies in the word “natural”. You cannot control it, but you have the right to choose. Once you have mastered the essentials of selection, it is equivalent to indirectly controlling it and letting it serve your shooting.
how to choose? Obviously, we must first understand the characteristics of light quality. The rising morning light at dawn and the sinking light in the evening obviously have different light qualities, depending on the photographer’s hobbies and practical experience. Take the dimming evening light as an example. This light has a soft tone, rich in drama, and gives people a calm and deep feeling. It is the light that many photographers like. Be sure to pay attention to the transition between highlights and shadows, and don’t leave shadows with sharp edges on your face. If you are shooting in a wide space, it is best to find a place to block direct light.
There are several elements created on location, which have an important impact on light quality and deserve attention. Such as sunlight, fog, Tyndall phenomenon, and so on.
Light Direction
You should usually follow the direction of the light (not necessarily the standard frontal light, in fact, you often have to form a specific angle), try to change the angle to obtain different effects, and carefully control the shadows. Sometimes it is necessary to take some creative images, but in any case, you should avoid “dead black” on the model’s face-this can only bring discomfort to the viewer. Take backlit (including side backlight) portraits, try to use reflectors to fill the face with light. The key issue is that to try various angles, the distance and angle between the camera, the light direction and the model usually form a complicated contrast relationship. Only by practicing diligently can you find the right combination-of course there are many combinations.
Dramatic Light
We often hear the term “dramatic”. What does the drama of portrait photography mean? I think it lies in the action contained in the picture and the atmosphere of the movie lens version. The action is achieved by the photographer’s lens capture ability, and the atmosphere comes from the light control.
Natural light shooting cannot freely combine light, and at the same time you have to be aware that the light is changing at any time. This requires an accumulation of experience in light changes that are usually encountered, and the ability to predict and predict.
There are certain light effects that are a panacea for the dramatic atmosphere: backlight photography, contour light performance, and extreme silhouette shooting-all of which have the function of creating atmosphere, but not enough for drama.
It must be supplemented with action to make the drama truly manifest. Scene design, momentary capture, angle arrangement, and sensitivity to certain details are the key to filming theatrical elements.
Common dramatic light elements include: backlighting, dramatic effects brought by window light, and special visual beauty created by special elements such as shadows, contours, and silhouettes. Please observe the dramatic elements of the work.
Post Processing
The post-processing of natural light photography is particularly critical, because there are a lot of things you need to correct. Experts recommend that you try to use RAW raw data files to store data instead of JPG. The original shooting data retained by RAW, no matter in terms of exposure correction, color correction and latitude adjustment, there are these that cannot be effectively completed when processing JPG images.
In the initial stage of data processing, it is recommended to use raw data file processing software such as Lightroom to set the exposure and color to produce image files with minimal loss. After that, if you have further requirements, use tools such as Photoshop to adjust.
Photography Techniques for People and Portraits
When taking photos of people with lighting, it takes time and effort to take beautiful photos. Sometimes, it is inevitable that beautiful photos cannot be taken just because the lighting is not ideal. Always pay attention to the work scene, you may inadvertently find that the best light comes from a place you never expected.
Build Connections
Many photographers prefer to shoot objects like landscapes and flowers because the subject is still and easy to grasp. Human expressions are fleeting. When shooting portraits, the photographer’s goal is to show the essence of the subject vividly and vividly through the partial expressions of the subject.
When taking photos of people, lighting is important, but it is also indispensable to understand how to show the emotions of the subject. It takes time and practice to learn to work with portrait subjects. The photographer and the subject must respect each other, but the most important thing is to ensure that the subject remains solid and relaxed in front of the camera.
The photographer and the subject should have a cordial conversation. Even a few minutes is better than no communication. Explain to the subject what you are trying to express in the photo. What kind of emotion do you want people to have when they see the photo? What is the overall feeling of the photo?
By discussing the above things with the photographic subjects, it will help you to establish a better connection and thus better coordinate and cooperate in your work.
Aperture Priority
When shooting portraits and people, the first thing to consider is to set a larger aperture. Use a larger aperture (smaller aperture value), the resulting depth of field will be shallower, so that the object is more sharp, the background will become more blurred. In this way, the object will appear more and more completely different from the background, and the character will be more prominent.
When this photo was taken, the ISO was set to 200, the exposure time and shutter were 1/80 second and f/4. Because of the large aperture and the telephoto zoom lens set to 175mm, the background of fallen leaves in the autumn sky has completely turned into a fuzzy yellow carpet.
Using a telephoto lens or a compact camera that can zoom at close distances can create a bokeh effect in the photo. Another advantage of a larger aperture is that you can use a faster shutter speed for shooting, which better prevents the effect of shooting due to the movement of the subject. This is crucial when shooting young children.
It is helpful to use aperture priority in portrait photography. On the one hand, this can control the depth of field; on the other hand, the camera’s exposure meter can automatically control the shutter, making shooting faster. According to this, you can hope not to miss a beautiful moment. When the light is insufficient, be sure to monitor the shutter speed and ensure that the shutter speed is fast enough to prevent any blur.
Search for Open Shadows
Some people think that when shooting portraits outdoors, the “best by nature” lighting is natural, and there is no need to worry about it. This is as easy as going out for a walk. Is that really the case? In fact, it is not necessarily.
Generally speaking, the best lighting effect for portrait photos comes from the warm sunshine, and the bright sunshine is not beautiful. The soft light makes it easier to see more details of facial expressions, without covering the face with heavy shadows.
At noon, the biggest problem faced when taking photos of people is that direct sunlight on the head will cause strong contrast and shadows on the face. Direct shots will form shadows in the eye sockets, making people look like funny raccoons.
Even when it gets dark, the contrast between light and dark is usually very strong. At this time, half of the portrait is in direct sunlight, while the other half is in shadow, so half of the face will either turn white or sink into dark shadows.
In most cases, the softer light is not something you can meet but you can’t ask for it; you just need to spare a moment to look around and you can find it by your side. The light environment you are looking for is called an open shadow. Light haze, big trees or even the other side of a building can be ideal environments for creating open shadows.
When shooting under direct sunlight, people often squint their eyes. This is rarely the case when shooting in open shadows. When the subject is under the canopy of a big tree, the soft light shines on the person’s face, making people seem to be bathed in light from all directions.
Spot metering is used in the photo to get the normal exposure value of the little girl’s face. Exposure index: ISO is 200, aperture is f/2.8, and exposure time is 1/160 second.
In open shadows, there are a variety of metering methods. In most cases, the light meter is sufficient, but overexposing the aperture from +1/3 to +2/3 stops will greatly increase the brightness of the scene. In addition, for dark environments, ensure that the white balance is set correctly.
If the white balance is not set correctly, the captured images will often appear too blue. Using the correct white balance will not spoil rich skin tones. In addition, try to keep the subject as close to the edge of the shadow as possible, which helps to add more brightness and texture to the face.
Handle Darker Shadows
Under the same lighting conditions, exposure may be limited when shooting people in darker shadows (like shadows formed by buildings or large eaves). Using close-range metering can reduce the external background light entering the lens, which is a good way to get the correct exposure value.
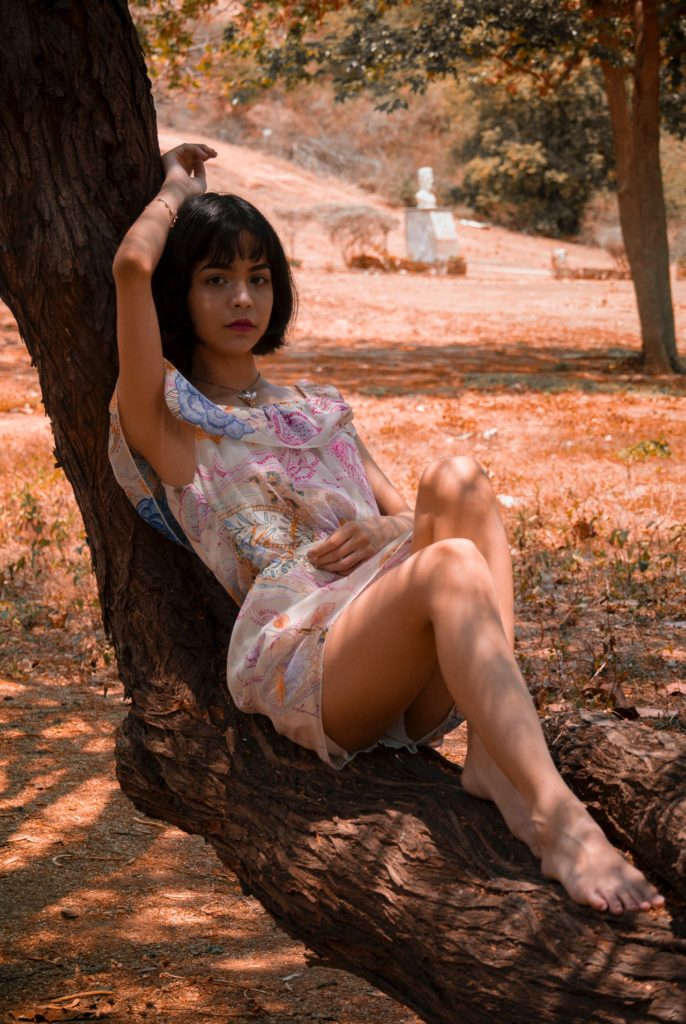
Dappled sunlight (like the light spots created through the sparse foliage of a tree canopy) can be particularly difficult to deal with. The contrast of the spot needs to be reduced, but don’t reduce the brightness of the spot on the subject too much.
In an environment like the picture above, the most important thing to pay attention to is not to overexpose any small spot of light on the character, especially the light spot on the face.
Exposure compensation can be used if necessary, but generally speaking, a well-observed light position is sufficient. In this scene, the model can move, the light breeze can make the trees sway, and of course the sunlight also moves along the sky. Therefore, it is important to always pay attention to the position of the light.
Exposure compensation is set to +1/3 to ensure sufficient brightness for shadows and dark backgrounds. In addition, the photo was processed into a sepia tone using PhotoshopElements, adding a warm tone to the black and white image.
When the sky is slightly overcast (or cloudy), it may be very suitable for shooting people. At this time, the projection is mostly soft and straight light, and some very beautiful highlights may appear in it.
In this environment, make sure that the light is soft enough or can be adjusted so that shadows do not appear on the subject’s eyes.
It is very important to use center-weighted metering so that the bright sky can be excluded when measuring exposure.
