Table of Contents
The Choice of Light
The use of side light highlights the light and dark layers of the snow scene. In addition, the combination of ladder shadows makes the tone of the overall picture more varied.
Aperture F4, exposure time 1/1250s, focal length 96mm, sensitivity 100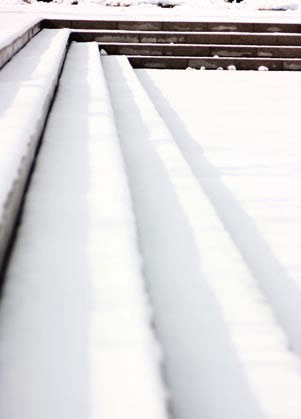
The Effect of Snow on Light
Because snow is a pure white crystal, it is highly reflective and appears brighter when the sun hits it. Therefore, in the shooting of snow scenes, if the front light or top light is used for shooting, due to the relationship of flat or vertical light, not only can the snow-white fine crystal objects not be able to produce light and dark layers and textures, but also the scene will lose its three-dimensional sense. Therefore, in order to show the light and dark layers of the snow scene and the transparent texture of the snow, it is best to shoot the snow scene on a sunny day after the snow. And it is better if it can catch up with the early morning light.
The Choice of Light
Under the sun, the use of side light, side backlight and backlight can best express the light and dark layers of the snow scene and the transparent texture of the snow particles. And the tone is also full of changes. Even a distant view can create a far-reaching atmosphere. However, when the backlight illuminates the snow scene with a large area of white, the scenes of other tones that are not covered by snow will inevitably turn black. Therefore, in order to make the snow and other tones in the snow scene have a sense of hierarchy. When shooting snow scenes, it is best to choose soft sunlight.
The use of light plays a very crucial role in photography. In many cases, photographers cannot change the natural light. So they have to wait for the light to change or use different angles to make reasonable use of the light.
Correct Metering and Exposure
Proper metering and exposure is the key to success or failure in taking snow photos. In a large area of snow, the in-camera metering system is used to meter the light. And the snow scene is generally underexposed according to the displayed data. This is because the camera’s internal light meter is metered in a certain program. And the data it displays is the average light value of the highlights, midtones, and shadows in the integrated scene. This is feasible in most cases, but the strong reflected light in snow scenes often makes the metering results differ by 1-2 stops of exposure.
The photographer can use exposure compensation. Based on the actual situation, increase the exposure by 1 to 2 levels. Maybe some beginners are not clear about the concept of exposure compensation. Simply put, exposure compensation is adding or subtracting exposure from the exposure measured by the camera. For example, in the case of aperture priority, the exposure parameter measured by the camera is F2.8, 1/60 sec. If you add a stop of exposure compensation at this time, the exposure parameter will be changed to F2.8, 1/30 sec. Decrease the exposure compensation by one stop, then the exposure parameter will be changed to F2.8, 1/125 second.
Of course, photographers can also use manual mode to adjust the aperture shutter. This can also achieve the effect of exposure compensation. Photographers can also take the more common method. That is to use the camera to aim at a mid-tone object (it can be a tree and other objects that are close to gray). Then press the shutter halfway without letting go, and then compose the camera to shoot the snow scene. During the whole process, the photographer must be careful not to directly meter and shoot at the white snow.
Shooting Snowflakes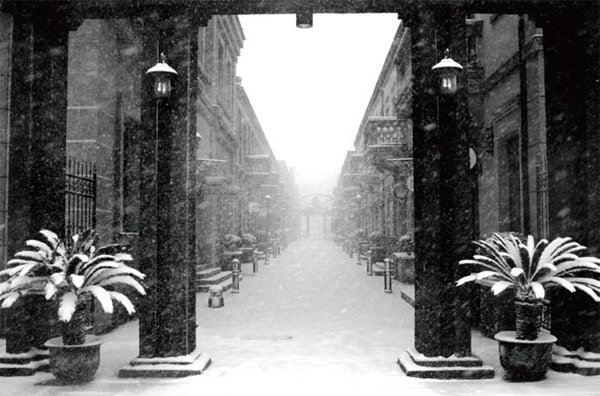
Use a high-speed shutter to freeze the momentary state of snowflakes falling. But because most of the background is too bright, the snowflakes are not obvious.
Aperture F4 Exposure time 1/250s Focal length 24mm Sensitivity 200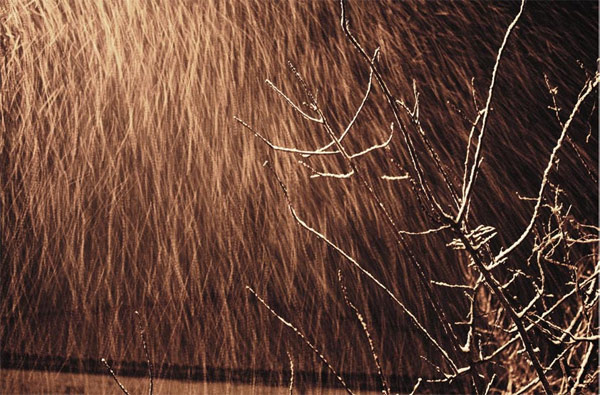
The use of slow shutter speed and dark background makes the traces of snowflakes clear at a glance
Aperture F4 Exposure time 1/5s Focal length 78mm Sensitivity 500
In snowy days, if the photographer wants to take pictures of flying snowflakes, it is important to pay attention to the choice of background and the application of shutter speed. If the photographer wants to express the sense of lines when the snowflakes are flying, he can choose to shoot at a slow shutter speed, generally 1/15~1/60s is appropriate. If the photographer wants to freeze the moment when the snowflakes fall, they can choose to shoot with a fast shutter speed. And the snowflakes are frozen at a certain moment, giving people a certain sense of beating. In the selection of the background, the photographer should choose a darker background as a foil. Because a dark background can emphasize the presence of snowflakes more than a bright background. And at the same time, it can avoid the interference of the background to the snow.
Using a Certain Carrier to Express the Snow
Scene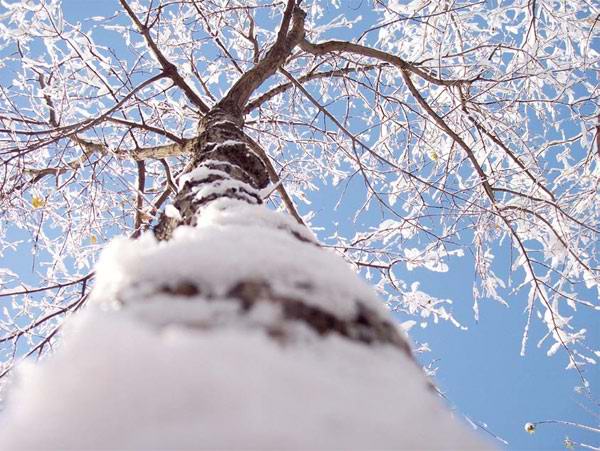
For snow scenes, photographers should not only point the lens to a large area covered by heavy snow. But also observe some other small details. For example, snow-covered branches, buildings, fences, etc. The performance of these materials may bring richer meanings to the expression of snow scenes. And at the same time strengthen people’s feelings of ice and snow. When photographers choose to hang trees as their subjects, they should give priority to multiple thin branches, low but lush woods or individual branches for shooting. For the composition, whether it is a panorama of the whole branch or a close-up of a small branch, it has a distinct expressive force.
Use Color Temperature to Express Different Temperature Senses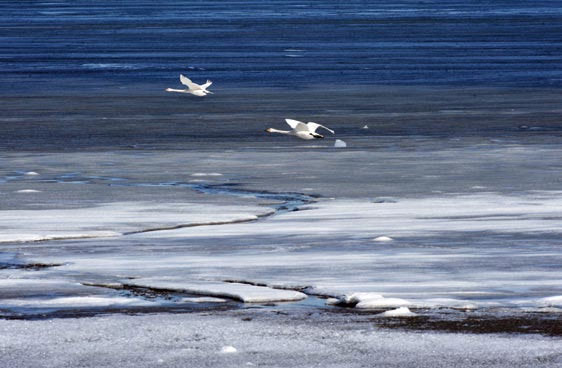
Aperture F13 Exposure time 1/640s Focal length 400mm
The snow scene should be white and flawless, but in different climates or time periods, photographers can get different snow scene effects through different color temperatures. On a sunny winter day, affected by the direct light, the picture taken can directly show the whiteness of the snow. When shooting on a cloudy day, the snow surface will show a cool tone under the influence of light, so that it can express the coldness and mysterious atmosphere of winter. In the morning and evening when the color temperature is low or under the dim street lights at night, the light will be more inclined to warm colors, and the white snow scene at this time will also be inclined to warm colors due to the influence of the color temperature of the light.
Shoot with Foreground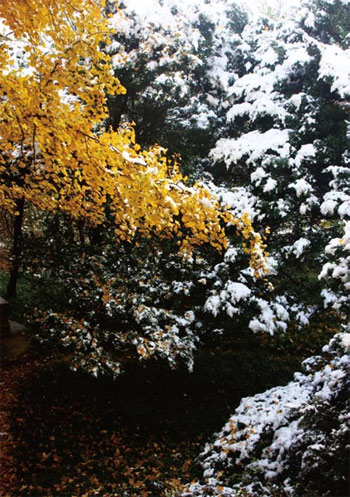
Use the yellow leaves as the foreground to set off the whiteness of the snow
Aperture F4.5 exposure time 1/250s focal length 30mm
When the ground is covered with snow, it tends to show a relatively single color, resulting in an overly flat picture. Therefore, when shooting, the photographer must master certain composition skills to find a bright foreground for the picture, so as to form a contrast with the snow-covered scene. In this way, the picture has a certain sense of three-dimensionality and distance.
Shooting of Tree Hangings and Icicles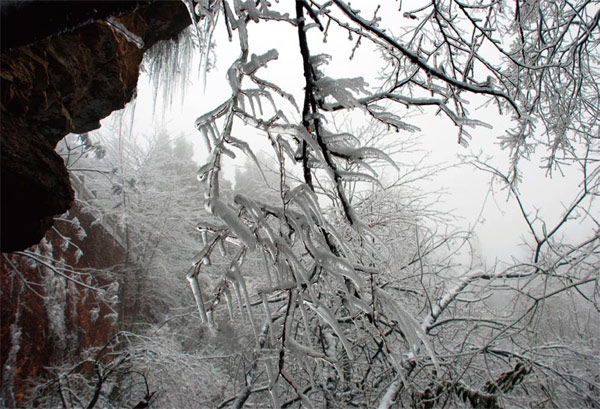
The tree hangings and icicles shot in the upward direction are more immersive
Aperture F5 Exposure time 1/100s Focal length 20mm
Tree hangings and icicles are a unique sight in winter. A tree hang is a sight of snow and ice clinging to objects such as branches. Icicles are generally hung vertically on eaves, cliffs and other places. In the process of expressing tree hangings and icicles, photographers can show the crystal clear and transparent texture of ice by increasing exposure compensation. Of course, shooting from the side and looking up at the angle can make it more compelling.
