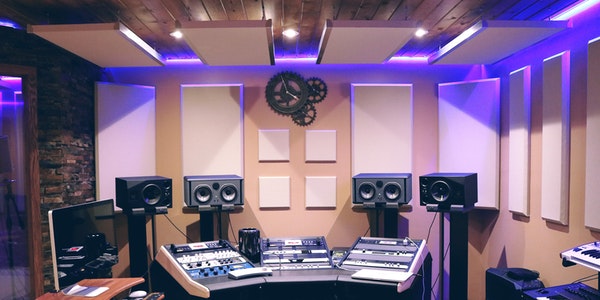
Studio lighting is not like natural light. Photographers can use subjective ideas and performance needs. On the one hand, it increases the difficulty of lighting. In order to improve the effect and speed of lighting, a skilled lighting technique is used to create a wonderful light and shadow effect. However, because the lighting in the studio is subjective and arbitrary, it allows the photographer to maximize the effect of lighting on the one hand, and generally follow the following steps and rules.
Table of Contents
Determine the main light
The main light is the dominant light source, which determines the main tone of the picture. In lighting, only when the main light is determined can it make sense to add auxiliary light, background light, and contour light. In the process of determining the main light, it is necessary to systematically consider the light source, intensity, coverage area and the distance to the subject according to the shape characteristics of the subject, the texture performance, the distribution of light and shade, and the separation of the subject and the background. distance.
For most of the subject matter, generally choose softer light, such as reflector, soft light and fog light as the main light. Direct floodlights and spotlights are rarely used as the main light, unless the picture needs to bring a strong contrast effect from them.
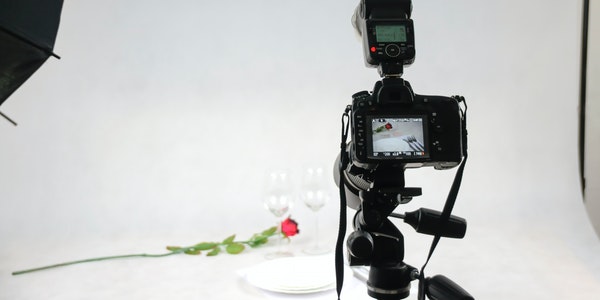
The main light is usually higher than the subject, because the most comfortable and natural lighting is usually the light effect that simulates natural light. The main light is too low, the subject will form an abnormal bottom light illumination, and the main light is too high will form the top light, making the side of the subject contrast with the top surface.
Add Auxiliary Light
The illumination of the main light will cause shadows on the subject, unless the photographic picture requires a strong contrast. Generally, in order to improve the gradation and tone of the shadow surface, auxiliary lights should be added when lighting.
The auxiliary light generally uses soft light, and its light position is usually on the opposite side of the main light. When adding auxiliary light, pay attention to controlling the light ratio. The appropriate light ratio is usually between 1:3-1:6. The light ratio should be smaller for light subjects, and the light ratio for dark objects should be smaller. bigger.
When adding auxiliary light, you should also pay attention to avoid that the auxiliary light is too strong. If the auxiliary light is too strong, it will easily cause the light to be clamped and produce redundant and awkward shadows. In order to control unnecessary shadows, in addition to making the auxiliary light weaker than the main light when lighting, sometimes the method of appropriately lowering the light level or placing the auxiliary light as close as possible to the camera position is used to project the projection to the back of the subject.
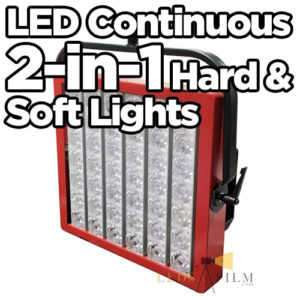
According to the needs of the picture effect, the auxiliary light can be one or more. While using various lamps as auxiliary light, don’t forget to use reflectors as much as possible, which can often produce unexpectedly good results.
Set the Background Light
The main function of the background is to set off the main body or render the atmosphere. Therefore, when dealing with the background light, it is necessary to pay attention to contrast and harmony.
When shooting small objects, it is often difficult to light the background separately because the subject is very close to the background. At this time, the main light doubles as the background light. In the specific control of the ratio of the main light to the background light, it can be controlled by selecting the appropriate lamp distance, orientation and illumination range, or using various translucent diffusers or opaque shading objects at the appropriate position on the main light and background axis Perform occlusion to get proper brightness.
When the subject is large and there is enough distance between the subject and the background, the background can be illuminated separately. The background light generally does not interfere with the lighting of the subject, and it is easy to control the coverage, brightness and uniformity of the background light.
In the specific lighting process, special attention should be paid to whether there will be a phenomenon of “merging” between the subject and the background with similar brightness, or whether the large-area background with uniform brightness is indeed uniform in the center and the surroundings. For these two Under the circumstances, don’t trust your own visual inspection too much. It is best to use a light meter for serious detection, because human eyes are often insensitive to small changes in brightness, but the film will faithfully record it.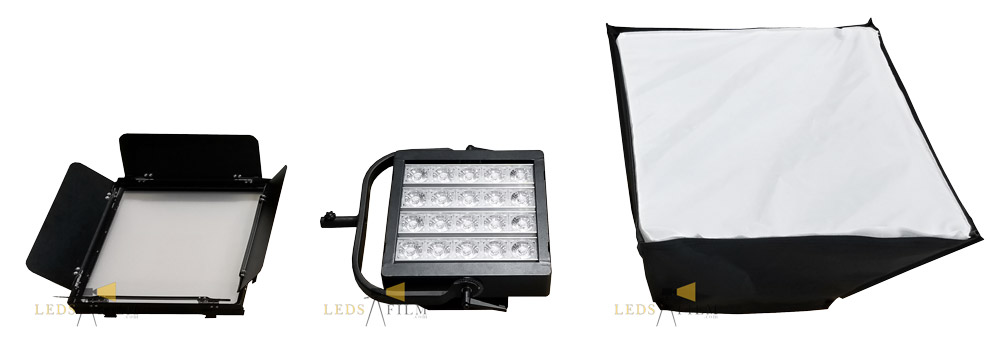
In addition, when lighting the background light of frequently shot high-key or low-key photos, it should be understood that their background light is not as bright as we imagined, or the darker the better. If the background brightness is too strong, the diffused light produced will not only easily cause glare to the lens, but also affect the light effect of the subject.
It is not necessary to control the background too dark when taking low-key photos. Generally, it is more appropriate to control the background brightness to an EV value higher than the brightest part of the subject when shooting high-key photos, and to control the background brightness to one EV value lower than the darkest part of the subject when shooting low-key photos.
Add Contour Light
The main function of the contour light is to produce a bright and bright outline of the subject, so that the subject is separated from the background.
Contour light is usually projected back from above or above the background, and the light level is generally one, but sometimes two or more can be used as needed. Contour light usually uses spotlights, which are strong and hard, and often produce heavy projections on the screen. Therefore, it is necessary to weaken or eliminate these messy projections when arranging the contour light. To eliminate or weaken these projections, in addition to adjusting the lamp position, sometimes clever use of reflectors for contour light projection will have unexpected effects.
When arranging the contour light, you should also pay attention to the light ratio of the contour light and the main light. Generally, the contour light is brighter than the main light. In addition, when lighting, you should choose hard light or soft light as the contour light according to the needs of the subject. There are usually two ways to obtain soft light. One is to place umbrella lights, soft lights, etc. as close to the subject as possible, so that the brightness of the contour light is higher than the main light, but this is often more laborious, the other method It is simpler, just use the diffuser in the spotlight to soften the light.
It should be clear that contour light is not a necessary light for every picture. It is only added when the picture needs it, otherwise, it will be superfluous.
Add decorative light
Decorative light is mainly used to decorate certain parts or details of the subject, and it is a partial, small-scale use of light. The difference between decorative light and auxiliary light is that it does not aim to increase the brightness of the dark parts, but to make up for the lack of image shaping of the main light, auxiliary light, background light and contour light. Catch light, luminescence, key projection light on the bright part of the subject, and partial lightening at the edge are all typical decorative lights. Generally, the decoration of decorative light should not be too strong or too hard. Too strong or too hard will easily produce light spots and destroy the overall perfection of the lighting.
Examine
In the above lighting process, because the light is added in one kind, the latter kind of light is likely to have an impact on the previous light effect. Therefore, after the lighting is completed, the overall light effect needs to be carefully examined, such as the lighting effect. There are no obvious shortcomings or unreasonable places, whether the projection density meets the requirements, whether the projection position is appropriate, whether the lighting of each light source is interfered, whether each light source enters the framing screen and causes halo, etc. You can examine these details Avoid abandoning all previous efforts due to a momentary negligence.
Studio lighting techniques
In order to achieve the ideal light and shadow effect, in addition to following the above-mentioned lighting steps and rules when lighting the studio, special attention must be paid to the following skills and essentials.
Control the light source area
The size of the light source area is directly related to the light-emitting properties of the light source, and the light-emitting properties of the light source affect the contrast of light and dark of the subject. Therefore, controlling the area of the light source and the degree of diffusion of the light source can better control the contrast effect of the subject. When low contrast is required, the area of the light source is large, and the degree of diffusion is also large, so that the light coverage exceeds the subject; when high contrast is required, the area of the light source is small, and the degree of diffusion is also small, so the light has directivity.
Ensure sufficient lighting brightness
Sufficient lighting brightness allows us to freely control the required depth of field through the aperture. Although the method of prolonging the exposure time or performing multiple exposures can be used to solve the problem when the lighting brightness is not enough, these two methods will bring inconvenience to shooting. Extending the exposure time will easily cause the exposure reciprocity law to fail, which will result in the film’s coarser grains, reduced contrast, and color deviation; the use of multiple exposures requires the position of the subject and the camera to remain stationary during the exposure, and the exposure calculation It is also more complicated, and the difficulty of shooting is greatly increased.
Choose the right light distance
First of all, the size of the lamp distance directly affects the light intensity of the subject. The light intensity of the subject changes according to the reciprocal of the square of the lamp distance, and the light intensity varies greatly with the lamp distance. In addition, the size of the light distance will also affect the contrast between light and dark of the subject. When the lamp distance is small and the area of the light source is smaller than the subject, the light source can be regarded as a point light source, and the contrast of the subject is relatively large. Conversely, when the lamp distance is large, the light source can be regarded as a surface light source, and the contrast of the subject is small.
Minimize the use of lamps
In lighting, it is not that the more lamps are used, the better. Too many lamps will not only make the lighting complex, but also bring chaotic projections, and the elimination of these projections is often difficult. Therefore, in lighting In the medium, it is necessary to use as few lamps as possible, and when necessary, a reflector can be used to fill light.
Use reflectors as much as possible
It is advocated to use more reflectors in lighting. In addition to not producing unpleasant projections, all kinds of reflectors can provide reflected light with different light properties, which is easy to control. The reflector can not only be used as the main light, but also can be used as auxiliary light for the dark part of the subject. It can even be cut according to the needs of lighting and the shape of the subject to fill some parts of the subject. Excellent control of the light domain.
In advertising photography, there is often a phenomenon that the number of reflectors used is more than the number of lamps. For an advertising photographer, whether the reflectors can be used flexibly and effectively is a sign of whether their lighting is mature.
Appropriate light ratio control
The light ratio control in lighting involves the contrast of the subject itself and the contrast between the subject, companion and background in the picture. It also determines the tone of the entire picture and the texture and detail of the subject. The light ratio control in lighting is generally based on the principle of truly expressing the inherent surface brightness, texture and color of the subject itself. For example, to show its elegance and cleanliness for a white subject, the subject should be treated in a high-key manner.
The black subject should show its depth and dignity, and the subject should be treated as a low-key. Of course, under the premise of not violating the advertising creativity, photographers can also creatively control the light ratio according to their own personality and habits to achieve the most ideal lighting effect.
