
When it comes to supplemental lighting, people often think of portraits, especially commercial portraits, and various supplementary lighting techniques emerge in endlessly. In addition to portraits, there are also many techniques for ecological lighting. The special topic introduces a variety of ecological lighting techniques, guys who have never known it, come and learn.
Table of Contents
Continuous Light Source
Continuous light sources include tungsten filament lamps, quartz halogen lamps and LED lamps. The biggest advantage of tungsten lamps and quartz halogen lamps is that they allow you to accurately predict the final image effect. However, it generates a lot of heat and is not suitable for delicate living bodies. They may have to cooperate with a slower shutter speed, so they are not suitable for shooting moving subjects. However, the LED lamp solves the heat problem very well and reduces the heat to a minimum.
The Brightness Range of the Subject
Under normal circumstances, a digital camera cannot capture all the tones that the human eye can see. On a sunny day, the brightness range may far exceed 8 stops, and the bright area may be thousands of times brighter than the shaded area.
An ordinary digital camera can usually only record a brightness range of about 5 files. This means that details in shadows or highlights may be lost, or both. We can change the light in many ways. For example, a diffuser or reflector can also be used to fill up the shadows with an electronic flash. Each accessory has its own characteristics, it is worth trying more to see which is more suitable for different subjects.
Reflector
The main purpose of the reflector is to reflect light to the shadow area of a scene, brighten it, and reduce the overall contrast.
We can use many things as reflective surfaces, such as white cardboard, silver reflectors, mirrors, etc., which can reflect light onto shadows. Different surface materials and sizes determine its own characteristics.
Some manufacturers produce a series of circular reflectors, which can be folded into a portable pouch. Some companies produce all kinds of reflectors, including white, silver and gold.
For most close-up and macro photography, you may only need a small reflector with a diameter of 30 cm. They are only about 10 cm in size when folded, and white and silver are the most commonly used. Small pieces of white cardboard, silver cardboard or mirror cards are also worth keeping. The silver lid of the food packaging can be changed to a useful reflector.
The lighting of this alpine plant in the picture below is too strong, creating a deep shadow. A white reflector is placed on the right side of the picture below to reflect the light onto the shadows, thereby obtaining a more pleasant effect.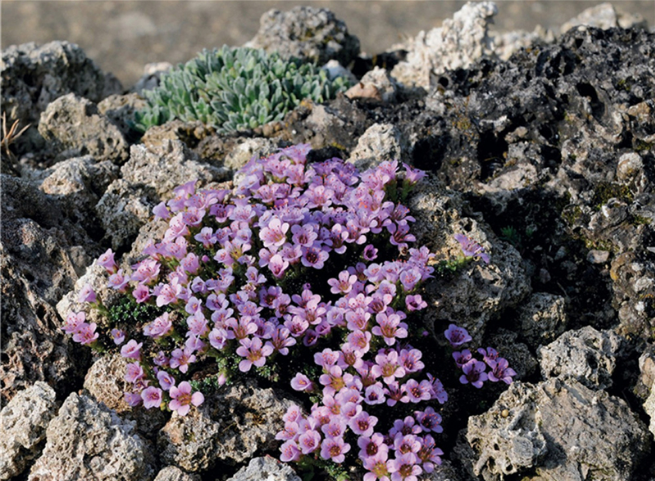
Diffuser
The diffuser is placed between the light source and the subject to soften the light, creating an effect similar to clouds covering the sun.
Like reflectors, they come in many types. Round foldable diffusers or umbrellas are available on the market, but they can also be randomly replaced with drawing paper or gauze that covers greenhouses.
If you use other materials instead of professional diffusers, such as drawing paper, you may need to verify whether its color is neutral and not cast. The simple way is to shoot 18% gray cards or similar objects under the light of a softbox.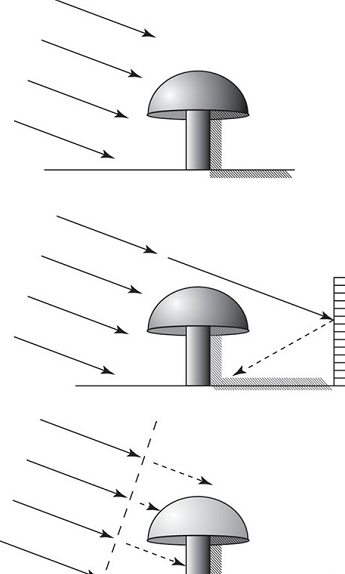
(1) The harsh sunlight casts deep shadows. The brightness range of the subject is larger than the range that the camera can record, and the effect is a black shadow without details.
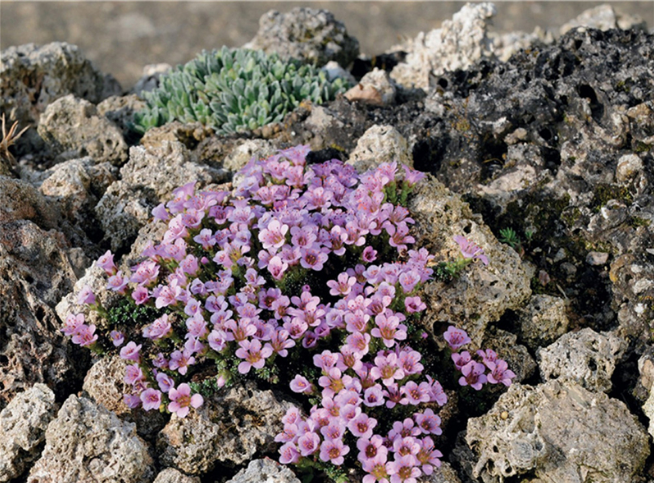
(2) The reflector can be used to reflect light back to the shadow, reducing the overall contrast. Silver reflectors are better than white reflectors. If there is a highlight on the upper right of the subject, using silver will not affect it.
(3) Put the diffuser between the subject and the sunlight, it will soften the sunlight like clouds and dilute the bright highlights.
Flash
The electronic flash is characterized by small size, high power, and consistent light. When used with a digital camera, it can be used as the main light source or as an auxiliary light in daylight, just like a reflector.
It is generally believed that flashlights can “freeze” moving subjects, but the flash duration of many flashlights is only about 1/500s, which may cause blurring of objects moving at high speeds.
Photographer Stephen Dalton uses special high-speed flash equipment when photographing insects in flight, and the flash can reach 1/25000s or less.
If you want to take photos in this regard, you need to check the technical specifications of your flash. When shooting indoors, you can completely use the flash to light the subject. When shooting outdoors, the flash can be used in combination with daylight in various ways.
No matter how you use the flashlight, the general rule is that its effect should not be too conspicuous, the more natural it looks, the better.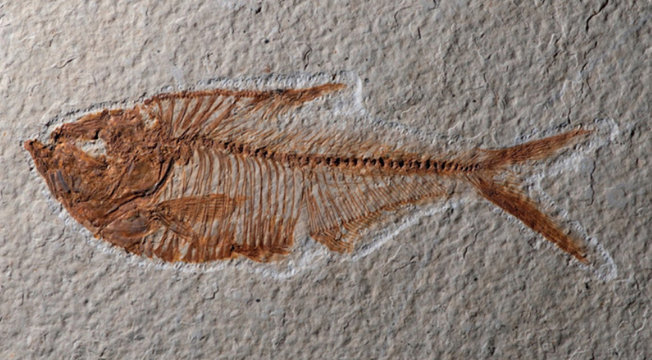
Fish fossil embedded in a flat limestone. In order to emphasize the surface texture, the photographer placed a small flash at an acute angle to the specimen. Note the ruler next to the specimen. 1/60s, f/11. Nikon D300, Nikkor 105mm macro lens.
The fossil is placed in a diffuser (a white plastic lampshade) to produce a softer effect, and the details of unevenness are reduced. 1/60s, f/11. Nikon D300, Nikkor 105mm macro lens.
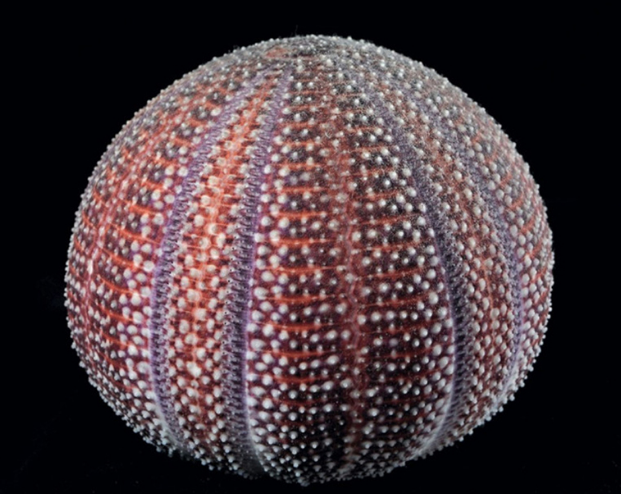
(A) Use a lamp to light the sea urchin from the left. The image has a high contrast and lacks details in the shadows.
(B) A silver reflector was used to fill in the shadows on the right side, but the back of the sea urchin and the background were a bit blurred.
(C) A flash is placed behind the sea urchin to separate the subject from the background.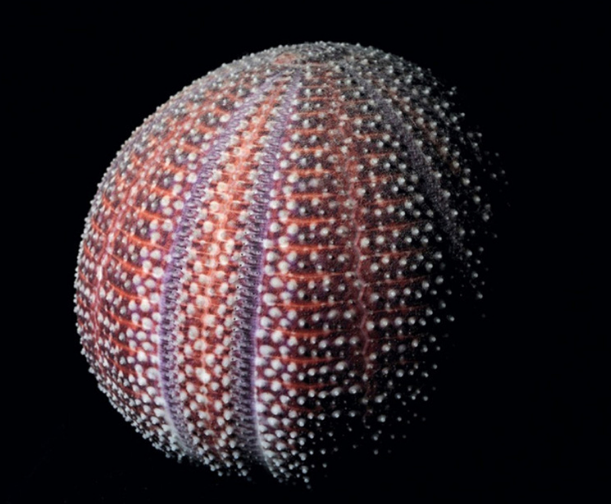 Picture A
 Pictrue B
 Picture C
Combination of flash and daylight
The combination of a small electronic flash element and daylight can balance the light ratio. The output of the flash can be adjusted according to the intensity of sunlight, thereby adjusting the intensity of the flash to achieve various light effects. There are two main ways to use it:
- Mainly natural light, supplemented by flash.
- The flash is the mainstay, and the natural light is the supplement.
★ Mainly natural light, supplemented by flash
Suppose you are shooting mushrooms in a harsh environment (assuming the brightness range of the subject is 400:1). The camera’s TTL metering gives an exposure of 1/60s, f/11. If you add a flash to this setting and set the flash output according to f/11, the subject will be overexposed at this time because it has been correctly exposed twice.
However, if the flash is adjusted to -1 EV exposure compensation, daylight will be used as the main light and the flash will be used as the auxiliary light. You can try different exposure compensation settings. For subjects whose midtones are dominant, the exposure compensation of -1.7EV may work well. For subjects with shallower tones, -0.7EV is sufficient.
(1) When the light ratio is 400:1 (highlight reflects 400 units of light, while shadows reflect 1 unit of light), the flash is used to add one unit of light to the entire scene.
(2) At this time, the light ratio becomes 401:2 or 200.5:1, and the contrast is reduced by half. Note that in this case, the shadows are affected far more severely than the highlights. This is also one of the reasons why wedding photographers like to use flash to fill light on sunny days-the contrast between the bride’s white wedding dress and the groom’s black suit is too strong. Similar techniques are often used by bird and wildlife photographers, such as increasing the brightness of feathers or adding a little highlight to the pupils.
★ Flash is the mainstay, natural light is the supplement
If the same mushroom grows in a dense woodland with dark light, you can use flash as the main light source and add some “sparks” as supplementary light.
You may need to use the off-camera hot shoe connection to place the flash on a side above the subject, or behind or on the back. First adjust the aperture according to the flash (such as f/11).
If the standard speed of flash sync is 1/125s, the background will be very dark, even black. On the contrary, assuming no flash, use the corresponding shutter speed of f/11-in some cases it may be as low as 1/2s or more than 1s. Press the shutter, and the flash will first correctly expose the mushrooms.
At this time, the shutter remains open for a long time, which will fill in the shadows produced by the flash and shoot the background. This technique has an obvious disadvantage: if the subject is moving, such as swaying in the breeze, although the flash will freeze the subject for a certain moment, its exposure under natural light will form a “ghost”.
Almost every outdoor shooting situation is different, you should try more according to different subjects to achieve the desired effect.
We are now discussing some basic principles of daylight combined with flash. Some advanced flashes, such as Nikon SB800, can save us a lot of calculations. For example, many cameras have the “slow sync” function, which can automatically balance the ambient light and flash, and will prevent the background from becoming too dark by using a longer shutter speed.
Wireless flash devices such as the “Nikon Creative Lighting System” can flexibly adjust the position and brightness of the flash without worrying about extension cords.
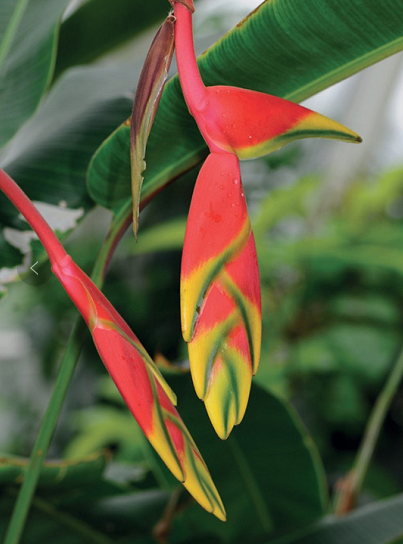
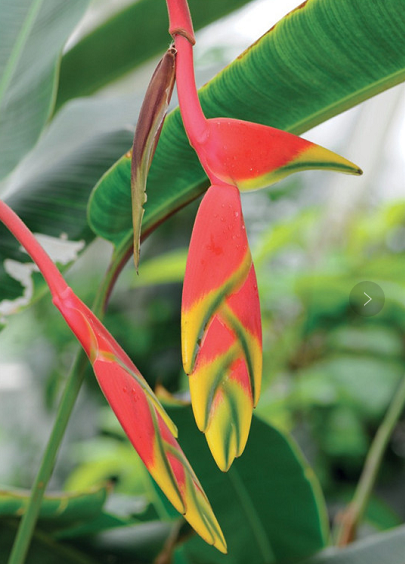
Lobster flowers (Helena) in a glass greenhouse.
(1) Shoot in daylight, 1/40s, f/8. The picture looks flat due to scattered light.
(2) Using two Nikon SB-R200 macro flashes, 1/60s, f/8, the photos look contrasted.
(3) Using two Nikon SBR200 macro flashes, 1/30s, f/8, the photo shows more daylight and gives a more natural effect. Nikon D300, Nikkor 105mm macro lens.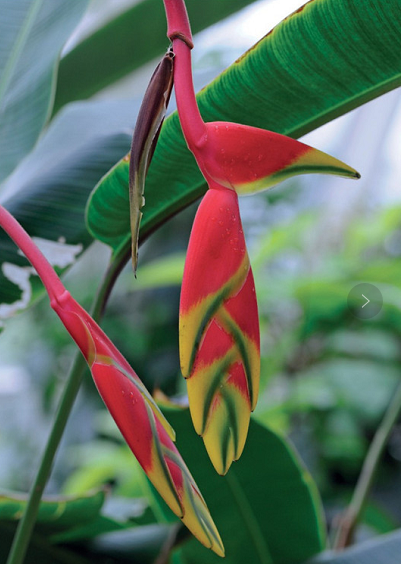 Picture A
 Picture B
 Picture C
Ring flash
The ring flash is a circular flash tube that can be installed in front of the lens to provide an average shadowless illumination for the subject.
Initially they were used more in medical fields, such as dental or surgical photography. Since the lighting has no special features, it is only used for certain subjects, such as illuminating the internal structure of the bellflower.
Some components can be combined with two or more ring flashes and can be controlled independently, thus creating creative light effects.
When we use a traditional ring flash, we can try to cover a part of the flash tube (usually the lower left or lower right quarter) to create a layer.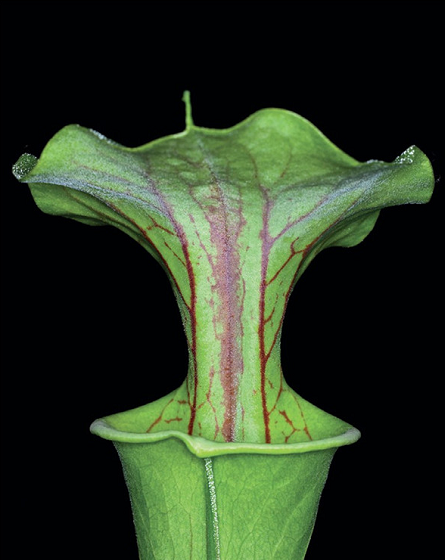
The ring flash did not show the depth or texture of this pitcher plant. 1/125s, f/8, Nikon D300, Nikkor 55mm macro lens.
Special flash for macro
Some manufacturers produce components that can mount one or more flashes in front of the lens. Such as the Nikon RC1 remote flash system, which is a ring device that can be installed in front of the lens, on which 8 small flashes can be placed, and the position and angle can be adjusted at will.
When you change from a horizontal composition to a vertical composition, this device can be changed flexibly. Its ring can be rotated, so it can ensure that the light effect of the vertical composition is the same as that of the horizontal composition.
There is also a separate flash that can be used for background or backlighting. This system is wireless and can be controlled by remote control or through the “control mode” of the camera.
The power of each flash head can be adjusted individually to obtain different light ratios. Each flash has a modeling light to precisely adjust the position of the flash, but the modeling light is not very useful in strong sunlight.
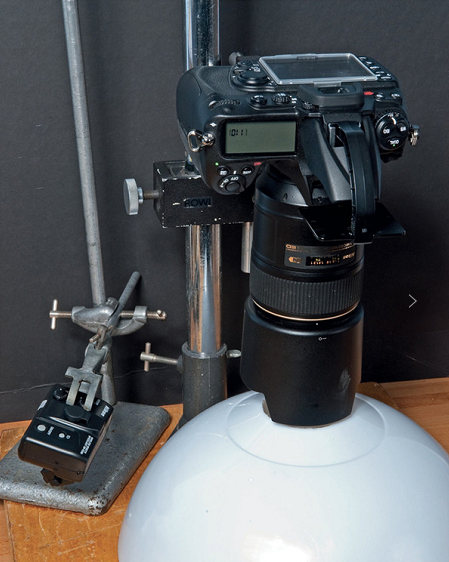
Customized flash bracket
When shooting a small subject in the field, there may be occasions where it is impractical to support the camera with any tripod, and you need to hold the camera at this time.
Some macro lenses are already equipped with image stabilizers, but we may also need to use flash, especially when shooting small insects. Many photographers use their self-made brackets that can fix one or more flashes when shooting insect-like subjects in the wild.
Like them, you also need a flexible bracket so that the flash can be arranged within a certain range of the lens. For example, it can be placed on the top, side or other positions of the lens. A bracket can be made by assembling metal belts, rigid or flexible poles, and spherical heads. When the flash is placed off-camera, you need an extension cord to trigger the flash.
If necessary, use a lower power flash to fill in the shadows caused by the main light. It should be located as close as possible to the camera, it is meaningless to fill in the shadows outside the lens range.
You can also add a small reflector on the other side of the flash to fill up the shadows. Put the diffuser on the flash or stuck on the lens, you can get softer light.
The main purpose of the stand is to provide a small and flexible component for outdoor photography, so it needs to be portable, lighter, and easy to assemble and operate. Many manufacturers manufacture flash brackets, such as Kirk, Really Right Stuff, Wimberley, Novoflex and Manfrotto.