Table of Contents
Real-time Mode
The ability to move the focus frame freely makes it ideal for shooting scenes where composition is important.
Even if the position where you want to achieve focus is at one end of the screen, you can move the focus frame to focus reliably. Therefore, it is very effective for shooting scenes where composition is a priority. Suitable for taking portrait and landscape photos.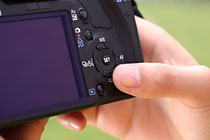
Use the cross keys or multi-selector to move the focus frame
The focus frame in live mode can be moved freely within the frame. The method of moving the focus frame varies depending on the model, but it is usually operated using the cross keys or the multi-function selector. When stopped at any position, that position becomes the AF point.
After determining the position of the focus frame, press the autofocus start button and the camera will start autofocusing. Depending on the model, the AF start button may be different, but generally there is a dedicated button, and there is no AE lock button. When the focus frame turns green to focus, you can press the shutter button to release the shutter to take the picture.
Position of focus
Since there is no limit to the position of the focus point, it is possible to focus on a specific desired position.
The focusing principle of the real-time mode is to measure the contrast of the object on the image sensor, and focus while scanning the contrast wavelength difference. This makes it possible to focus almost anywhere on the entire frame without the framing constraints imposed by the placement of the focus points as when shooting with the viewfinder.
And since the position of the focus frame can be freely set, there is no need to use AF lock. You can freely move the focusing frame to the position you want to focus on. At the same time, it also has the feature that the real-time display shooting screen can be continuously displayed without interruption of display.
In addition, any part can be enlarged and displayed to achieve more precise focus. Although the freedom of focus position has good versatility, depending on the scene, it may sometimes take slightly longer to complete focusing. Easier to use when people are basically stationary, such as portrait photography. Also be aware that focusing may also take slightly longer in poorly lit locations.
Face Detection Live Mode
It is suitable for taking group photos and people’s portraits. And it is equipped with an AF mode with facial recognition function.
When a face is detected, a white focus frame is automatically displayed on the LCD monitor screen. The focus frame is automatically tracked even if the person moves laterally. When the position of the focusing frame coincides with the face you want to focus on, press the AF start button to start the AF and shoot. While focusing is complete, the focus frame will turn from white to green.
When the face automatically selected by the camera does not fit the creative concept, you can use the “+” key or the multi-function selector to select the face you wish to focus on automatically. This is very effective when shooting people who are deep in the frame.
Shooting angle
Automatically detect the faces of people in the screen, and the shooting angle is free.
The AF mode that uses “Face Recognition Technology” to focus can automatically detect the face of the person in the screen and automatically display the focus frame. Focus can be prioritized, and faces can be detected even when backgrounds and people are mixed. Therefore, there is less chance of focusing errors. In addition, when there are multiple faces in the screen, priority recognition will be performed according to the size of the faces in the screen. And the focus frame will be displayed on the face that has been recognized with priority. When you want to focus on another face, you can use the “+” key or the multi-function selector (varies by model) to select the face you want to focus on. It not only realizes automation, but also fully reflects the creative idea of the photographer.
Fast Mode
Used for high-angle and low-angle shooting, it is the fastest autofocus mode for Live View shooting.
Even at heights that cannot be visually observed when using the optical viewfinder, if you use the quick mode, you can easily change the shooting angle to shoot. Suitable for a variety of subjects including portrait photography. The range of applications is very wide, including portrait photography in a crowd and group photography of a large number of people.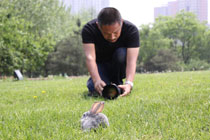
low angle shot
Even at low angles where you could only shoot down on your back before, if you shoot with Live View, you can freely compose your shots. Shooting poses are easier than when using angle viewfinders, etc.. And you can shoot from a variety of bold shooting angles without worrying about getting your clothes dirty.
As with shooting with the optical viewfinder, you can choose to use all focus points.
Focusing is performed using the camera’s built-in phase-difference detection AF sensor, as when shooting with the optical viewfinder. Since the AF method is the same as when shooting with the optical viewfinder, the focusing speed is fast. This makes it an AF mode suitable for shooting moving subjects.
The available focus points are the same as when shooting with the optical viewfinder. Not only automatic selection but also manual selection of all focus points to use a specific focus point. Simply press the autofocus start button to start autofocusing quickly and easily. Focusing can be achieved quickly even at shooting angles that are difficult to shoot with the optical viewfinder. Not only for taking portraits, but also for snapping or photographing animals.
Manual Focus
Enlarged display + tripod can achieve high-precision focus.
Easily achieve precise focus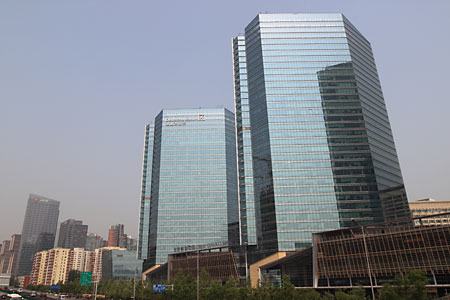
Manual Focus Live View Shooting
When performing Live View shooting, use manual focus to achieve highly accurate focus. Since it is less affected by the AF sensor or the brightness of the subject itself, it is suitable for shooting landscapes or night scenes. When magnified display, the display of the LCD monitor is very clear, and the details can be well grasped.
Manual focus method during Live View shooting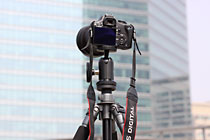
1. Fix the camera on a tripod
In Live View shooting, if you want to use manual focus to achieve high-precision focus, the premise is that you need to use a tripod. Although there are no restrictions on the tripod used, if the tripod is not strong enough, it may cause the Live View shooting screen to shake, making the image difficult to observe. So pay attention.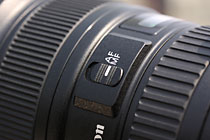
2. Switch to manual focus mode
Slide the focus mode switch located on the side of the lens to the “MF” position. This operation is not required for lenses that do not have an autofocus mechanism, such as TS-E lenses. In addition, focus can be achieved in manual focus mode regardless of the autofocus mode setting on the camera side.
3. Determine the focus position
Start Live View shooting and display the image on the LCD monitor. Manual focus is used to roughly focus and adjust the overall image and composition. Determine the part you want to focus precisely. And use the “+” key or the multi-function selector to move the magnifying box.
4. Use 5 times magnification to display for approximate focus
Press the AF point selection/magnification button to first focus using the 5x magnification display. You can also directly use the magnified 10 times display to focus. But due to the dramatic changes in the field of view, it may sometimes be difficult to grasp the overall image effect. It is best to first use the magnified 5x display to grasp the focus situation and image atmosphere.
5. Using 10 times magnification to display, further precise focusing
When the focus position is finally determined, press the AF point selection/magnification button again to increase the display magnification. Use the maximum magnification 10x display for ultimate precision focusing. If it is difficult to get the best focus, you can operate the focus ring with slightly larger movements to find the sharpest position.
6. Release the shutter
When the focus position is determined and the focus is completed, you should check again whether the subject and its surroundings have changed. Especially when shooting scenes like cityscapes, it’s a good idea to keep in mind to check if the scene changes during focusing. Press the AF point selection/enlargement button again. And after confirming that there is no problem with the overall picture, gently release the shutter to complete the shot.
