Table of Contents
Camera Basic Configuration
Focus Mode and Focus Point:
Generally speaking, the subjects of landscape photography are mostly static objects, so it is best to set the focus mode to one-shot AF and the focus point to single-point AF.
Exposure Mode:
Among the four available modes of program exposure (P), shutter priority (S), aperture priority (A) and manual (M), it is best to choose aperture priority (A) as a novice. Because in this mode, when you choose your aperture, the camera will automatically choose the shutter speed that produces the best exposure. In general, we need to control the depth of field effect through the aperture size when taking landscape photos.
Best Aperture:
Aperture controls not only exposure, but more importantly, depth of field to achieve unique effects. When taking landscape photos, in theory, the aperture should be adjusted to the smallest possible to obtain a large depth of field, that is, the front, middle, and rear scenes are all clear. However, practice has proved that it is difficult for many lens apertures to achieve ideal clarity and sharpness after exceeding F18. Therefore, we recommend increasing the aperture setting from the minimum aperture value by 2 to 3 stops, that is, between F13 and F16.
Metering method:
In normal lighting conditions, it is best to choose center-weighted metering. If the on-site lighting situation is complex and it is necessary to take care of the tone level of the entire picture, the average metering method should be used. When metering, special attention should be paid to the selection of “point”: one is to select the correct metering subject, and the other is relative to the full screen. Metered subject brightness should be neither too high nor too low to prevent over or underexposure.
Sensitivity:
Because the lower the sensitivity, the higher the image quality, the less noise, the finer the image quality and the smoother the image transition. Therefore, when conditions permit, a sensitivity of 50 to 100 should be selected as much as possible. You only need to increase the sensitivity when the light is poor and you are not using a tripod, but try not to increase it too much, otherwise the noise in the dark parts of the picture will increase, and the highlights will even appear “dead white”.
Color Saturation:
Low saturation can obtain a wider color range, more color layers, and can record richer color and tone layers. So set the camera saturation to “low” or “soft”. If your camera doesn’t have a saturation setting, you can choose a mode such as Soft, Normal, or Standard.
Contrast:
Low contrast allows for maximum tonal gradation, which leaves room for adjustment in post-processing. If your camera does not have a “Contrast” setting, you can choose “Soft” or “Standard” in “Image Optimization” instead of “Landscape” or “Vivid”.
For beginners, it is necessary to understand some basic common sense and theory such as photography composition and lighting. But to really learn landscape photography well, you need a lot of practice in actual shooting scenes. In the actual shooting process, it is very important for beginners to master certain shooting techniques according to the environment. This often has a multiplier effect.
Use a Striking Foreground
a. Use the foreground to express the height of the object
When photographers take landscape photography, they often encounter some scene materials with obvious heights, such as high-rise buildings, tall stone monuments, cliffs, towering rocks and so on. At this time, photographers often want to express the tall scene in front of them through their own lenses. However, if the photographer only expresses the subject alone, the picture will be slightly monotonous, or the height of the subject will not be clearly expressed.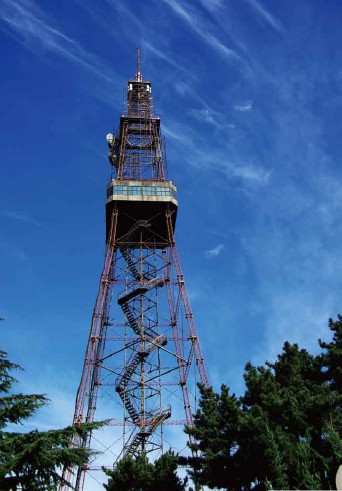
At this time, the photographer can observe whether there are available reference objects around the subject as the foreground. Such as trees and other objects with a certain height. Due to the height of the subject itself, it is generally necessary to use the upward shooting method and use the vertical form of the camera to express it. In this way, the height of the subject can be shown, and the overall picture will not appear monotonous. In addition, when photographers shoot tall objects, they generally need to use a wide-angle lens, because the wide-angle lens has a large range in both height and width. This is conducive to better representation of the subject.
b. Use the foreground to express the depth of space
In landscape photography of large scenes, the foreground is often used. In particular, it expresses scenes with a sense of space, such as the vast grasslands and the vast sea. Although the scenery of the big scene is very attractive, it is not easy to express. Because the bigger the scene, the more elements are taken into the picture. For beginners, the expression of the overall feeling is even more difficult to grasp.
Some beginners find that the effect of the picture is often very flat and lacks three-dimensional sense after shooting a relatively distant and expansive landscape. At this time, photographers need to consider certain objects, such as sand and stones, low plants, etc., as the foreground. The use of the foreground allows the viewer to see the detailed details of the scenery. And the broad scenery for the middle and distant planes. Inject more meaning. Most importantly, by juxtaposing the near and far components of the scene, not only does it add depth to the photo. But it also gives the whole picture a three-dimensional feel.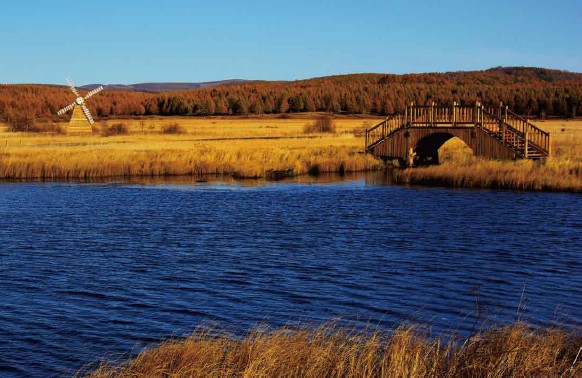
When expressing such a scene, the photographer also needs to use a wide-angle lens to shoot. In addition, you can achieve a large depth of field by choosing a smaller aperture. So that both foreground and distant components can be clearly reproduced. When using the foreground to express the sense of spatial depth, the photographer should pay attention that the foreground does not occupy too much area in the whole picture. Otherwise it will affect the overall feeling of the photo, because the scene in the middle and far and the spatial depth of the picture are the key points.
Use Reflections to Add Appeal
a. Choice of time and place
In landscape photography, reflections can add appeal and visual pleasure to the frame. Because the reflection of the scene can extend or repeat part of the pattern of the landscape, it can expand the expressiveness and range of the landscape image. Plus, the reflection itself can add a sense of tranquility to the scene.
The best times to capture reflections are around sunrise and sunset. The most dramatic reflections are often found on mirror-like water surfaces, such as small puddles, ponds, puddles, stagnant water formed by receding rivers, and small lakes. Before shooting, the photographer should observe the location of the framing. And you can also look for multiple locations with different shooting angles. So that different reflections can be captured in a very short period of time.
b. the use of light
For the shooting of reflection photos, the most ideal light is the front side light, with clear outlines and rich layers. Followed by forward light, clear water and blue sky, rich colors. Under normal circumstances, top light and backlight should not be used. Because the top light reflects strongly on the water surface, and the backlight tends to make the contrast between the subject and the background too large. This cause the image of the subject of the photo to be gray and hazy. Therefore, when taking a reflection photo, the photographer can choose the angle of the back to the sun or let the camera form an oblique angle of 45° with the sun.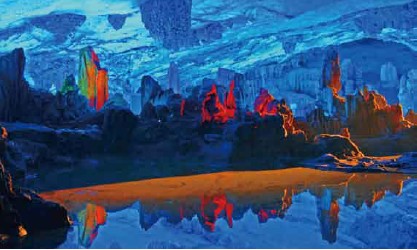
Since the reflection is in the water, the water surface absorbs some of the light, making the reflection less bright than the actual scene. Generally, the exposure of the reflection and the ground truth differs by about one f-stop. Photographers can set the exposure compensation to +1 to +2 stops when shooting. When the exposure value is determined by metering, under normal circumstances, the photographer should perform metering and determine the exposure value based on the brightness of the subject on the ground.
A more practical method is to point the lens at the real scene. Then press the shutter halfway, write down the exposure value of the real scene. Or turn on the AE exposure lock button on the camera. And press and hold this button to lock the currently measured exposure data. And when the photographer moves the lens to change the composition, he can still make exposure according to the data just measured. In this way, the color of the reflection will be darker than the real scene, forming a beautiful image.
C. Correct composition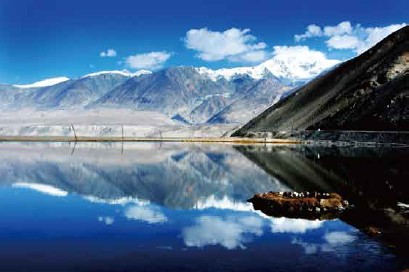
The photographer should also pay attention to the composition when shooting the reflection, especially the dividing position of the horizon. In general, if the photographer wants to express a certain sense of harmony and symmetry in the picture, he can consider placing the horizon in the middle of the picture. In this way, the reflection in the water will form a perfect echo with the actual scenery.
