Table of Contents
1. Plain Forward Light
If most of the light illuminates the subject from the front, we call it forward light. Think of the two headlights in front of us when we take ID photos, which are typical forward lights. As you may have guessed, shooting with the flash on a digital camera is basically a forward light.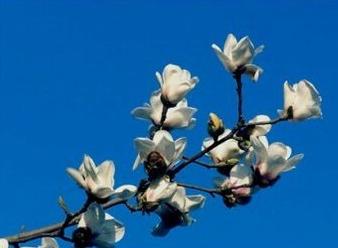
Many people like to put the subject under the lighting of the forward light when taking pictures, because at this time there is no shadow and the brightness is the highest when shooting people and scenes. The characteristic of forward light is that it can illuminate the subject evenly, which is the same as the ideal scene characteristics in our mind. This kind of light is not good at highlighting the texture and outline of the subject. For example, when we use forward light to shoot relief or rough rock walls, we can only get flat images.
We can use this feature of forward light to cover up the flaws on the character’s face. Under the forward light, if you put on a little makeup, the pimples on your face will not be so dazzling. You can use this method to make women appear more beautiful (but be aware that forward light will make the face more contoured). But in most photographic creations, forward light is less popular because its expressiveness is too general.
2. Sharp Side Light
If the light comes from the side of the subject, it is called side light. Contrary to the characteristics of forward light, side light emphasizes the outline and surface texture of the subject very much, because it will leave heavy shadows in the bumps.
Side light can be subdivided into side light and side backlight.
(1) Side smooth light (oblique side light):
Photographic lighting when the ray casts horizontally at an angle of about 45 degrees to the camera lens. In the creation of photographic art, it is often used as the main shaping light. This kind of light illumination can make the subject produce light and dark changes, which can well show the three-dimensional sense, surface texture and outline of the subject, and can enrich the dark layers of the picture, and play a good role in modeling.
(2) Side backlight
Also known as reverse side light, rear side light. Lighting when the raycast direction and the camera shooting direction are approximately 135 degrees horizontally. Side-lit scenes are mostly in shadow. The illuminated side of the scene often has a bright outline, which can better represent the outline form and three-dimensional sense of the scene.
In location photography, this kind of lighting can better express the atmospheric perspective effect. When using the side backlight for close-up and close-up of characters, auxiliary lighting is generally needed to prevent the face from being too dark. However, the brightness of the auxiliary lighting light should be controlled so that it does not affect the natural lighting effect of the side backlight.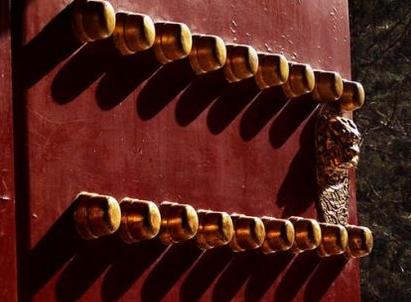
If you shoot an old man with a vicissitudes of life in a side light environment, you will get a very vivid effect, and the wrinkles on the face are portrayed in ravines. So if you’re photographing young women, you need to think twice. Unless she has a very three-dimensional silhouette and smooth skin, she will encounter white eyes.
For landscape photography, side-lit environments are a treasure. For example, if we want to photograph the Great Wall, the warm side light of the setting sun can depict the outline of the crenel and the surface of the city bricks, showing a heavy sense of history.
3. Brilliant Backlight
If the light comes from behind the subject, it is backlit. Usually, backlighting is avoided as much as possible in shooting, because backlighting can make the background quite bright, but the subject is pitch black, with only outlines and no layers.
We often hear the term “backlight compensation” in photography, which is to use artificial fill light (flash or reflector) to illuminate the backlit subject and avoid photographing the face without details.
In this way, the backlight seems to be terrifying. But its characteristics are also very obvious: the backlight can clearly outline the outline of the subject, for example, when shooting people, the hair and face will be “trimmed with a layer of gold”. At the same time, the backlight can effectively express the perspective of the air. For example, the fog in the morning and the cooking smoke in a small village can be more beautiful under the backlight.
4. Use top Light and foot Light with Caution
In addition to the horizontal angle of light exposure, the angle change relative to the vertical direction of the subject will also significantly affect the imaging effect. The most important of these is top lighting, where the light falls from the top of the subject’s head, which often occurs in the midday sun.
Top light is almost devastating to portrait photography because it casts heavy shadows on the faces of the two eyes, under the nose, and under the cheekbones, and is aptly called “skull light”. Shooting people in this light is a good prank idea, and if you want to avoid being hunted, it’s best to fill in the same way you would with backlighting.
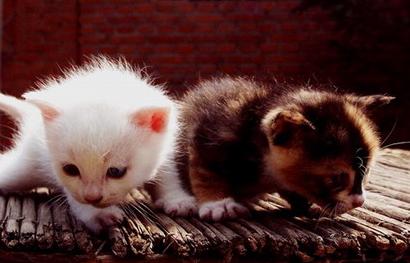
If the light comes from under the feet, it is called foot light. It has always been used to portray villains in classic movies. Chances of encountering this light in actual shooting are rare and best avoided.
In fact, it is more likely that the light is parallel to the subject or slightly higher. Therefore, what we usually consider more is the horizontal angle of the light.
5. Scattered Light
In daily shooting, what we often encounter is not just light in one direction, but mixed light sources from various angles. At this point, we should consider the direction of the strongest light source.
If it is cloudy or in the shadow of a sunny day, the light hitting the subject has no direction, we call it scattered light.
Compared with direct light, diffused light is very soft, without shadows, and can present rich details of the subject. However, the description of outlines and lines is relatively flat, and usually makes the contrast of the picture relatively low. Shooting portraits in the weather with thin clouds covering the sun is to use scattered light with a slight sense of direction. At this time, the lighting is uniform and can express the appropriate outline, and the people can open their eyes and not suffer from the sun, which is considered to be the most suitable natural light for shooting portraits.
6. Color Temperature of Light
In addition to the change of the illumination angle, the color of the light itself is also different. Take sunlight, for example, the morning sun is soft and warm. As the sun rises, the light becomes more and more “white” and stronger, becoming a dazzling light. At dusk, the sun returns to a warm state. Using the different colors of light, we can make targeted creations.
7. Warm Low Color Temperature
When the sun angle is relatively low in the early morning and evening, the color of the light will be significantly warmer, or the color temperature will be low. This light can paint a world unfamiliar to us, adding gold edging to sharply contoured objects and making people look healthier. Coupled with the low light angle in the morning and evening, it is easy to form a lighting environment with side light and backlight. This is the most favored by photographers.
For landscape photography, many photographers determine the angle of the sunrise in advance. Before dawn, they wait near the stepping point, adjust the equipment. And wait for the first rays of the sun to illuminate the subject. That kind of picture effect is completely invisible to us when the sun is shining.
At this time, we should pay attention to setting the camera’s metering and white balance. To accentuate the contours outlined by the sun, it is often necessary to reduce the exposure a bit. We can press the info button and open the brightness value square on the LCD screen to adjust the exposure compensation. So that the dark information occupies most of the space. In terms of white balance, in order to highlight the warm sunlight, it is best to manually set to daylight white balance mode. Otherwise, the camera may automatically recognize that the current color temperature is lower. And convert the warm-toned picture to normal color, then we will get up early in vain.
8. Cool High Color Temperature
Photos taken in normal sunlight match our usual observations. For example, in order to express the red walls and green tiles of the Forbidden City, you can choose after the sun rises. The palace is fully illuminated, and the colors are accurate and saturated. It should be noted that the color temperature will be higher around noon, cloudy days, and in the shadow of the sun. That may cause the picture to be bluish. At this time, you can use the manual white balance function to select cloudy mode, or to customize the white balance.
Knowing the angle and color temperature of light can help us choose better timing, better angles, and take creative photos. Or maximizing the subject’s strengths and masking its weaknesses.
Whether you want to specialize in portraits or landscapes, using light is a must. We recommend that when you shoot, you may wish to move around the subject, or let the subject move around. Take a few more shots in different lighting conditions, and gradually, you will find the light you like.
Finally, let me remind everyone that when the sun rises, it will emit the familiar white light. Under this kind of light, all objects will show their own color. This is the most accurate light environment for color expression.
