Table of Contents
Real Portrait Photography Techniques
For photographers, portraits are one of the most frequently encountered shooting subjects. In addition to being very attractive in itself, it is also the most common in life. People are always the subject in front of the camera, but it is not easy to shoot portraits that are both pleasing to the eye and reflect a certain connotation. Here are some typical scenes in life to help you master the main points of portrait photography.
How to Shoot Shallow Depth-of-field Portraits with Bokeh
When expressing people, especially female portraits, in order to highlight the soft lines and facial features of women, it is often necessary to use shallow depth of field to highlight the characters. The result of this is that the main character is very clear and vivid on the paper, but the background behind it will be blurred.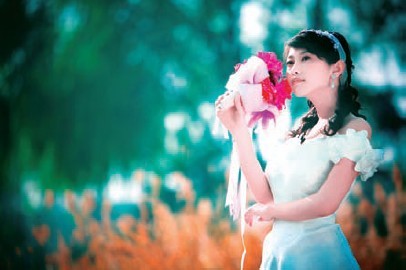
To shoot such an effect, there are three ways to obtain it: a large aperture, the subject is far from the background, and a long focal length.
1. Large aperture
The relationship between aperture and depth of field is inversely proportional, that is, the smaller the aperture, the longer the depth of field, and the larger the aperture, the shallower the depth of field. Professional photographers basically use a large aperture of at least F2.8 to shoot such an effect. It should be noted that the image quality of any camera lens will be different when different sizes of apertures are used for shooting. When using the maximum aperture, almost all the imaging area of the lens is used. Due to the processing of optical glass and the design and manufacture of the lens, the image quality at the center of the lens is significantly higher than the quality at the edge of the lens.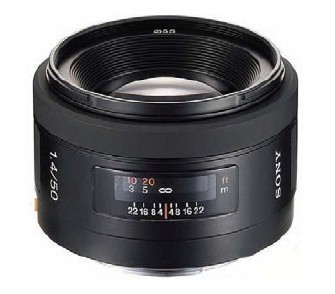
Therefore, at the maximum aperture, the image quality tends to be reduced. Our suggestion is to lower the maximum aperture by 1 to 2 stops for shooting. For example, a 50/1.4 lens can be used for shooting with f1.8 or f2.0.
2. Long focal length
Under the premise of the same aperture and the same shooting distance, the relationship between the focal length of the lens and the depth of field is also inversely proportional. The longer the focal length of the lens, the smaller the viewing angle, the larger the image, and the highly compressed scene space. Therefore, a long focal length lens is easier to take a shallow depth of field effect. When using a long focal length, you need to pay special attention to the safety shutter. The safety shutter speed is the reciprocal of the focal length, that is, the safety shutter speed = 1/focal length.
For example, if you use a 50mm focal length to shoot on a Canon EOS 30D, then 1/50s is a safety shutter. In other words, a shutter speed above 1/50s can guarantee you a clear picture effect. If a focal length of 200mm is used, it will take more than 1/200s to ensure the stability of shooting. Below this speed, the shaking of the hand may cause the photo to be taken falsely.
In addition, the middle focal lengths of 85mm, 100mm, 135mm are generally selected for portraits. The perspective in the middle focal length is not exaggerated (to avoid over-protruding the nose of the character), and the picture is not distorted. And when shooting portraits, the distance is appropriate to facilitate communication with photographers and models. The middle focal length can well express the figure, facial features, facial expressions and skin texture.
3. Shooting distance
Under the premise that the aperture and focal length of the lens remain the same, the distance between the subject and the camera is different, and its depth of field is also different. The longer the shooting distance, the longer the depth of field and the greater the range of clarity. The closer the shooting distance, the shallower the depth of field and the smaller the clear range. At the same time, the further away the subject is from the background, the more blurred the background will be.
4. Light selection
If you shoot portraits under direct sunlight, the shadows formed will be very obvious. Therefore, try to choose morning, afternoon or cloudy, and shoot in soft natural light. If the light is too strong, use a large-aperture lens to avoid direct light and shoot in an environment where the light is more uniform. If you are shooting against the light, you need to use a reflector or flash to fill up the face of the person.
How to Take Close-up Portraits
Portrait close-ups are widely used in fashion magazines and businesses, and are a popular type of portrait photography. We should note the following points when taking close-up portraits.
1. Cut boldly
The more parts are included in the photo, the more elements need to be controlled and the more difficult the composition. Bold cutting is a good solution! Every part of a person can become the subject, of course, the most common is to highlight the eyes and lips.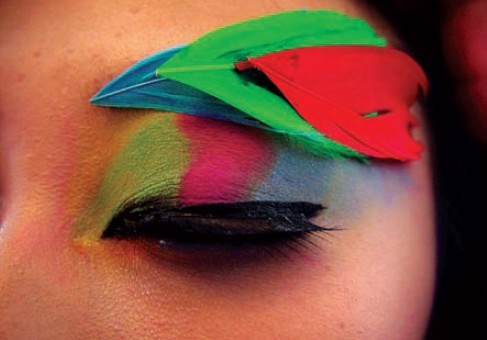
2. Create paintings
To shoot close-up portraits, you must pursue the feel of the picture. We can use makeup and props as part of the composition to create the atmosphere of the entire picture.
3. Eye contact
People’s eyes are often the most important part of the picture. In most portrait close-up shots, the model looks at the lens, which naturally causes the viewer to “communication” with the subject. This special “directivity” can sometimes get special effects if used properly.
When the model’s eyes are not looking into the lens, it is necessary to reserve some imagination space in the direction of the person’s line of sight, so that the gaze becomes an extension of the composition.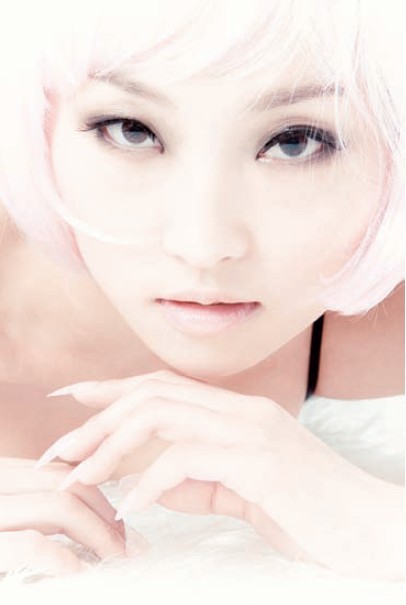
4. Mobilize the emotions of the model
The average photography enthusiast does not have too many opportunities to shoot professional models. Therefore, it is very important to mobilize the emotions of ordinary subjects. In order to increase the success rate, you can tell the subject before the shoot what you want to take a photo of what it feels like, and communicate with her more. In addition, when shooting, you must continue to encourage the subject and keep her focus on your lens. The continuous shooting made her feel that the shooting process was very happy and smooth. Even if she does not perform well during the shooting process, you must continue your shooting and encourage her to make her performance better and better.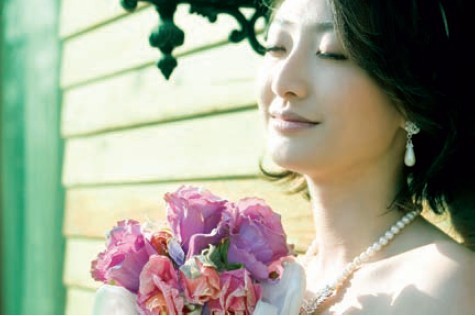
5. Pay attention to beauty details
When shooting, you also need to pay attention to the characteristics of the model and the details of deportment. If the person’s face is wide, try to shoot from the side as much as possible. If the chin is longer, you can look down a little and shoot. If she has big beautiful eyes, then you might as well take close-ups that express the eyes.
In terms of overall posture, you also need to pay attention to the following basic points.
1) head and body
The character’s head and body should not become a straight line. When the front of the body is facing the lens, the model should slightly turn or tilt the head to the sides. When the head is facing the camera, the character’s body should be rotated a bit, so that the film will be very vivid.
2) legs and arms
Avoid parallel legs and arms. The specific method is to let the model put the center of gravity on one leg, and the other leg can be bent appropriately. Model can bend the arms all the way or form a certain angle. In this way, the photos will be very dynamic.
3) Sitting Posture
If the posture of the subject is sitting, arrange to sit in front of the chair as much as possible, and avoid sitting the whole body in the chair. In this way, it is easy for the subject to maintain a good posture.
4) hands and shoulders
The gestures of hands and shoulders are very important in portrait photography. Pay attention to the integrity of your hands when shooting, and don’t make them feel deformed, broken, or incomplete. For example, when you put your hands on your hips or put them in your pockets, you should expose some of your fingers to avoid the impression of being cut off. Keep your arms parallel to your shoulders, as this will make you feel rigid and mechanical. When shooting, you can make the subject’s shoulders one high and one low, or one behind the other. The model can place the hands on different parts of the body easily and naturally.
5) Hair Style
Professional fashion photography often needs a professional hair stylist. In fact, in ordinary shooting, let the subject’s hair naturally float to the face and in front of the eyes. And you may also obtain unexpected effects. It should be noted that, under normal circumstances, do not let your hair cover your eyes.
How to Shoot Portraits in Low Light Environment
Bars, cafes, indoor natural light, streets at dusk and other low-light environments often have interlaced light and shadow, blurred lights, and richer levels of light and shadow. For many portrait photographers, it can be said to be full of charm and challenges. When taking photos in such a low-light environment, the most prone problem is the blurring of the photos caused by the instability of the handheld. In fact, as long as you pay attention to choosing the right lens and master some shooting methods and techniques, you can also take professional photos in low-light environments.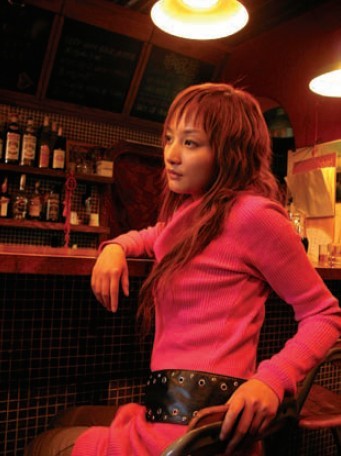
1. equipment preparation
To take photos in low-light environments, it is best to choose a large aperture lens with f1.4~f2.8 and focal length between 35mm~50mm. Large apertures can achieve higher shutter speeds in poorly lit rooms. With a medium focal length, not only can you take close-up shots. But you can also take full-body shots, and the shooting method is more flexible.
If conditions permit, you can choose cameras and lenses with body anti-shake performance. For example, Sony α350 and α200 both have body anti-shake function. This can reduce blurring caused by camera shake. The anti-shake system is built into the camera body, allowing you to use a shutter speed 3-4 stops lower than theoretically. This means that you can enjoy the freedom of direct handheld shooting under conditions that normally require a flash or a tripod to shoot.
2. Use auxiliary tools to stabilize the camera
Large aperture lens, anti-shake body, and anti-shake lens are all for improving the stability of handheld shooting. If environmental conditions permit, you can also use tripods, desktops, railings, walls and other fixtures to support and stabilize the body and the camera.
3. Camera settings
In low-light environments, in addition to using a large-aperture lens to ensure sufficient light input, increasing the ISO can also achieve a faster shutter speed. Although the ISO setting of a digital SLR camera can reach 1600 or even 3200, noise and noise will be generated on the screen at a high ISO setting. Different brands and models of DSLR have different image quality performance under high ISO settings. We should testit to control the ISO setting within a tolerable range of picture quality. On the premise of ensuring a safe shutter speed, try to set a relatively low ISO value.
4. Light selection
In low-light environments, the light distribution is not even, and portrait photography needs to express facial expressions and demeanor well. Therefore, it is suitable to choose front light or side light, so that there is relatively sufficient light on the face of the character. And photographers will require the model required to keep still when shooting. If conditions permit, you can also use reflectors to fill the face with light. That will make the portrait effect more prominent.
5. Accurate metering
When shooting in low-light environments, accurate metering is particularly important. Because the photos taken under high ISO settings, if we brighten them later, the noise in the dark parts will be displayed very obviously. That will affect the picture quality. Therefore, we can set the camera to spot metering. Approach the model, fill the viewfinder with a uniformly lit area on the face of the person. And half-press the shutter to measure a set of aperture and shutter combinations. Then set the shooting mode to manual mode (M). And set the parameters according to the previously measured aperture and shutter values. So that you can ensure accurate exposure of people’s faces.
6. Focus
For portraits, photographwes usually use the central focus point for single-point focus, focusing on the model’s eyes. And then press the shutter button halfway to recompose the shot. In a low light environment, sometimes because the light of the subject is too dark and the contrast is too weak, it may not be able to achieve focus or focus. At this time, you need to use manual focus or use a lens with full-time manual function to manually adjust at any time.
